Windshield Garnish Molding Replacement Without Head Curtain Inflator Module
Removal Procedure
- Remove the instrument panel top cover. Refer to Instrument Panel Upper Trim Plate Replacement in Instrument Panel, Gages, and Console.
- Disable the head curtain inflator module. Refer to Disabling the SIR System in SIR.
- Lift the screw cover out by using a small flat screwdriver.
- Remove the molding screw.
- Starting at the upper rear section of the molding, pull firmly at the clip locations to disengage the molding from the vehicle.
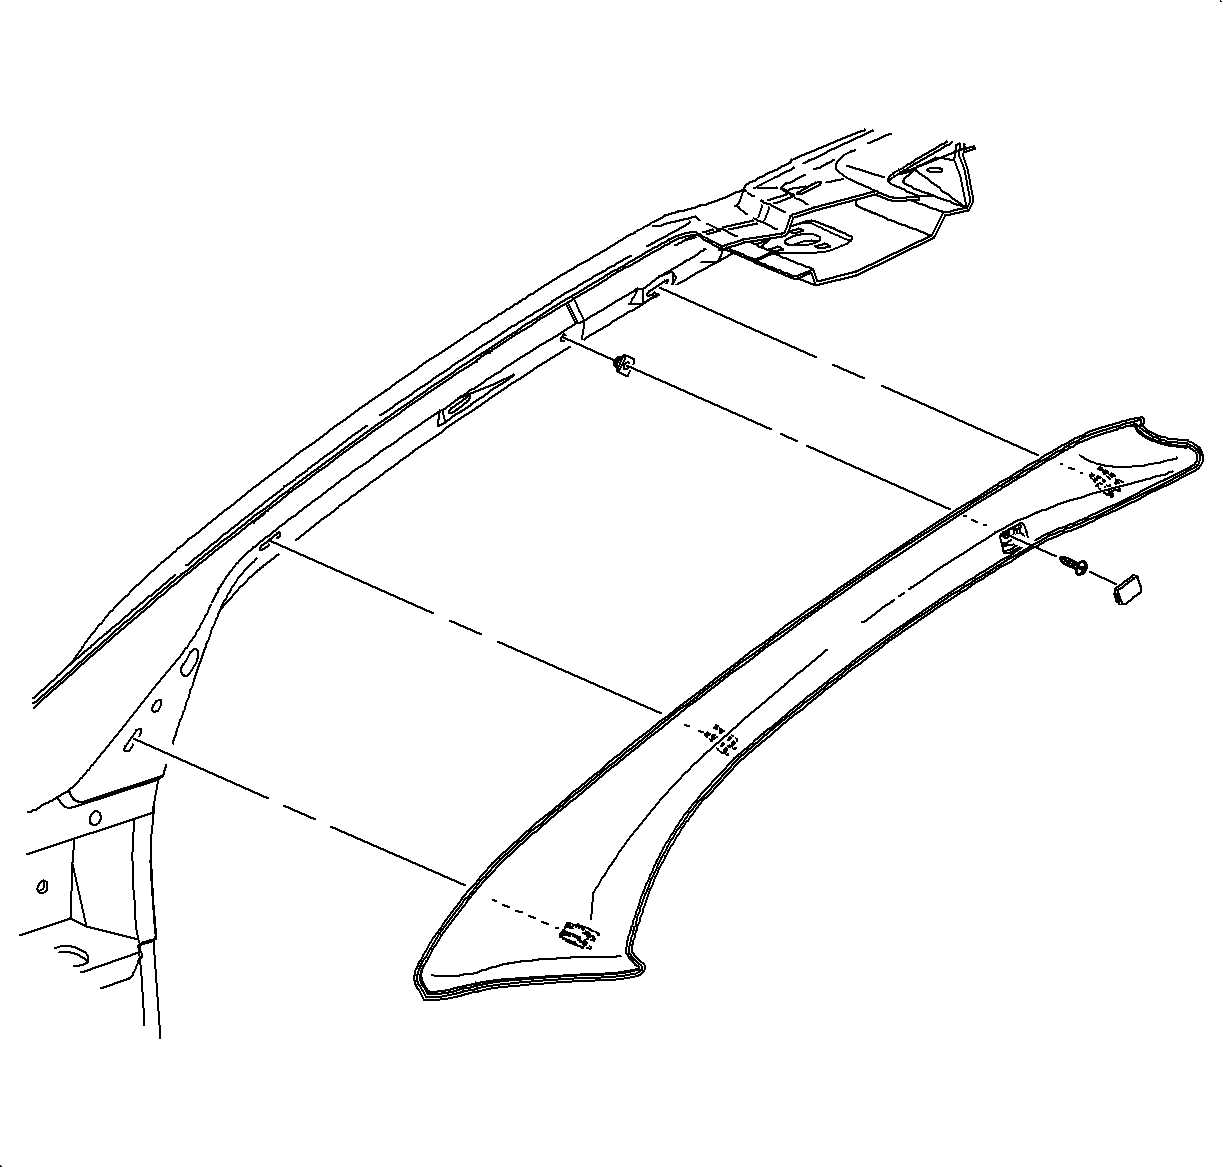
Important: Before removing, note the position of the door weatherstrip over the edge of the windshield garnish molding.
Installation Procedure
- Align the molding clips and push firmly to engage.
- Install the molding screw and the screw cover.
- Reposition the door weatherstrip over the edge of the garnish molding.
- Install the instrument panel top cover. Refer to Instrument Panel Upper Trim Plate Replacement in Instrument Panel, Gages, and Console.
Tighten
Tighten the windshield garnish molding screw to 1.2 N·m (11 lb in).
Windshield Garnish Molding Replacement 1st Design Coupe
Removal Procedure
Important:
• LHD shown, RHD similar • Right side shown, left side similar
- Remove the instrument panel upper trim panel. Refer to Instrument Panel Upper Trim Plate Replacement in Instrument Panel, Gages, and Console.
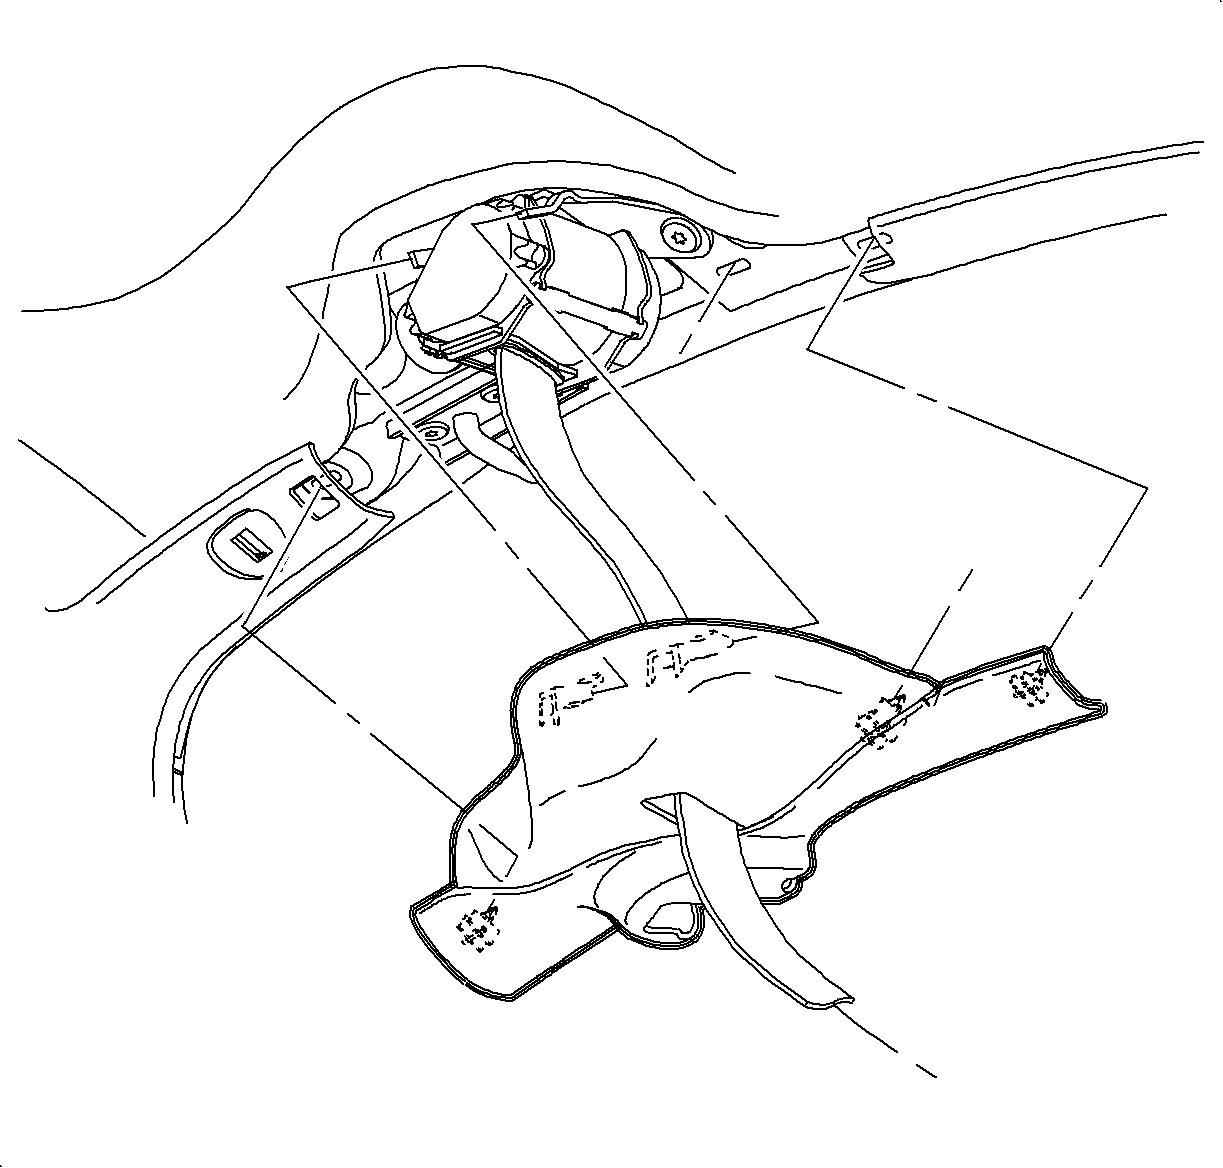
- For the left side windshield garnish molding, remove the seat belt retractor cover by pulling at the clip locations.
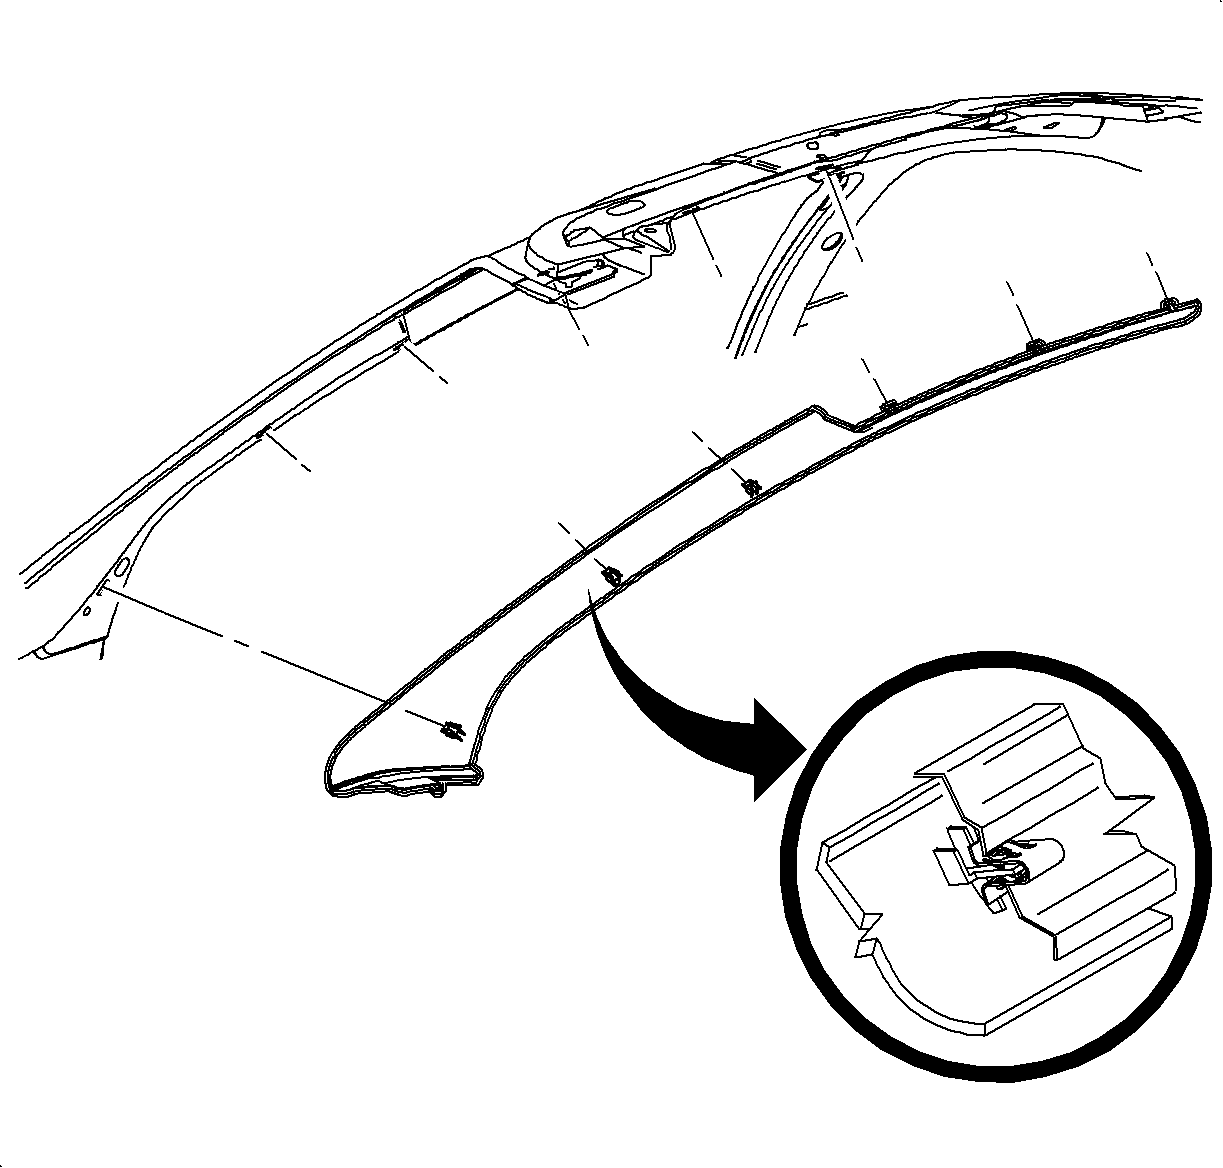
- Starting at the upper rear section of the molding, pull firmly at the clip locations to disengage the molding from the vehicle.
Installation Procedure
Important:
• LHD shown, RHD similar • The right side shown, left side similar
- Place the forward edge of the molding to the windshield pillar base. Align the clips and push firmly to engage the molding clips at the forward edge of the vehicle.
- For the left side windshield garnish molding, install the seat belt retractor cover.
- Install the instrument panel upper trim panel. Refer to Instrument Panel Upper Trim Plate Replacement in Instrument Panel, Gages, and Console.
Windshield Garnish Molding Replacement 1st Design Sedan/Wagon
Removal Procedure
- Remove the instrument panel upper trim panel. Refer to Instrument Panel Upper Trim Plate Replacement in Instrument Panel, Gages, and Console.
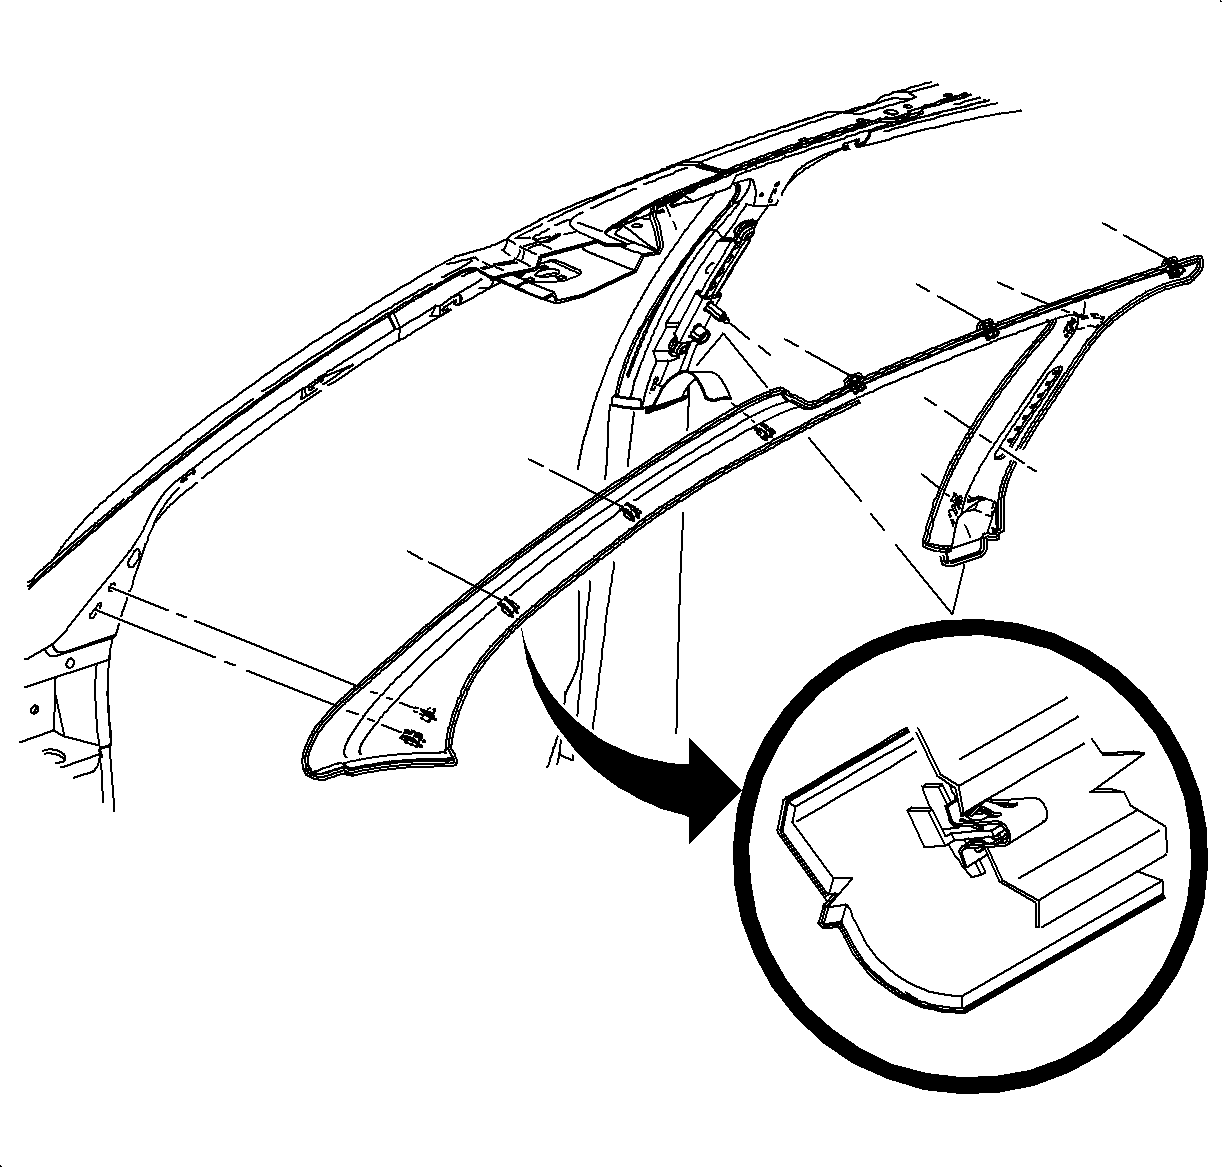
- Unsnap the shoulder belt fastener cover and remove the shoulder belt attaching fastener.
- Remove the shoulder belt adjuster knob by unsnapping the locking clip with an awl.
- Starting at the upper rear section of the molding, pull firmly at the clip locations to disengage the molding from the vehicle.
Installation Procedure
- Place the forward edge of the molding to the windshield pillar base. Align the clips and push firmly to engage the molding clips at the forward edge of the vehicle.
- Locate the upper garnish molding center pillar tab in seat belt mid guide.
- Install the shoulder belt. Make sure that it is not twisted.
- Align the remaining clip of garnish molding to the vehicle and push firmly at the clip locations to secure the remaining clips.
- Torque the fastener.
- Snap the shoulder belt fastener cover.
- Install the shoulder belt adjuster knob.
- Install the instrument panel upper trim panel. Refer to Instrument Panel Upper Trim Plate Replacement in Instrument Panel, Gages, and Console.
- Check the function of the shoulder belts.
Important: On sunroof equipped vehicles, ensure that the sunroof wiring is not pinched.
Caution: Apply Loctite 242® Threadlocker US P/N 12345382 (Canadian P/N 10953489), or equivalent, on all restraint bolts/nuts before installation. Failure to use such threadlocker correctly may result in personal injury.
Tighten
Tighten the front shoulder belt Bolt to 50 N·m (37 lb ft).
Windshield Garnish Molding Replacement With Head Curtain Inflator Module
Removal Procedure
- Remove the instrument panel top cover. Refer to Instrument Panel Upper Trim Plate Replacement in Instrument Panel, Gages, and Console.
- Disable the head curtain inflator module. Refer to Disabling the SIR System in SIR.
- Lift the screw cover out by using a small flat screwdriver.
- Remove the molding screw.
- Starting at the upper rear section of molding, pull firmly at the clip locations to disengage the molding from the vehicle.

Important: Before removal, note position of the door weatherstrip over the edge of windshield garnish molding.
Installation Procedure
- Partially seat the garnish molding clips at the sheet metal hole locations.
- Tuck the curtain inflator module tether under the lower edge of the garnish molding.
- Push firmly at the clip locations to engage the clips in sheet metal.
- Install the garnish molding screw and cover.
- Reposition the door weatherstrip over the edge of the garnish molding.
- If equipped, enable the head curtain inflator. Refer to Enabling the SIR System in SIR.
- Install the instrument panel top cover. Refer to Instrument Panel Upper Trim Plate Replacement in Instrument Panel, Gages, and Console.
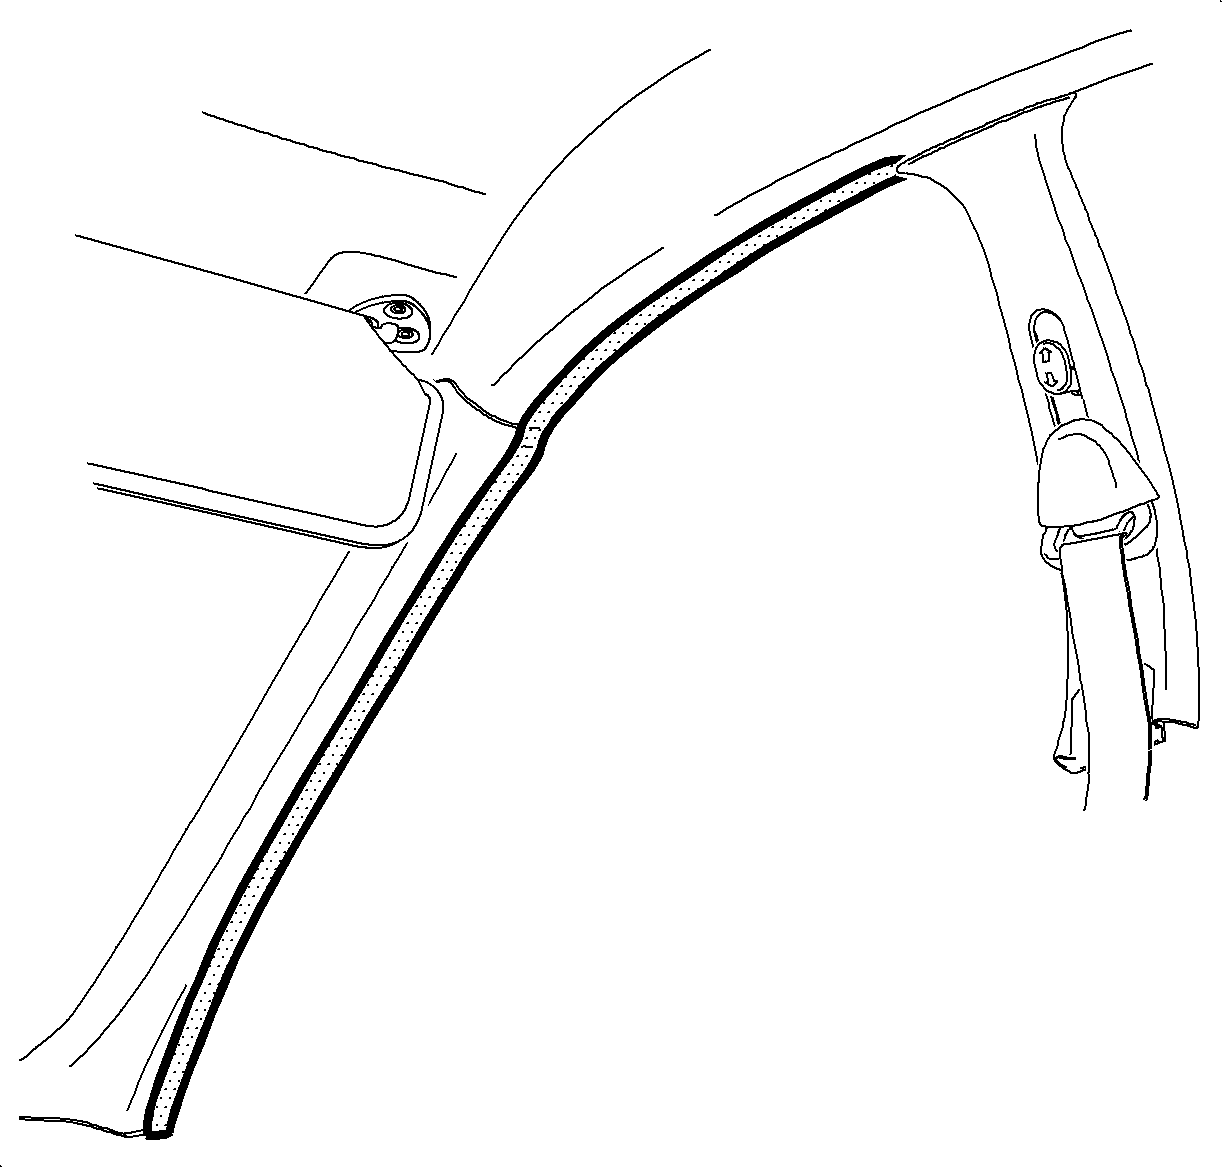
Caution: Head curtain inflator module tether must be routed below all garnish molding clips and screw locations. Incorrect routing may result in personal injury or improper curtain airbag deployment.
Tighten
Tighten windshield garnish molding screw to 1.2 N·m (11 lb in).
