Battery
| • | Inspect the battery for cracks in the case or cover. |
| • | Inspect the terminals and cable ends for corrosion. |
Notice: Refer to Fastener Notice in the Preface section.
| • | Verify the terminal bolt torque. |
Tighten
Tighten the battery terminal bolts to 17 N·m (13 lb ft).
| • | Repair cross threaded terminals. |
Notice: Do not use a tap to remove excess material from lug terminals. Battery damage
may result.
- Clean out the excess material in the threads using a small pick.
- Thread a new bolt in by hand and hand tighten.
- Torque the bolt.
Tighten
Tighten the battery terminal bolts to 17 N·m (13 lb ft).
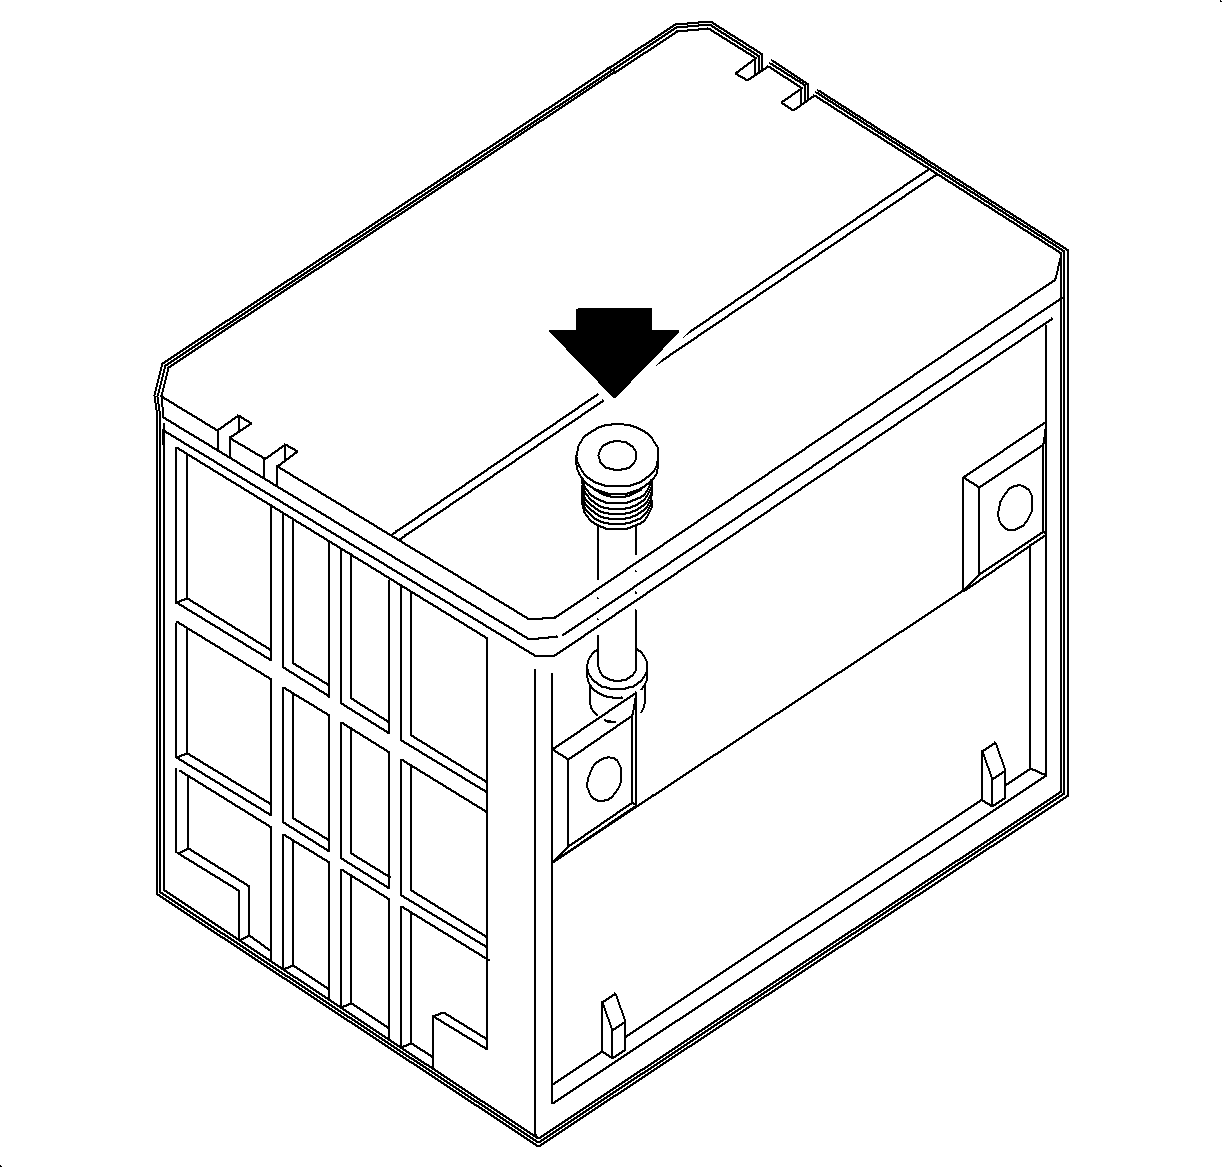
Built-In Hydrometer Check
Important: Before testing the battery, lightly tap the eye of the hydrometer to ensure
that gas bubbles have not lodged themselves in the hydrometer. If the battery needs
replacement, check the charging system for proper operation.
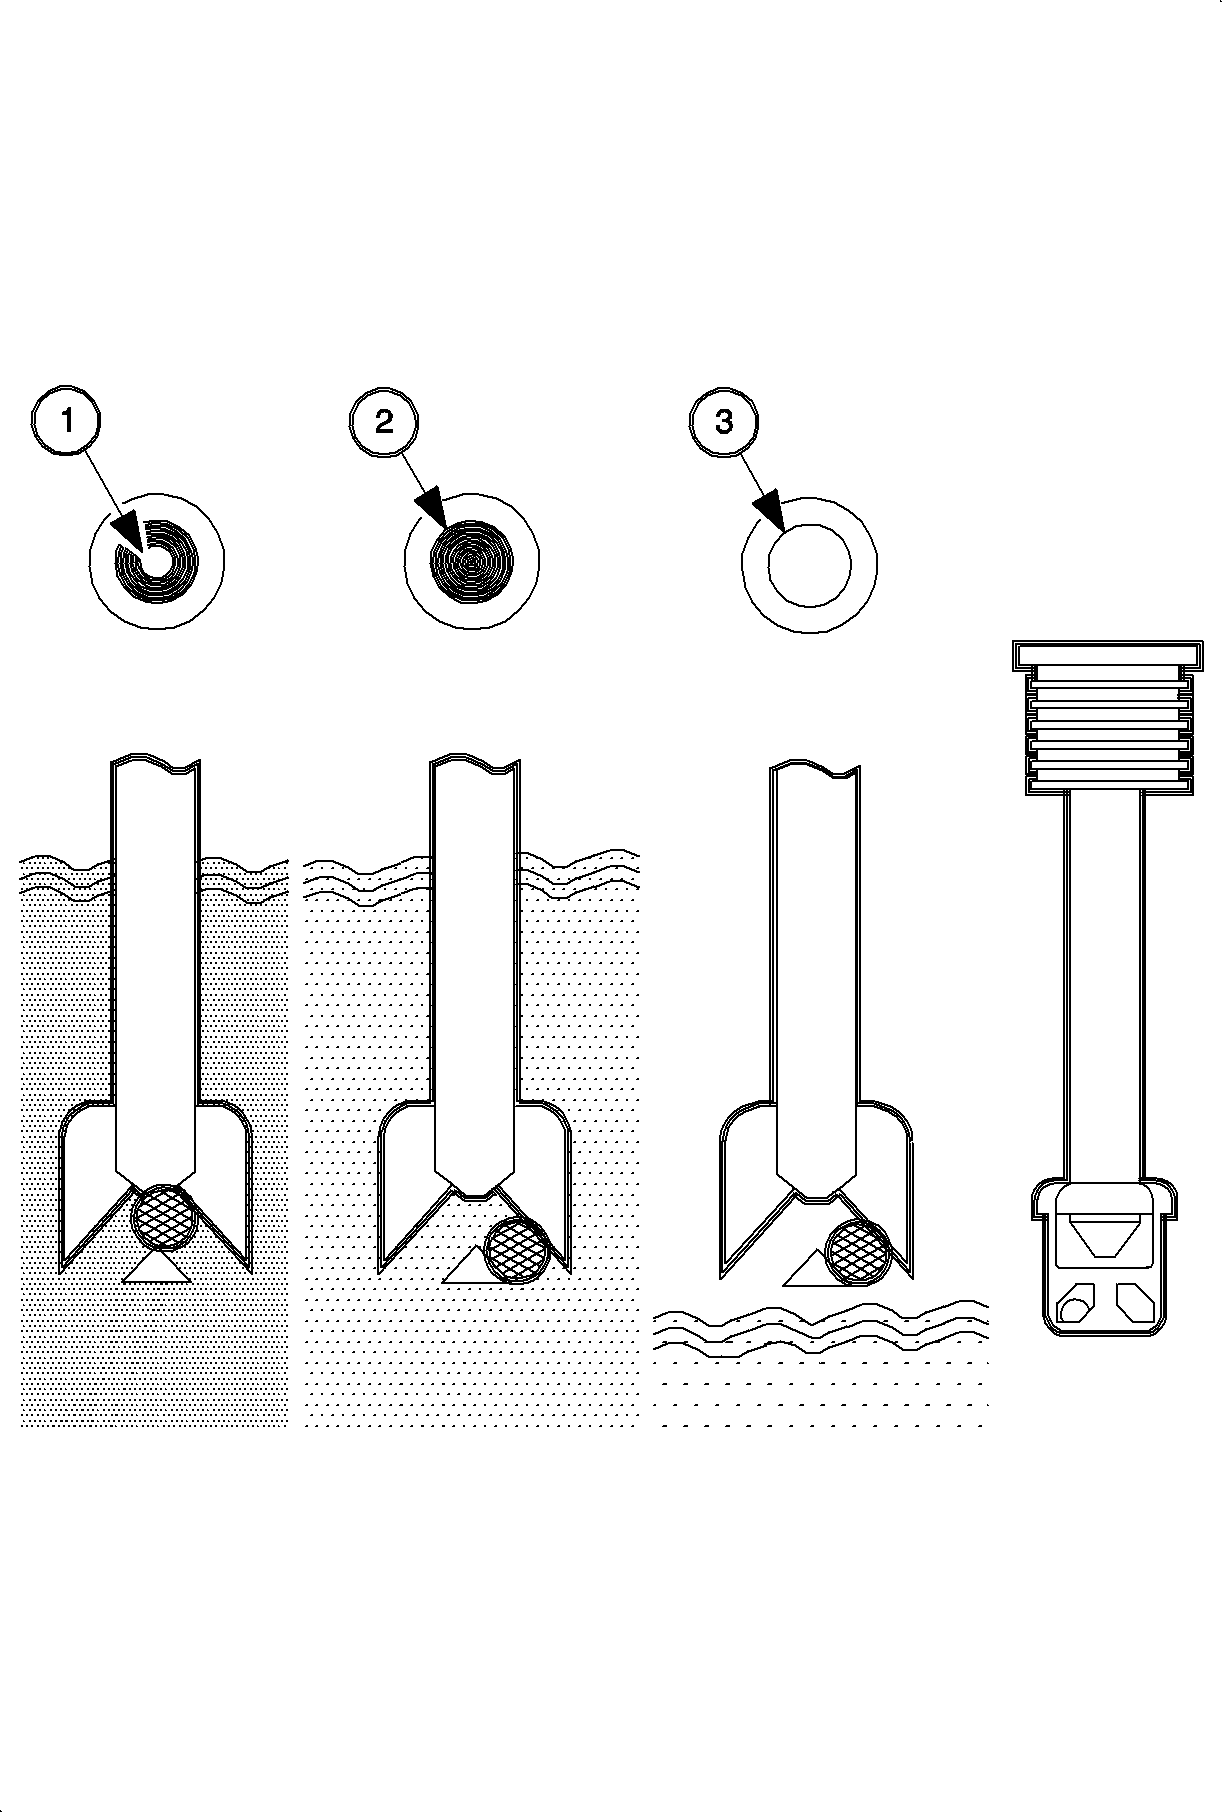
Tap lightly on the eye and observe the built-in hydrometer.

| • | Green dot visible: this indicates a sufficient state of charge for further
testing. |
| • | Dark indicator, green dot not visible: this indicates an insufficient
charge of less than 65 percent. The battery must be charged. Refer to
Battery Charging
. |
| | Important: Do not charge a battery with a clear or yellow indicator.
|
| • | Clear or yellow indicator: this indicates the battery's electrolyte level is
low and is not serviceable. The battery must be replaced. |

- Green dot - 65 percent or greater state of charge
- Dark dot - Below 65 percent state of charge
- Yellow or Clear dot - Low level of Electrolyte
Hydrometer Indicator
| State of Charge
| Required Action
|
Green Dot
| Above 65%
| Load Test
|
Dark Dot
| Below 65%
| Charge Batatery
|
Clear or Yellow Dot
| Low Electrolyte
| Replace Battery
|
Fusible Link
| • | Inspect the link for damage or discoloration. |
| • | Test for battery voltage on both ends of the link. |
| • | Replace with the same size fusible link. The wire-gage size is printed
on the insulation. |
Theft Deterrent Systems
| • | Inspect the vehicle for theft deterrent systems. |
| • | Refer to the manufacturer's documentation. |
Start Circuit
| | Important: Test the battery first. Refer to Battery Load Test.
|
| • | Inspect thepositive and negative battery cables. |
| • | Inspect the ground circuit cables. |
| • | Inspect the starter assembly connections. |
| • | Test the ignition switch for proper operation. |
Charge Circuit
| • | Inspect the accessory drive belt tension and condition. |
| • | Verify the generator to engine block bolt torque. |
| • | Test the fusible link in the circuit between the generator and the starter. |
| • | Verify the battery cable and terminal connection. |
Charge (Battery) Telltale
During engine start-up, the I/P cluster performs a bulb check by illuminating
the telltale for three seconds. If a code setting condition occurs, the PCM signals
the I/P cluster to illuminate the charge telltale. The PCM communicates with the
I/P cluster by class II on circuit 1807.
Battery Load Test

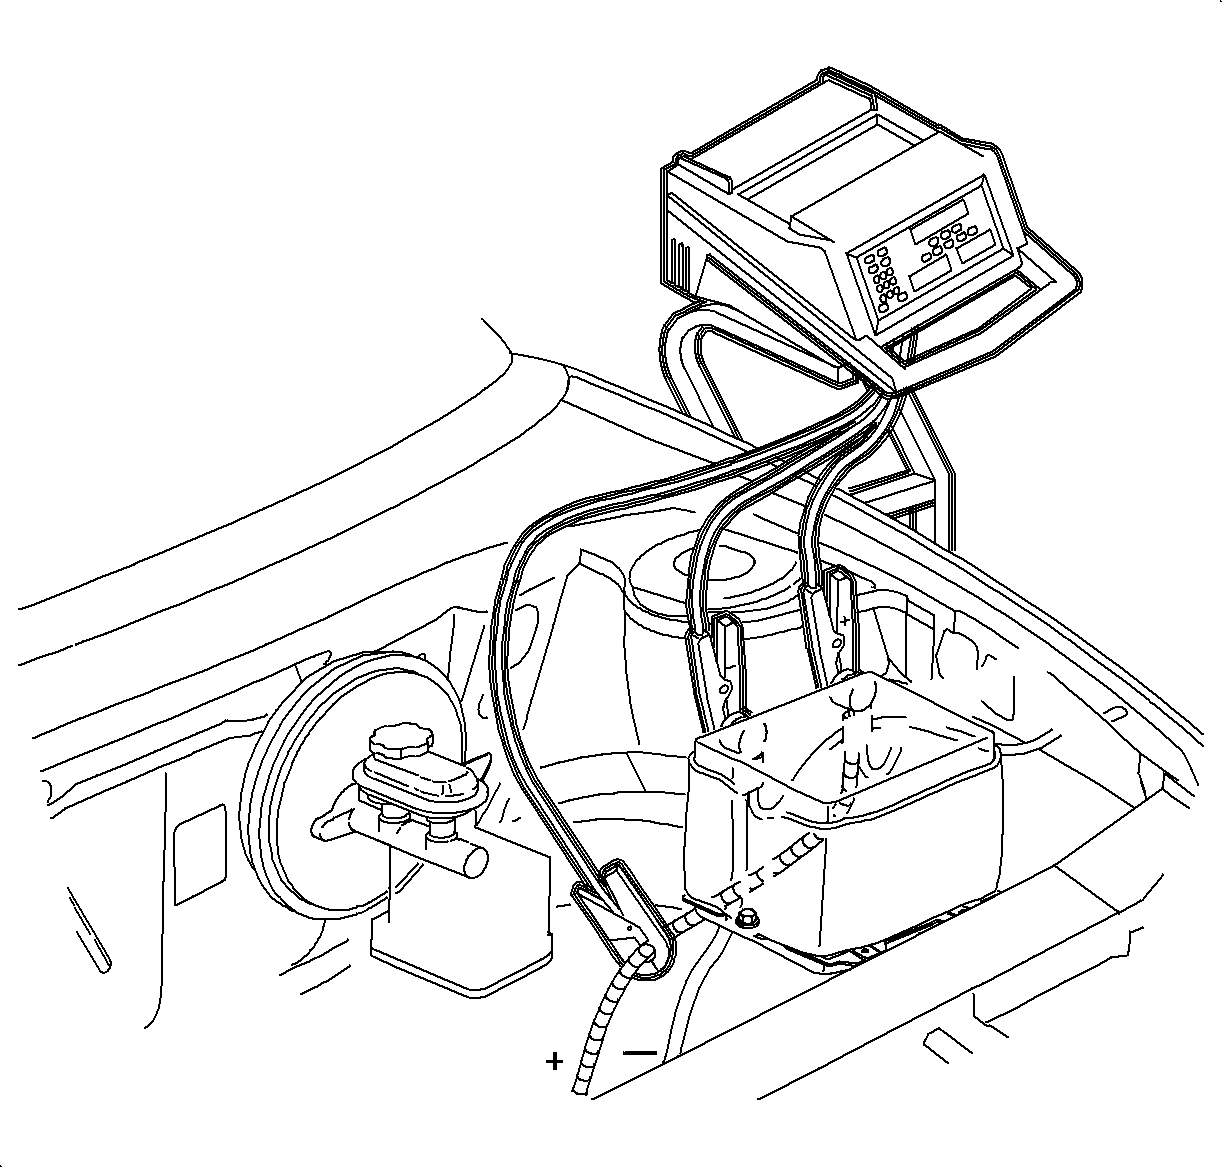
- Turn the SA9154Z-A
Start and Charge System Tester ON and
press the BATTERY TEST key.
Important: Make sure the battery terminals and cables are clean.
- Clamp the red lead to the positive battery terminal. Make sure the leads are
secure.
- Clamp the black lead to the negative battery terminal.
- Turn the ignition and all accessories OFF.
- Press BATTERY TEST or BATTERY TEST after CHARGING. The BATTERY TEST after
CHARGING removes the surface charge before testing.
- The display says INPUT COLD CRANKING AMP (CCA). Using the number keypad,
input the CCA and press ENTER. The display says TEST IN PROGRESS.
- To abort the test push any function key or the POWER OFF key.
Test Results
Display says TEST RESULT and shows diagnosis:
| • | Good Battery -- the battery is capable of holding a charge and is
performing to specifications. |
| • | Good, Low Charge -- the battery is good but needs to be recharged. |
| • | Bad Battery -- the battery will not hold a charge and perform to
specifications. The battery should be replaced. |
| | Important: When charge and retest appears, the battery must be charged. Refer to
Battery Charging
.
|
| • | Charge and Retest -- the battery condition cannot be determined until
after it is fully charged. |
Good Battery
If a battery has tested good and continues to discharge in service, the following
are possible causes to the problem:
| • | Vehicle accessories left ON. |
| • | Conditions in the charging system such as slipping belt, high wiring resistance,
faulty generator/charging system. |
| • | Blown fusible link between the starter and generator. Refer to Fusible
Link. |
| • | A vehicle electrical load exceeding the capacity of the generator. |
| • | Extended slow speed driving with many electrical accessories turned ON. |
| • | Conditions in the vehicle electrical system such as shorted wires or high
parasitic current loads. |
| | Notice: Do not check for battery terminal tightness by rotating the cable while attached
to the battery. This could cause the battery lug face to be damaged and result in
a poor electrical connection.
|
| • | Loose cable connectors, loose hold downs, or improper charging
of a previously run down battery. |
| • | Corroded or loose cable connections or other cranking system conditions. |
| | Important: A dead battery is usually a symptom of another problem. Fix the problem. Don't
just charge the battery.
|
| • | Long periods of vehicle storage without disconnecting the battery. Parasitic
loads can discharge a battery in four to six weeks. |


