For 1990-2009 cars only
Removal Procedure
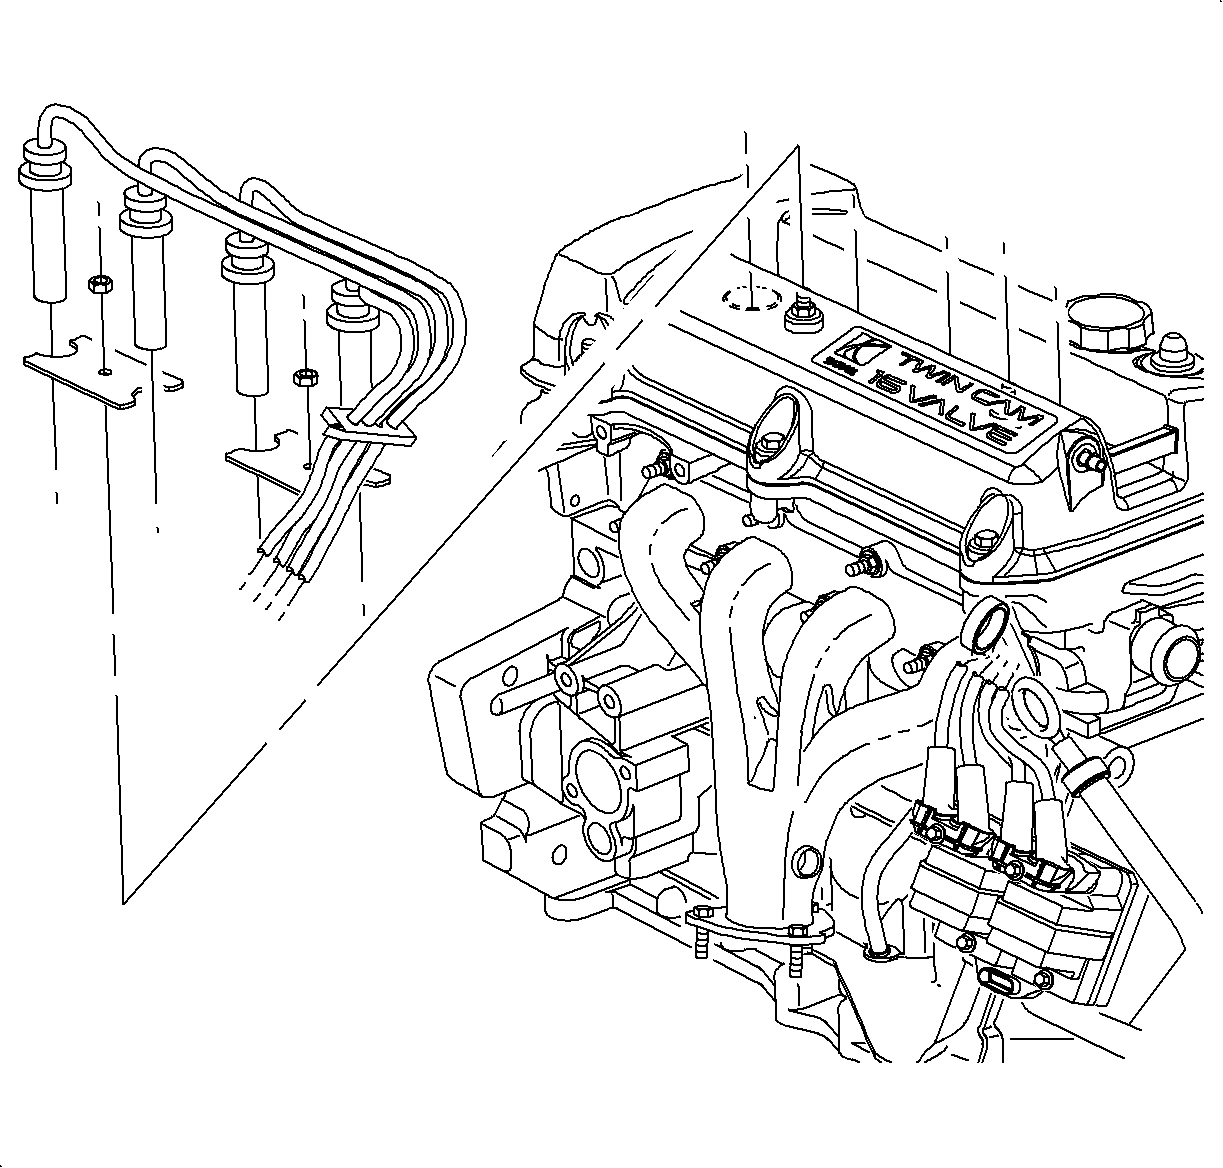
- Remove the air induction resonator.
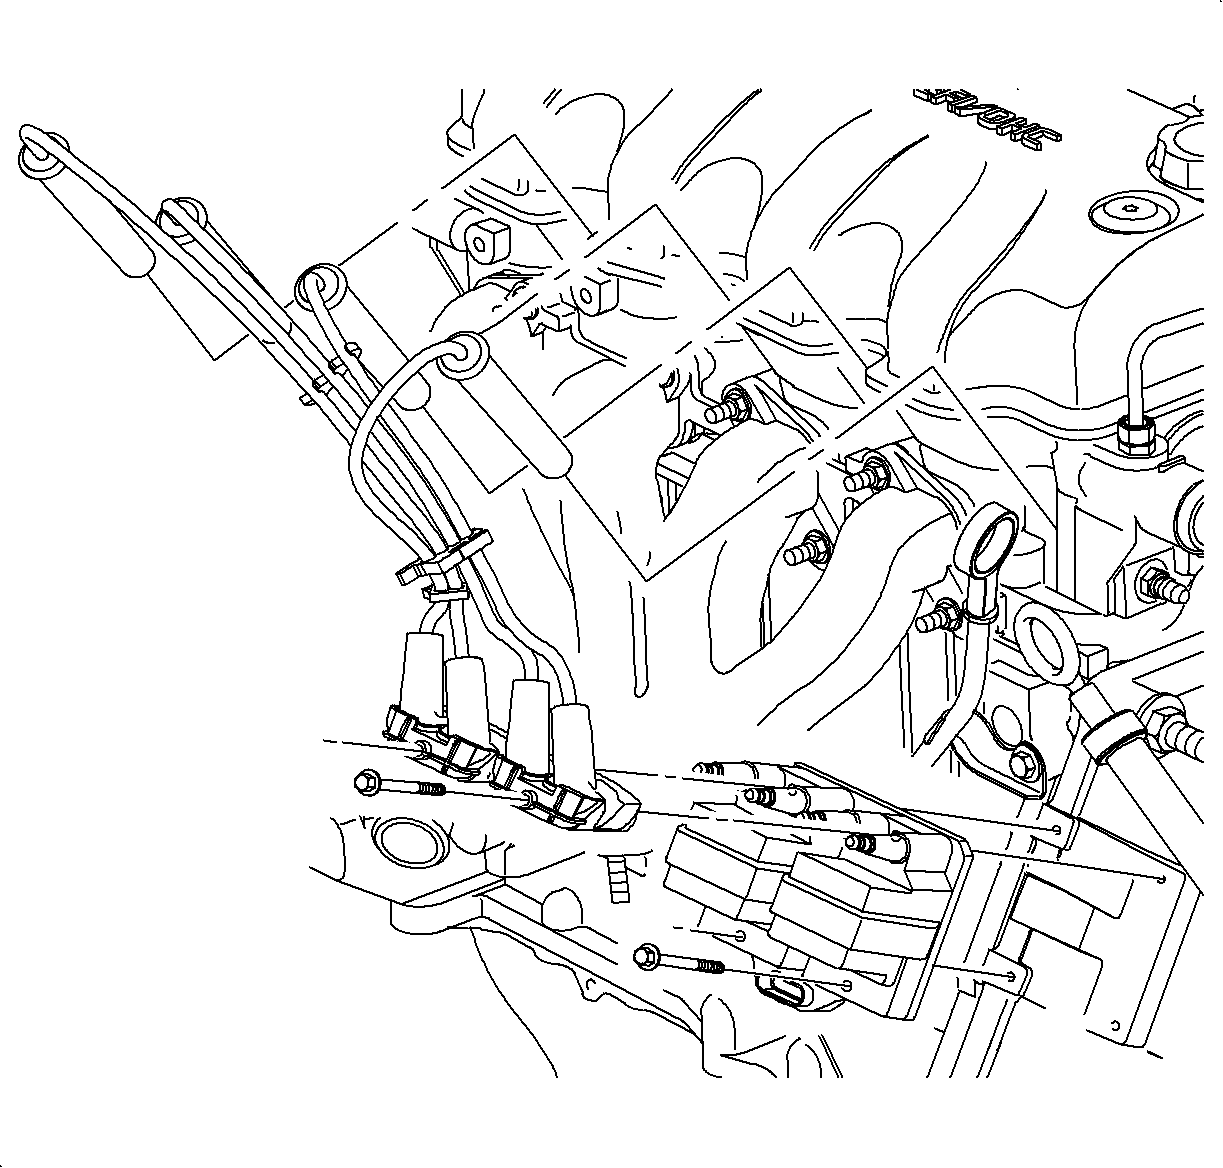
- Remove the upper electronic ignition (EI) module bolts.
- Twist the boots to break any bonding. Gently pull the spark plug boots off the EI module.
- Remove the connector position assurance (CPA) attachment nuts from the valve cover (DOHC/LL0 only.)
- Twist boots to break any bonding and remove the spark plug wires from the spark plugs.

Important: Use a small flat-blade screwdriver to remove spark plug wires from the coil tower by gently prying between the EI module and black CPA.
Installation Procedure
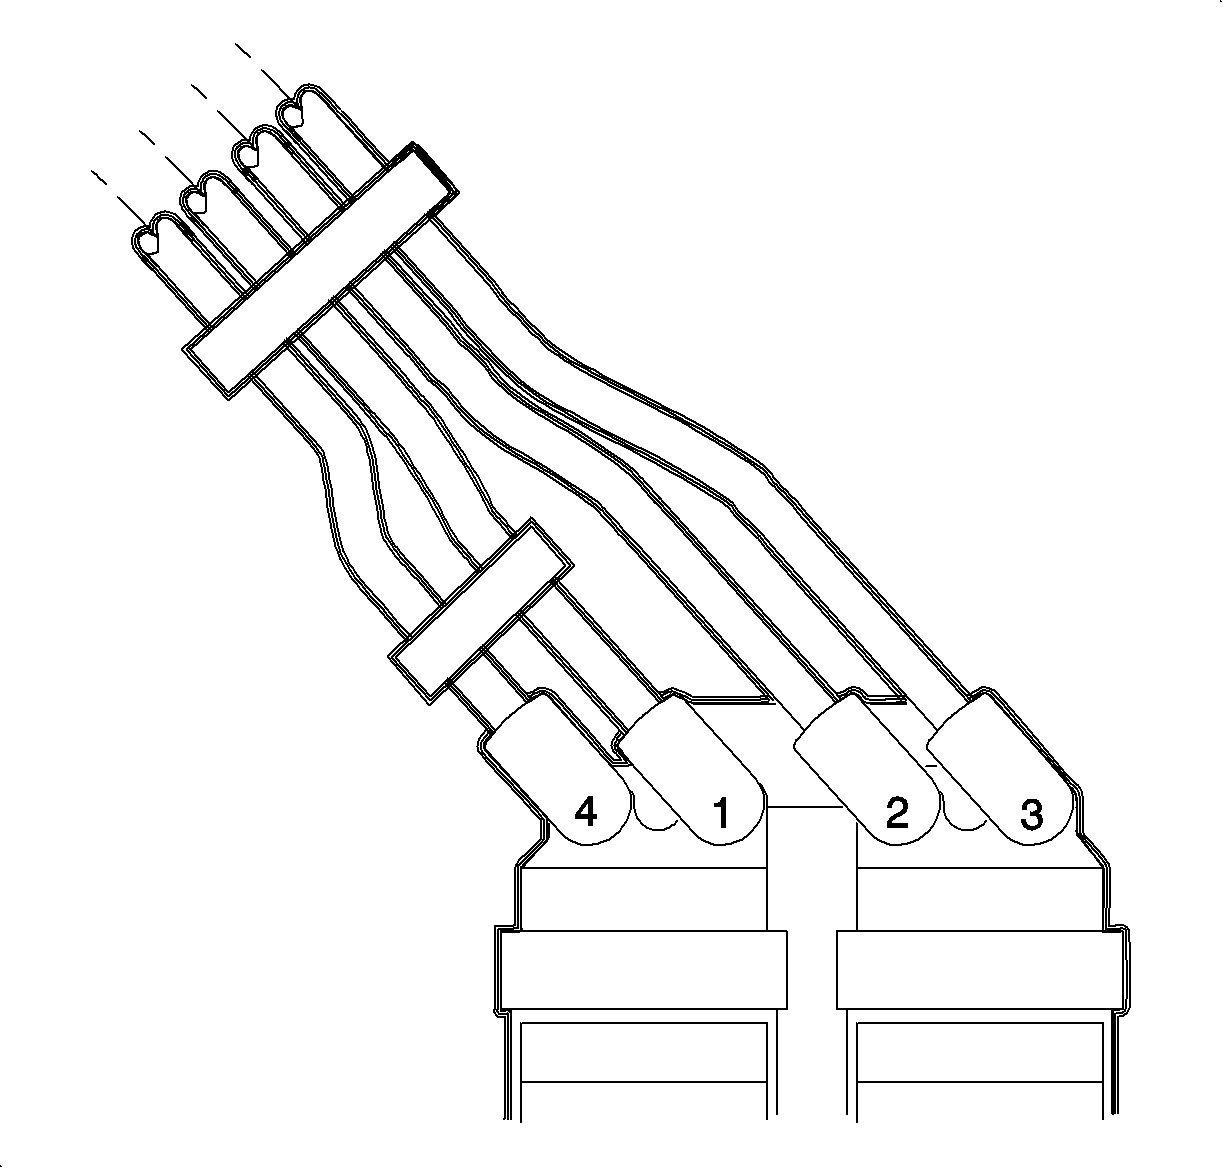
- Install the spark plug wires with the CPA on the EI module. Make sure the orientation of the wires is correct.
- Install the upper EI module bolts.
- Install the spark plug wires with the CPA (DOHC/LL0 only) on the spark plugs. Press the boots until a click is heard or felt.
- Install the CPA attachment nuts on the valve cover (DOHC/LL0 only).
- Install the air induction resonator.
- Start the engine to verify no misfires exist.

Important: Install the correct spark plug wire on the correct EI module coil tower as indicated on the illustration.
Notice: Refer to Fastener Notice in the Preface section.
Tighten
Tighten the EI module bolts to 8 N·m (71 lb in).
Important: Install the spark plug wires on the correct spark plugs as indicated on each spark plug wire. Make sure the routing of the wire on the engine is away from moving parts and exhaust.

Tighten
Tighten the CPA Attachment Nuts-to-Valve Cover to 17 N·m (13 lb ft).
