For 1990-2009 cars only
Front Seat Belt Retractor Replacement Sedan
Removal Procedure
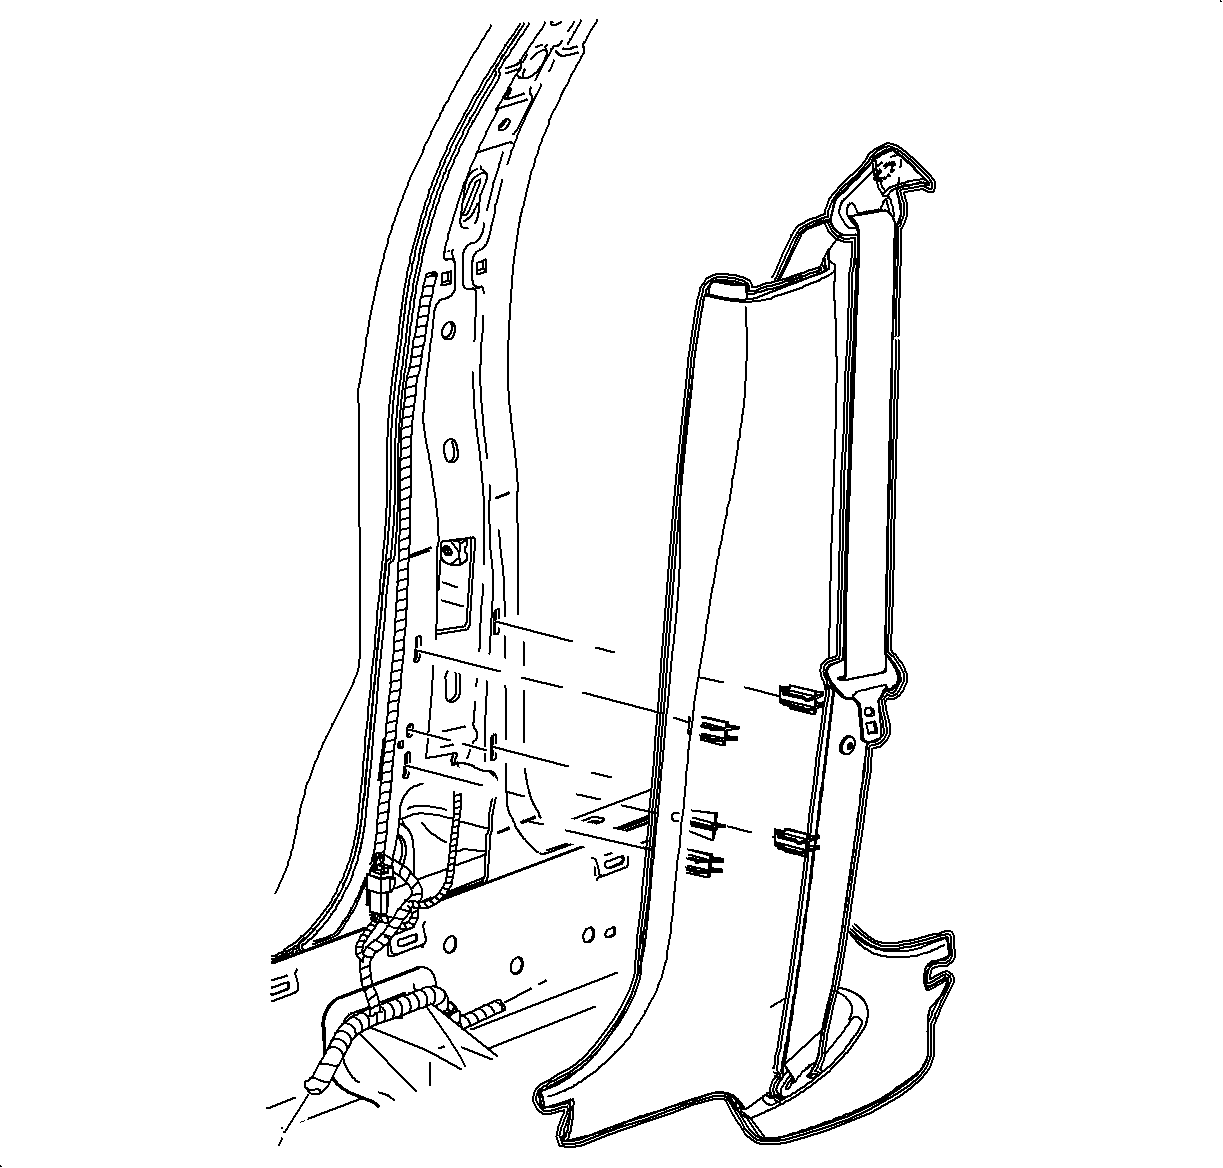
- Starting at the center pillar, pull firmly on the hinge pillar molding and the carpet retainer to partially remove them.
- Pull firmly at the clip locations to disengage the center pillar lower trim finish panel.
- Remove the center pillar lower trim panel.
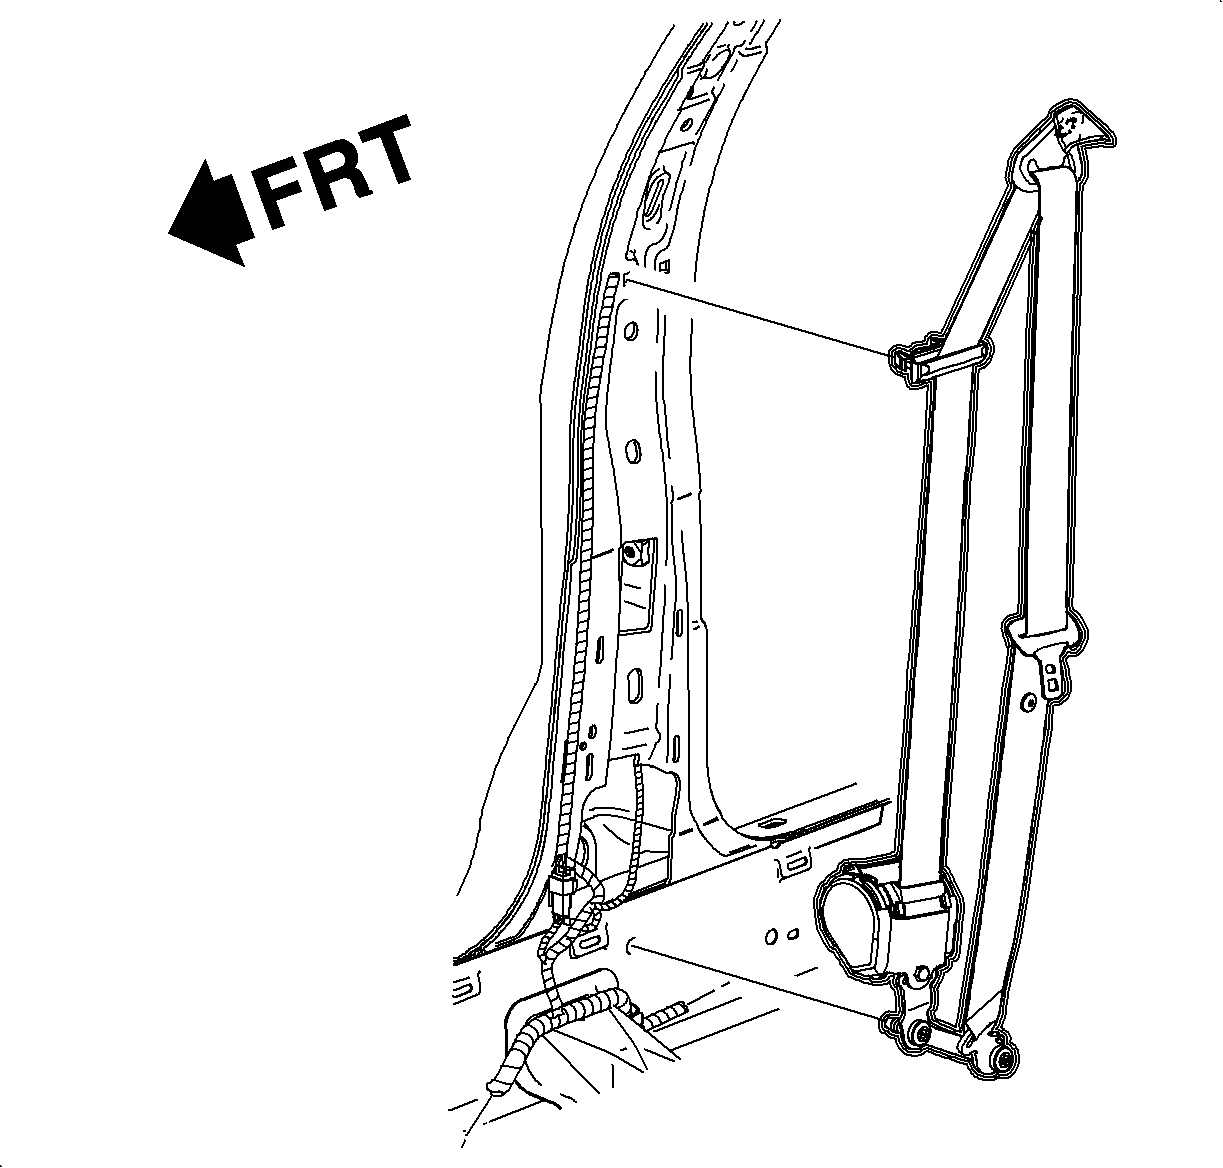
- Remove the front seat belt unit bolts from the bottom of the seat belt unit and remove the seat belt unit from the rocker mounting location.
- Open the shoulder belt unit bolt cover to expose the attaching fastener.
- Remove the shoulder belt unit fastener.
- Unsnap the mid-guide from the center pillar by pressing the clips inboard with a small screwdriver.
- Remove the seat/shoulder belt unit.
Installation Procedure
Important: Apply Loctite 242®, or equivalent, on all restraint fasteners prior to installation.
- Insert retractor into the rocker mounting location.
- Hand start the rear and front seat belt unit fasteners to align the seat belt to the rocker mounting location. After the seat belt unit bolts are started, tighten the seat belt bolts.
- Position the seat belt unit and snap the mid-guide into the center pillar holes. Make sure the belt is not twisted.
- Position the top of the shoulder belt unit to the upper attachment point and hand start the shoulder belt upper attachment bolt.
- Close the seat belt unit bolt cover.
- Check the seat belt unit installation for twists and operation of retractor.
- Route the seat belt webbing into the center pillar lower trim finish panel.
- Install the center pillar lower trim panel.
- Install the hinge pillar molding and the carpet retainer.
- Verify the seat belt unit operation.
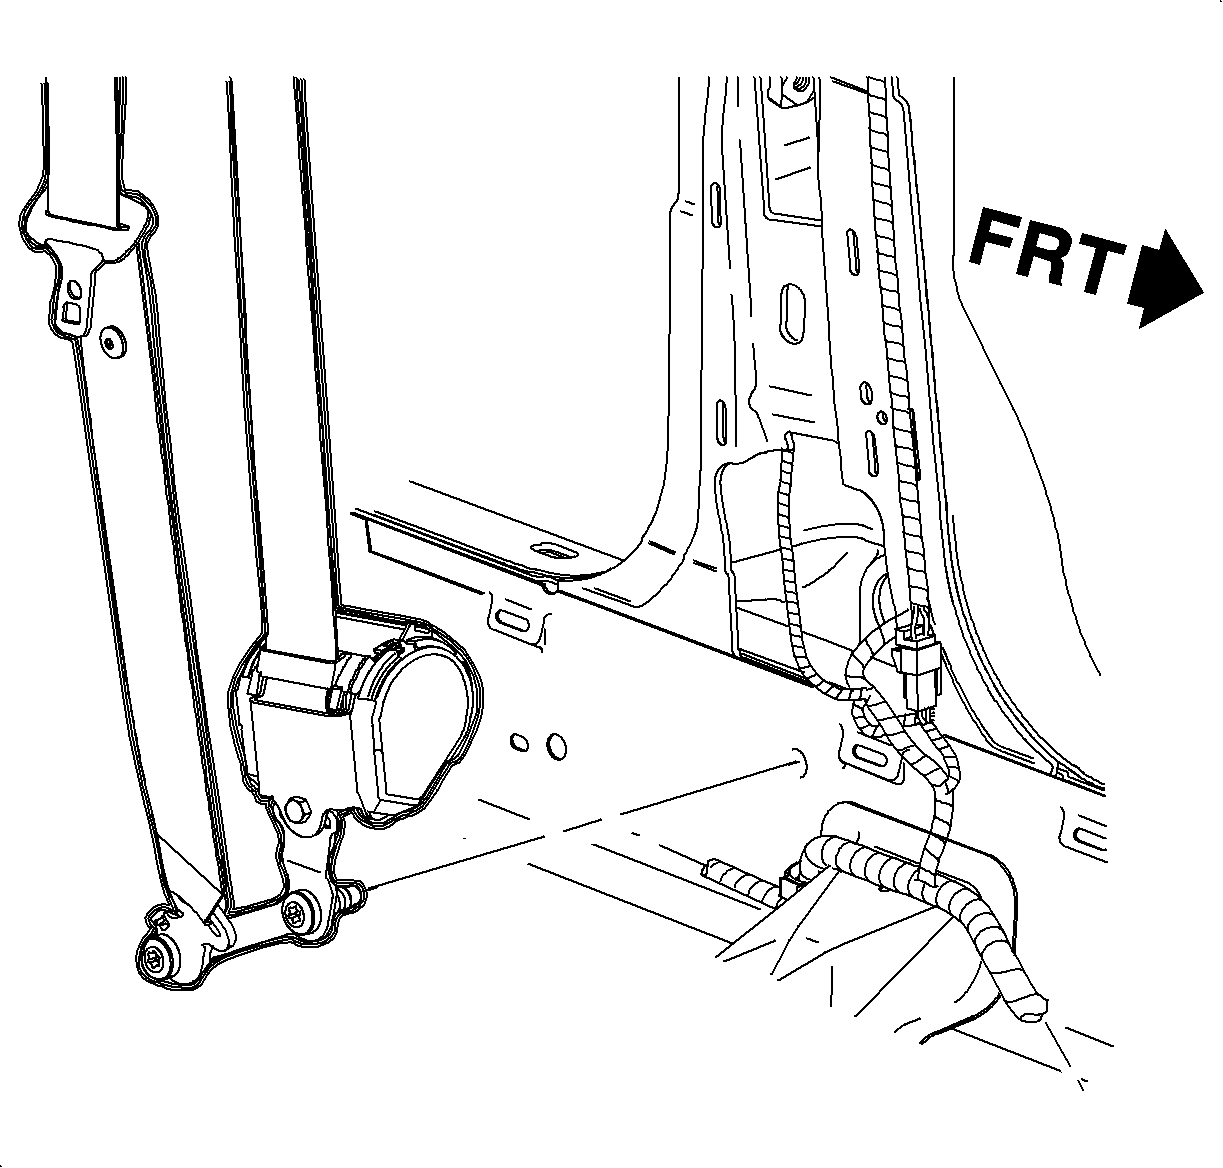
Notice: Refer to Fastener Notice in the Preface section.
Tighten
Tighten the seat belt rocker fastener to 50 N·m (37 lb ft).

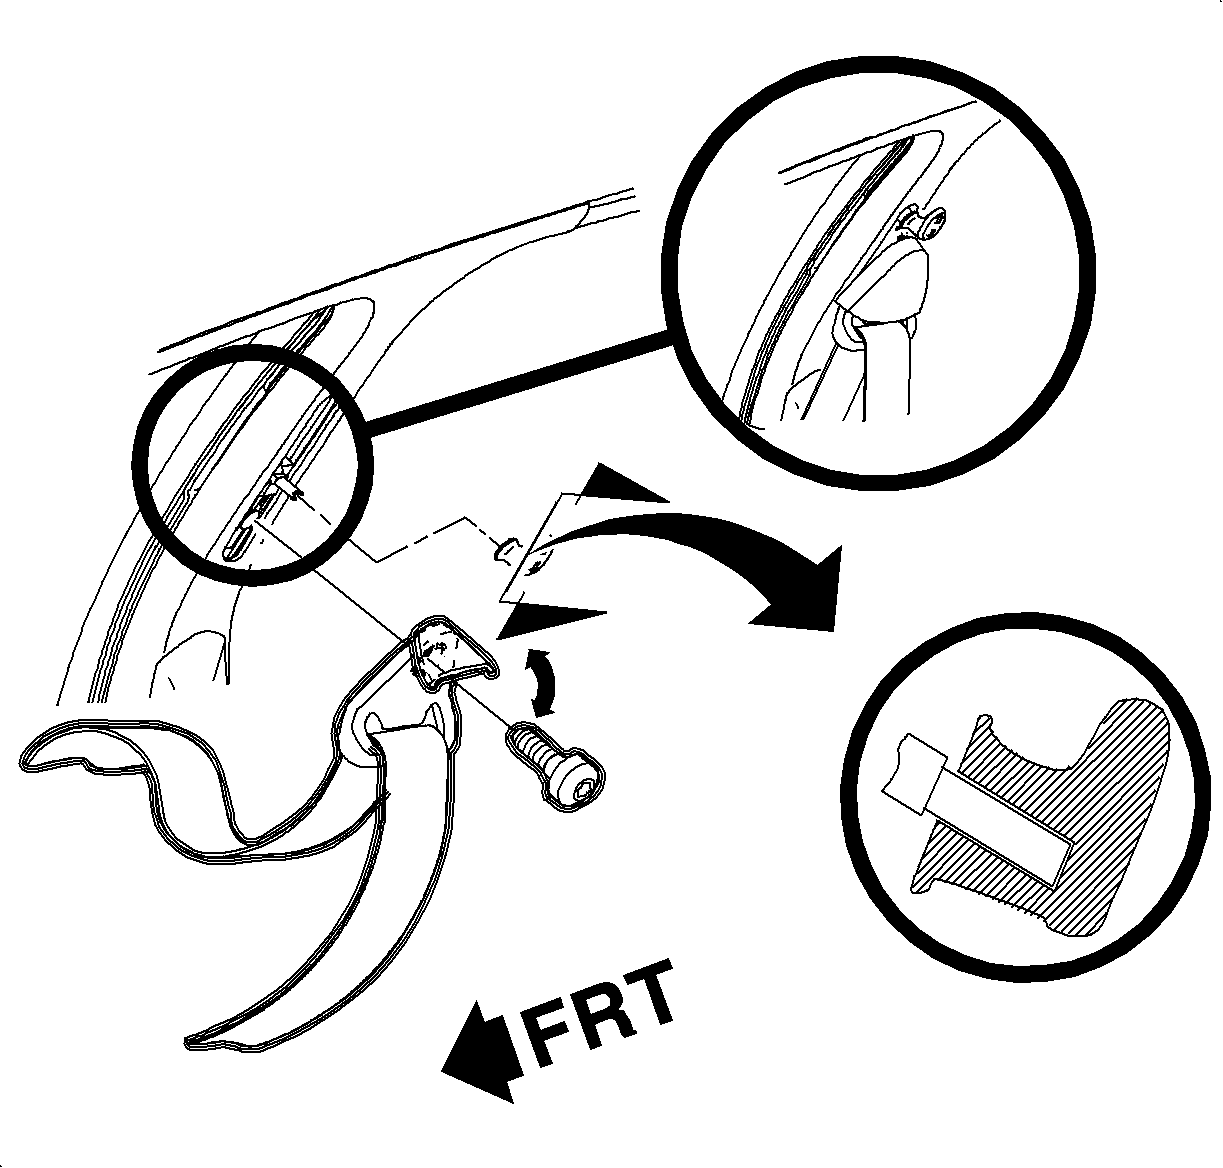
Tighten
Tighten the seat belt rocker bolt to 50 N·m (37 lb ft).

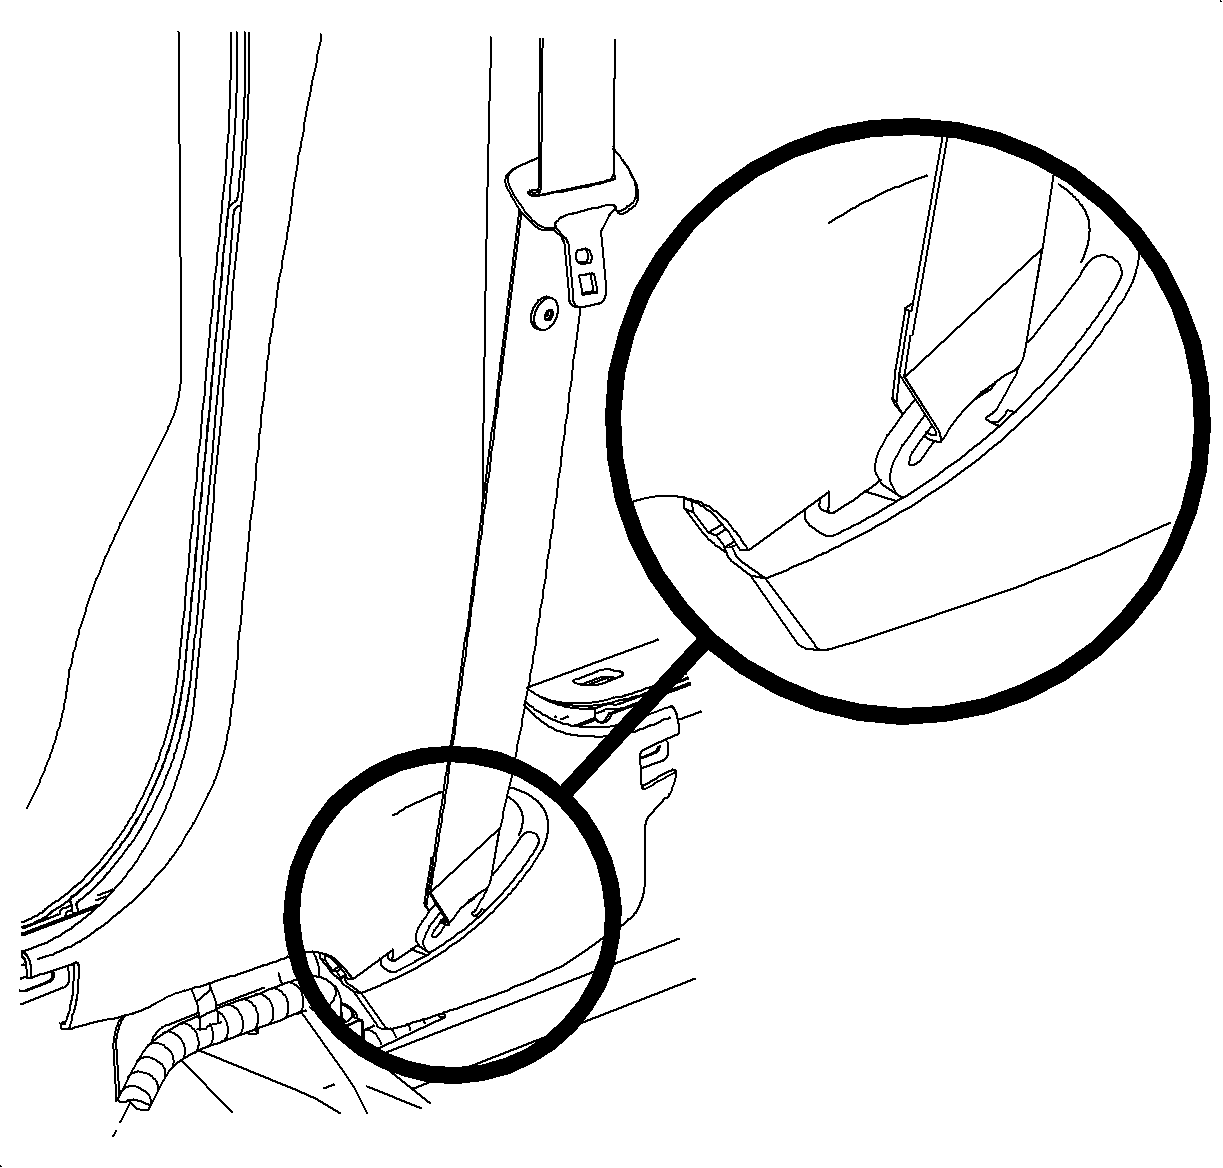
| 8.1. | Position the center pillar lower trim panel to vehicle. |
| 8.2. | Push firmly at attaching clip locations to engage the clips. |
| 8.3. | Tuck out-board tabs of the trim panel under the weatherstrip. |
