Tools Required
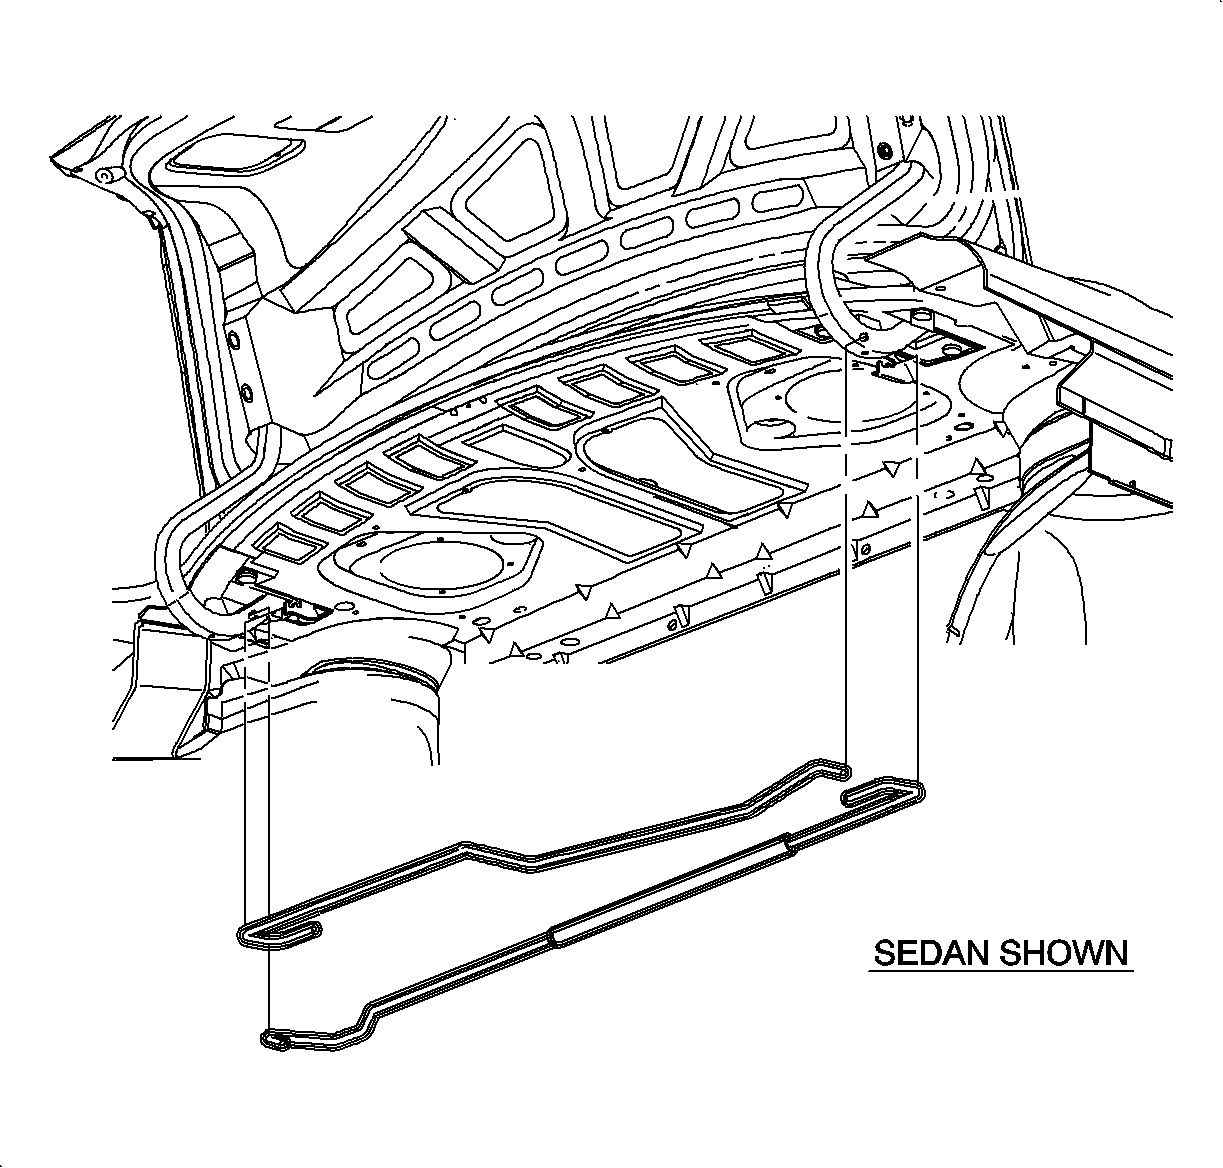
SA9702B Trunk Lid Torsion
Tool
Removal Procedure

Caution: When the hood hold open rod is being removed or installed, provide alternate
support to avoid the possibility of damage to the vehicle or personal injury.
- Place a prop under the rear compartment lid that will safely support
the lid.

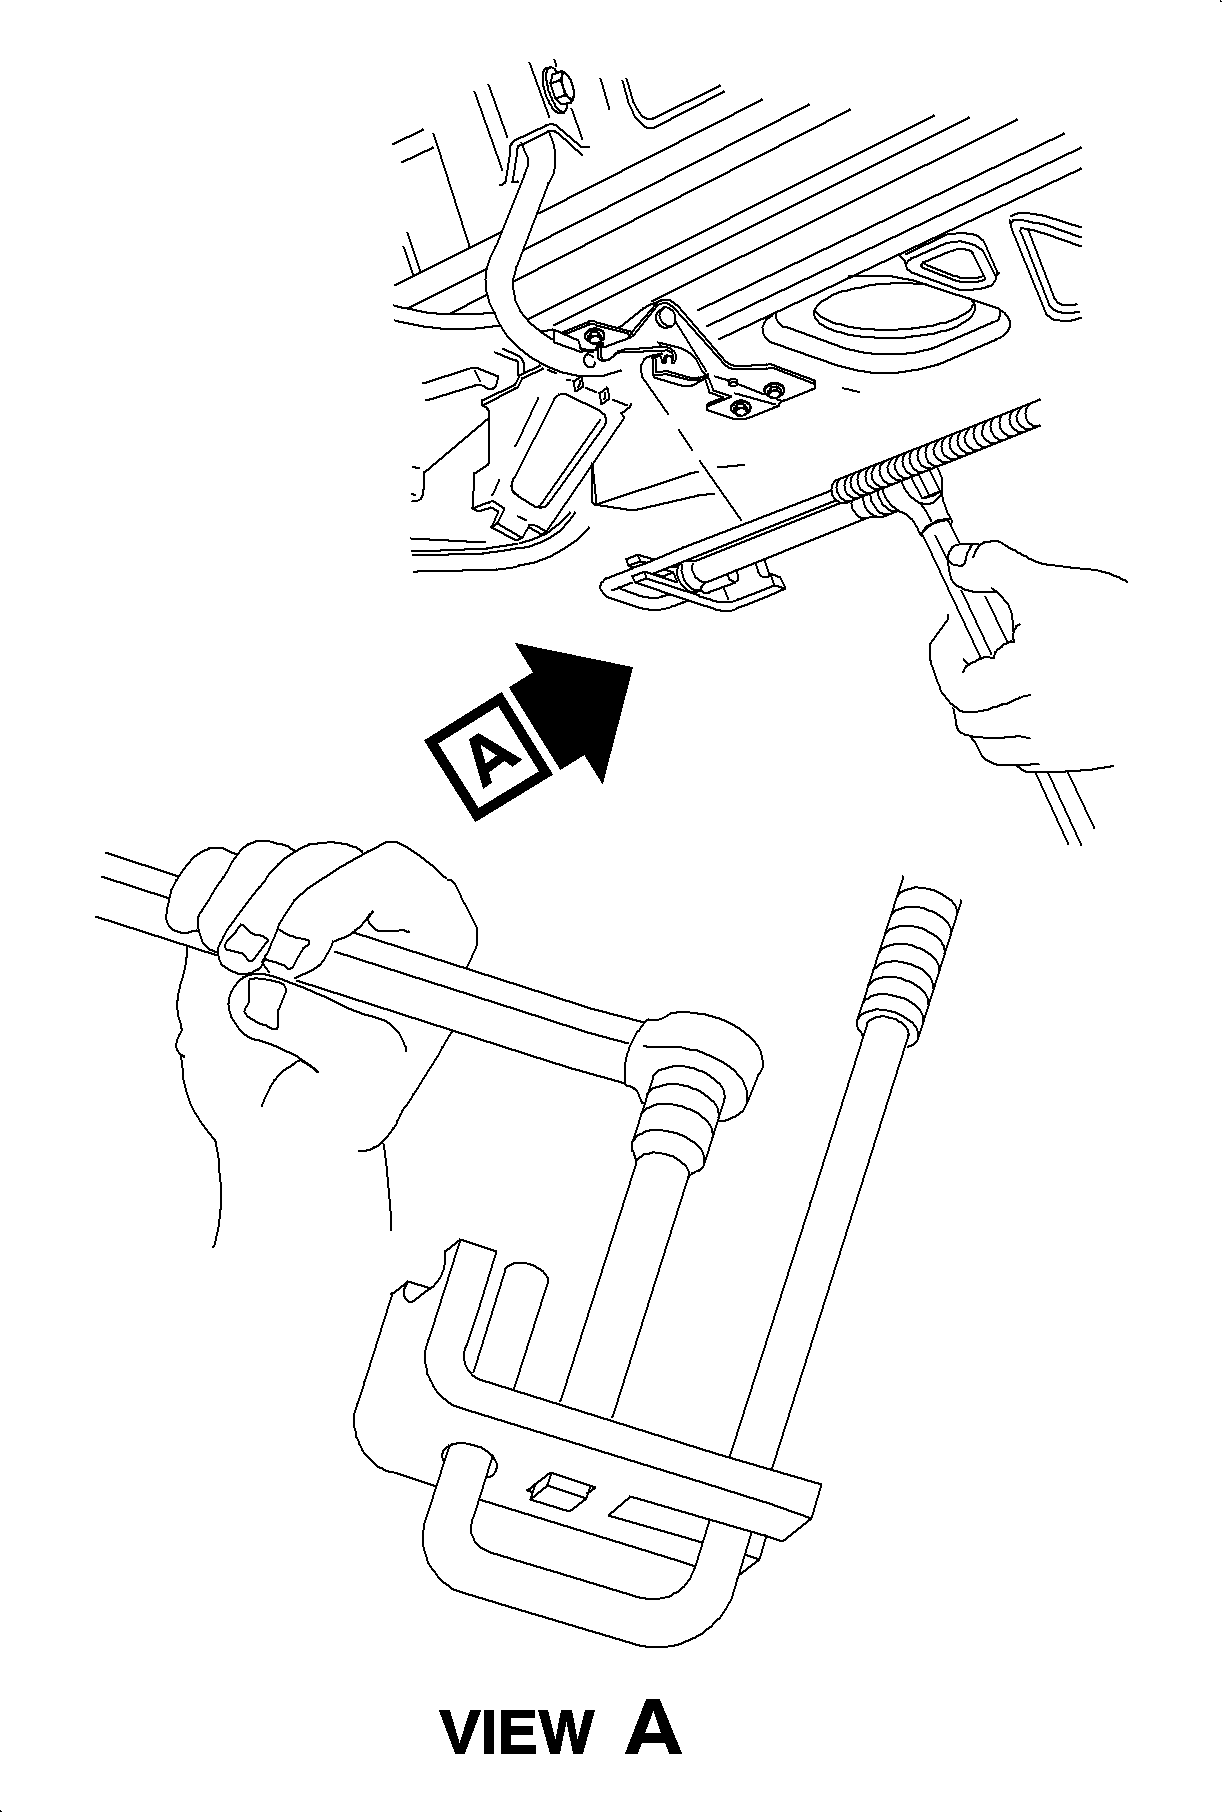
- Attach the SA9702B
to the
lower torque rod.
- Twist the torque rod and remove the rod from the bracket.
- Relax the rod, remove the tool, and remove the rod. Note the position
of the rod for installation.
- Attach the SA9702B
to the upper torque rod.
- Twist the torque rod and remove the rod from the bracket.
- Relax the rod, remove the tool, and remove the rod. Note position of
rod for installlation.
Installation Procedure

- Install the upper torque rod into the left hinge arm.
- Install the SA9702B
to the upper torque rod and twist the upper torque rod.
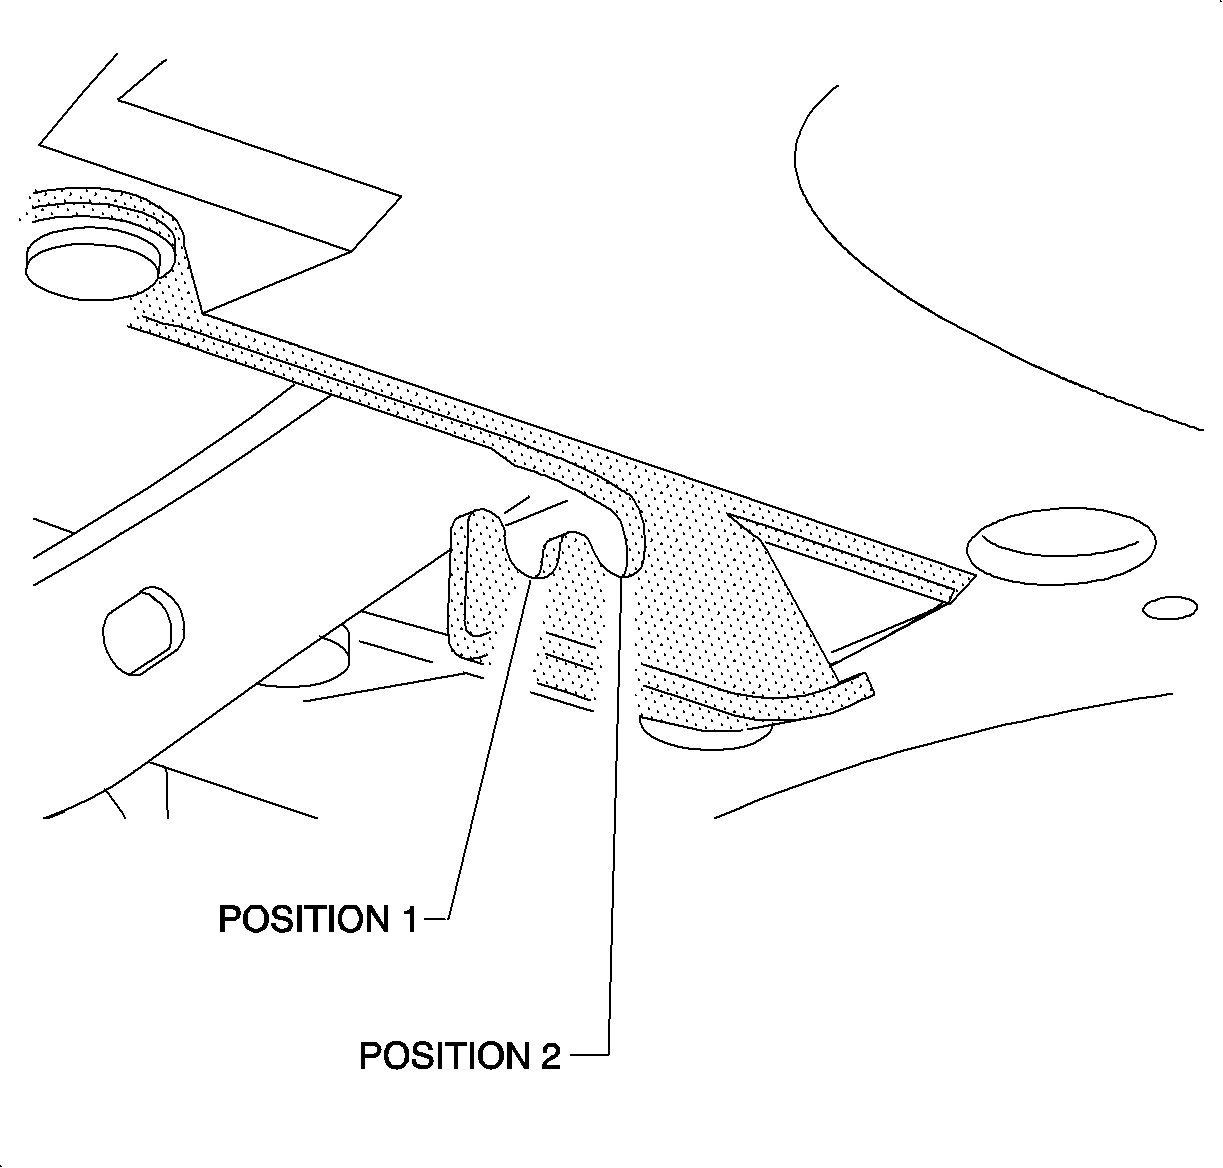
- Install the upper torque rod into the bracket of the right hinge at the
proper position. Refer to the following chart for the proper position of the torque
rod.
- Relax the upper torque rod and remove the tool.
| - | Application: SL, SL1, SC1 and SC2 without rear |
| - | Application: rear compartment lid spoiler |
| - | Application: SL2 without spoiler |
| - | Application: SL, SL1, SL2 and SC2 with spoiler |
- Install the lower torque rod into the right hinge arm.
- Install the SA9702B
to the lower torque rod and twist the lower torque rod.
- Install the upper torque rod into the bracket of the left hinge at the
proper position. Refer to the above chart for the proper position of the torque rod.
- Relax the lower torque rod and remove the tool.


