For 1990-2009 cars only
Removal Procedure
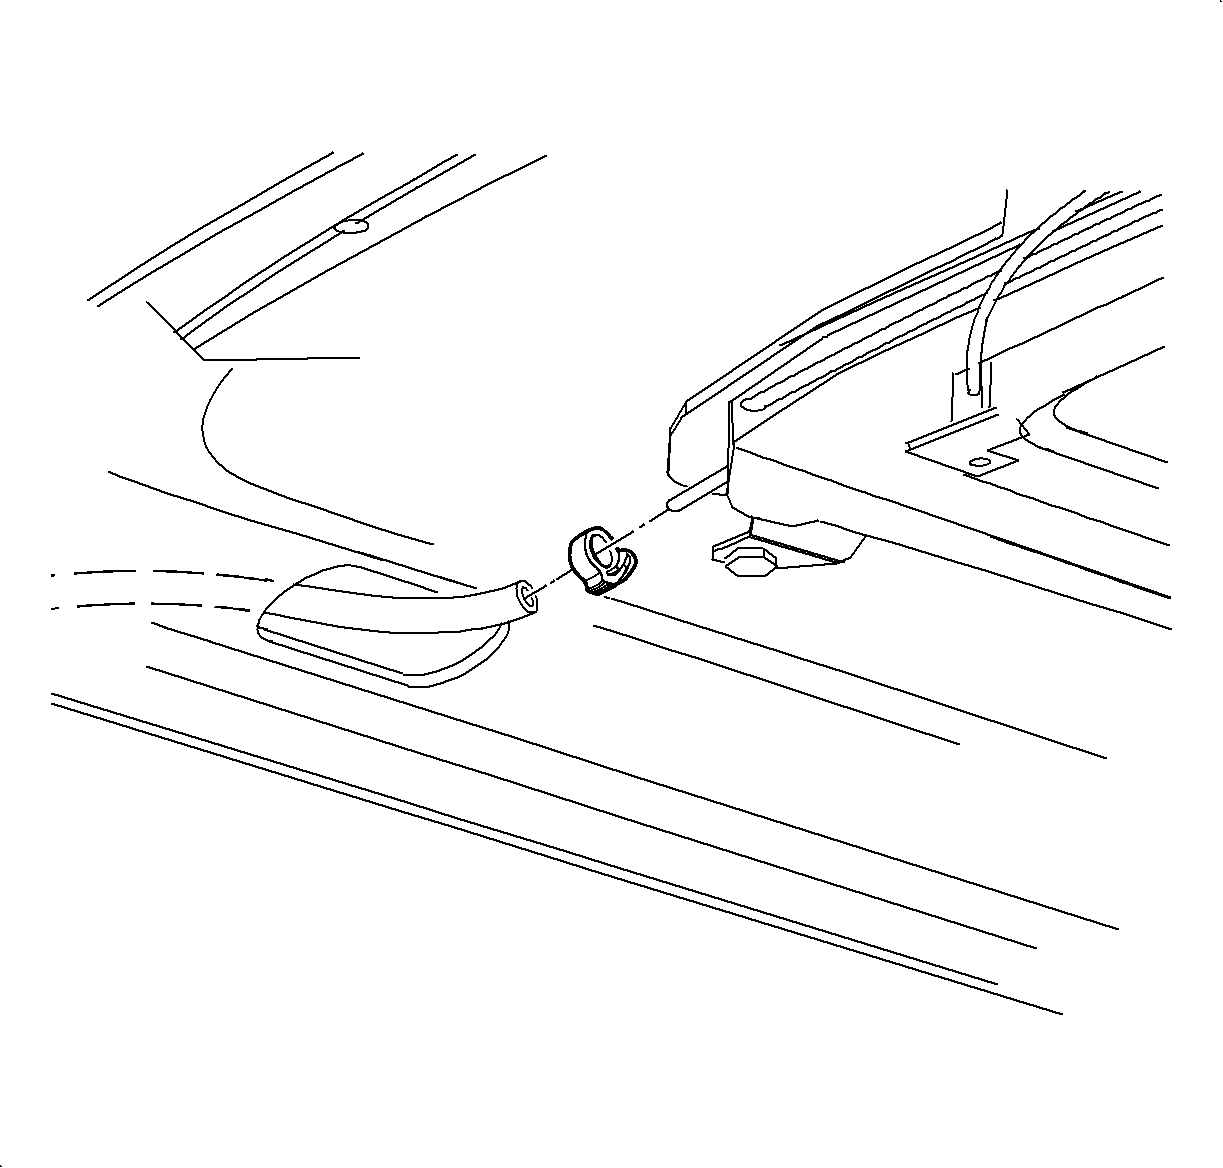
- Remove the headliner to gain access to the front drain hose attachment at the sunroof tray. Refer to Headlining Trim Panel Replacement in Interior Trim.
- Disconnect the sunroof front drain hose from the sunroof tray and attach 2.5 m (8 ft) length of electrical wire to serve as a feeder for pulling the new hose through.
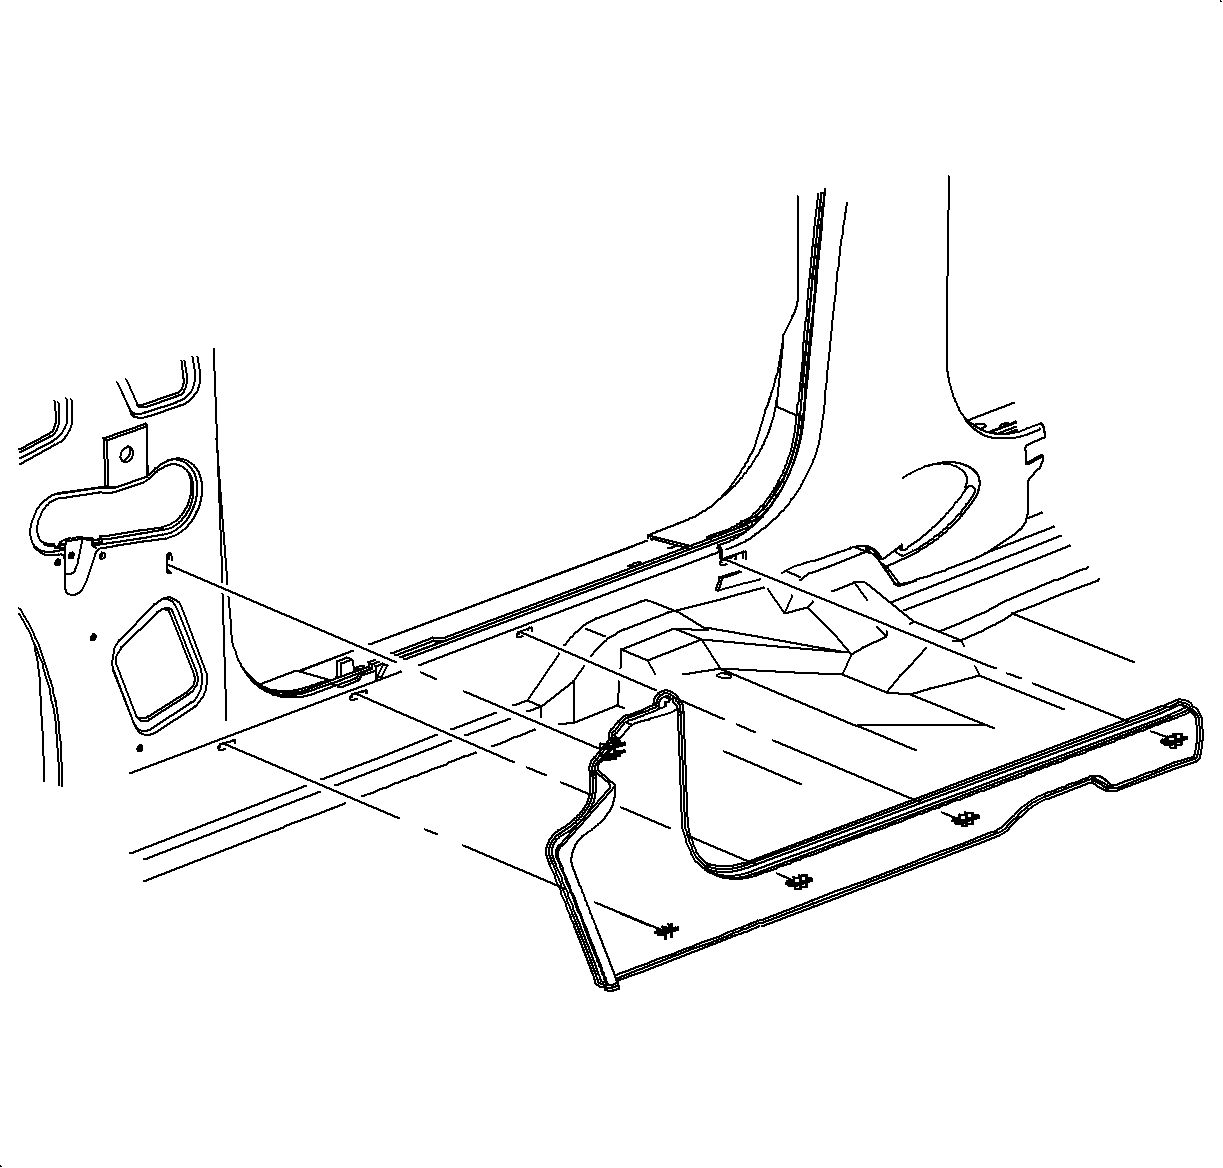
- Remove the front lower garnish/sill mouldings.
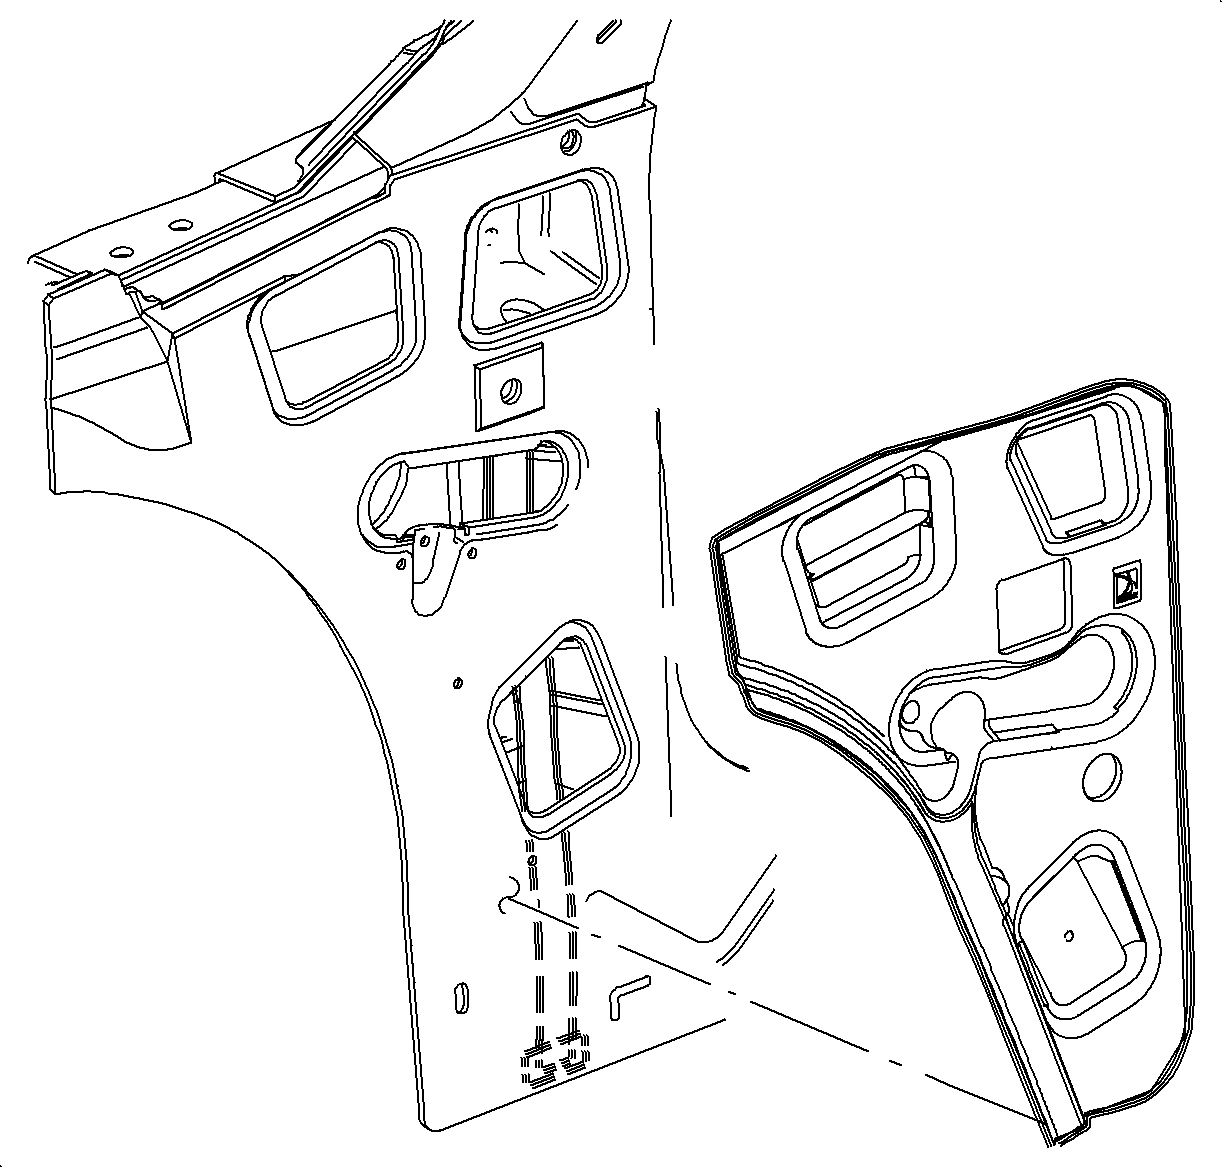
- Partially remove the insulators in the hinge pillar to expose the lower sunroof drain hose attachment.
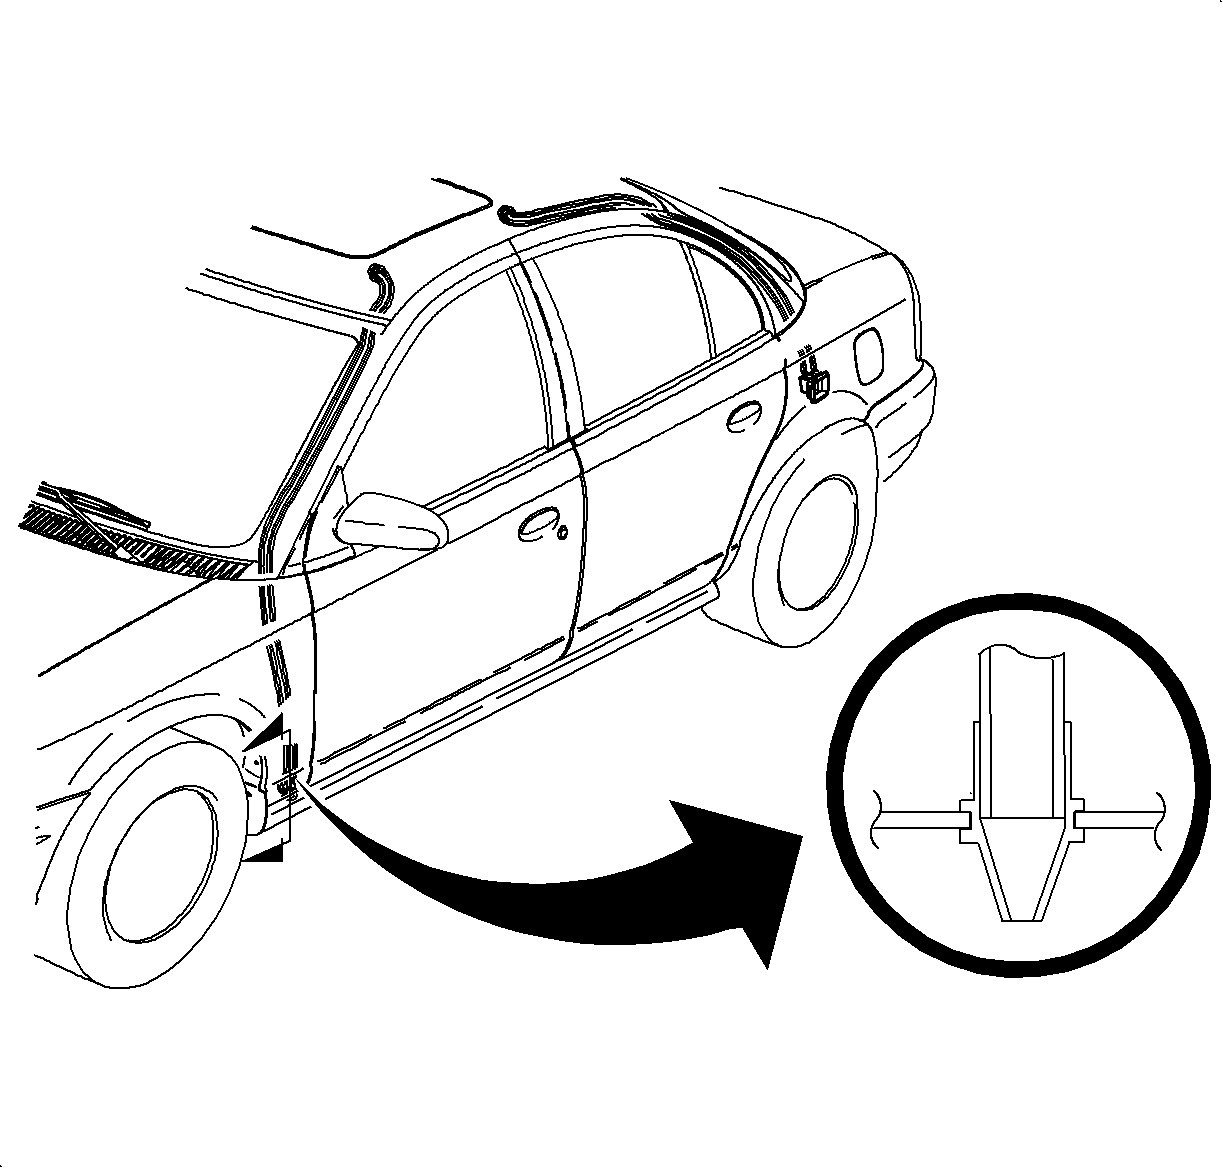
- Disconnect the drain hose from the bottom of the lower hinge pillar.
- With the feeder wire attached at the top of the drain hose, pull the hose out from the bottom, leaving the feeder wire inside the hinge pillar.
- Disconnect the feeder wire from the hose.

Notice: Be careful not to put a bend in the headliner. This may cause a wrinkle that cannot be repaired.


Installation Procedure
- Attach the drain hose to the feeder wire at the module wire.
- Pull the hose down at the hinge pillar from inside the passenger compartments with the feeder wire. Remove the wire after the hose has been routed.
- Connect the drain hose to the lower grommet.
- Connect the drain hose at the sunroof module using a clamp.
- Pour water down the hose from the sunroof tray and inspect for leaks. Repair if a leak is detected.
- Install the headliner. Refer to Headlining Trim Panel Replacement in Interior Trim.
- Install the lower insulator.
- Install the lower garnish/sill mouldings.


Important: Inspect the drain hose for kinks. If necessary, cut the hose to the required length to ensure that the hose is not kinked.


