Tools Required
SA9132S Lower Control Arm Ball Stud Separator
Removal Procedure
- Raise vehicle on hoist.
- Remove road wheel.
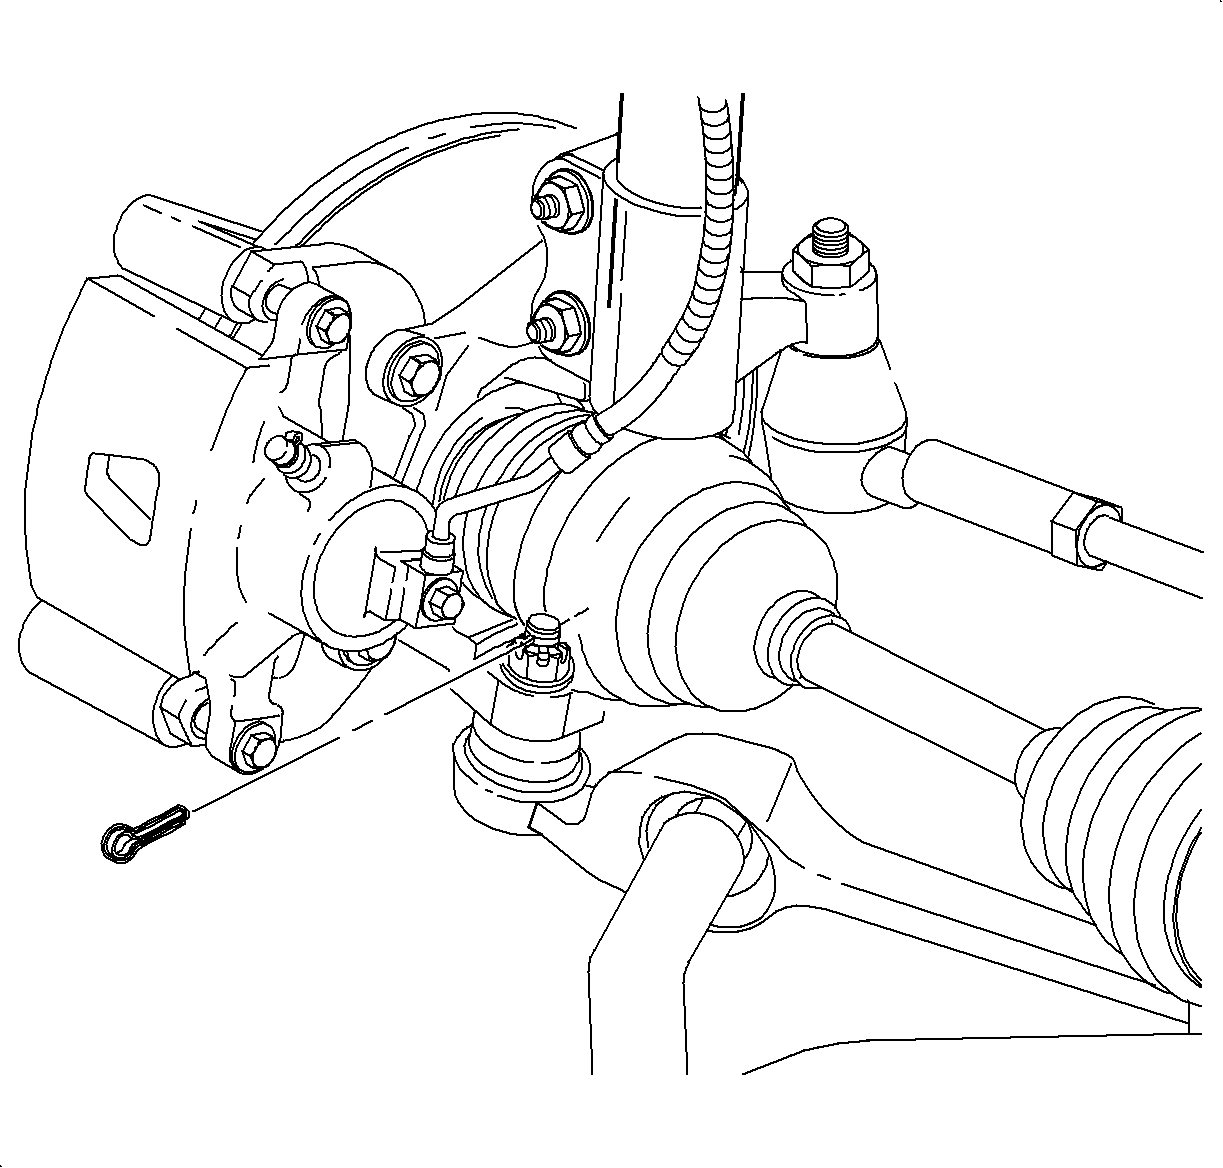
- Remove and discard lower control arm ball stud cotter pin.
- Loosen lower control arm ball stud castle nut, until top of castle nut is level with top of ball stud.
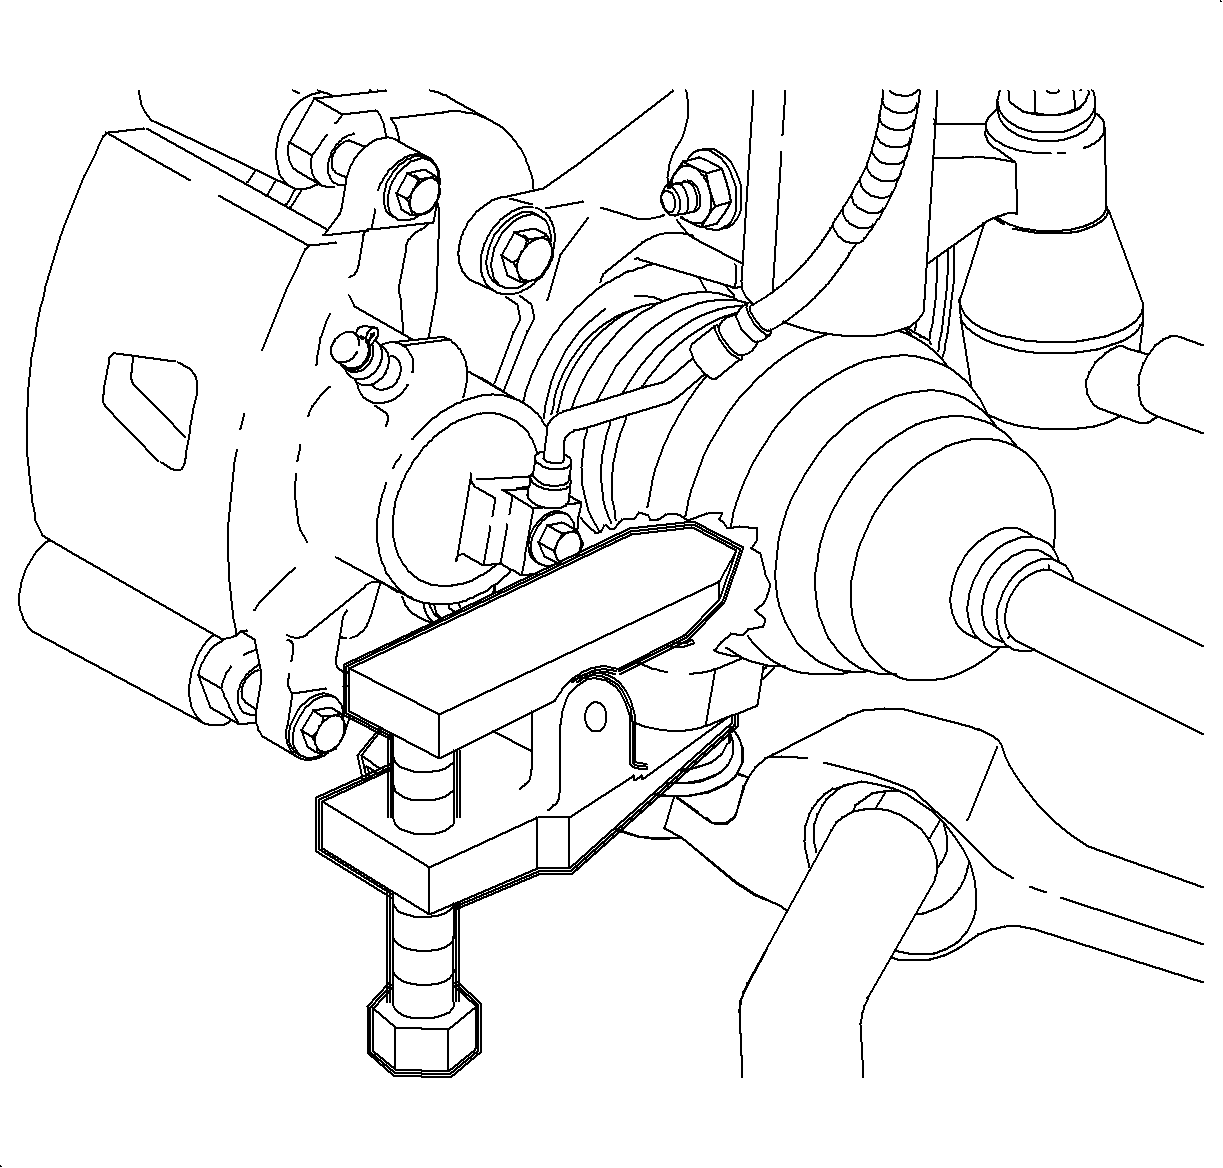
- UsingSA9132S (or equivalent), separate lower control arm from knuckle.
- Remove lower control arm ball stud castle nut.
- Remove front inner fender splash shield.
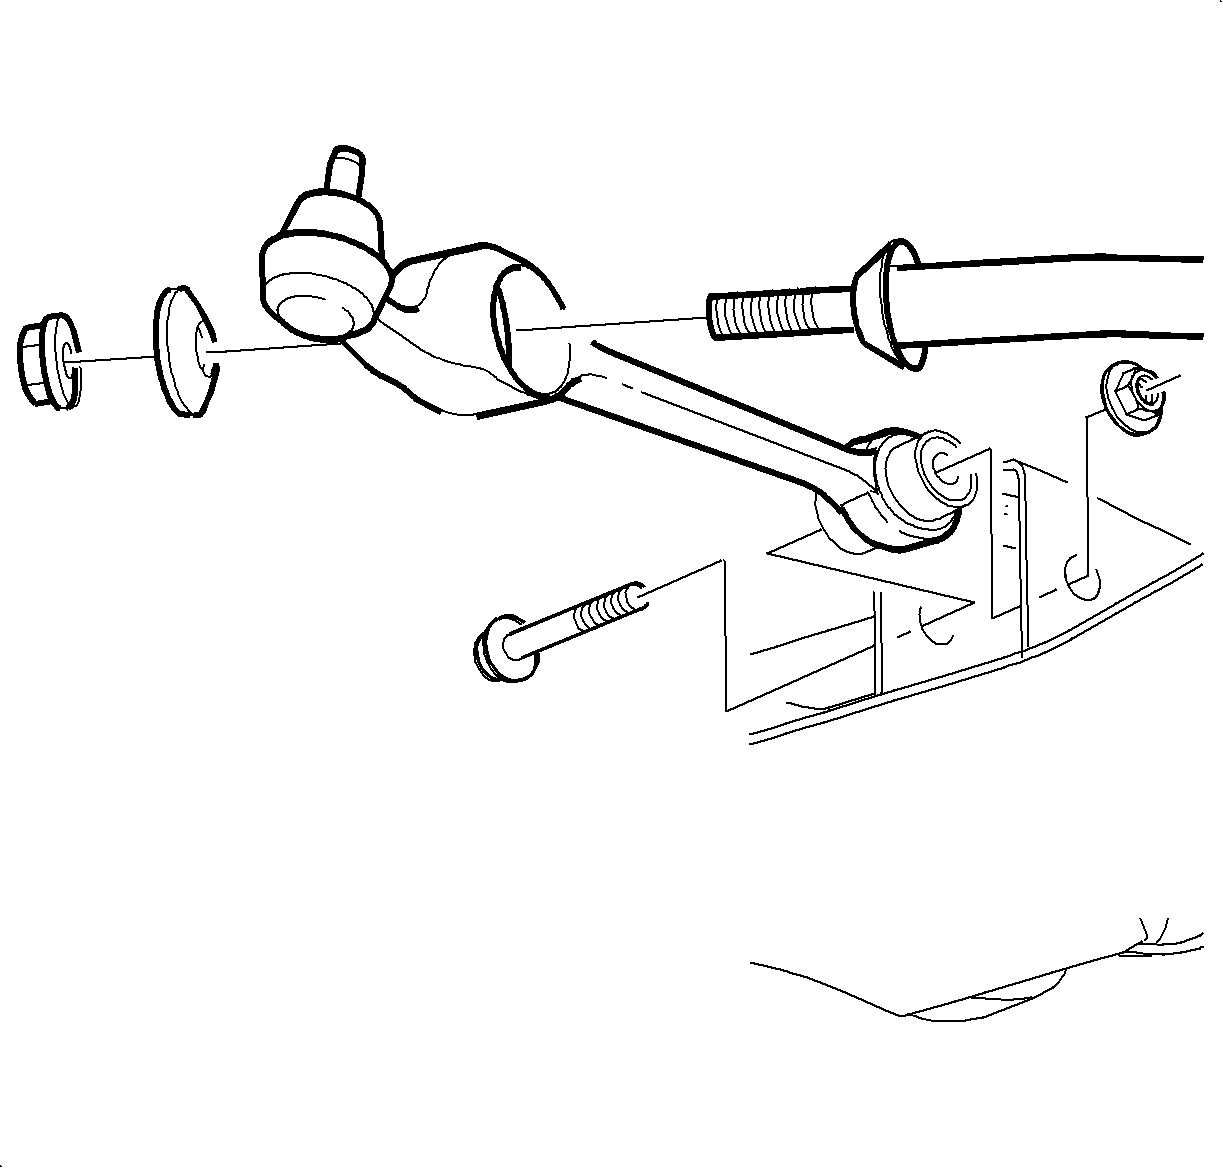
- Remove the lower control arm-to-cradle fastener.
- Remove front stabilizer shaft nut at lower control arm.
- Remove lower control arm from vehicle.
Caution: Ensure that the vehicle is properly supported and squarely positioned. To help avoid personal injury when a vehicle is on a hoist, provide additional support for the vehicle on the opposite end from which the components are being removed.
Notice: Care must be taken to prevent damage to the speed sensor ring on ABS vehicles. Minor surface damage to the speed sensor ring can result in ABS system malfunctions.
Notice: Do not attempt to separate the joint using a wedge-type tool because seal may be damaged.
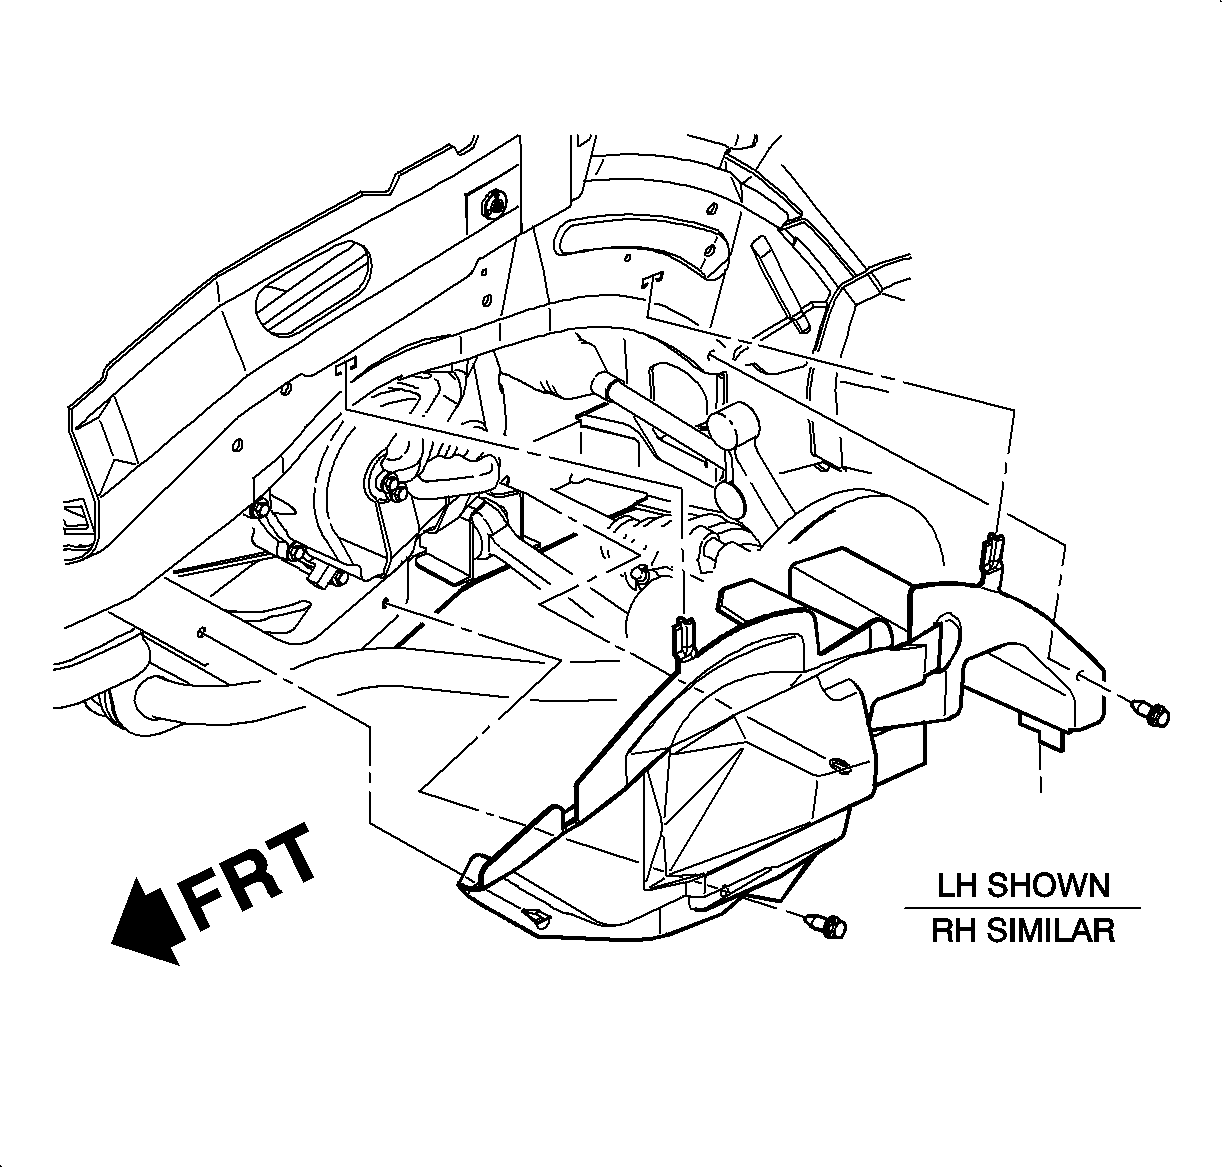
| 7.1. | Remove the 2 push pins. |
| Important: If molded-in fasteners are damaged or broken, drill out with a 5/16 in. bit and replace with a push pin. |
| 7.2. | Remove lower shield to cradle molded-in fasteners at cradle by gently prying at three fastener locations. |
| • | LEFT SIDE -- Remove the front section of the splash shield first, then rear. |
| • |
| • | RIGHT SIDE -- Remove the rear section of the splash shield first, then front. |
Installation Procedure
- Install control arm onto front stabilizer shaft.
- Position end of control arm into the cradle and install fastener.
- Install control arm-to-front stabilizer shaft fastener nut.
- Connect ball stud to steering knuckle with fastener. Torque and install new cotter pin.
- Install front inner fender splash shield.
- Install tabs in body cut-out.
- Align molded-in shield fasteners with holes in cradle. Push straight in to install.
- Install push pins.
- Position wheel onto hub.
- Install wheel nuts and tighten in a crisscross pattern. Repeat tightening pattern to make sure torque is correct.
- Lower vehicle from hoist.
- Perform vehicle wheel alignment. Refer to Wheel Alignment Specifications

Important: Do not install nut at this time.
Tighten
| • | Tighten the Control Arm-to-Frame Bolt to 125 N·m (92 lb ft). |
| • | Tighten the Control Arm-to-Frame Nut to 100 N·m (74 lb ft). |
Tighten
Tighten the Control Arm-to-Front Stabilizer Shaft Nut to 144 N·m
(106 lb ft).
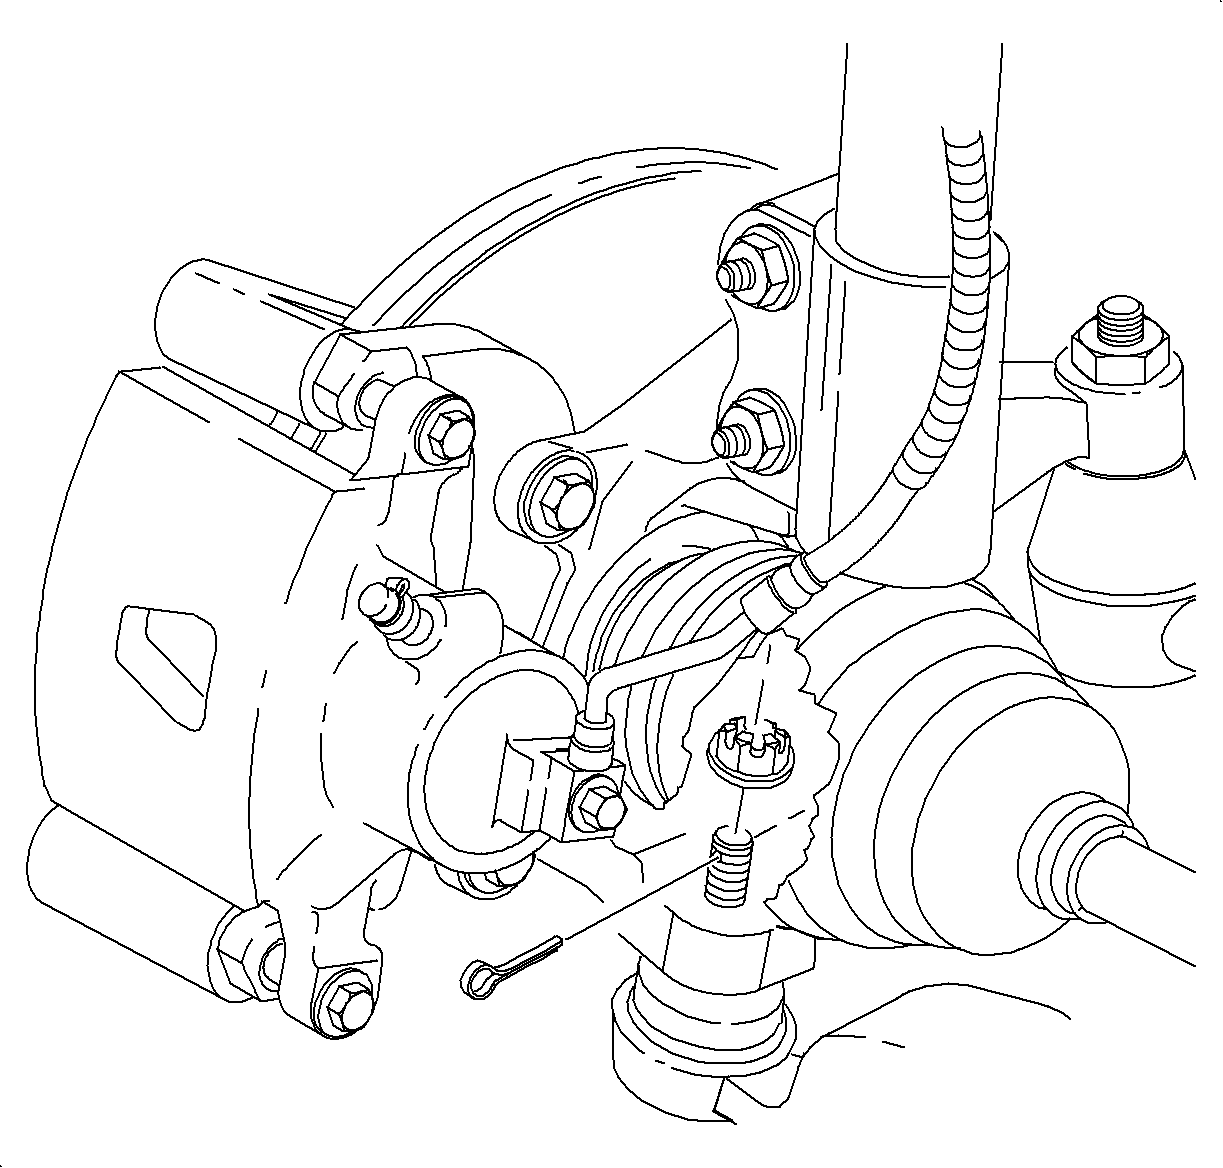
Important: Lower control arm ball stud threads should be thoroughly cleaned and lubricated before installing and tightening nut.
Important: If necessary to rotate castle nut to orient it to hole in the stud, always tighten nut; never loosen it.
Tighten
Tighten the Ball Joint Stud Castle Nut to 75 N·m (55 lb ft).

Important: On left side, install rear section of splash shield first, then front. On right side, install front section of splash shield first, then rear.
Important: Make sure splash shield flaps are tucked in at body locations.
Notice: Before installing wheels, remove rust or corrosion from wheel mounting surfaces and brake rotors/drums. Failure to do so can cause wheel nuts to loosen in service.
Tighten
Tighten Wheel Nuts 140 N·m (103 lb ft).
