Tools Required
SA9168NE Exhaust and Tailpipe Cutter
Removal Procedure
- Raise the vehicle squarely on a lift.
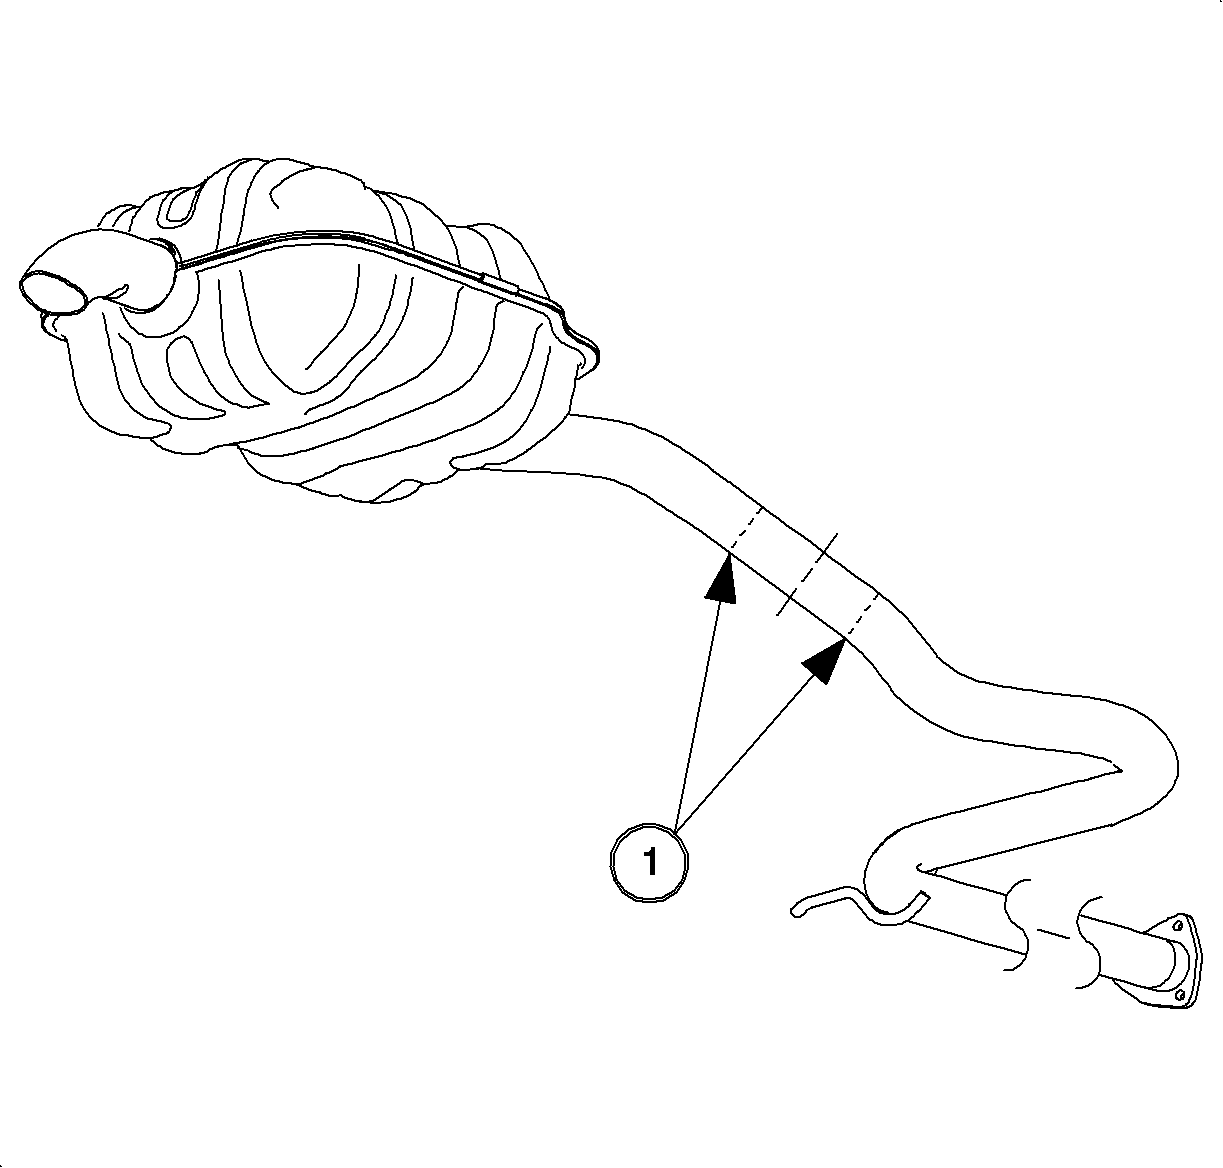
- Using the SA9168NE or equivalent, cut the intermediate pipe in front of the rear suspension. Locate the center (1) of the approximately 100 mm (4 in) long straight section, mark the pipe, and make the cut.
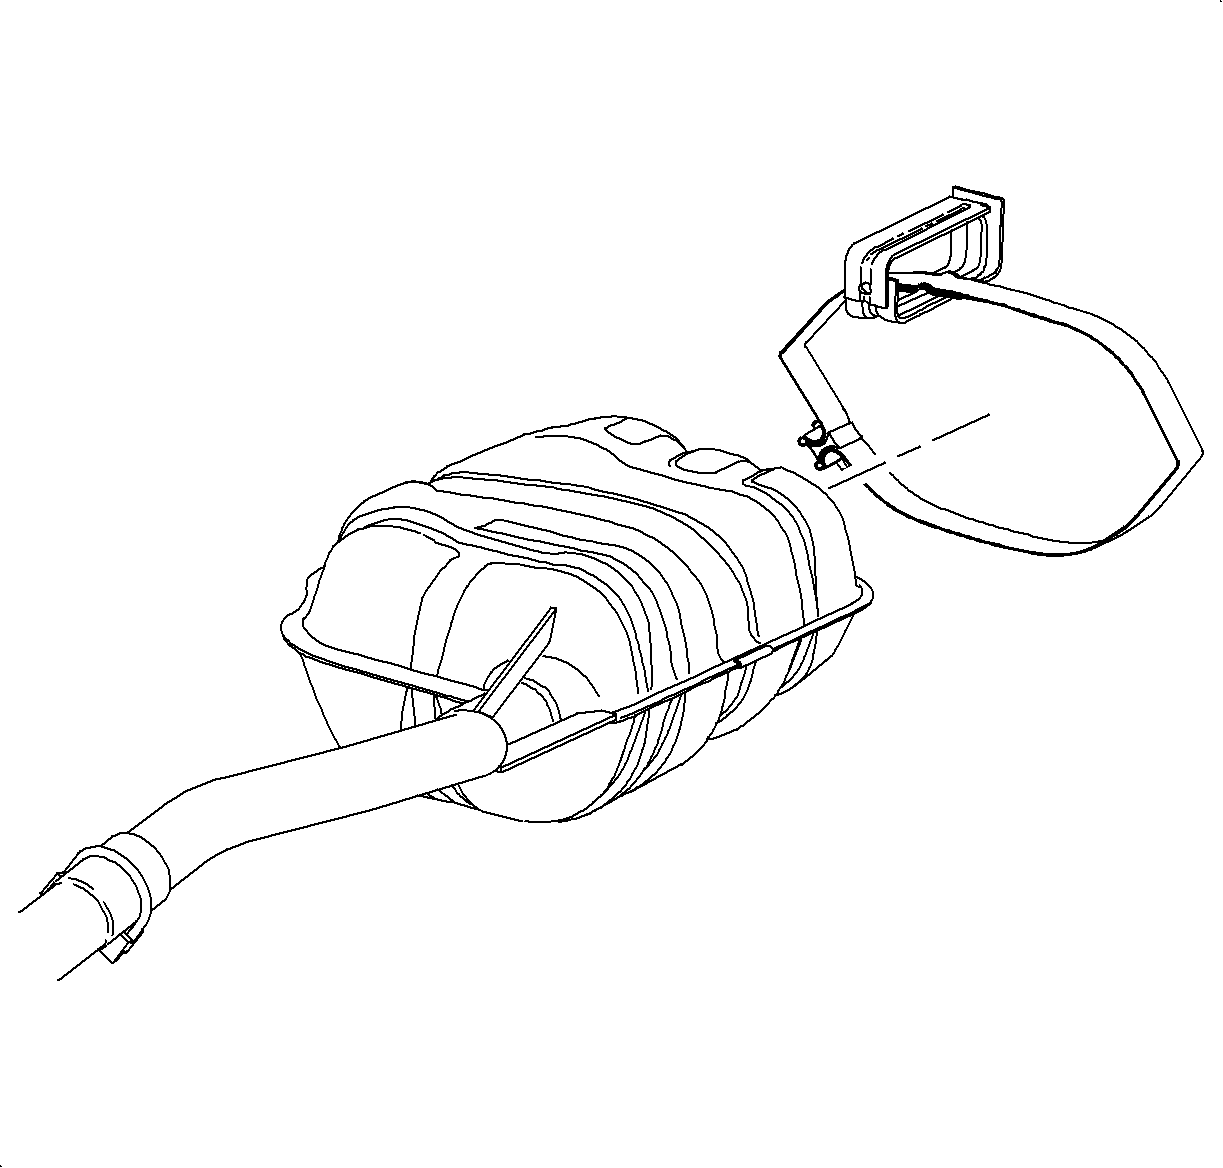
- Remove the muffler strap fastener and muffler.

Caution: Ensure that the vehicle is properly supported and squarely positioned. To help avoid personal injury when a vehicle is on a hoist, provide additional support for the vehicle on the opposite end from which the components are being removed.
Important: If the entire intermediate pipe and muffler assembly is being replaced, the service intermediate pipe must be shortened at the outlet end. Cut the intermediate pipe right behind the up-sized outlet end.

Important: Always use a chain cutter to cut the stainless steel exhaust system pipes.
Installation Procedure
- Loosely install the muffler clamp over the service replacement muffler inlet
- Load the replacement muffler to the vehicle, sliding the muffler inlet pipe over the cut section of intermediate pipe.
- Hold the muffler in location to muffler strap and tighten the clamp. Locate the muffler strap between the stamped channel in the muffler.
- Tighten the muffler strap.
- Ensure that the muffler clamp is properly located and aligned. Tighten the clamp.
- Check the entire exhaust system for alignment, clearance to heat shields, and leaks. The muffler body band clamp blade must be free to move in the hanger or vibrations will be transmitted from the exhaust system into the body. The muffler can be moved both vertically and horizontally in the isolator block. The muffler should move 1/16 in. vertically and 1/8 in. horizontally minimum in the isolator block.
- Tighten the muffler isolator block.

Tighten
Tighten the muffler strap around the muffler to 22 N·m (16 lbs ft).
Notice: Position the muffler to ensure that there is 19 mm (3/4 in) of clearance between the muffler and muffler ramp. If proper clearance can not be obtained, the intermediate pipe must be shortened.
Important: Ensure that after installing the replacement exhaust sections that the system has not shifted rearward allowing contact between the hanger bracker screw (1) and the hanger block. This will cause noise. Loosen the muffler strap and shift forward on the muffler to eliminate contact - retighten.
Tighten
Tighten the muffler strap around the muffler to 22 N·m (16 lb ft).

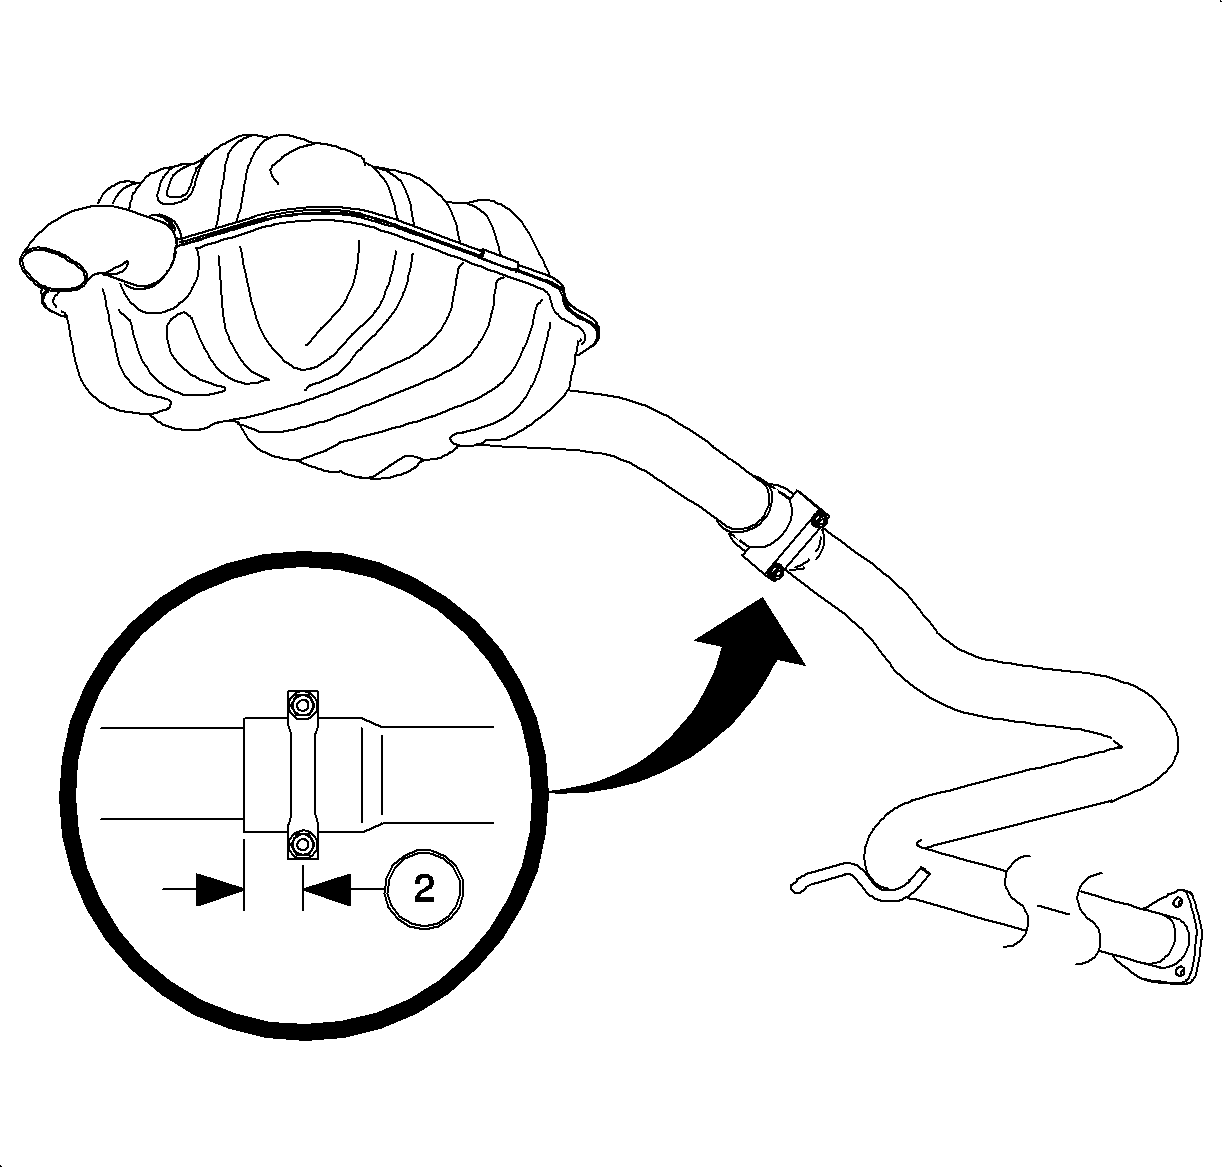
Important: Locate muffler clamp 25 mm (1 in) (2) from the end of the muffler inlet pipe and position clamp with U-bolt facing away from fuel tank.
Tighten
Tighten the intermediate pipe to 41 N·m (30 lb ft).

Important: If muffler movement cannot be obtained, or the muffler isolator block is damaged, the exhaust system will have to be carefully lowered for adjustment or replacement of the muffler isolator block. Washers may have to be installed between the muffler block bolt and frame rail to align the hanger parallel with the muffler.
Tighten
Tighten the muffler isolator block-to-body to 25 N·m (19 lb ft).
