For 1990-2009 cars only
Removal Procedure
- Drain the cooling system by opening the drain valve at the bottom of the radiator. Collect the fluid in a container.
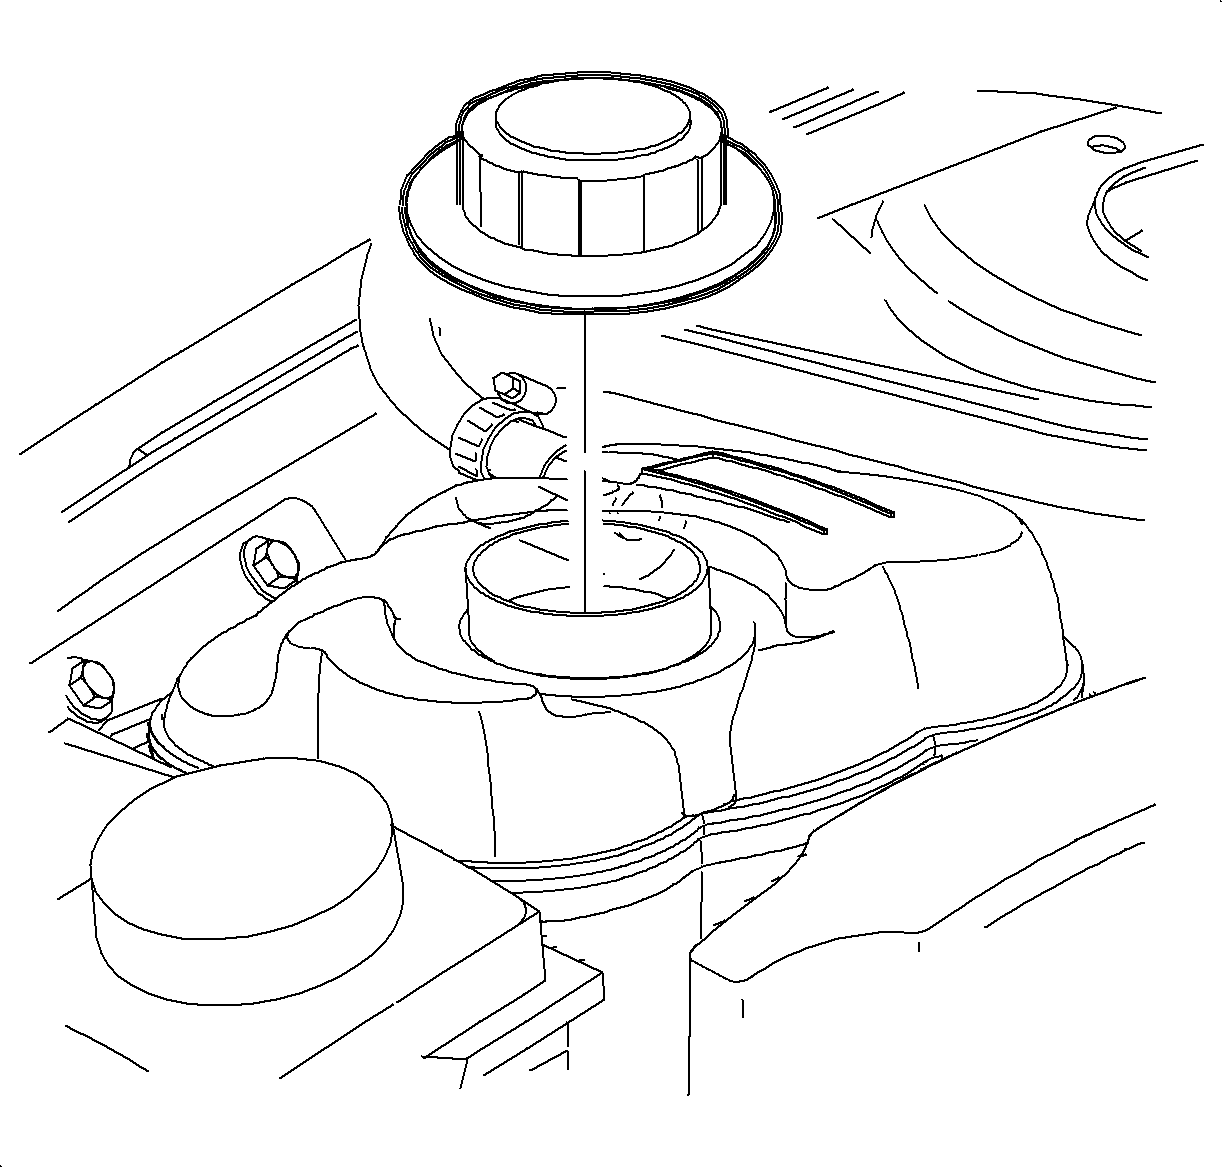
- Remove the surge tank cap.
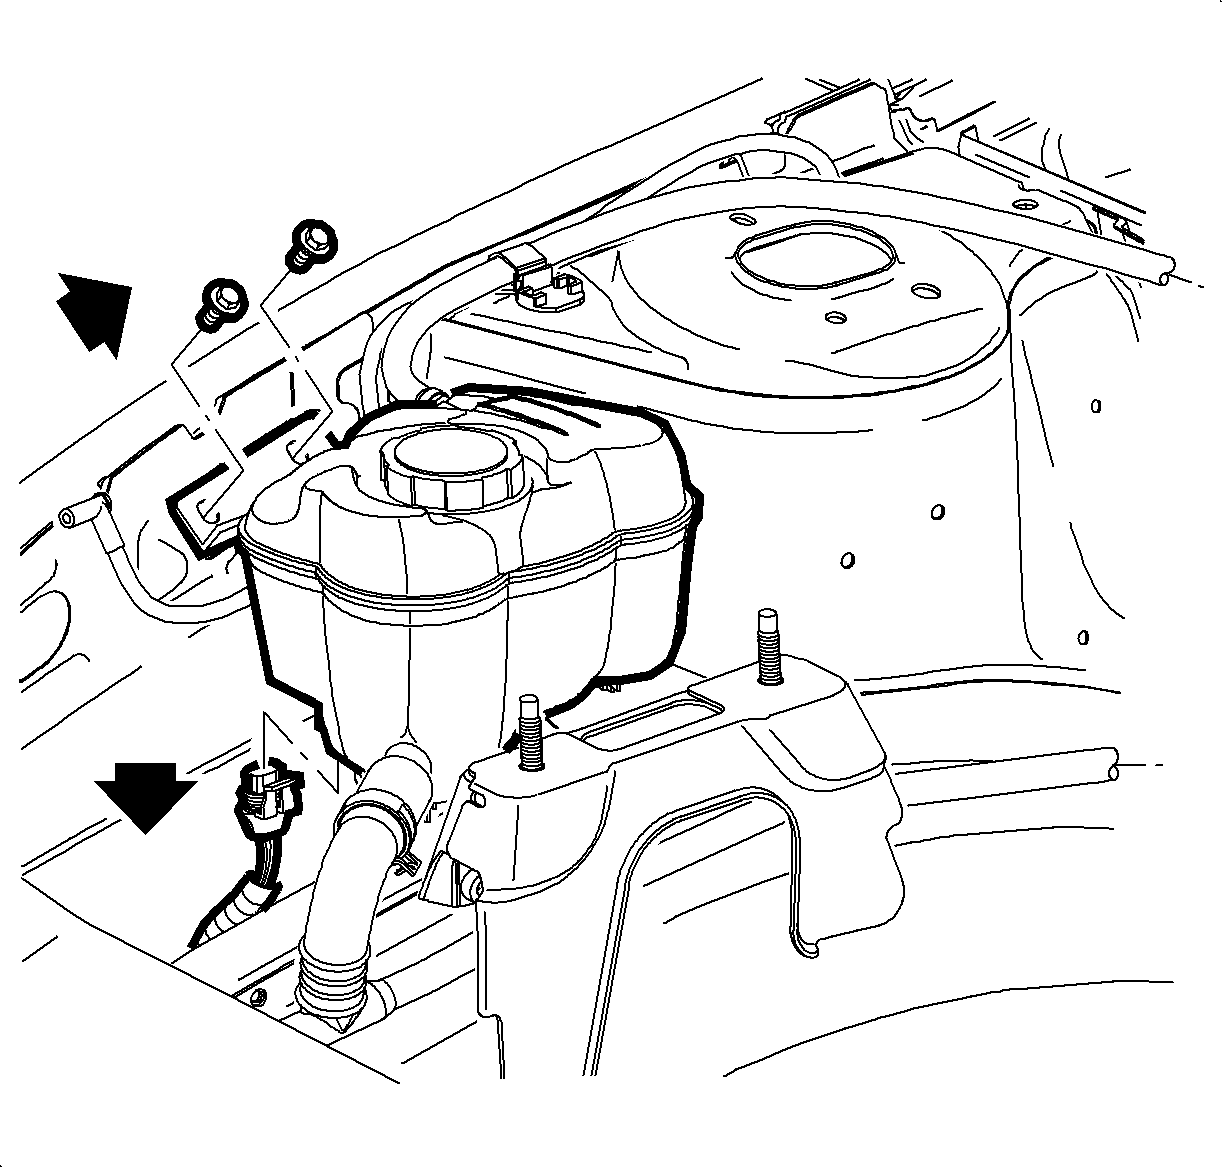
- Remove the surge tank screws. Move the washer fluid bottle off to the side.
- Disconnect the electrical harness from the low coolant sensor.
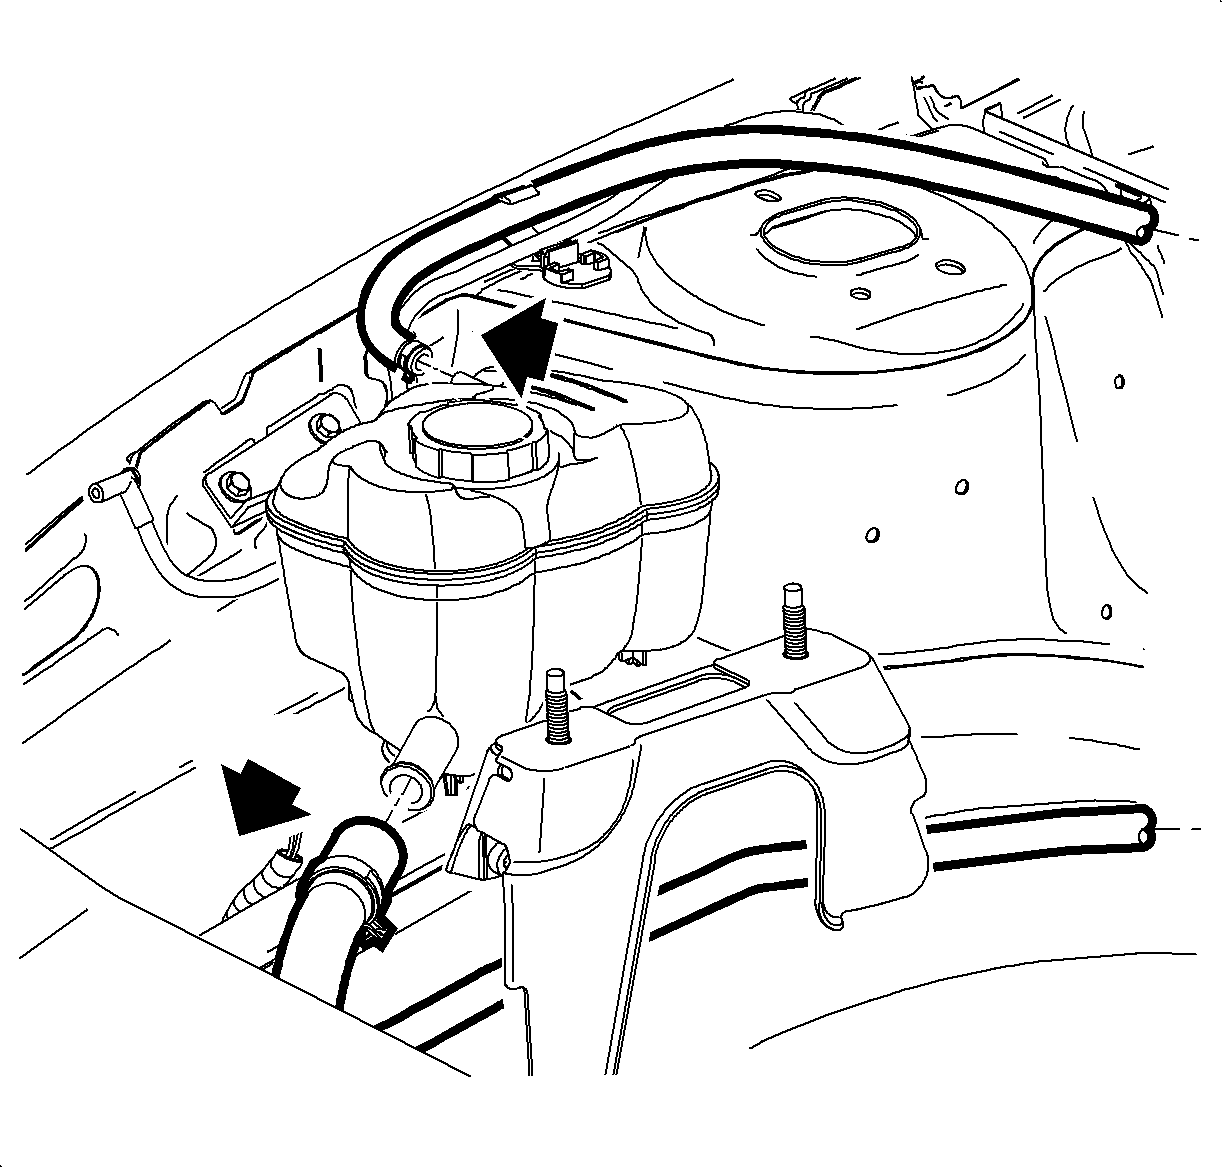
- Remove the clamps from the vent hose and the heater return pipe hose.
- Disconnect the hoses.
- Remove the surge tank and drain out any remaining fluid.
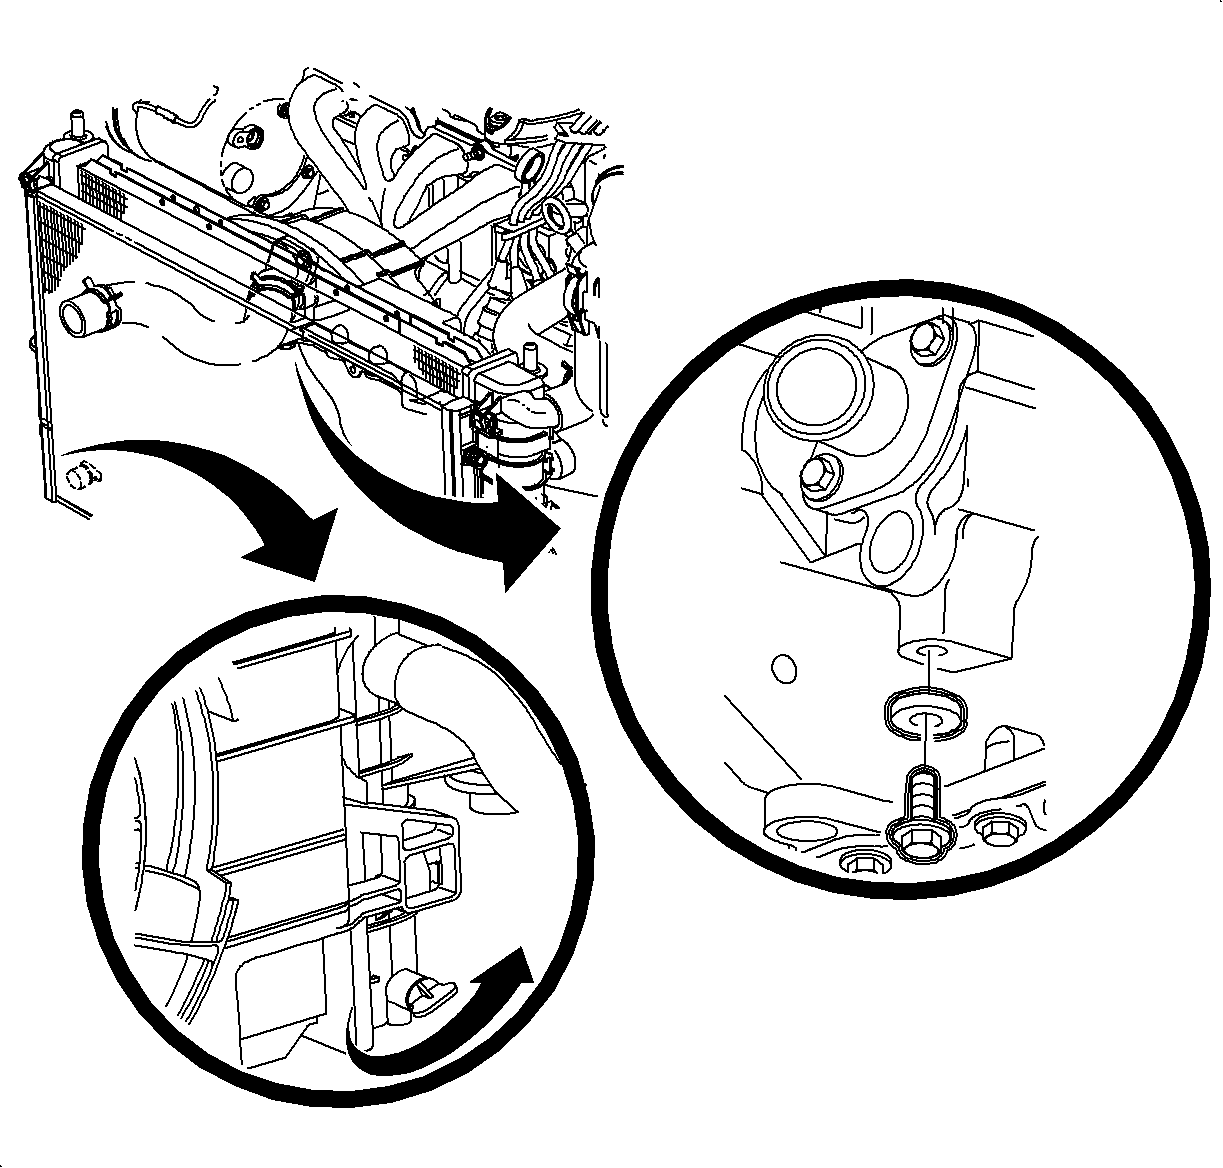
Caution: To avoid the danger of being burned, do not remove the cap while the engine, radiator, and surge tank are still hot. Scalding fluid and steam can be blown out under pressure.
Installation Procedure
- Connect the electrical harness.
- Connect the heater return pipe hose.
- Connect the vent hose. Install the pipe hose clamp at the 3 o'clock position.
- Position the coolant surge tank and the washer bottle through holes in the body. Install and tighten the screws.
- Close the radiator drain plug.
- Fill the cooling system with a 50/50 mixture of Dex-Cool™ antifreeze and clean water.
- Fill the coolant bottle to the FULL COLD range.
- Run the engine until the upper radiator hose is hot, then add additional coolant, if needed, to bring the level to the FULL COLD range.
- Install the coolant surge tank cap and check for leaks.
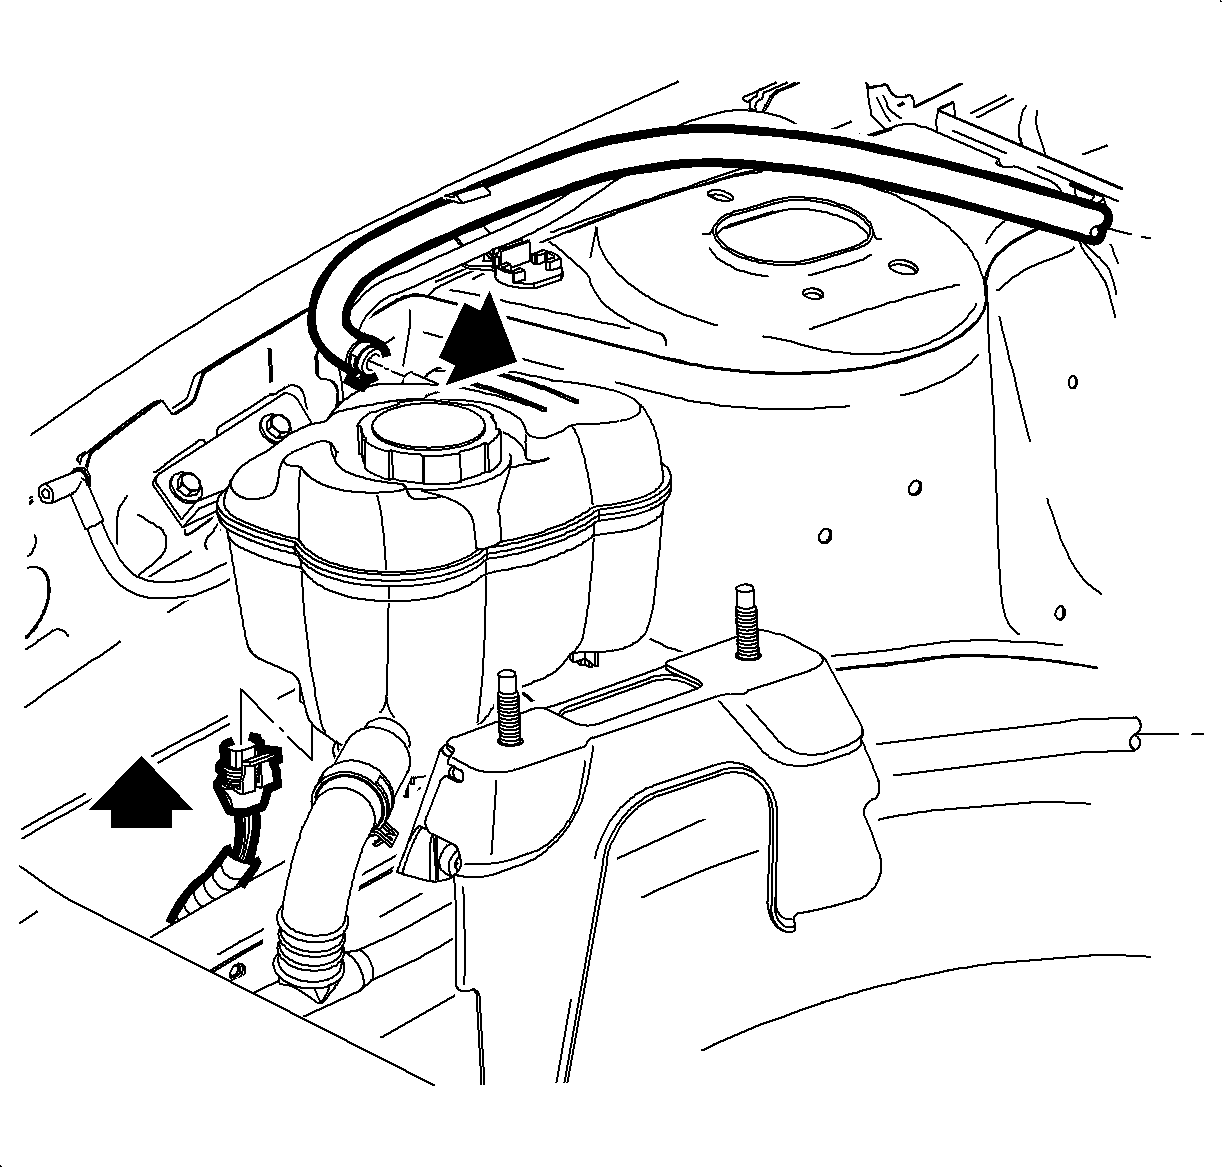
Important: Check the low coolant sensor float by shaking the bottle. The float should rattle.
Notice: Refer to Fastener Notice in the Preface section.
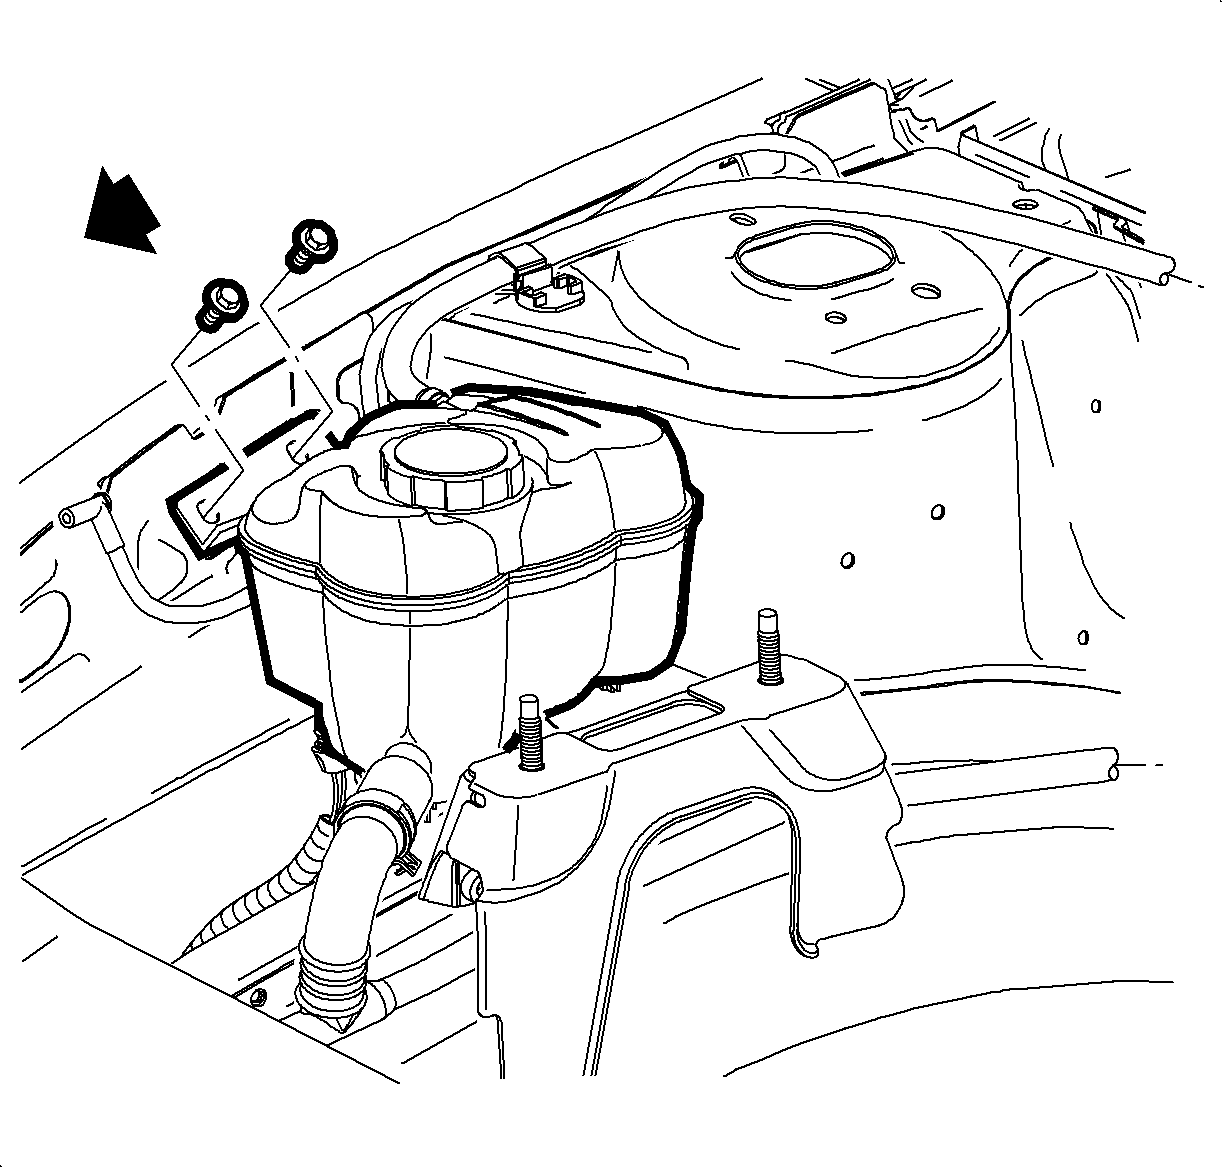
Tighten
Tighten the surge tank attachment bolts to 5 N·m (44 lb in).
