For 1990-2009 cars only
Removal Procedure
- Disconnect the negative battery cable.
- Remove the intake air duct, air filter box, and resonator.
- Remove the fan motor electrical connector.
- Remove the wiring harness from the shroud.
- Removethe top hold down bolt from the cooling fan assembly.
- Lift the cooling fan off of the upper and lower mounting brackets.
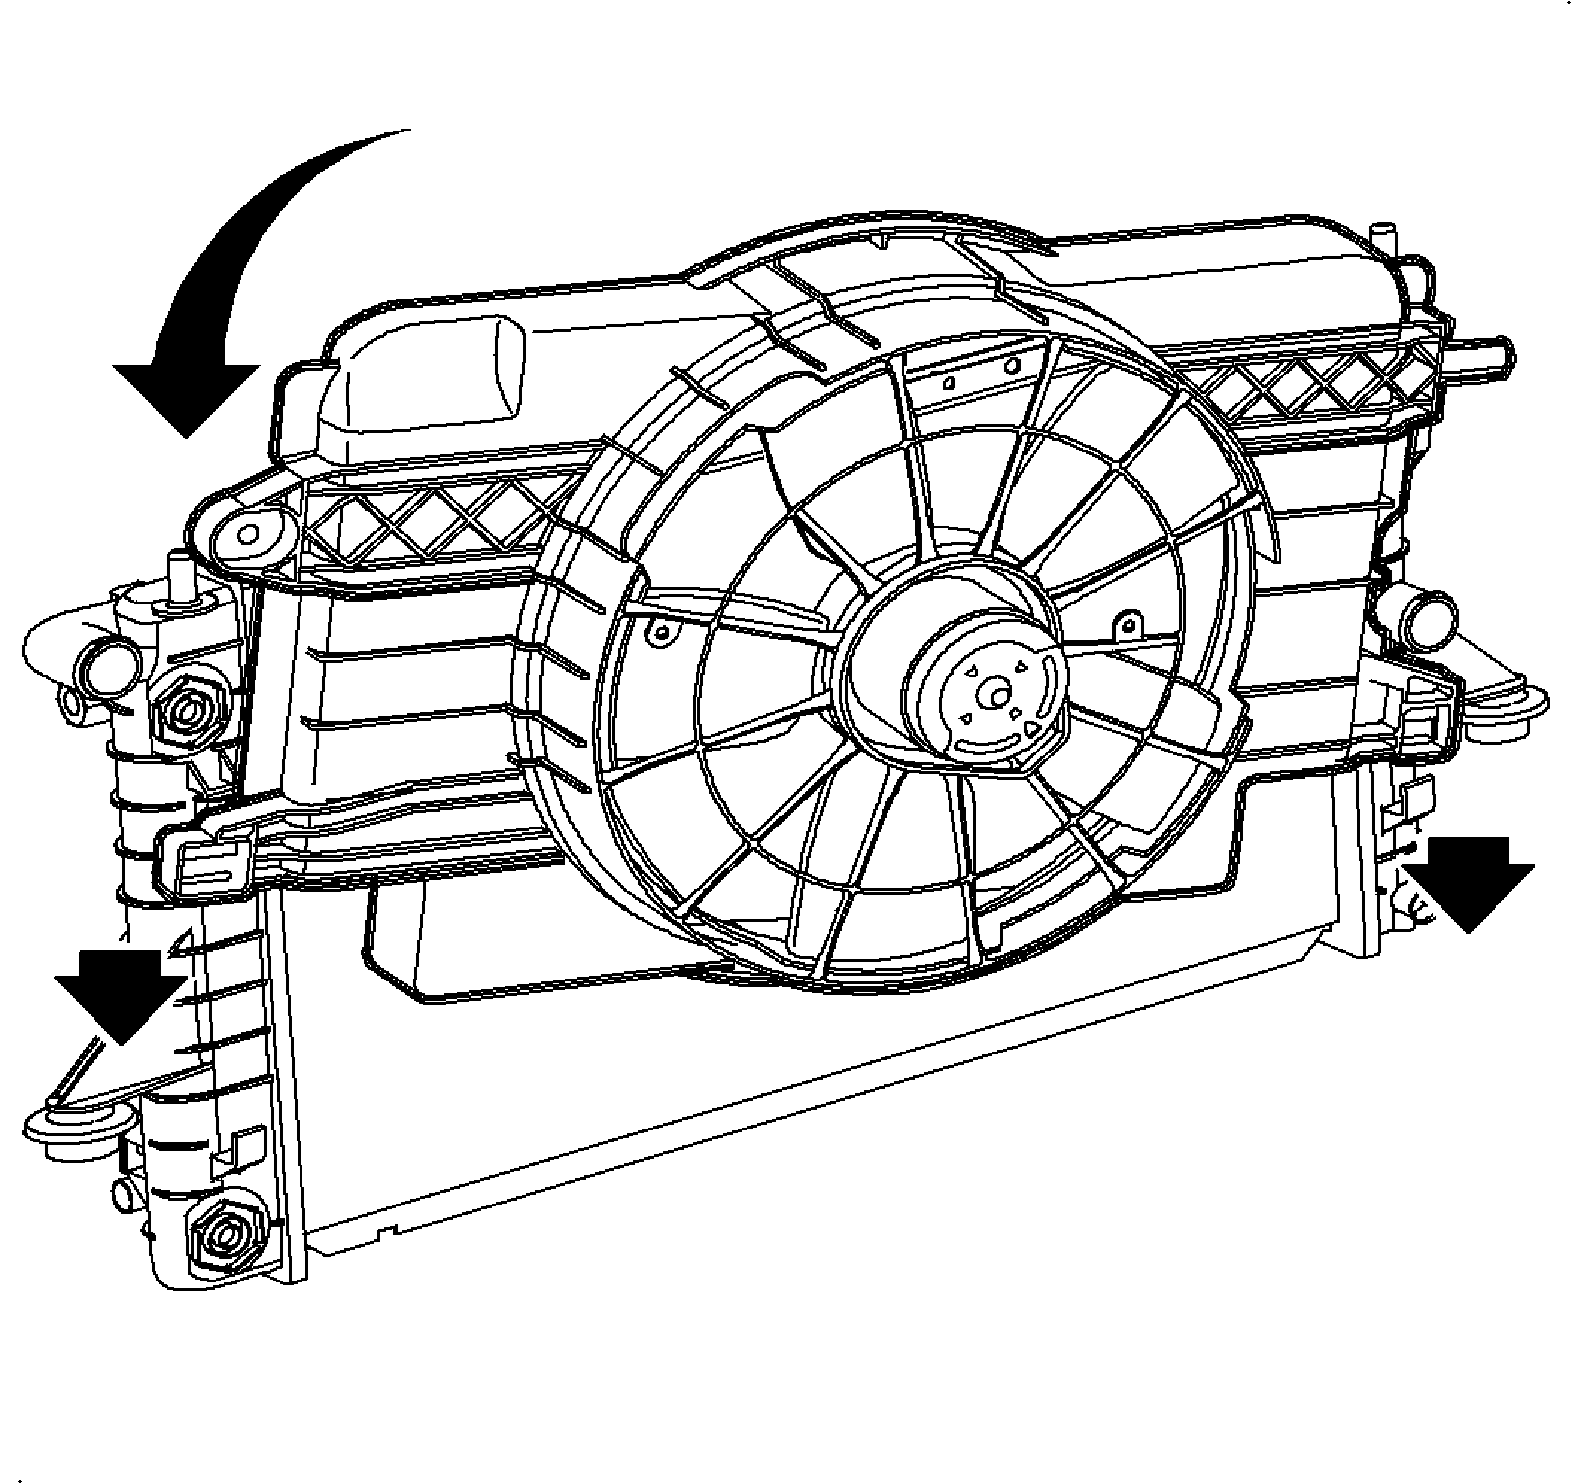
- Move the assembly to the left and rotate counterclockwise lifting the right side up past the upper radiator hose.
- Remove the fan assembly from the vehicle.
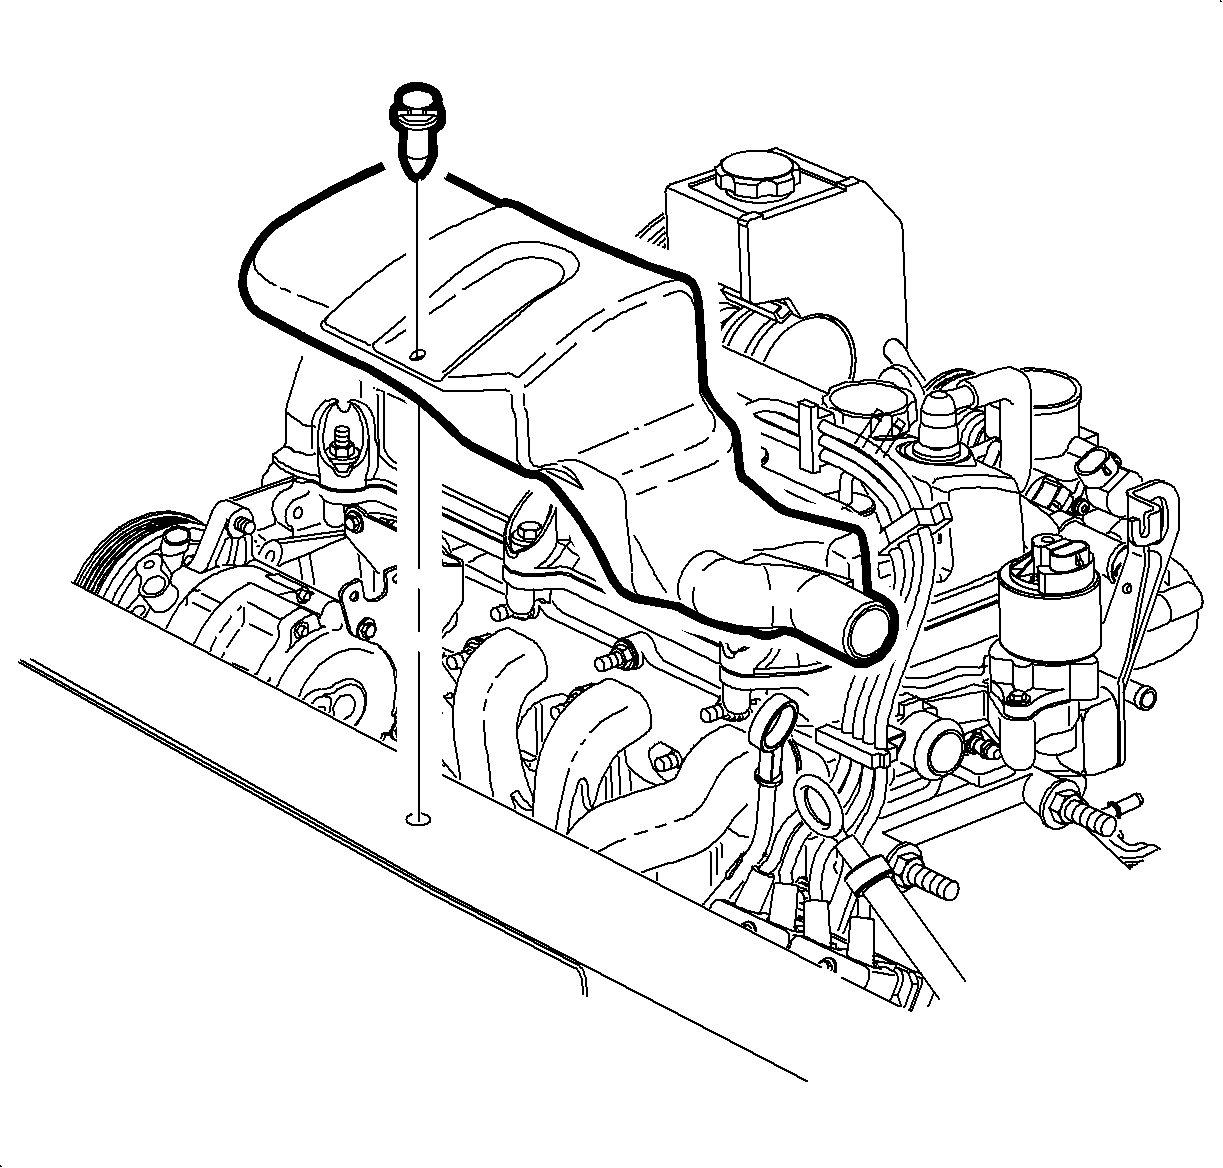
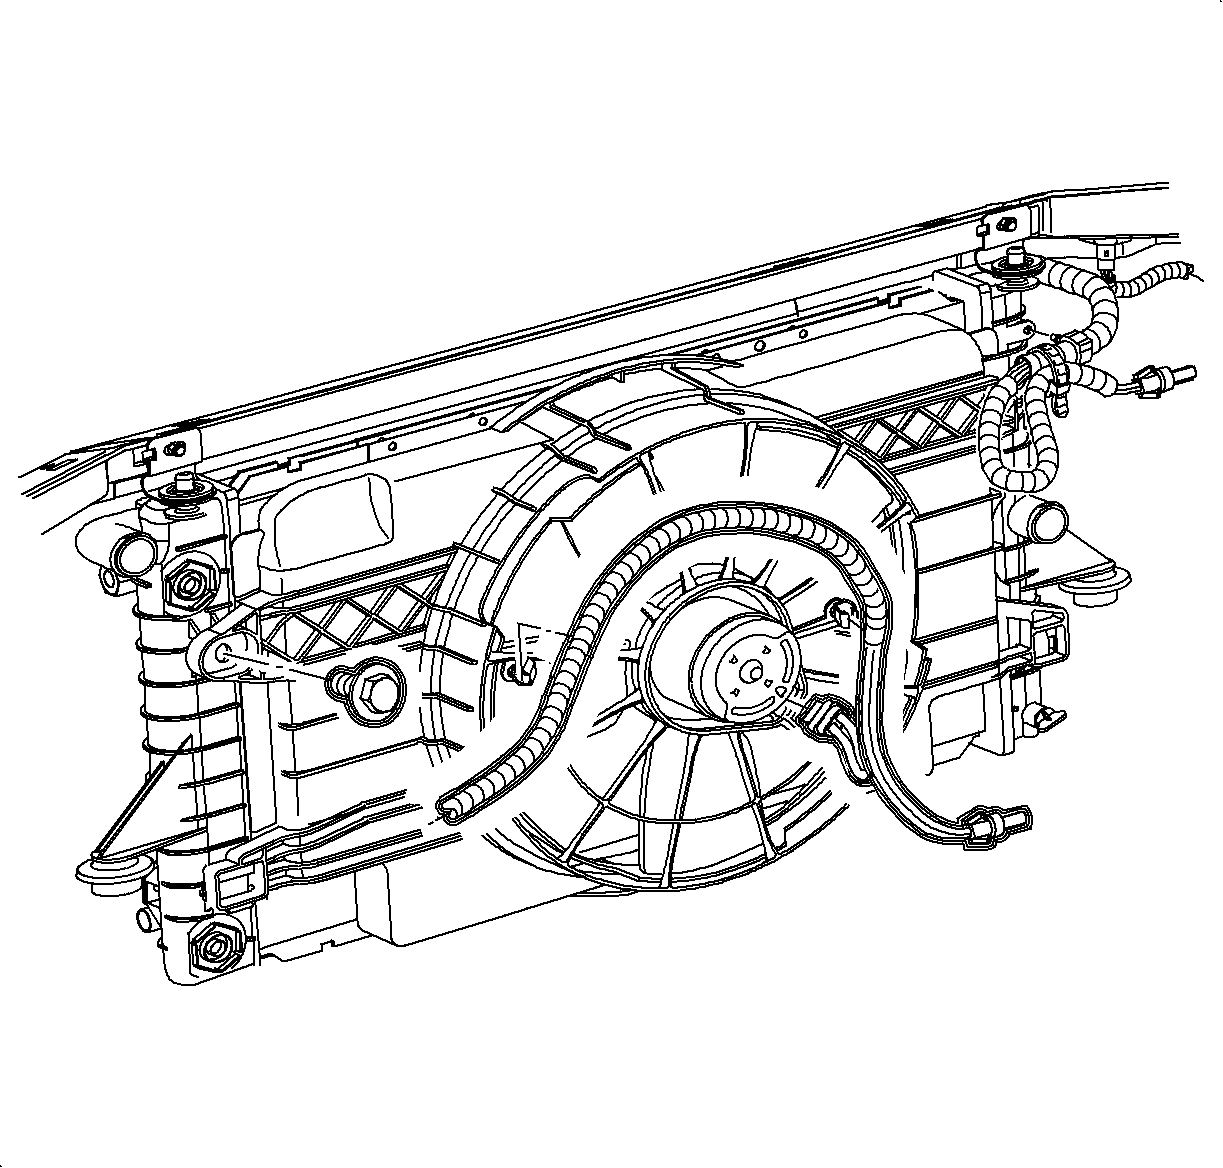
Important: On models with an automatic transaxle, it may be necessary to loosen the top automatic transaxle oil cooler line and move it out of the way.
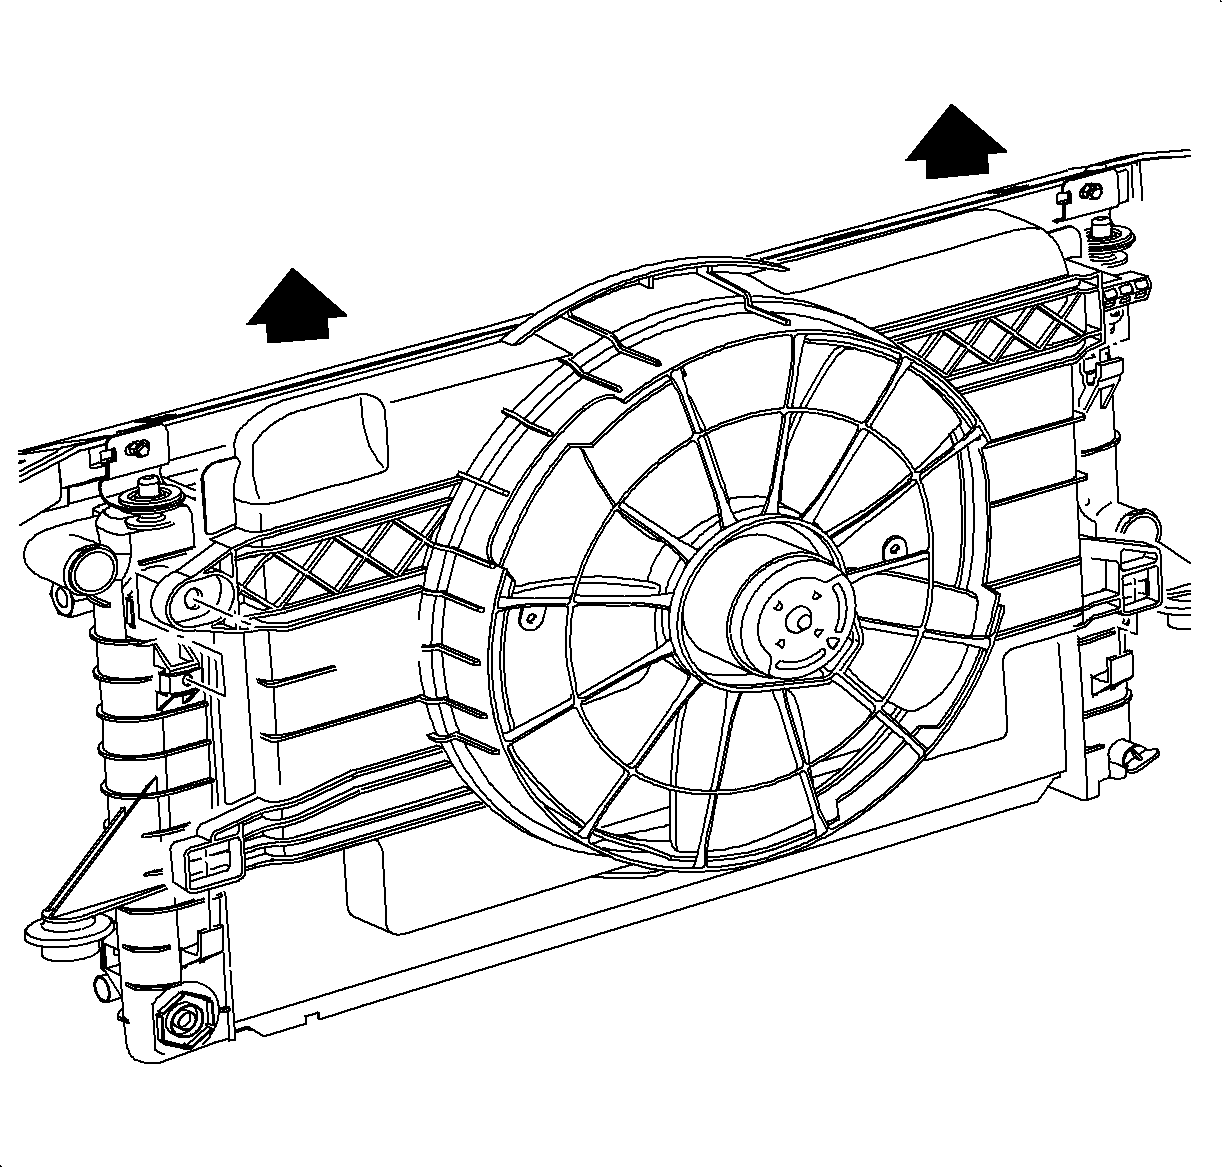
Installation Procedure
- Install the cooling fan in the vehicle with the lower left corner first.
- Rotate the assembly to place the lower left fan mount under the lower radiator hose.
- Position the cooling fan assembly on the lower mounting brackets.
- Install the upper fan mount pin into the slot in the radiator tank. Push the top of a fan straight down to engage.
- Install and tighten the upper hold down bolt.
- Install the fan motor electrical connector.
- Install the wiring harness to the fan shroud.
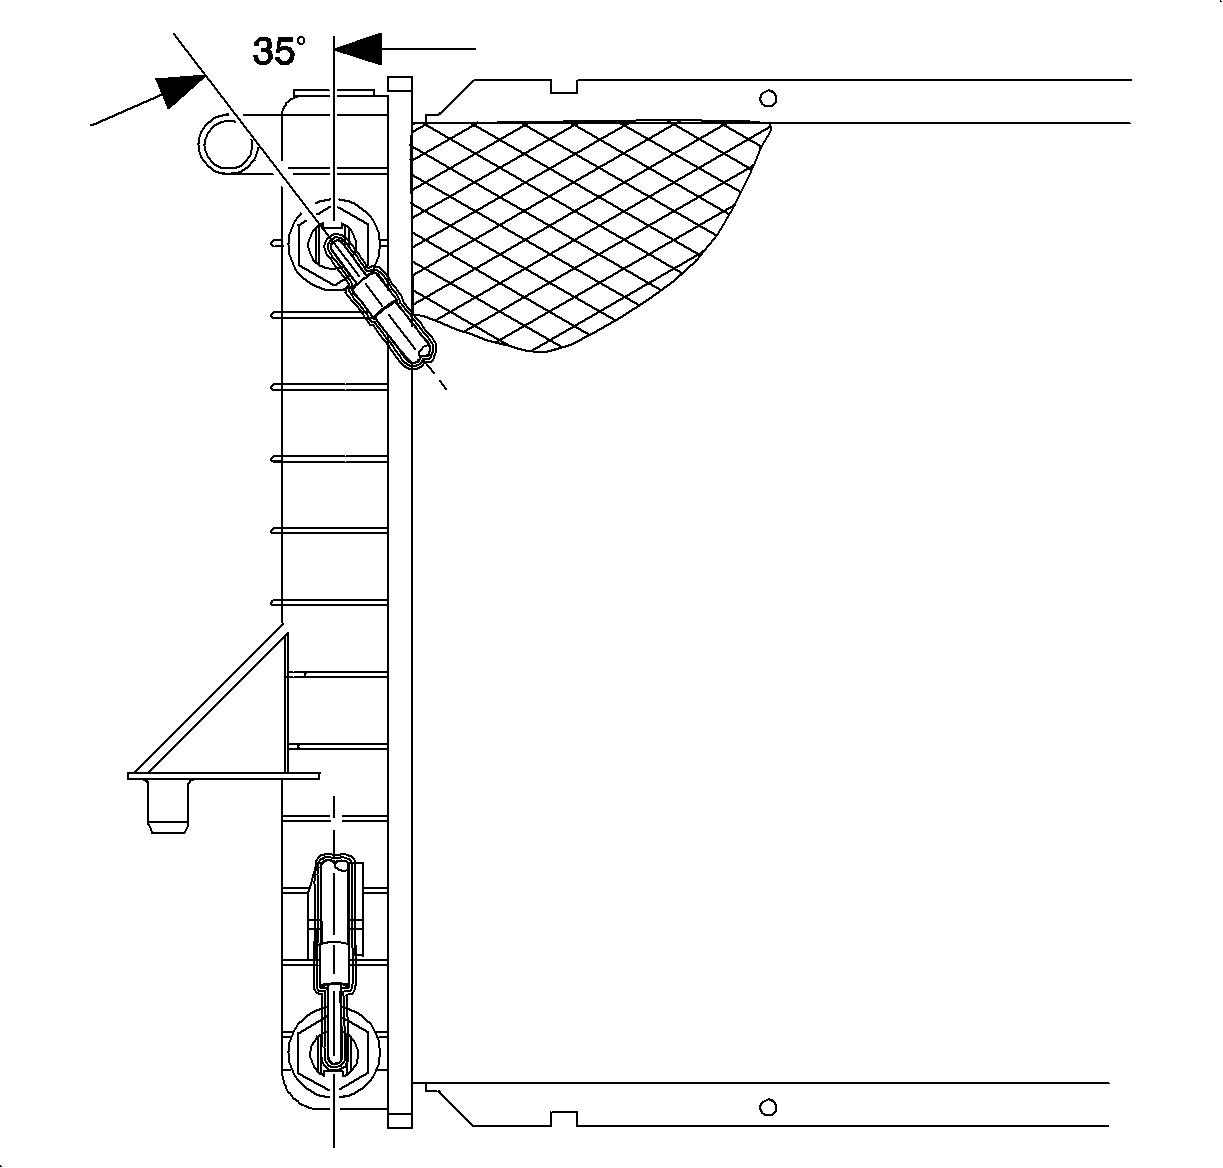
- Position the upper transaxle oil cooler line at 35° to vertical centerline of radiator end tank, and hold while tightening.
- Install air filter box, intake air duct and resonator.
- Connect negative battery cable.
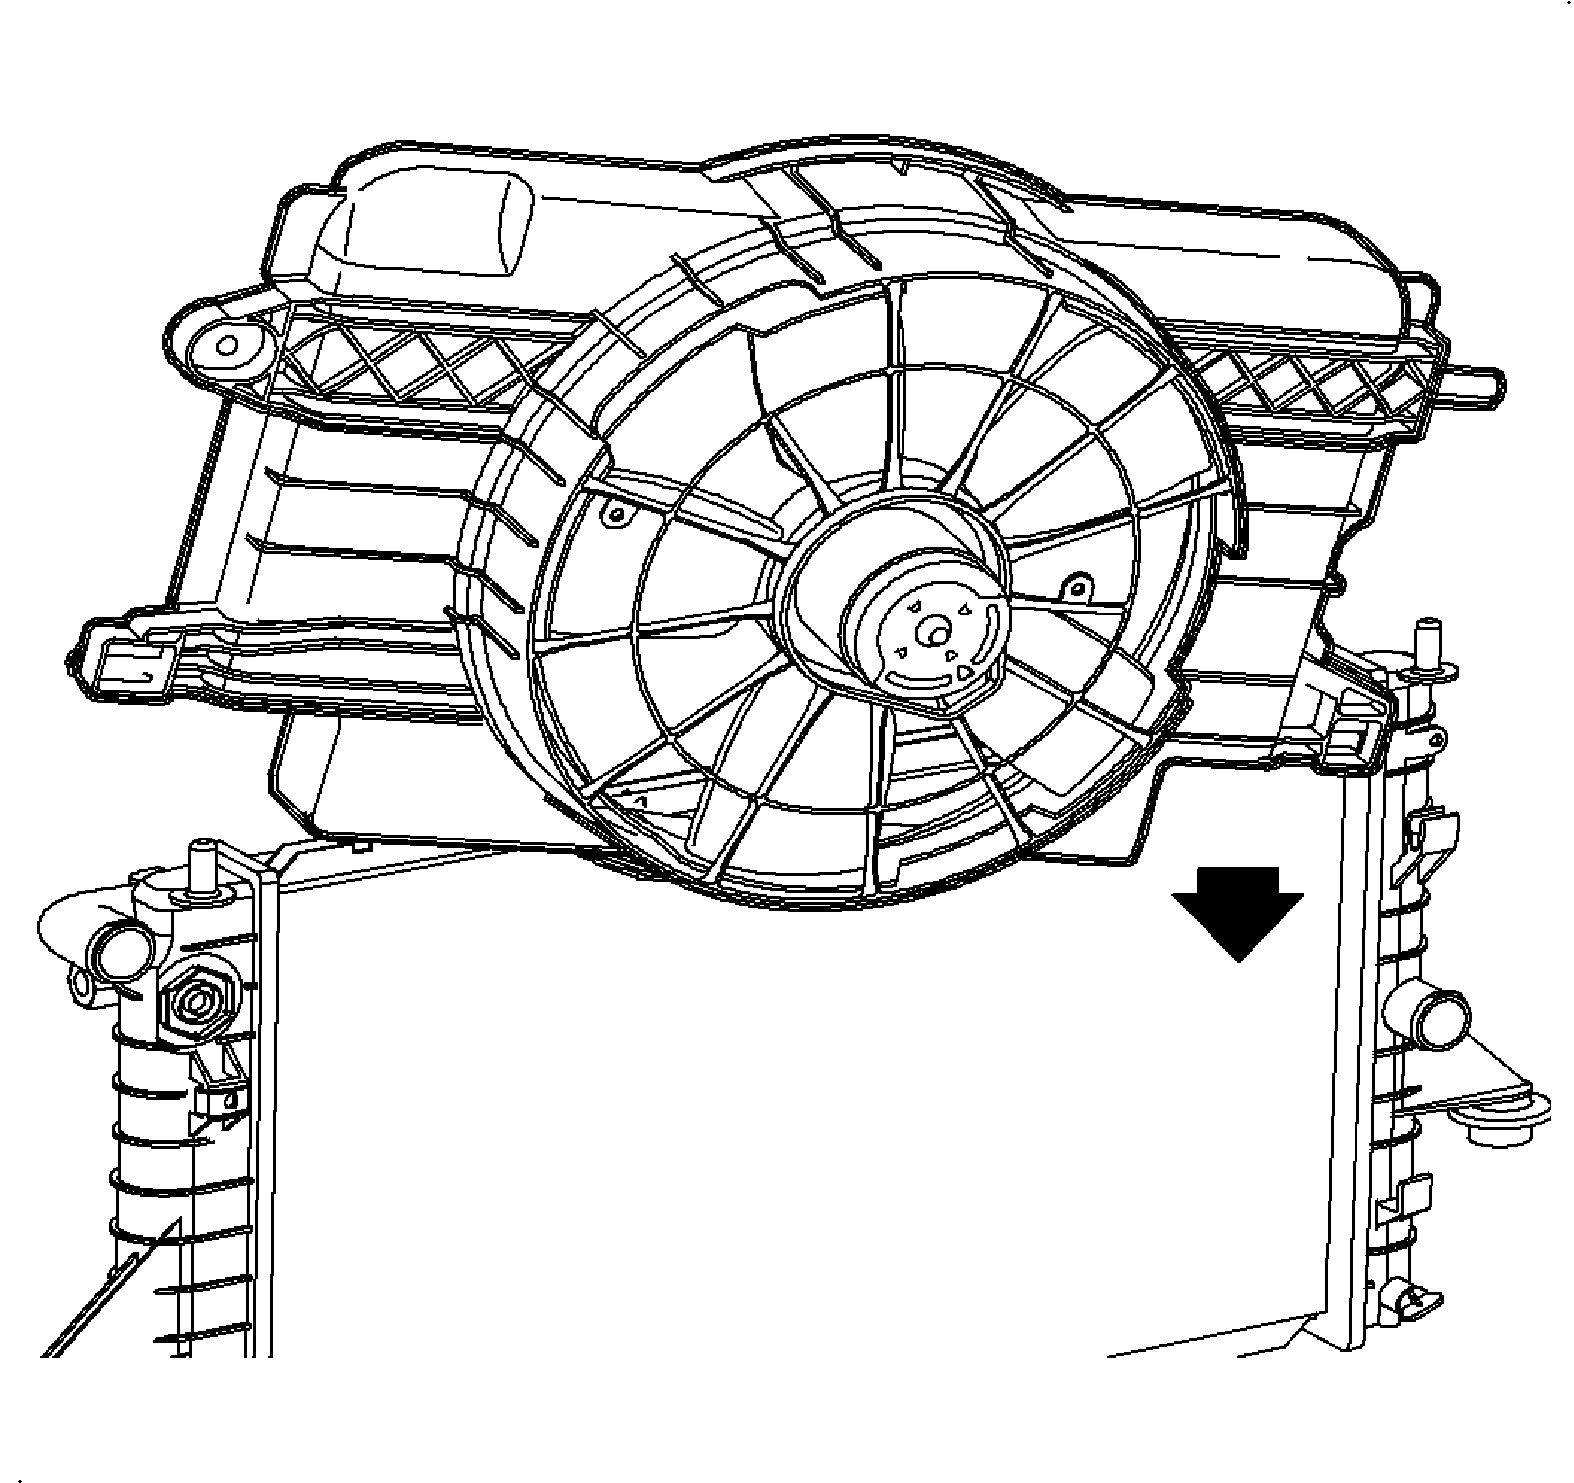
Notice: Refer to Fastener Notice in the Preface section.

Tighten
Tighten the upper hold down bolt 6 N·m (53 lb in).
Important: Tighten the upper automatic transaxle oil cooler line if necessary.
Tighten
Tighten the upper transaxle oil cooler line to 14 N·m (10 lb ft).

Tighten
Tighten the Battery Terminal Bolts to 17 N·m (13 lb ft).
