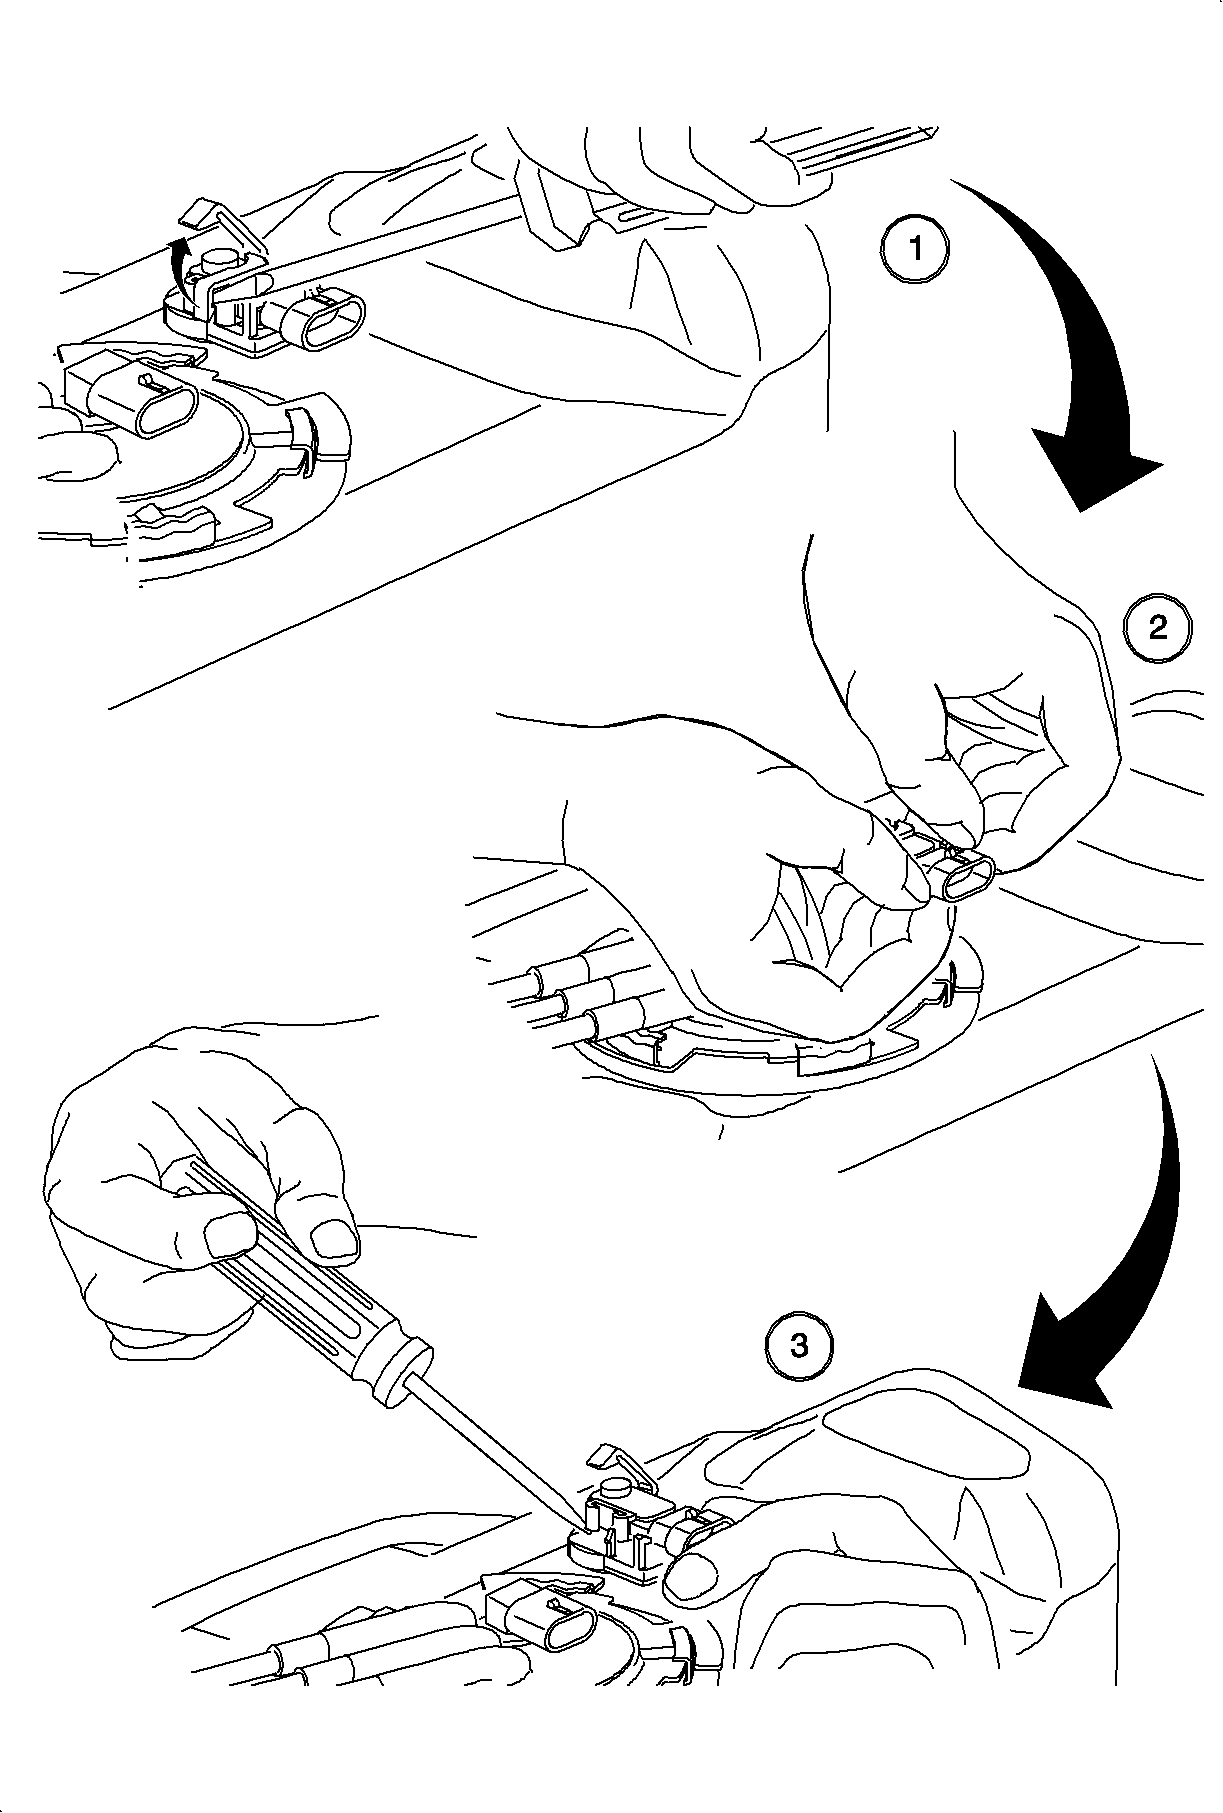
For 1990-2009 cars only
Removal Procedure
The fuel tank pressure sensor is located on the top of the fuel tank near the rear of the tank.
- Remove the fuel filler pipe and the fuel tank from the vehicle.
- Unlatch the retaining arm over the tank pressure sensor using a small, flat-blade screwdriver.
- Disengage the sensor from the locating uprights at the connector-end using hand pressure and fingertips only.
- Remove the tank pressure sensor from its mounting boss on the fuel tank using a flat-blade screwdriver at the rear of the sensor to pry up and assist in removal.

Notice: Use care when removing the tank pressure sensor from the fuel tank. The mounting pad is part of the tank and if damaged will require replacement of the tank.
Notice: Avoid contact of any tool with the top surface of the fuel tank pressure sensor. If this surface is damaged, the sensor will require replacement.
Installation Procedure
- Install the tank pressure sensor into the fuel tank mounting boss.
- Latch the retaining arm of the mounting bracket over the tank pressure sensor and ensure that the connector end is located between the uprights on the mounting pad.
- Install the fuel tank and fuel filler pipe.
- Perform the Service Bay Diagnostic Test for the evaporative emission system using the scan tool. This test will verify the integrity of the vapor handling areas of the fuel system. Refer to Service Stall System (SSS) user guide.
Important: To facilitate installation of the tank pressure sensor into its mounting boss on the fuel tank, lightly lubricate the multi-ribbed seal on the tank pressure sensor. A drop of clean engine oil is sufficient.
