Removal Procedure
- Disconnect the negative battery cable.
- Remove the air cleaner from the vehicle.
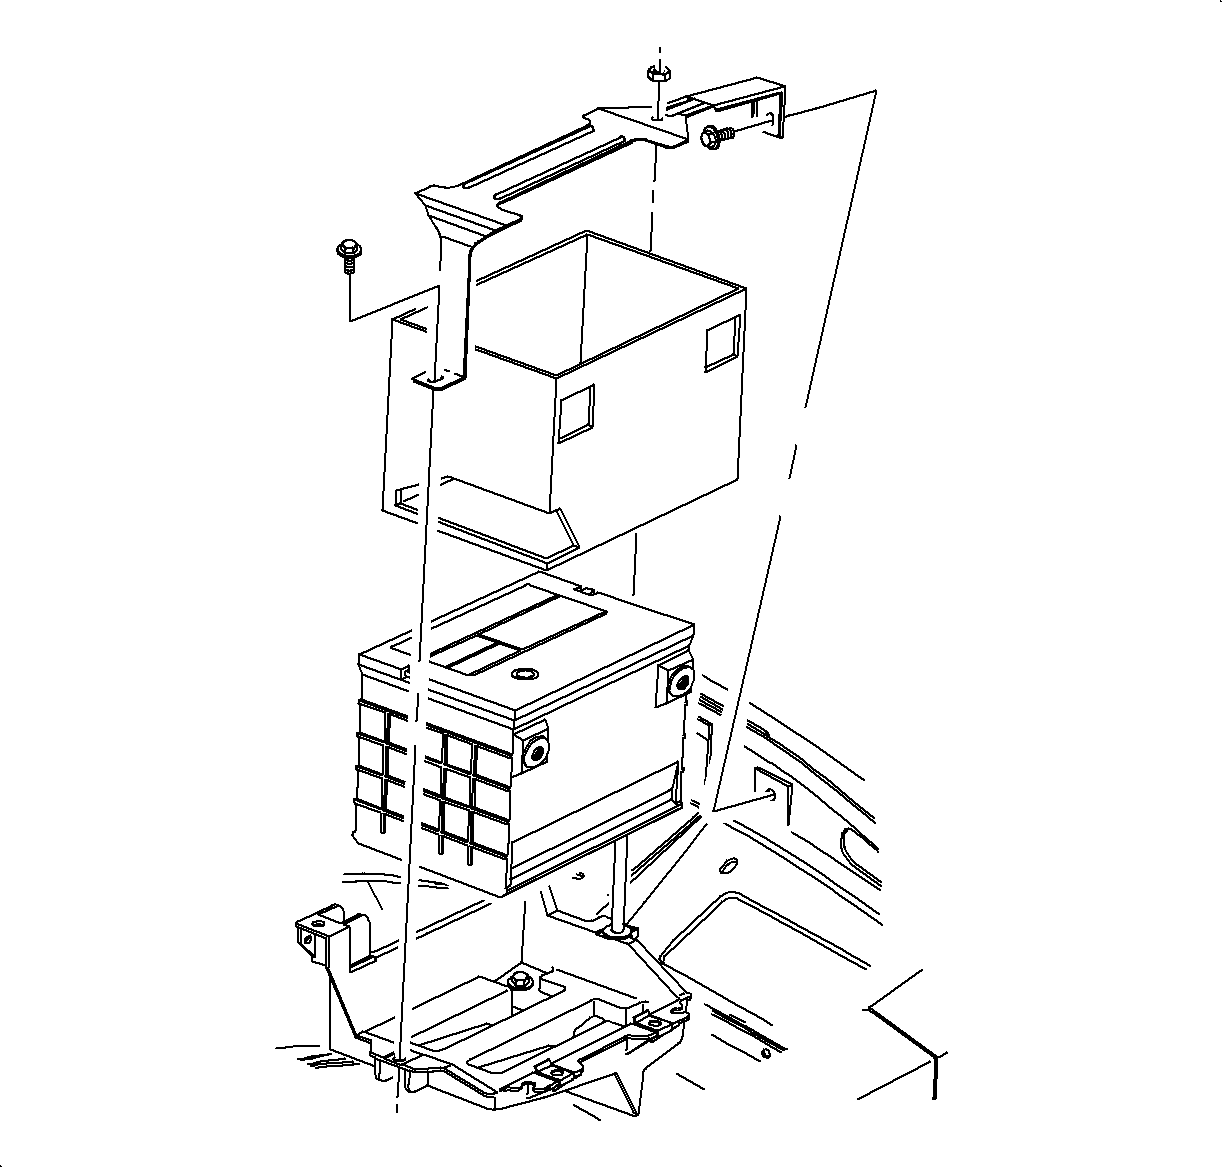
- Disconnect the positive battery cable from the terminal.
- Remove the battery hold-down retaining nut and screw, and lift off the battery hold-down retainer.
- Lift the battery off the vehicle. Place the battery in a safe location.
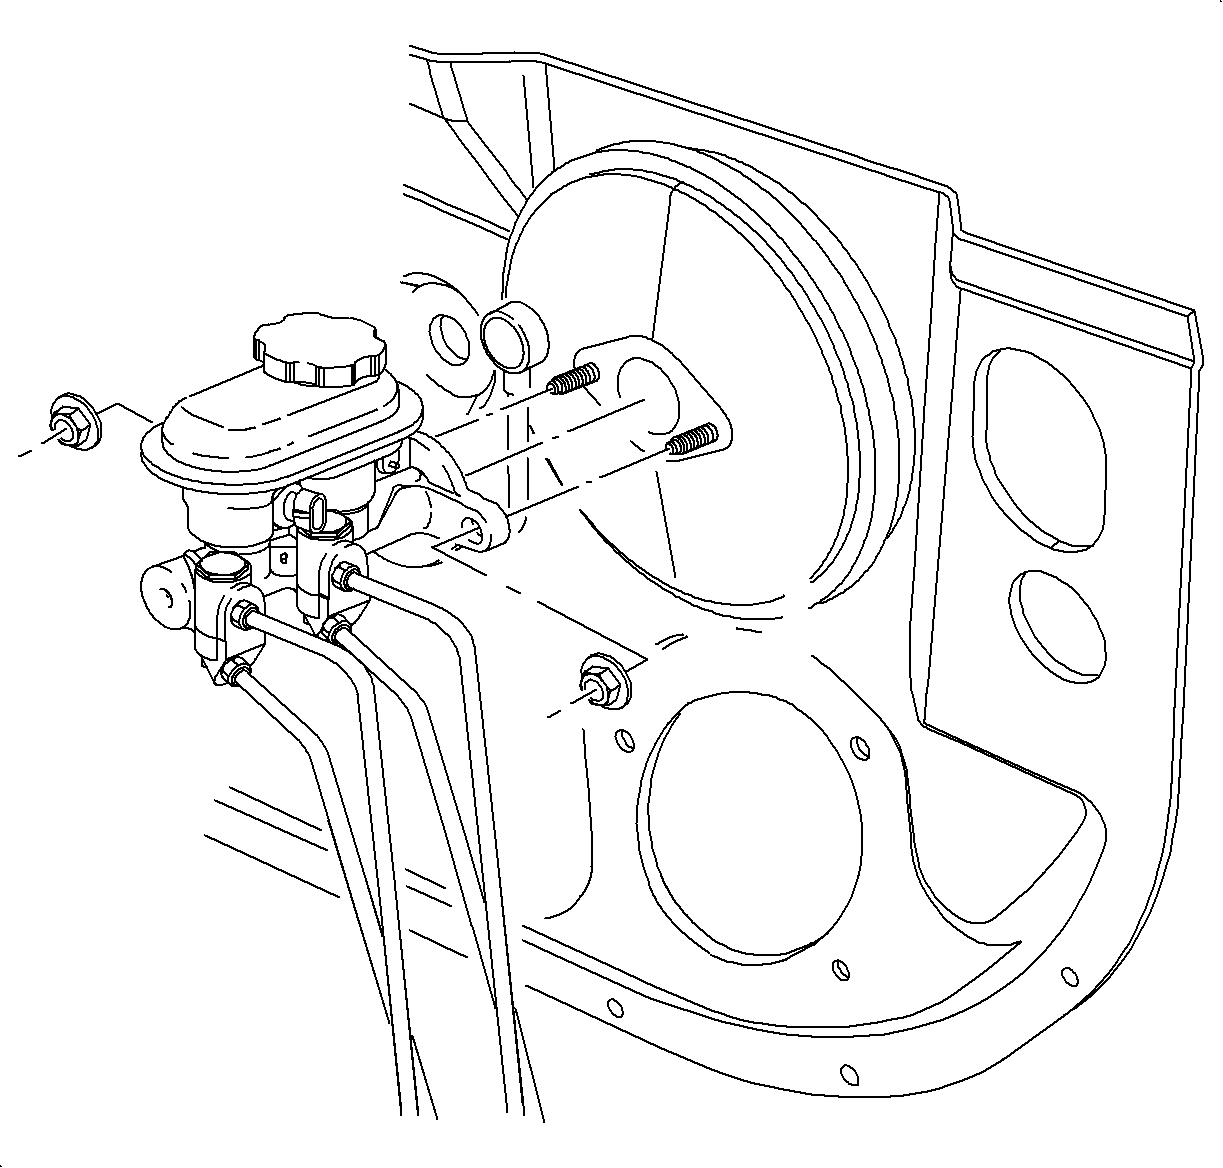
- Remove the master cylinder-to-brake booster nuts.
- Move the master cylinder control assembly away from the booster, far enough that the brake booster can be removed.
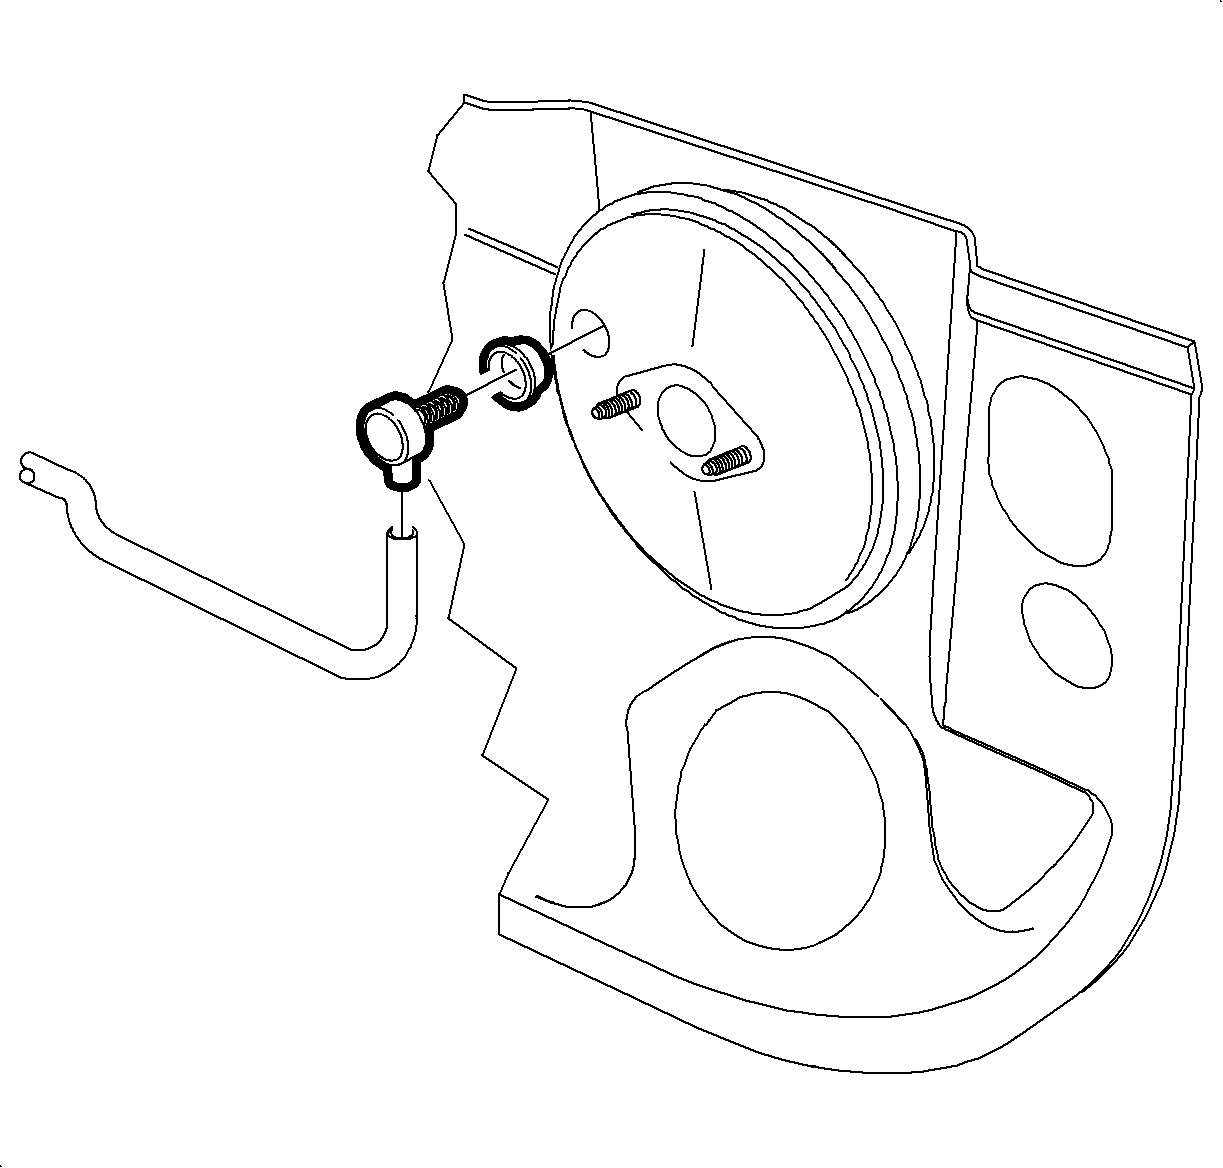
- Disconnect the vacuum check valve and hose from the booster.
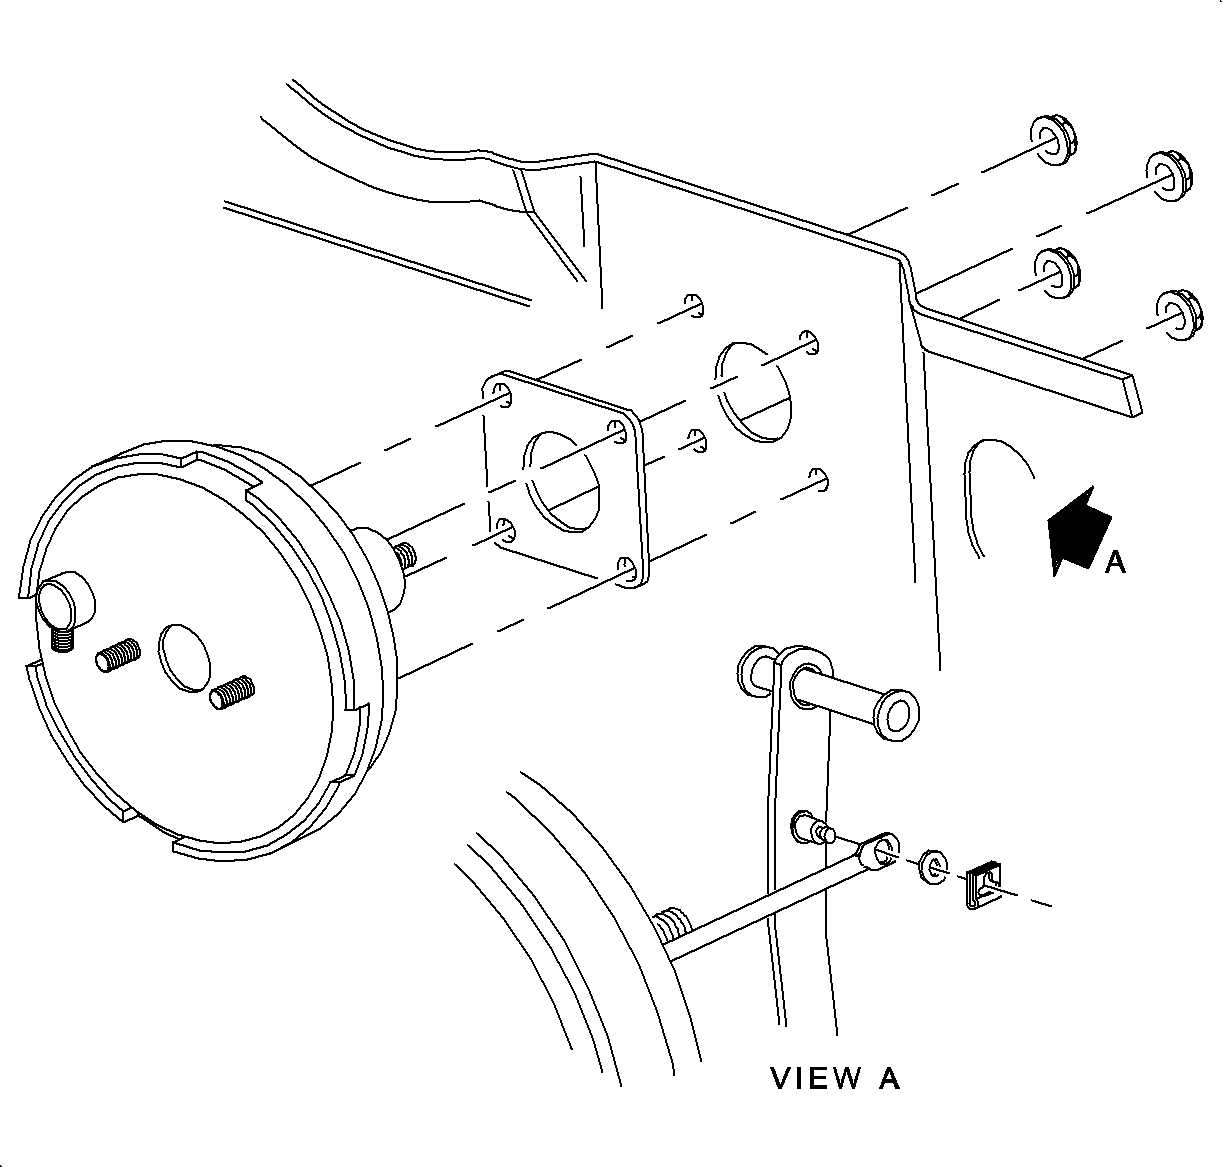
- Remove the booster push rod retainer and washer.
- Remove the four nuts attaching the vacuum booster to the vehicle interior.
- From under the hood, remove the booster. Tilt the booster to disengage the push rod from the brake pedal pin.

Important: The vacuum booster and pushpin are a matched set. Boosters are measured during manufacturing and a pushpin of the correct length is selected and fitted to the booster. Boosters and pushpins are not interchangeable and must always be installed as a set.

Important: On manual transaxle equipped vehicles, the clutch reservoir and bracket need to be removed and put aside.

Notice: Do not bend brake pipes.
Installation Procedure
- Position the booster in the vehicle. Do not install the fasteners at this time.
- Lubricate the brake pedal push rod pin.
- Install the booster push rod onto the brake pedal pushrod pin with the retainer and washer.
- Install the four booster-to-body fasteners.
- Connect the vacuum hose and check valve-to-booster.
- Position the master cylinder onto the brake booster studs and install the fasteners.
- Install the battery carefully in the battery tray; make sure that the terminals do not short against any metal during the installation.
- Install the battery hold-down retainer, locking the battery into the tray.
- Install and tighten the hold-down retainer nut and screw.
- Install the positive battery cable first.
- Install the negative battery cable last.
- Install the air cleaner assembly in the vehicle.
- Check and adjust the stop lamp switch.

Tighten
Tighten the fastener to 27 N·m (20 lb ft).
Notice: Do not bend brake pipes.
Important: On manual transaxle equipped vehicles, install the clutch reservoir bracket prior to installing fasteners.
Tighten
Tighten the fasteners to 27 N·m (20 lb ft).

Important: Make sure the battery tray is clean. Make sure that the battery cable ends are clean and free of corrosion. Clean with a wire brush. Make sure that the battery is in good physical condition (e.g., no cracks, or obvious damage) and that the terminals are clean.
Tighten
Tighten the nut to 9 N·m (80 lb in).
Tighten
Tighten the positive battery cable to 17 N·m (13 lb ft).
Tighten
Tighten the negative battery cable to 17 N·m (13 lb ft).
