Rear Seat Belt Retractor Replacement Coupe
Removal Procedure
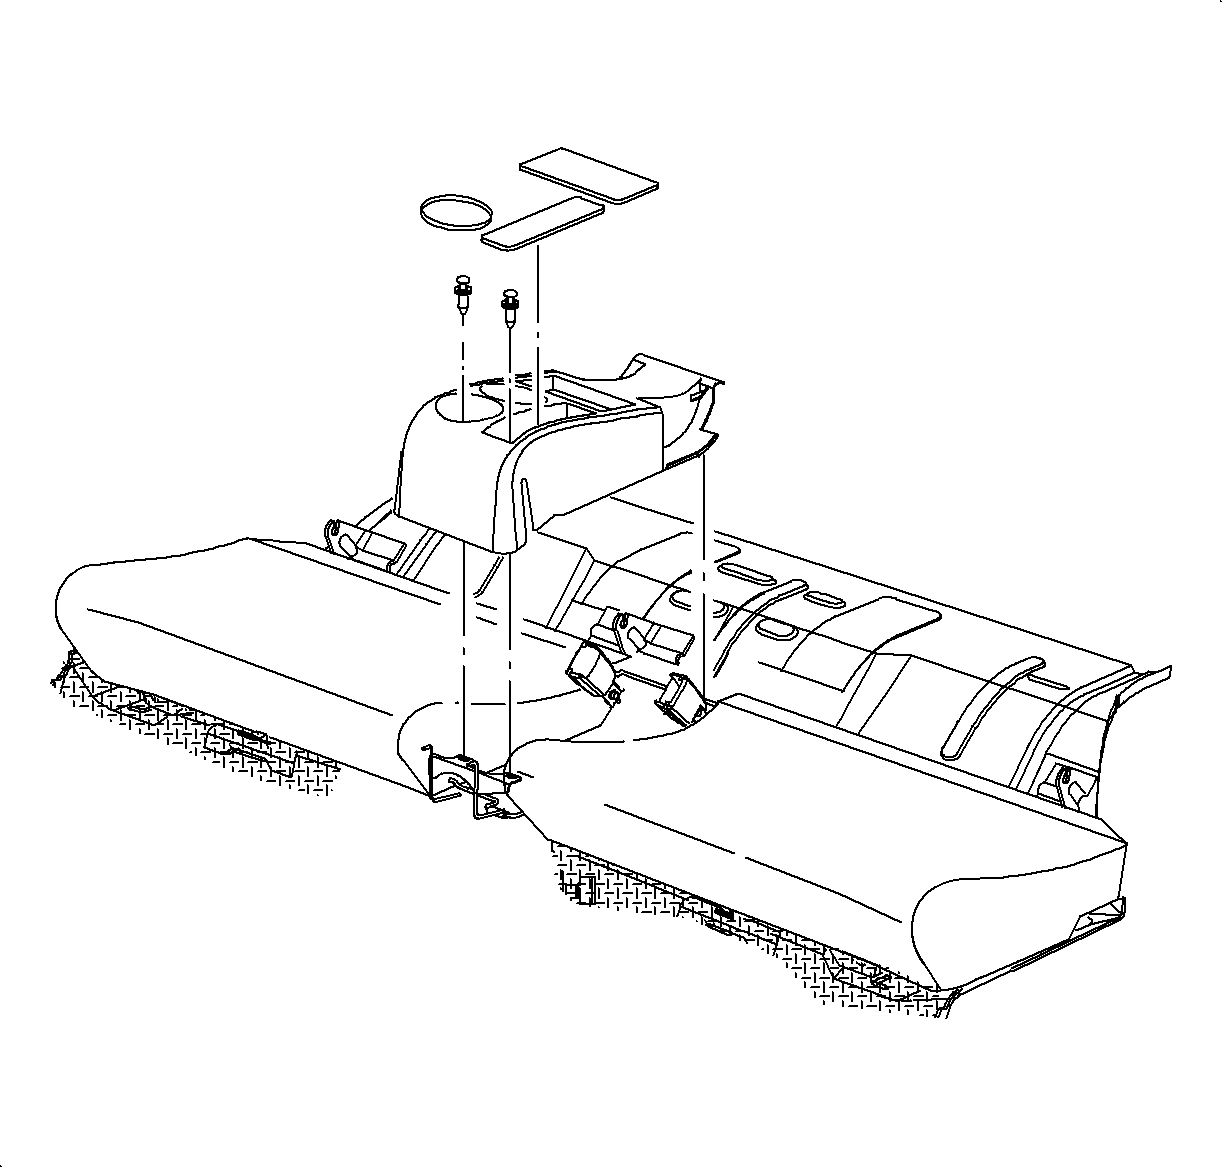
- Remove the inserts from the rear seat center console.
- Remove the rear seat center console fasteners and remove the console.
- Remove the rear seat cushion by pushing rearward and upward at lower front retainer locations to disengage the seat cushion retainer.
- Push the center seat belt buckles through the seat cushion.
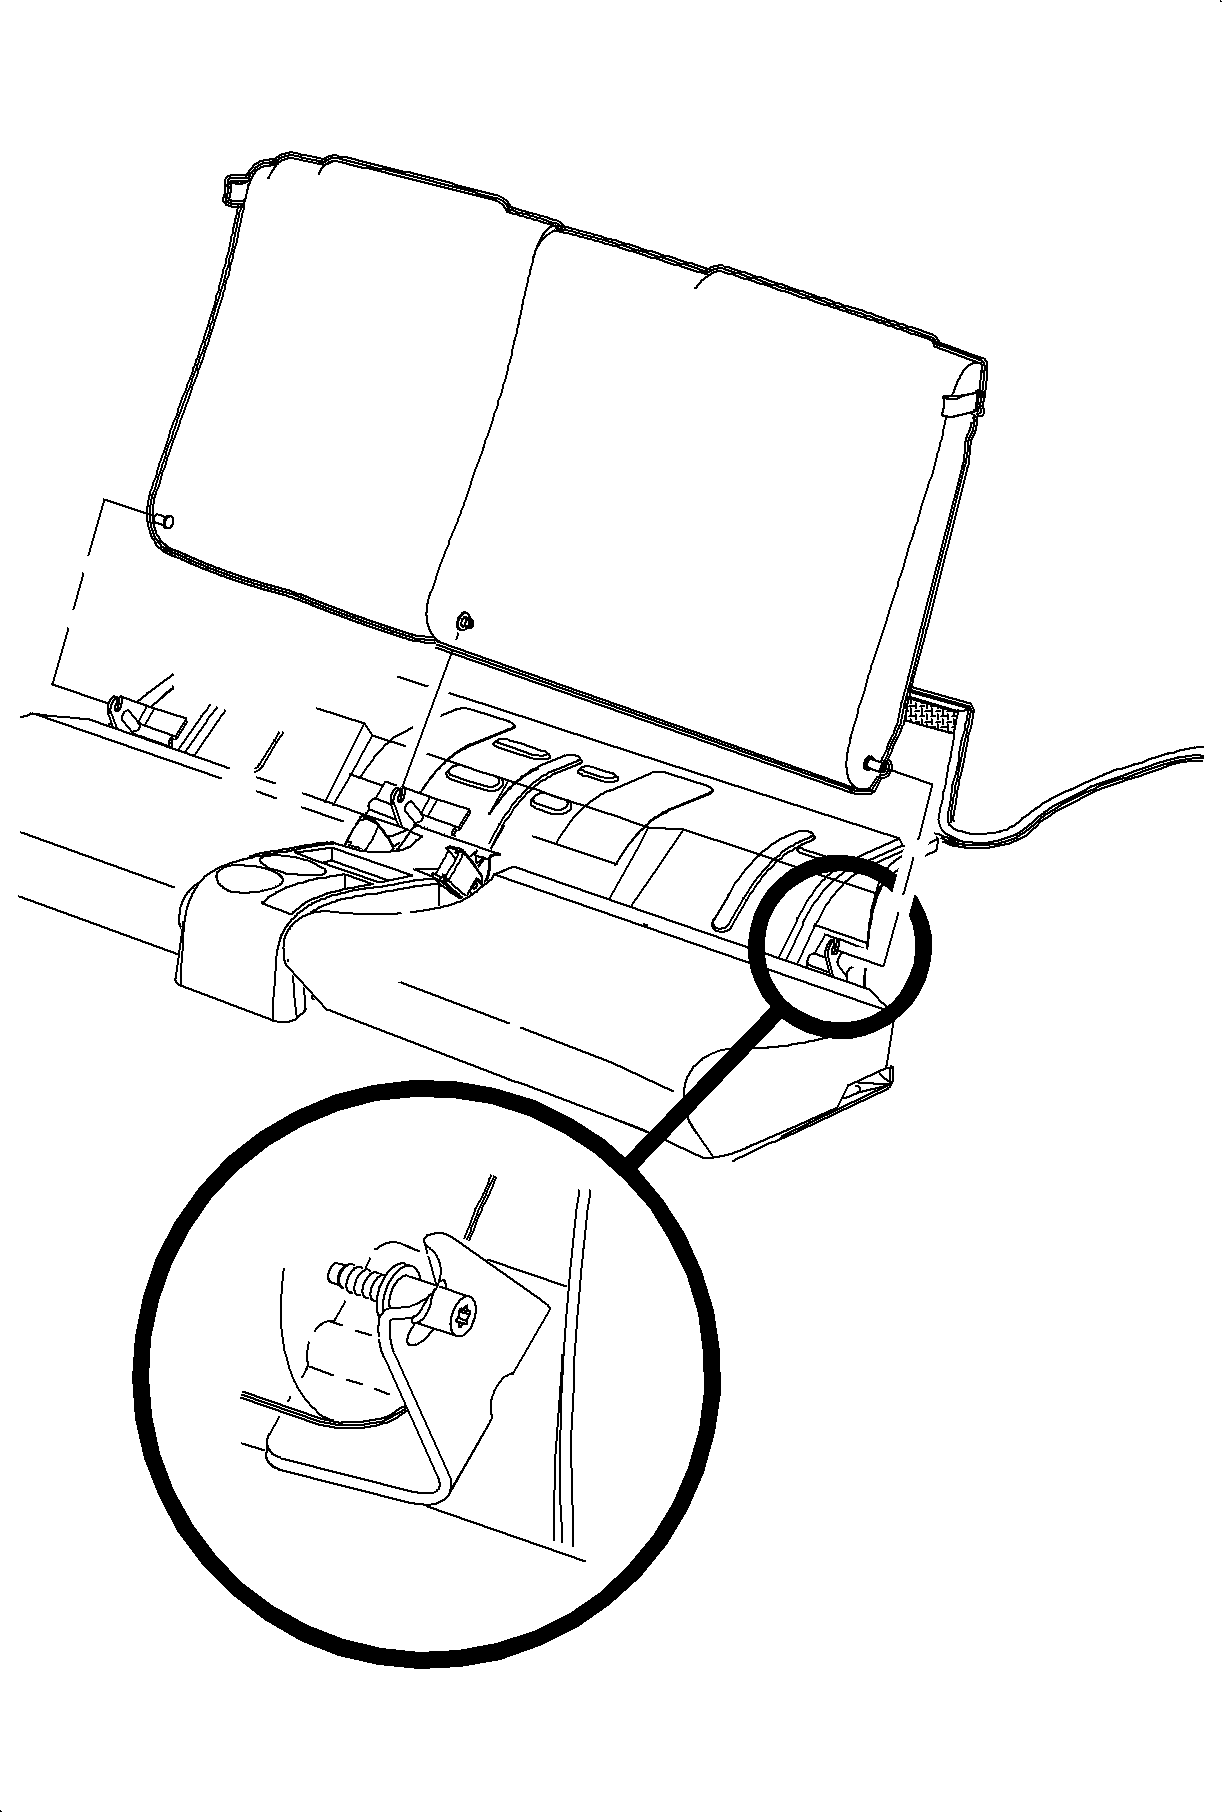
- Lower the rear seat back and lift the rear compartment carpet.
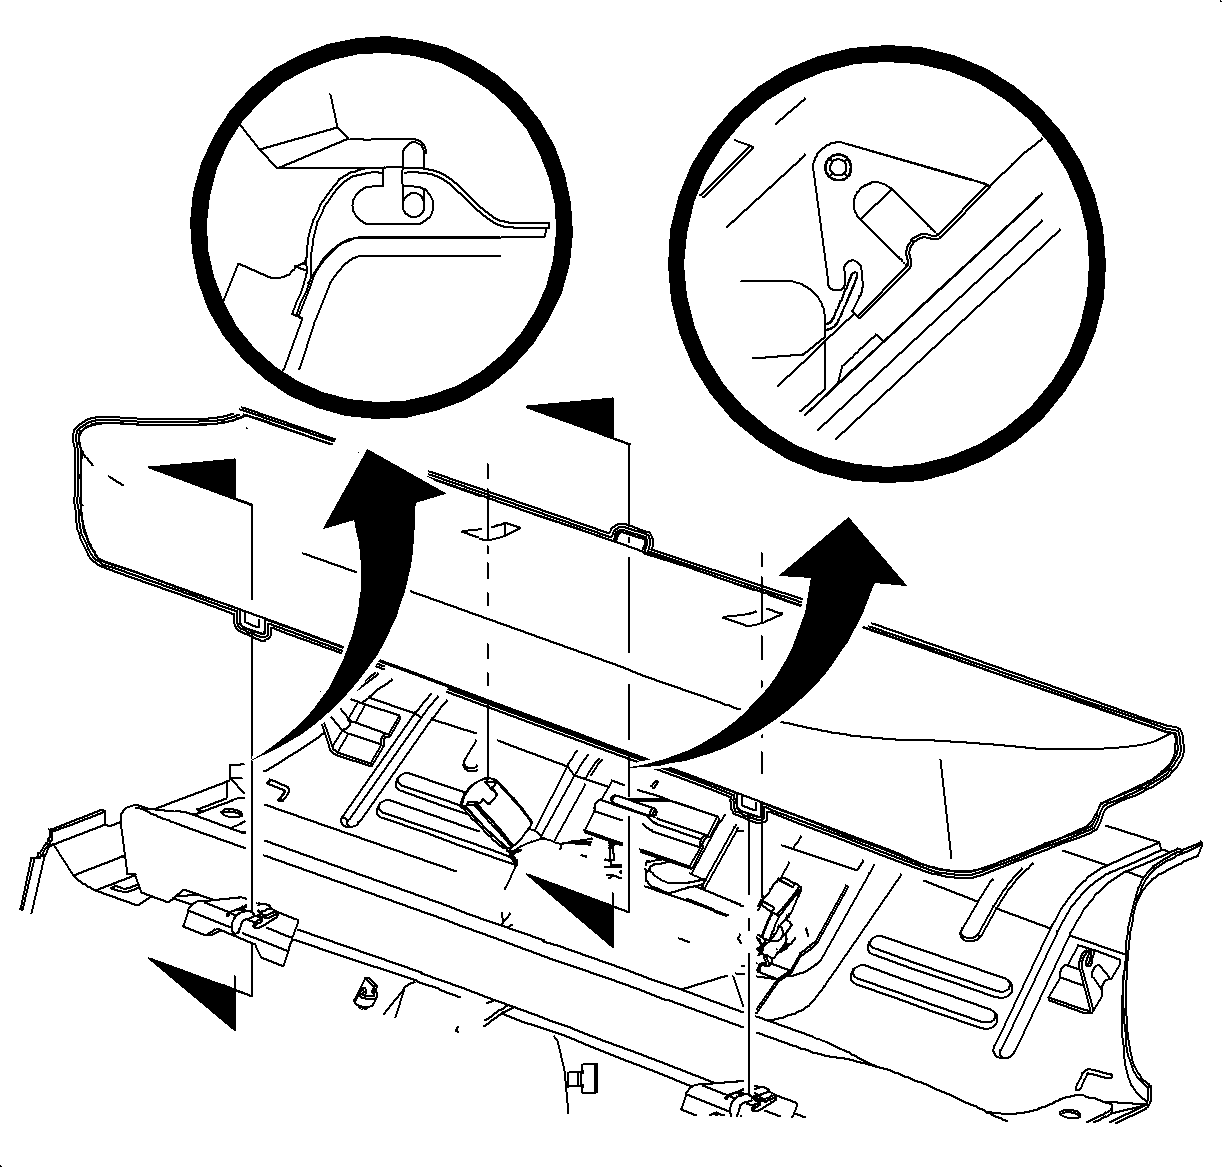
- Using a large flat blade screwdriver, gently pry the outer seat back "easy load" bracket outboard, just enough for the seat back pin to disengage from "easy load" bracket.
- Lift the seat back up and remove from the vehicle.
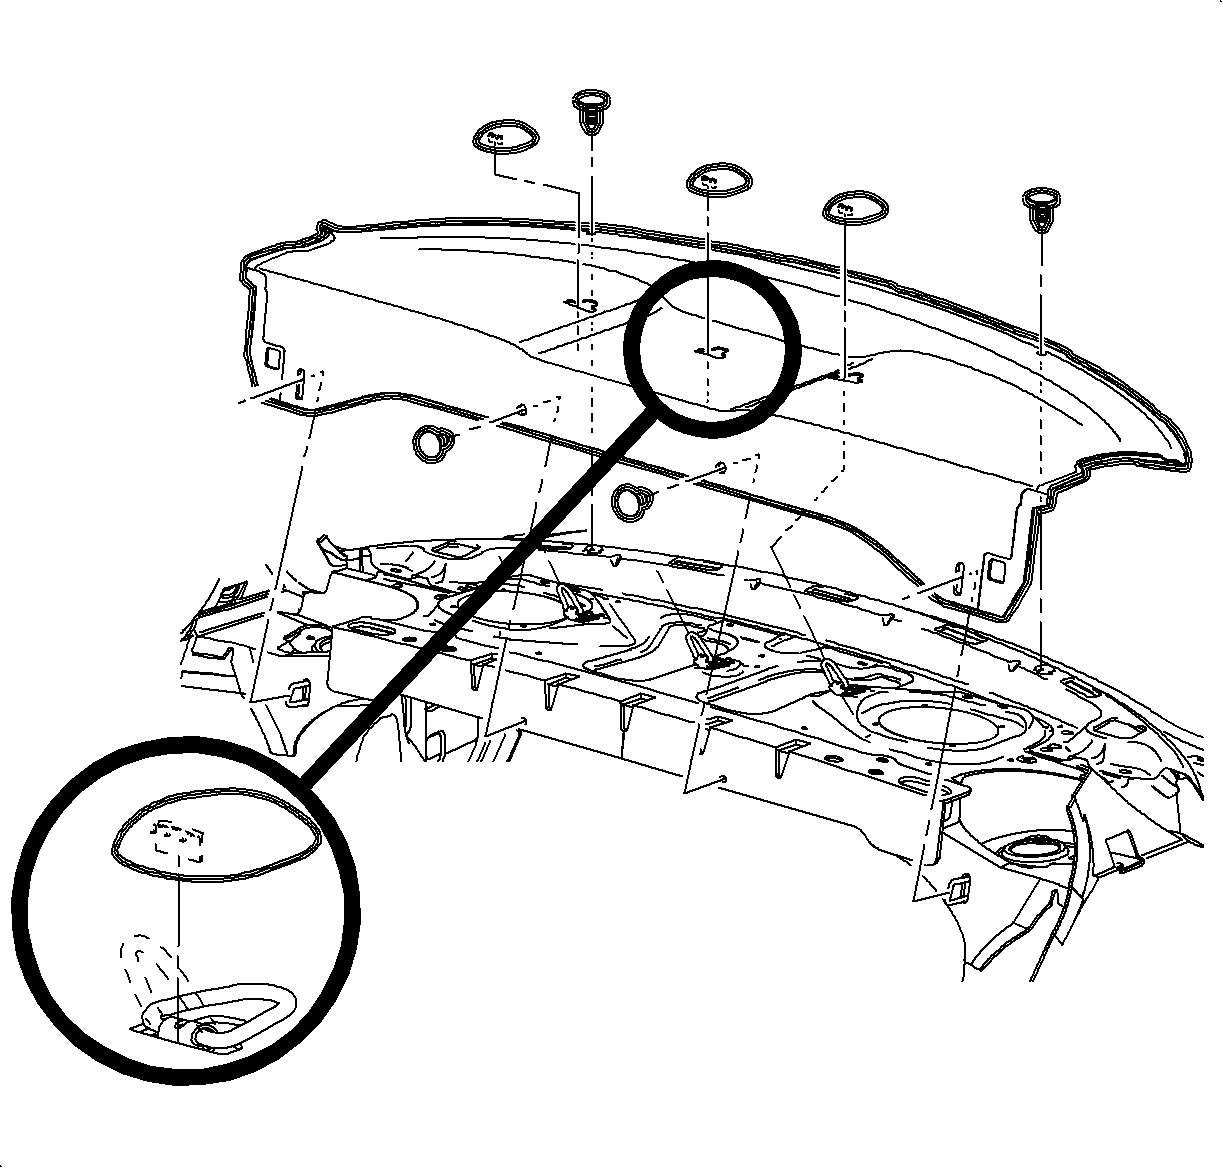
- Remove the push pins rivets from the rear window trim panel.
- Unclip the rear fasteners of the front lower hinge garnish molding to partially loosen the molding at the quarter trim panel location.
- Slide the belt assembly out of the trim panel.
- Remove the fasteners that attach the seat belt slide bar and move slide bar.
- Remove the seat belt retractor access door.
- Remove the push pin.
- Remove the seat belt unit and presenter arm. Refer to Seat Belt Retractor Replacement - Right Front .
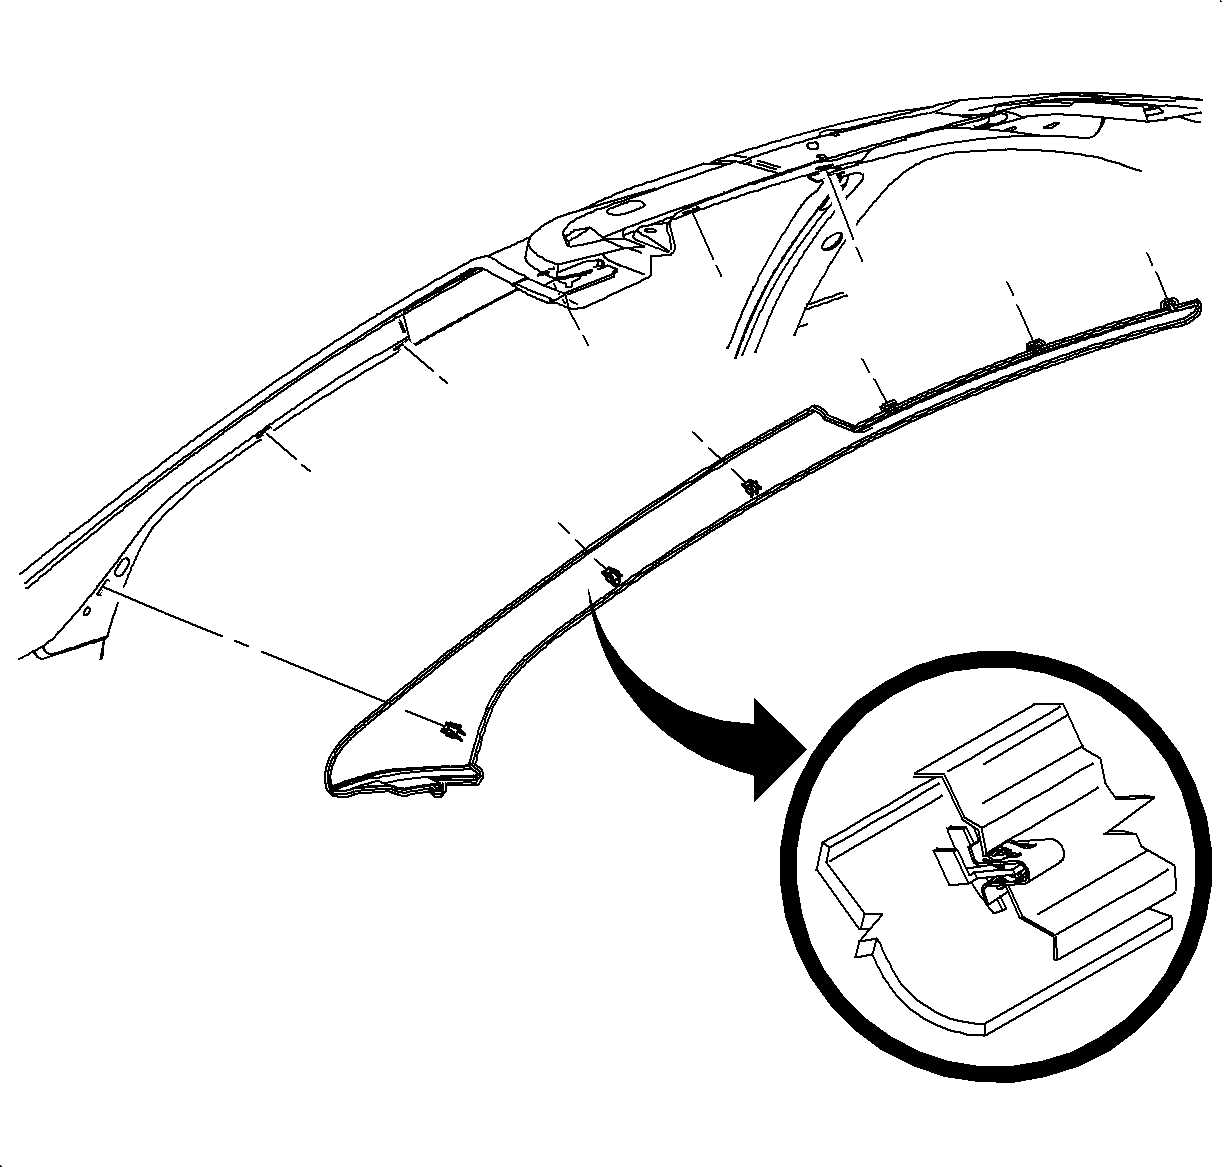
- On 1st design vehicles only, disengage the rear clips of the windshield garnish molding to allow the removal of the quarter window trim garnish molding.
- Remove the quarter window trim garnish molding.
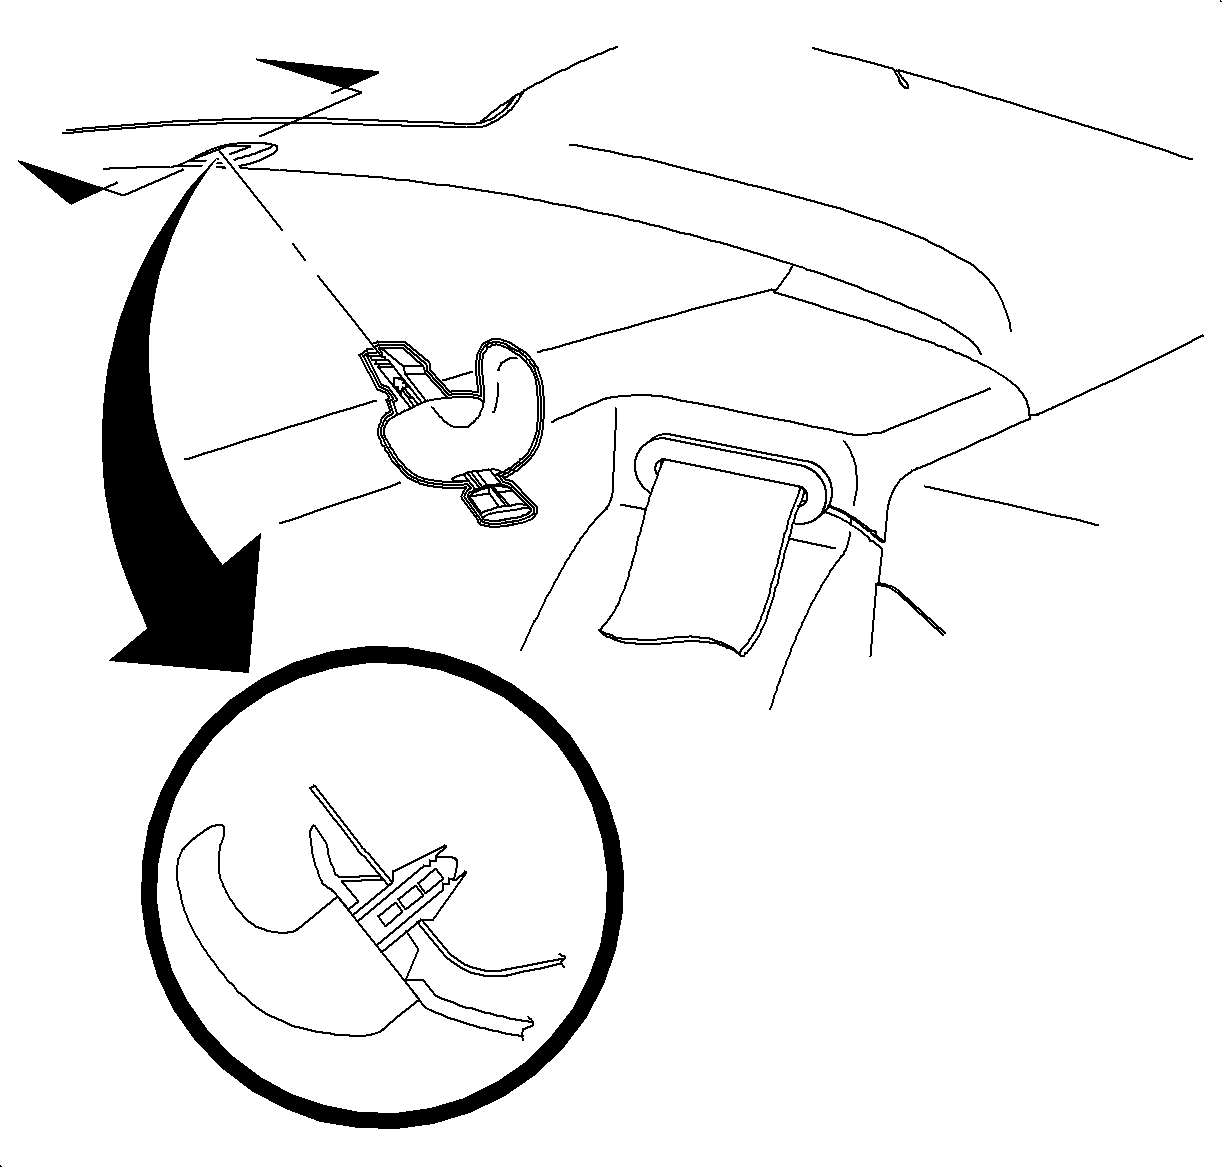
- For 1st design vehicles, remove the coathook by inserting a small screwdriver blade between the outside of the hook and the center section. Apply pressure to force center section outward.
- Remove the quarter window trim garnish molding by disengaging the clips.
- For 2nd design vehicles, remove the coathook screw and the coathook.
- Pull at the top of the quarter trim panel to disengage one push pin from the spaceframe.
- Disengage one clip attaching quarter trim panel, then lift the panel to disengage two hooks from the quarter panel inner lower front assembly.
- Remove the quarter panel trim.
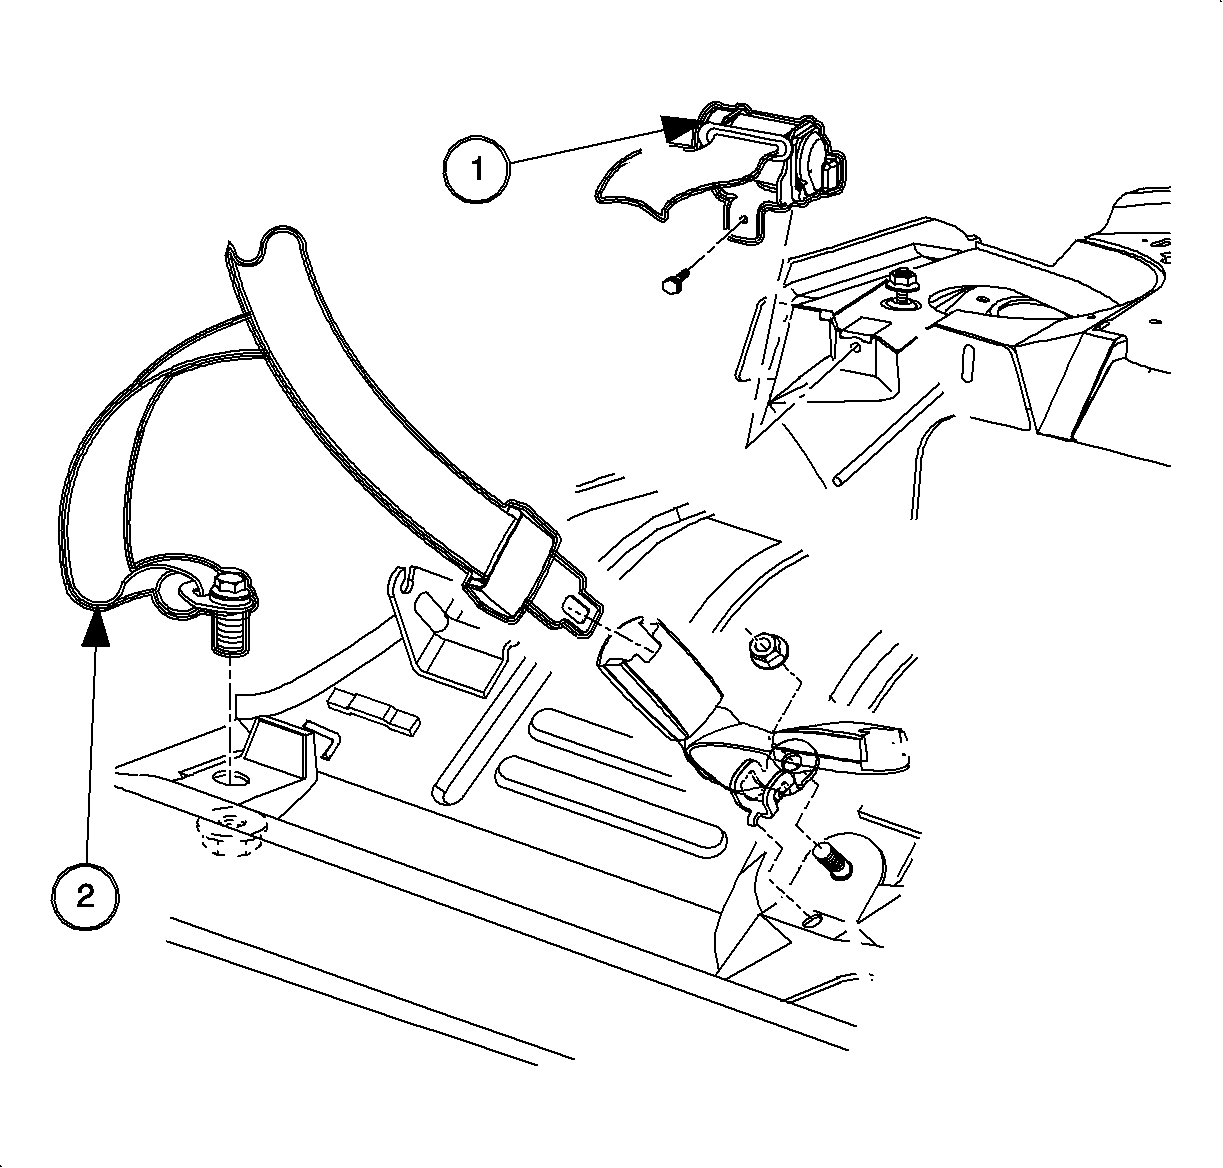
- Remove the shoulder belt lower anchor bolt (2).
- Remove the small bolt at the front of the retractor (1). Slide the retractor toward the rear of the vehicle and lift retractor up to remove, leaving large nut tightened to stud on package shelf.
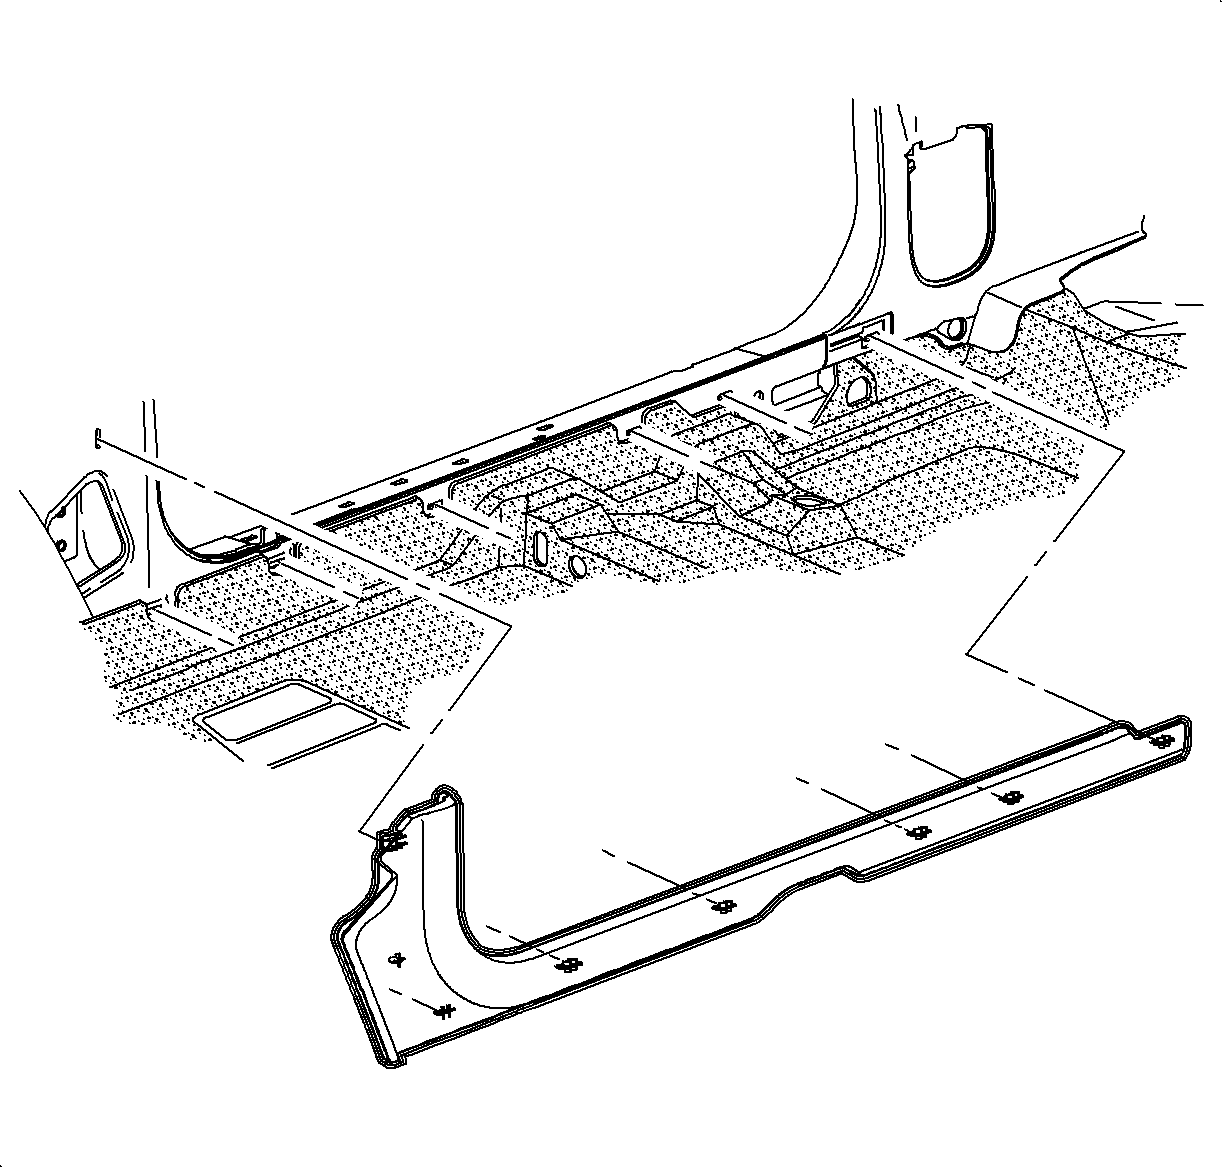
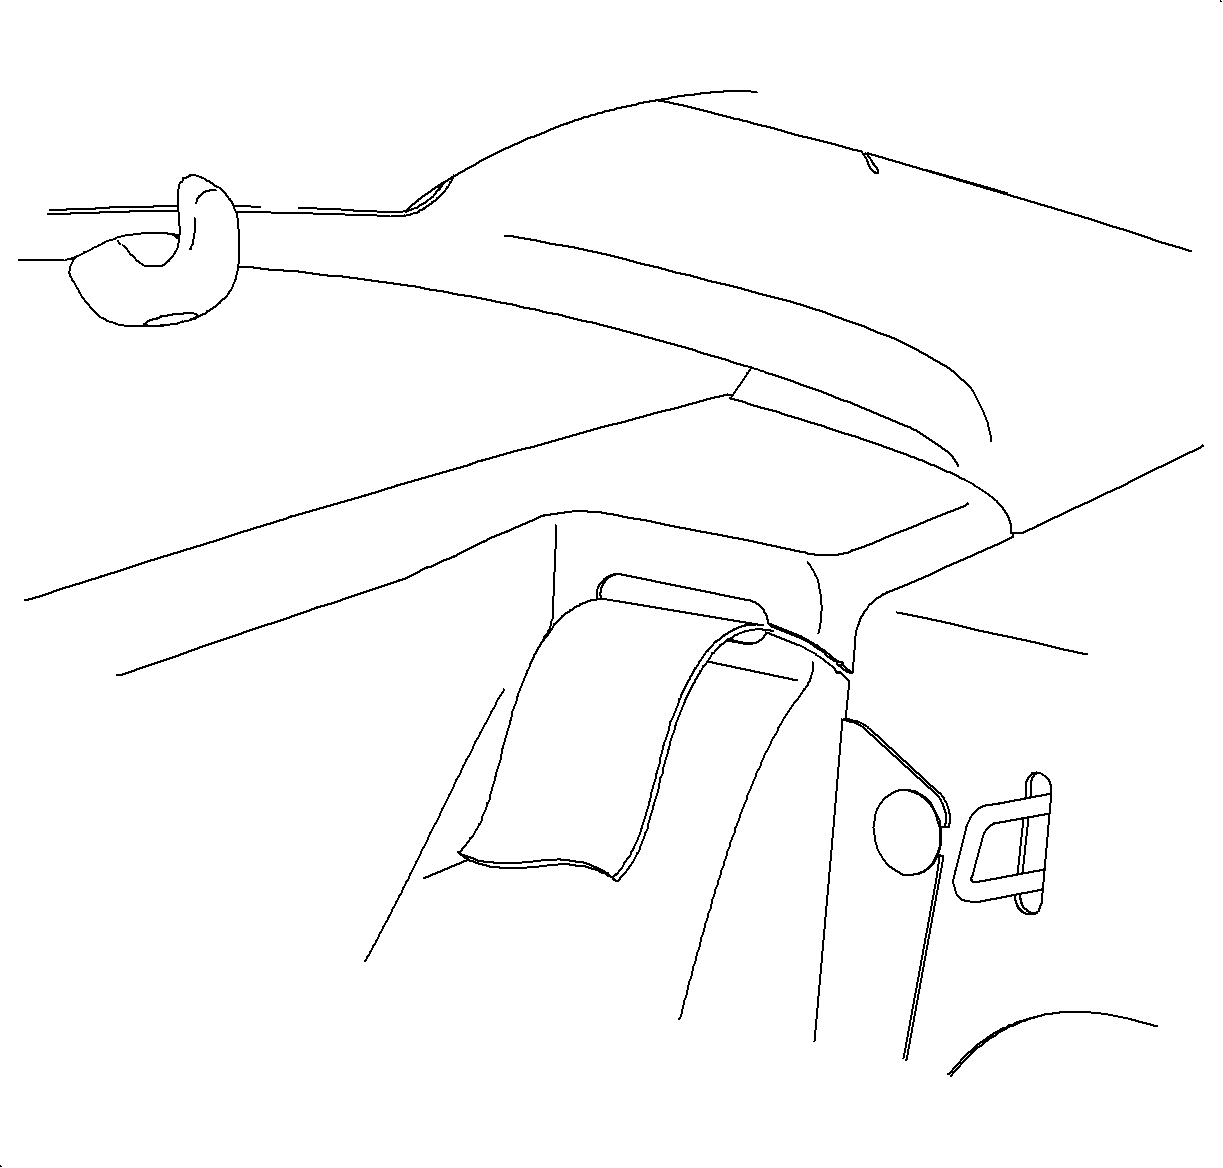
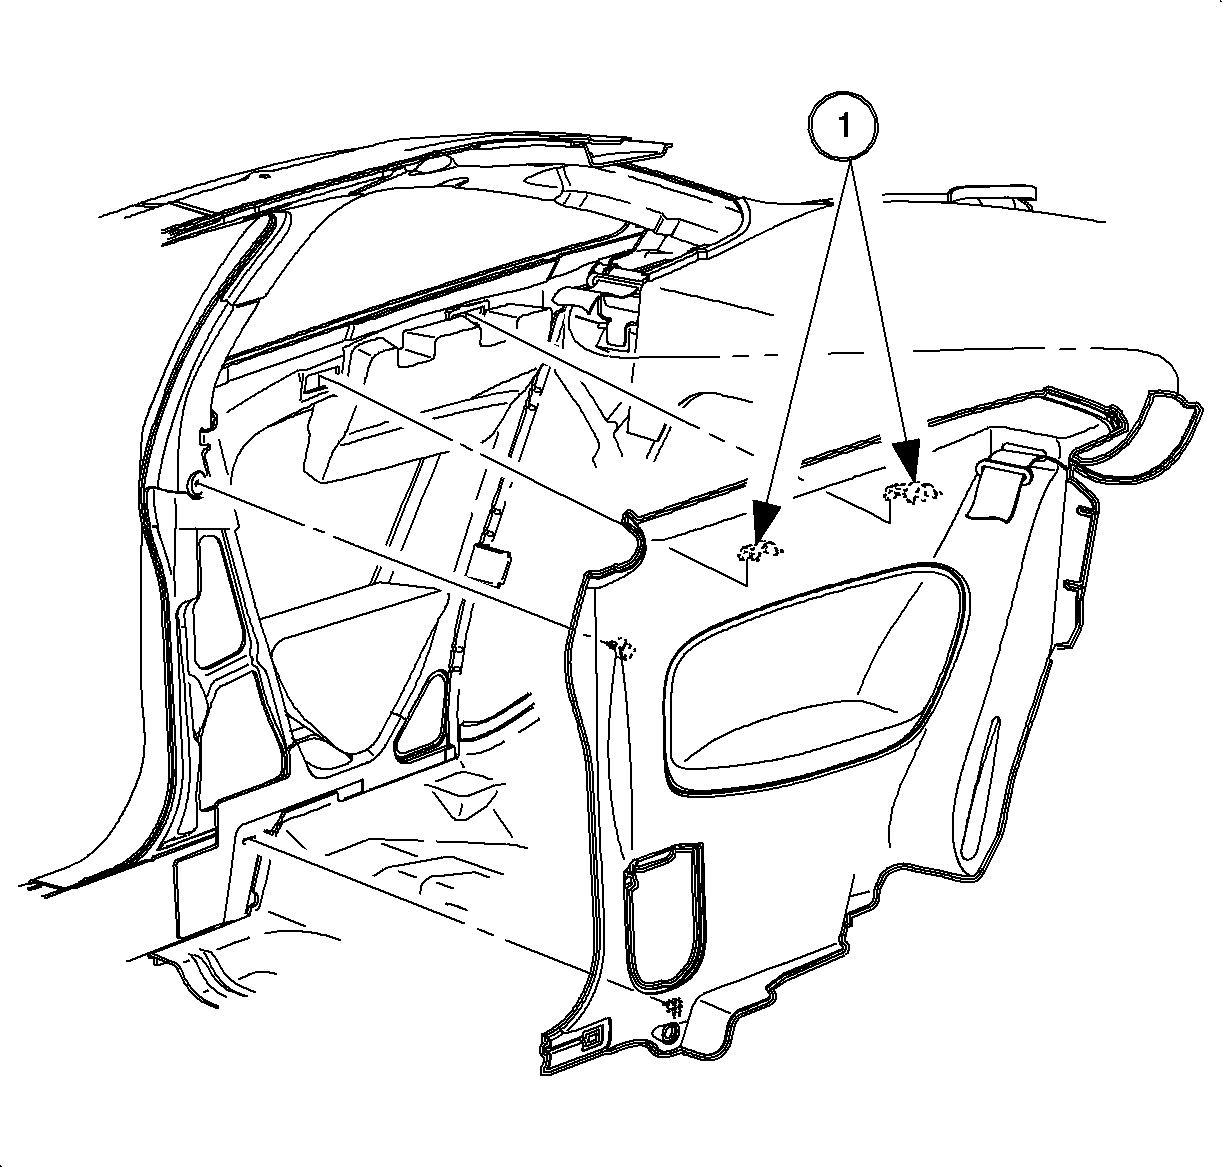

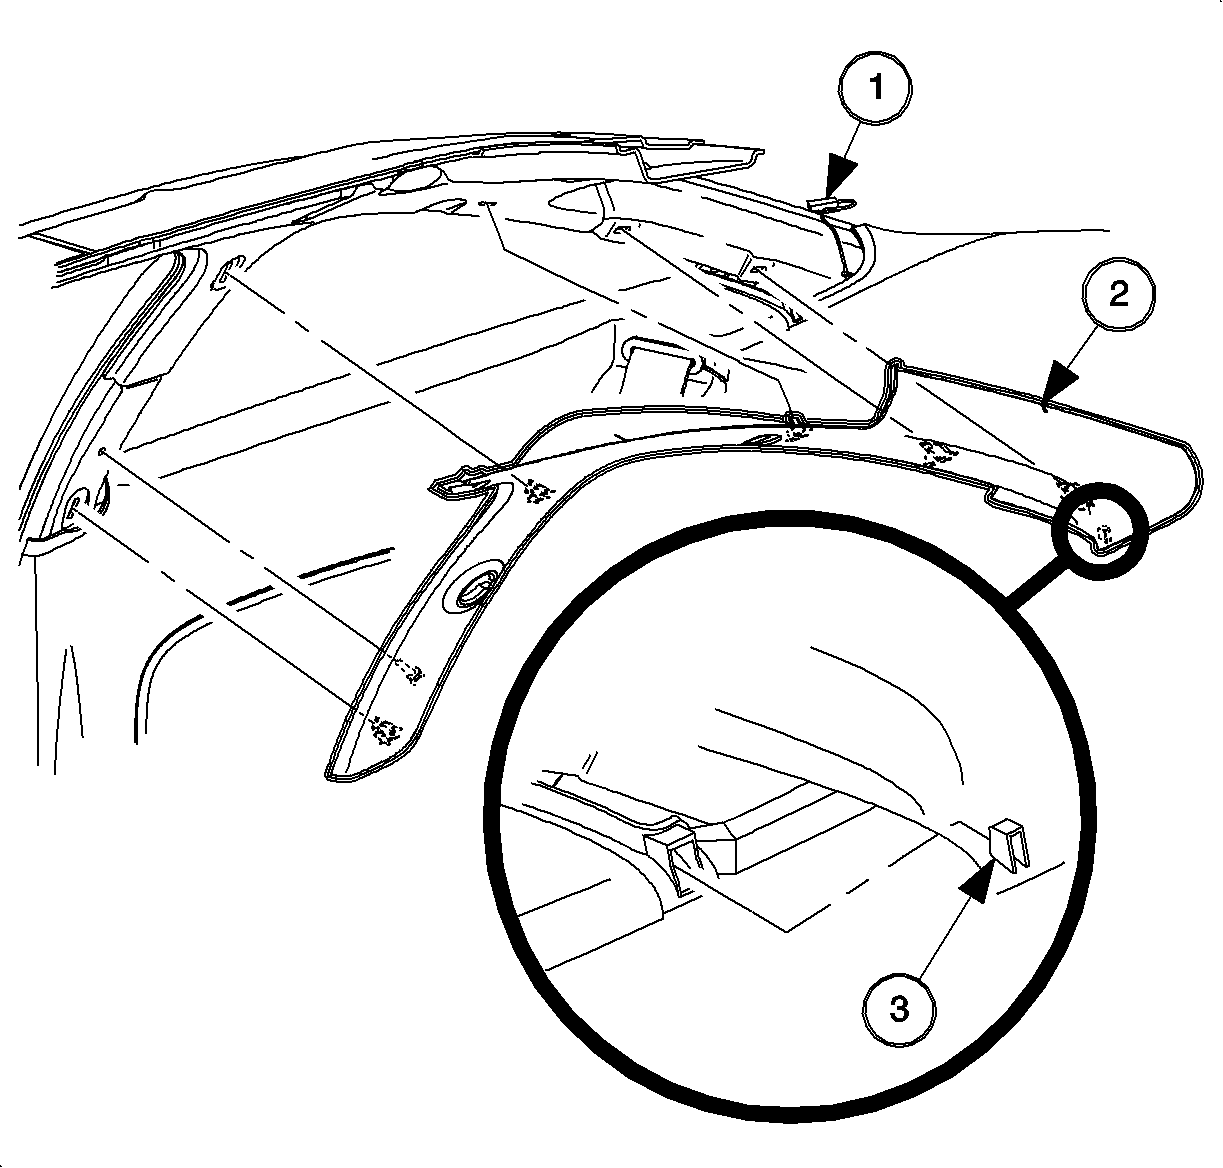

(1) Quarter Trim Panel Hooks
Installation Procedure
Important: Apply LOCTITE 242®, or equivalent, on all restraint fasteners prior to installation.
- Install the retractor (1) onto the top stud.
- Install the small bolt to the retractor.
- Install the shoulder belt lower anchor bolt (2).
- Route the shoulder belt through the slot in the quarter panel trim.
- Install the quarter panel trim.
- Snap the rear fasteners of the front lower hinge garnish molding.
- Install the push pin fasteners to attach the rear window finish panel and the quarter trim panel to spaceframe.
- For 2nd design vehicles, ensure that the head curtain inflator module tether is not hanging below the headliner edge. If so, tuck the tether underneath the headliner.
- Install the quarter window trim garnish molding.
- Snap in the rear clips of the windshield garnish molding.
- Install the coathook.
- Install the front seat belt unit and presenter arm assembly. Refer to "Front Seat Belt Unit and Presenter Arm installation procedure in this section.
- Install the rear seat routing rear seat belt/buckle units through the slots in seat cushion.
- Lock the seat into position by aligning retaining rod of seat frame wire with rear compartment retainer.
- Push down and rearward on the cushion to secure the wire into the lower front retainers.
- Pull up on the cushion to verify that it is secure. Ensure the belts are not twisted.
- Guide the rear seat back assembly onto the center pivot pin.
- Align the outer pivot pin with lead in ramp on the "easy load" bracket.
- Push downward on the seat back to engage pin into position.
- Engage cargo floor carpet with seat back.

Notice: Refer to Fastener Notice in the Preface section.
Tighten
Tighten the rear shoulder belt-to-floor bolt to 50 N·m (37 lb ft).
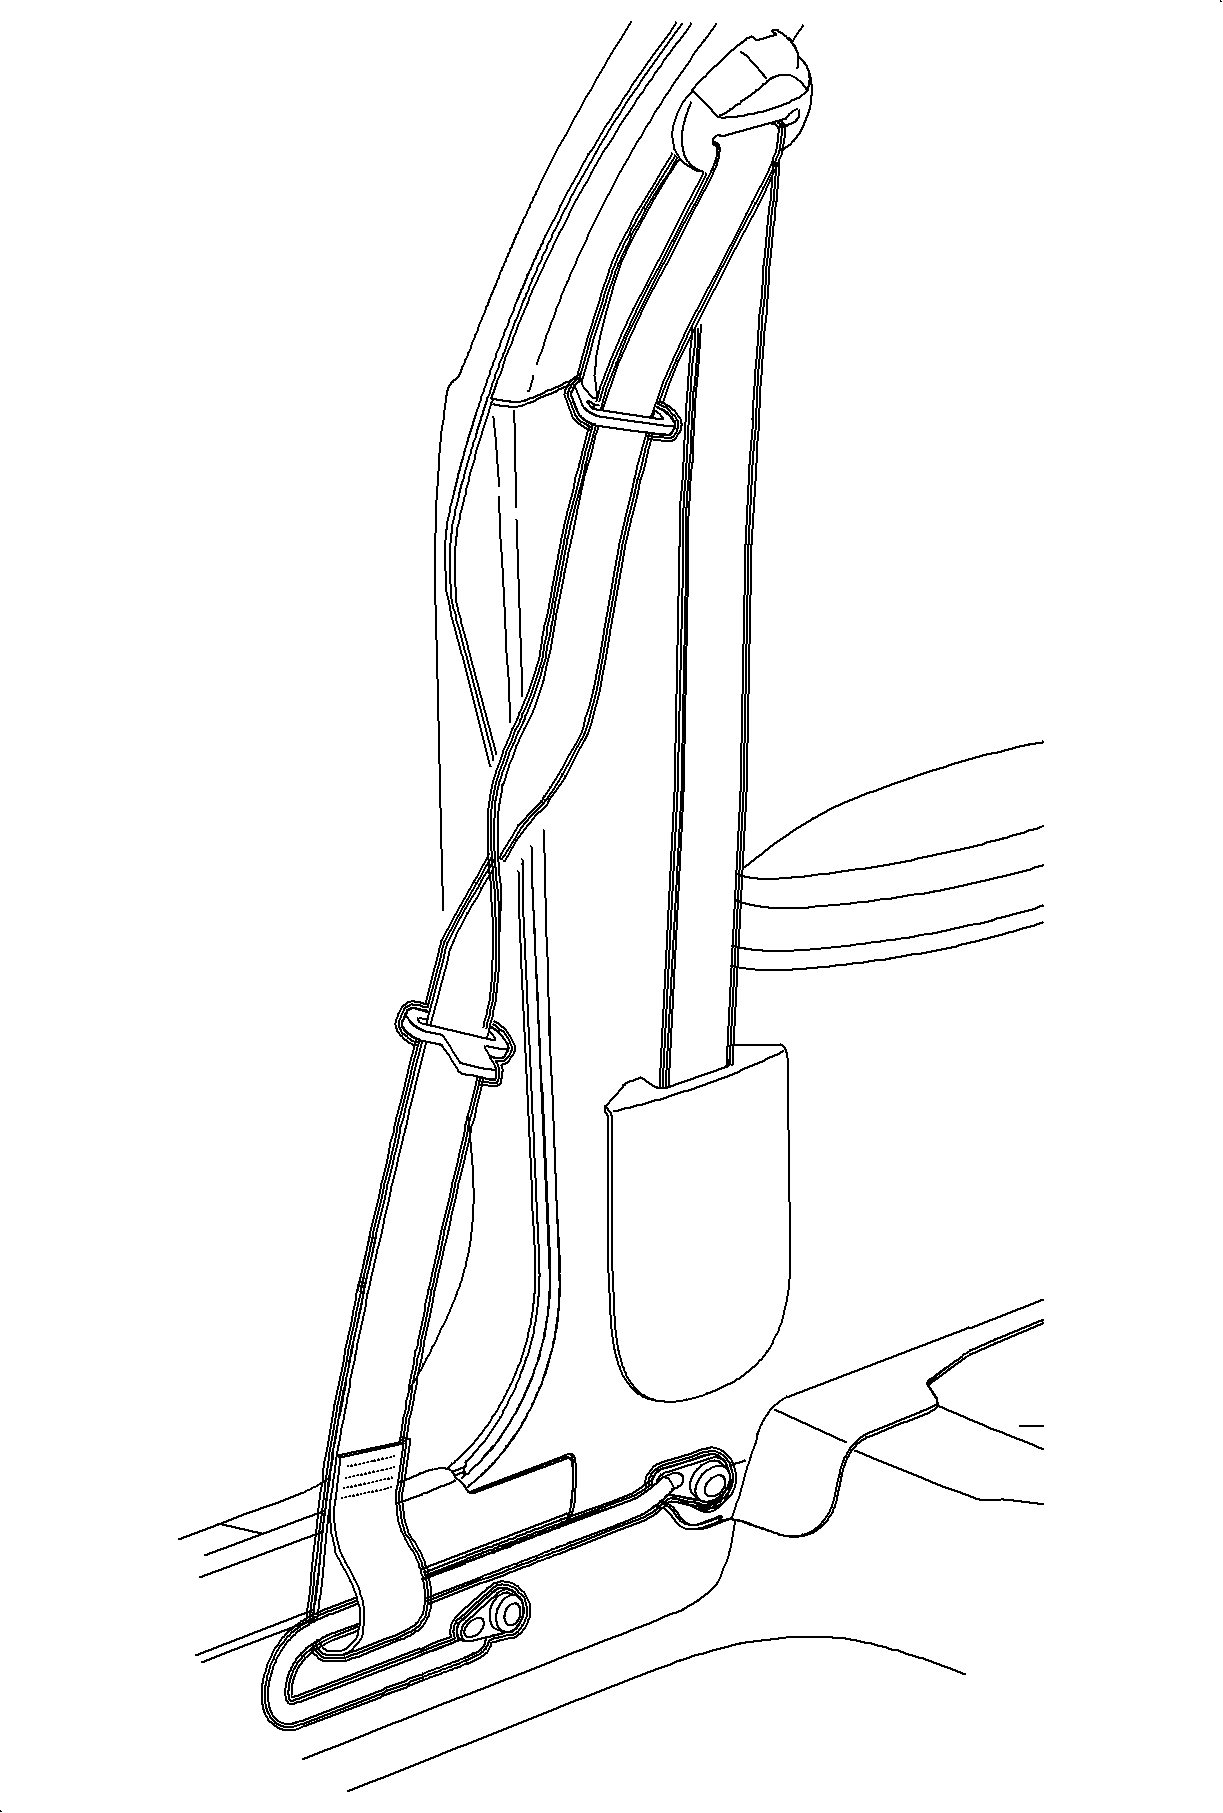
Caution: Observe orientation of the shoulder harness belt to the rear compartment pan as shown in illustration. Incorrect orientation may result in personal injury.
Tighten
Tighten the shoulder lower anchor bolt to 50 N·m (37 lb ft).


(1) Defogger Lead
(2) Defogger Notch
(3) Interlock Tab
Tighten
Tighten the seat belt retractor fastener to 50 N·m (37 lb ft).

Rear Seat Belt Retractor Replacement Sedan
Removal Procedure
- Remove the rear seat cushion. Refer to Rear Seat Cushion Replacement .
- Remove the shoulder belt harness anchor bolt from floor pan.
- Remove the body lock pillar upper molding. Refer to Garnish Molding Replacement - Body Lock Pillar Upper in Interior Trim.
- Remove the rear window trim finish panel. Refer to Upper Rear Trim Finish Panel Replacement in Interior Trim.
- Remove the shoulder belt retractor fastener from quarter inner upper panel.
- Push down on the shoulder belt retractor to disengage the shoulder belt pin and remove the shoulder belt assembly.
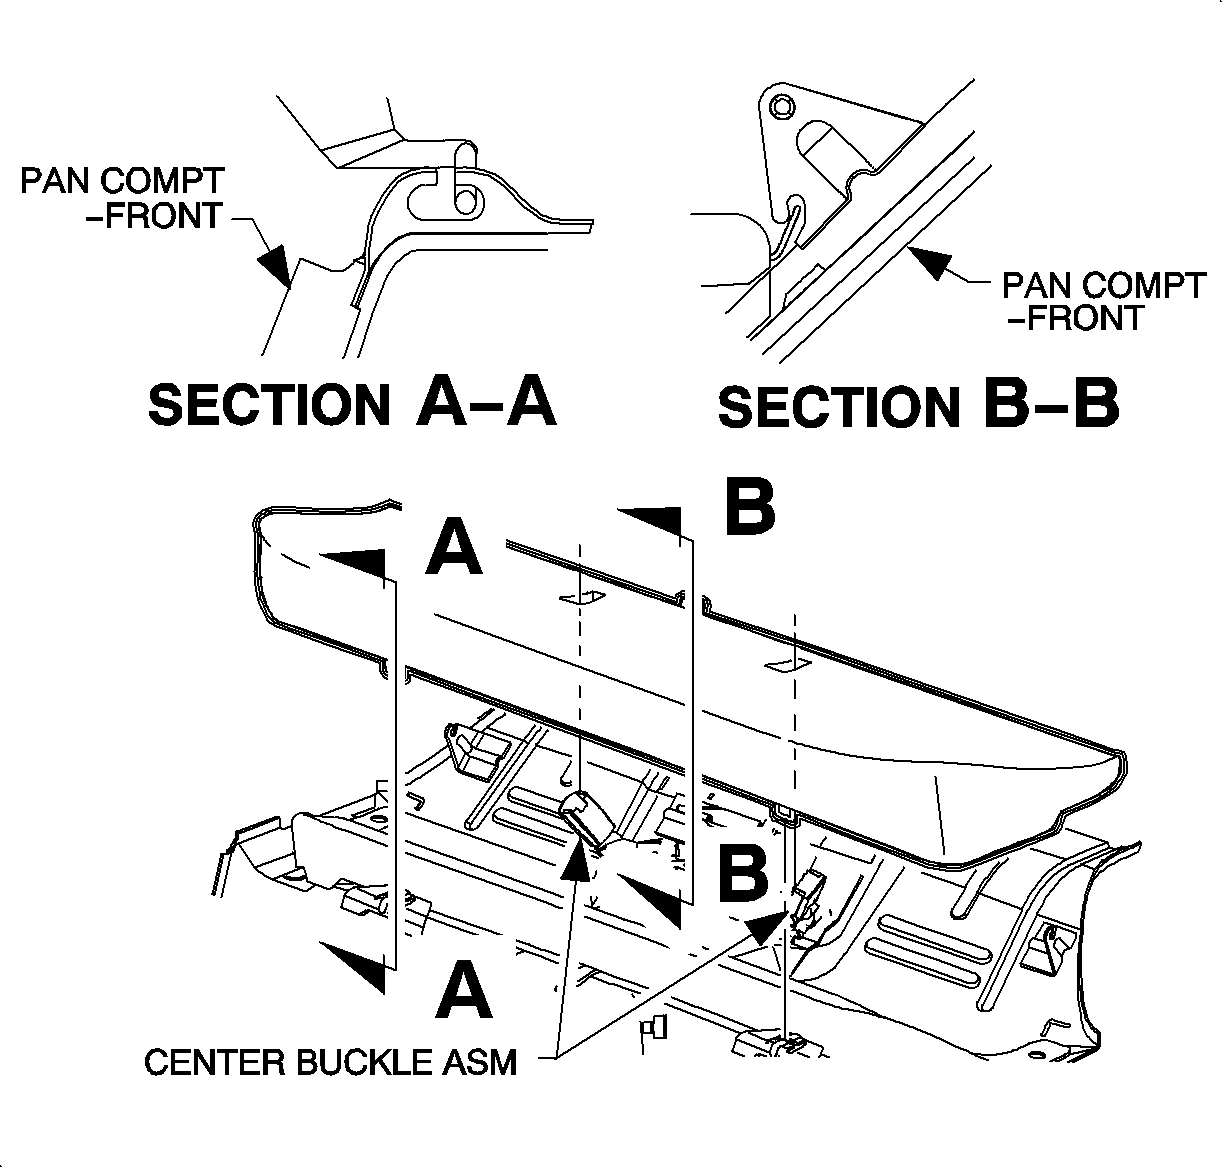
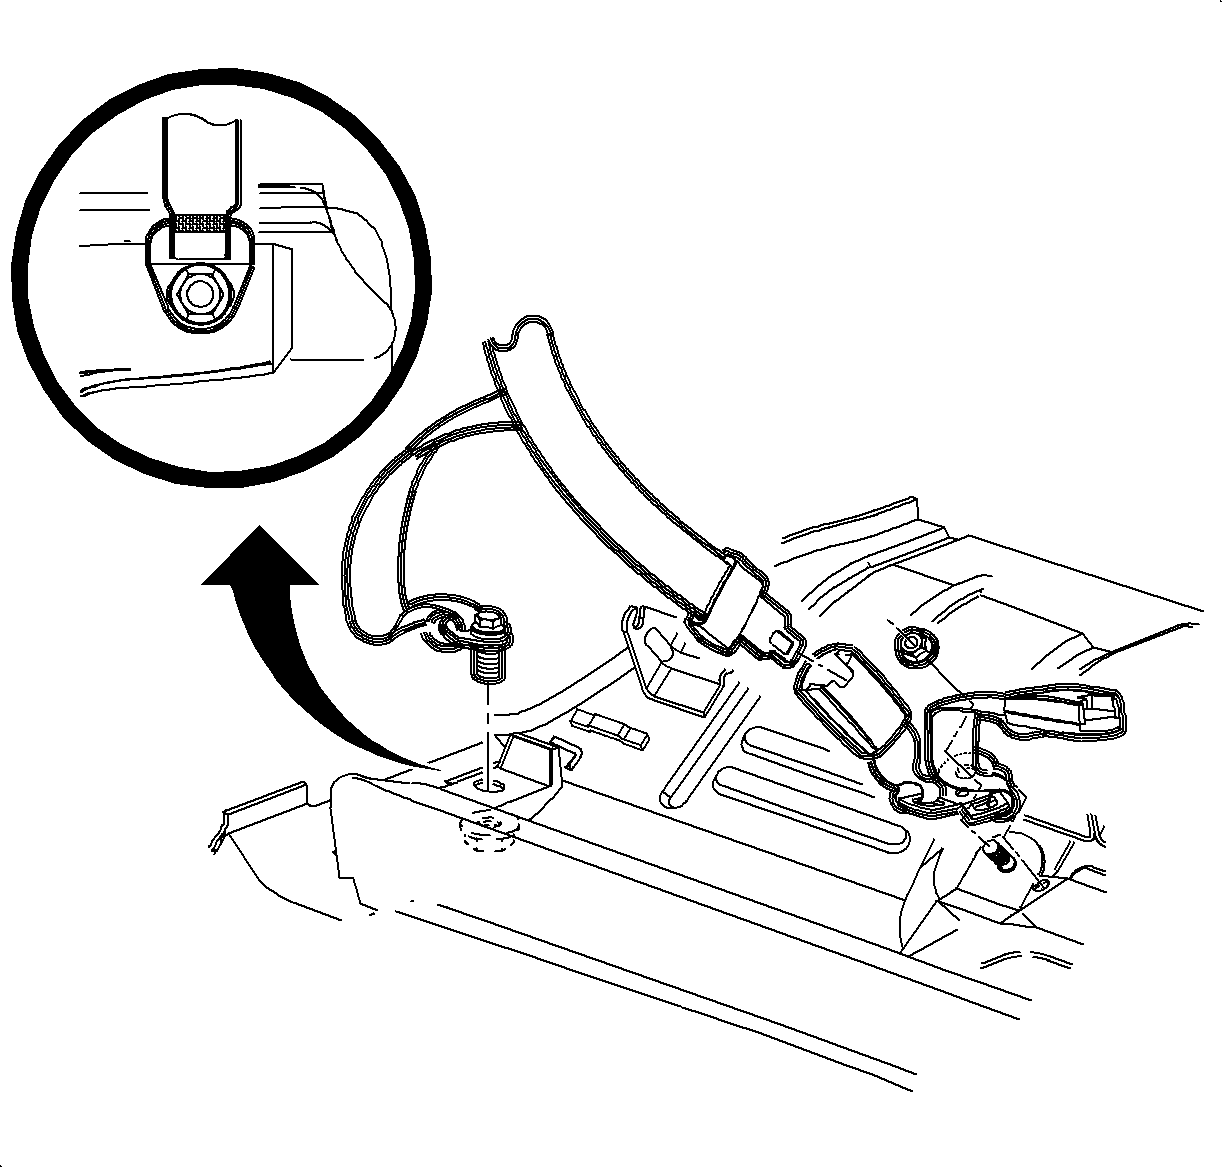
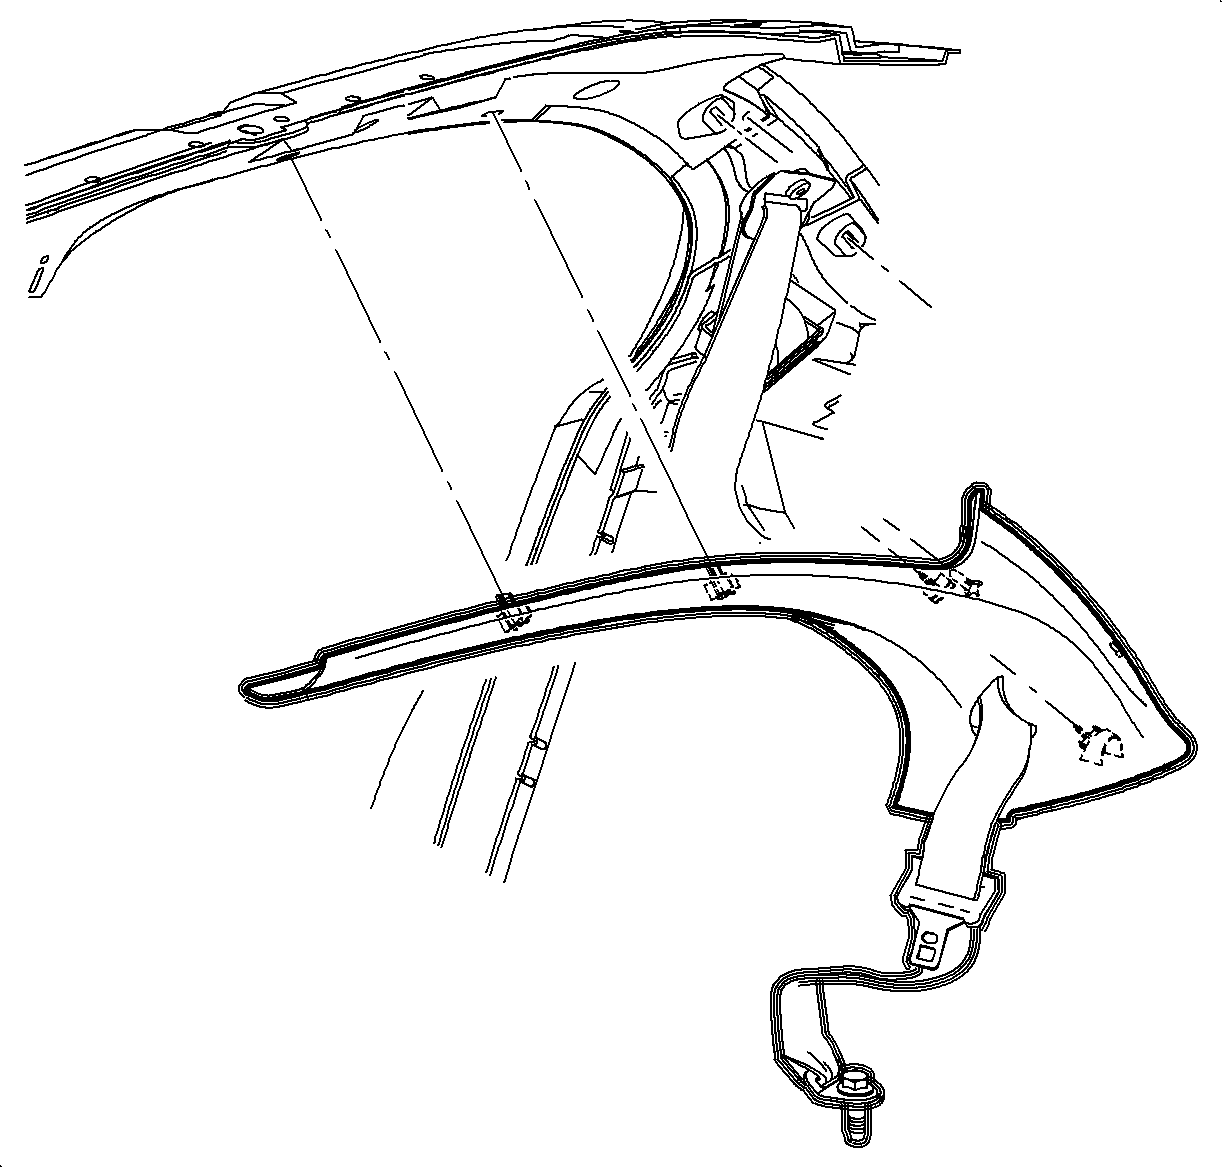

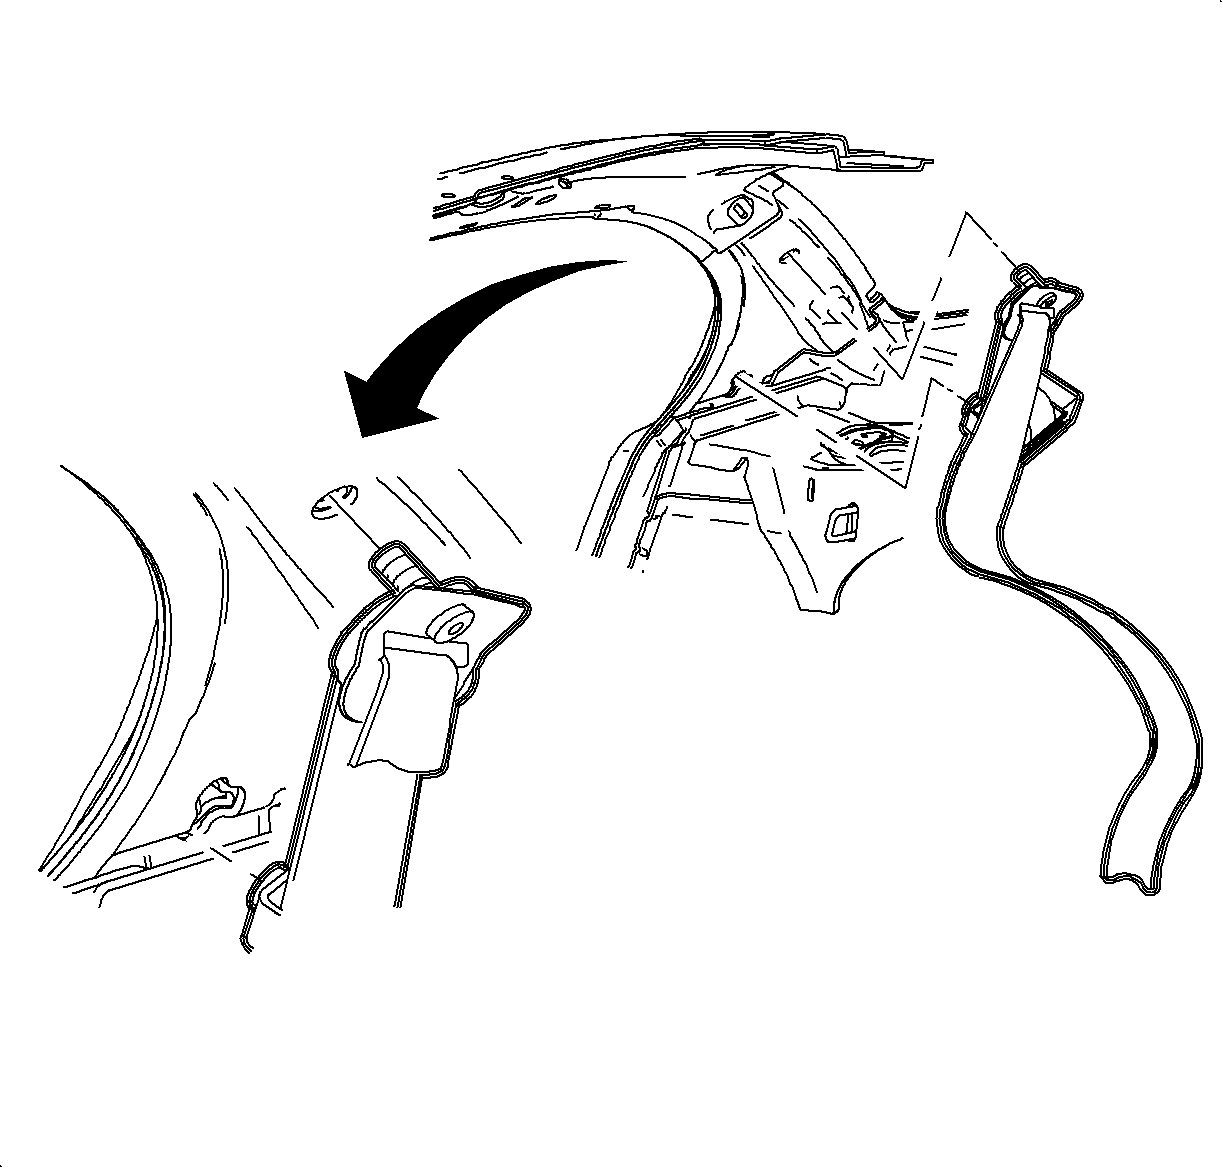
Installation Procedure
Important: Apply LOCTITE 242®, or equivalent, on all restraint fasteners prior to installation.
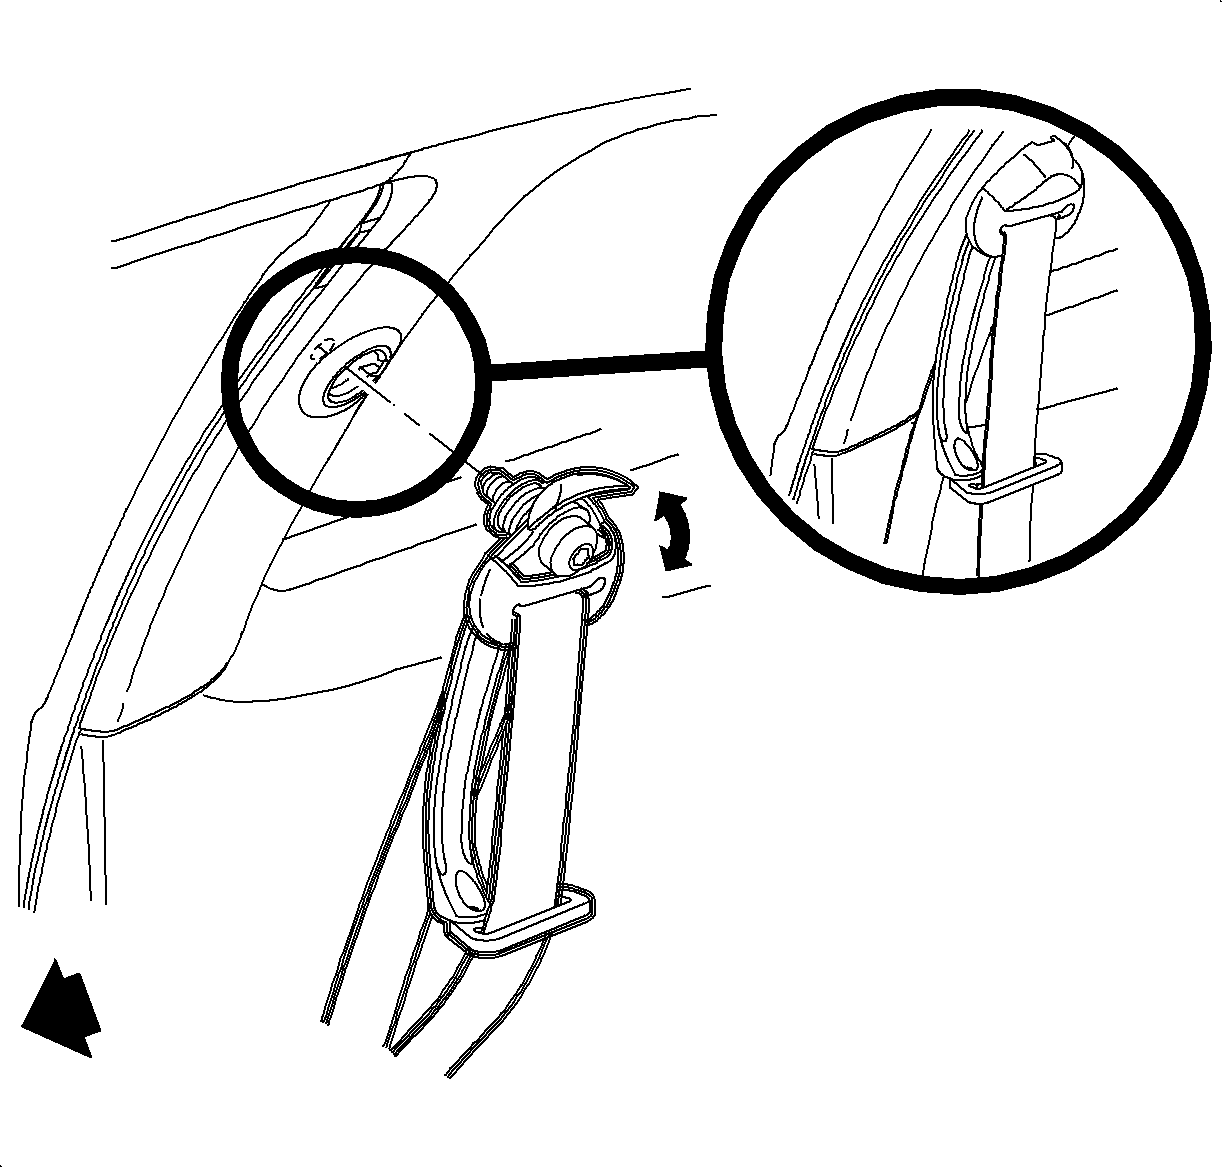
- Position the shoulder belt retractor assembly to quarter inner upper panel, inserting pin on restraint into hole in panel.
- Swing assembly up and push up until the shoulder belt retractor is locked in.
- Align the upper hole and tighten the captured fastener.
- Install the rear window trim finish panel. Refer to Upper Rear Trim Finish Panel Replacement in Interior Trim.
- Route the shoulder belt harness through the body lock pillar upper molding hole and then install the body lock pillar upper molding. Refer to Garnish Molding Replacement - Body Lock Pillar Upper in Interior Trim.
- Install the shoulder belt harness anchor bolt to the floor pan.
- Install the rear seat cushion. Refer to Rear Seat Cushion Replacement .
- Check function of the rear shoulder belt to ensure proper operation.

Notice: Refer to Fastener Notice in the Preface section.
Tighten
Tighten the seat belt unit retractor fastener to 50 N·m (37 lb ft).


Tighten
Tighten the rear shoulder belt-to-floor bolt to 50 N·m (37 lb ft).

