For 1990-2009 cars only
Removal Procedure
- Remove the front seats. Refer to Front Seat Replacement - Bucket in Seats.
- Remove the console. Refer to Console Replacement in Instrument Panel, Gages, and Console.
- Remove the front lower garnish molding by firmly pulling at the clip locations.
- Remove the rear cushion. Refer to Rear Seat Cushion Cover Replacement in Seats.
- On coupe, remove the quarter lower trim finish panel. Refer to Rear Quarter Trim Panel Replacement - Right Side .
- Remove the rear carpet retainer by firmly pulling at the clip location.
- Remove the center pillar lower molding by firmly pulling at the clip locations.
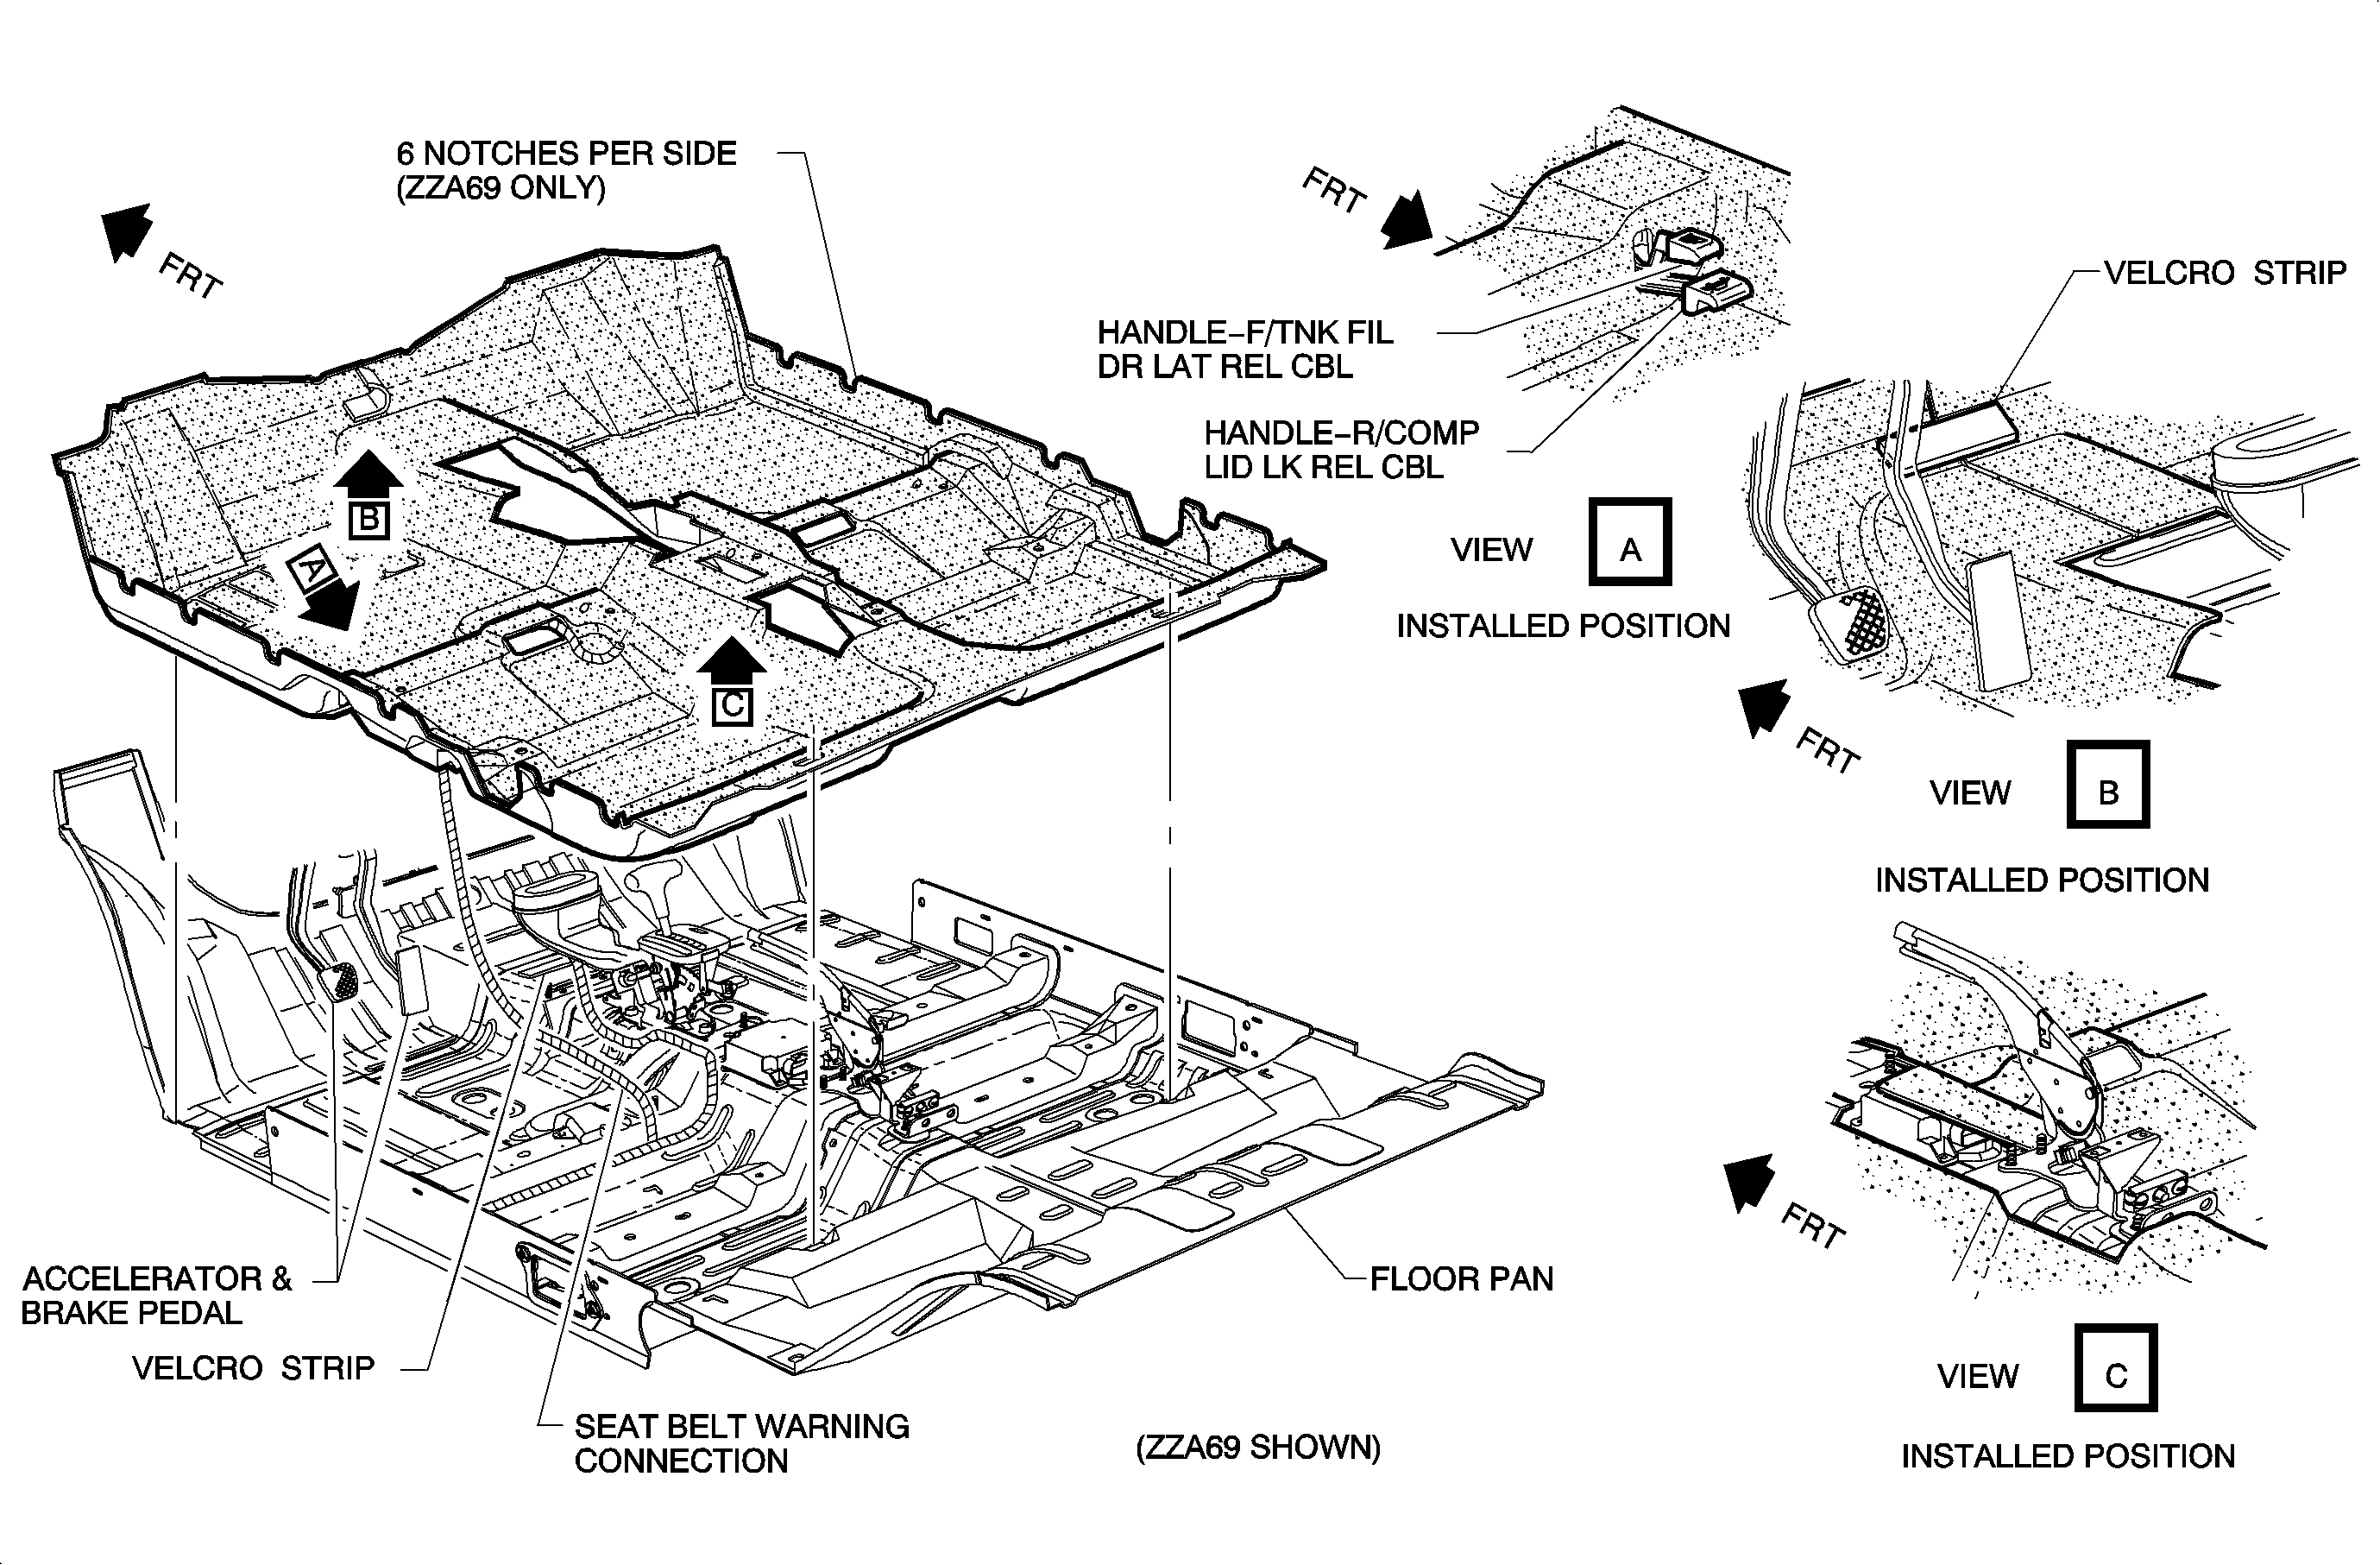
- Remove the carpet by guiding it off of the fuel door/rear compartment release levers.
- Remove the carpet from the vehicle.
Important: LHD shown, RHD similar.
Installation Procedure
- Install the carpet into the vehicle.
- Guide the carpet around the fuel door/rear compartment release levers.
- Tuck under and around the instrument panel center location. Install the center pillar lower molding by firmly pushing at the clip locations.
- Install the front lower garnish molding by firmly pushing at the clip locations.
- Install the rear carpet retainer by firmly pushing at the clip locations.
- On the coupe, install the quarter lower trim finish panel. Refer to Rear Quarter Trim Panel Replacement - Right Side .
- Install the rear seat cushion. Refer to Rear Seat Cushion Cover Replacement in Seats.
- Install the center console. Refer to Console Replacement in Instrument Panel, Gages, and Console.
- Install the front seats. Refer to Front Seat Replacement - Bucket in Seats.
Important: LHD shown, RHD similar.
Important: On the coupe, be certain to observe the orientation and torque requirements of the slide bar because it is crucial to correct the operation of the seat belt system.
