Rear Quarter Trim Panel Replacement - Right Side Coupe
Removal Procedure
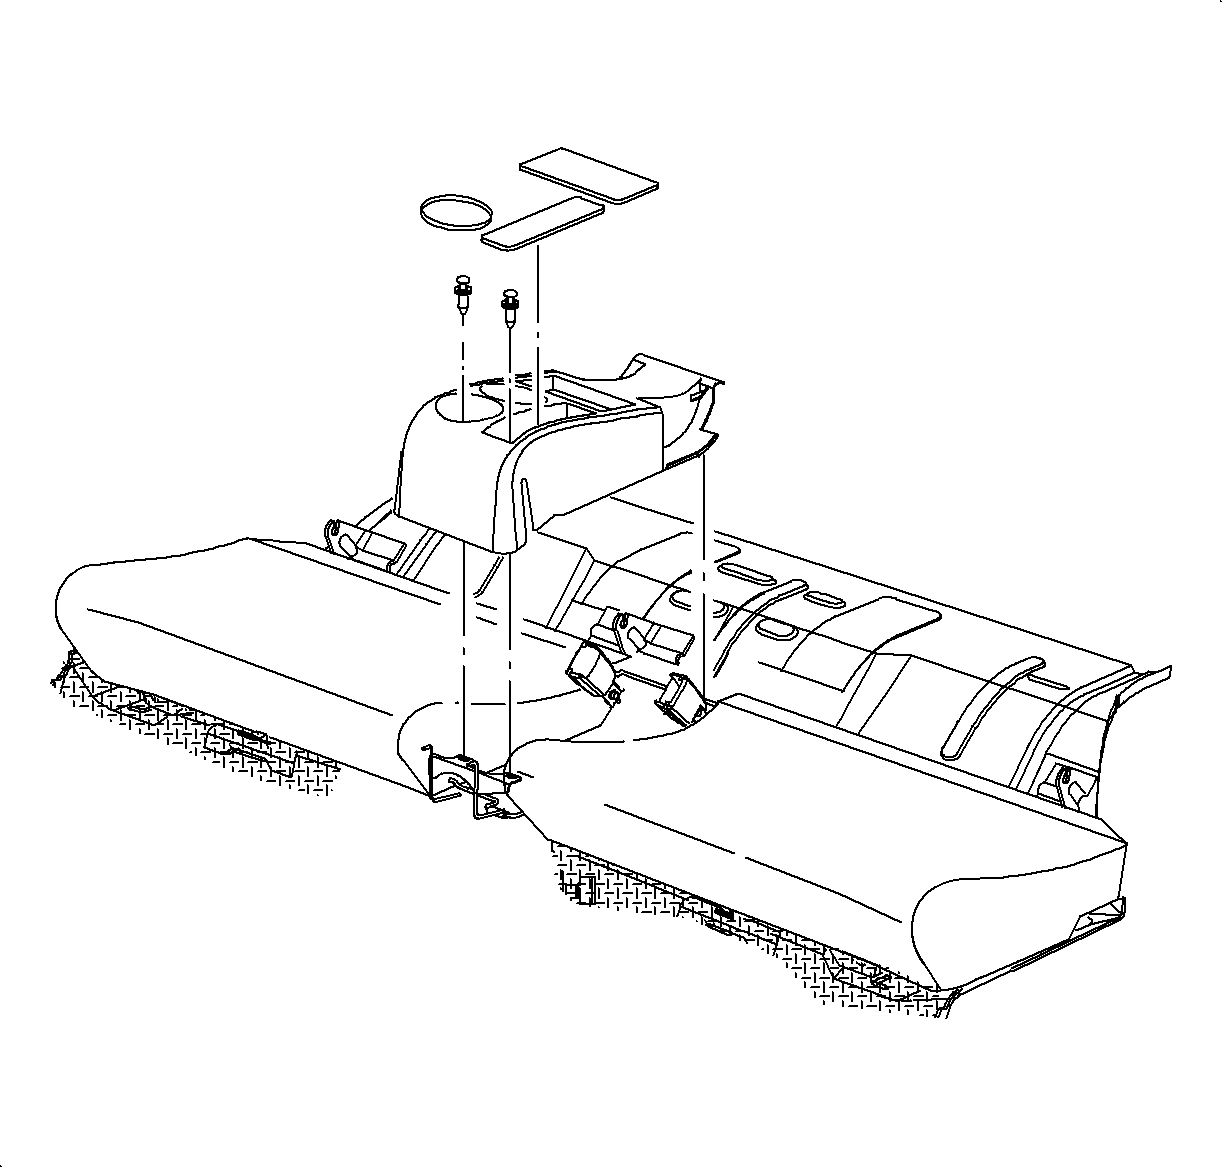
- Remove the rear seat cushion. Refer to Rear Seat Cushion Replacement in Seats.
- Lower the rear seat back and remove the push pin rivets from the rear window trim finish panel.
- Remove the rear fastener of the front lower hinge garnish molding to partially loosen the molding at the quarter trim panel location.
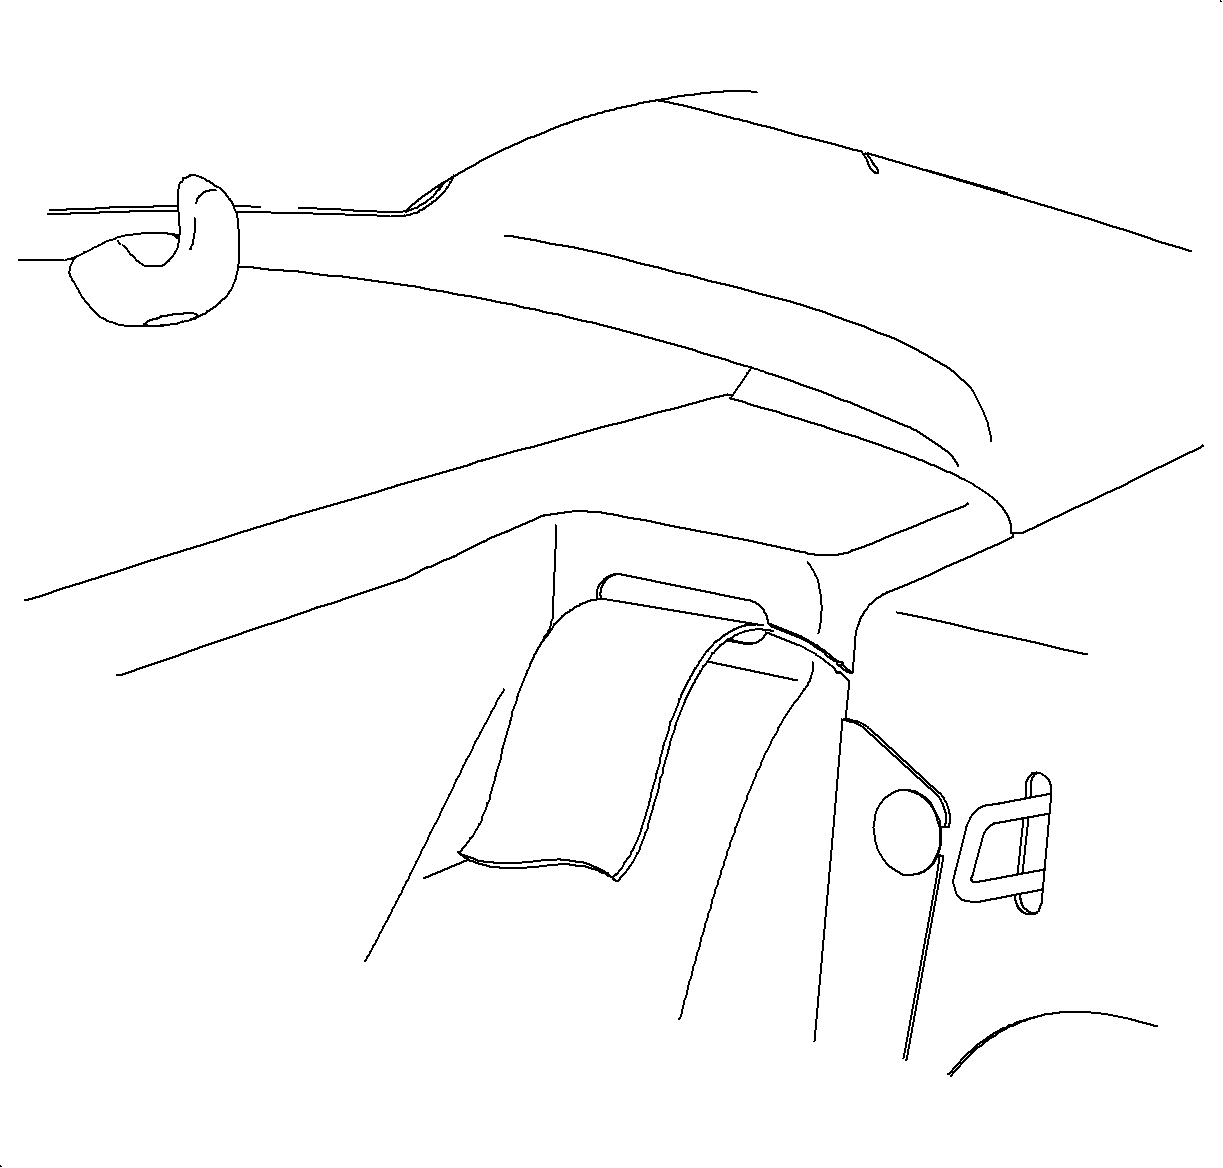
- Slide the belt assembly out of the trim panel.
- Remove the Torx® fasteners that attach the seat belt slide bar and remove the slide bar.
- Remove the seat belt retractor access door.
- Remove the push pin.
- Remove the Torx® fastener and the seat belt unit retractor.
- Unsnap the seat belt bolt cover.
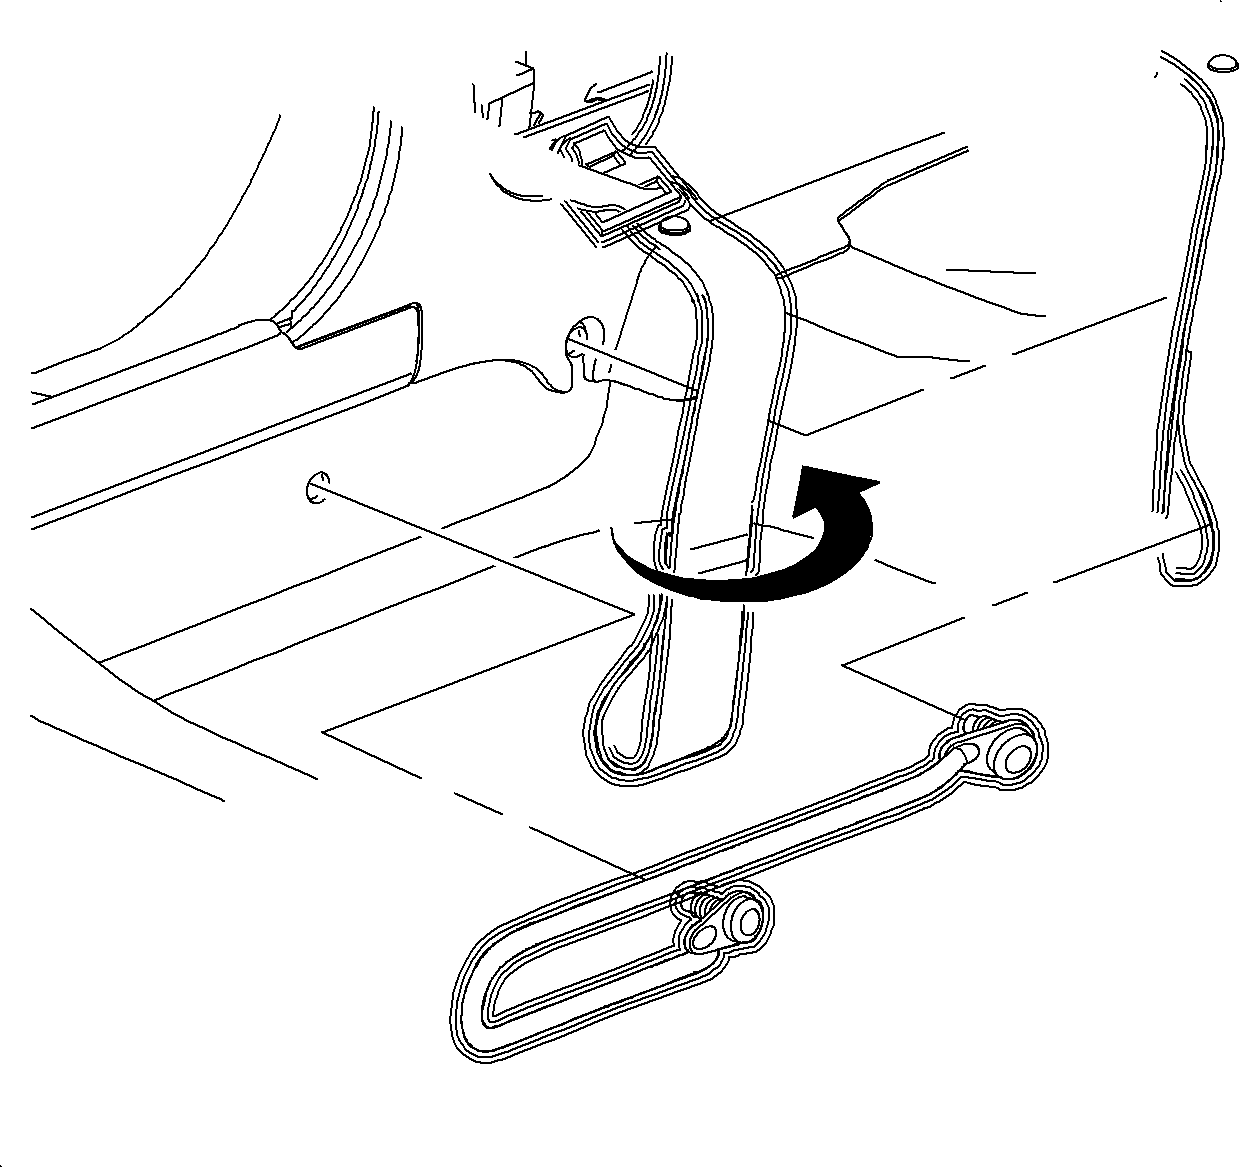
- Loosen the Torx® fastener and rotate the presenter arm forward to disengage the presenter arm guide notch from the spaceframe.
- Remove the presenter arm and the seat belt unit.
- On first design vehicles only, disengage the rear clip of the windshield garnish molding to allow the removal of the rear upper garnish molding.
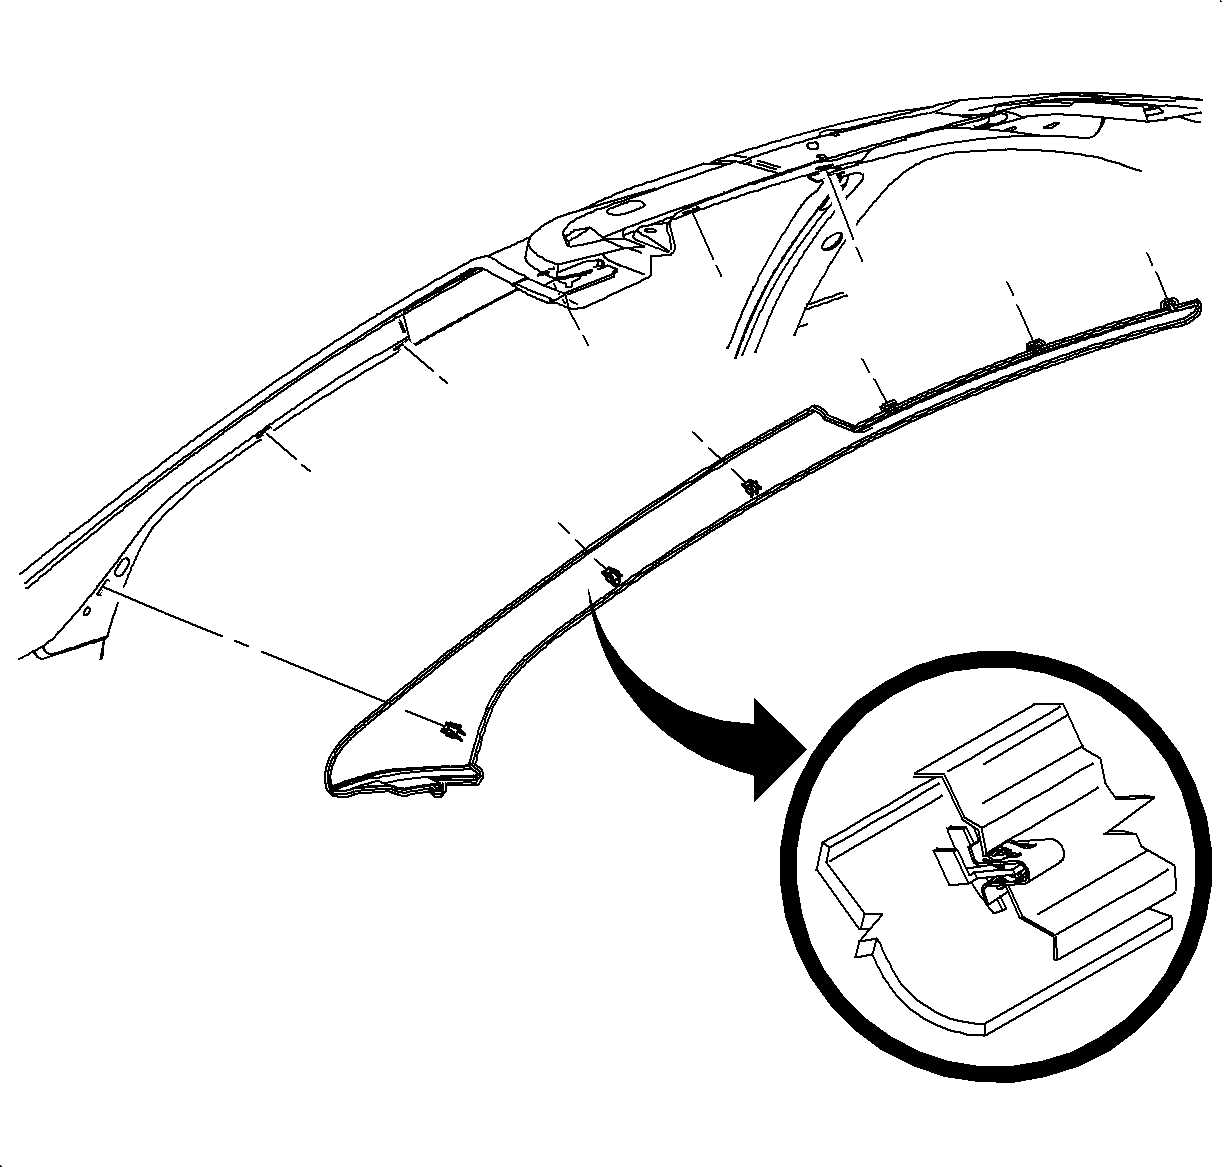
- Remove the quarter window garnish molding by disengaging the clips. Refer to the following:
- Pull at the top of the quarter lower trim panel molding to disengage one push pin from the spaceframe.
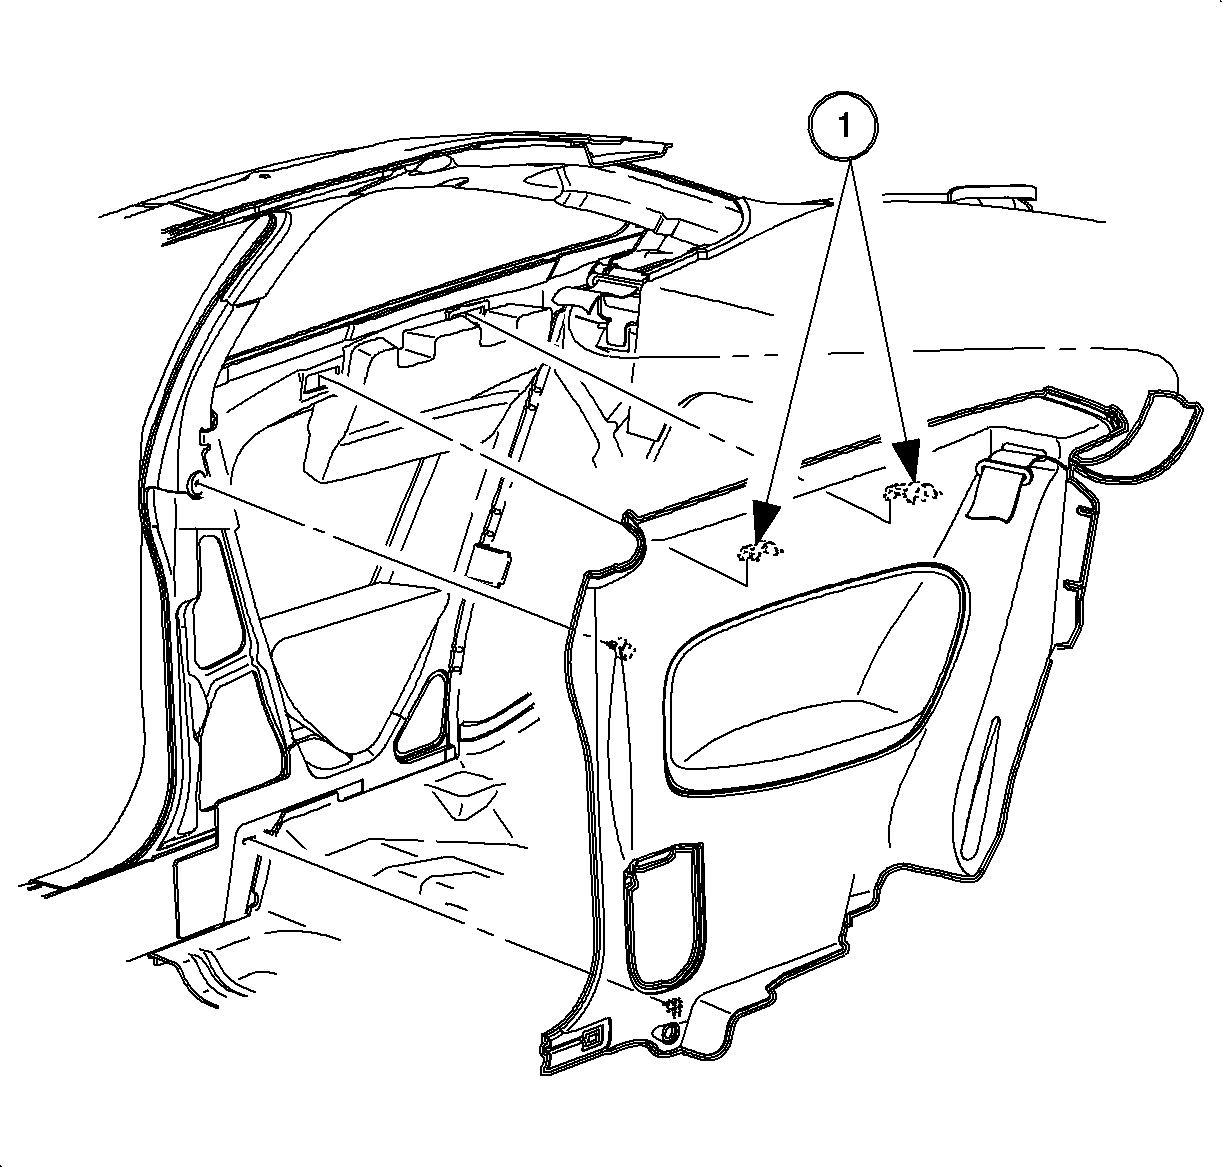
- Disengage one clip attaching the quarter trim panel. Lift the panel to disengage two hooks (1) from the quarter panel assembly.
- Move the quarter trim panel away from the spaceframe.

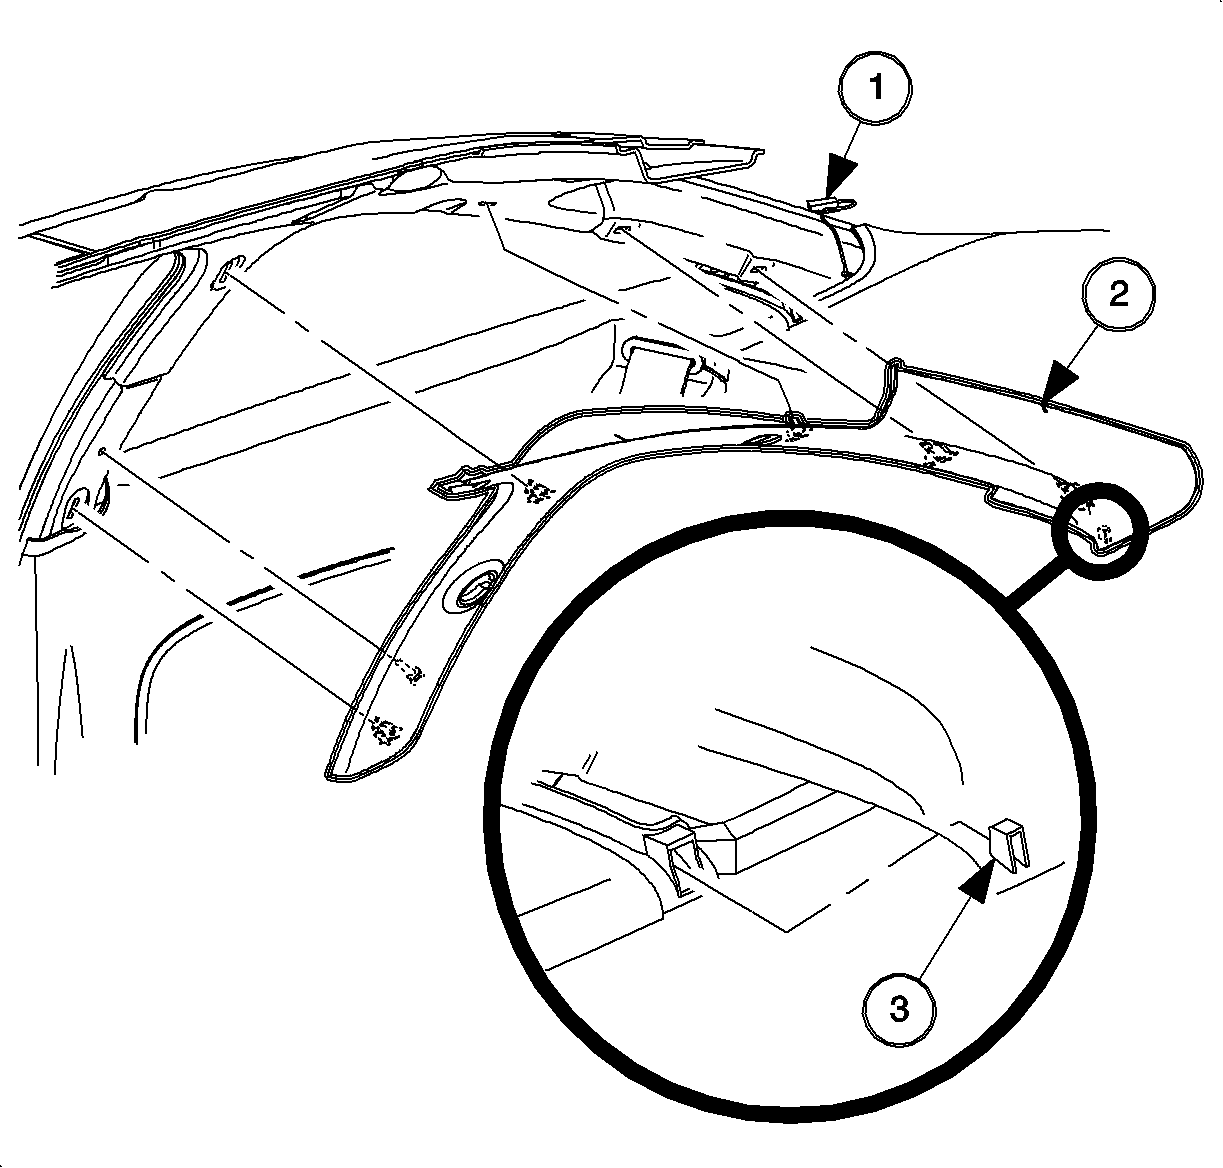
| • | Defogger Lead (1) |
| • | Defogger Notch (2) |
| • | Interlock Tab (3) |
Installation Procedure
- Route the seat belt webbing in the quarter trim panel assembly.
- Position the trim panel to the spaceframe and engage the hooks (1).
- Push the top of the panel to engage one push pin.
- Push in the trim panel clip.
- Install the push pin fasteners to attach the rear window finish panel and the quarter trim panel to the spaceframe.
- Position and engage the hinge pillar garnish molding clips previously disengaged.
- Position the quarter window garnish molding in place and engage the clips. Refer to the following:
- Install the presenter arm and the seat belt unit assembly.
- Install the seat belt unit retractor.
- Install the seat belt retractor access door.
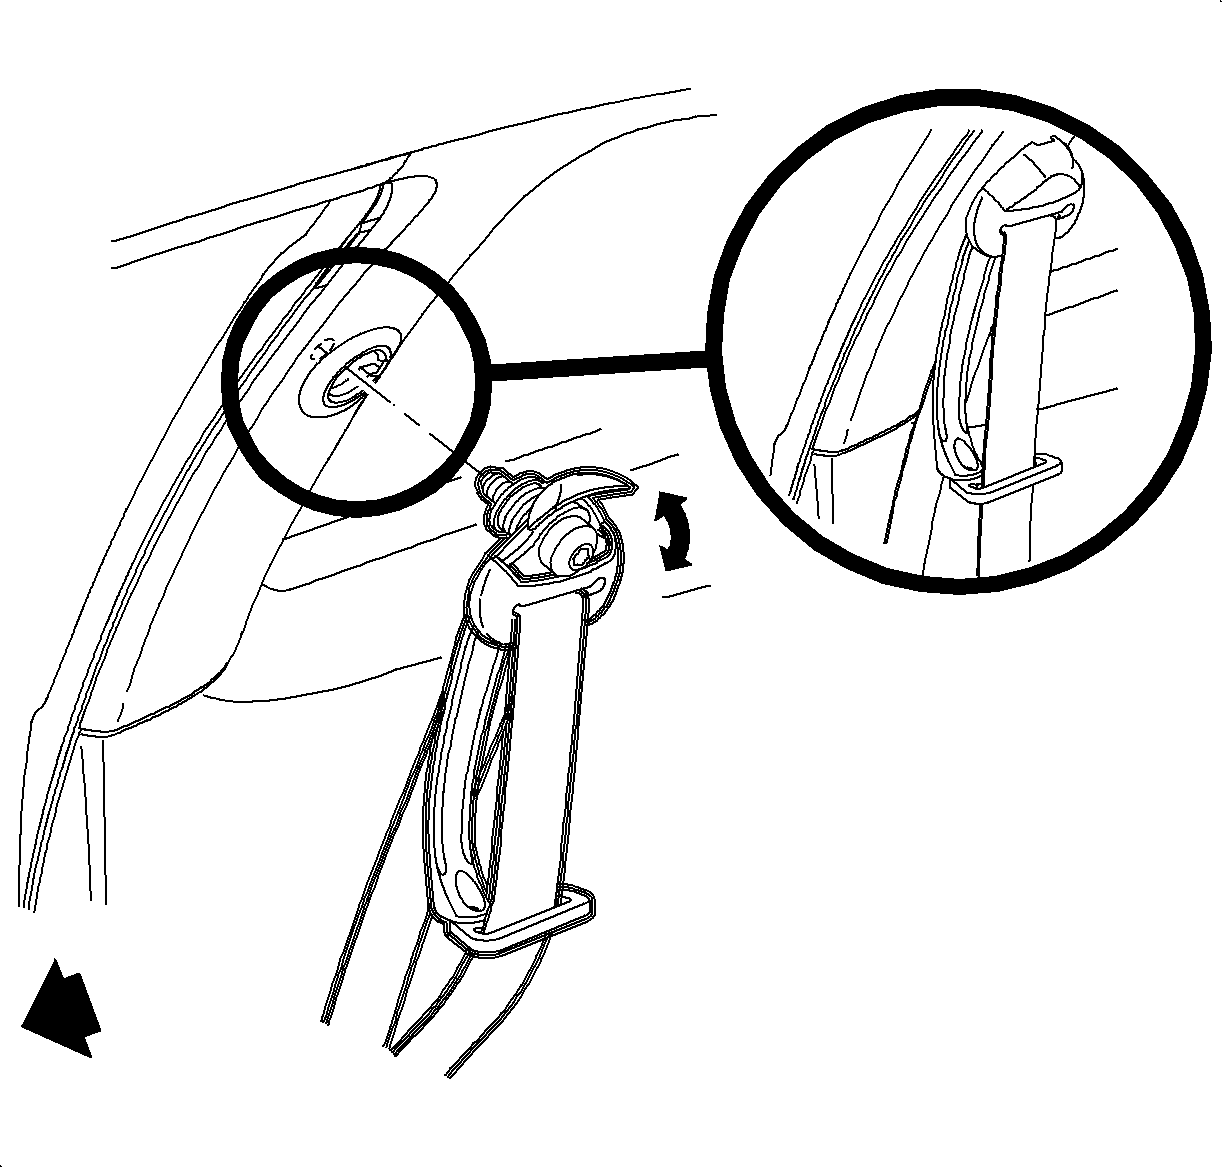
- Grasp the seat belt at the unattached end.
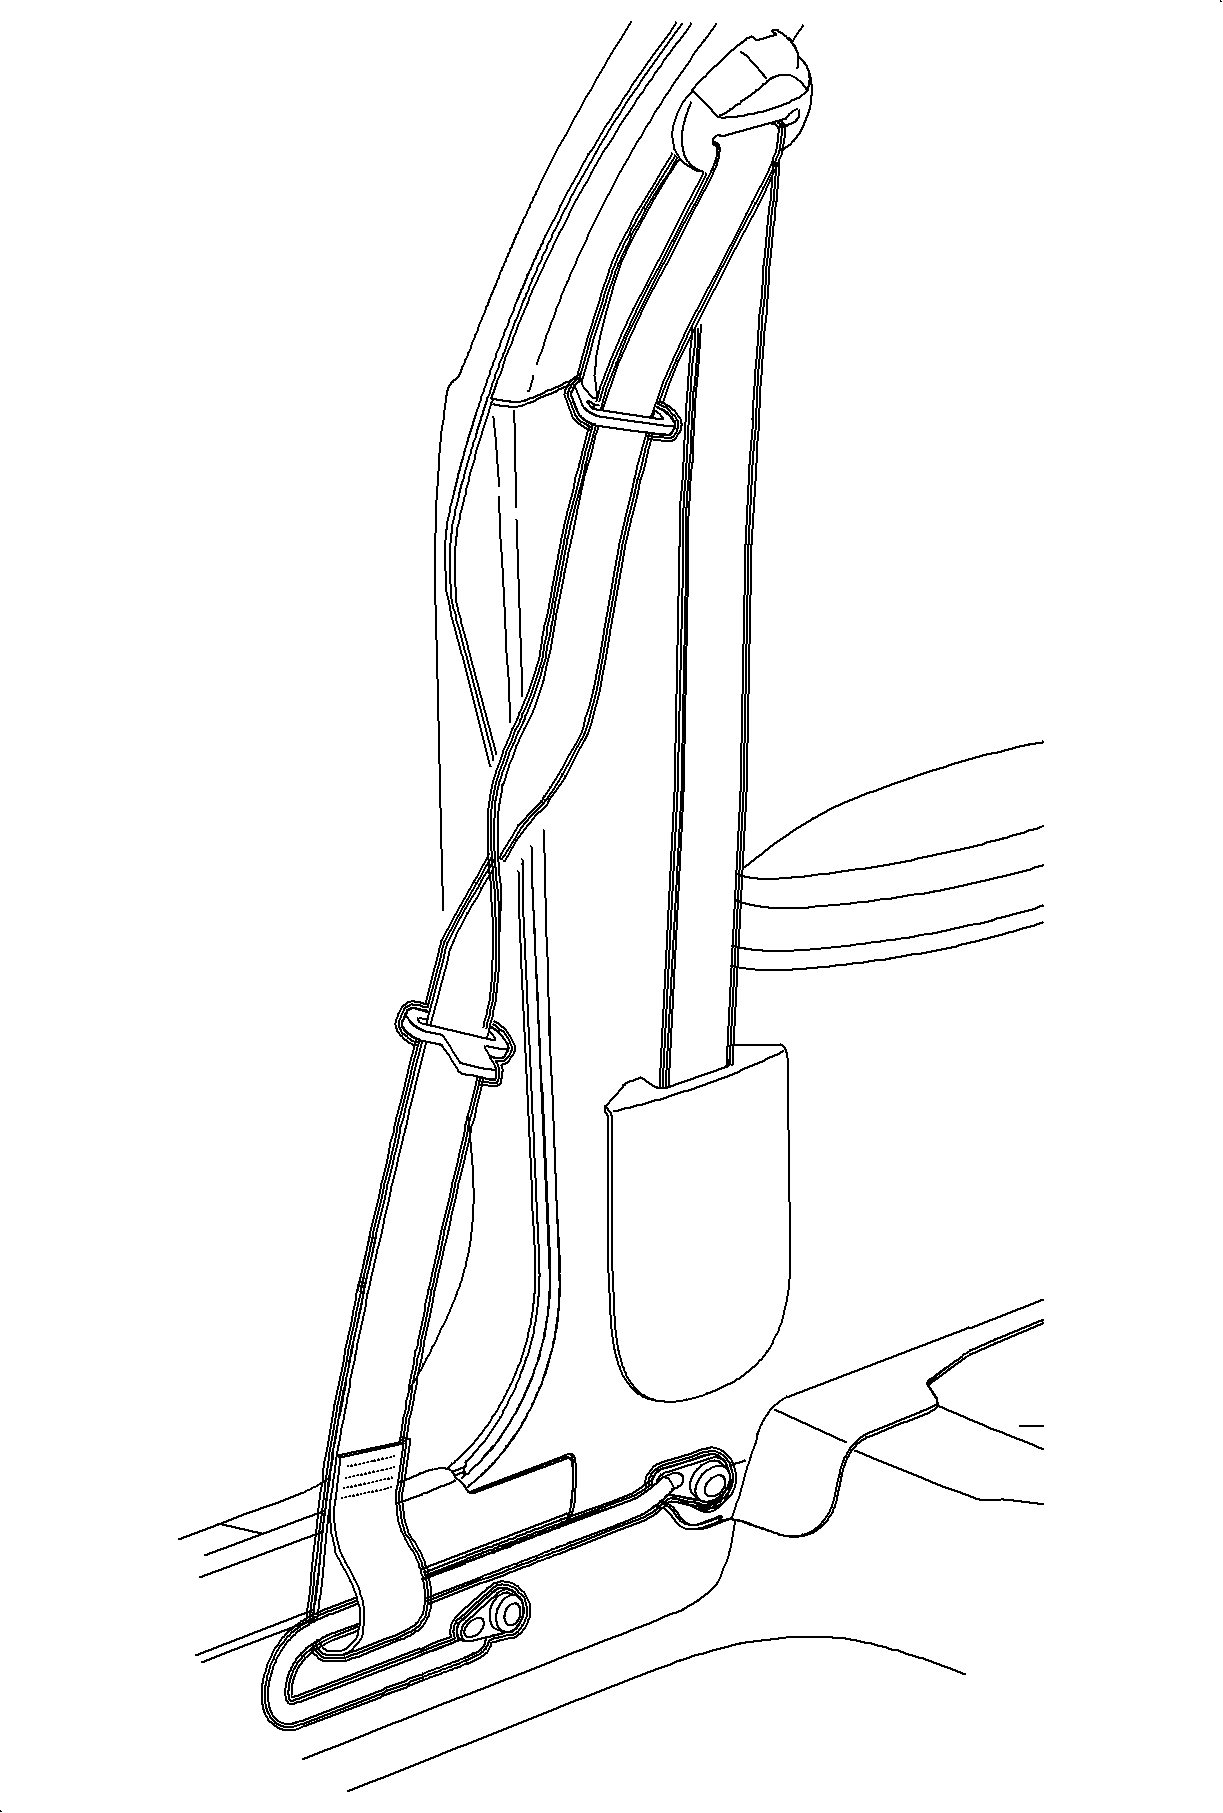
- Rotate the belt loop inboard to the center of the car 180 degrees rearward. Place the loop over the slide bar as pictured.
- Install slide bar.
- Check the function of the seat belt.
- Install the rear seat cushion. Refer to Rear Seat Cushion Replacement in Seats.


Important: Engage the interlock extension of the rear upper garnish molding to the quarter trim molding.

Caution: The head curtain inflator module tethers must be routed correctly. Improper routing may result in personal injury or improper curtain airbag deployment.
Important: Ensure that the head curtain inflator module tether is not hanging below the headliner edge. If so, tuck the tether underneath the headliner.
| • | Defogger Lead (1) |
| • | Defogger Notch (2) |
| • | Interlock Tab (3) |

Caution: Observe the orientation of the presenter arm assembly and the seat belt unit. Incorrect orientation may result in personal injury.
Caution: Apply Loctite 242® Threadlocker US P/N 12345382 (Canadian P/N 10953489), or equivalent, on all restraint bolts/nuts before installation. Failure to use such threadlocker correctly may result in personal injury.
Tighten
Tighten the presenter arm bolt to 50 N·m
(37 lb ft).

Caution: Apply Loctite 242® Threadlocker US P/N 12345382 (Canadian P/N 10953489), or equivalent, on all restraint bolts/nuts before installation. Failure to use such threadlocker correctly may result in personal injury.
Tighten
Tighten the shoulder belt retractor bolts to 50 N·m
(37 lb ft).
Important: Make certain the cut and stitched side of the belt loop is facing outboard and the belt is straight as pictured.
Caution: Apply Loctite 242® Threadlocker US P/N 12345382 (Canadian P/N 10953489), or equivalent, on all restraint bolts/nuts before installation. Failure to use such threadlocker correctly may result in personal injury.
Tighten
Tighten the shoulder belt slider bar to 50 N·m
(37 lb ft).
