For 1990-2009 cars only
Garnish Molding Replacement - Wheelhouse Wagon
Removal Procedure
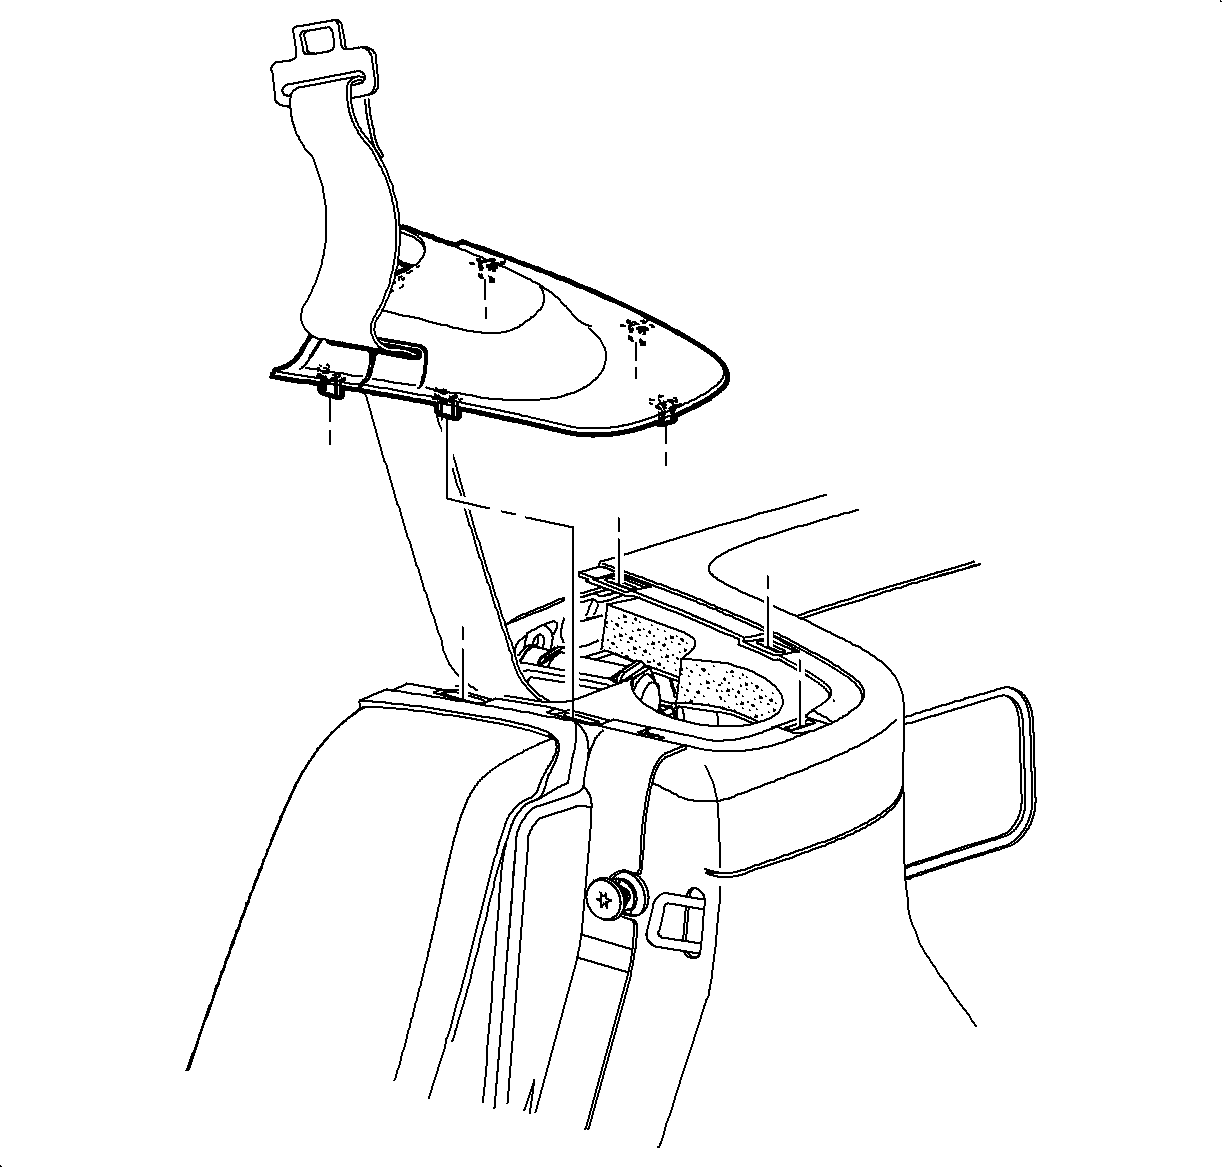
- Remove the rear wheelhouse trim finish panel by pulling up to disengage the clips. Slip the shoulder belt out of trim finish panel at the slit in the cover.
- Remove the body lock pillar molding. Refer to Body Lock Pillar Trim Finish Molding Replacement - Lower .
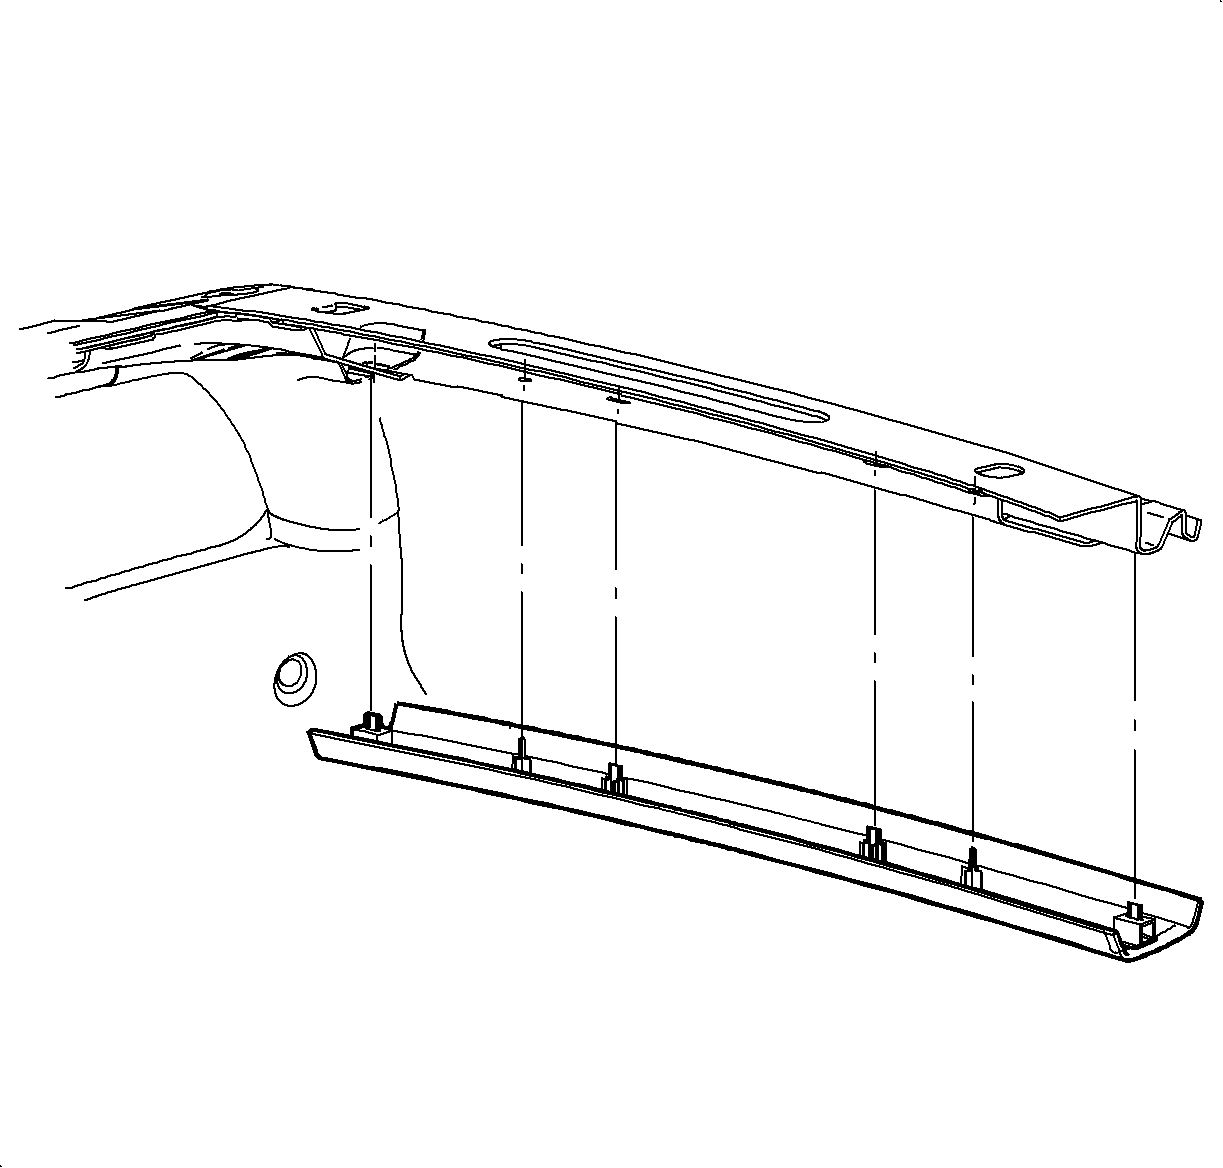
- Remove the headliner rear header trim panel assembly by pulling at the clip locations to disengage the clips.
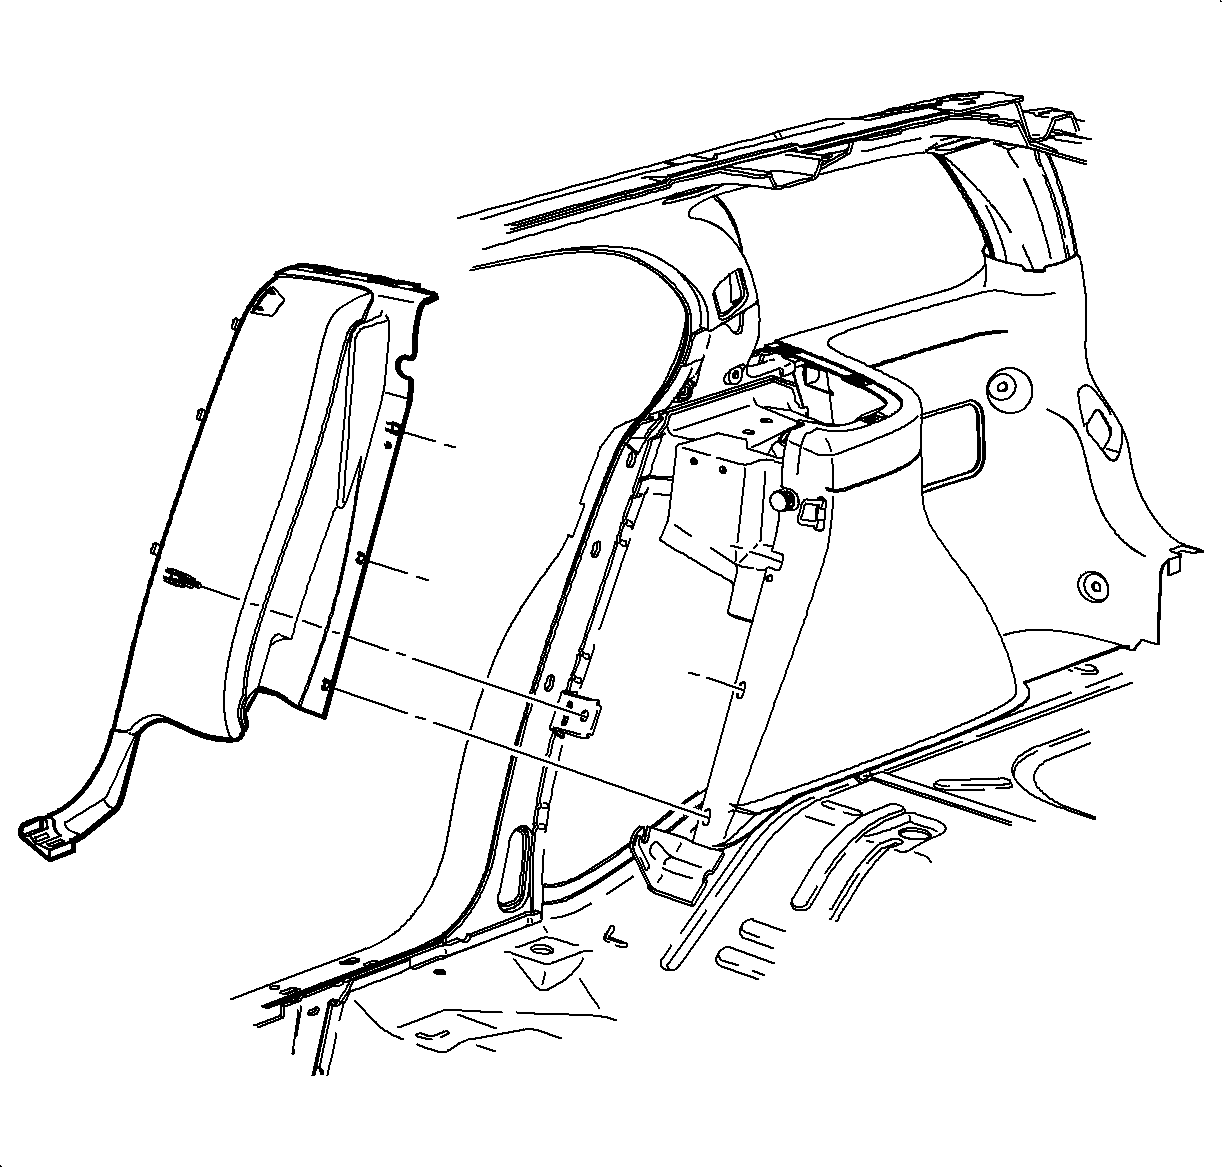
- Remove the corner upper garnish molding by pulling at the clip locations to disengage the clips.
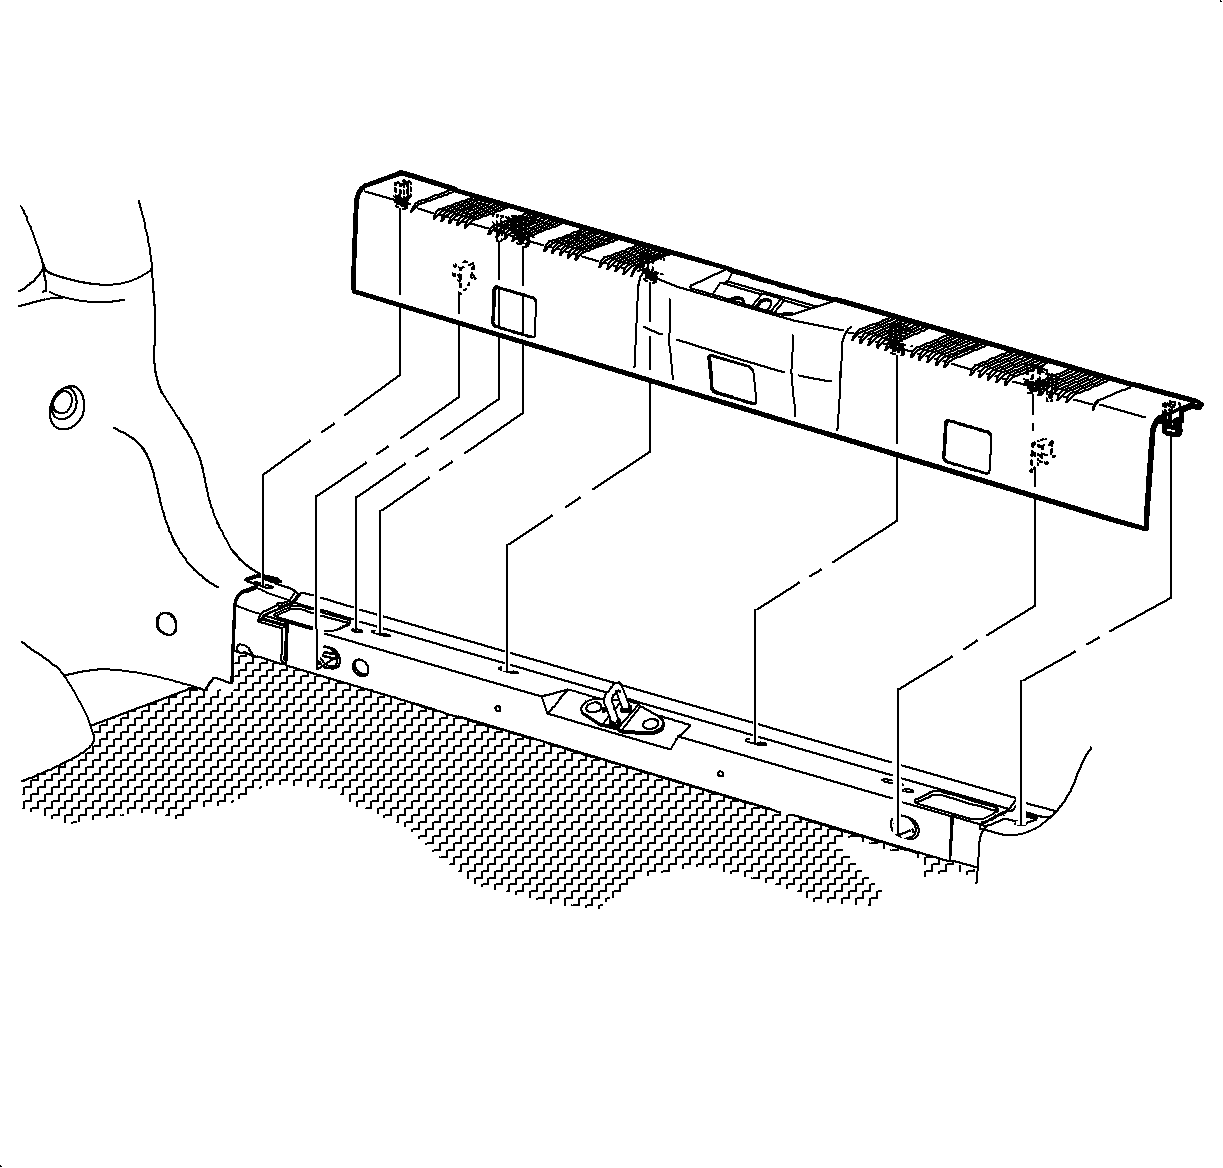
- Remove the rear end trim finish panel by pulling to disengage the clips.
- Remove the rear cargo net retainers by twisting in a counterclockwise direction.
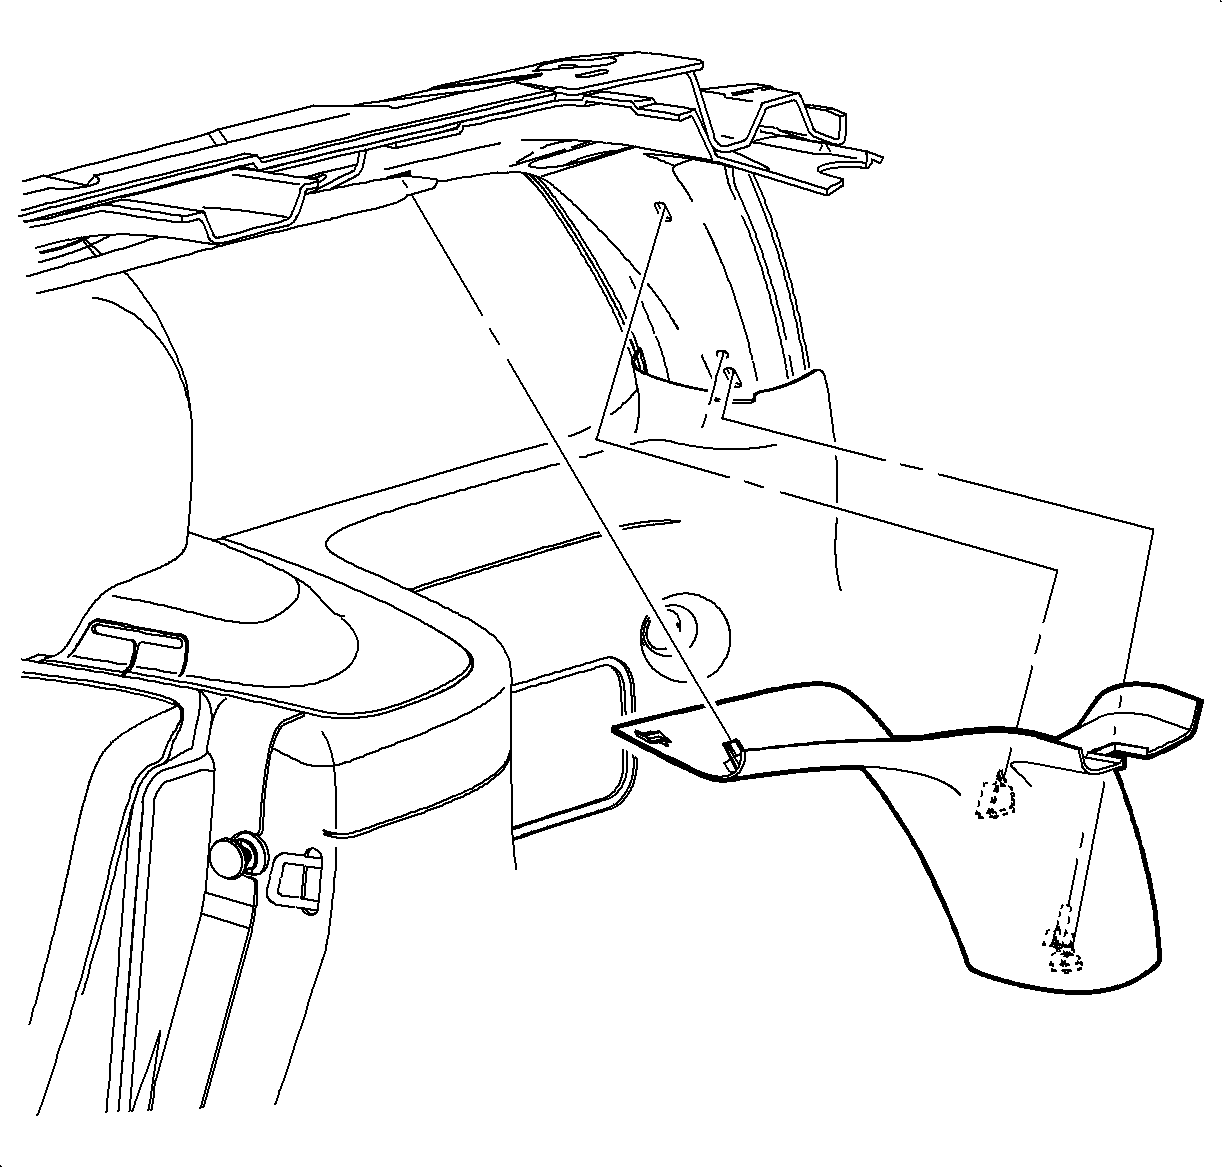
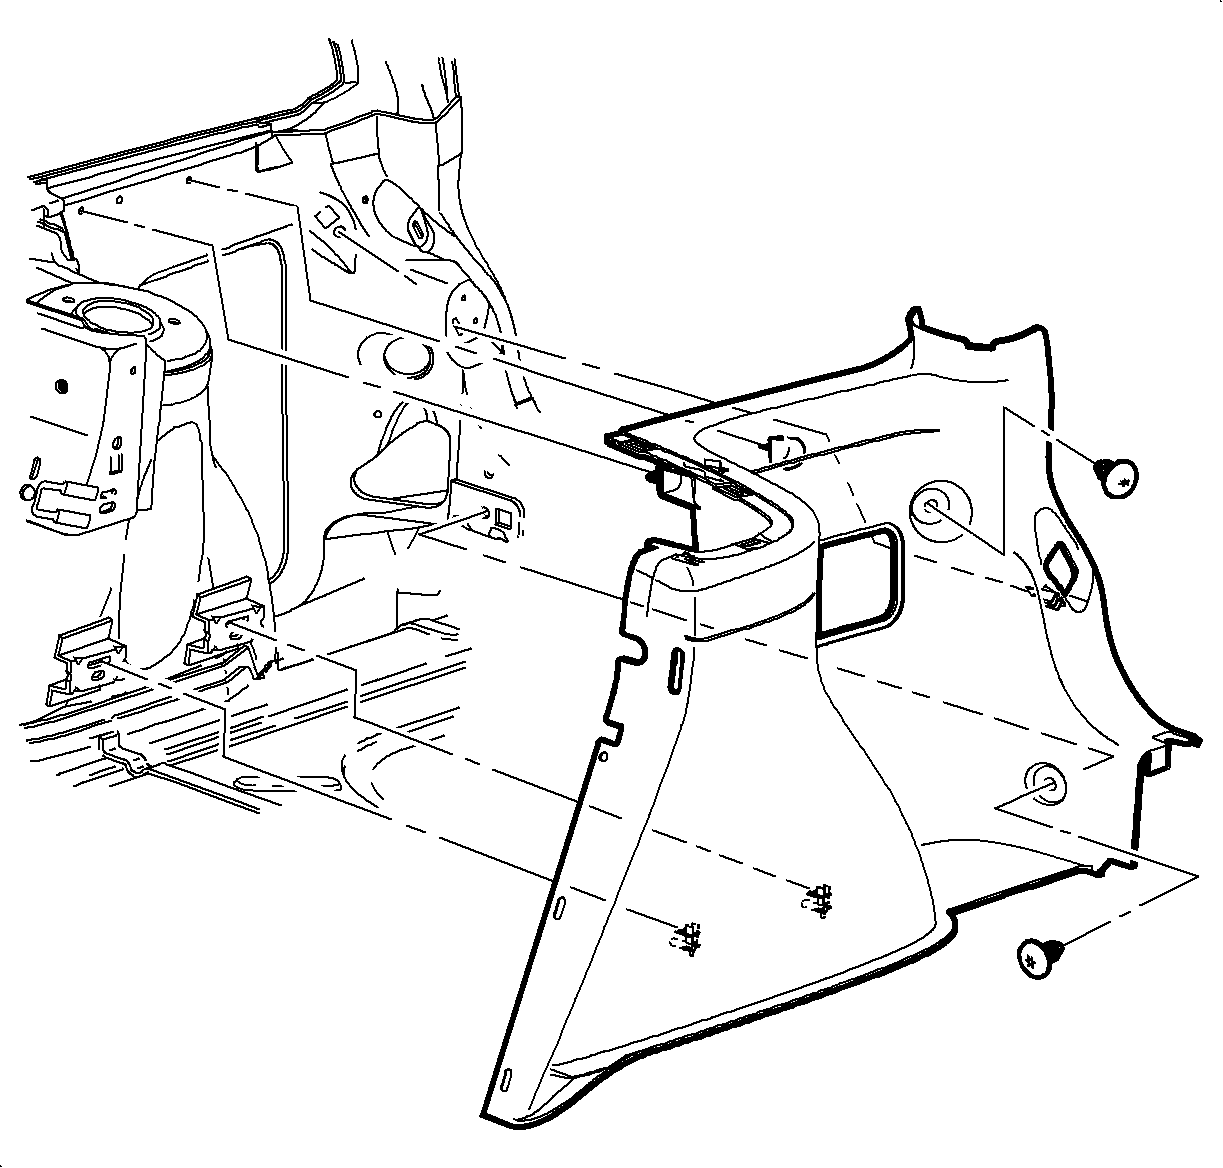
- Remove the wheelhouse garnish molding by pulling at the clip locations to disengage the clips.
Installation Procedure
- Position the wheelhouse garnish molding to the vehicle by pushing at the attaching clip locations to engage the clips.
- Install the cargo cover net retainers by twisting clockwise.
- Install the rear end trim finish panel by pushing at the clip locations to engage the attaching clips.
- Position the corner upper garnish molding to the vehicle. Push at the attaching clip locations to engage the clips.
- Install the headliner rear header trim panel by pushing at the clip locations to engage the attaching clips.
- Install the body lock pillar molding. Refer to Body Lock Pillar Trim Finish Molding Replacement - Lower .
- Route the shoulder belt into the rear wheelhouse trim finish panel at the slit. Position the rear wheelhouse trim finish panel to the vehicle. Push at the attaching clip locations to engage the clips. Check to make sure the shoulder belt is not twisted and operates properly.


