Rear Side Door Trim Panel Replacement Coupe
Removal Procedure
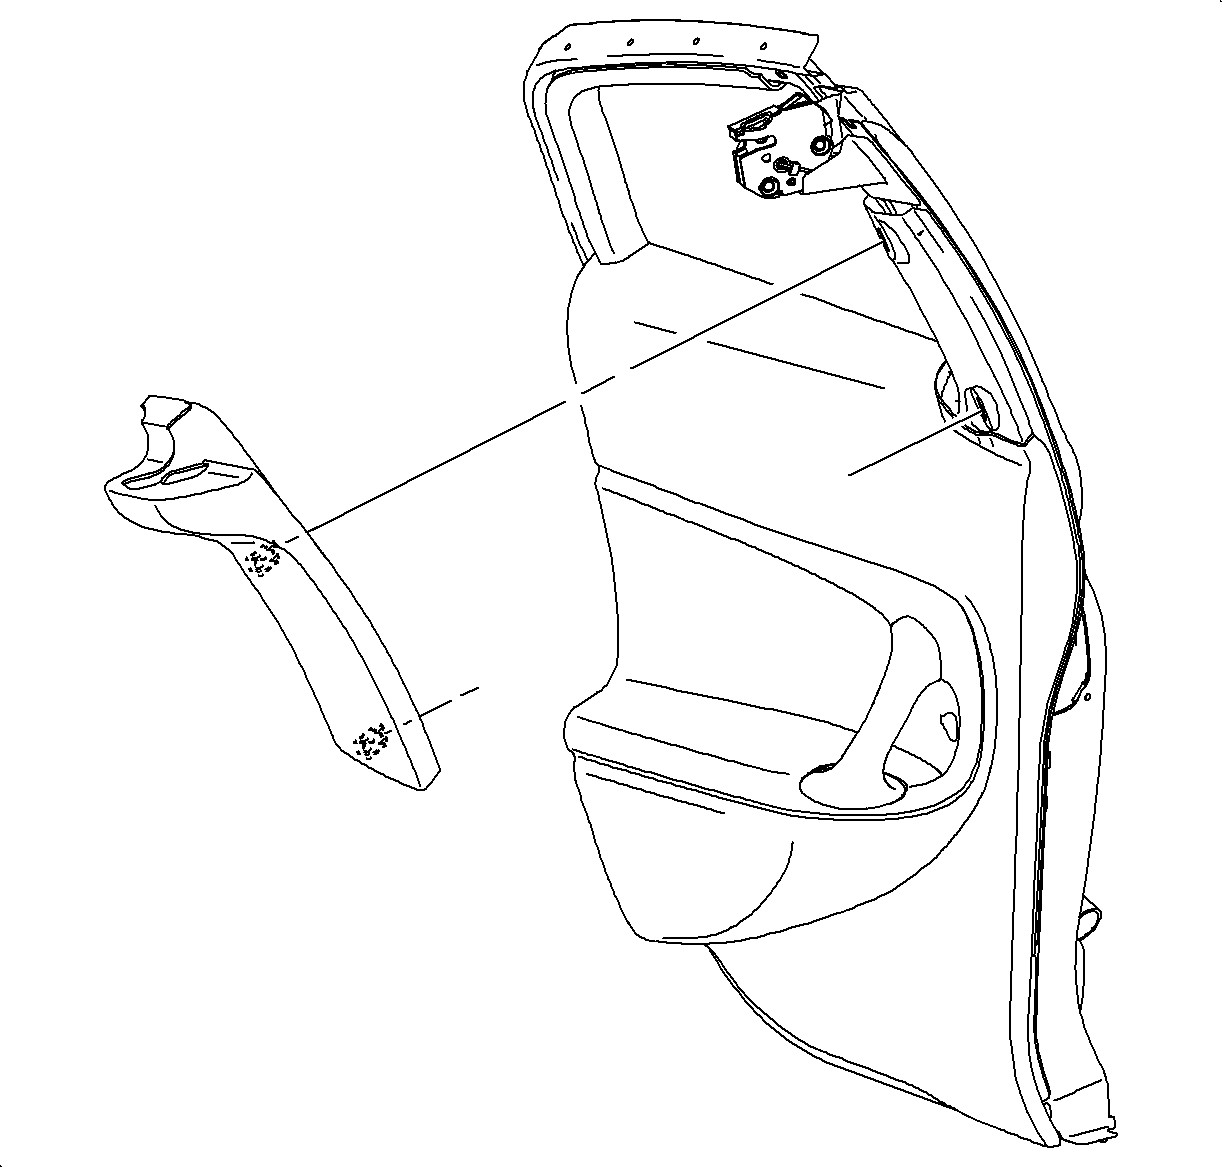
- Remove the rear side door upper trim panel by pulling.
- Remove the rear side door inside handle opening cover by inserting a small, non-marring tool into the pry point located at the bottom of the cover.
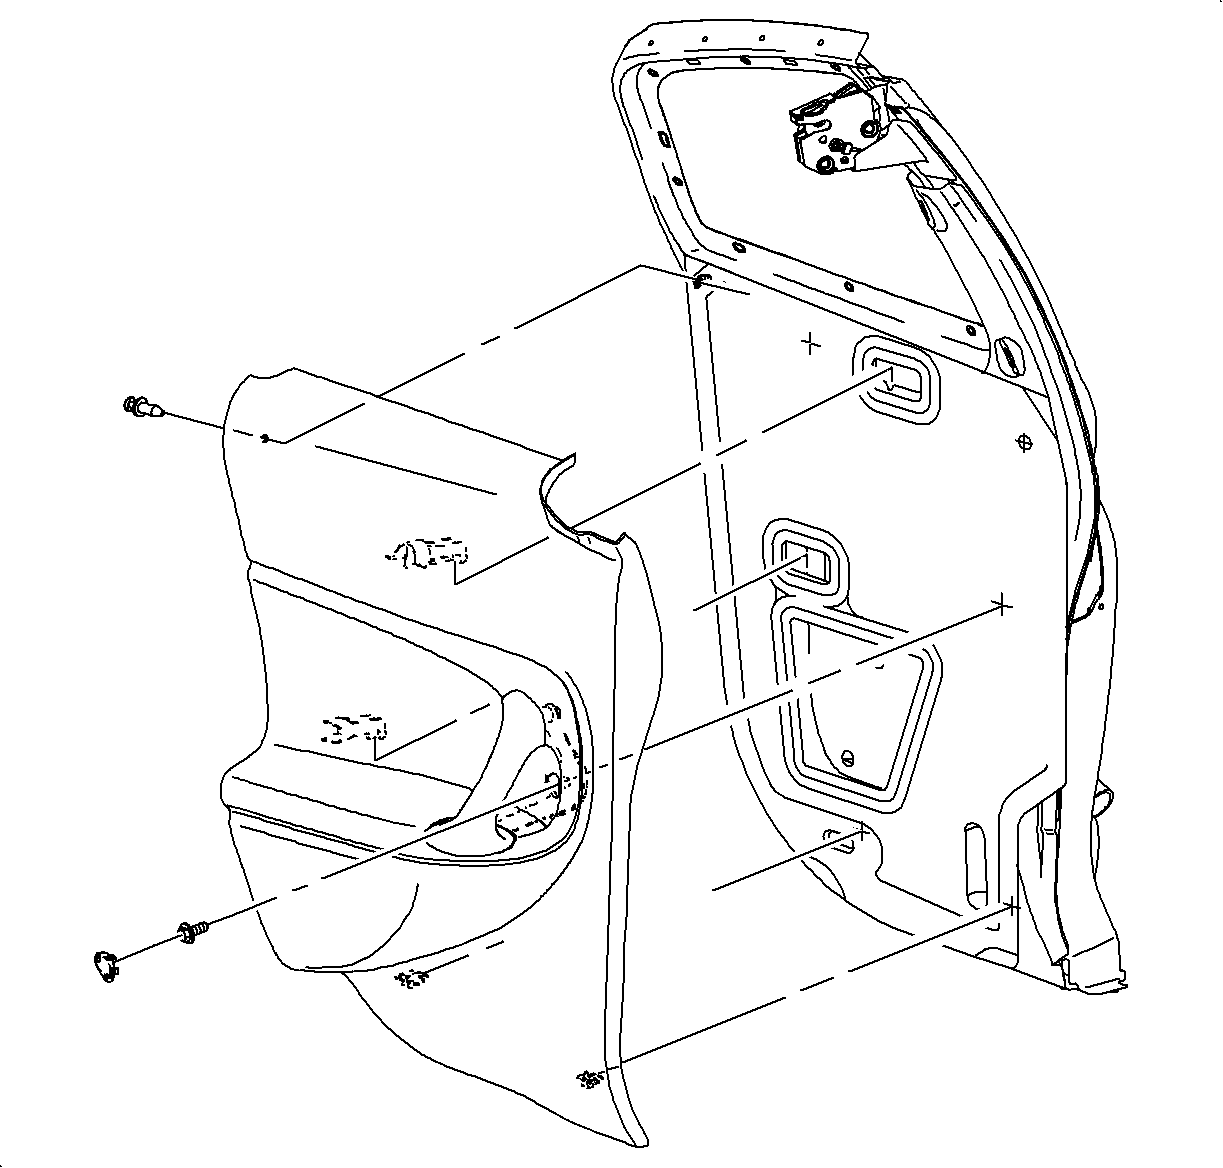
- Remove the rear side door inside fastener.
- Remove the rear side door lock pin by pulling out the middle head first, then remove the entire lock pin.
- Remove the rear side door trim panel by pulling at the very bottom of the panel to disengage the clips.
- Grasp the inside door handle and lift straight up.

Caution: If energy absorber is removed or damaged it must be replaced with a new part. If omitted, the vehicle will not meet federal motor vehicle safety standards (FMVSS), subjecting the retailer to possible civil penalties for making the vehicle inoperative to the FMVSS, and increasing the risk of injury to the vehicle occupants.
Important: Use protective tape to keep from scratching the rear side door lower trim panel.

Installation Procedure
- Install the rear side door trim panel by sliding the panel over the door structure from the top until the plastic clips engage the door structure.
- Push the bottom of the rear side door trim panel to engage the clips.
- Install the rear side door inside fastener.
- Install the rear side door lock pin.
- Install the rear side door inside handle opening cover.
- Install the rear side door upper trim panel.

Notice: Make sure that the rear door trim panel plastic clips insert into the door structure holes, or the plastic clips will break.
Notice: Refer to Fastener Notice in the Preface section.
Tighten
Tighten the rear door trim panel fasteners (Coupe) to 5 N·m (44 lb in).
Rear Side Door Trim Panel Replacement Sedan/Wagon
Removal Procedure

- Remove the fastener from the center of the inside door handle assembly.
- Slide the door handle assembly forward while pulling outward from the trim panel.
- Using a thin screwdriver, disengage the lock and latch rod from the retainers.
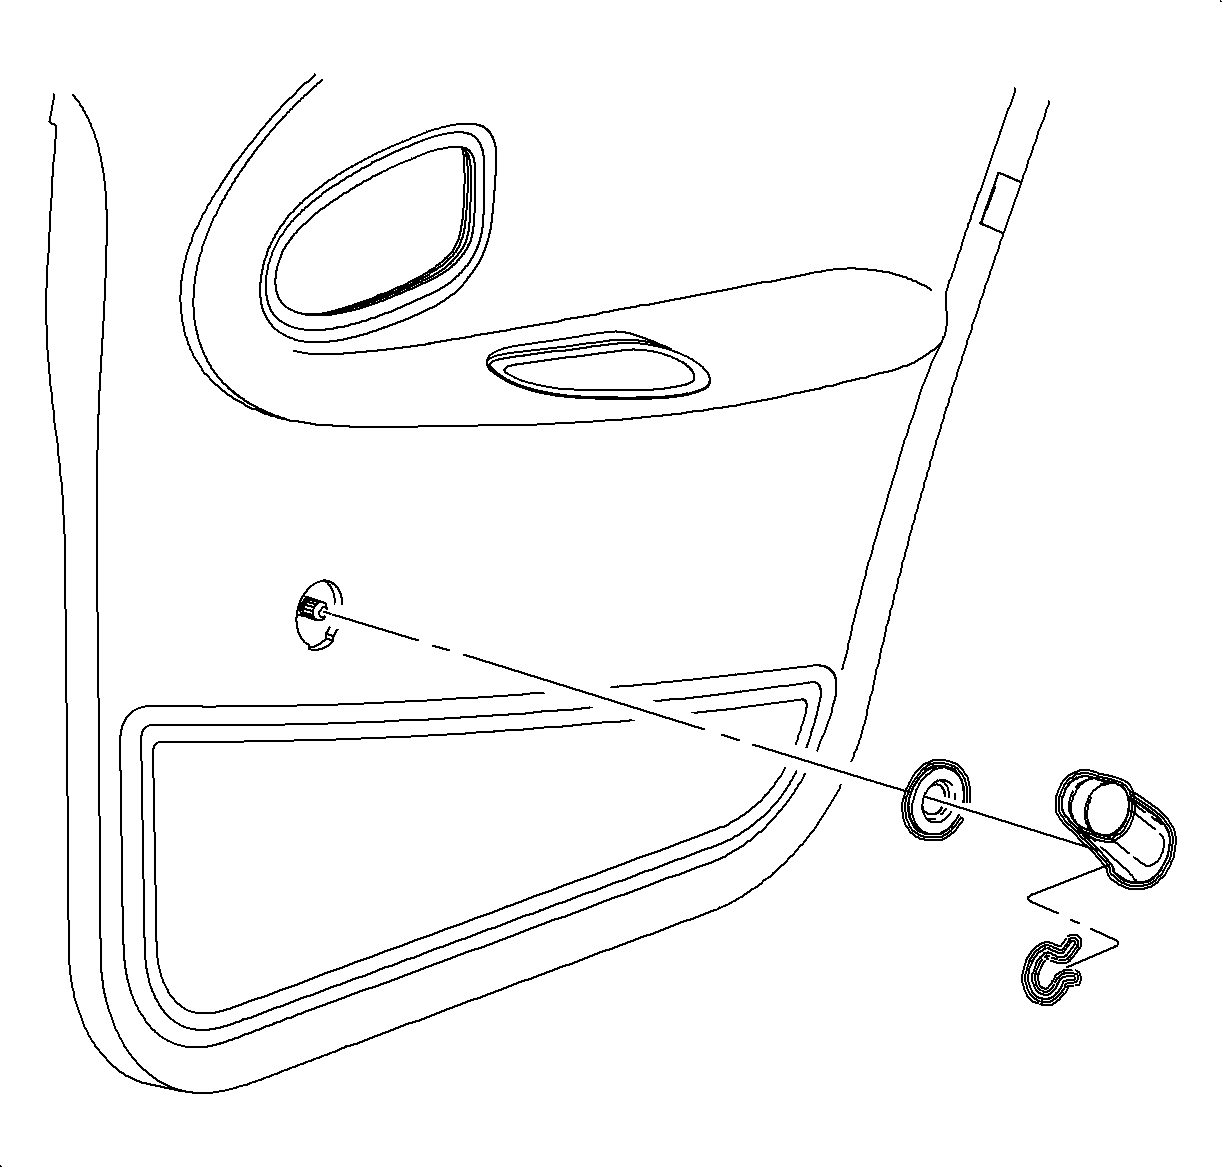
- On manual window vehicles, using a standard window handle tool, disengage the manual window regulator handle clip and remove the window handle.
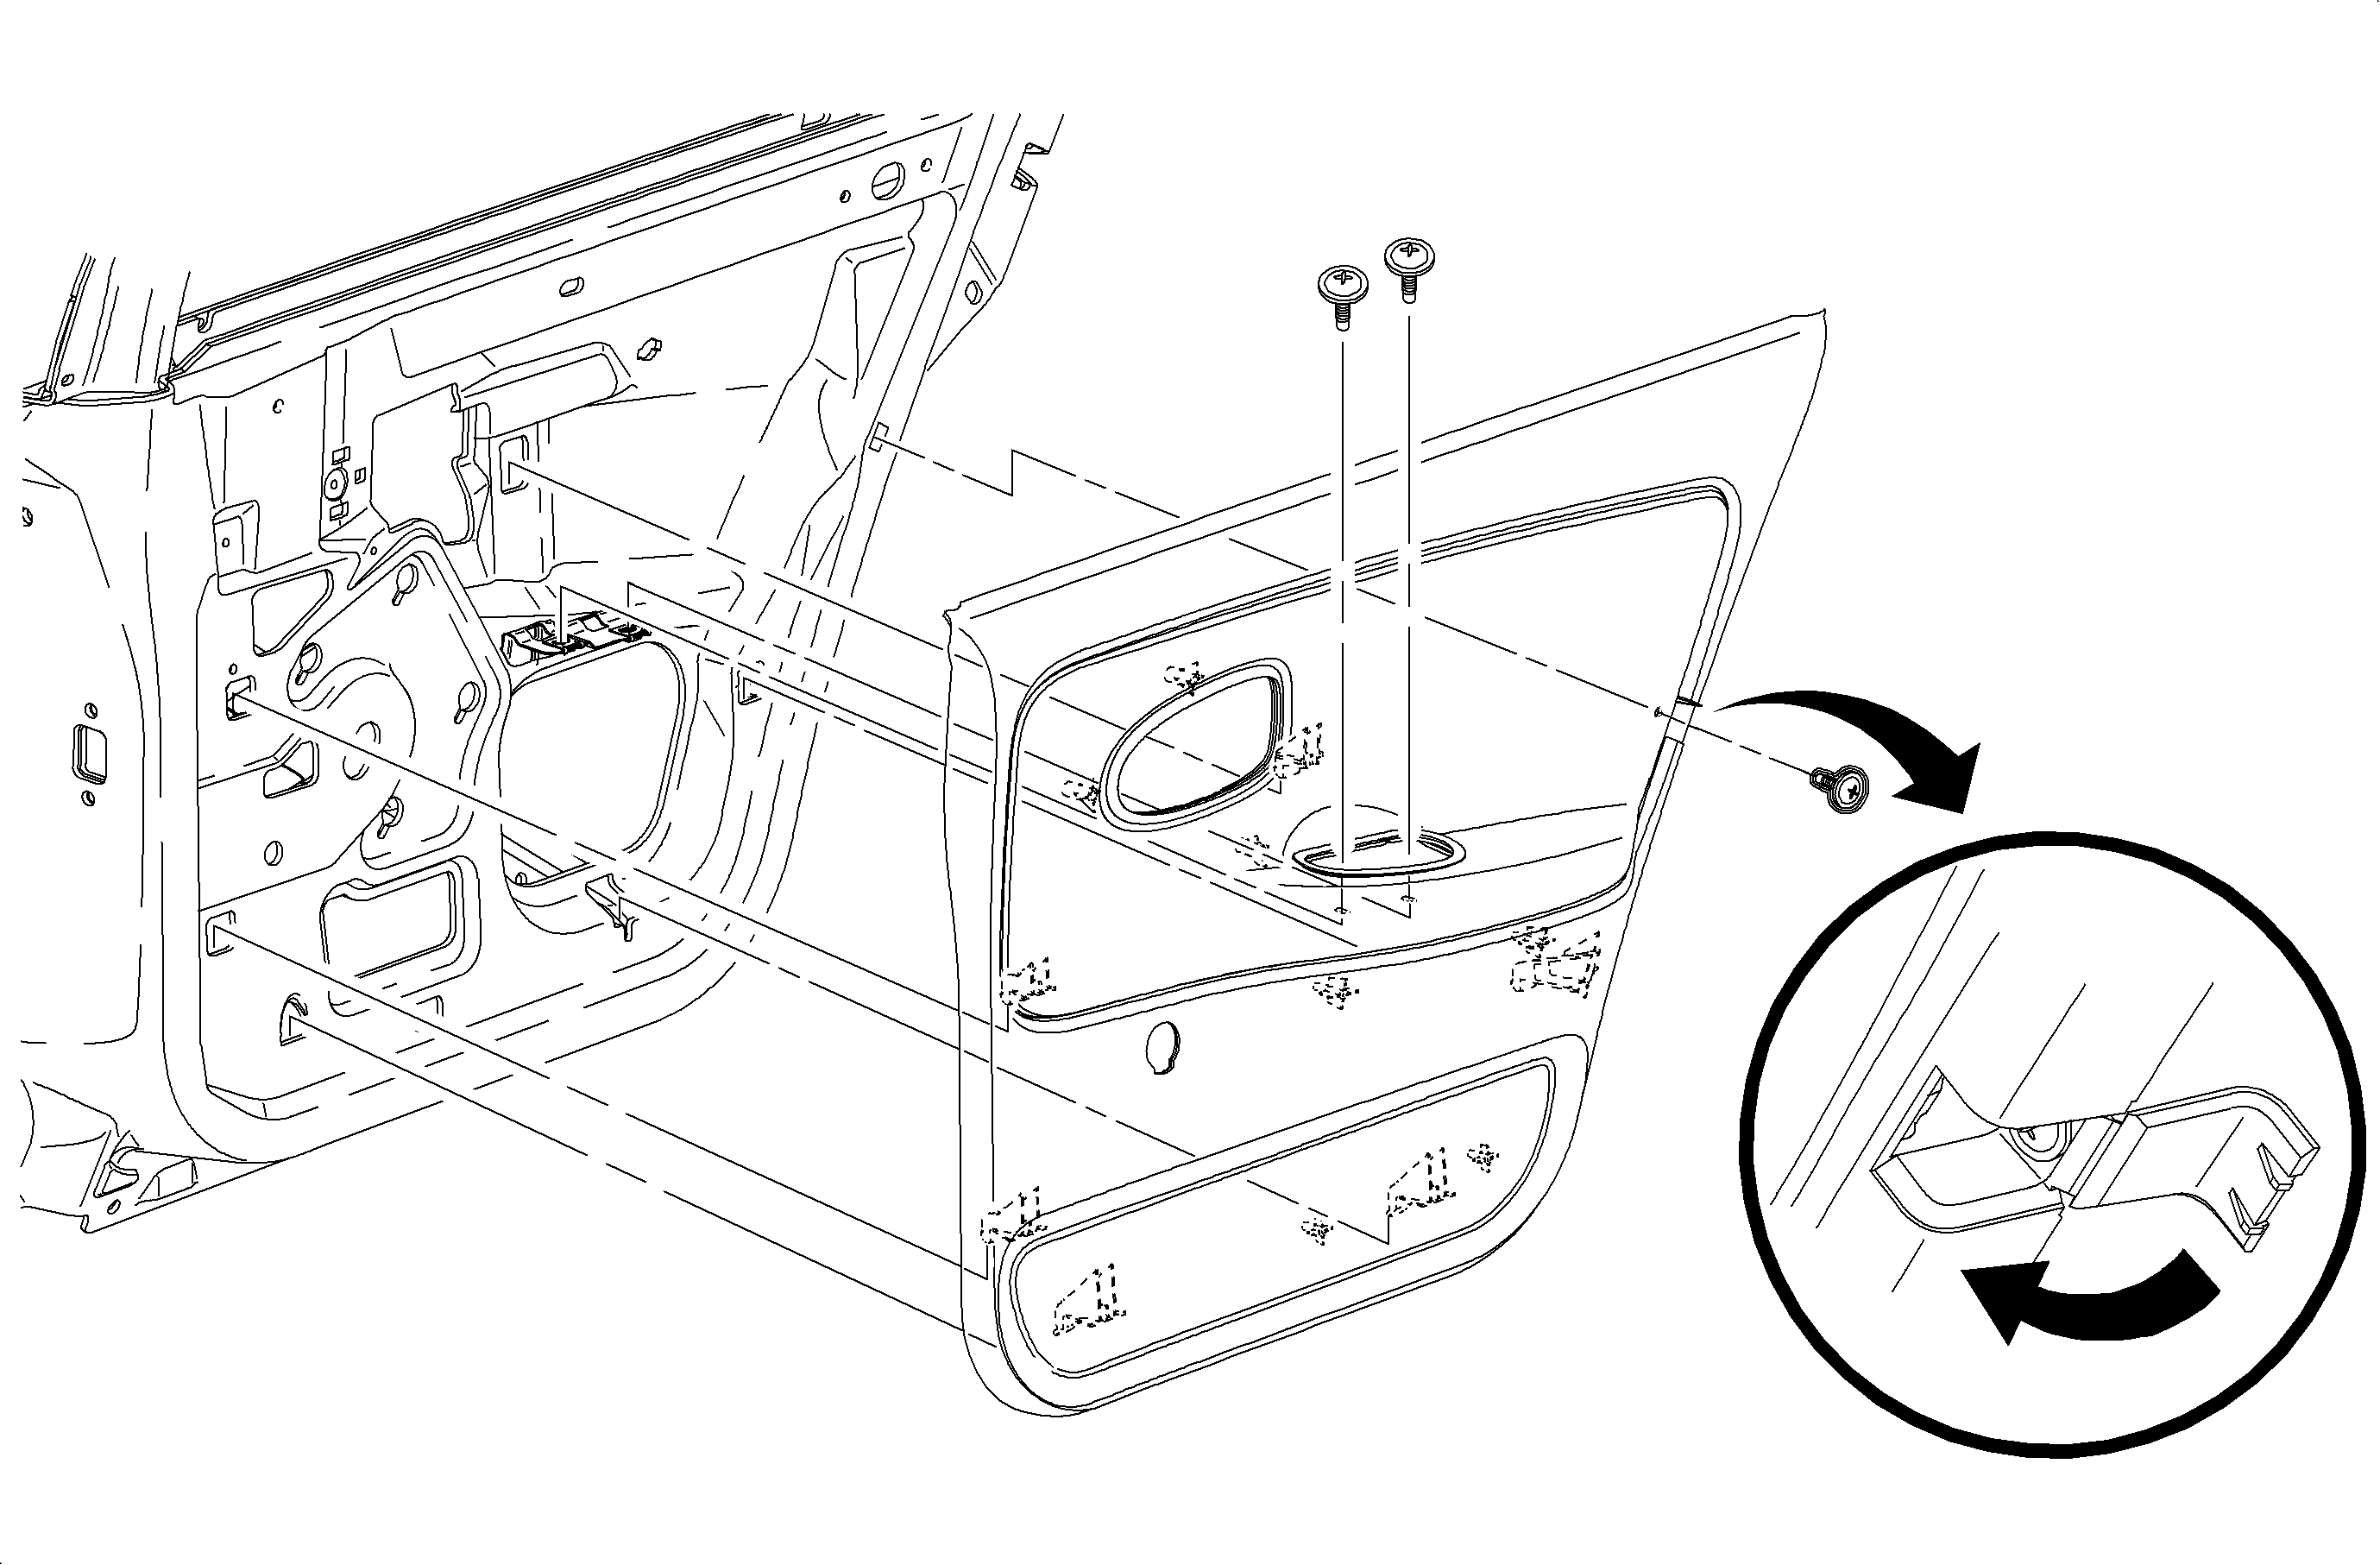
- Open the access cover at the rear of the door trim panel and remove the door trim panel fastener.
- Remove the door trim panel fasteners at the pull cup location.
- Pull up on the door trim panel assembly to disengage the trim panel to door structure attaching hooks and remove the door trim panel.
Caution: If energy absorber is removed or damaged it must be replaced with a new part. If omitted, the vehicle will not meet federal motor vehicle safety standards (FMVSS), subjecting the retailer to possible civil penalties for making the vehicle inoperative to the FMVSS, and increasing the risk of injury to the vehicle occupants.


Installation Procedure
- Position the door trim panel to the door structure at the attaching hooks. Lock in the door trim panel by pushing downward on the door trim panel.
- Install the door trim panel fasteners at the pull cup and at the rear of the door trim panel.
- Close the access cover.
- On manual window vehicles, install the manual window regulator handle clip on the handle.
- Install the door handle onto the vehicle with the handle pointed in a forward and slightly upward position with the window closed.
- Position the door handle assembly in the trim panel. Tip the handle outward at the top.
- Using a thin hook style tool, lift the latch and lock rods into the trim panel and slide rearward to engage the tabs.
- Install the screw in the handle.
