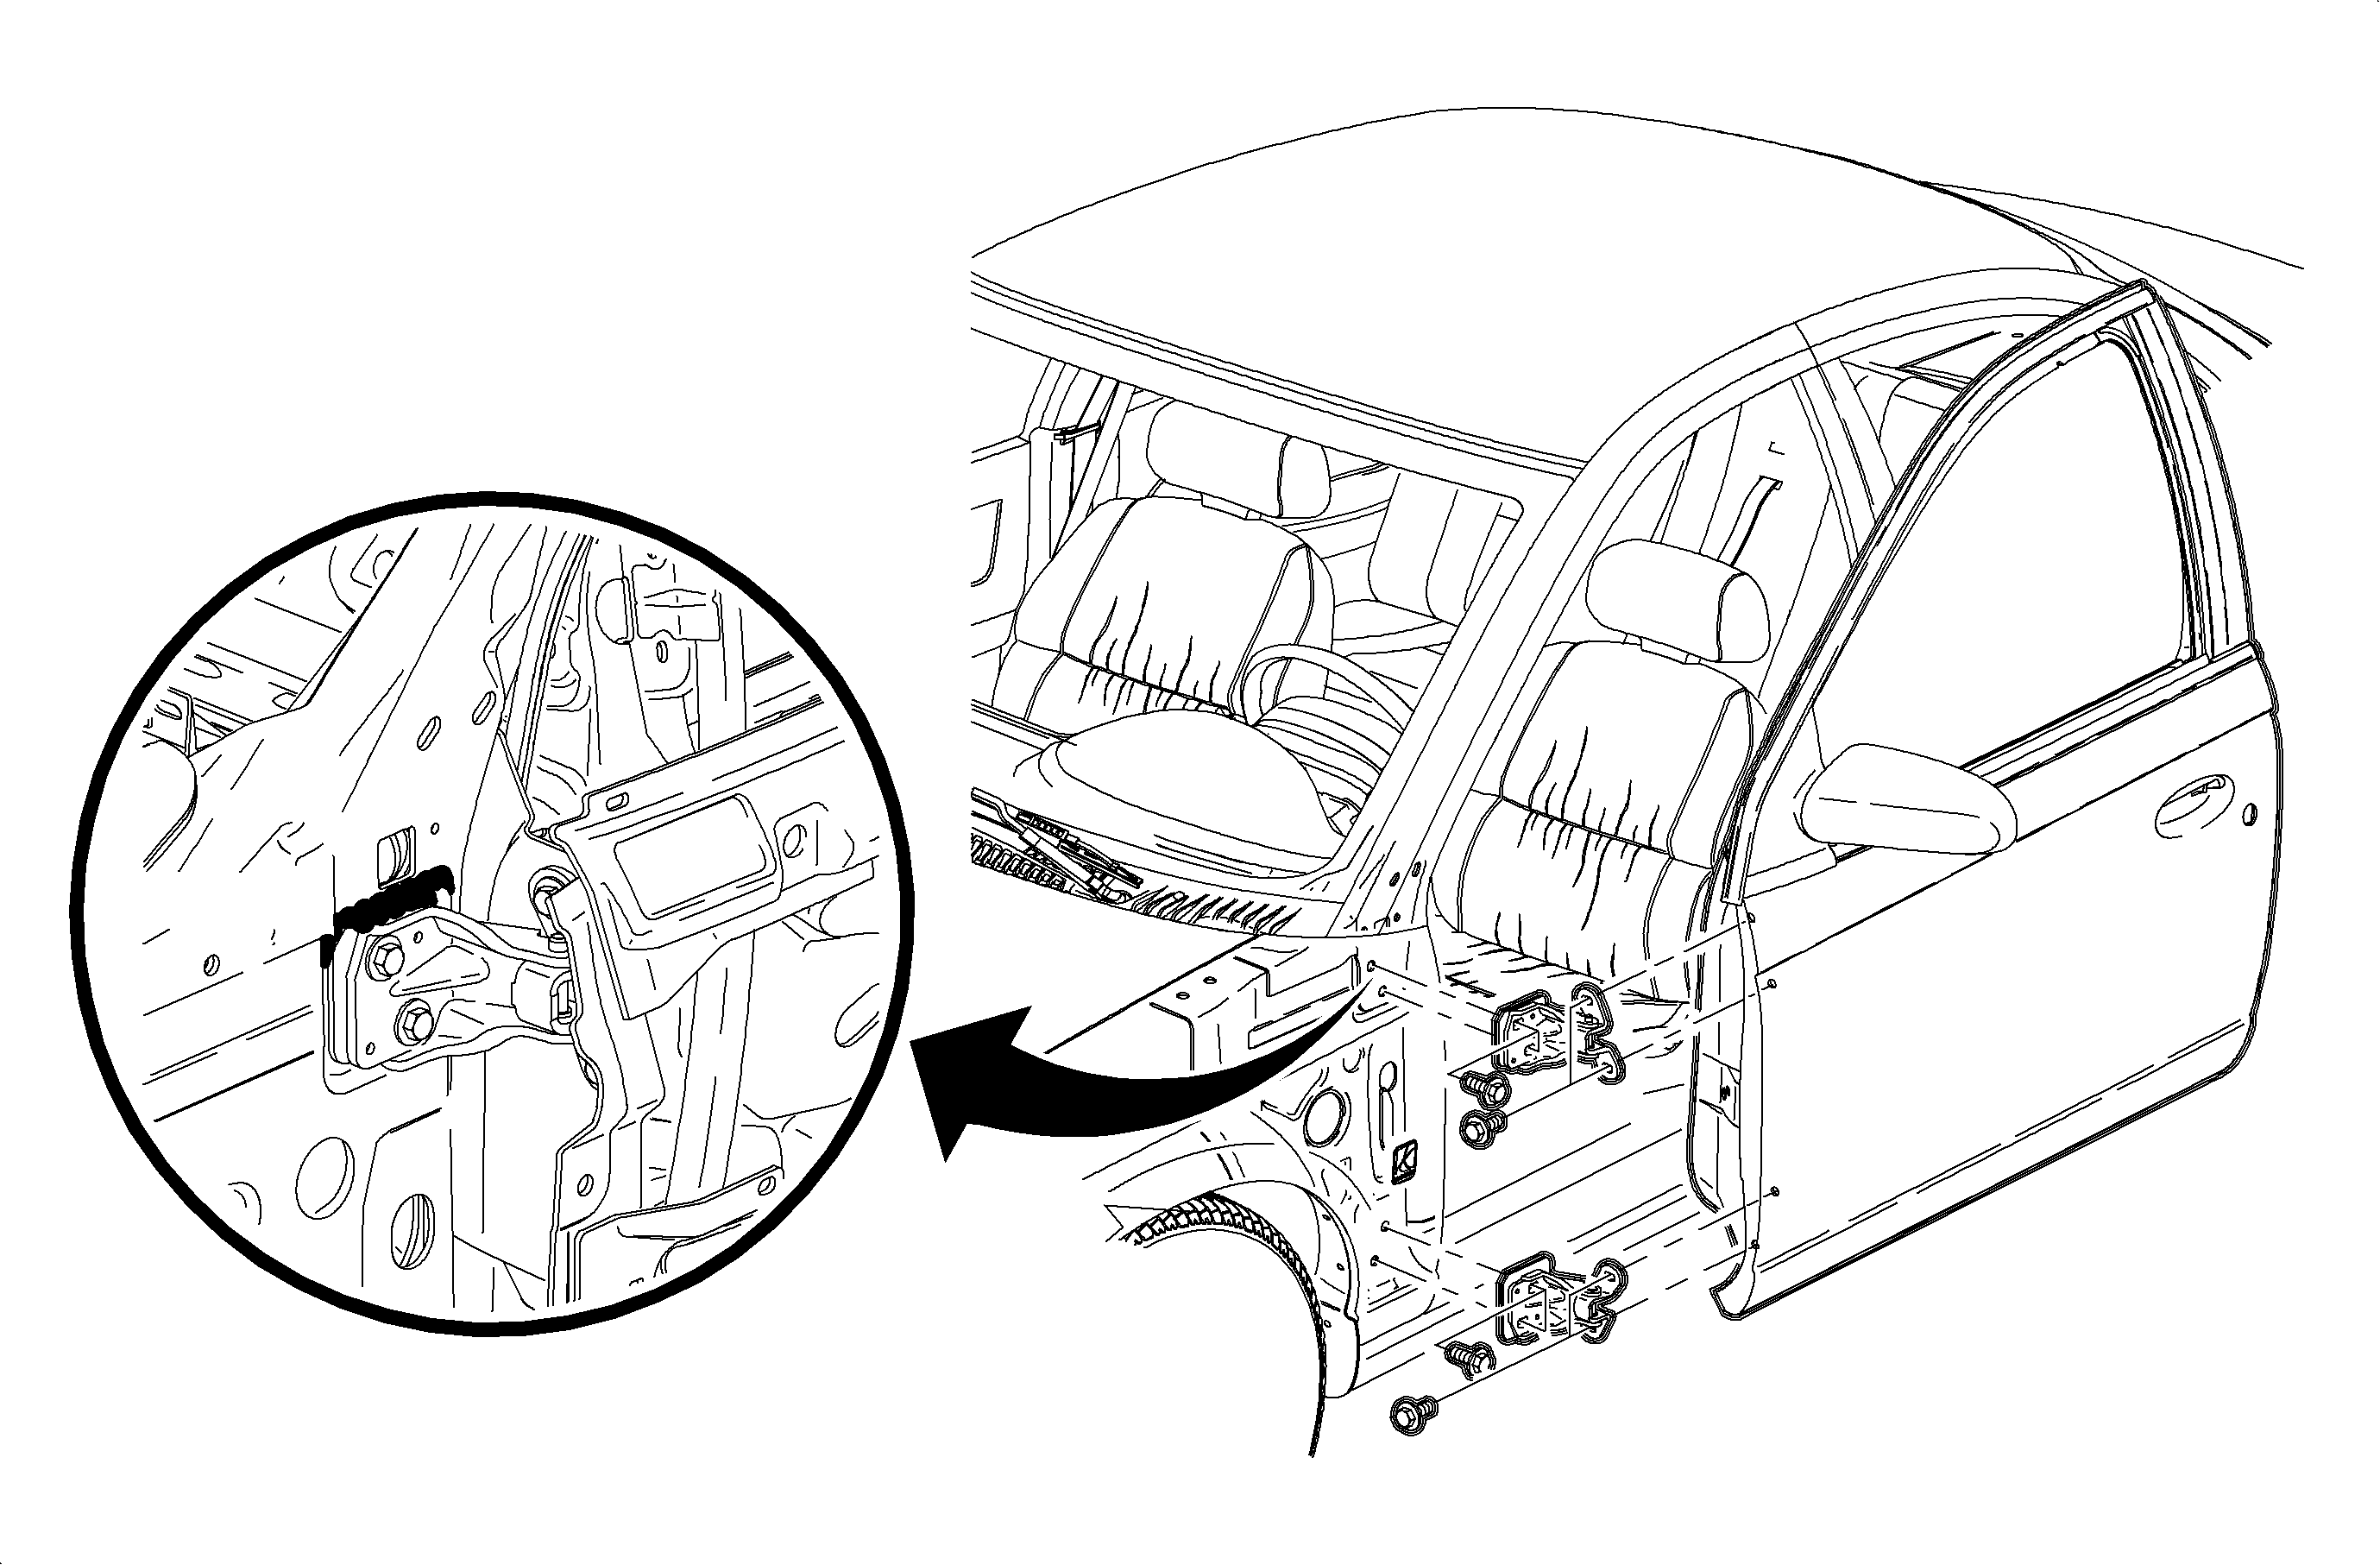
Removal Procedure

- Mark around the
outside of the hinge with a soft marker for installation and place approved support
under the door.
- Disconnect the check link at the door by removing the bolt.
- With the door fully latched on the striker, remove the hinge to door bolts
- To remove the lower hinge from the body:
| 4.1. | Remove the lower fender fasteners. |
| 4.2. | Disconnect the rear half of the fender liner by removing the attaching
fasteners. |
| 4.3. | Remove thehinge to body bolts and remove the hinge, one at a time. |
- To remove the upper hinge from the body:
| • | Loosen the bolts of the rear half fender. |
| • | Disconnect the rear half on the wheel liner by removing the attaching
fasteners. |
| • | Twist the rear half of the fender, from the bottom, away from the body
to allow the hinge to be removed. |
Installation Procedure
- Loosely install all of the hinge bolts. Align with the marks made during
removal and snug all of the hinge bolts.
- Check the fit of the door and adjust as required.
Notice: Refer to Fastener Notice in the Preface section.
- Tighten the hinge to door bolts and then the hinge to body bolts. Apply a sealer
to the hinge.
Tighten
| • | Tighten the door hinge-to-door bolts to 30 N·m (22 lb in). |
| • | Tighten the door hinge-to-body bolts to 30 N·m (22 lb in). |
- Position the fender in place.
- Reattach the wheel liner.
- Install the fender. Refer to
Front Fender Replacement
in Body Front End.
- Connect the check link to the body bolt.
Tighten
Tighten the door check link-to-body bolt to 10 N·m (89 lb in).
- Remove the support from the door.

