For 1990-2009 cars only
Removal Procedure
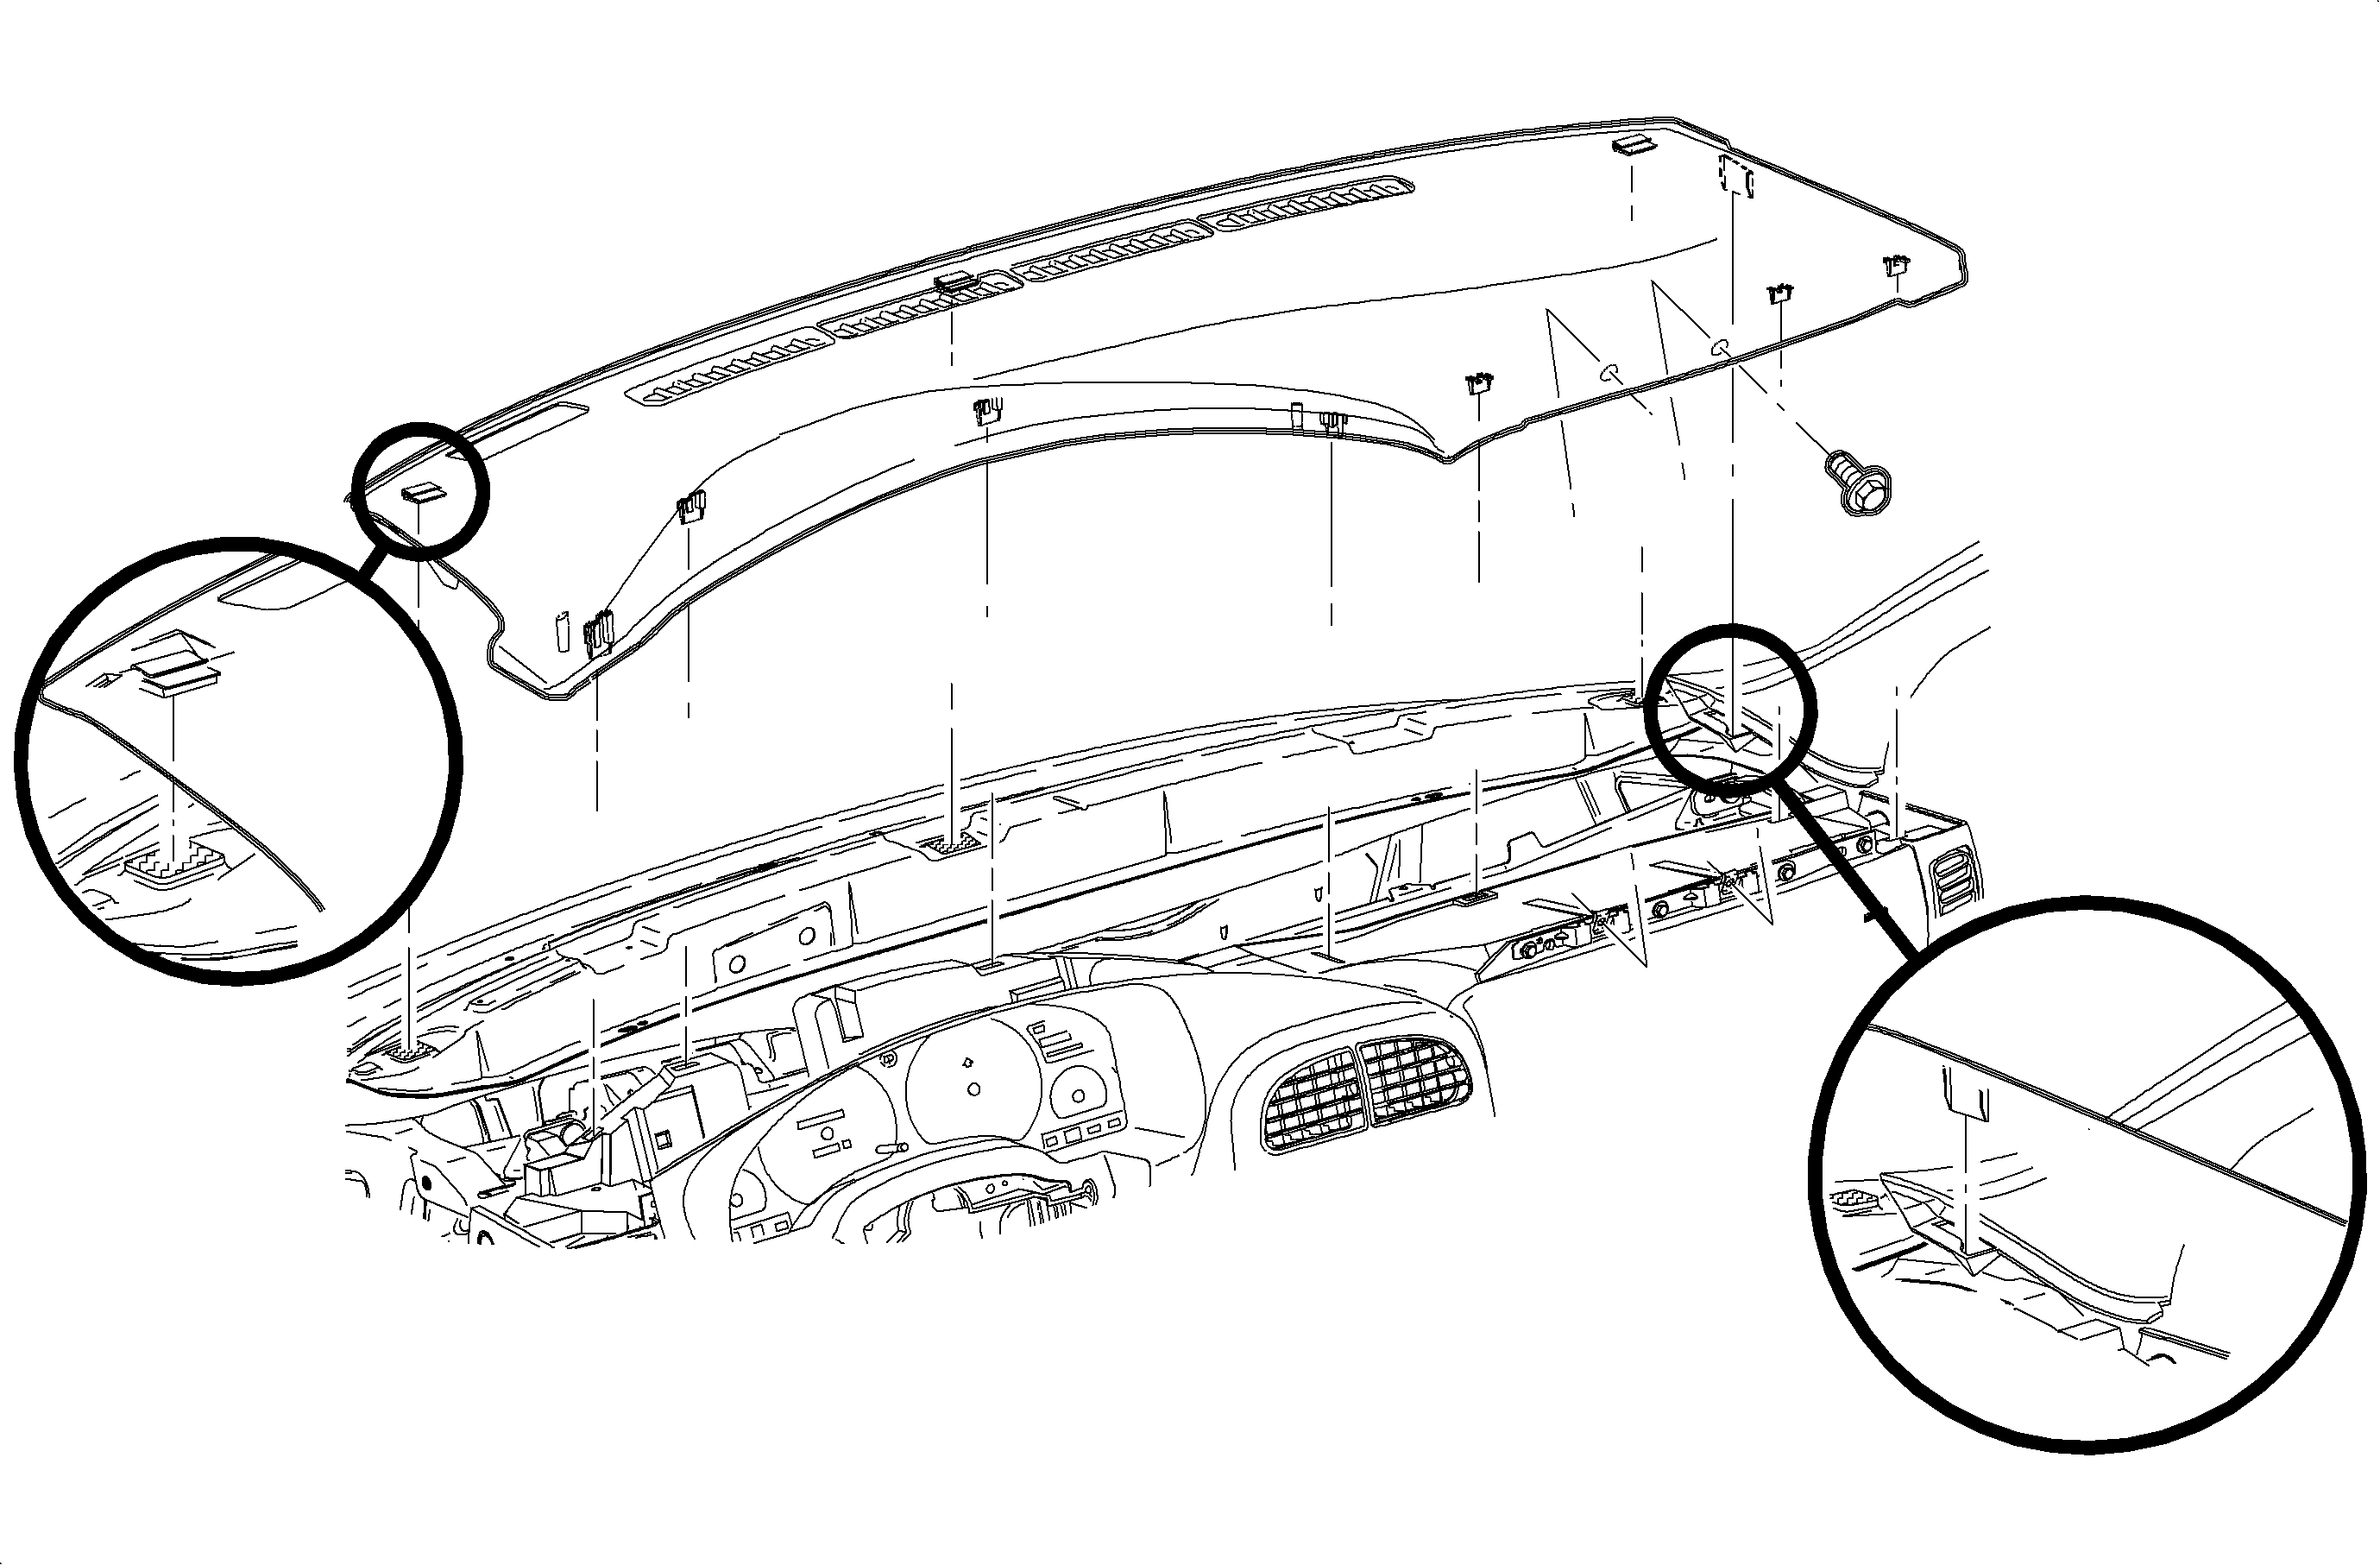
- Remove the fasteners located under the upper trim panel on the passenger side of the vehicle.
- Disengage the clips at the locations by grasping the edges of the upper trim panel and lifting up.
- Disengage the hook-and-loop fastener attachments at the rear of the upper trim panel by reaching under the panel and lifting straight up.
- Raise the upper trim panel enough to clear the VIN plate.
Notice: Be careful not to damage the VIN plate when removing or replacing the upper trim panel.
Installation Procedure
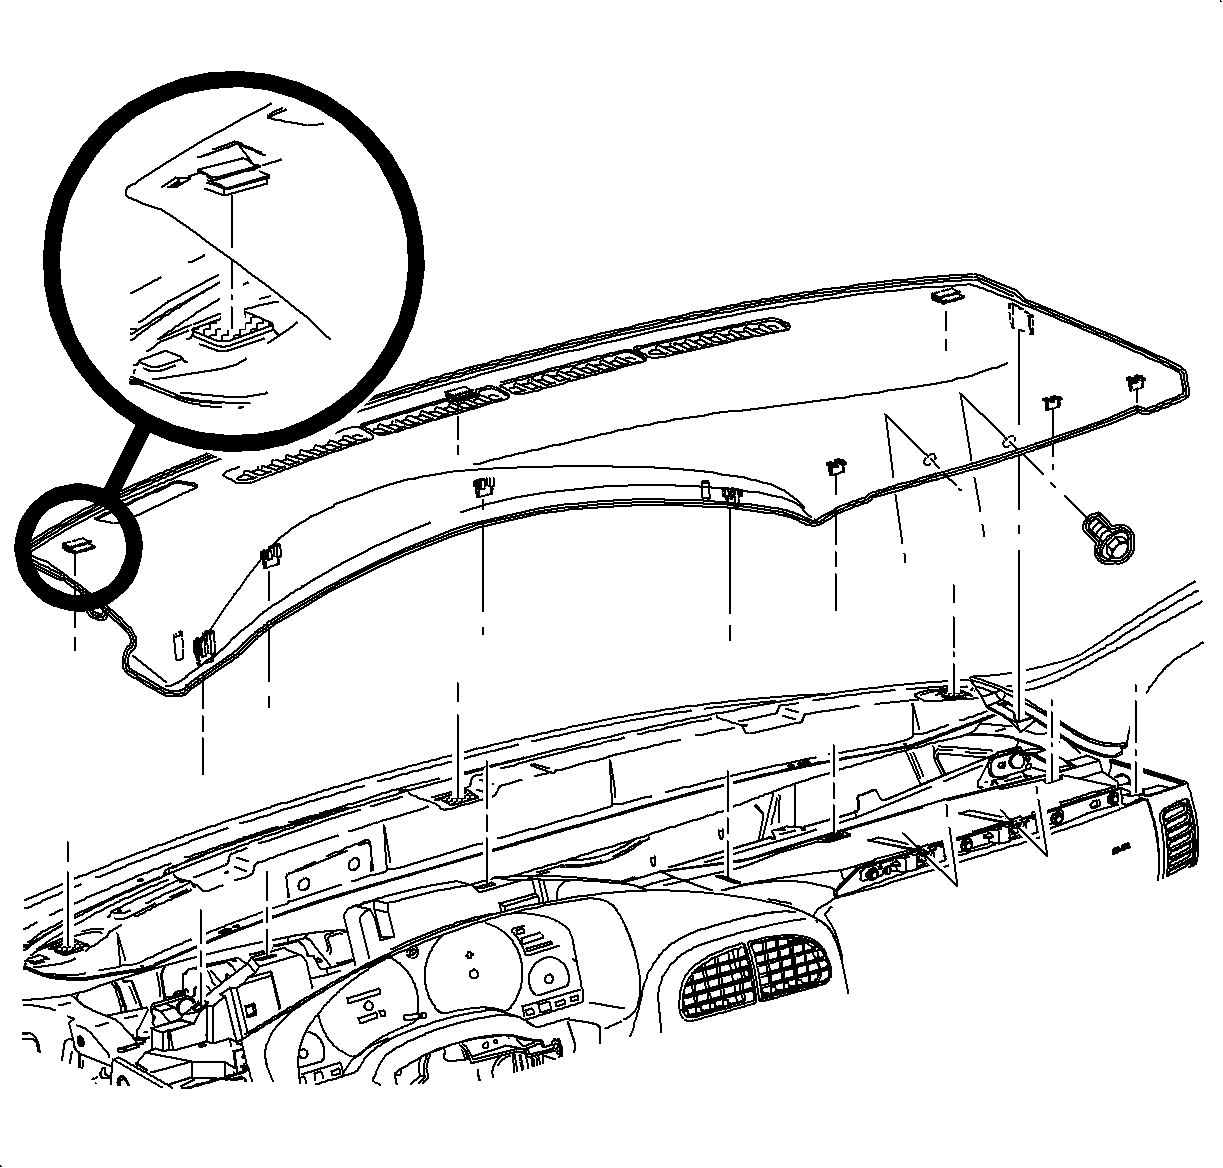
- Ensure the hook-and-loop fastener attachments on the upper trim panel are correctly inserted.
- Position the upper trim panel on the retainer assembly.
- Align the tabs on tne sides of the upper trim panel with the openings in the windshield garnish molding.
- Align the clips and the clip location.
- Firmly snap in the clips at the clip locations.
- Install the fasteners on the underside of the upper trim panel on the passenger side of the vehicle.
Notice: Be careful not to damage the VIN plate when removing or replacing the upper trim panel.
Important: Be sure the upper trim panel seal is correctly seated on the forward edge before installing the upper trim panel.
Notice: Refer to Fastener Notice in the Preface section.
Tighten
Tighten the I/P upper trim panel fasteners to 6 N·m (53 lb in).
