Whistle Noise at Highway Speeds with HVAC in Recirc Mode (Repair Sealer Skip in the HVAC Plenum Area)

| Subject: | Whistle Noise at Highway Speeds with HVAC in "Recirc" Mode (Repair Sealer Skip in the HVAC Plenum Area) |
| Models: | 2002 Saturn S-Series Vehicles |
| Attention: | Technician |
Condition
Some customers may comment on a whistle noise at highway speeds with the HVAC in the "Recirc" mode. If the "Recirc" mode is turned off, the noise is eliminated.
Cause
The source of the whistle noise may be a body seam sealer skip on the right side of the vehicle in the HVAC plenum area. When the HVAC system is placed in "Recirc" mode, the recirc door closes and seals off the air inlet opening. Once the vehicle starts moving, the plenum becomes "pressurized" because the incoming air has nowhere to go. The pressurized air is then forced into the vehicle at the sealer skip location causing the whistle noise. When the "Recirc" mode is in the "OFF" position, the plenum is no longer pressurized because the air flows through the air inlet opening into the vehicle.
Correction
Seal the affected area with Kent® Leak Chek Aerosol Body Seam Sealer, P/N 50087, or equivalent.
Instrument Panel - Upper Trim Panel Removal
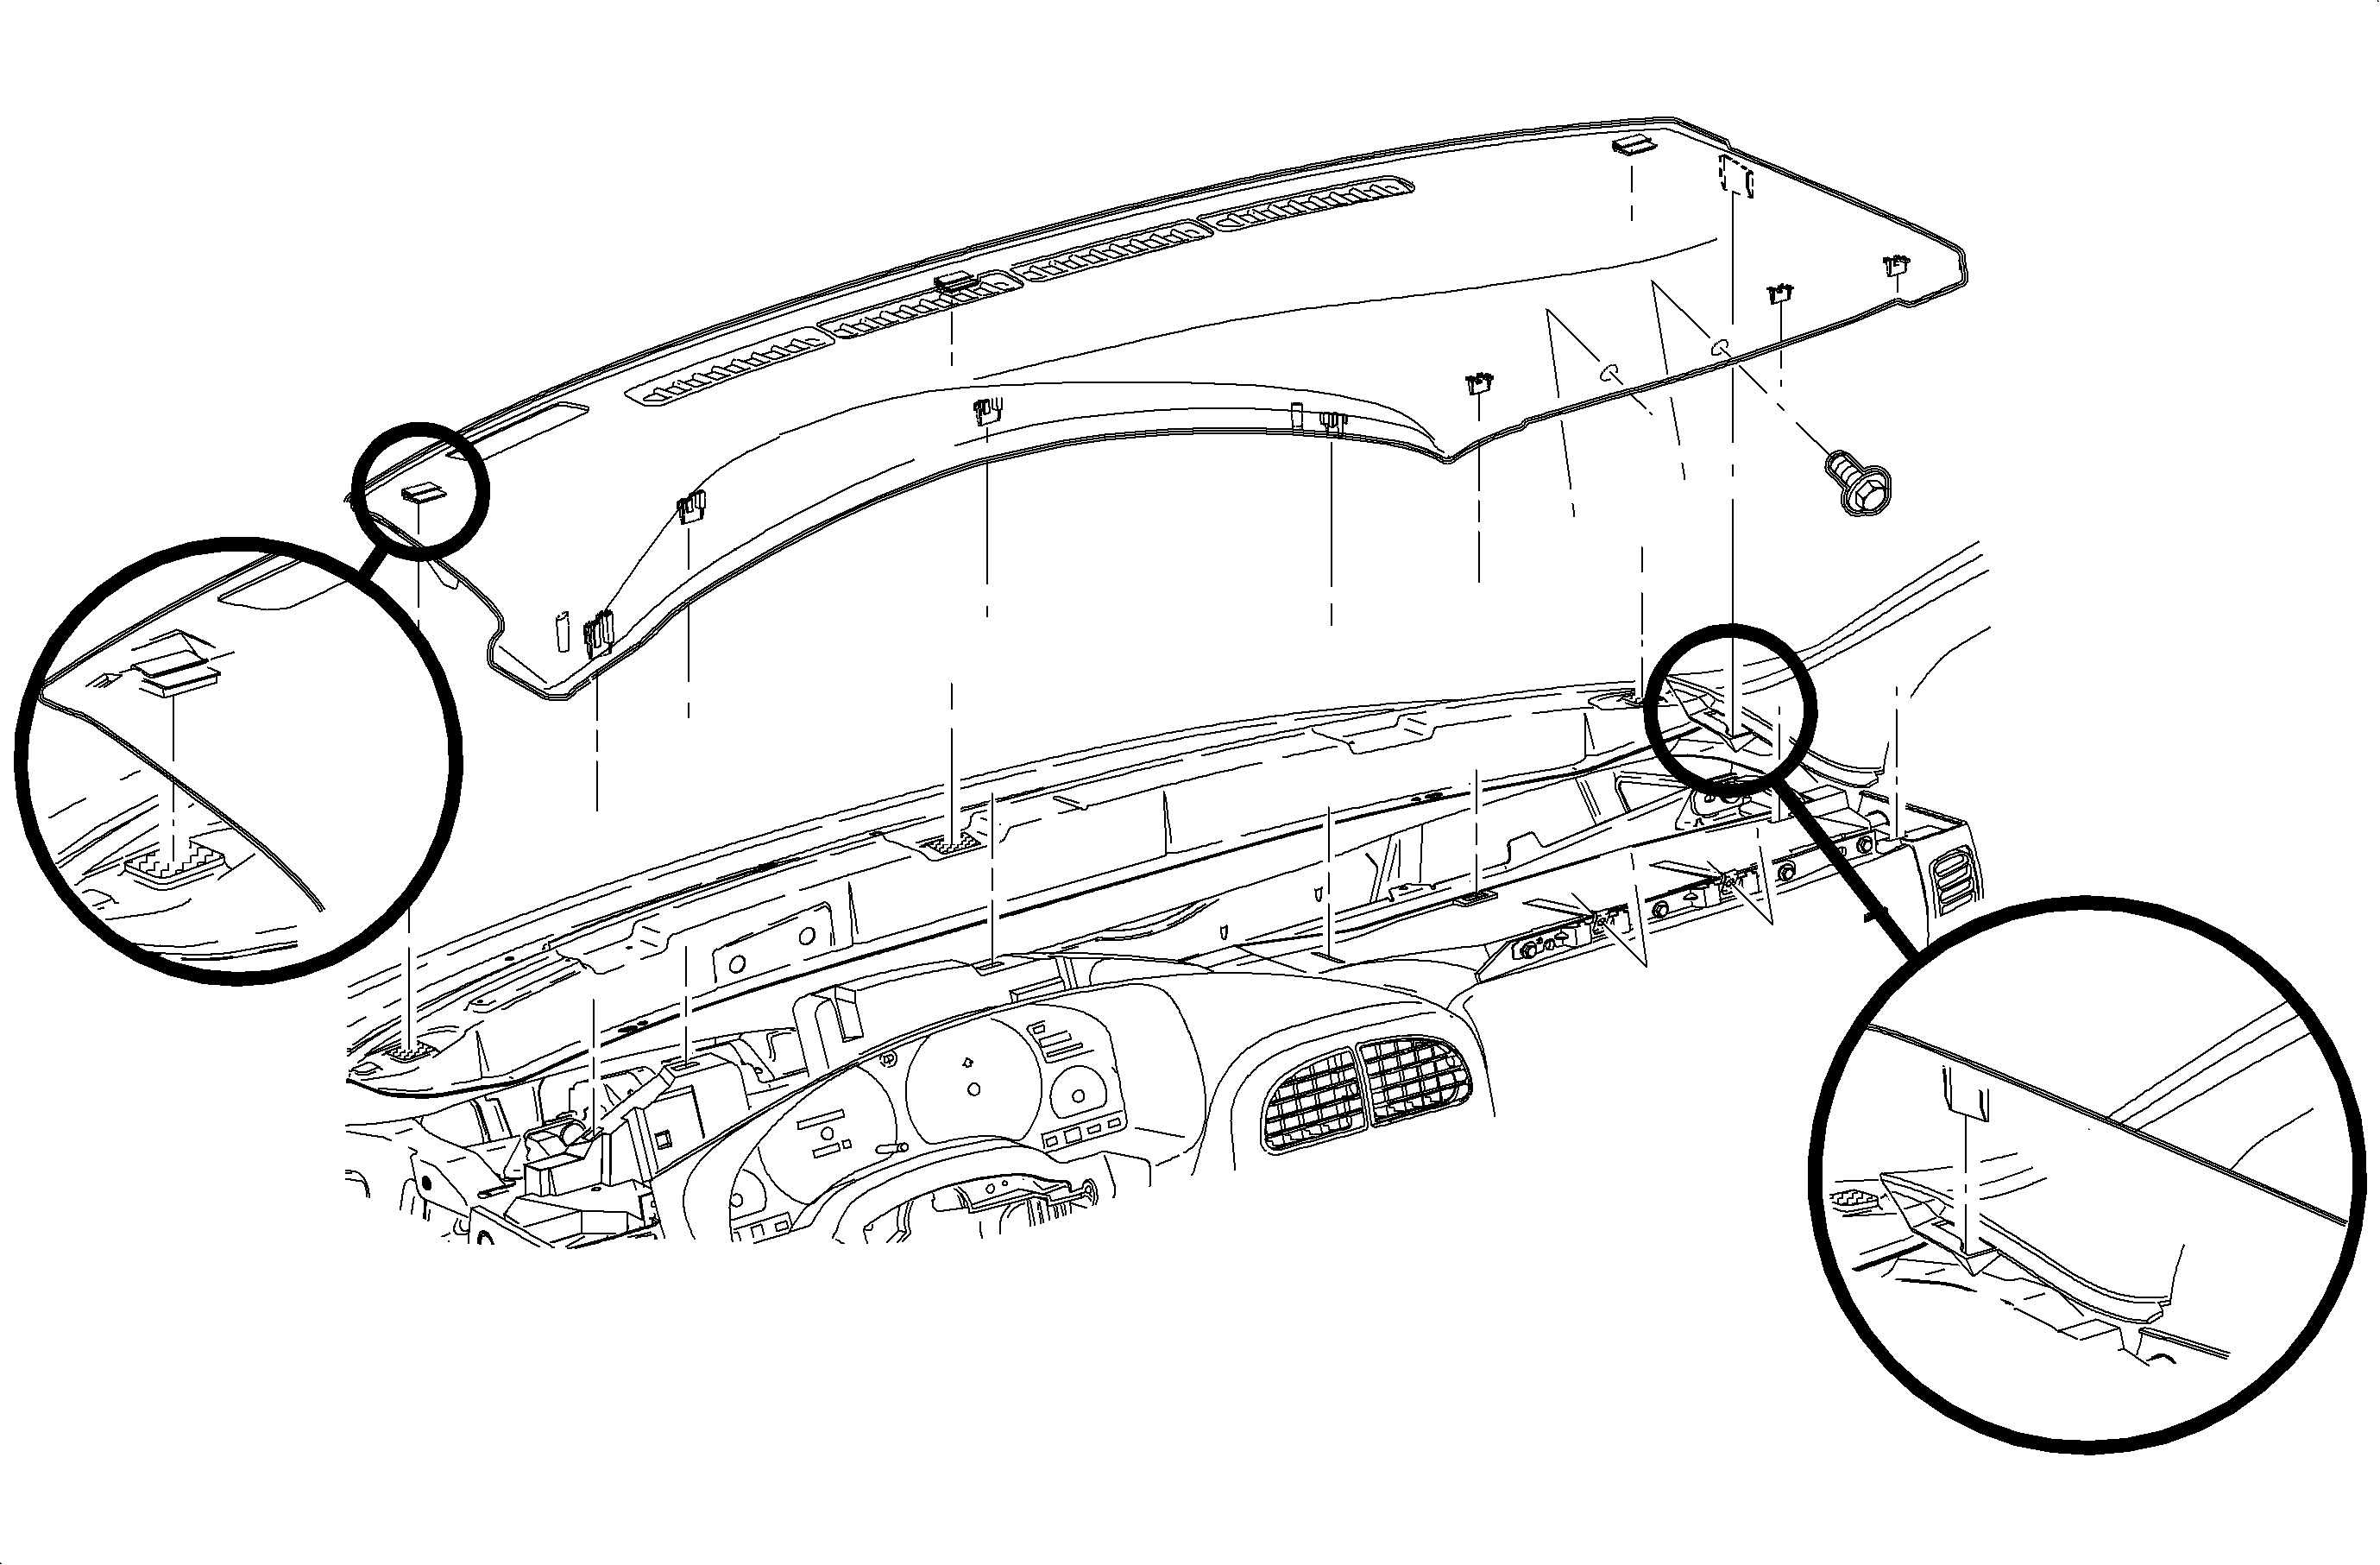
- Remove fasteners located under upper trim panel on passenger side of vehicle.
- Disengage clips at locations by grasping edges of upper trim panel and lifting up.
- Disengage hook-and-loop fastener attachments at rear of upper trim panel by reaching under panel and lifting straight up.
- Raise upper trim panel enough to clear VIN plate.
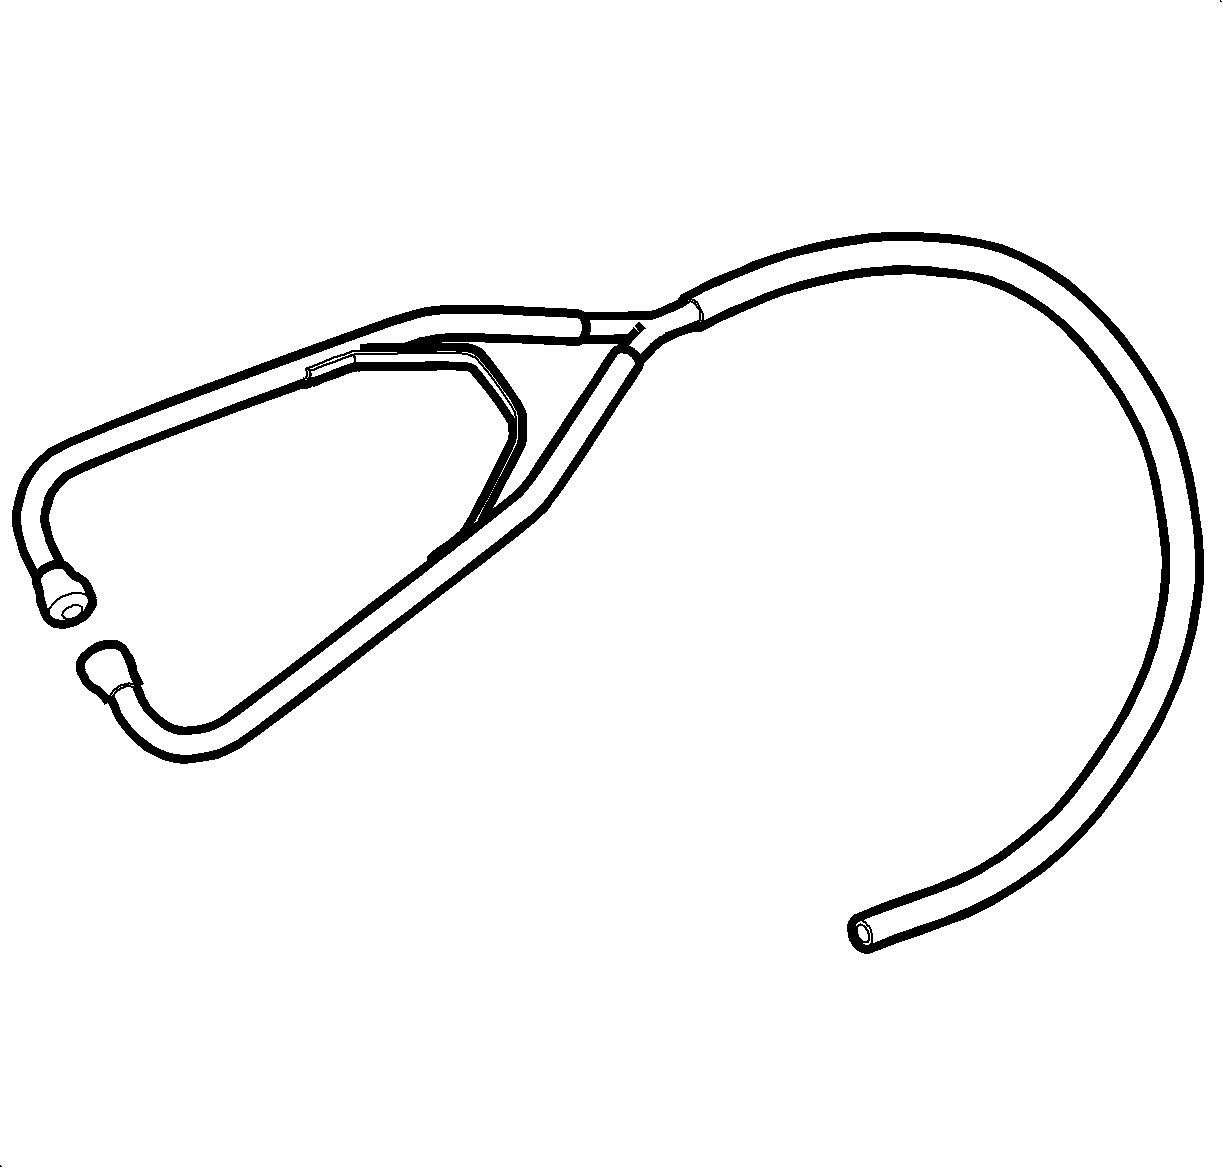
- Using a stethoscope, attach a 24" (60.96 cm) piece of rubber tubing to the end of the stethoscope.
- With HVAC re-circulation in the "ON" position, drive vehicle at the speed the whistle noise begins to be noticeable (approximately 35 mph [56 kph]).
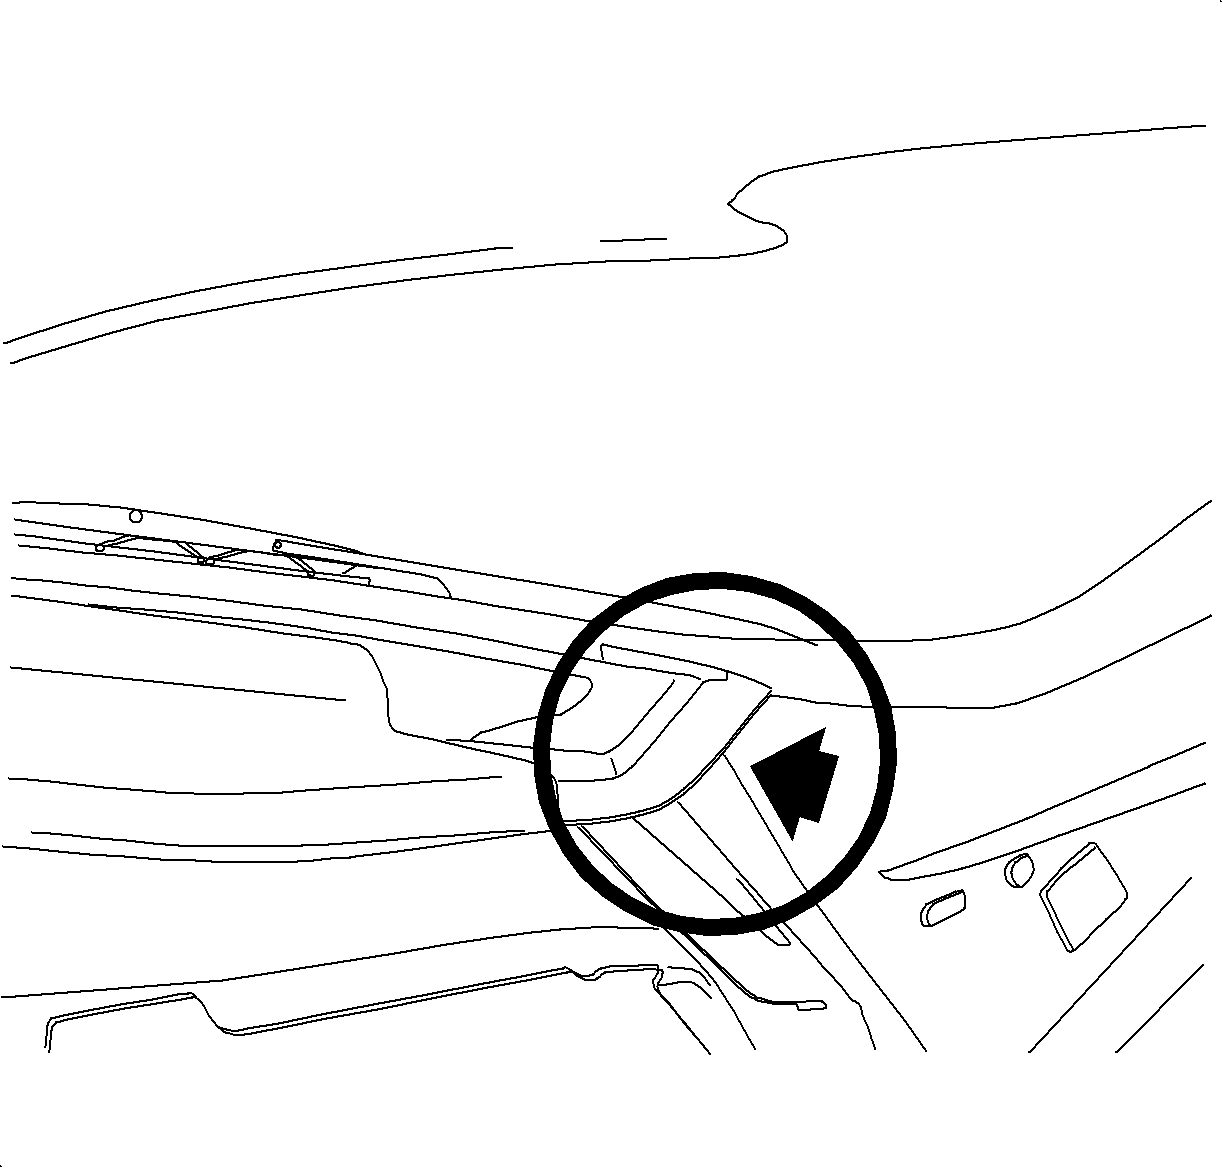
- Place rubber tubing from the end of stethoscope on the plenum weld seam at the base of the A-pillar. Move tubing until noise is pinpointed.
- If the noise is heard near the base of the A-pillar at the outboard side of the cowl seam, then proceed to the repair procedure.
- If the noise cannot be heard in that location, continue using the stethoscope to pinpoint the exact location of the noise. Once a location is determined, proceed to the repair procedure in this bulletin.
Notice: Be careful not to damage VIN plate when removing or replacing upper trim panel.
Important: Two technicians will be needed for the next step. One to drive the vehicle, one to diagnose the noise.
REPAIR PROCEDURE
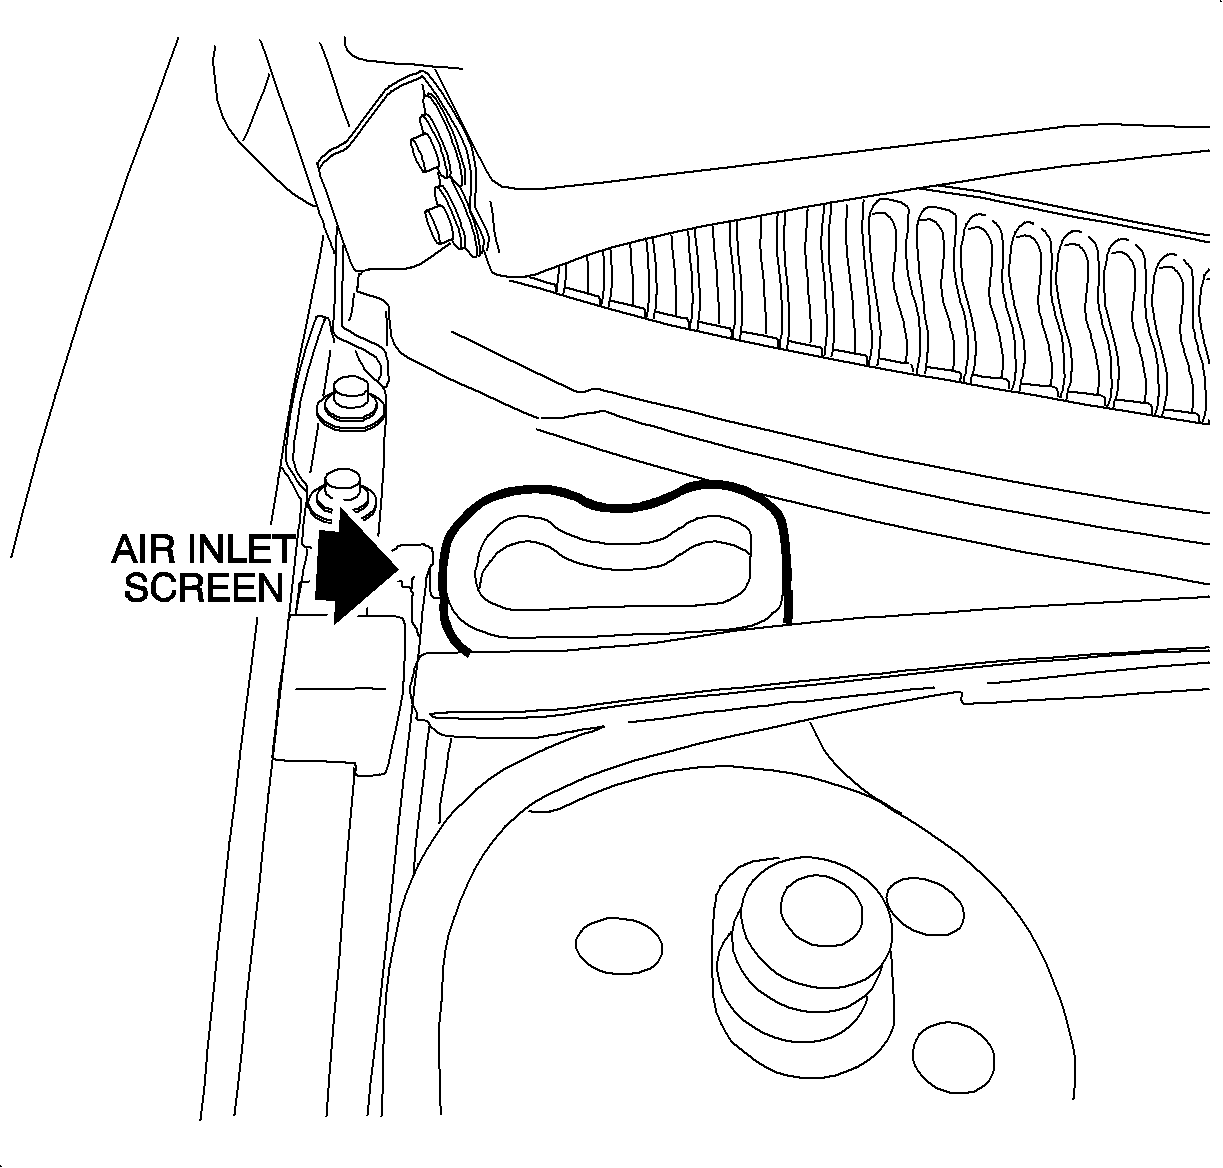
- Raise hood and locate the air inlet screen.
- Remove the air inlet screen.
- Using Vacuum Harness Assembly, P/N 21006245, cut a 90° section leaving approximately 1" (2.54 cm) of tubing on each end of 90° radius. Total length of tubing will be approximately 2" (5.08 cm).
- Using the 12" (30.46 cm) extension that came with the Kent® Leak Chek Aeresol Body Sealer, attach the 2" (5.08 cm) long 90° tube to the 12" (30.46 cm) extension by using a short piece of 7/64" ID 1/8" (3.18 mm) rubber tubing. Make sure the 2 pieces of tubing are tight enough so that they will not separate during application of the sealer.
- Once the applicator tube is complete, install it to the valve of the Kent® Leak Chek Aerosol Body Sealer, or equivalent.
- Insert the tip of the applicator into the air inlet opening until it reaches the opposite end of the plenum (there should only be about 1" (2.54 cm) of tubing exposed outside of the air inlet opening).
- Spray the Kent® Leak Chek Aerosol Body Sealer, or equivalent, while pulling the applicator outward. This will ensure the sealant is applied along the entire length of the seam.
- Once sealant has been applied, retest vehicle. If whistle noise is eliminated, go to next step. If whistle noise is still evident, repeat steps 7 & 8.
- Install new air inlet screen, P/N 21031308.
- Install I/P top cover.
Important: Each can of Kent® Leak Chek Aerosol Body Sealer comes with a 12" (30.48 cm) applicator tube extension. The applicator tube will need to be modified for proper application of the sealer. Prepare the applicator tube using the following procedure.
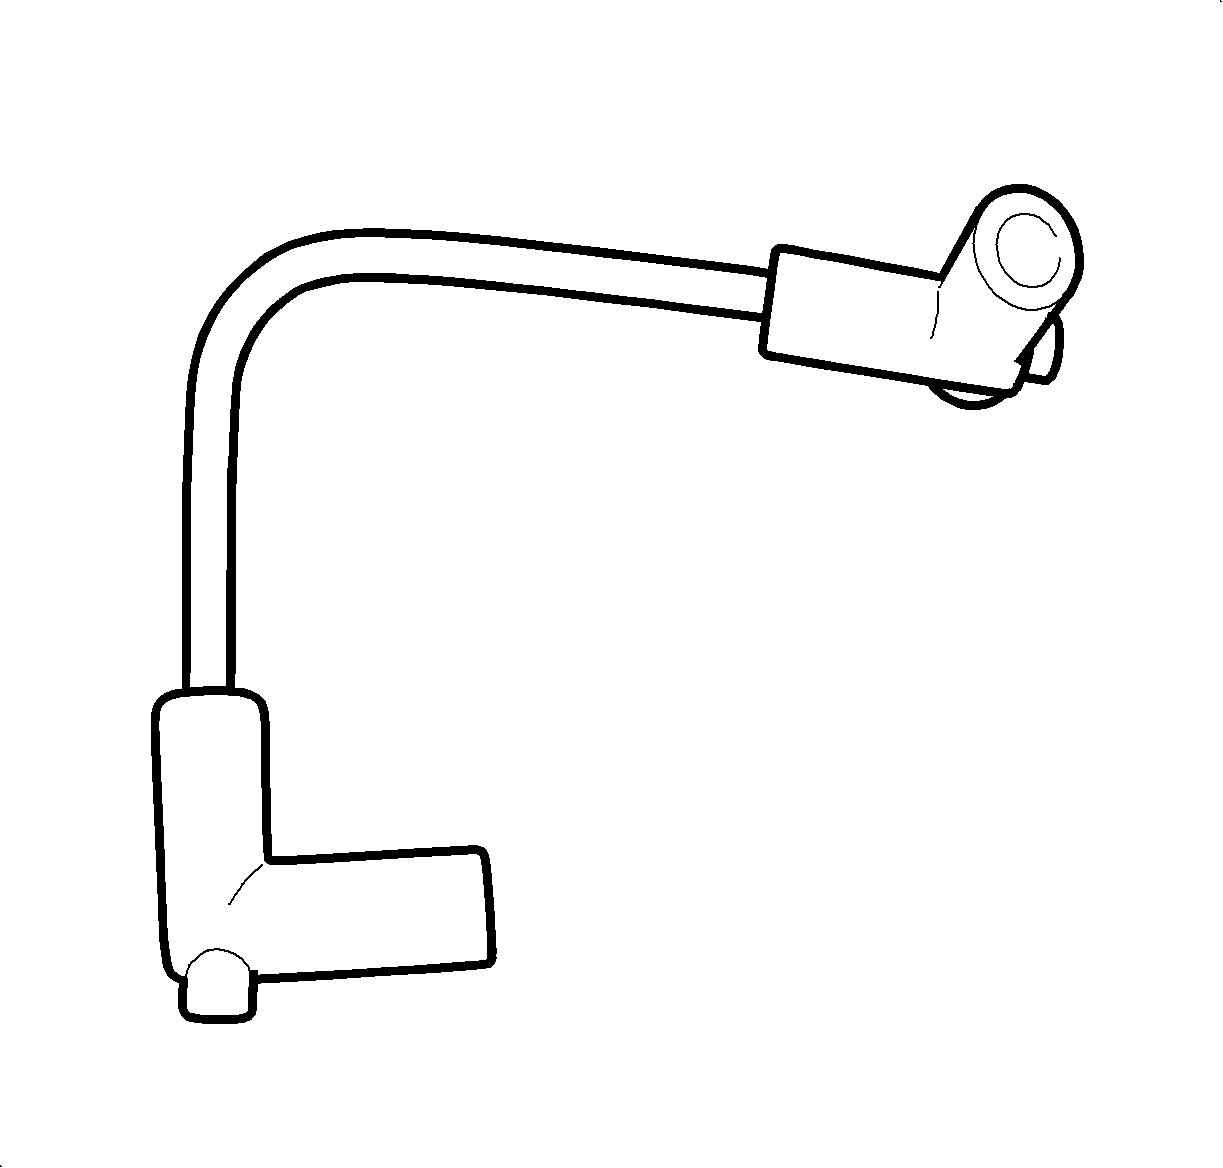
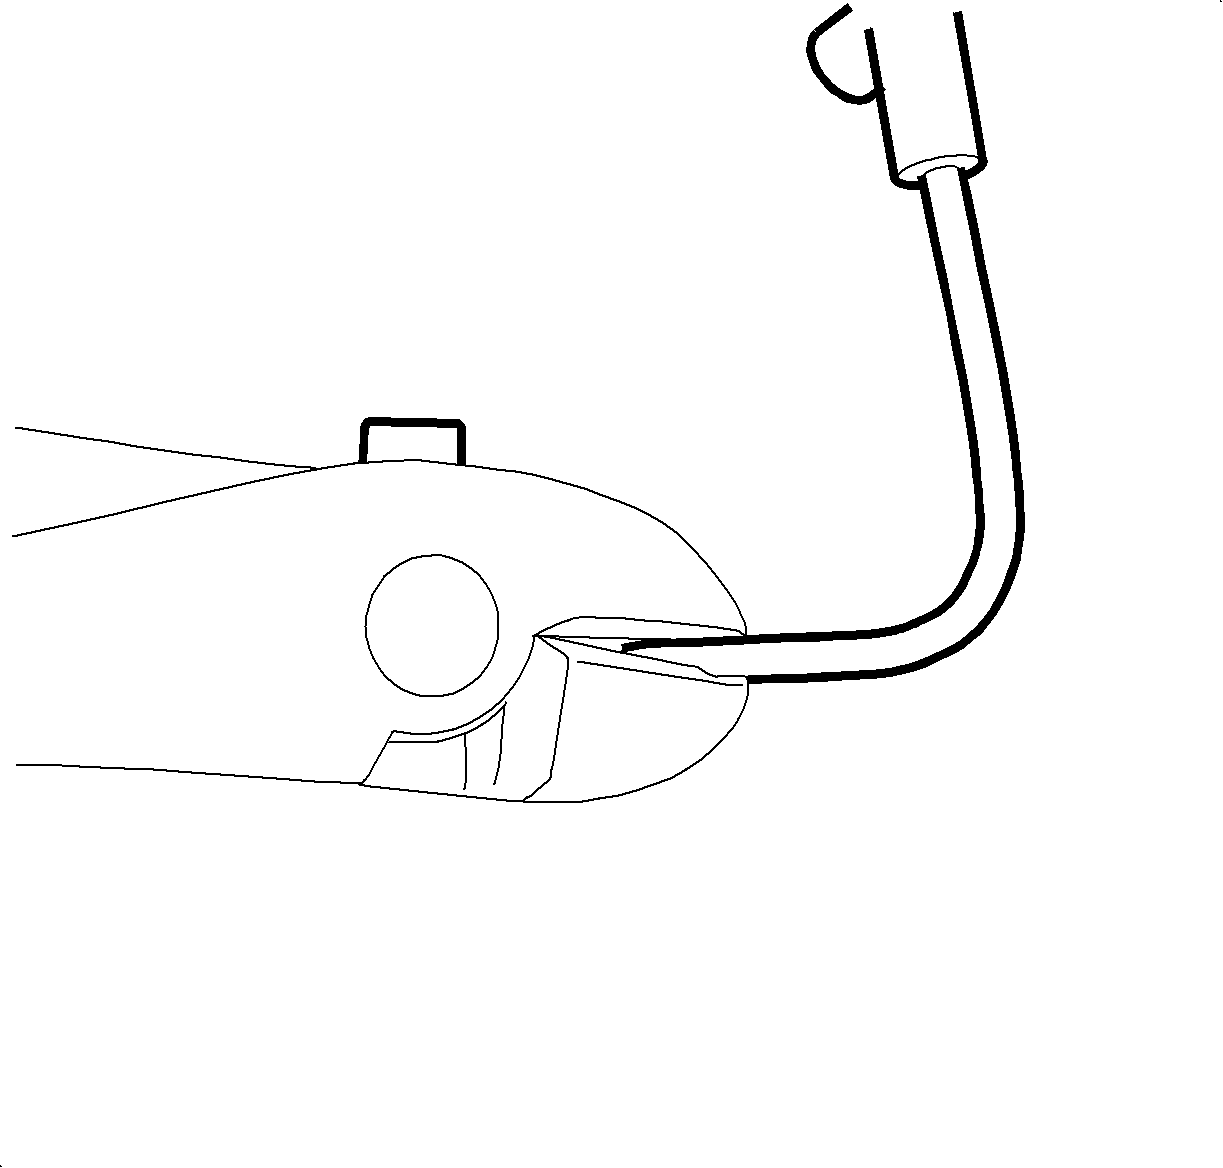
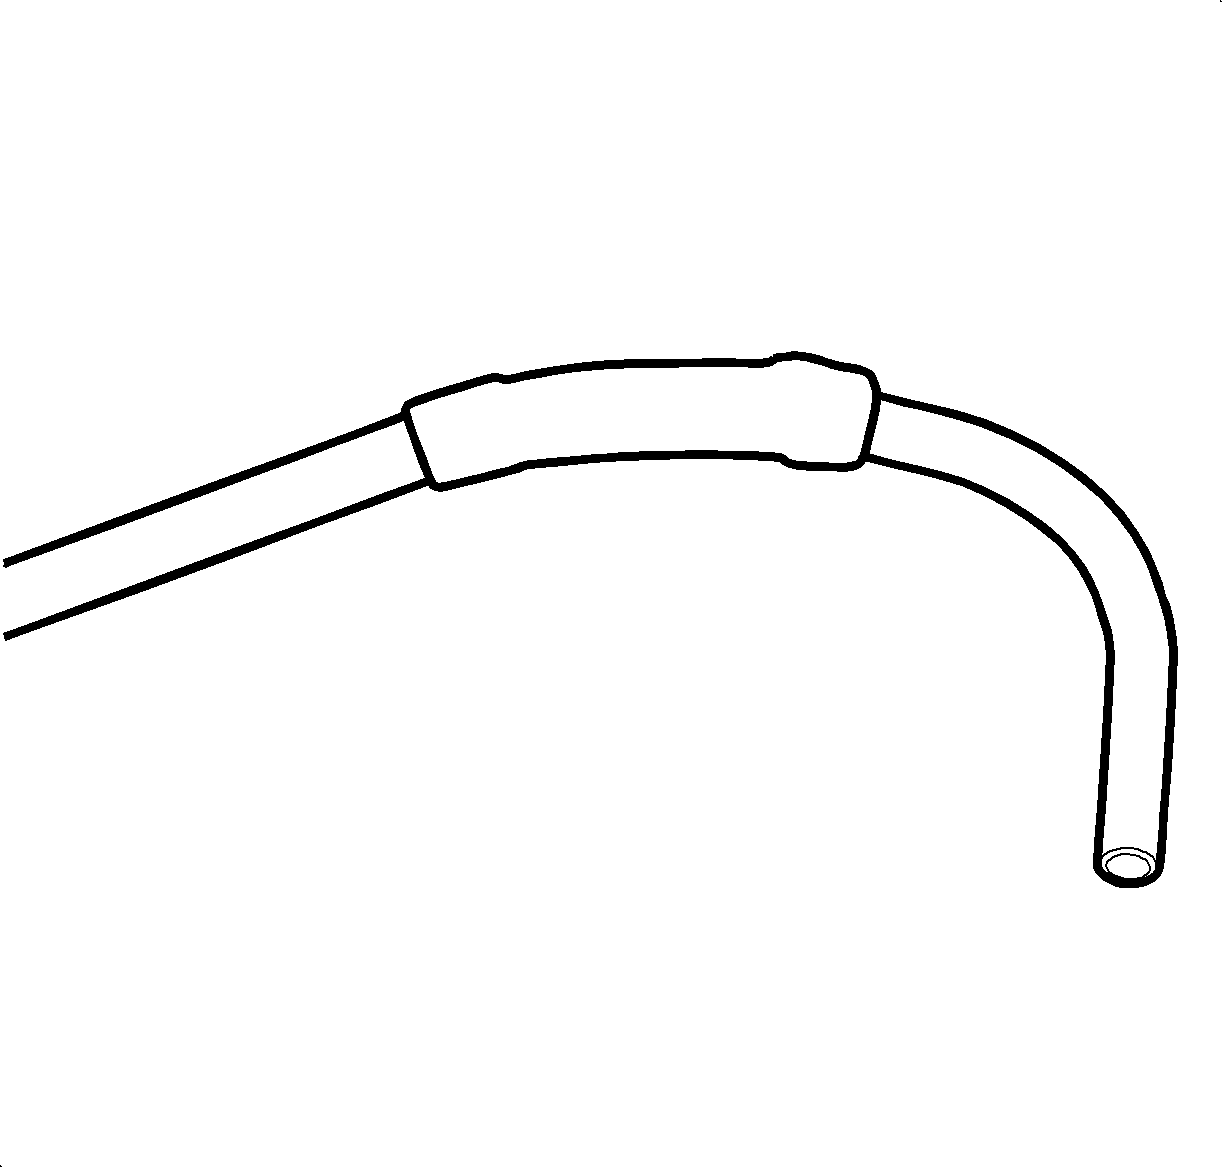
Notice: The applicator tube must be aimed toward the outboard side of the vehicle. Applying sealer toward the inboard side (driver side) of the vehicle may cause damage to the recirc door and/or the HVAC blower motor.
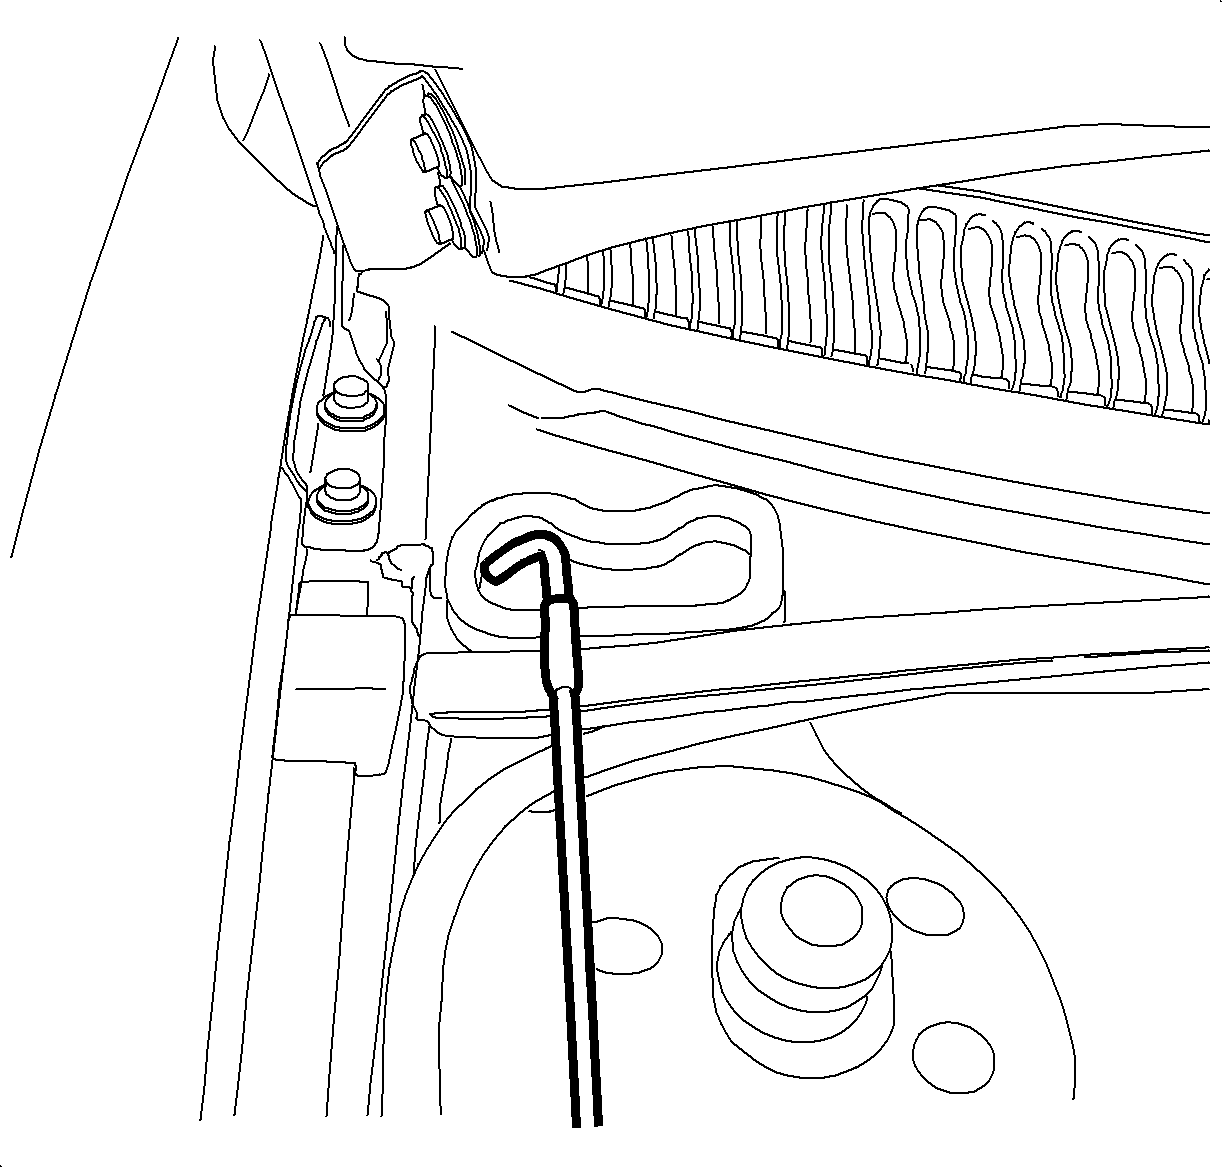
Important: Do not spray the sealer while inserting the applicator tube.
Notice: Do not use excessive amounts of sealer. A very small amount is needed if applied in the correct location. Excessive sealer that flows into the air inlet opening may restrict air flow.
INSTALLATION

Notice: Be careful not to damage VIN plate when removing or replacing upper trim panel.
Important: Be sure upper trim panel seal is correctly seated on forward edge before installing upper trim panel.
Important: Ensure hook-and-loop fastener attachments on upper trim panel are correctly inserted.
- Position upper trim panel on retainer assembly.
- Align tabs on sides of upper trim panel with openings in windshield garnish molding.
- Align clips at clip locations.
- Firmly snap in clips at clip locations.
- Install fasteners on underside of upper trim panel on passenger side of vehicle.
Tighten
Tighten the I/P Upper Trim Panel fasteners to 6N·m(53
in-lbs).
Parts Information
Part Number | Description |
|---|---|
21006245 | Vacuum Harness Assembly |
21031308 | Air Inlet Screen |
50087 | Kent® Leak Chek Body Sealer (or equivalent) |
Claim Information
To receive credit for this repair during the warranty coverage period, submit a claim through the Saturn Dealer System for D9702 (HVAC Plenum Reseal)
Retail Reimbursement Information
One can of Kent® Leak Chek Aerosol Body Sealer will repair 4 vehicles.
