FRONT SIDE MARKER/TURN SIGNAL/ PARK LAMP RUBS PAINT

SUBJECT: Front Side Marker/Turn Signal/Park Lamp Rubs Paint from Lower Fascia at Lower Rear of Lamp Assembly (Add Shim and Remove Excessive Boilout from Lamp Assembly) --------------------------------------------------------------
MODELS: 1995 and 1996 Saturn SC2 Coupes -------------------------------
CONDITION:
----------
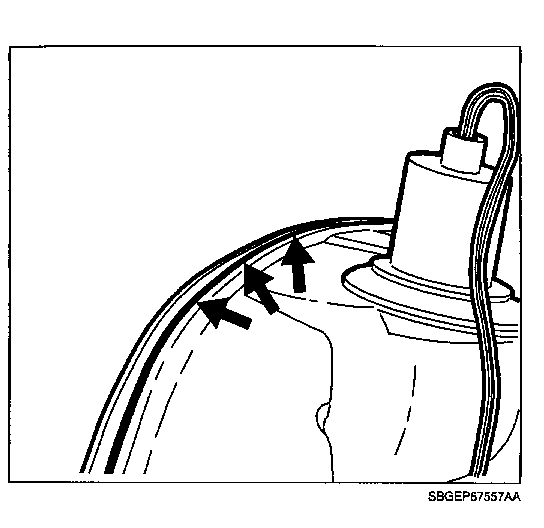
The front side marker/turn signal/park lamp assembly may rub against fascia, causing paint to be rubbed off.
CAUSE:
------
This condition may be caused by tolerances that are too tight between front side marker/turn signal/park lamp assembly and front fascia and excessive boilout of the adhesive between the lamp lens and housing assembly. (Boilout is the excess gray adhesive material at the seam.)
CORRECTION:
-----------
Add two 5/16 inch flat washers between headlamp housing bracket and upper motor rail, and remove excessive adhesive boilout from bottom of front side marker/turn signal/park lamp assembly according to procedures in this bulletin.
PROCEDURES
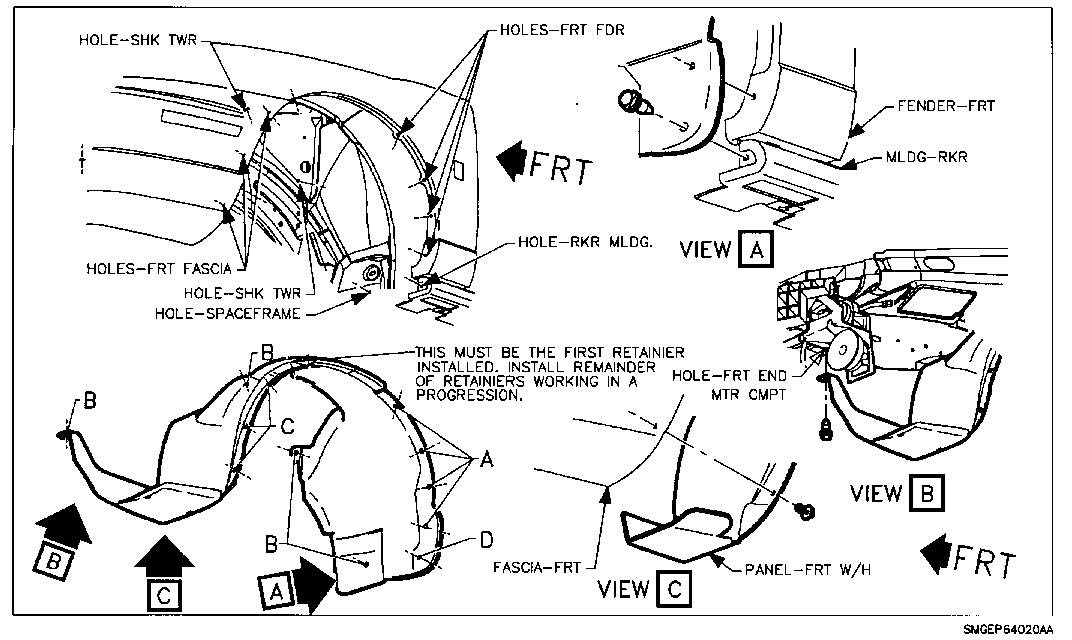
1. Remove bolts attaching wheelhouse panel to front fascia.
2. Remove inner plastic fasteners attaching wheelhouse panel to fender support bracket, motor compartment side panels and inner wheelhouse panel.
3. Remove plastic fasteners at outer edge of wheelhouse panel to fender attachment location.
4. Remove wheelhouse panel.
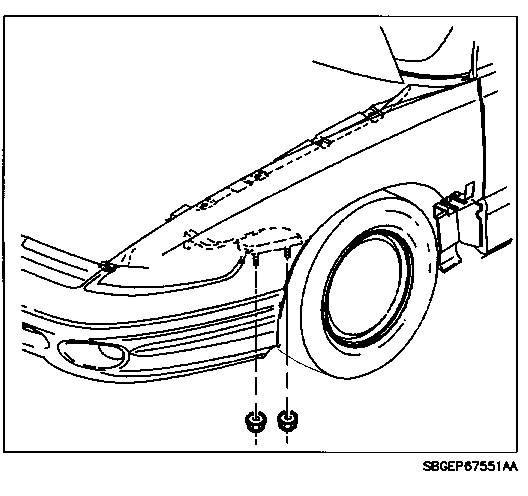
5. Remove fender to fascia nuts located on the backside of fender to fascia joint, just forward of wheel opening.
6. Remove top fender bolts.
7. Raise headlamps
8. Hold fender away from vehicle using a clean rolled up cotton towel.
9. Remove headlamp housing to upper motor rail bolt.
10. Install two, 5/16 in. x 1.5 mm thick washers between headlamp housing bracket and upper motor rail, and install headlamp housing to upper motor rail bolt. Torque: 10 N-m (89 in-lbs)
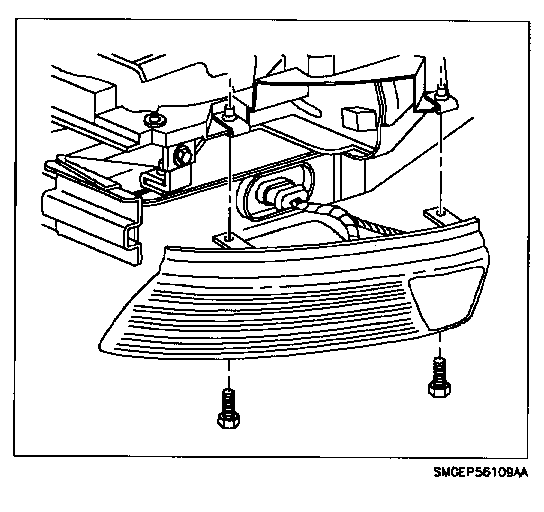
11. Remove front side marker/turn signal/park lamp assembly bolts.
12. Disconnect lamp sockets and lower front side marker/turn signal/park lamp assembly, and remove from vehicle.
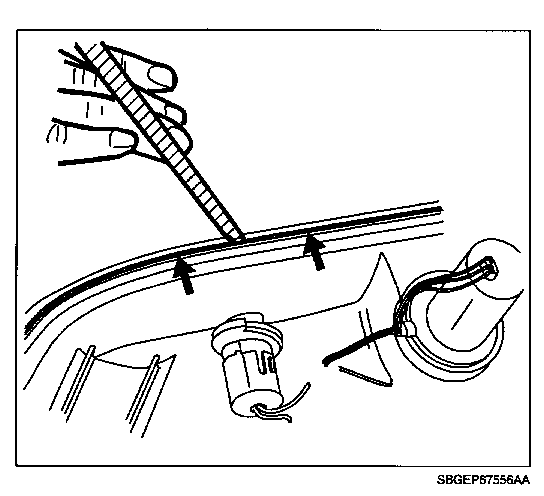
NOTICE: Remove only the adhesive boilout from the lamp assembly along the bottom edge to the point that is lower than the outboard edge of the amber lens. Removing too much material may adversely affect the seal of the lamp assembly.
13. Using an emery board or file, remove excessive adhesive boilout (gray in color) along the bottom rearward half of the lamp assembly.
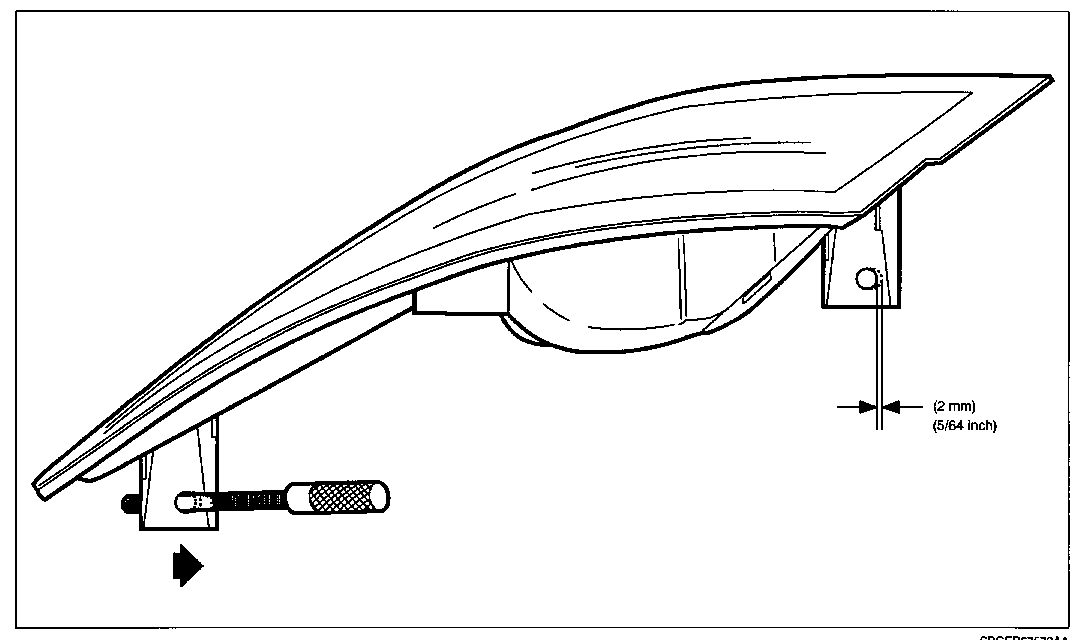
14. If necessary, slot the lamp assembly attachment holes forward up to 2 mm (5/64 in.) to create additional rearward adjustment of the lamp assembly. (Left side lamp assembly shown in illustration, right side lamp assembly similar.)
15. Install lamp assembly and bolts. Adjust fore/aft adjustment as necessary.
16. Install partially removed fender and top fender bolts. Torque: 10 N-m (89 in - lbs)
17. Install fender to fascia nuts located on backside of fascia.
18. Position wheelhouse liner to vehicle.
19. Install plastic fasteners and bolts at outer edge of wheelhouse panel.
20. Install inner plastic fasteners.
PARTS REQUIREMENTS:
2 - 5/16 in. x 1.5 mm Thick Washers per Side
CLAIM INFORMATION:
To receive credit for this repair during the warranty coverage period, submit a claim through the Saturn Dealer System as follows:
Labor Case Operation Type Description Code Time ---- ----------- ---------- ----
VW Add Shim and Remove Excessive Adhesive Boilout from Lamp Assembly Right Side T9723 0.8 hrs Left Side T9724 0.8 hrs
NOTE: If the front fascia needs to be color/clearcoated, relate A0007 to the appropriate labor operation listed above.

General Motors bulletins are intended for use by professional technicians, not a "do-it-yourselfer". They are written to inform those technicians of conditions that may occur on some vehicles, or to provide information that could assist in the proper service of a vehicle. Properly trained technicians have the equipment, tools, safety instructions and know-how to do a job properly and safely. If a condition is described, do not assume that the bulletin applies to your vehicle, or that your vehicle will have that condition. See a General Motors dealer servicing your brand of General Motors vehicle for information on whether your vehicle may benefit from the information.
