Decklid Does Not Stay Open in the Full Open Position and/or Too Hard to Open

| Subject: | Decklid Does Not Stay Open in the Full Open Position and/or Too Hard to Open. -- Reposition or Replace the Rear Compartment Lid Hinge Torque Rods. Due to revisions under Models Affected, this bulletin supersedes bulletin 95-T-02, which should be discarded. |
| Models: | 1996-1999 Saturn Sedans |
Condition:
When in the full open position, the decklid may not stay open or may fall down, or has a greater than normal opening force.
Cause:
The decklid torque rods may have been improperly installed during production. Also, if a rear decklid spoiler is installed at the retailer, the new torque rods may not have been installed to accommodate the weight of the decklid spoiler.
Correction:
Refer to the Procedure in this bulletin to relocate the torque rods to the correct location in the rear compartment.

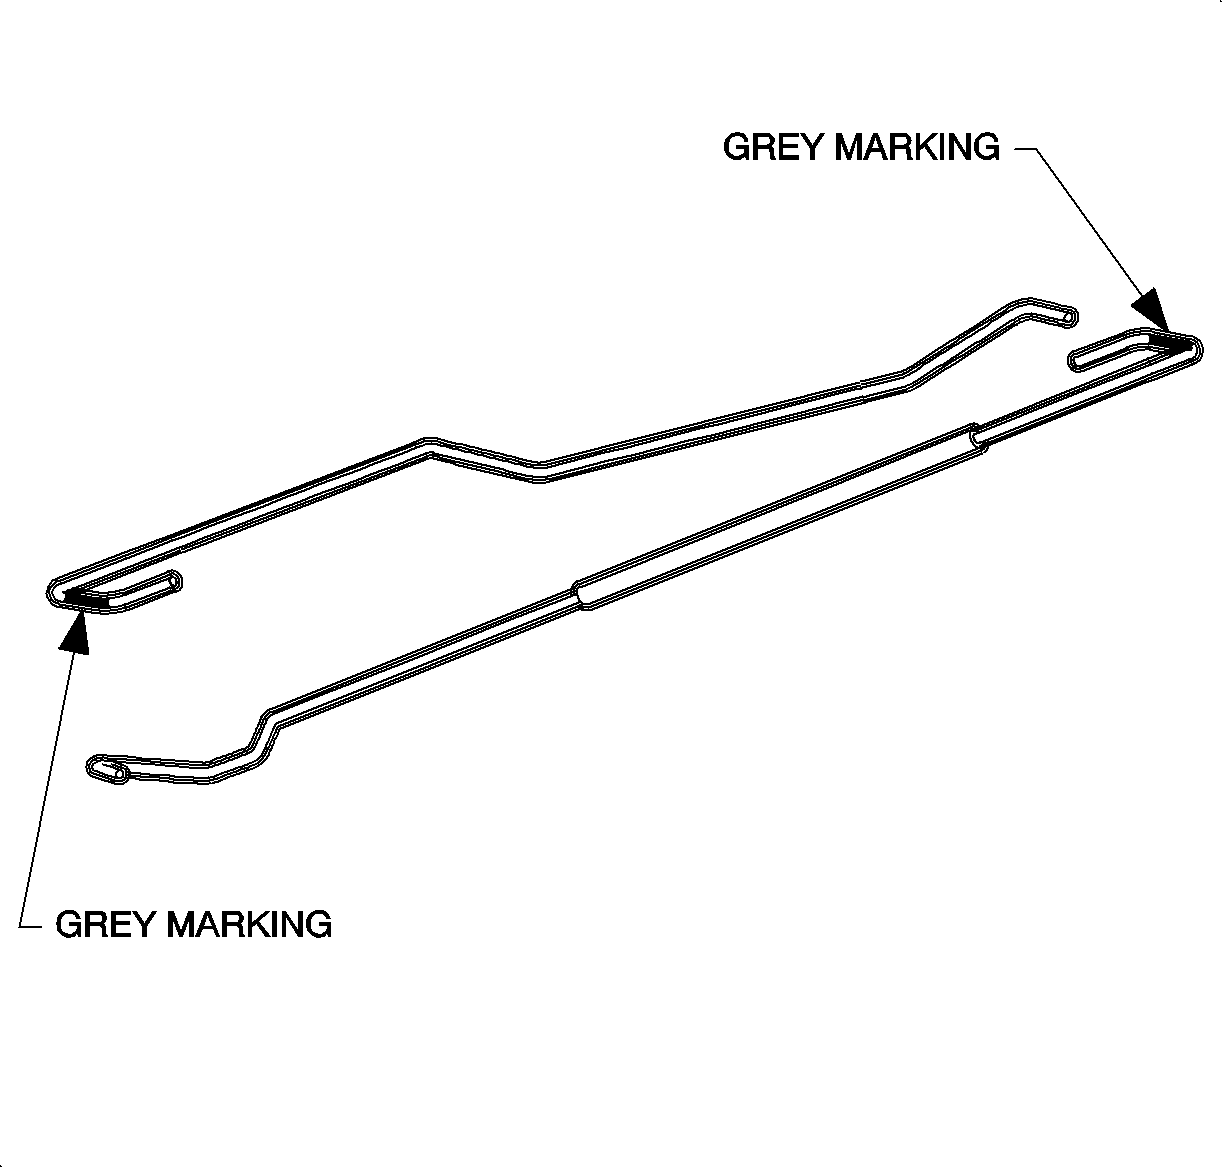
For SL, SL1, and SL2 models without the rear decklid spoiler option (D80), the correct torque rods are P/N 21098704 and P/N 21098705. These torque rods are colored black and have no identifying paint marks on them.
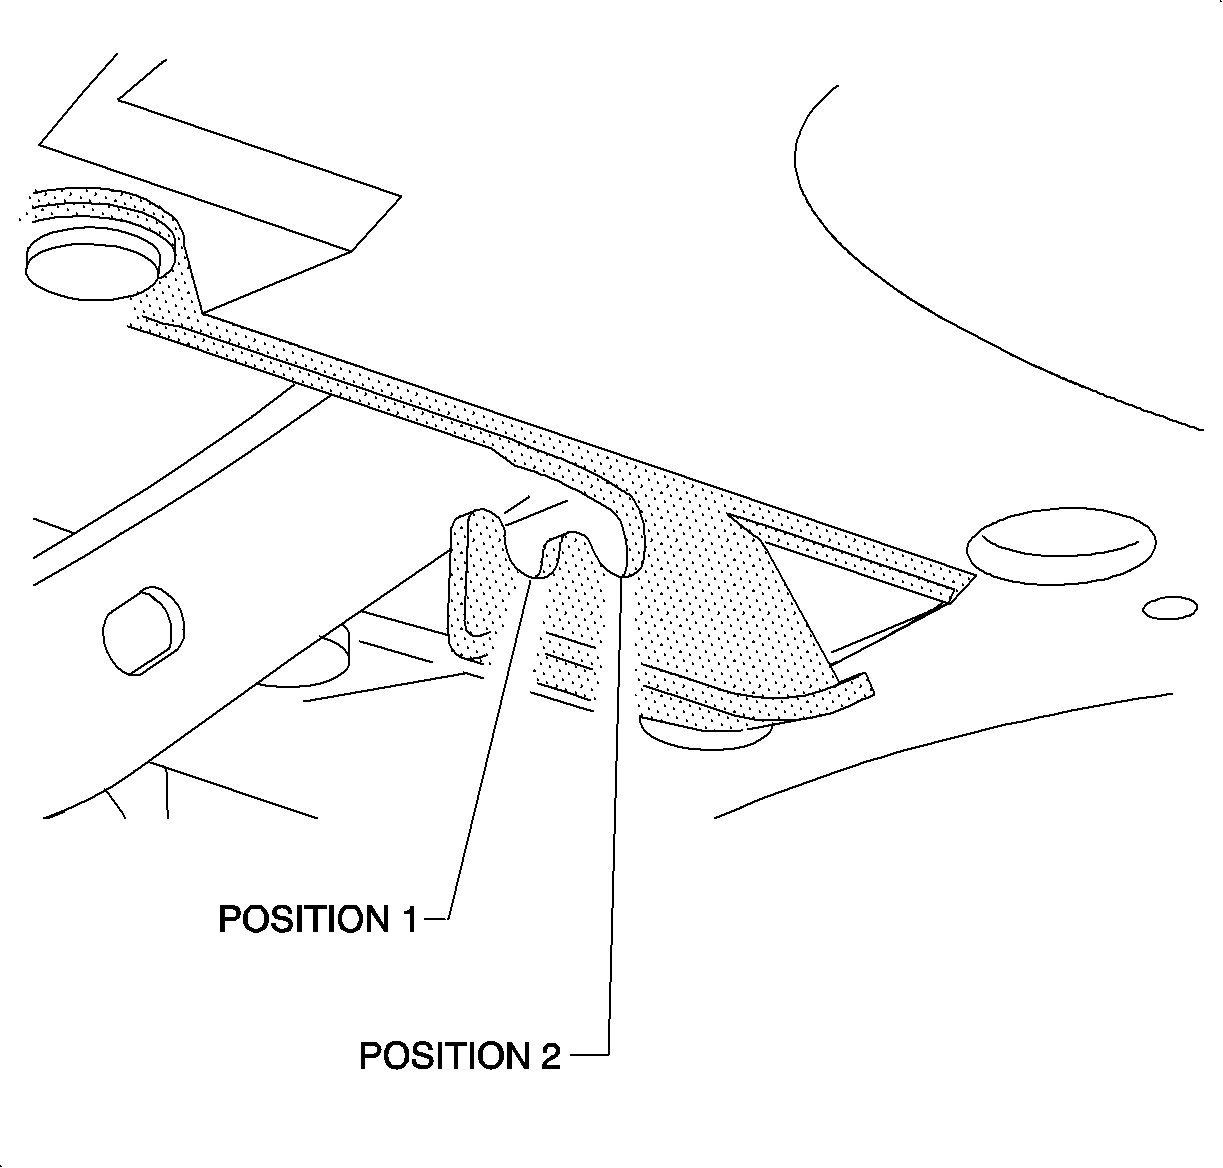
| • | For SL and SL1 models the torque rods must be installed in the rear position (position 1) of the rear decklid hinges. |
| • | For SL2 models, the torque rods must be installed in the front position (position 2), of the rear decklid hinges. This is due to the increased weight of the center reflex panel installed on the SL2. |

For SL2 models equipped with the rear decklid spoiler option (D80), the correct torque rods are P/N 21098706 and P/N 21098707. These torque rods are black in color with a gray paint marking on the U bend area of the torque rods. he torque rods must be installed in the front position (position 2) of the rear decklid hinges.
If the rear decklid spoiler is added to a Saturn Sedan, the rear decklid specific torque rods P/N 21098706 and P/N21098707 must be used in the front slots (position 2), of the rear decklid hinges. Failure to use these torque rods with the rear decklid spoiler will result in poor hold open quality of the rear decklid.
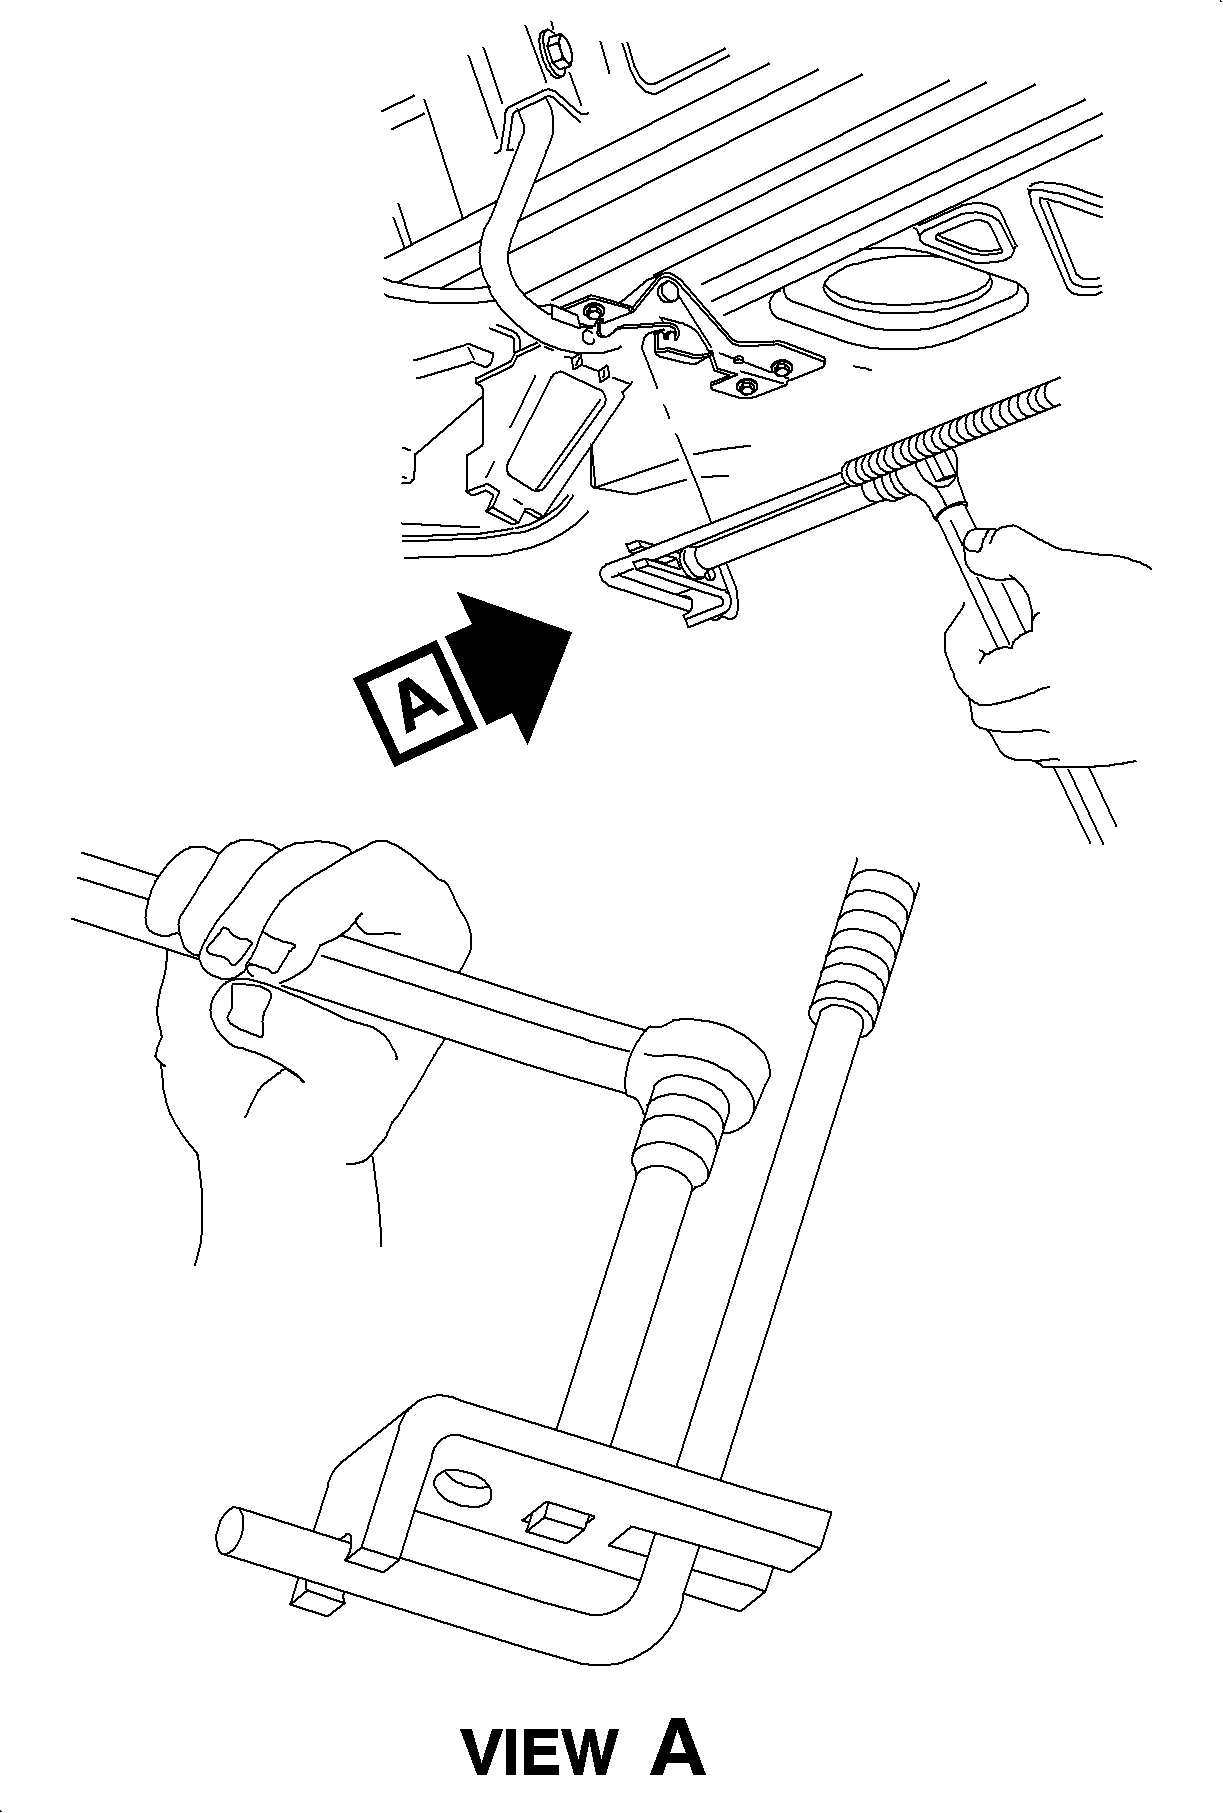
If an SL2 rear center reflex panel is installed on an SL or SL1, the torque rods must be moved from the rear slots (position 1), to the front slots (position 2), on the rear decklid hinges. Use tool SA9192B and the following procedure to move the torque rods.
Notice: The addition of extra weight to the rear decklid by aftermarket products may affect the performance of the torque rods.
Important: No warranty should be submitted for adjustment or installation of new torque rods due to retailer installed spoilers or reflexes.
Removal Procedure
- Place a prop under the rear compartment lid.
- Attach tool SA9192B to the lower torque rod and twist the torque rod, then remove the torque rod from the bracket.
- Relax the lower torque rod, remove the tool and remove the lower torque rod. Note the position of the lower torque rod for installation.
- Attach tool SA9192B to the upper torque rod and twist the upper torque rod, then remove the upper torque rod from the bracket.
- Relax the upper torque rod, remove the tool and remove the upper torque rod. Note the position of the upper rod for installation.
Caution: Rear compartment lid will fall when torque rods are removed if support is not provided.

Installation Procedure
- Install the upper torque rod into the left hinge arm.
- Install tool SA9192B to the upper torque rod and twist the upper torque rod, then install the upper torque rod into the bracket of the right hinge at the proper position. Refer to the following chart for the proper position of the torque rod.
- Relax the upper torque rod and remove the tool.
- Install the lower torque rod into the right hinge arm.
- Install tool SA9192B to the lower torque rod and twist the lower torque rod, then install the lower torque rod into the bracket of the left hinge at the proper position. Refer to the above chart for the proper position of the torque rod.
- Relax the lower torque rod and remove the tool.

| • | Position 1 -- SL, SL1 without the rear decklid spoiler |
| • | Position 2 -- SL2 without rear decklid spoiler |
| • | SL, SL1, SL2 with the rear decklid spoiler |
Claim Information:
To receive credit for this repair during the warranty coverage period, submit a claim through the Saturn Dealer System using the appropriate Electronic Labor Time Guide and Labor Operation Code B5460 -- Right Side and/or B5461 -- Left Side.
