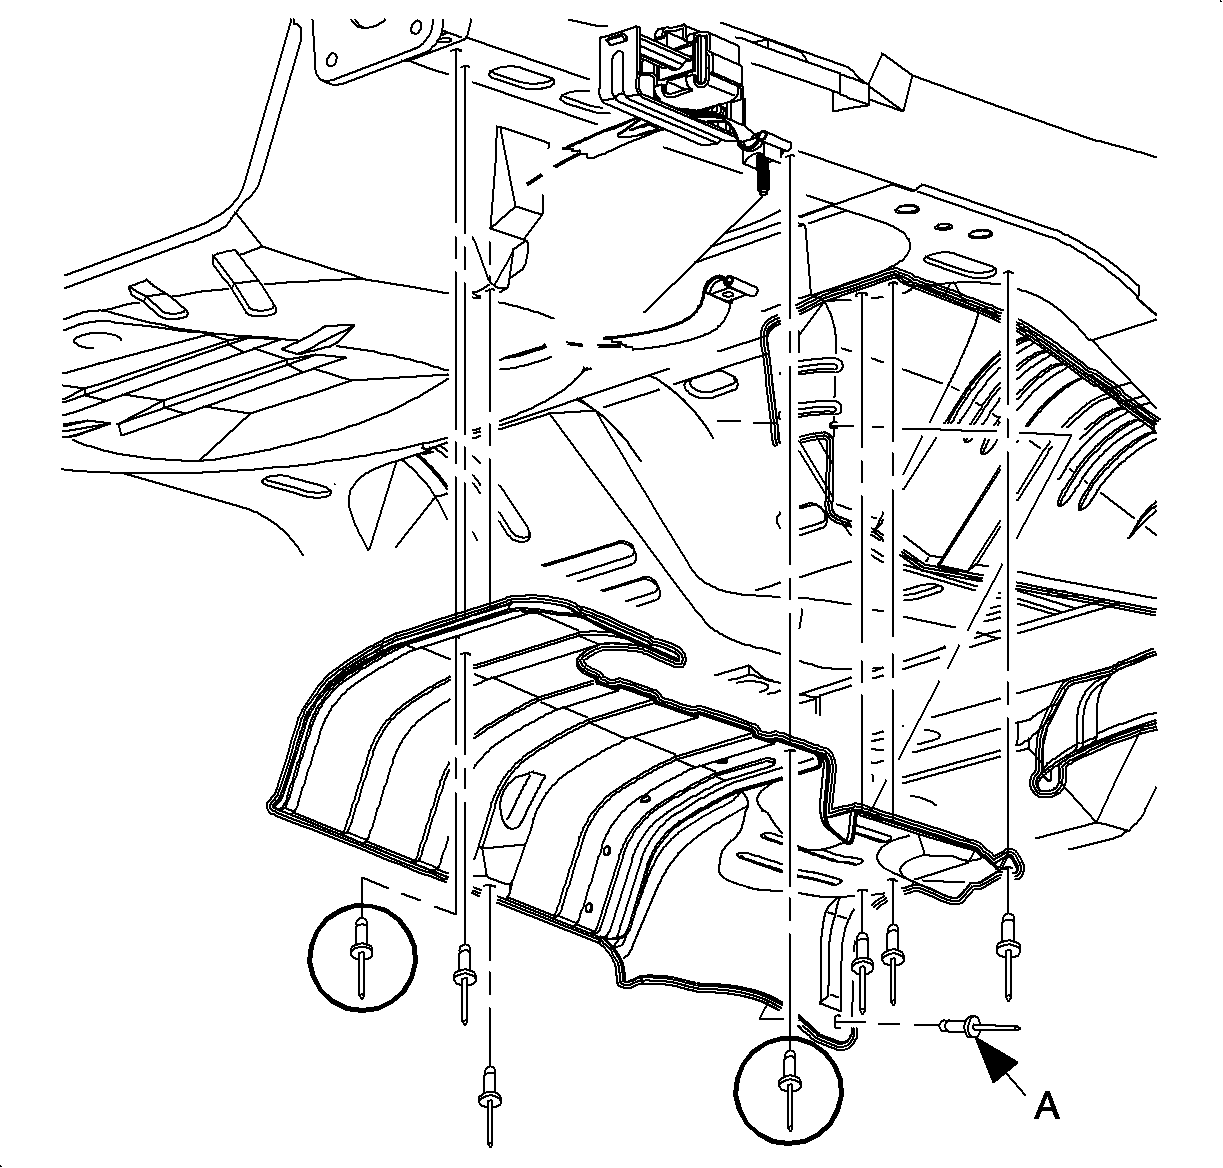
Removal Procedure
- Raise the vehicle squarely on a lift. Refer to the lift instructions for positioning vehicle.
- Remove the muffler strap fastener and hanger.
- Lower the muffler until the pipe assembly rests on the suspension crossmember.
- Remove the muffler heat shield rivets by guiding off the heads with a small grinder or by punching out the center of the rivets with a 3/32 in. punch. Use a 3/16 in. drill to remove the rivet without damaging the retainer hole.

Caution: Ensure that the vehicle is properly supported and squarely positioned. To help avoid personal injury when a vehicle is on a hoist, provide additional support for the vehicle on the opposite end from which the components are being removed.
Caution: Heavy work gloves and eye protection must be worn when modifying the exhaust heat shield, and when removing and installing the intermediate exhaust pipe isolator. The exhaust heat shield edges are extremely sharp and contact with the edges could cause personal injury.
Notice: Inspect the shields for cracks, tears, and missing fasteners. All shields must be firmly attached. Shields must be installed whenever removed for exhaust system or body repairs, etc. to prevent vehicle panel and fuel tank damage.

Notice: Use extreme care when gringing off the rivet heads. Always install all the shields to insure against panel and fuel tank damage.
Installation Procedure
- Position the heat shield in place.
- Install the heat shield rivets starting with the 2 circled. Installing these rivets first aligns the shield.
- Install the muffler hanger and strap nut.

Notice: To prevent damage to the fuel tank, the special rivet (P/N 21011238), labeled A in the illustration, must be used. Do not use a substitue rivet.
Tighten
Tighten the muffler strap around the muffler to 22 N·m (16 lb ft).
