For 1990-2009 cars only
Tools Required
SA9110T Weight Set
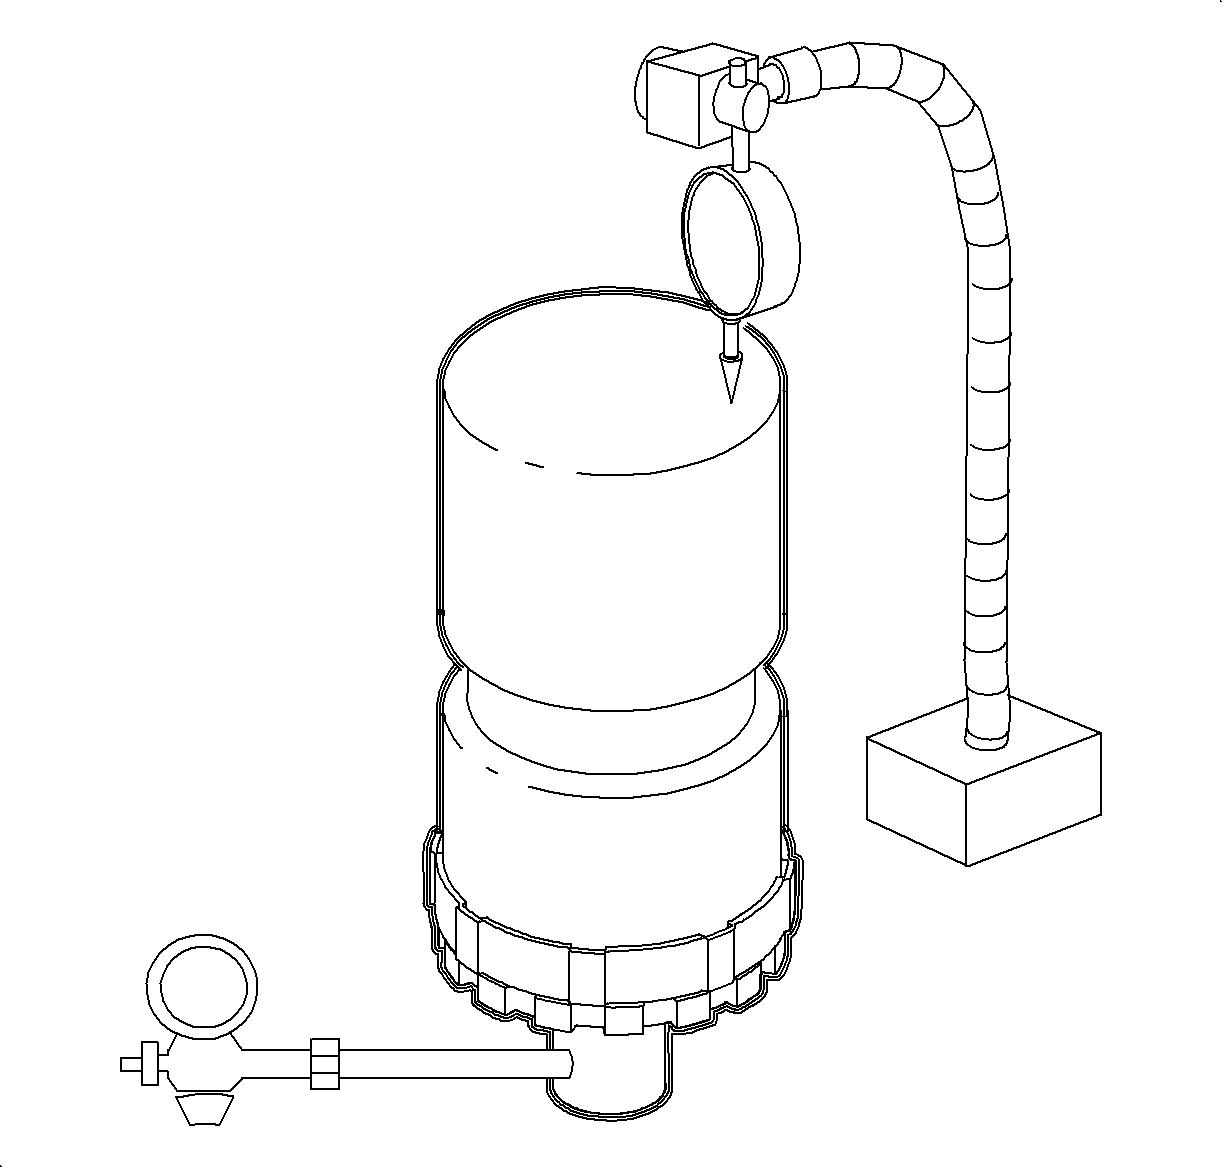
- Place both weights on the clutch backing plate using weight set SA9111T-1 and SA9111T-2.
- Install the air check fixture to the clutch housing.
- Position the dial indicator with the tip resting on the weight.
- Apply regulated air pressure to the clutch piston and release.
- Zero dial indicator. Apply air pressure and measure the piston travel. If end play is not in spec, release pressure, change the snap ring and recheck the measurement.
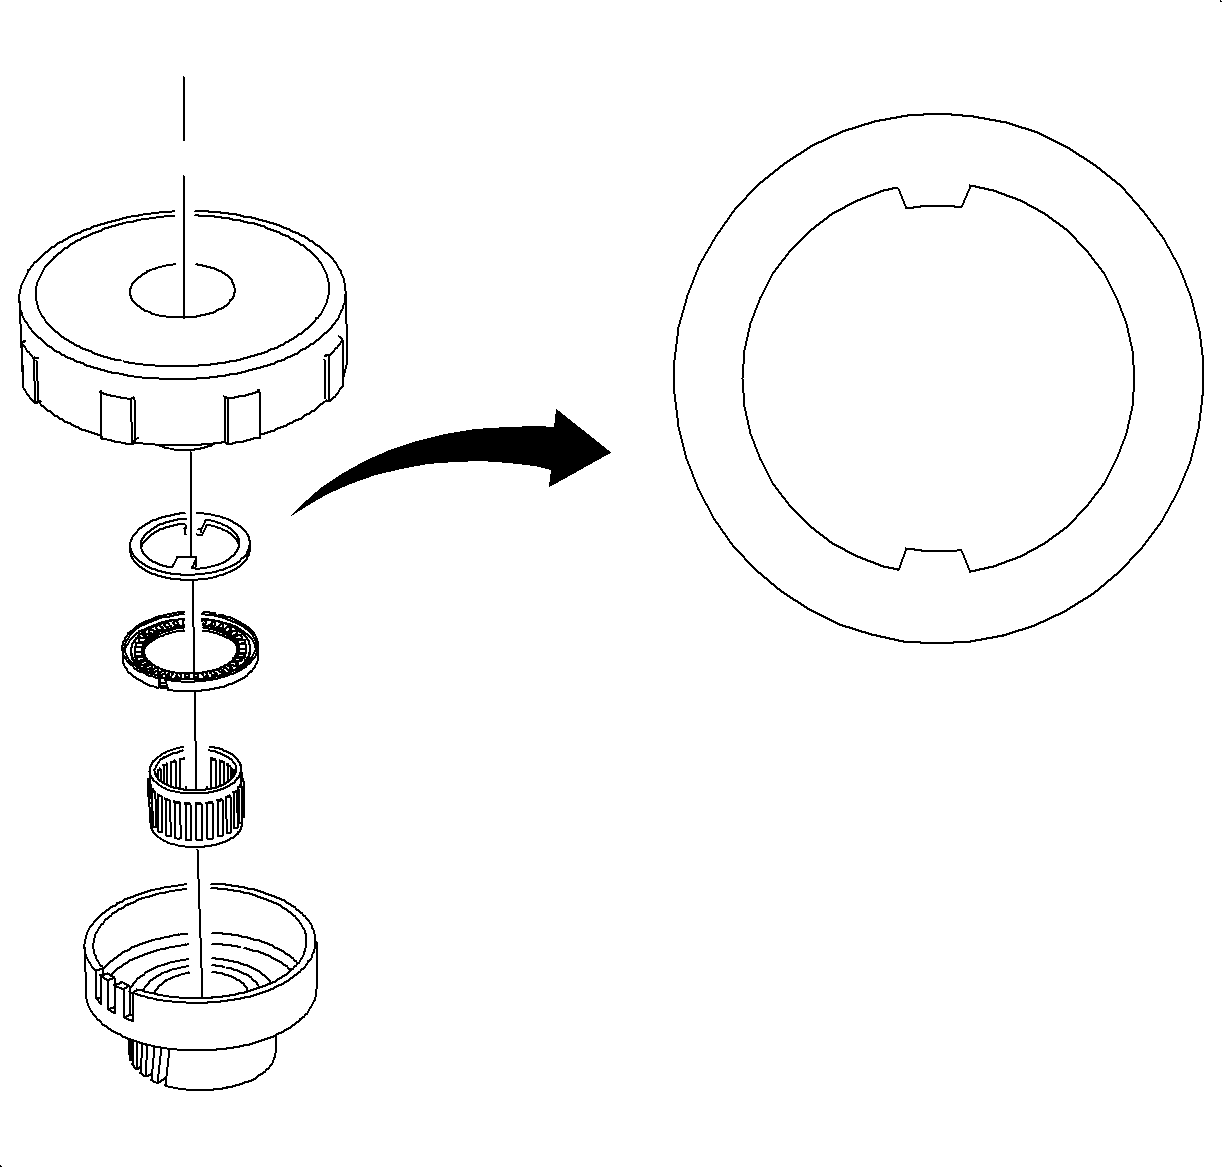
- If 1st clutch housing is being replaced it will be necessary to install a new bearing and race. Press on the new race with the thick end up until flush.
- First clutch only: Install the 1st gear thrust washer.
- Install the thrust bearing with the roller toward the thrust washer.
- Install the 1st clutch needle bearing.

Regulated Pressure
| • | 1st Clutch 415 kPa (60 psi) |
| • | 2nd, 3rd, 4th clutch 550 kPa (111 psi) |
End Play
| • | 1st clutch 0.960-1.410 mm (0.038-0.055 in) |
| • | 2nd clutch 1.520-2.190 mm (0.060-0.086 in) |
| • | 3rd clutch 1.170-1.560 mm (0.046-0.061 in) |
| • | 4th clutch 0.910-1.180 mm (0.36-0.46 in) |

Important: Chamfer-side goes toward housing and flat-side goes toward bearing.
Make sure tabs on the washer line up with slots on the hub.
