Removal Procedure
- Remove the windshield. Refer to Windshield Replacement in Stationary Windows.
- Remove the bolts from the modular dash assembly and from the cross car beam.
- Disconnect the negative battery cable.
- Remove the brake master cylinder.
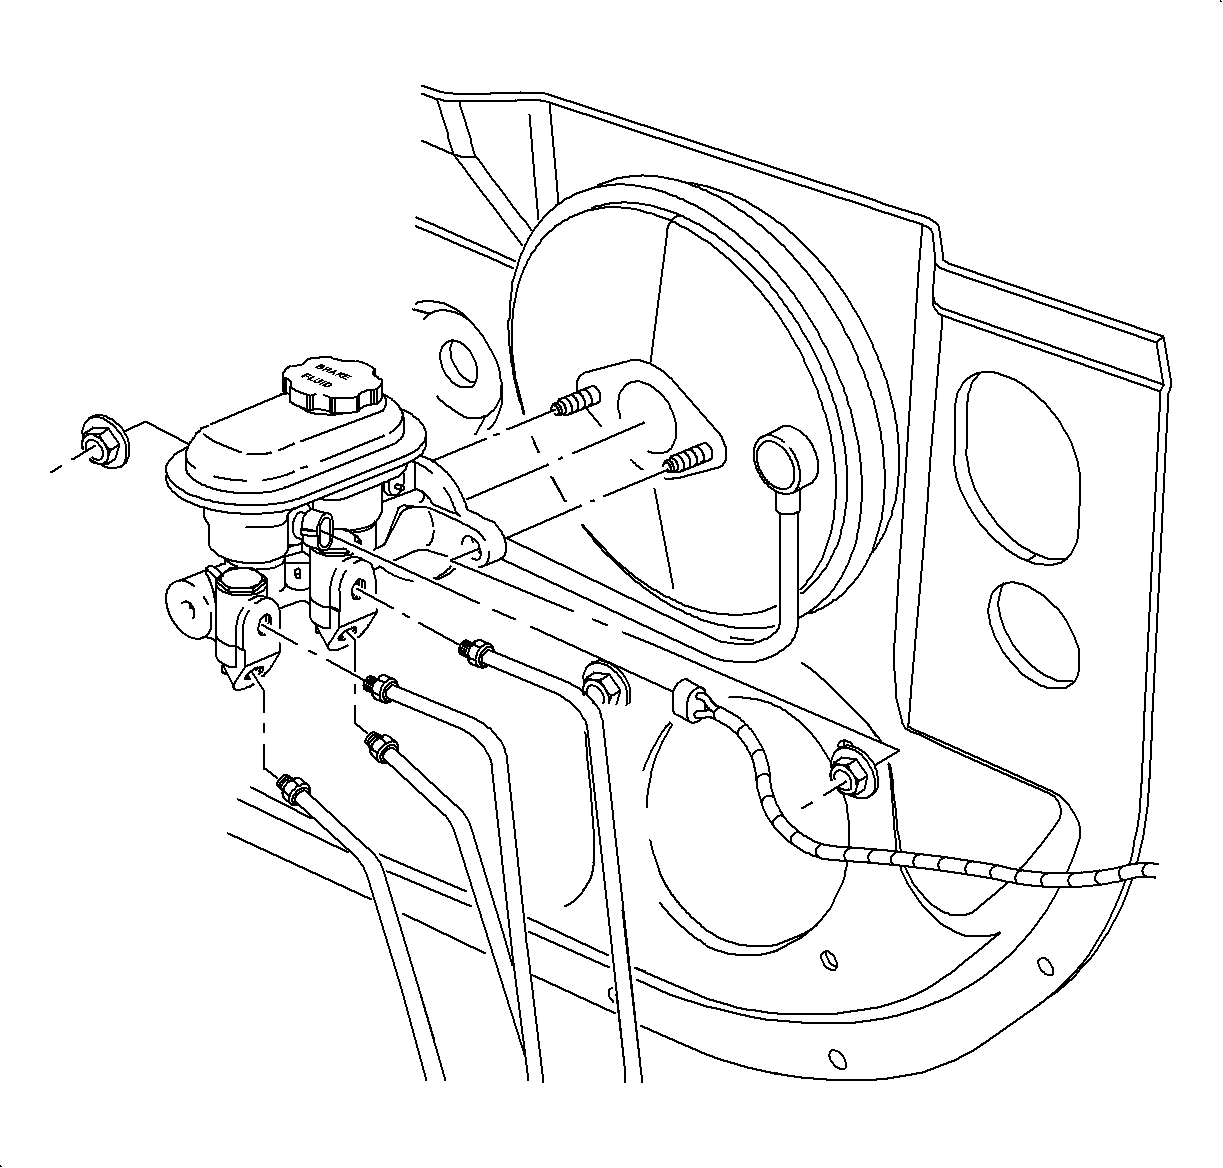
- Remove the brake line fitting nuts from the master cylinder.
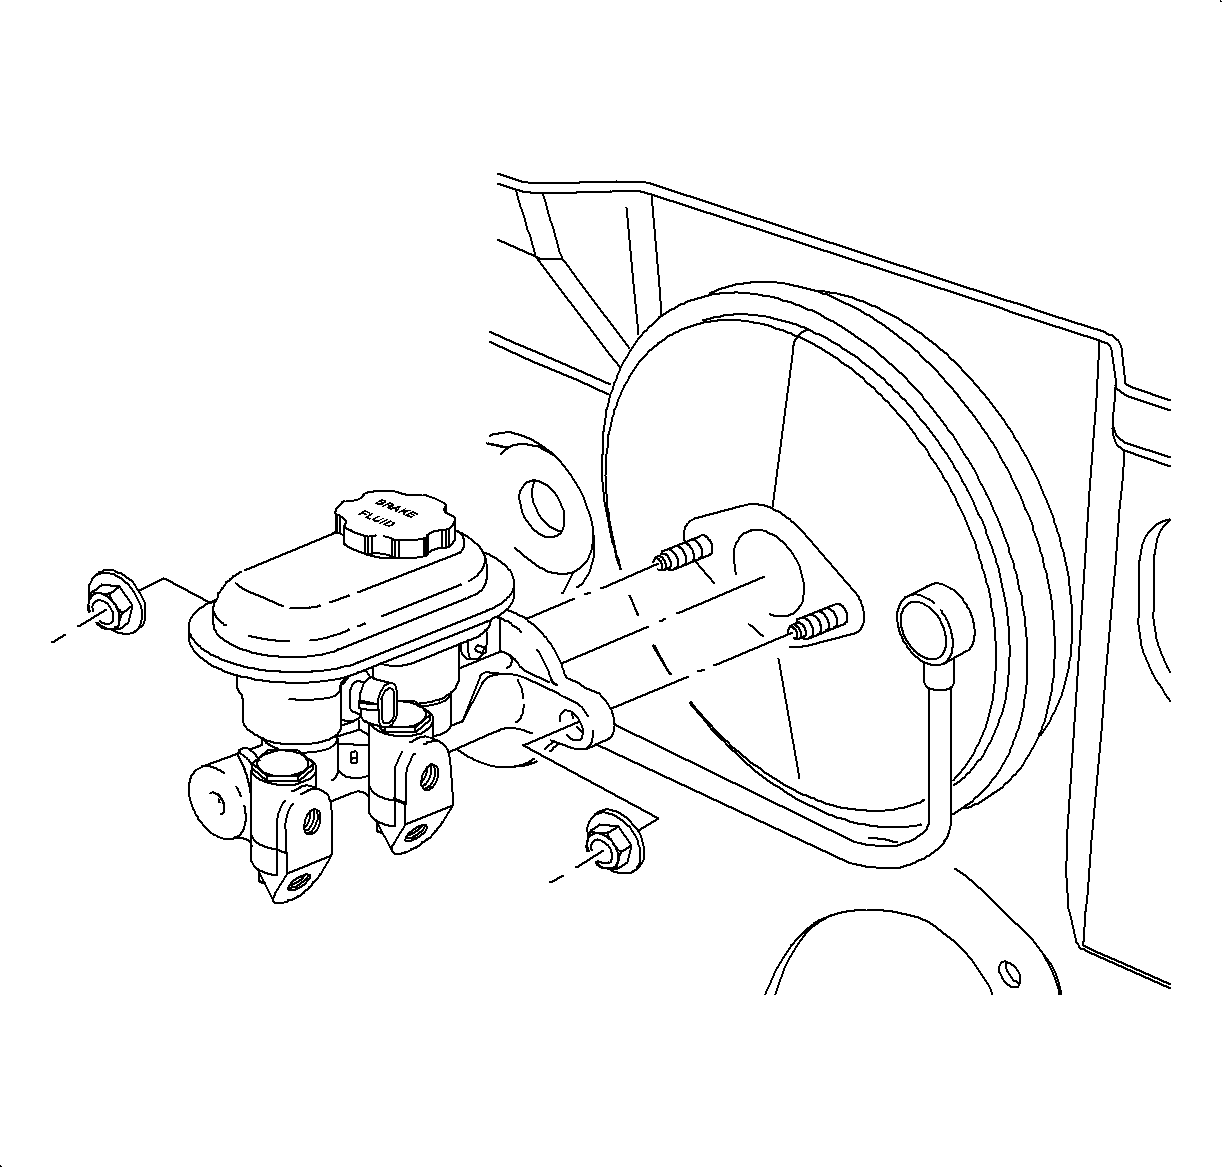
- Remove the 2 master cylinder-to-brake booster attachment nuts.
- Remove the master cylinder.
- Remove the dash insulator.
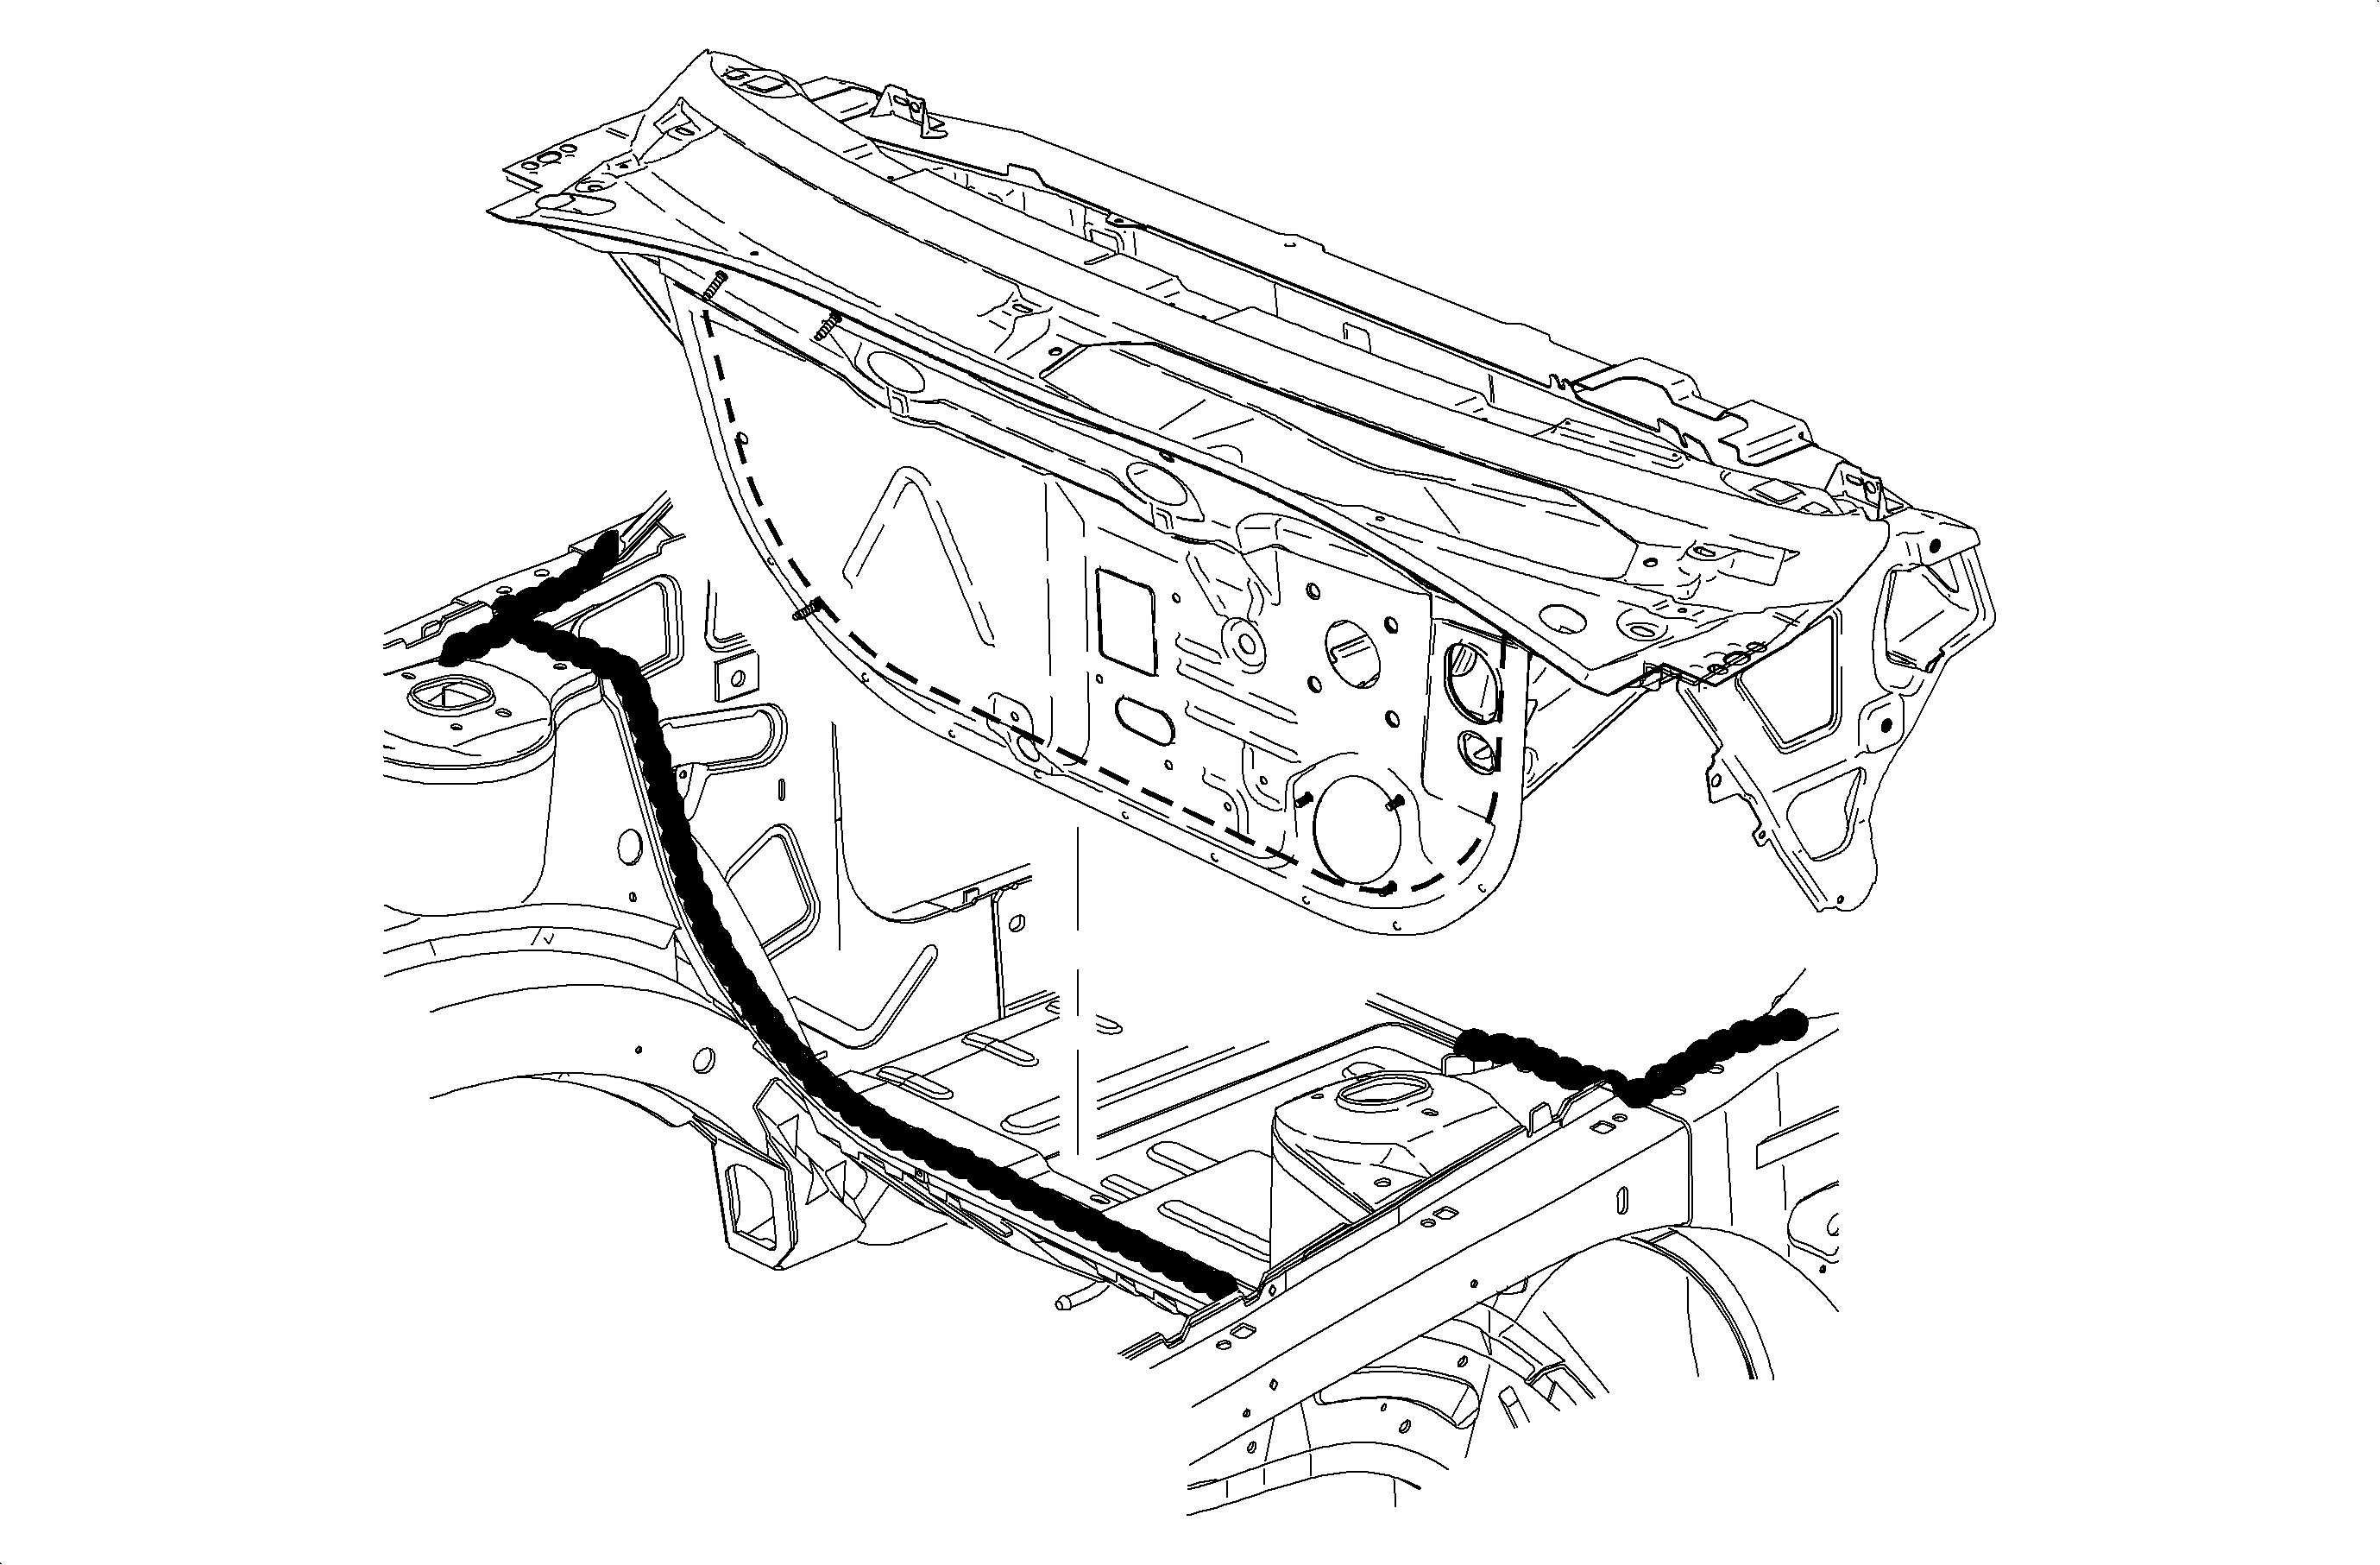
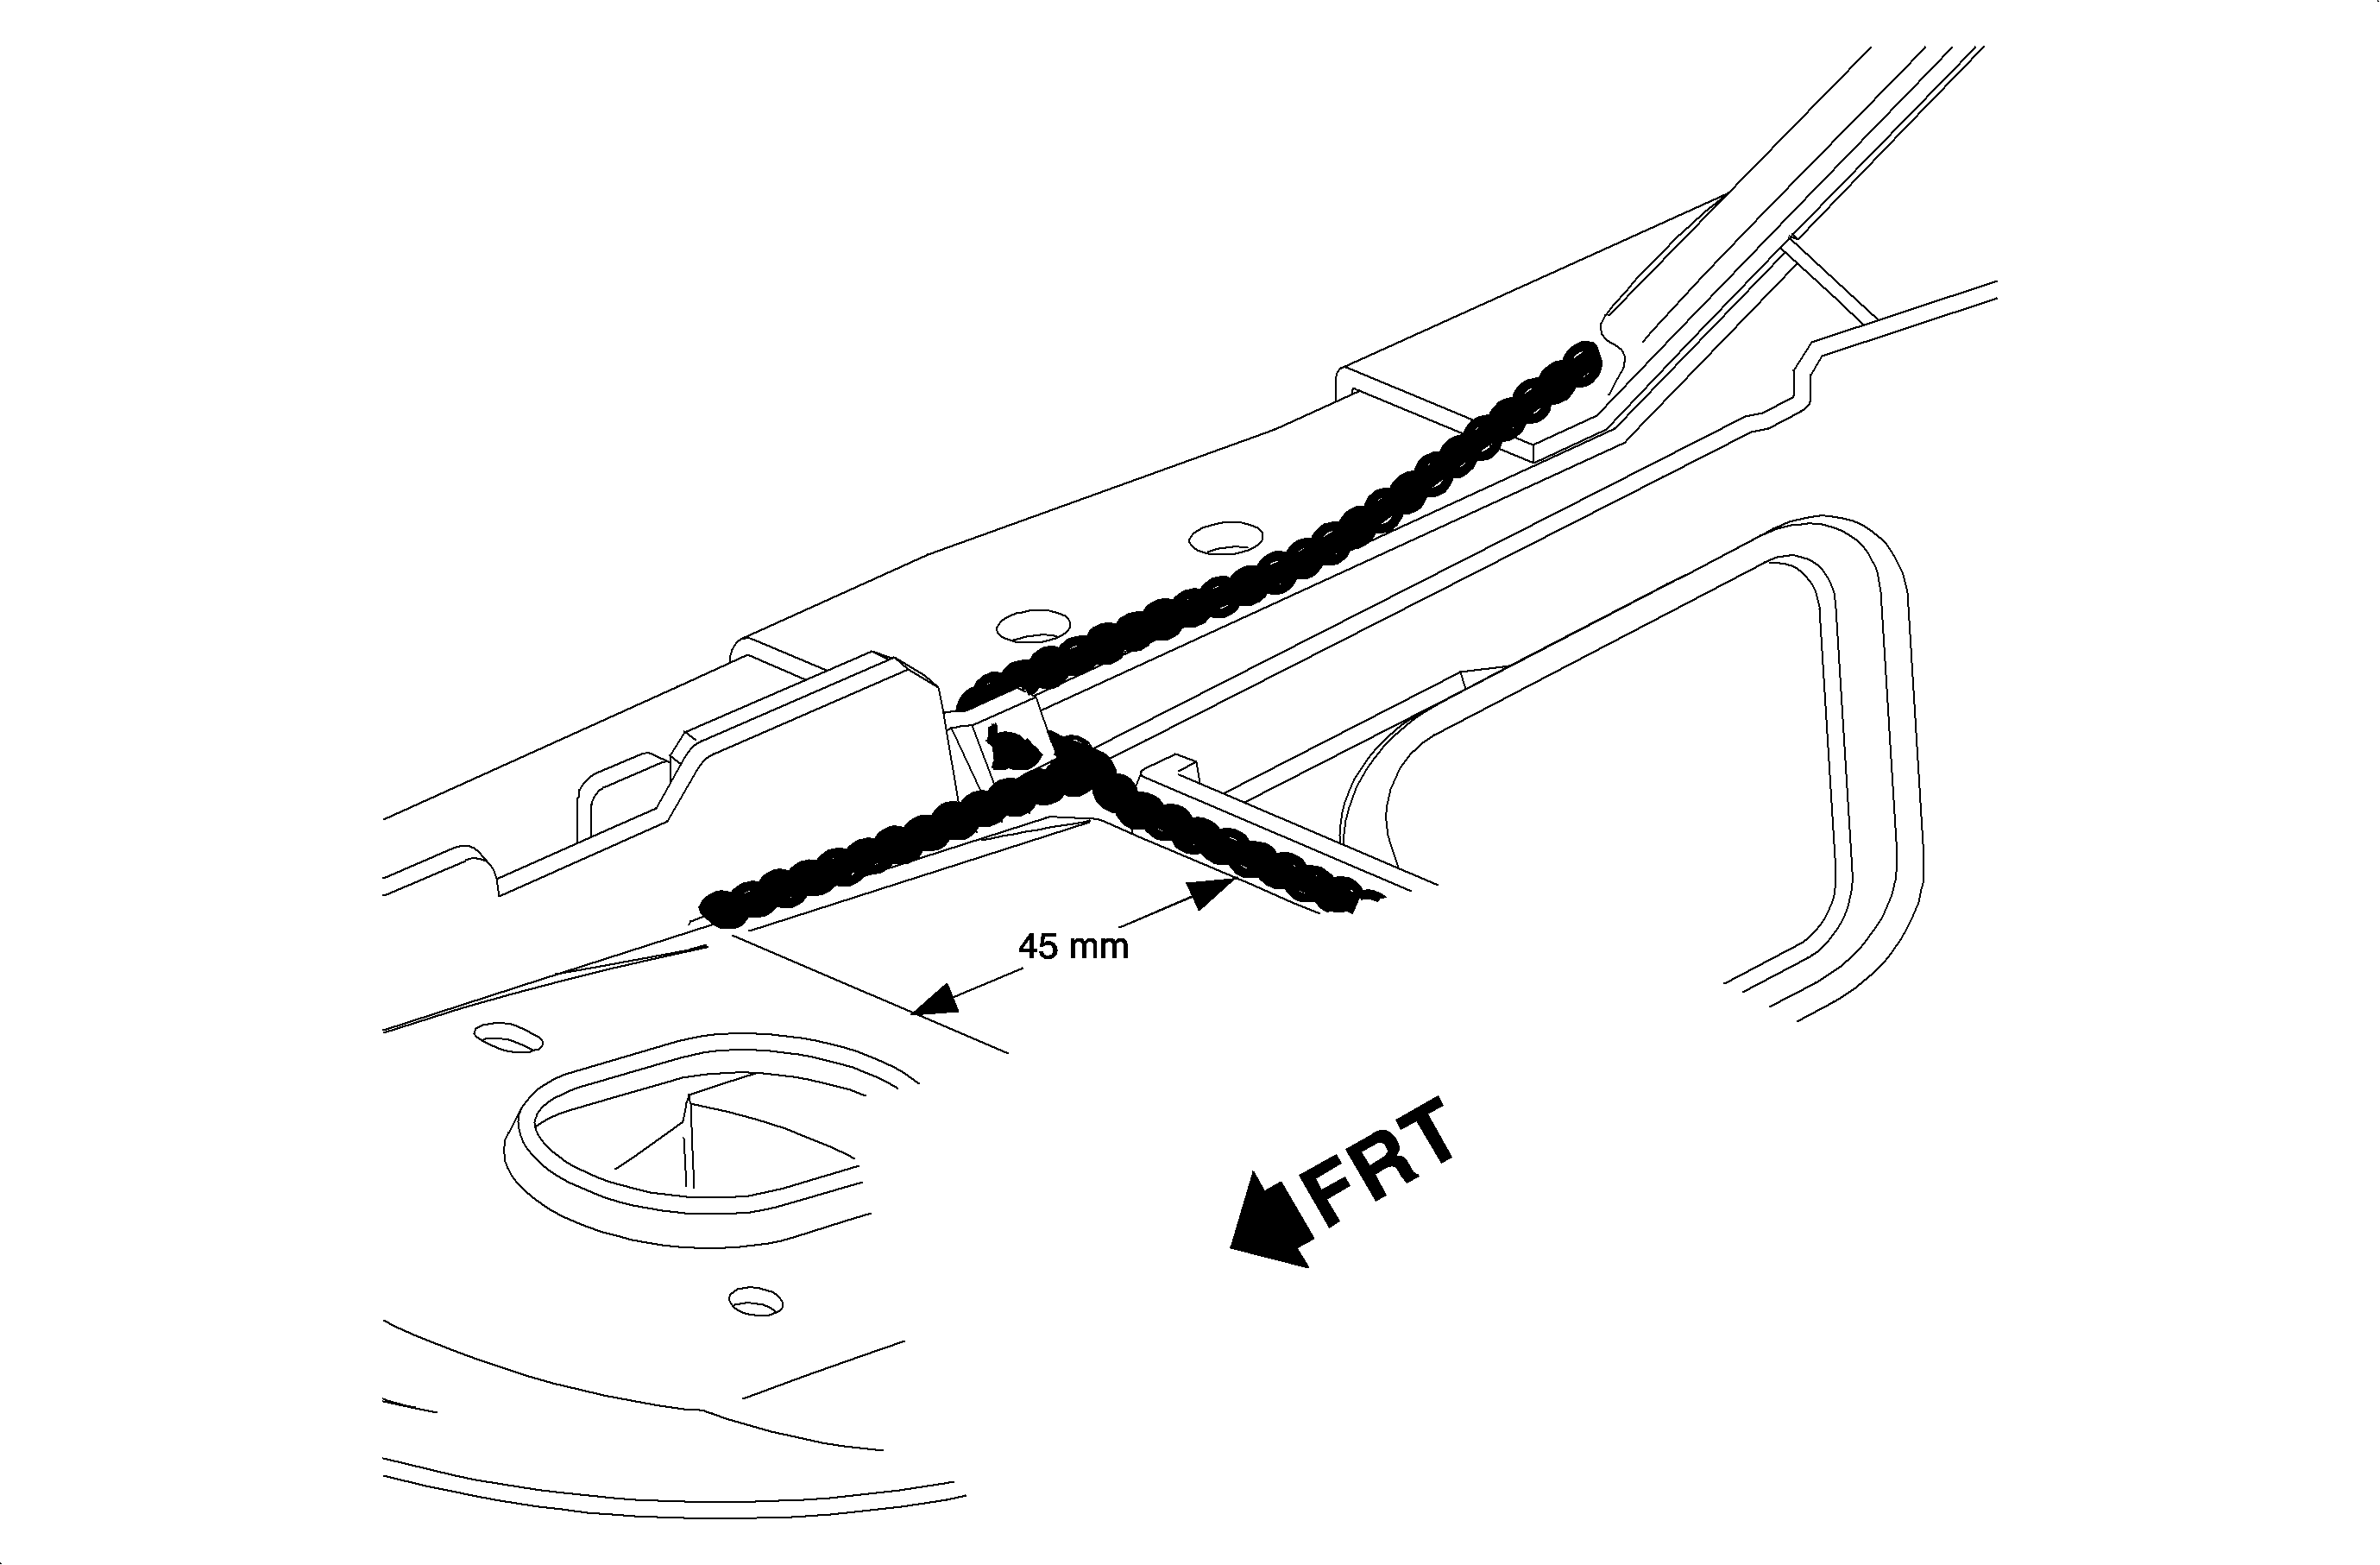
- Cut the modular dash assembly above the smile joint in the area of the dotted line.
- Using piano wire, cut the sealing joint to the dash in the shock tower area.
- Heat the joint with a heat gun to loosen the adhesive bond. Pull the remainder of the modular dash flange from the adhesive joint.
- Remove the old adhesive from the smile joint. Clean the joint areas with isopropyl alcohol in the sealer path areas and prepare for the new adhesive (P/N 12345633).
- Apply adhesive into the smile joint and sealing areas as shown in the illustration.
- Install the dash ensuring proper engagement of the smile joint.
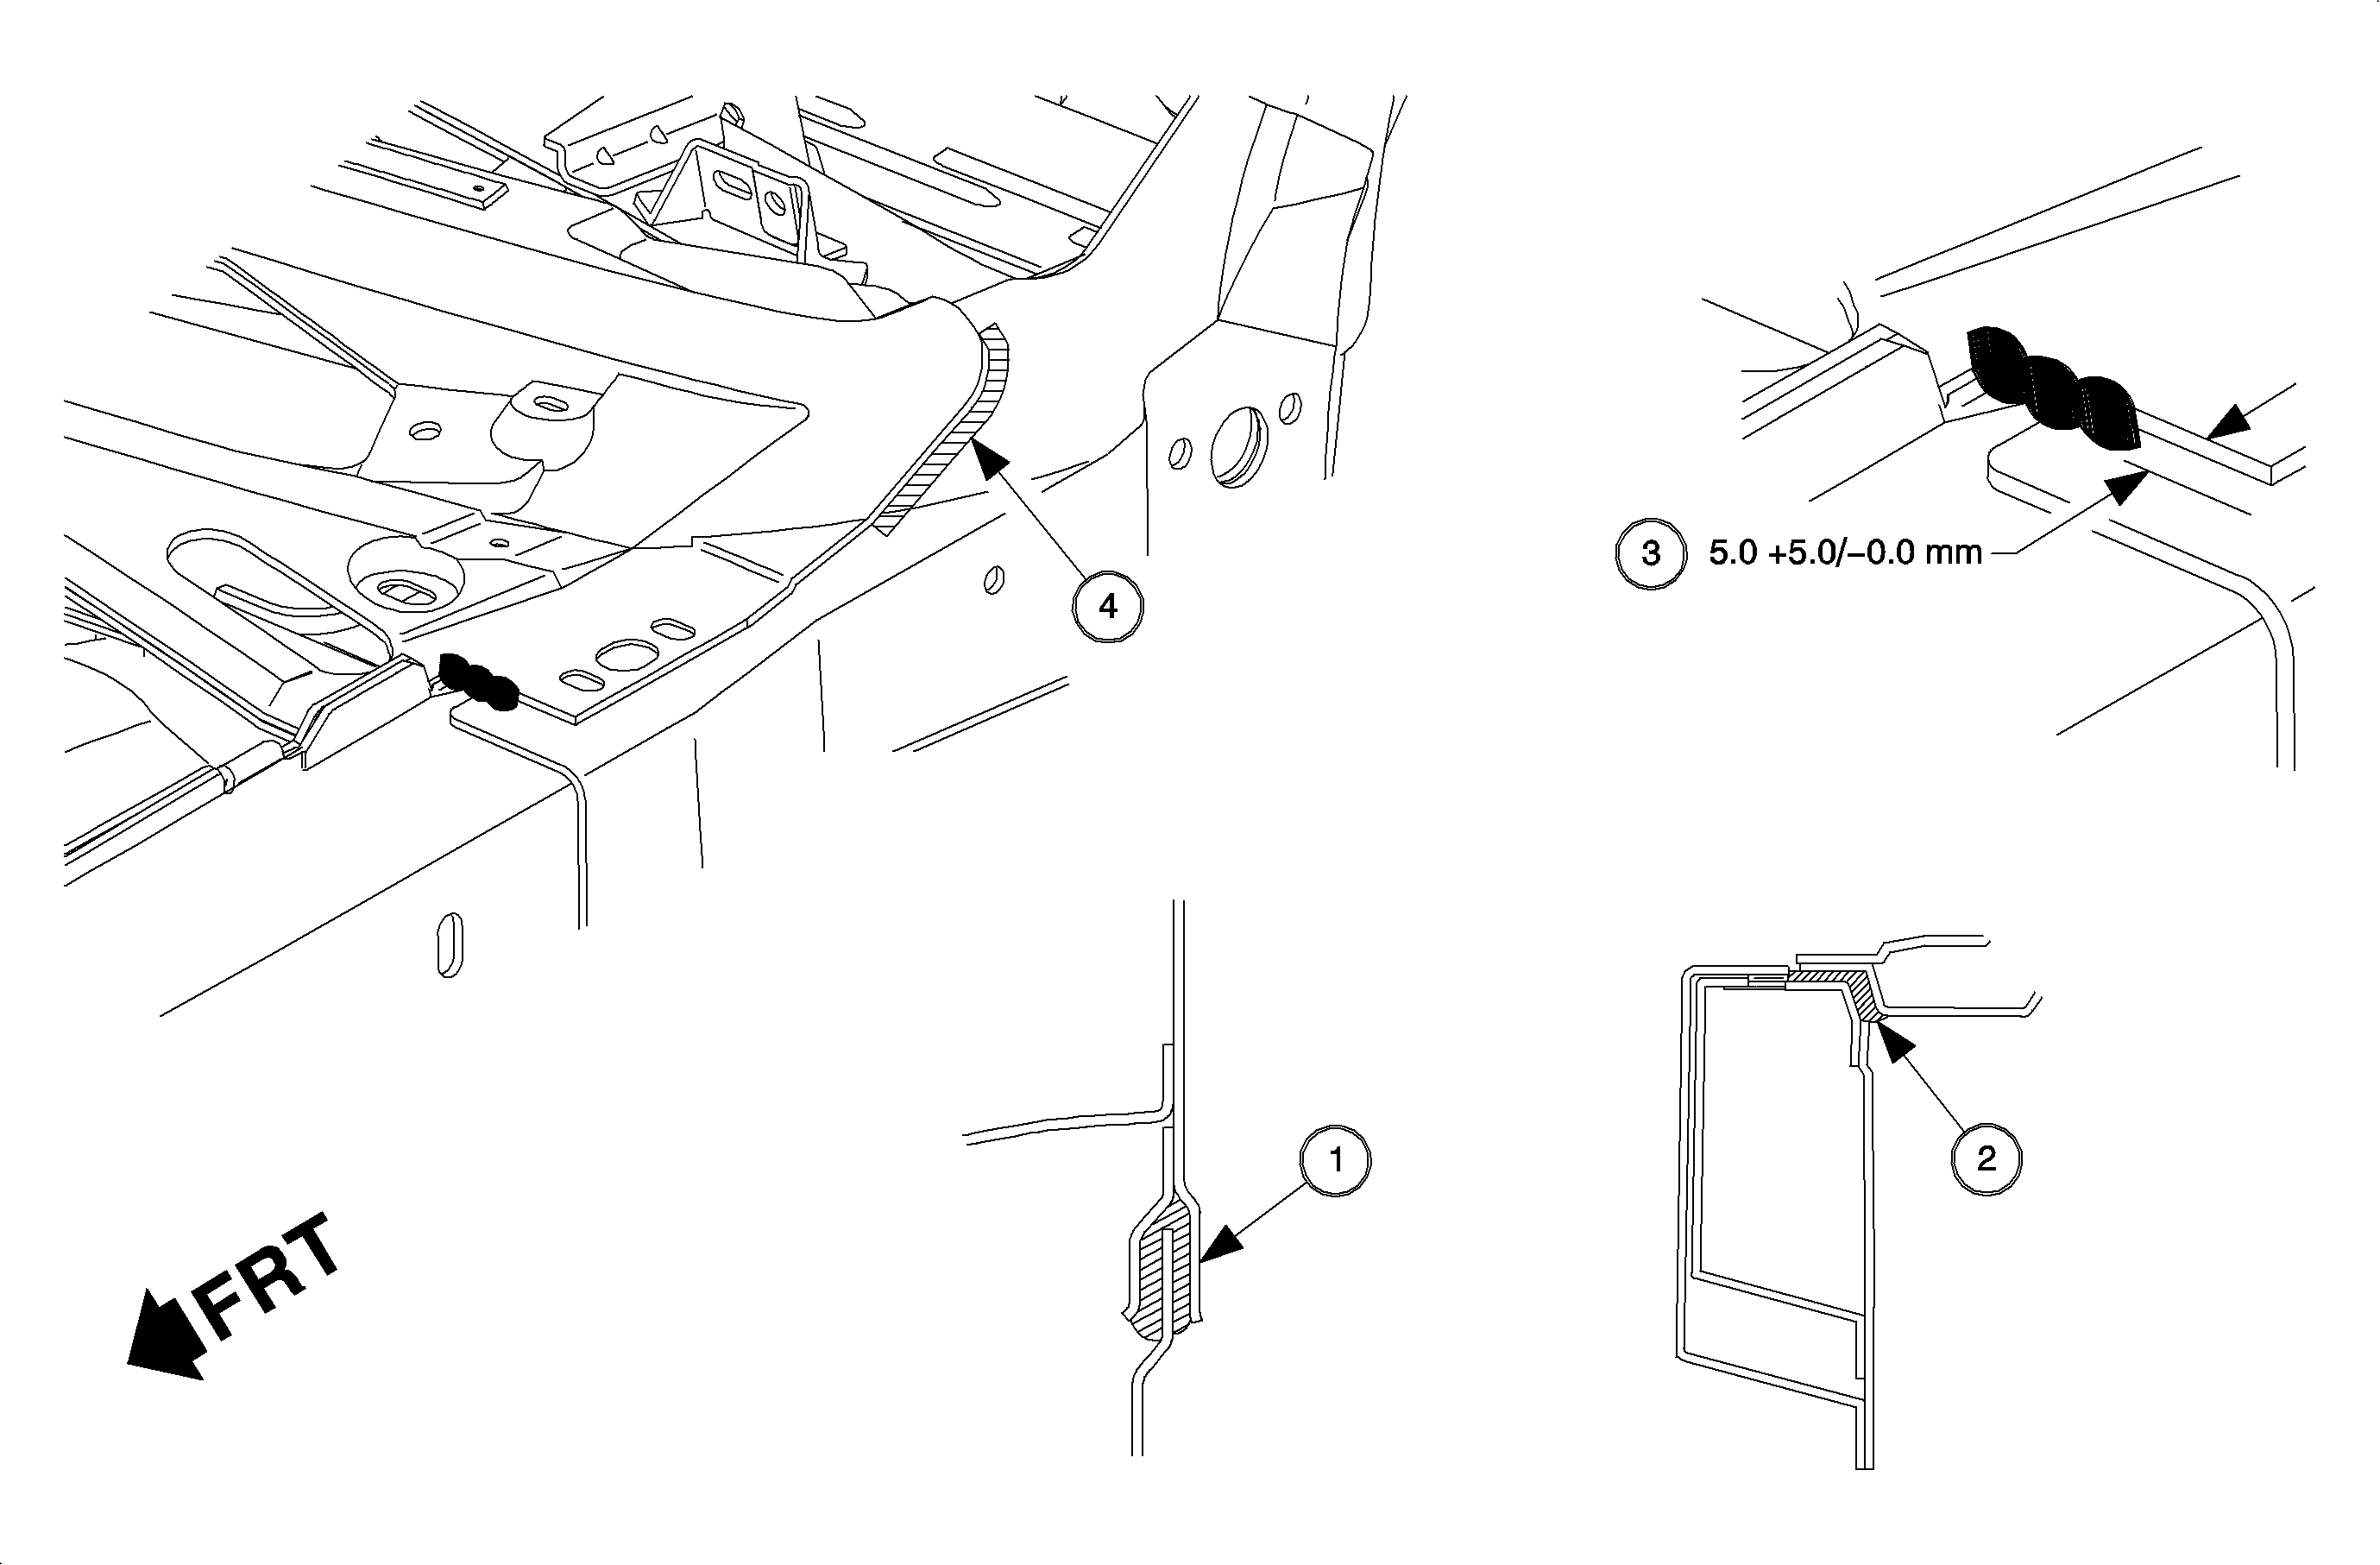
- Check the sealing of the dash assembly to the front body hinge pillar (3), shock tower (2), windshield pillar (4), and instrument panel reinforcement panel (1). No water and air leaks are permissible.
- Position the master cylinder onto the brake booster studs and install the fastening nut.
- Position the brake lines into the master cylinder and secure the brake line fitting nuts.
- Install the electrical connector for the brake fluid level sensor switch.
- Fill the brake fluid reservoir with clean brake fluid up to the base of the reservoir fill neck.
- Bleed the brake system.
- Check the brake fluid level.
- Check for leaks with the engine running and the brakes applied. Also check the system performance.
Caution: Refer to Battery Disconnect Caution in the Preface section.
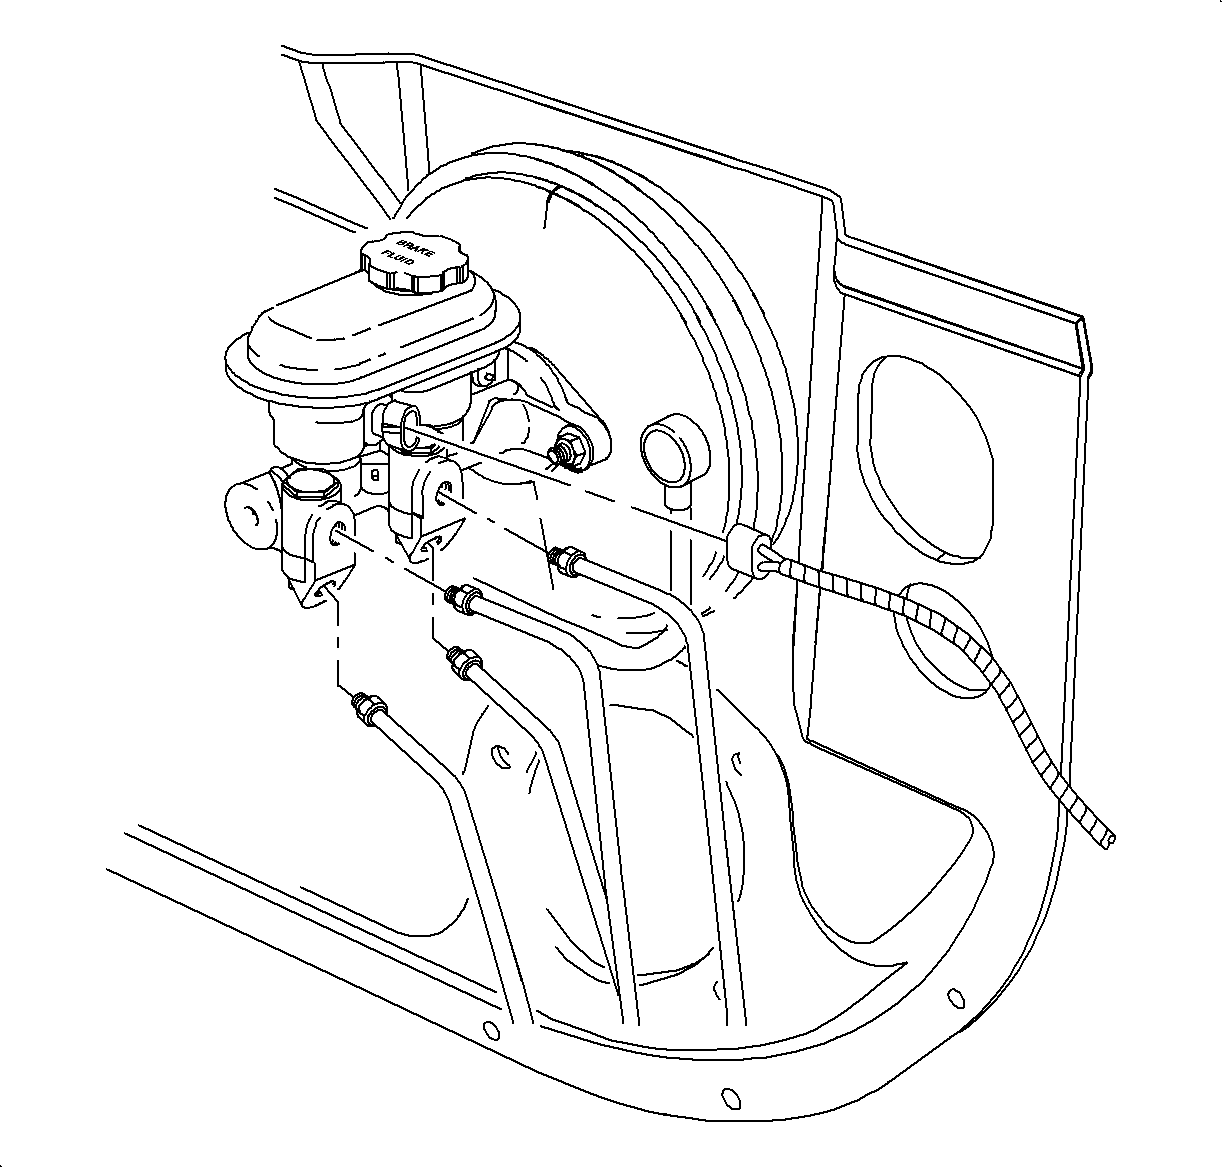
Notice: After removing the brake line fitting nuts, do not excessively pull or bend the brake lines away from the master cylinder.
Notice: Plug the open lines and fittings to prevent brake fluid loss and contamination.
Notice: Be careful not to bend the brake lines.

Caution: When using tools that may create smoke when cutting or heating urethane adhesive, work should be done in a well ventilated area and/or with a NIOSH/MSHA approved air supplied respirator to prevent possible harmful exposure. When the urethane adhesive is heated enough to give off smoke, high levels of methylene diisocyanate may be present. Unprotected exposure to methylene diisocyanate may result in severe, chronic, debilitating respirator problems.

Caution: This joint must seal completely. It must be tested to ensure there are no water leaks or paths for carbon monoxide to intrude into the passenger compartment.
Notice: Refer to Fastener Notice in the Preface section.

Tighten
Tighten the master cylinder-to-brake booster nuts to 27 N·m (20 lb ft).
Notice: Be careful not to bend the brake lines.
Tighten
Tighten the brake line-to-master cylinder nuts to 32 N·m (20 lb ft).
When the vehicle is completely reassembled, performance check the following systems:
| • | All of the electrical systems |
| • | The braking systems |
| • | The HVAC system |
| • | The steering system |
| • | Water leak test the modular dash and the windshield. Check all of the seams for water leaks and air leaks. |
| • | The engine cooling system |
| • | The engine air intake system |
