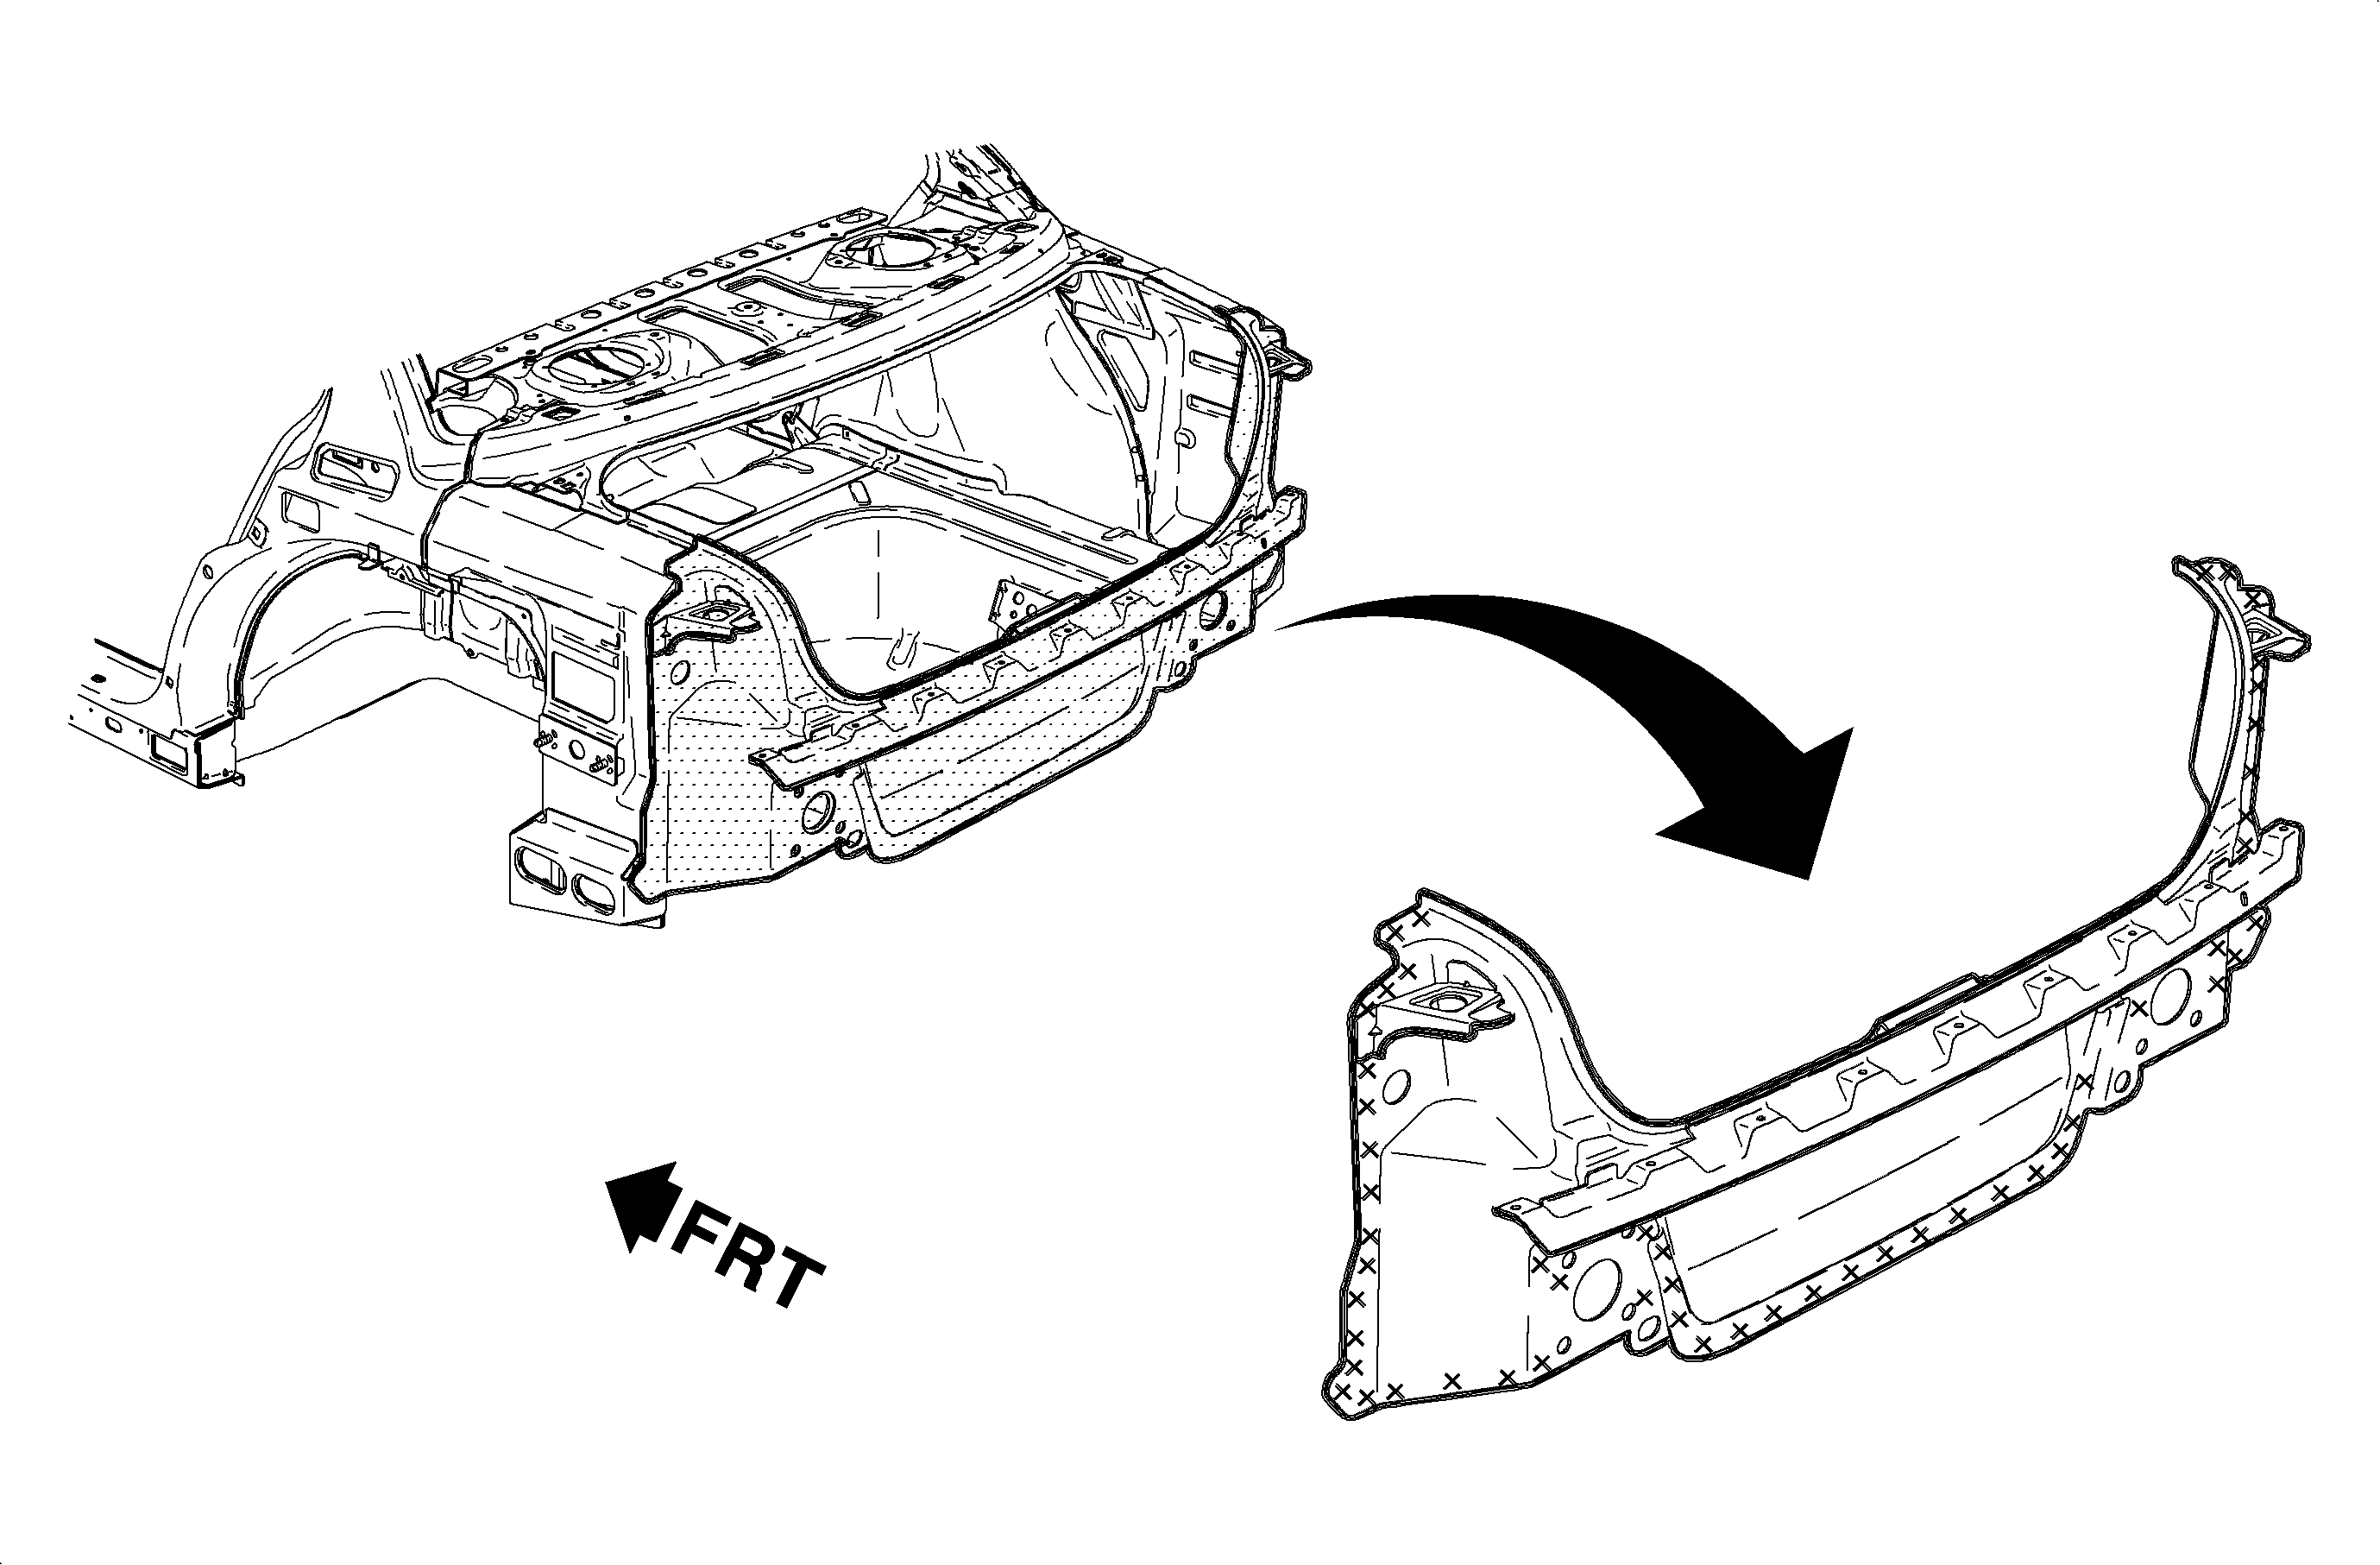
Panel Assembly - Rear End Replacement Sedan

- Note the amount and location of the spot welds.
- Remove the sealer and drill spot welds from:
| 2.1. | The panel assembly rear compartment rear |
| 2.2. | The panel assembly rear compartment side left and right |
| 2.3. | The rail assembly rear compartment longitudinal |
- Clean all of the weld seams with a wire brush, prime, and seal all repair
areas.
- Apply a permanent underbody sealant.
Important: Ensure that proper corrosion protection processes are used on all repair areas.
- Prime with a 2-part catalyzed primer.
- Apply sealers and corrosion protection materials according to the information
in the Body Paint section of this service manual or the paint manufacturer's recommendations.
- Clean the surface for welding and grind the primer off of the new part
at the connecting points. Apply 3M® Weld-Thru Coating P/N 05913, or equivalent,
to all areas to be welded.
- Measure and align the panel assembly rear end. Clamp into place.
- Use a MIG to plug the weld.
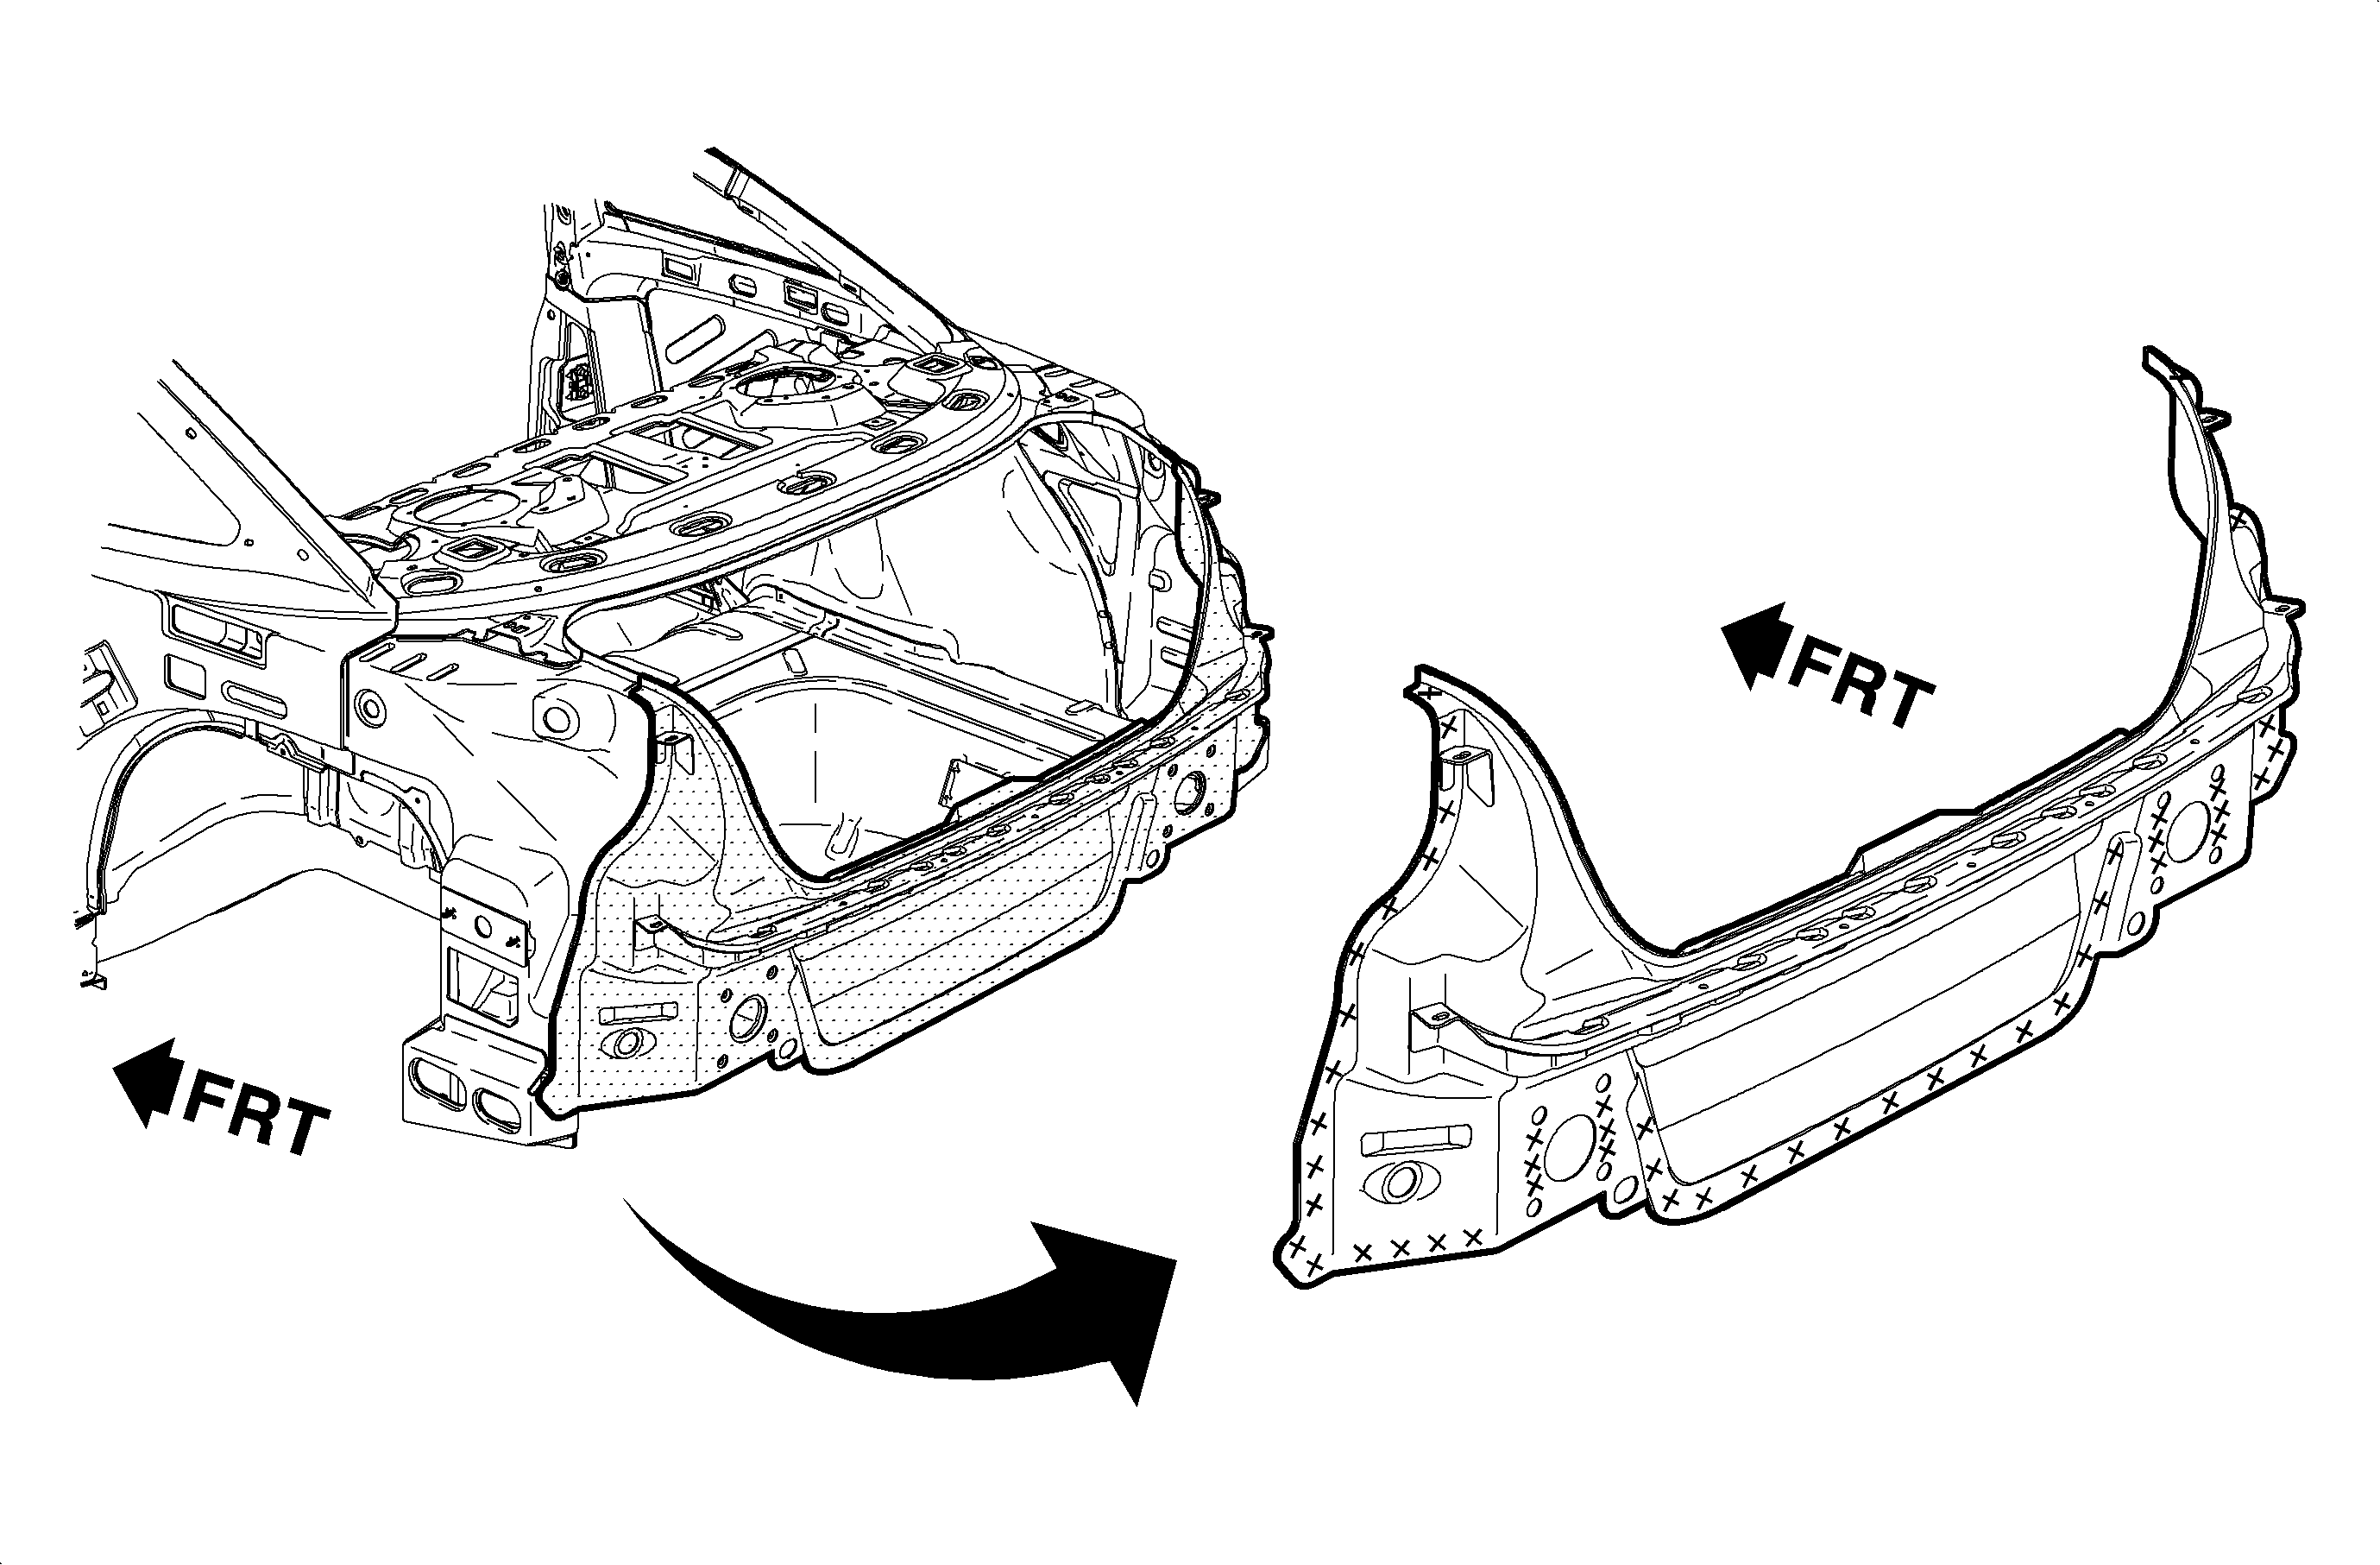
Panel Assembly - Rear End Replacement Coupe

- Remove the sealer.
- Drill the spot welds from:
| 2.1. | The panel assembly-rear compartment rear |
| 2.2. | The panel assembly-rear compartment side left and right |
| 2.3. | The gutter assembly-rear compartment side |
| 2.4. | The rail assembly-panel compartment longitudinal |
- Clean all of the weld seams with a wire brush, prime, and seal all repair
areas.
- Apply a permanent underbody sealant.
Important: Ensure that proper corrosion protection processes are used on all repair areas.
- Prime with a 2-part catalyzed primer.
- Apply sealers and corrosion protection materials according to the information
in the Body Paint section of this service manual or the paint manufacturer's recommendations.
- Clean the surface for welding and grind the primer off of the new part
at the connecting points. Apply 3M® Weld-Thru Coating P/N 05913, or equivalent,
to all areas to be welded.
- Measure and align the panel assemble rear end. Clamp into place.
- Use a MIG to plug the weld.
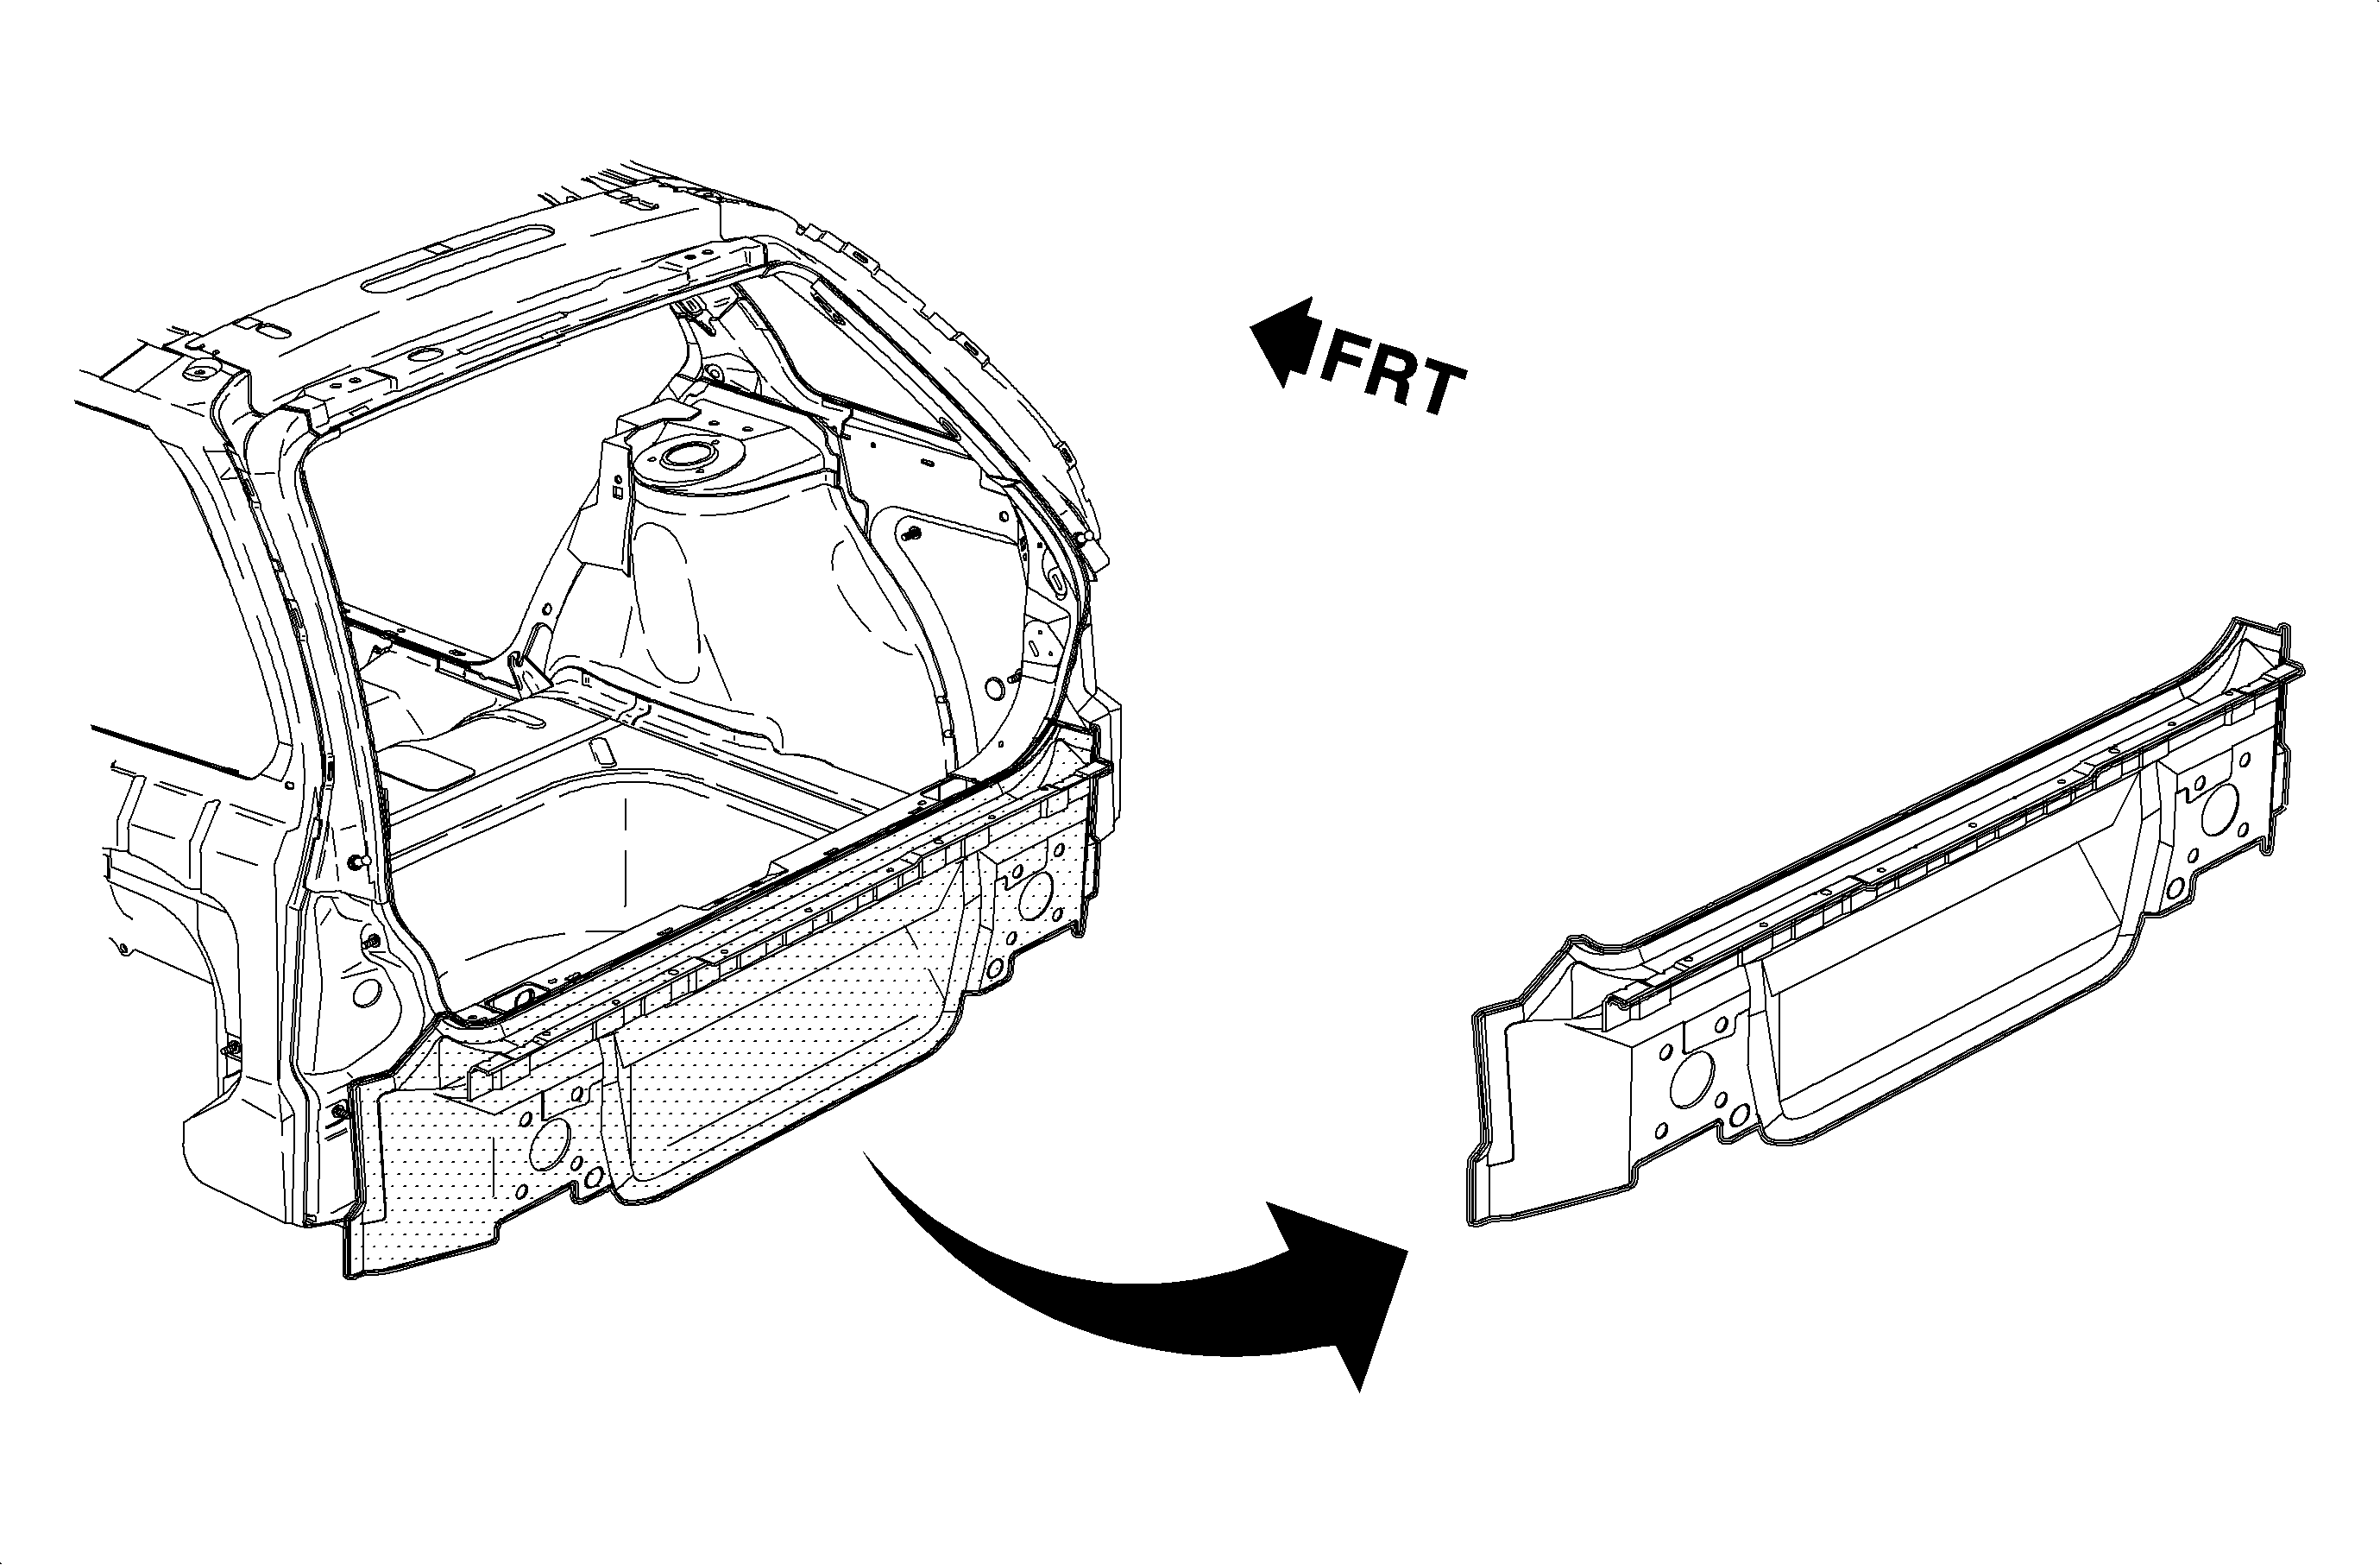
Panel Assembly - Rear End Replacement Wagon

- Note the amount and location of the spot welds.
- Drill the spot welds from:
| 2.1. | The panel quarter inner lower rear |
| 2.2. | The panel back body outer lower |
| 2.3. | The panel assembly rear compartment rear |
| 2.5. | The panel assembly frame body side rear |
- Clean all of the weld seams with a wire brush, prime, and seal all repair
areas.
- Apply a permanent underbody sealant.
Important: Ensure that proper corrosion protection processes are used on all repair areas.
- Prime with a 2-part catalyzed primer.
- Apply sealers and corrosion protection materials according to the information
in the Body Paint section of this service manual or the paint manufacturer's recommendations.
- Clean the surface for welding and grind the primer off of the new part
at the connecting points. Apply 3M® Weld-Thru Coating P/N 05913, or equivalent,
to all areas to be welded.
- Measure and align the panel assembly rear end. Clamp into place.
- Use a MIG to plug the weld.


