Any of the Following Components or Circuits are Inoperative or Intermittently Inoperative - Rear Washer Pump, Rear Wiper, Speakers Cutting Out, Vehicle Cranks but May Not Start, MIL SES Light On

| Subject: | Any of the Following Components or Circuits are Inoperative or Intermittently Inoperative: Rear Washer Pump, Rear Wiper, Speakers Cutting Out, Vehicle Cranks but May not Start, MIL SES Light On with DTCs P0447, P0452, P462, or P1635 -- Due to a revision of the VIN breakpoint under MODELS AFFECTED, this bulletin has been revised and supersedes bulletin 00-T-43, which should be discarded. |
| Models: | 2000-2001 Saturn S-Series vehicles built up to and including VIN IZ252292 |
Condition:
The customer may comment that, on occasion, one or more of the following conditions may have occurred:
| • | The rear washer pump is inoperative -- wagon only |
| • | The rear wiper motor is inoperative -- wagon only |
| • | The speaker volume cuts out intermittently |
| • | The vehicle cranks but may not start -- DTC P1635 will set |
| • | The MIL SES light is ON with DTCs P0447, P0452, P0462 or P1635 |
Cause:
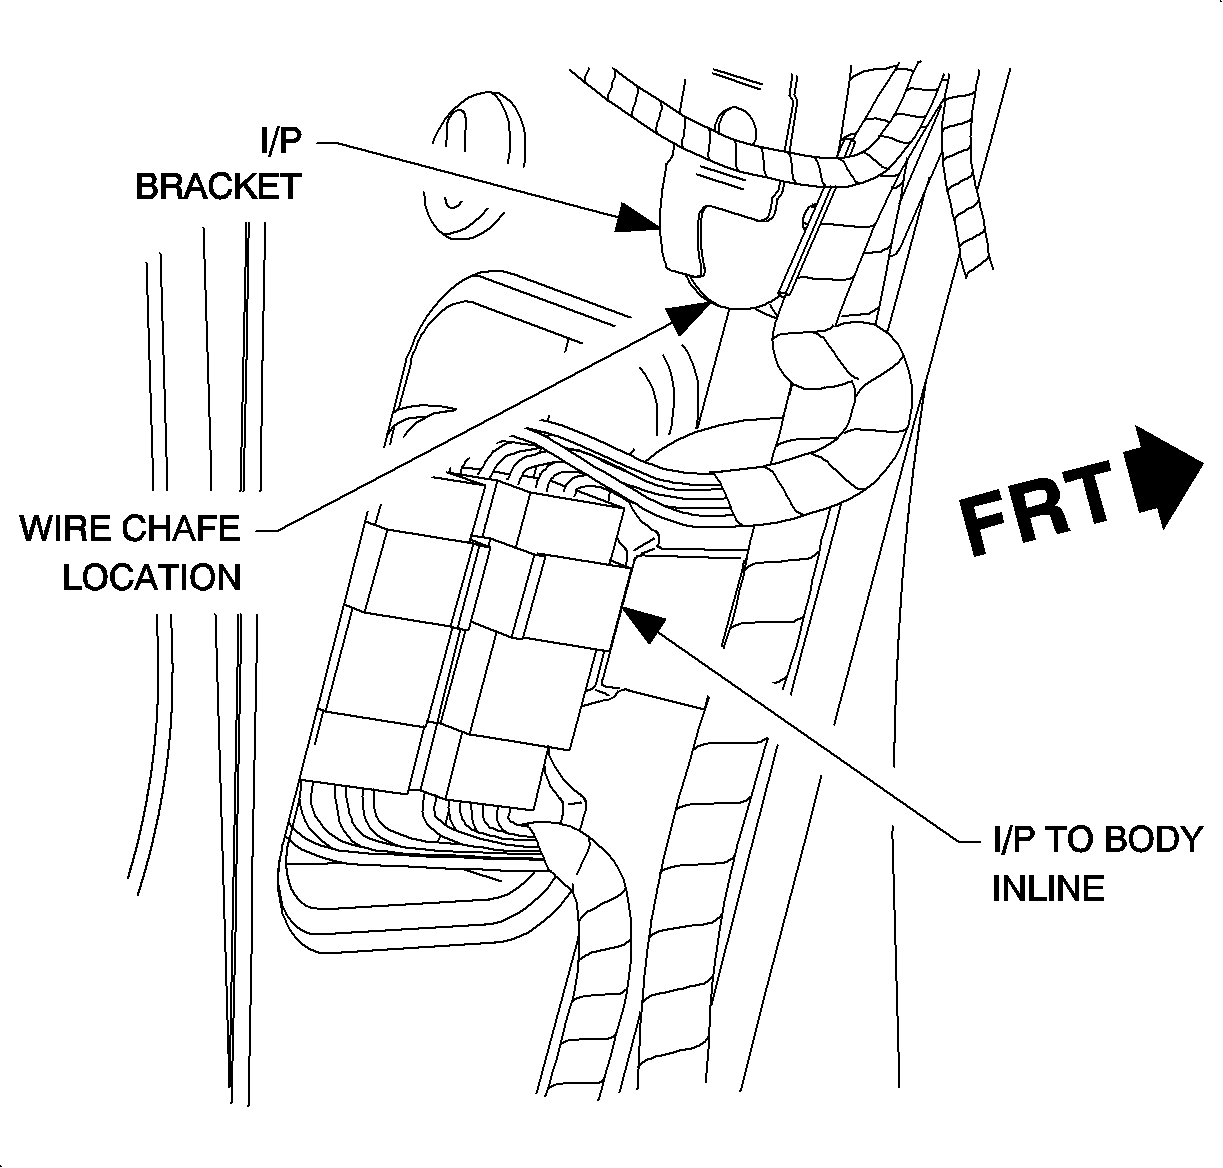
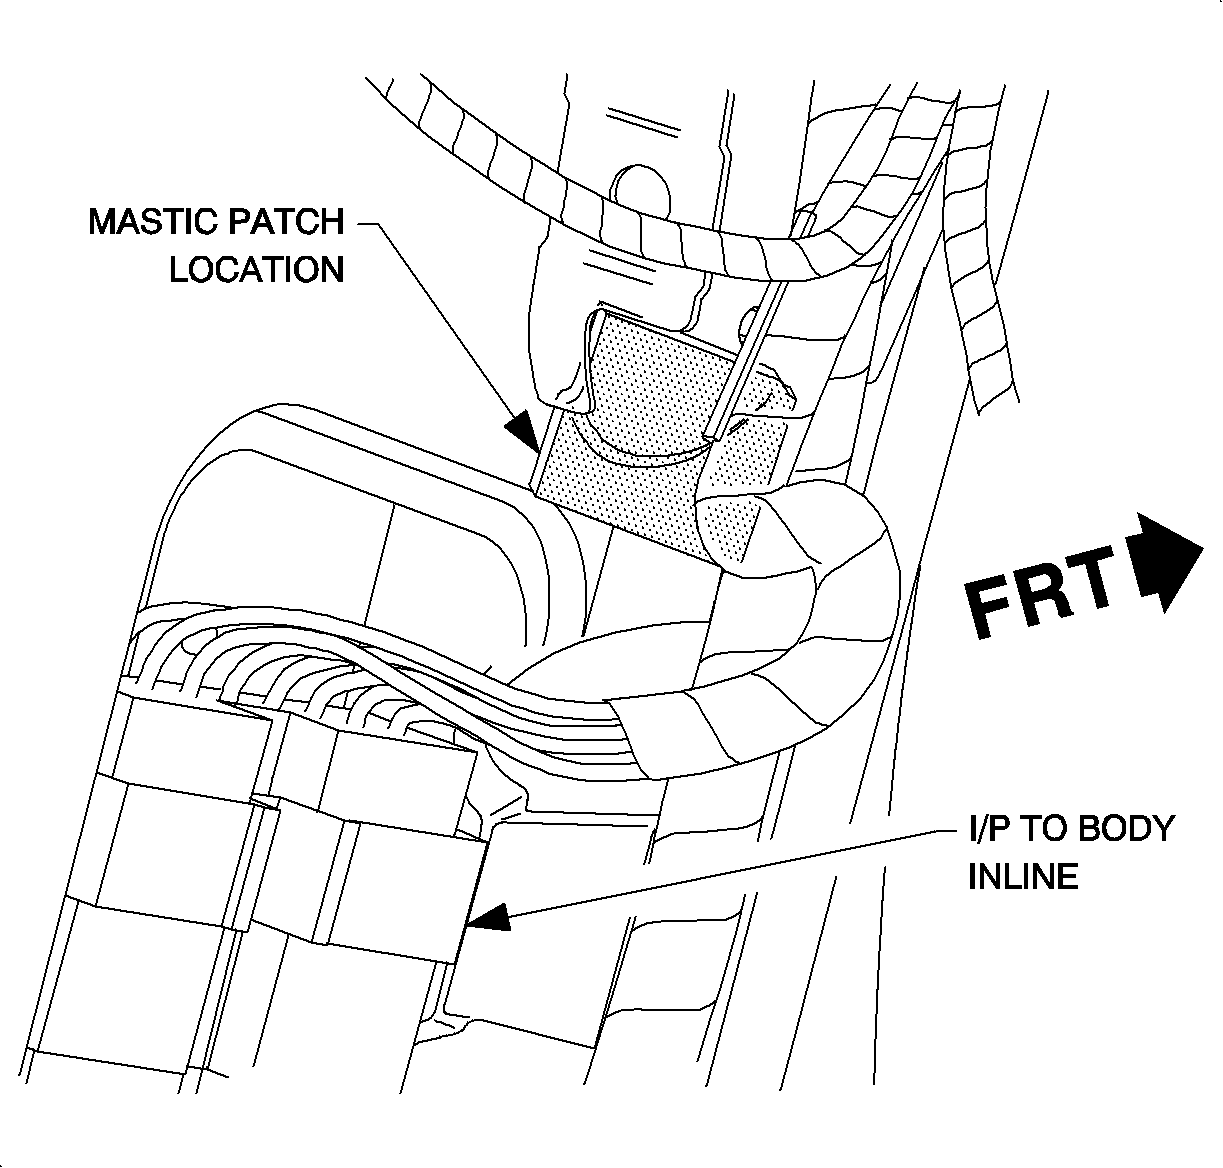
The cause of the above conditions may be the instrument panel (I/P) wire harness coming into contact with a left side I/P bracket at the left side footwell area. At that location, the I/P harness connects to a body-to-I/P inline connector. The I/P harness is attached to the left side I/P bracket by as rosebud clip. Between the rosebud clip and the I/P connector, the harness may come into contact with the left side I/P bracket. Chafing the wiring harness may cause a short to ground on one or more of the following circuits.
| • | The rear washer pump is inoperative (15A SUNROOF fuse open)-Circuit 392 (Dk Grn)- Rear washer pump switch (SW only) |
| • | The rear wiper motor is inoperative (15A SUNROOF fuse open)-Circuit 393 (Wht)- Rear washer pump switch (SW only) |
| • | The speaker volume cuts out intermittently |
| • | Circuit 200 (Lt Grn) RF speaker, Circuit 117 (Dk Grn) RF speaker |
| • | Circuit 201 (Tan) LF speaker, Circuit 118 (GRA) LF speaker |
| • | Circuit 199 (BRN) LR speaker, Circuit 116 (Yel) Lr speaker |
| • | Circuit 46 (Dk Blu) RR speaker, Circuit 115 (Lt Blu) RR speaker |
| • | DTC P0447 EVAP Vent Solenoid Control Circuit Low Voltage (CKT 1310) |
| • | DTC P0452 Fuel Tank Pressure Sensor Circuit Low Voltage (CKT 890) |
| • | DTC P0462 Fuel Tank Level Sensor Circuit Low Voltage (CKT 30) |
| • | DTC P1635 5-Volt Reference Circuit (CKT 416). Also, vehicle will crank but may not start. |
Correction:
Refer to the procedure in this bulletin to diagnose and repair this condition.
Procedure:
- Remove the left side hinge pillar garnish molding by gently prying at the clip locations. (Right side shown, left side similar).
- Inspect the I/P wiring harness at the wire chafe location shown in the illustrations.
- Cut the damaged wire at the location of the chafe.
- Remove the insulation from both ends of the cut wire, recommended wire strip length is 4.8 mm (3/16 in) for 12-20 gage wires and 9.5 mm (3/8 in)
- Using a Saturn approved crimp and seal splice sleeve, found in the terminal repair kit J 44020, position stripped ends of the wire in the sleeve until the wire hit stop.
- Hand crimp the splice sleeve using the correct jaws in the Packard crimper P/N 12085115 or appropriate crimping tool. Gently tug on the wires to ensure they are secure before applying heat to seal the sleeve.
- Apply heat using an Ultratorch® or heat gun. Heat to 175°C (347°F) until the glue flows around the edges of the sleeve.
- Check for continuity in the wire and verify the repair.
- If electrical tape was removed to perform the wire harness inspection or repair, tape the wires and harness to the original condition.
- Install one Sealer Patch P/N 21124362 to the metal edges of cockpit support under the wire harness to protect against further wire harness damage.
- Install the left side hinge pillar garnish molding by aligning and pushing at the clip locations (right side shown left side similar).
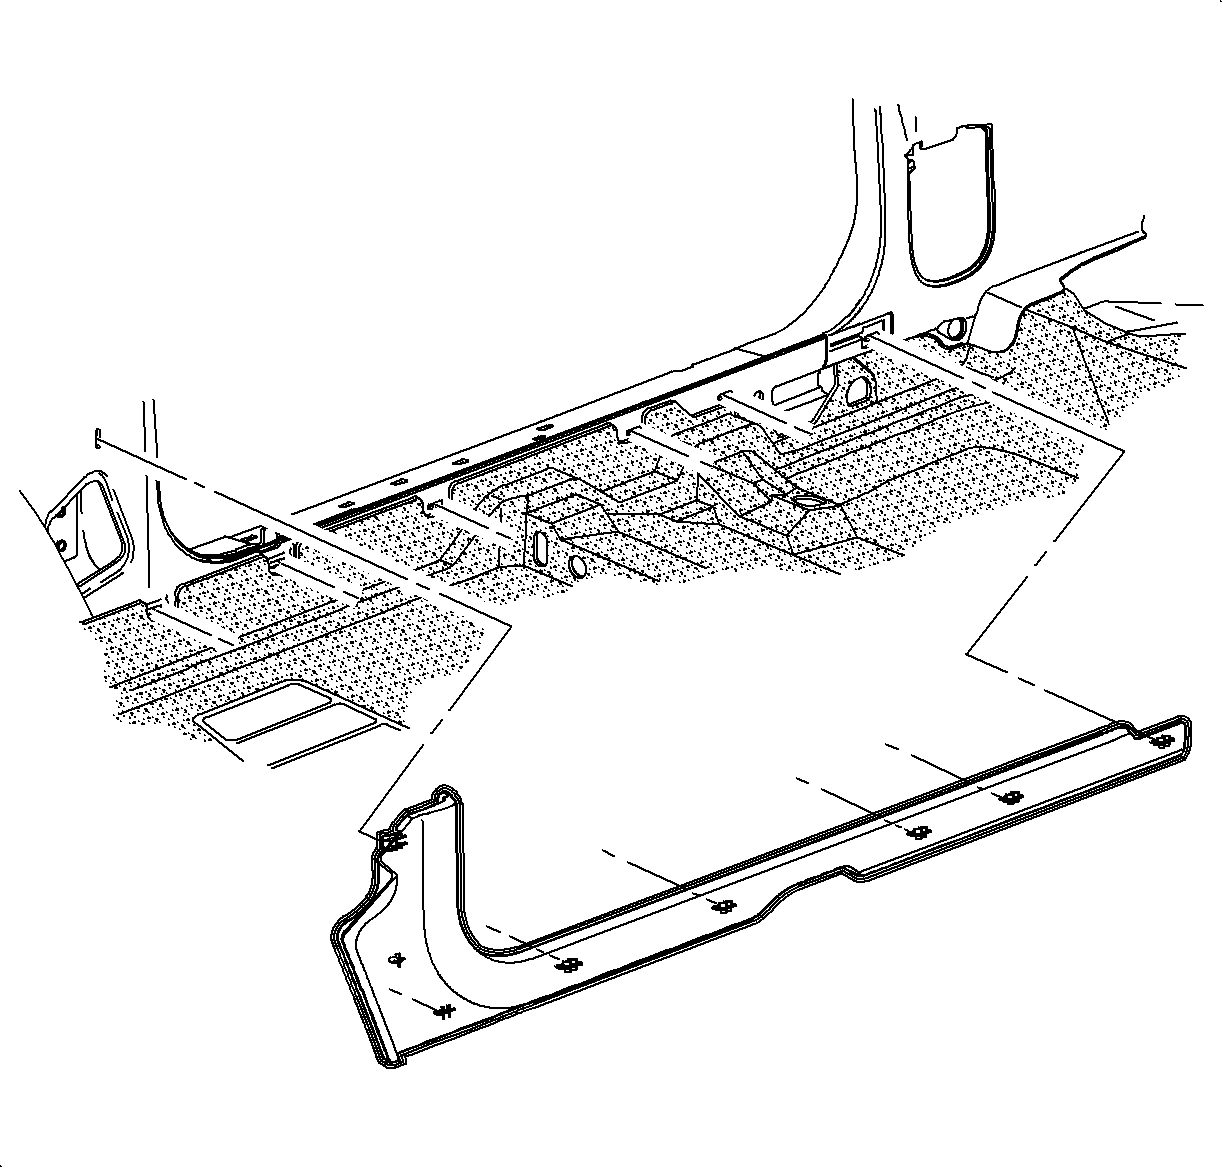
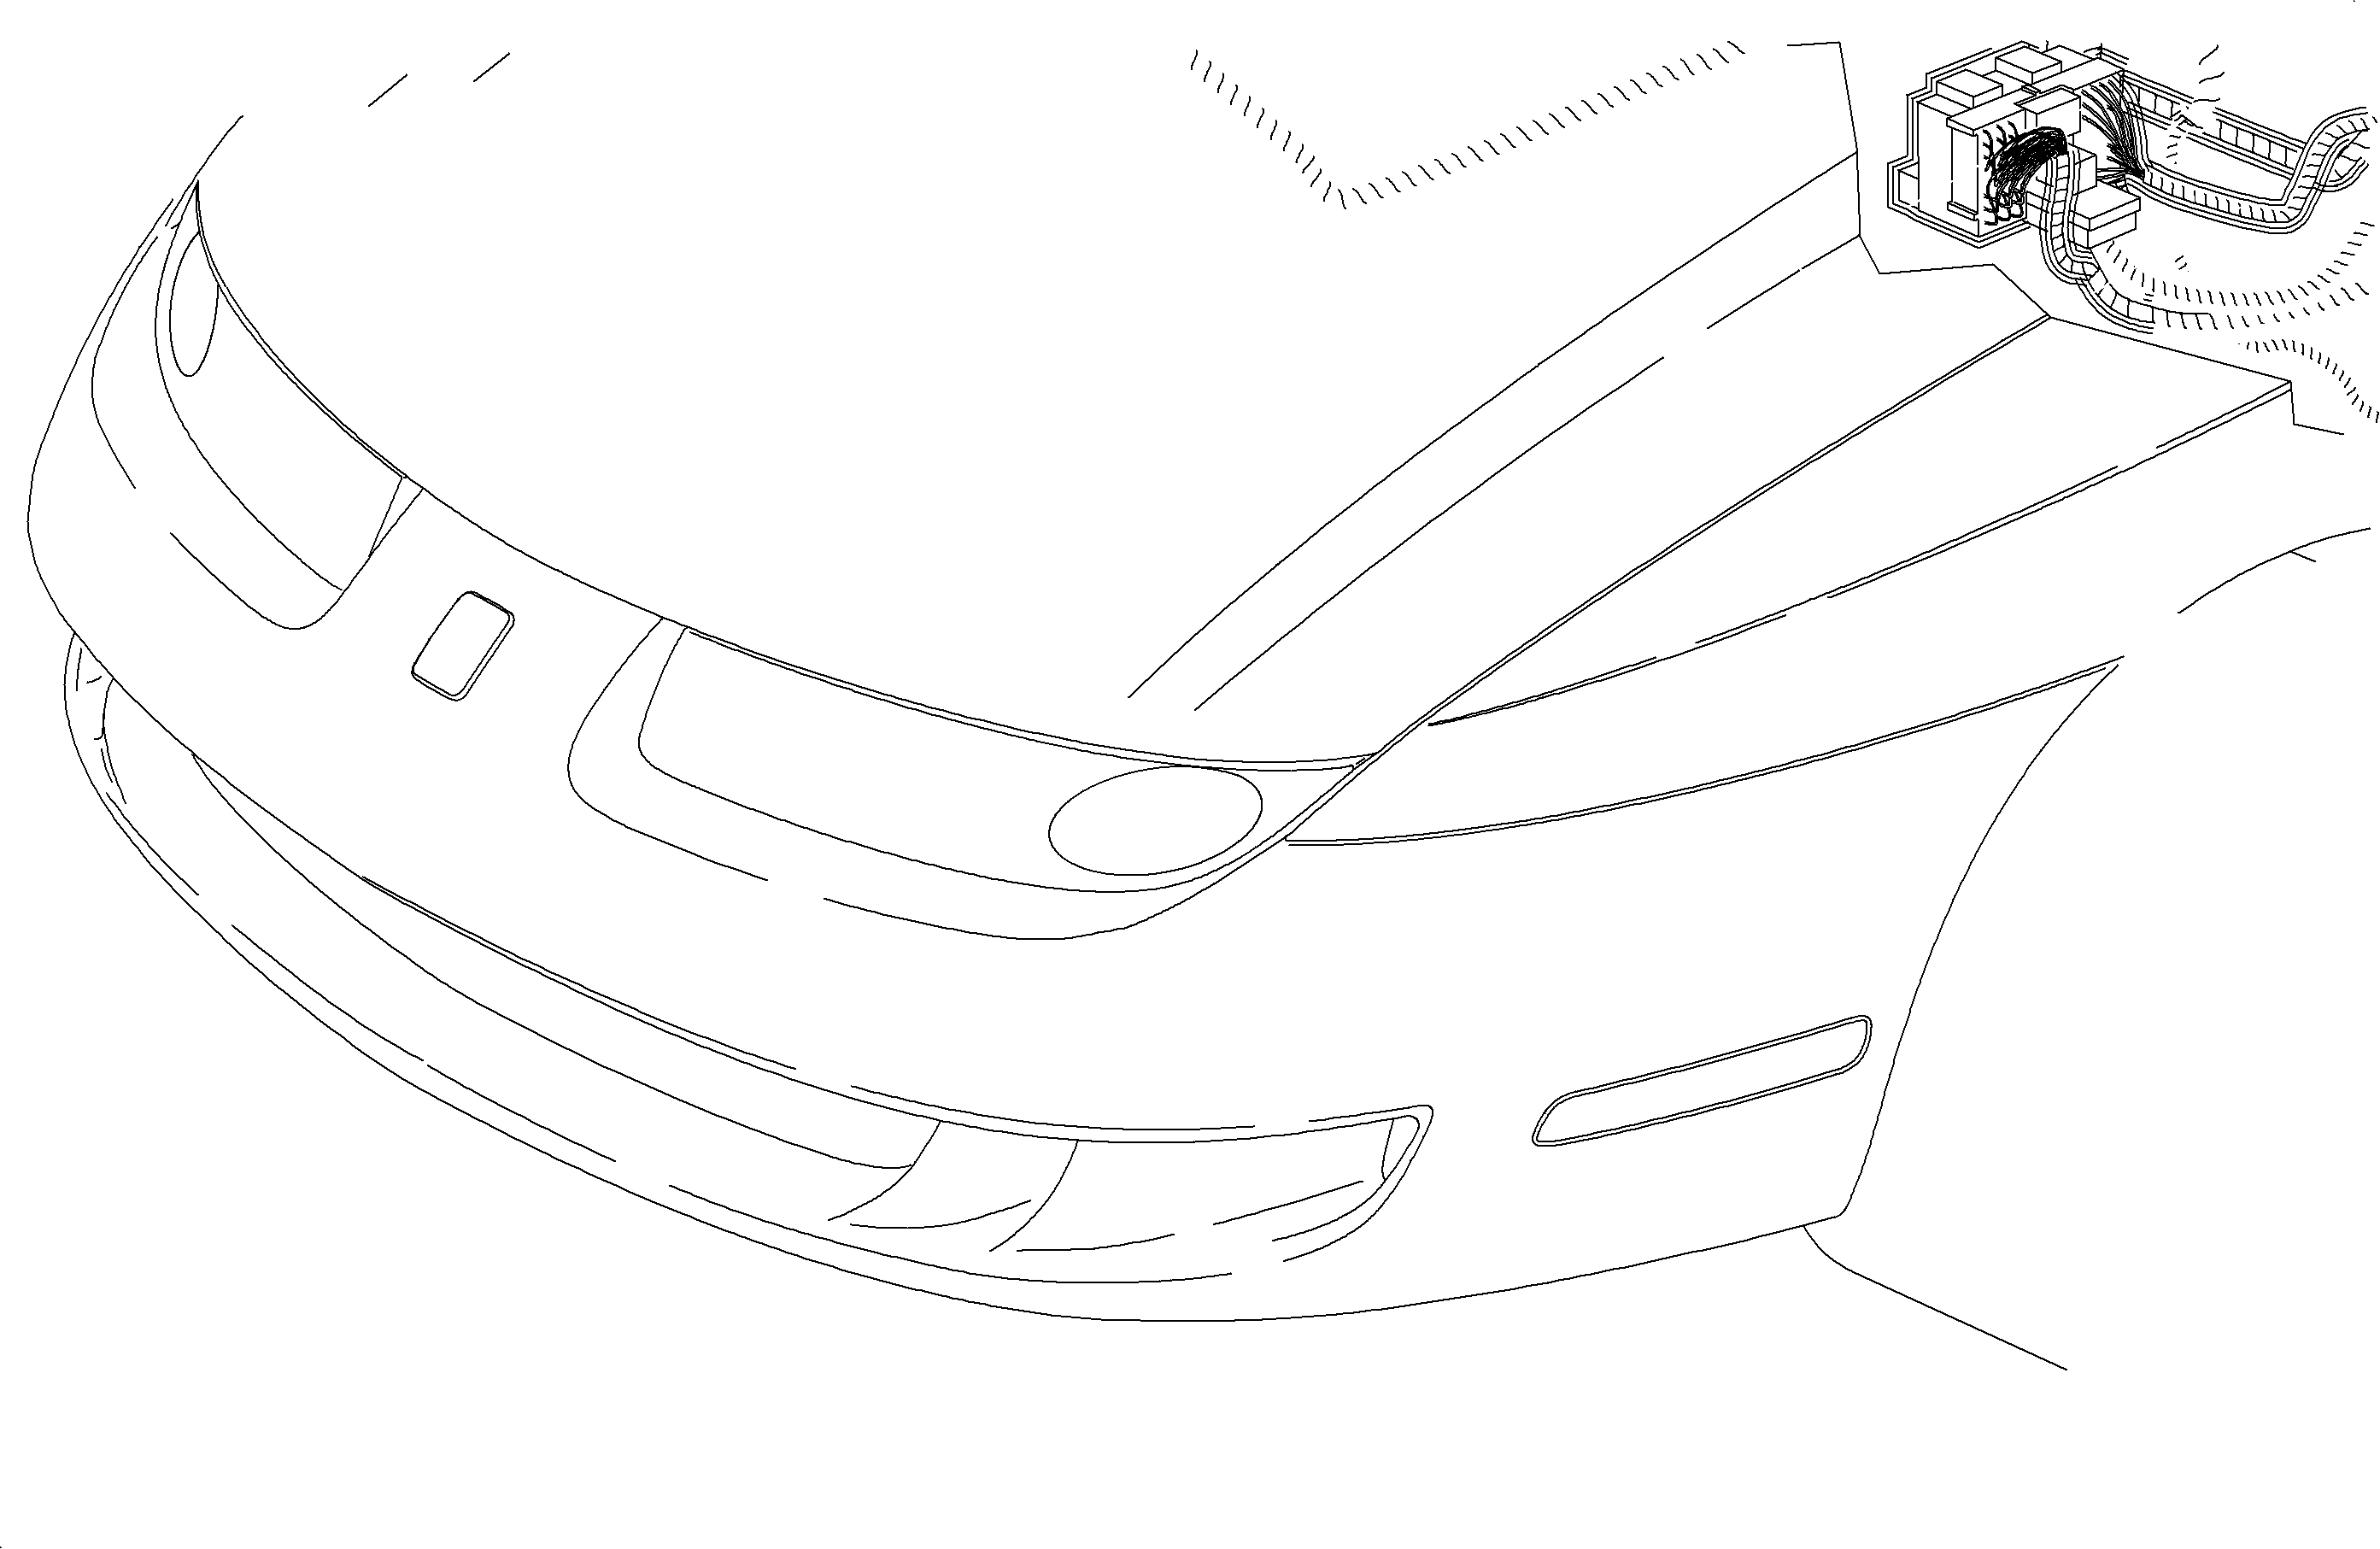
| • | If damage has occurred to any wires, continue with step 3. |
| • | If no damage is observed, refer to the appropriate service manual for further diagnostic information. |
for 22 gage wire so it can be folded in half. Caution must be used when stripping wire to prevent cutting the wire strands. Locate the new splice a minimum of 40 mm (1.5 in) from other splices.
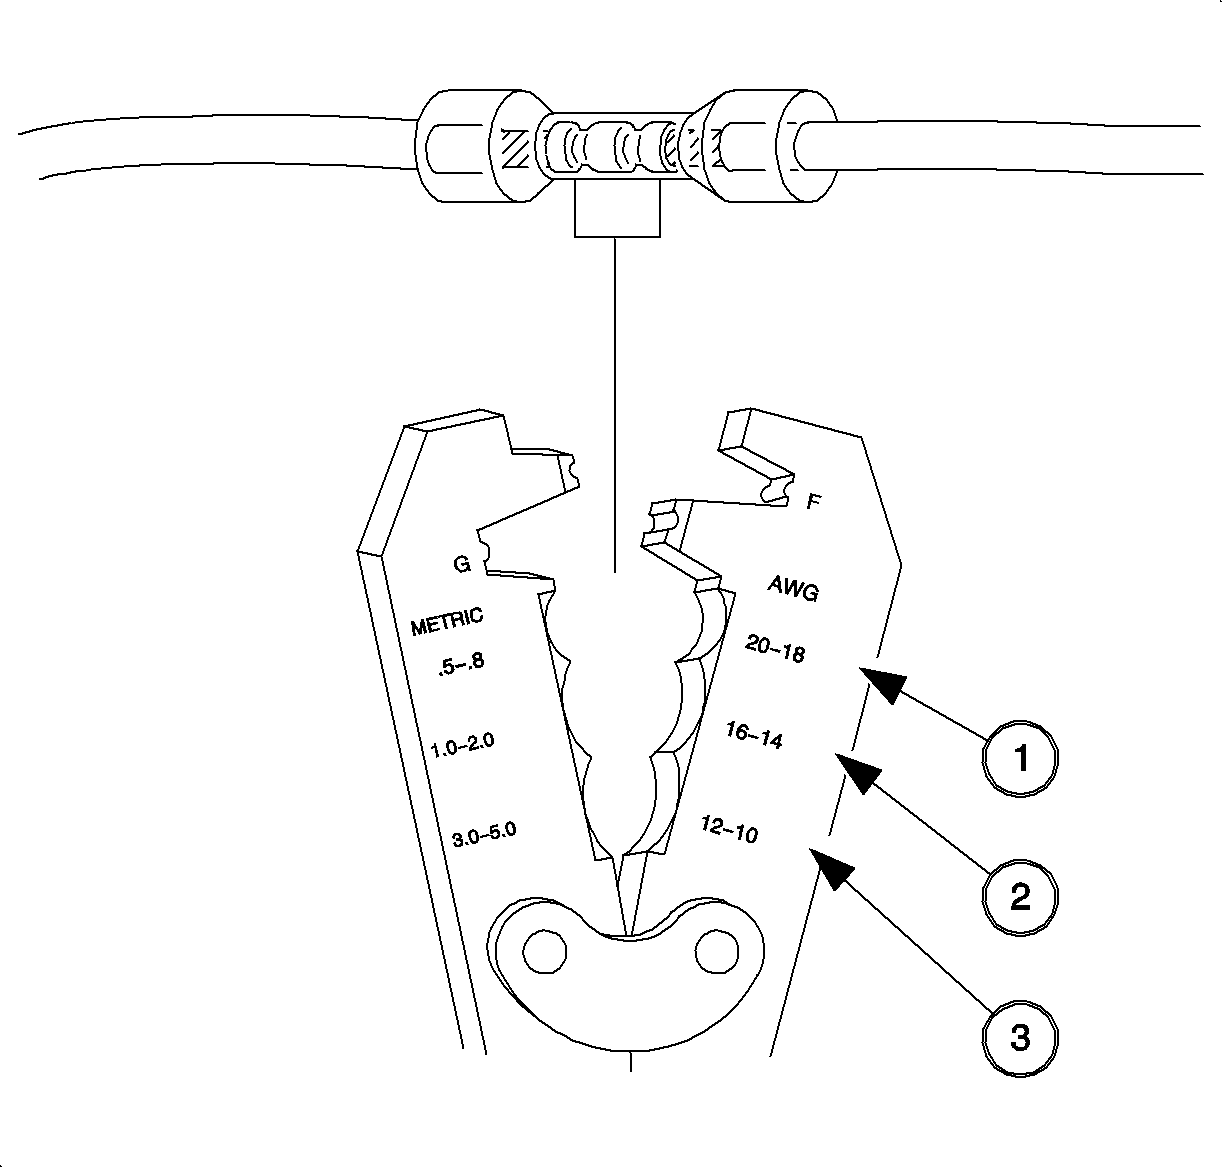
Important: For the wiring used in Saturn vehicles, it is recommended that only approved Packard Electric Crimp and Seal Splice Sleeves, or equivalent, be used.
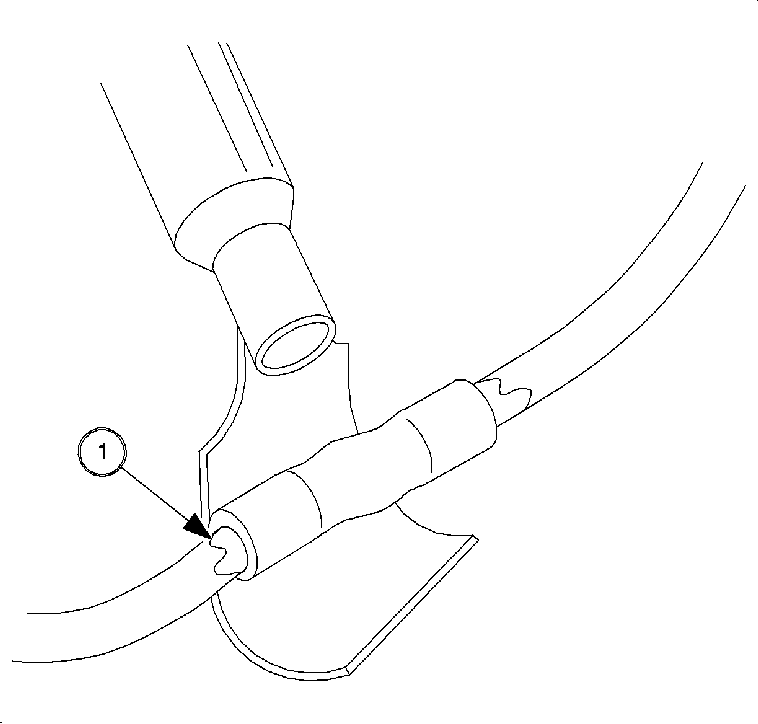
Caution: Do not use a match or open flame to apply heat to the splice sleeve.

Parts Requirements:
Part Number | Description |
|---|---|
21124362 | Sealer -- Rkr Inr Pnl |
| Salmon | Blue | Yellow |
|---|---|---|---|
Wire Size in Millimeters | 0.35, 0.50, 0.80 | 1.0, 2.0 | 3.0, 5.0 |
Wire Gage | 22, 20, 18 | 16, 14 | 12, 10 |
Packard P/P* | 12089189 | 12089190 | 12089191 |
Special Tool P/N** | 217670 | 217671 | 217672 |
* Order through Packard at 1-800-PACKARD (1-800-722-5273) ** Order through Saturn Special Tools Catalog. Included with Terminal Repair Kit J 44020. | |||
Claim Information: | To receive credit for this repair during the warranty coverage period, submit a claim through the Saturn Dealer System as Follows: | |||
|---|---|---|---|---|
-- | Case Type | Description | Labor Operation Code | Time |
-- | VW | Repair Chafed Wires At Left Footwell Area | Z4053 | 0.5 hrs |
-- | -- | Add: To repair each additional wire | -- | 0.1 hrs |
