DOME LAMP ON AT ALL TIMES OR INTERMITT.

SUBJECT: Dome Lamp On at All Times or Intermittently with Dome Lamp Switch in Door Position and/or Intermittent Activation of Security System and/or Security System will not Arm During Cold Soak (Replace Front Door Jamb Switch[es])
MODELS: 1996 Saturn Sedans and Wagons, and 1997 Saturn Sedans, AFFECTED Wagons and Coupes built before and including VIN VZ380187
CONDITION: During periods of precipitation or periods immediately following precipitation such as rain, a car wash, etc. the dome lamp may come On intermittently or stay On without any switch input. If the Saturn security system is in the "armed" state and the dome lamp comes On, the dome lamp may trigger a "full alarm cycle." If the dome lamp is On, the security system will not arm.
CAUSE: The condition may be caused by moisture intrusion into the door jamb switch contact cavity. This may create a resistive short circuit between the open switch contacts, causing the dome lamp to come On.
IMPORTANT: Since the rear door jamb switches are mounted facing rearward, they are not as susceptible to moisture intrusion as the front door jamb switches. When diagnosing this condition, perform the diagnostics on the front door jamb switches only.
CORRECTION: Refer to the following procedures to check resistance of door jamb switches
PROCEDURES NOTICE: When removing door jamb switch, make sure not to chafe wires when pulling door jamb switch out of pillar.
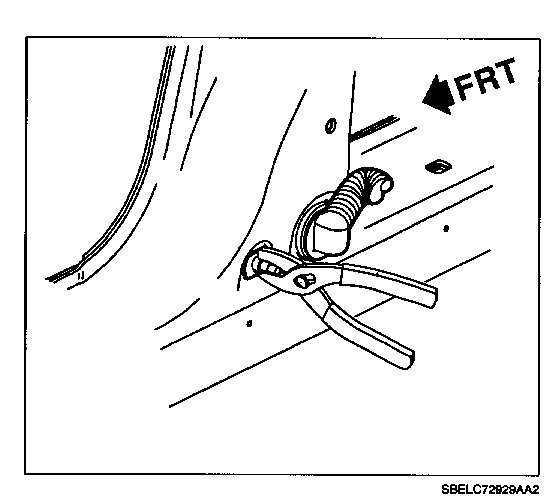
1. Using a pair of pliers, carefully remove door jamb switch by pulling back on the door jamb switch while rocking the door jamb switch side-to-side and disconnect harness.
2. Using the Saturn connector test adapter kit (J35616), and the appropriate leads, connect a DVOM to the door jamb switch terminals.
3. Set DVOM to resistance scale.
4. Depress door jamb switch plunger all the way in to open internal contacts.
5. Read resistance on DVOM. Resistance measurement should be infinite (high-resistance).
If DVOM shows switch is open (high-resistance), perform steps 1 through 5 for front door jamb switch on other side of vehicle. If both front doorjamb switches show open when the door jamb switch plunger is depressed, refer to the appropriate diagnostic chart in the "Electrical Service Manual," for further diagnostics. If there is continuity (low-resistance), or if there is any evidence of moisture during testing, replace door jamb switch with new door jamb switch (P/N 21023335).
IMPORTANT: When replacing door jamb switch, make sure to dry out body harness side of the switch connector. Also, make sure to use 15 mm deep-well, thin-wall socket to seat door jamb switch in place.
6. To install door jamb switch, connect harness and position door jamb switch to location hole in lower pillar area and using a 15 mm deep-well, thin-wall socket, push door jamb switch into place. Pull back on door jamb switch to verify it is properly installed.
7. Verify customer concern is corrected.
PARTS REQUIREMENTS: 21023335 Switch-Door Jamb
CLAIM INFORMATION: To receive credit for this repair during the warranty coverage period, submit a claim through the Saturn Dealer System using the appropriate Electronic Labor Time Guide and Labor Operation Code N2174 (Replace Right Front Door Jamb Switch) and/or N2175 (Replace Left Front Door Switch)

General Motors bulletins are intended for use by professional technicians, not a "do-it-yourselfer". They are written to inform those technicians of conditions that may occur on some vehicles, or to provide information that could assist in the proper service of a vehicle. Properly trained technicians have the equipment, tools, safety instructions and know-how to do a job properly and safely. If a condition is described, do not assume that the bulletin applies to your vehicle, or that your vehicle will have that condition. See a General Motors dealer servicing your brand of General Motors vehicle for information on whether your vehicle may benefit from the information.
