For 1990-2009 cars only
Removal Procedure
- For Sedans and Wagons:
- For Coupes:
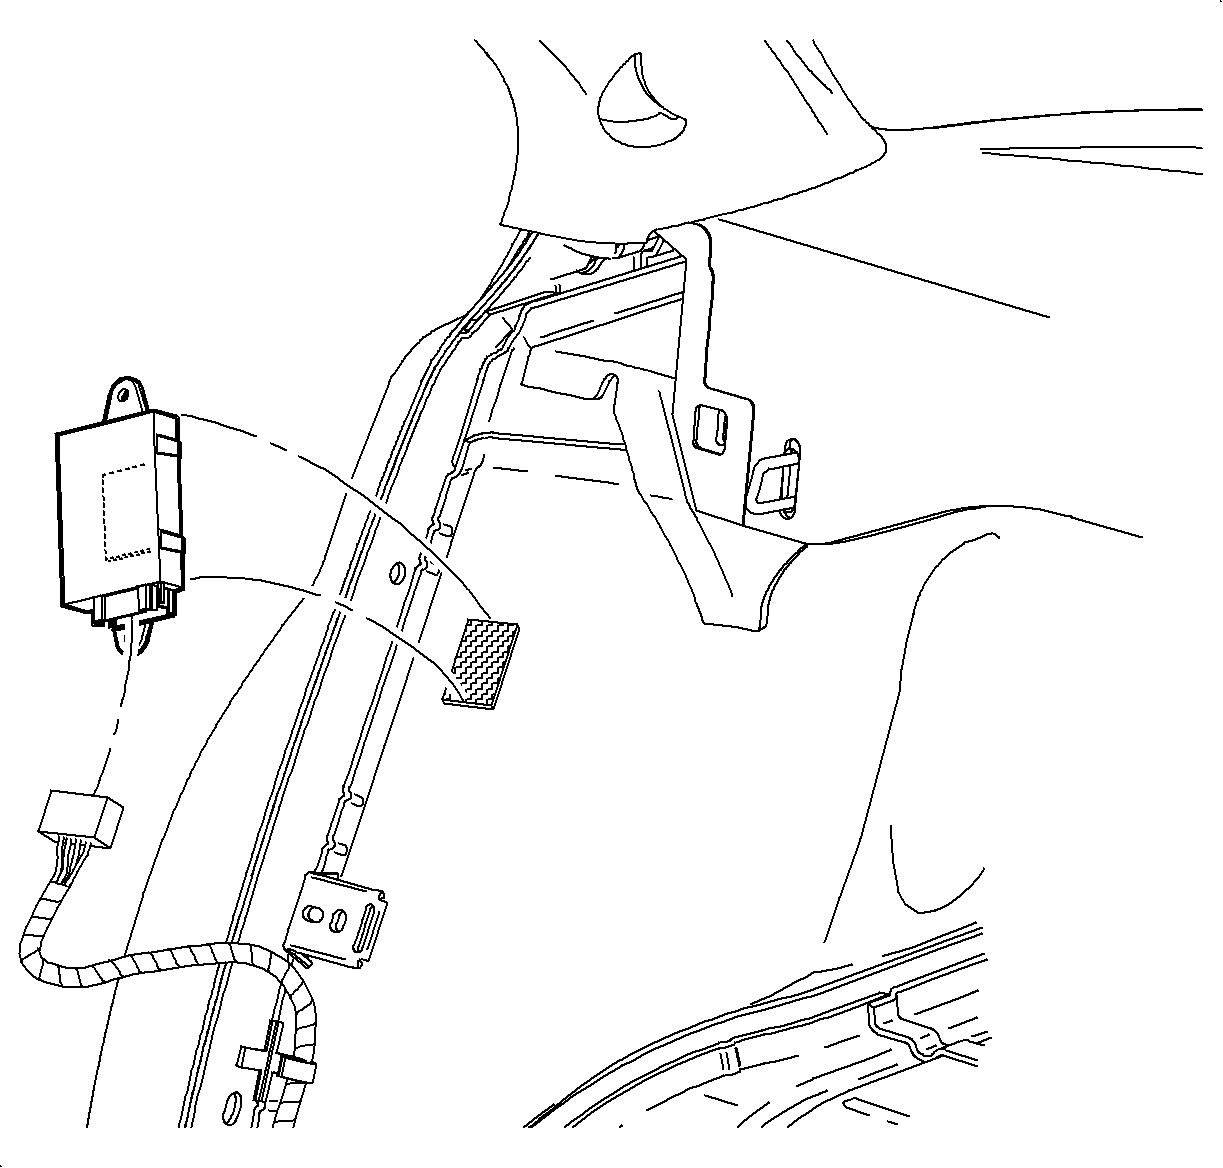
- Disconnect RKE module connector.
- Pull firmly on RKE module from the top to bottom, to disengage double side tape retainer.
- Remove RKE module.
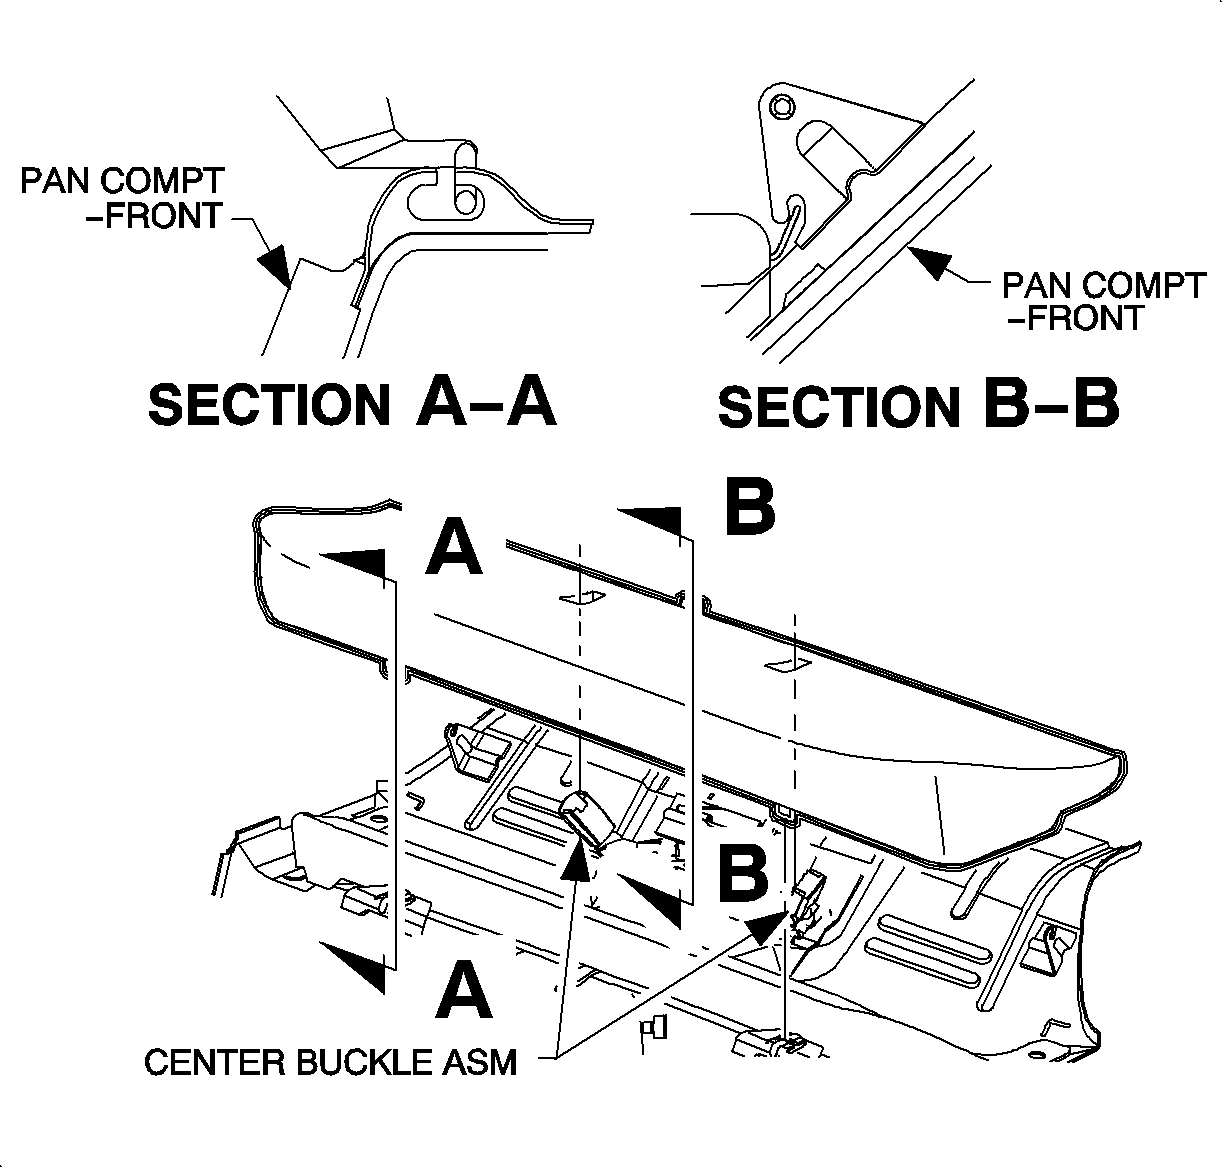
| 1.1. | Disengage seat cushion by pushing rearward, then upward at 2 front retaining locations to release the rear cushion from the retainer. |
| 1.2. | Slide the cushion from under the seat back guiding the seat belt buckle through the seat cushion and remove the seat cushion. |
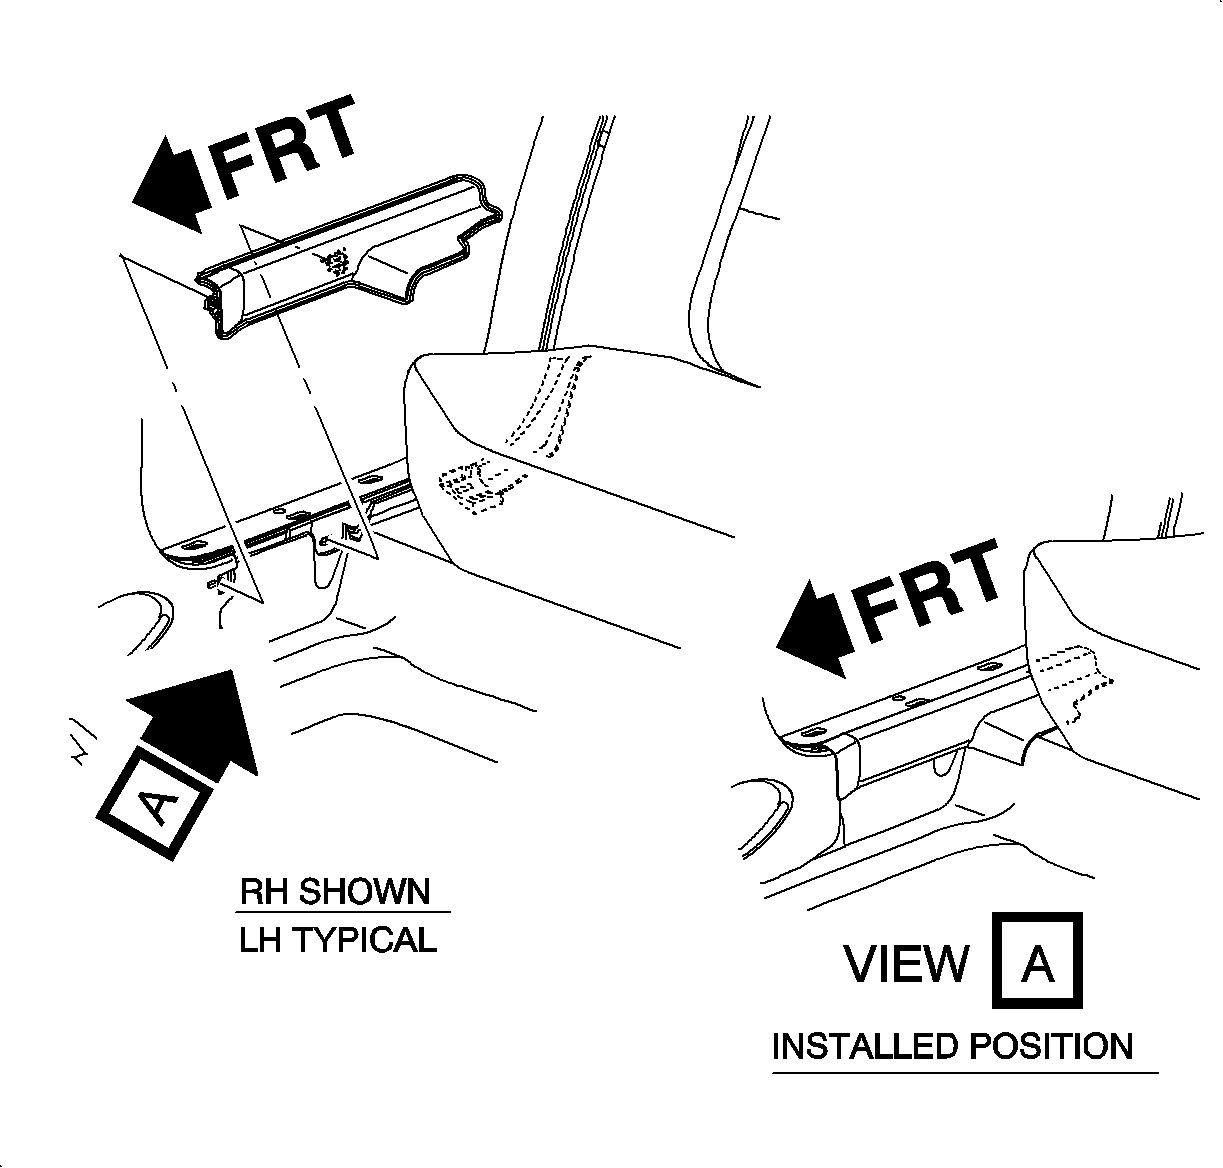
| 1.3. | Remove rear seat carpet retainer molding. |
| 1.4. | Lower rear seat back. |
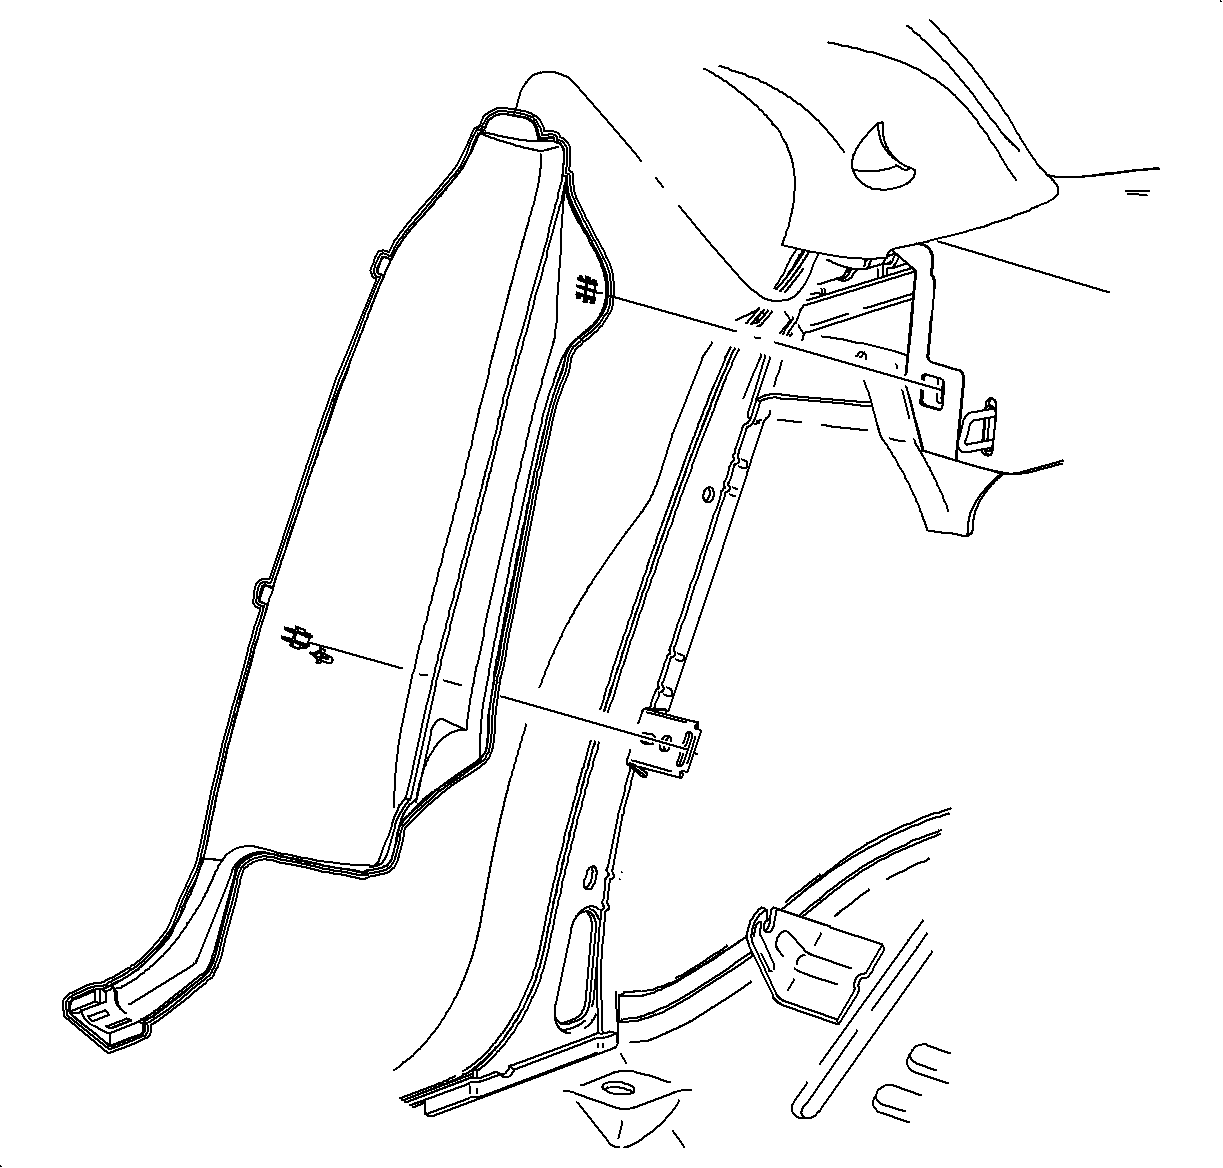
| 1.5. | Remove body lock trim finish molding by pulling firmly, starting at the bottom of the molding to disengage clips. |
| 1.6. | Slide molding out from under body lock pillar upper trim finish molding. |
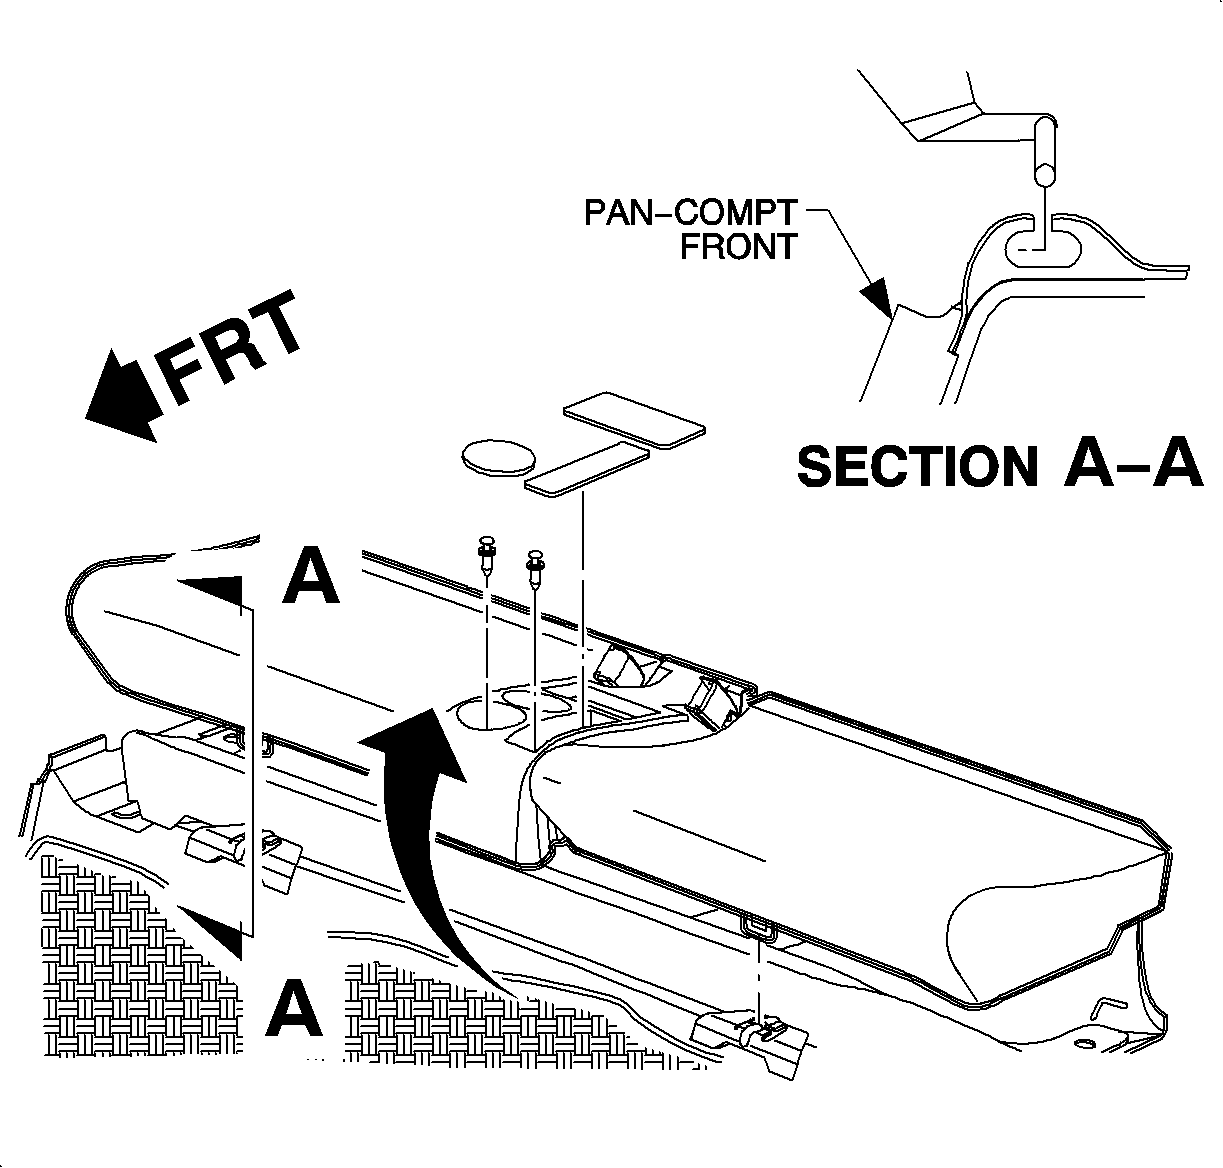
| 2.1. | Remove rear seat console inserts. |
| 2.2. | Remove rear seat center console fasteners. |
| 2.3. | Disengage seat cushion by pushing rearward, then upward at two front retaining locations to release the rear cushion from the retainers. |
| 2.4. | Slide the cushion from under the seat back guiding the seat belt buckle through the seat cushion and remove the seat cushion. |
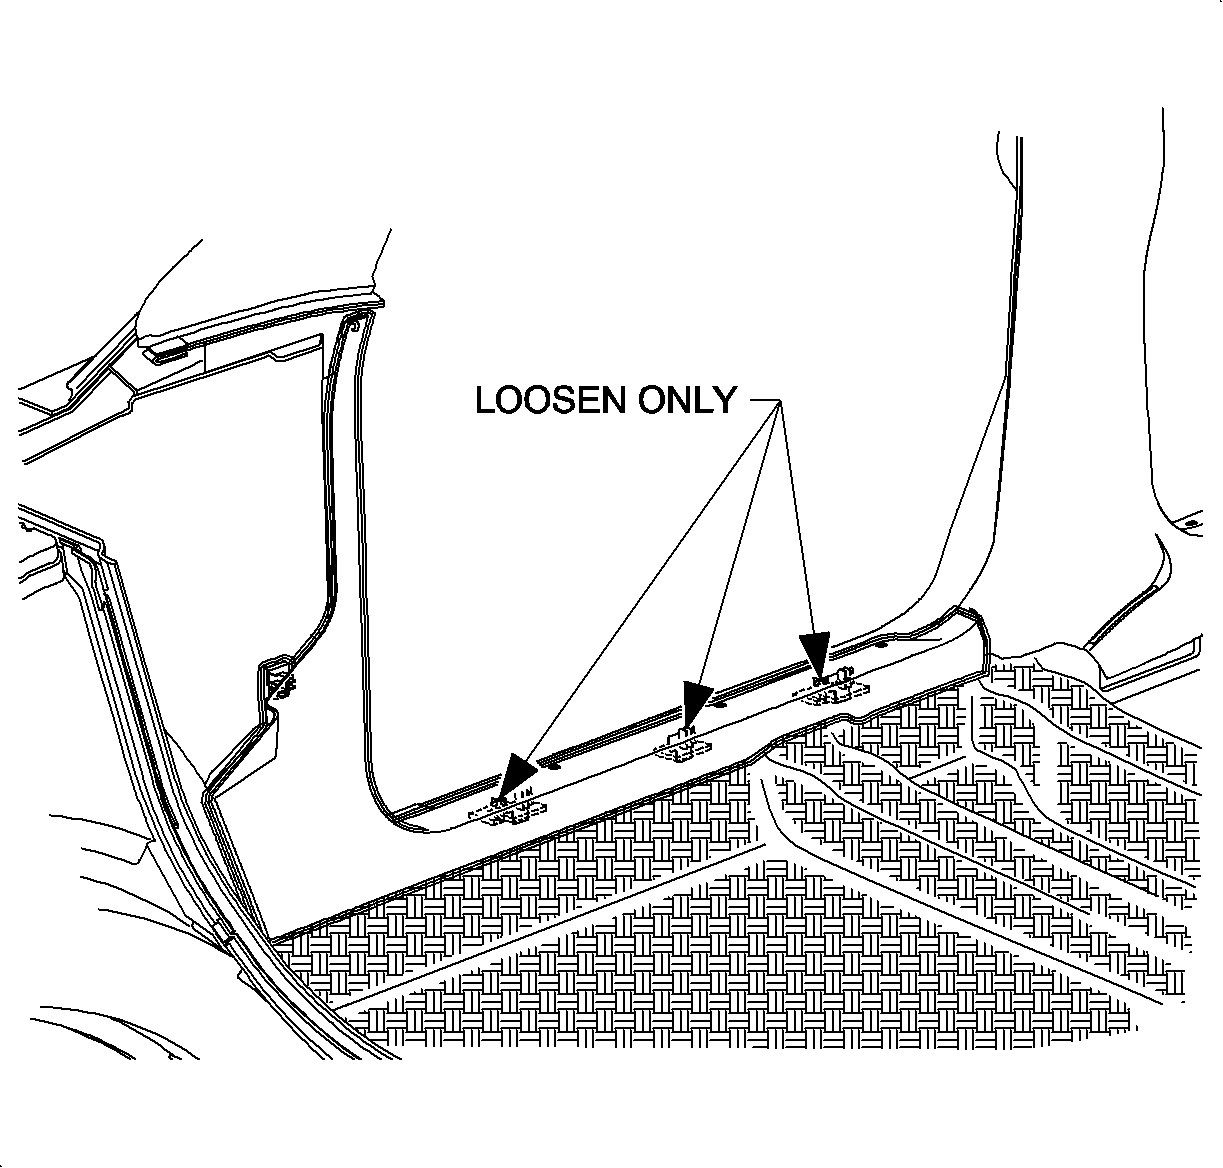
| 2.5. | Pull firmly on right front lower garnish/sill molding to loosen clips. |
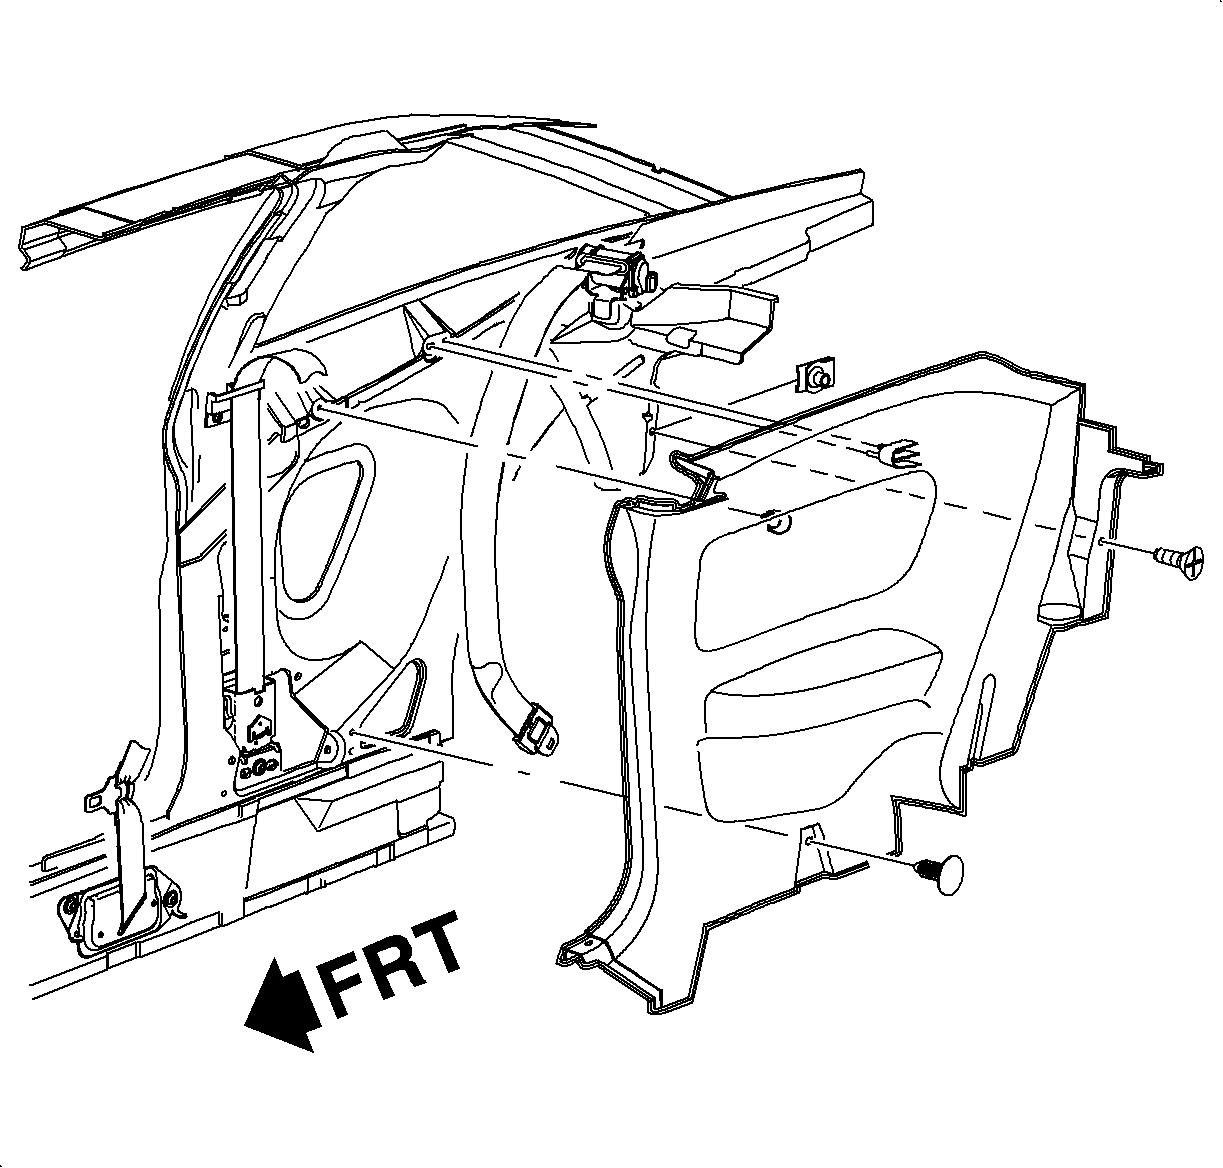
| 2.6. | Lower rear seat back. |
| 2.7. | Remove right quarter trim panel fasteners. |
| 2.8. | Remove right quarter trim panel. |
Installation Procedure
- Install RKE module.
- Connect electrical connector.
- For Coupes:
- For Sedans and Wagons:


| 3.1. | Install right quarter trim panel. |
| 3.2. | Install right quarter trim panel fasteners. |
| 3.3. | Raise rear seat back. |

| 3.4. | Position right front lower garnish/sill molding to vehicle and push at clip locations. |

| 3.5. | Position rear edge of rear seat cushion onto rear compartment ramp. Route seat belt buckles through rear seat cushion opening. Make sure that the seat belts are not twisted or that the buckles are not stuck beneath the rear seat cushion. |
| 3.6. | Align retaining rod of seat frame wire with rear compartment lower retainers. |
| 3.7. | Push rearward and down on the rear seat cushion to secure wire frame assembly. |
| 3.8. | Pull up on cushion to verify that it is securely fastened into place. |
| 3.9. | Install rear seat center console fasteners and inserts. |

| 4.1. | Slide body lock trim finish molding upper tab into the body lock pillar upper trim finish molding. |
| 4.2. | Line up attaching clips and firmly snap body lock trim finish molding into place. |
| Important: Outboard clip of the body lock pillar trim finish molding must be positioned under weather strip after installation. |
| 4.3. | Raise rear seat back. |

| 4.4. | Install rear seat carpet retainer molding. |

| 4.5. | Position seat cushion rear edge onto rear compartment ramps. Route seat belt buckles through the rear cushion slots assuring that the buckles are not twisted or stuck beneath the seat cushion. |
| 4.6. | Align the seat frame wire with the rear compartment lower retainers and push rearward while pushing downward to secure the seat frame wire into retainers. Pull up on cushion to verify that it is secure. |
