For 1990-2009 cars only
Removal Procedure
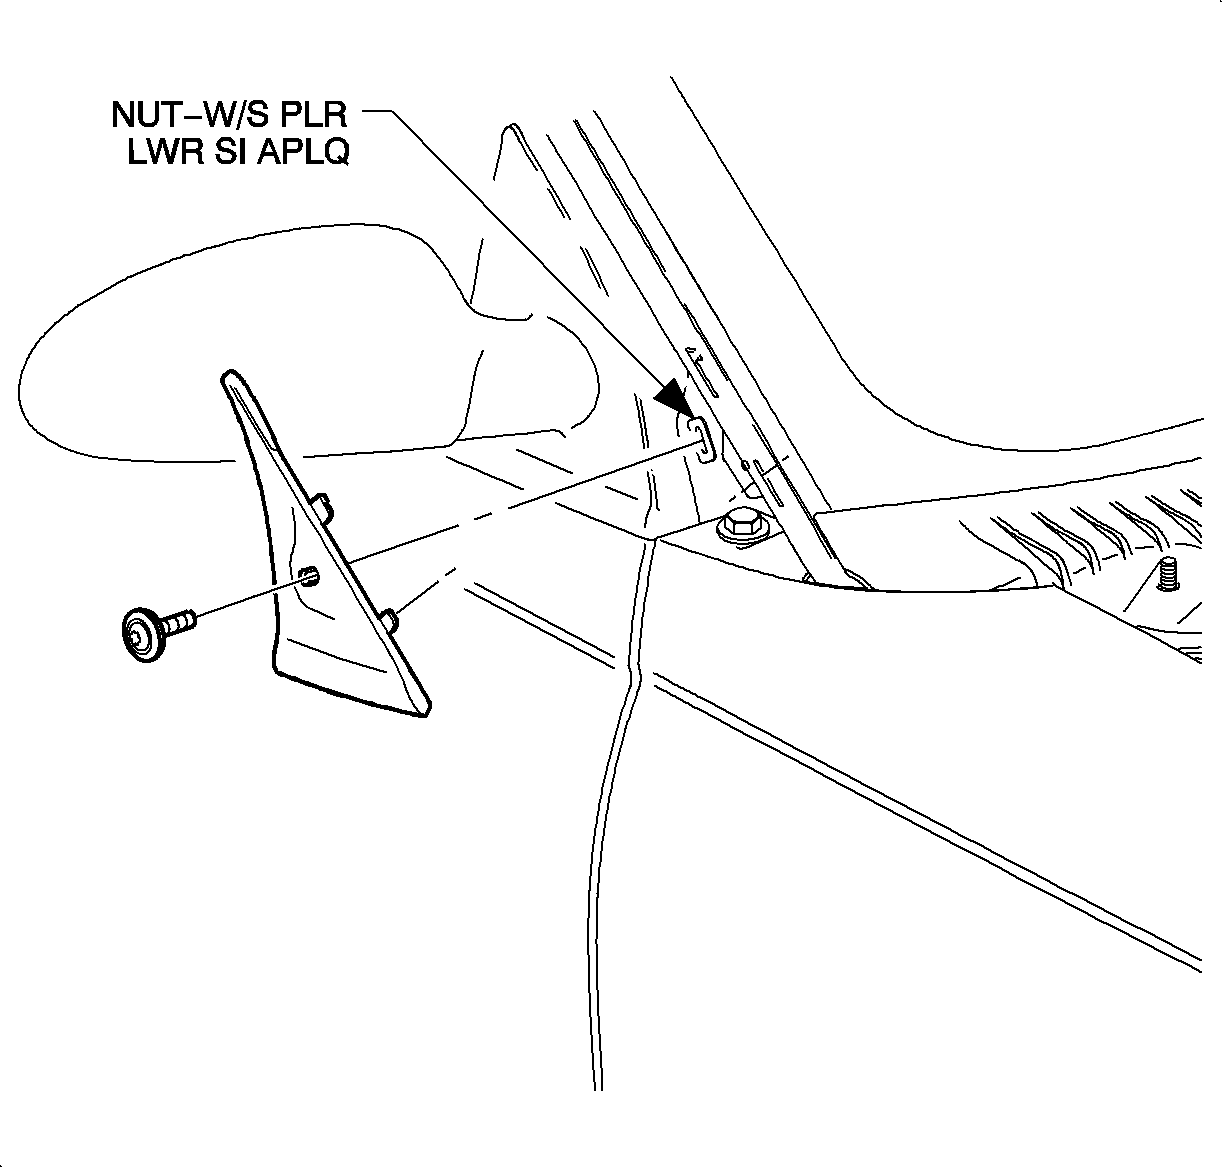
- Remove the windshield frame filler panel by removing the screw, then sliding the panel upward.
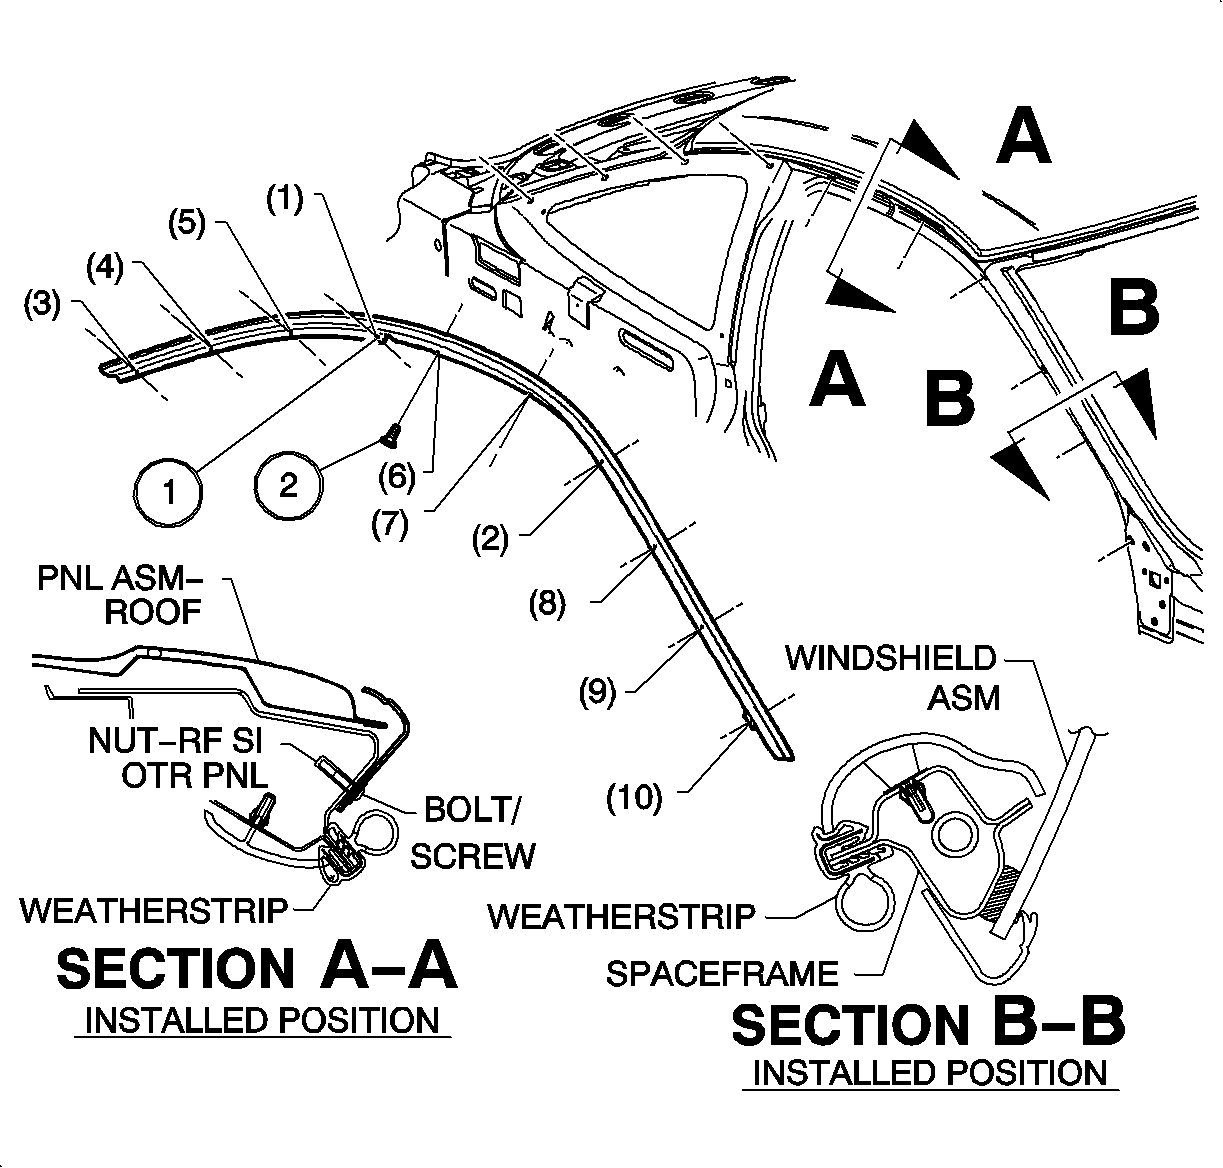
- Remove the retaining screws from the roof outer drip rail.
- Remove the drip rail.
- Carefully remove the rear end of the drip rail behind the rear quarter panel.
- Remove the front end of the drip rail from behind the front fender.

Installation Procedure
- Position the roof outer drip rail to the roof.
- Loosely install the up/down locating screw (1).
- Install and tighten the fore/aft locating screw (2).
- Install the remaining screws and tighten in order according to the illustration.
- Install the windshield frame filler panel by sliding the panel downward and installing the retaining screw.

| 1.1. | Insert the drip rail behind the front fender. |
| 1.2. | Insert the drip rail behind the rear quarter panel. |
| 1.3. | Install the screw (5) in the drip rail while working the rear side window encapsulated molding over the drip rail. |
| 1.4. | Remove the screw (5) once the drip rail is positioned under the encapsulated molding . |
Notice: Refer to Fastener Notice in the Preface section.
Tighten
Tighten the roof front drip molding screws to 1.5 N·m (13 lb in).
Tighten
Tighten the roof front drip molding screws to 1.5 N·m (13 lb in).

Important: Use a countersink screw for the attachment of the windshield frame filler panel only.
