Removal Procedure

Important: Removing the seat using the following sequence will aid in reassembly of the
unit. On the coupe passenger seat, do not activate the E-Z entry feature by pulling
the recliner release lever on the side of the seat at any time during removal and
installation procedures.
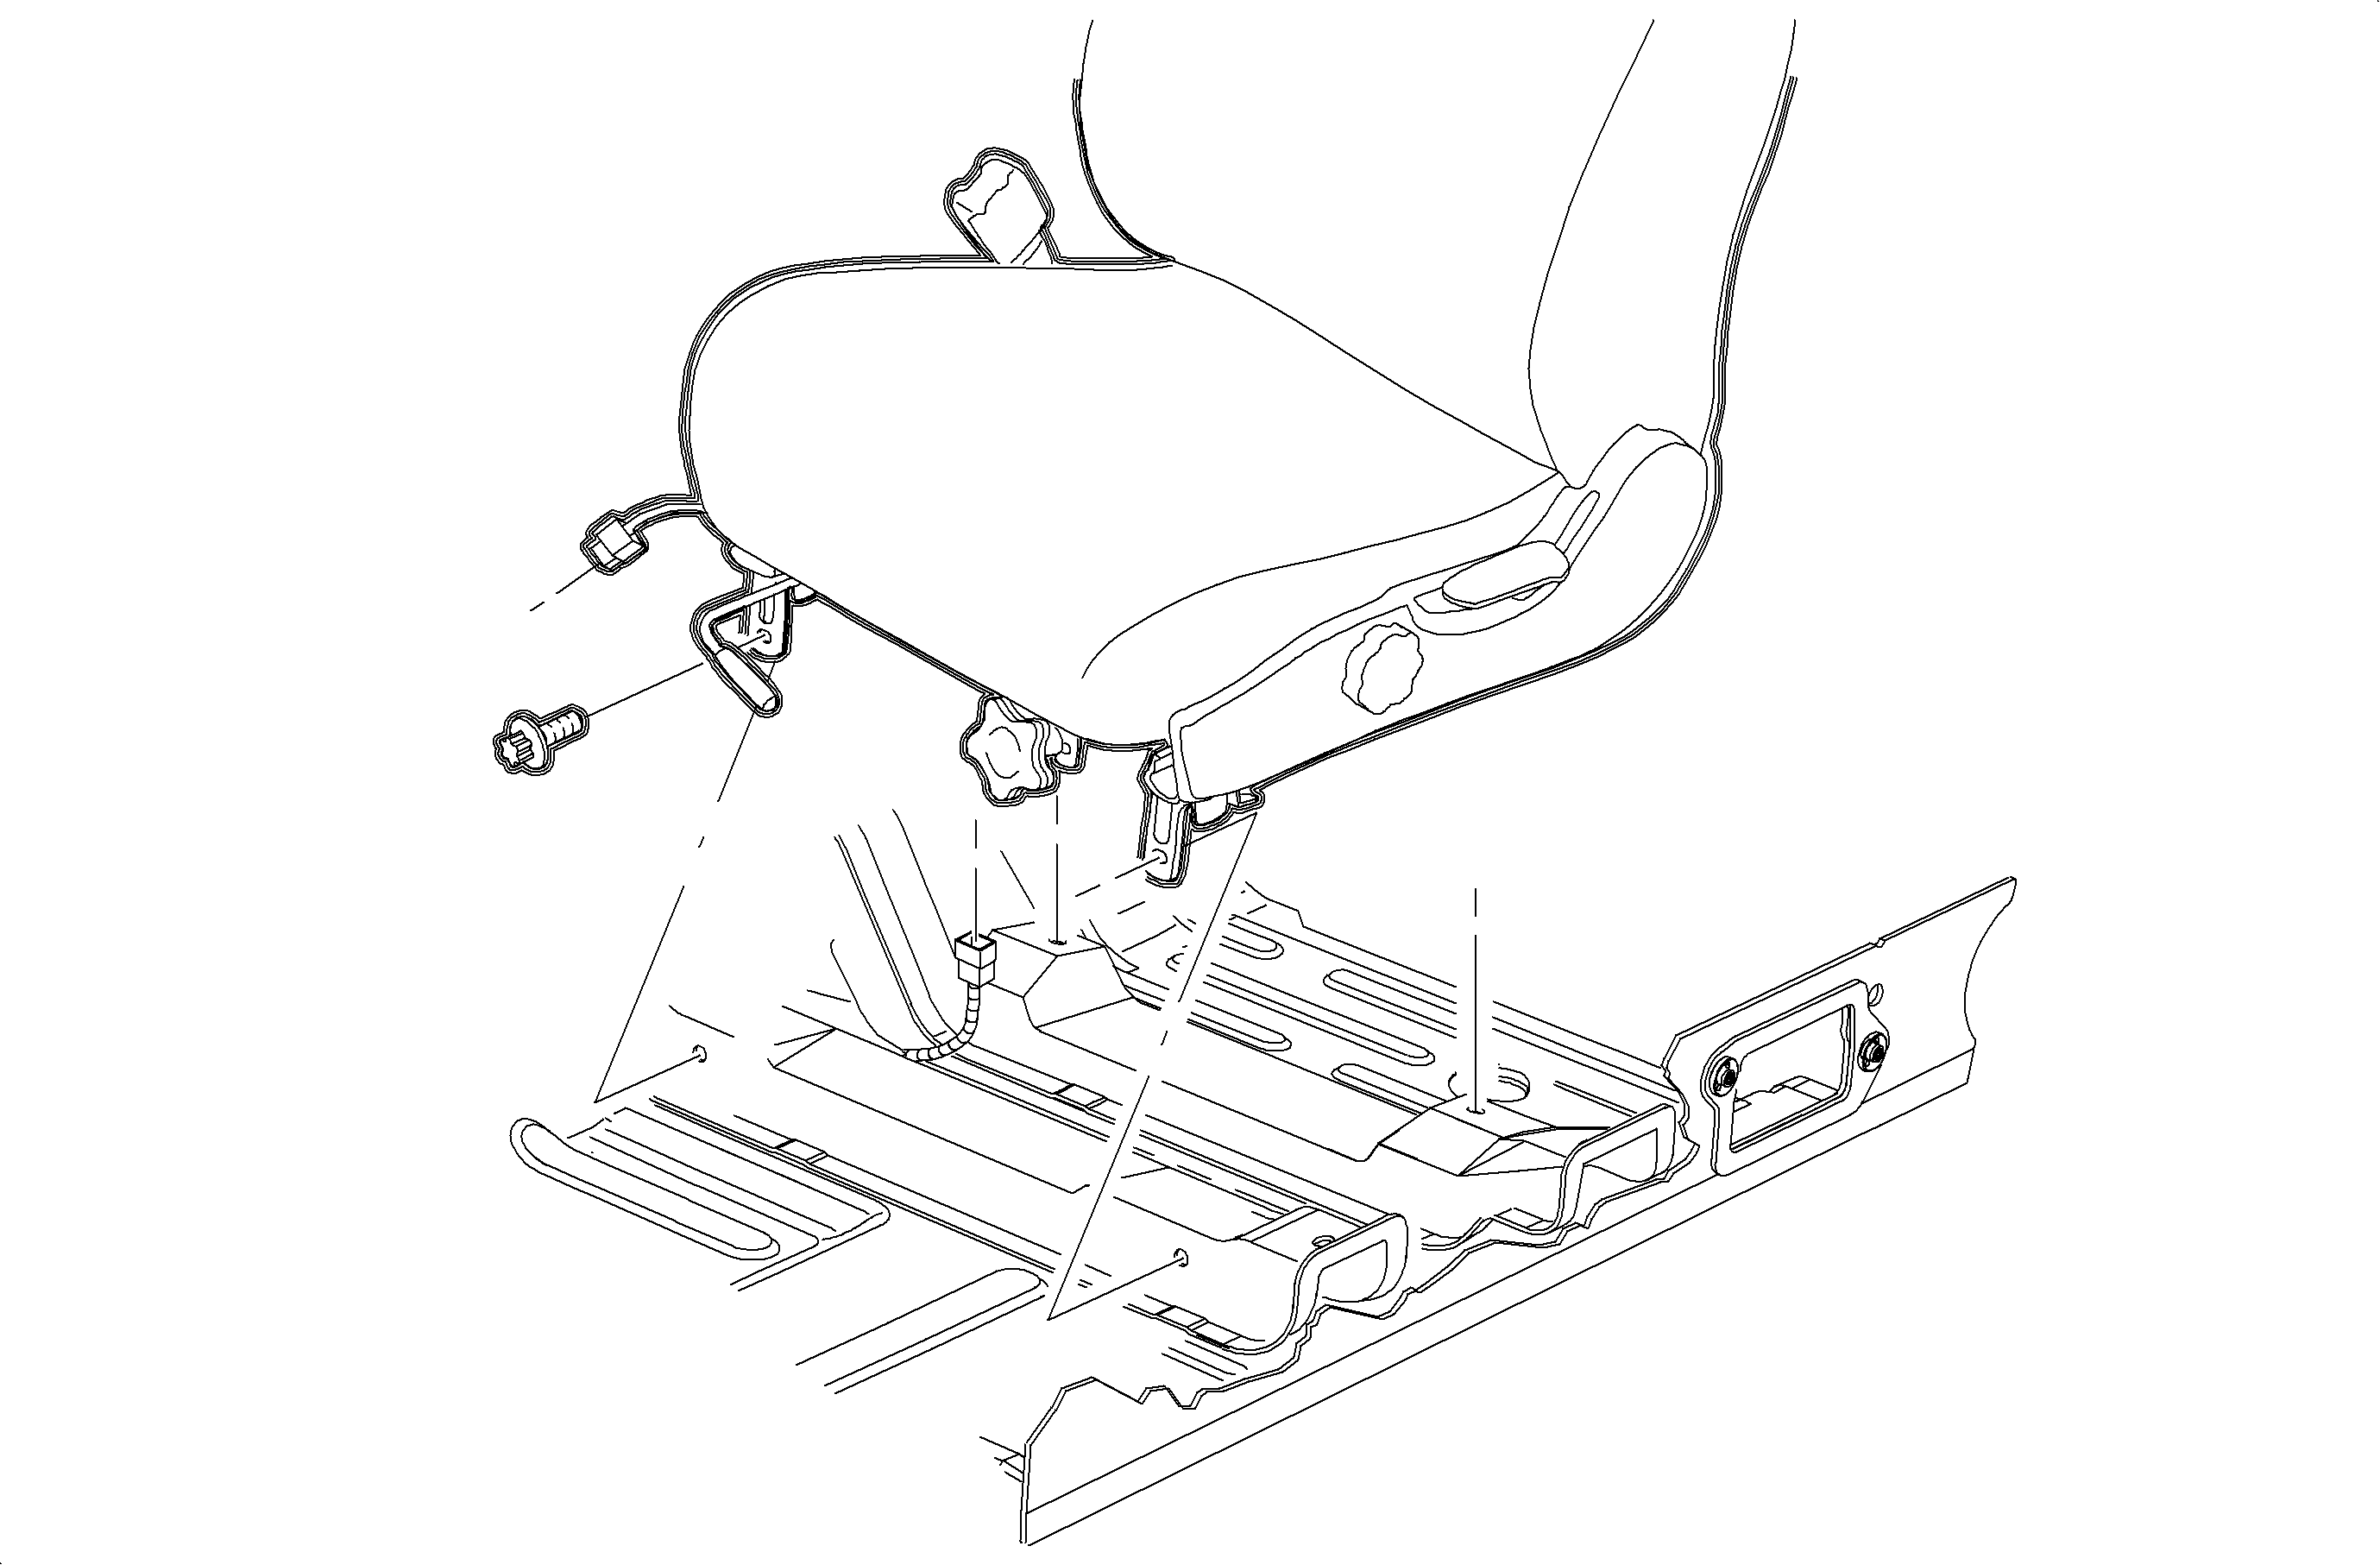
LHD shown; RHD similar.
- Remove the front bolts from the seat in the following order:
- Move the seat to the full forward position by activating the seat adjuster
lever.
- Remove the rear bolts from the seat in the following order:
- For the driver's seat, tilt the seat backwards and disconnect the seat
side mount buckle unit wiring harness.
- Remove the seat and place on a clean, protected work surface.
Installation Procedure
Important: LHD shown, RHD similar
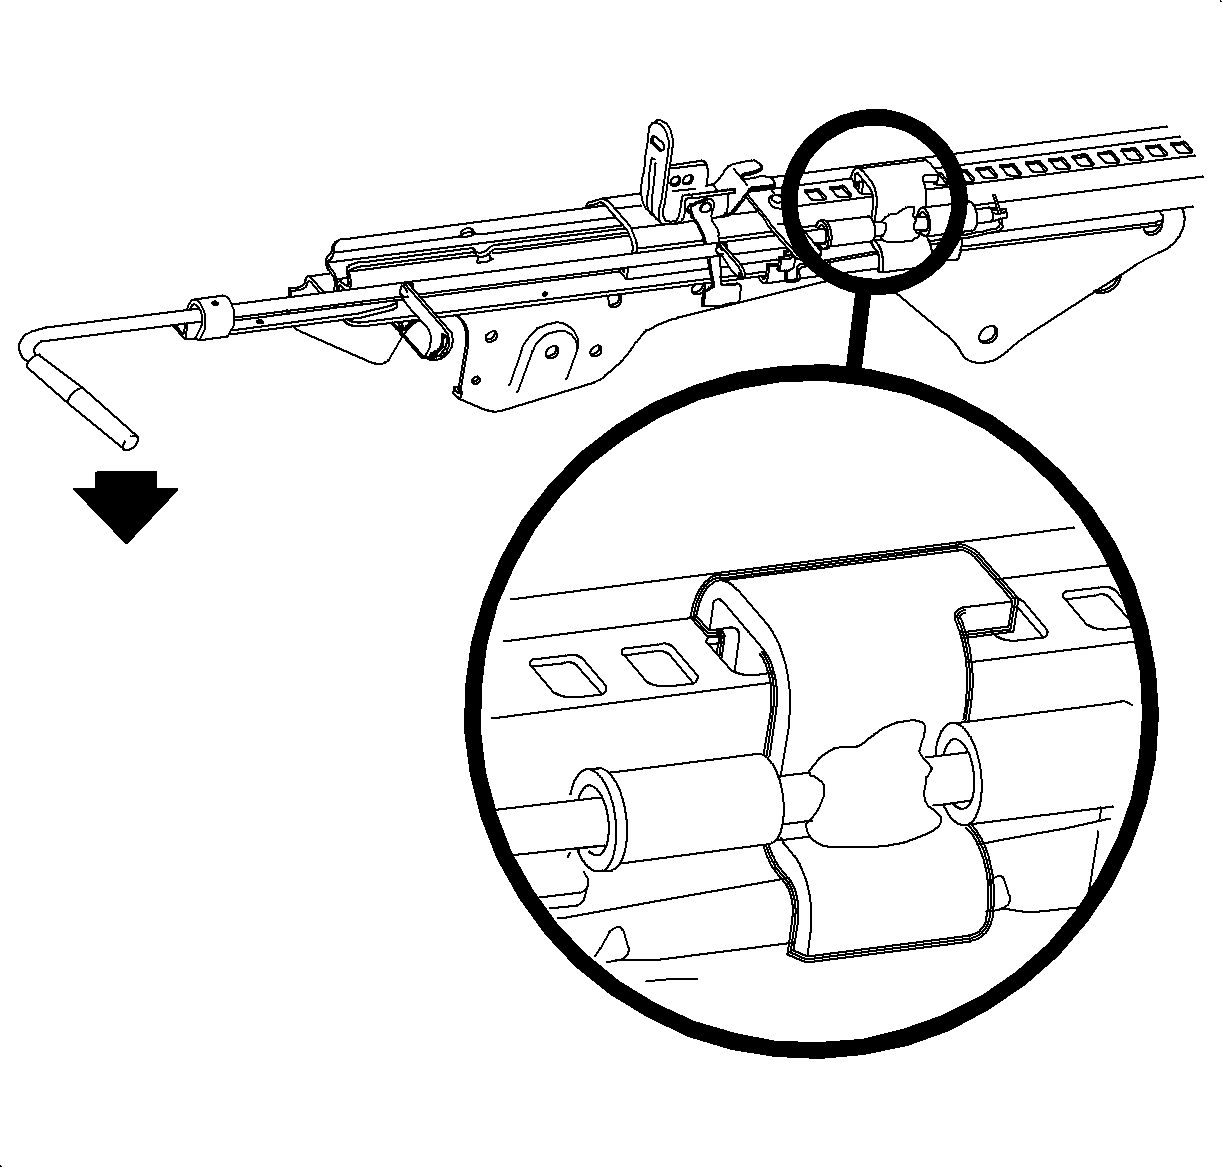
Important: Timing of the seat adjuster tracks in relationship to each other is essential
for proper installation. Handle the seat assembly with extreme care to prevent damage
to the seat mounting surface.

- Activate the seat
adjuster assemblies by releasing the adjuster lever.
- Position the seat cushion assembly forward to allow the pawls attached
to the seat track to lock in the third windows on both seat adjuster tracks.
- Carefully place the seat in the vehicle.
- For the driver's seat, position the seat to the vehicle. Tilt
the seat backwards, and connect the seat mount buckle unit wiring harness.
Notice: Refer to Fastener Notice in the Preface section.
Caution: Apply Loctite 242® Threadlocker US P/N 12345382 (Canadian P/N 10953489),
or equivalent, on all restraint bolts/nuts before installation. Failure to use such
threadlocker correctly may result in personal injury.

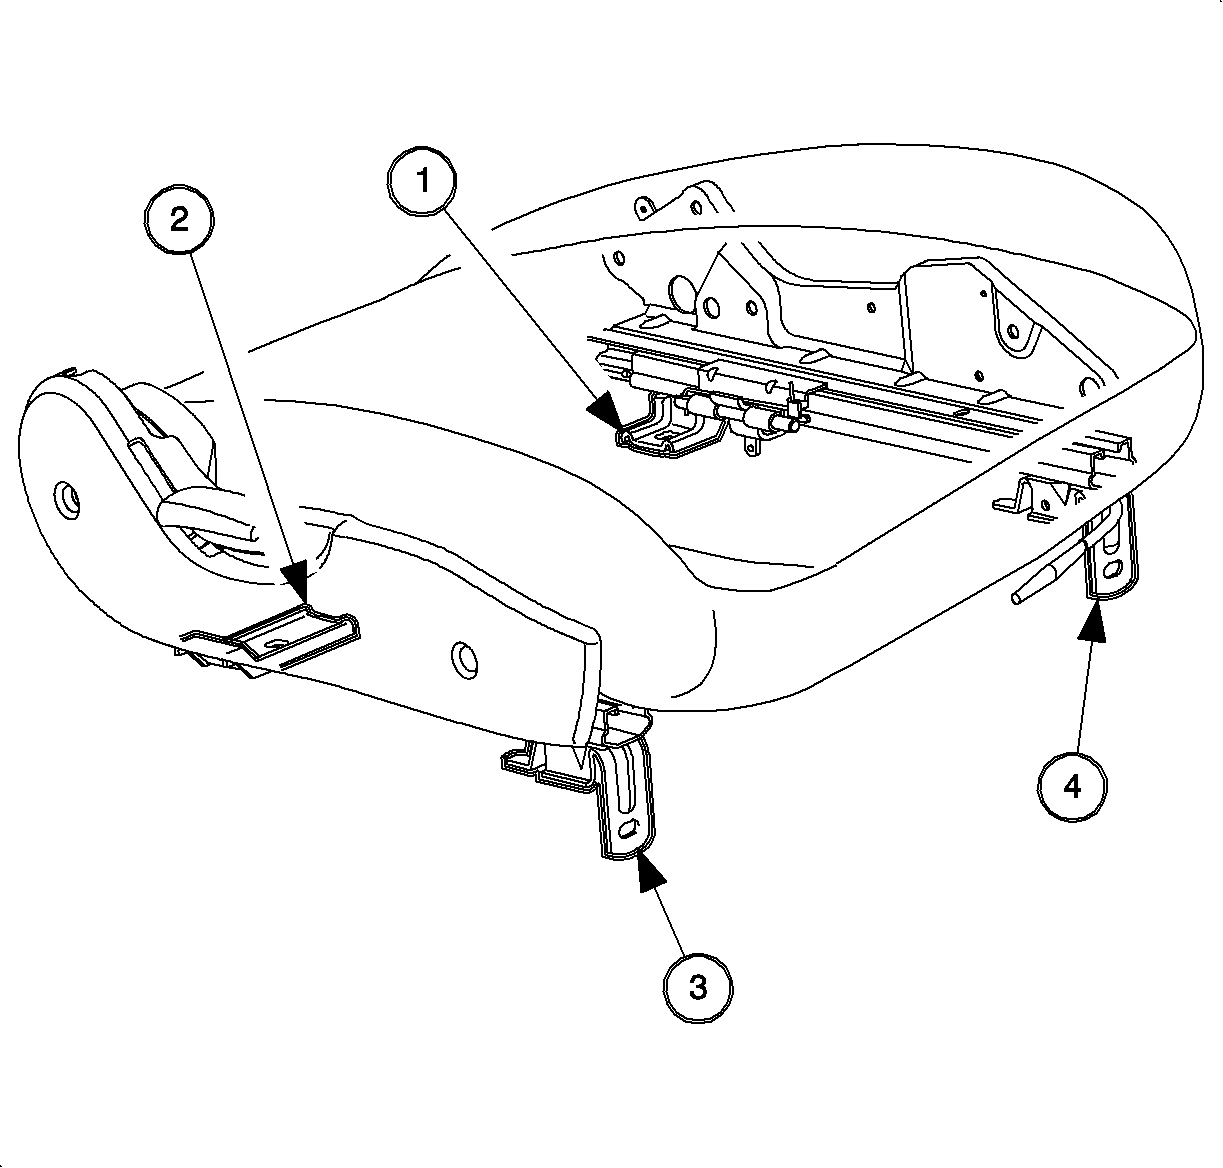
- Apply Loctite 242®
Threadlocker P/N 21485277, or equivalent, to the seat bolts. Install the following
seat bolts in the following order:
| 5.4. | Front inboard seat bolt (4) |
Tighten
Tighten the front seat-to-floor-panel bolts to 30 N·m (22 lb ft).
- Move the seat assembly to the full rearward position by activating the
seat adjuster lever.
- Install the front inboard seat bolt (4).
Tighten
Tighten the front seat-to-floor-panel bolts to 30 N·m (22 lb ft).
- Sit in the seat. Buckle and unbuckle the seat belt.
- Activate the adjuster lever and move the seat to various positions along
the seat tracks to ensure proper operation. The seat should lock at each desired position.
- On the Coupe passenger seat, from the outside of the vehicle, check the
operation of the E-Z entry feature.
| 10.1. | Pull up on the recliner release lever. The seatback should tilt forward
and the seat assembly should move to the full-forward position. |
| 10.2. | Move the seatback to its upright position and slide the seat assembly
rearward until it locks into place. |


