Waterleaks at Right and/or Left Front Footwell Area

| Subject: | Waterleaks at Right and/or Left Front Footwell Area (Seal Smile Joint HVAC Module, Strut Tower, and /or Frame Rail/Hood Hinge Areas as Necessary) This bulletin has been revised to include 2001 model year vehicles and supersedes bulletin 94-T-32B, which should be discarded. |
| Models: | 1991-2001 Saturn S-Series Vehicles |
Condition:
Water is leaking into the vehicle at the left and/or right front footwell areas.
Cause:
| • | The sealer skips along the smile joint area. |
| • | The sealer skips around the HVAC module seals. |
| • | The sealer skips behind the front strut tower at the upper outer corner where the strut tower cap meets the cowl panel. |
| • | The sealer skips at the frame rail area near the cowl panel. |
| • | Possible gaps between layers of metal at the hood hinge area. |
Correction:
Identify the waterleak paths as outlined in this bulletin and seal the waterleak paths.
Procedure: General Waterleak Testing
- Verify that the front footwell carpet is wet or exhibits a musty mildew odor or moisture exists under the carpet.
- Remove the carpet from the vehicle. Refer to the appropriate procedure in the Body/Repair Service Manual (1991-1999) or S-Series Body/Electrical Volume II Service Manual (2000-2001).
- With the aid of an assistant inside the vehicle to help detect the actual waterleak point, apply an unrestricted flow of water directly to the smile joint area.
- Position the hose so that the water flows through the air inlet grille, into the plenum area, and out the plenum drains over the HVAC module seals -- TXV seal, heater core pipe seal, and case drain seal.
- Apply an unrestricted flow of water to the front strut tower area at the upper outer corner where the strut tower cap meets the cowl panel. Refer to the illustrations.
- 1991-1995
- 1996-2001
- Apply an unrestricted flow of water to the frame rail/hood hinge area where the hood hinge attaches to the body.
Important: To detect a waterleak, always start at the lowest point and work up to the highest point.
Important: Waterleak testing may take up to 15 minutes before water is seen inside the vehicle. Make sure to periodically check the front footwell areas for signs of water leaks.
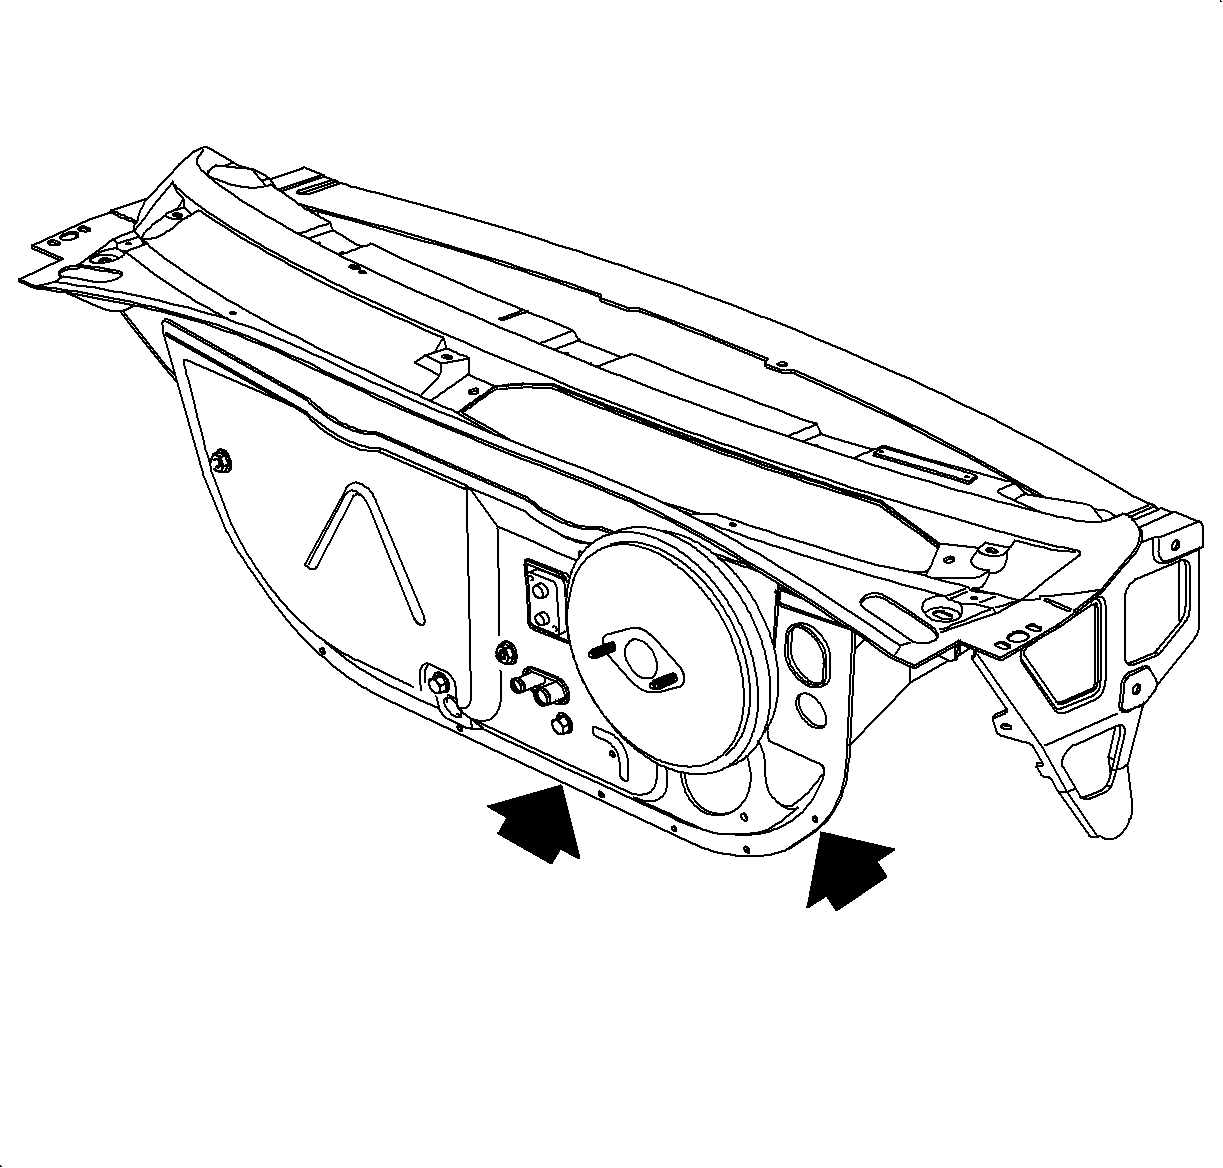
| • | If a waterleak is detected at the smile joint area, proceed to Smile Joint Waterleak Repair in this bulletin. |
| • | If no waterleak is detected at the smile joint, proceed to the next step. |
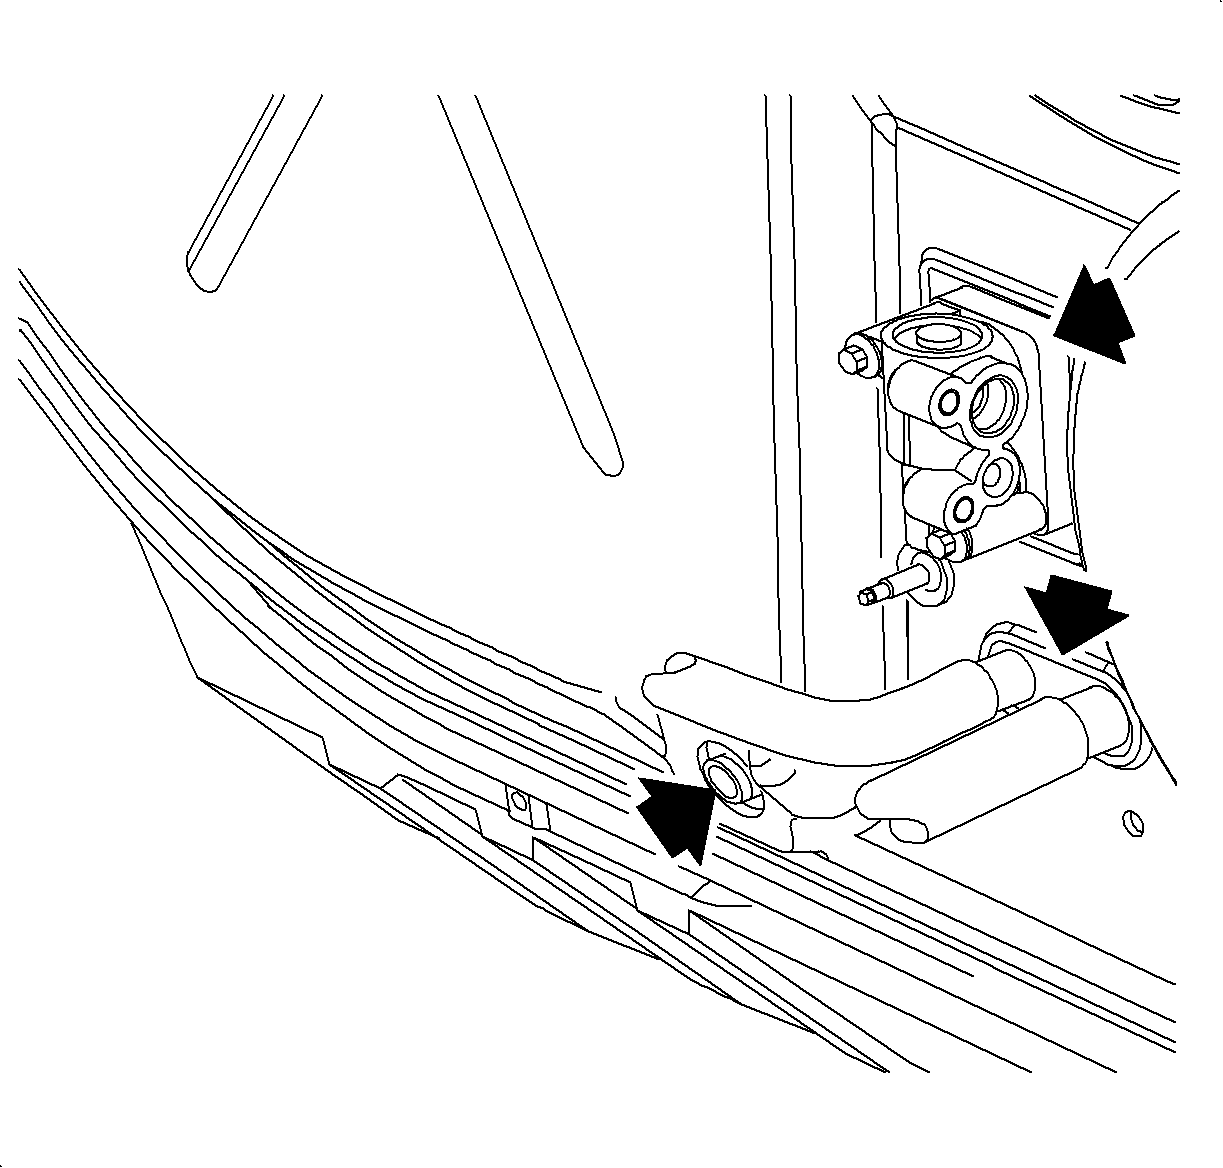
| • | If a waterleak is detected at the HVAC module seal area, proceed to HVAC Module Seal Waterleak Repair in this bulletin. |
| • | If no waterleak is detected at the HVAC module seal area, continue to the next step. |
| • | If a waterleak is detected at the strut tower area, proceed to Strut Tower Area Waterleak Repair in this bulletin. |
| • | If no waterleak is detected at the strut tower area, proceed to the next step. |
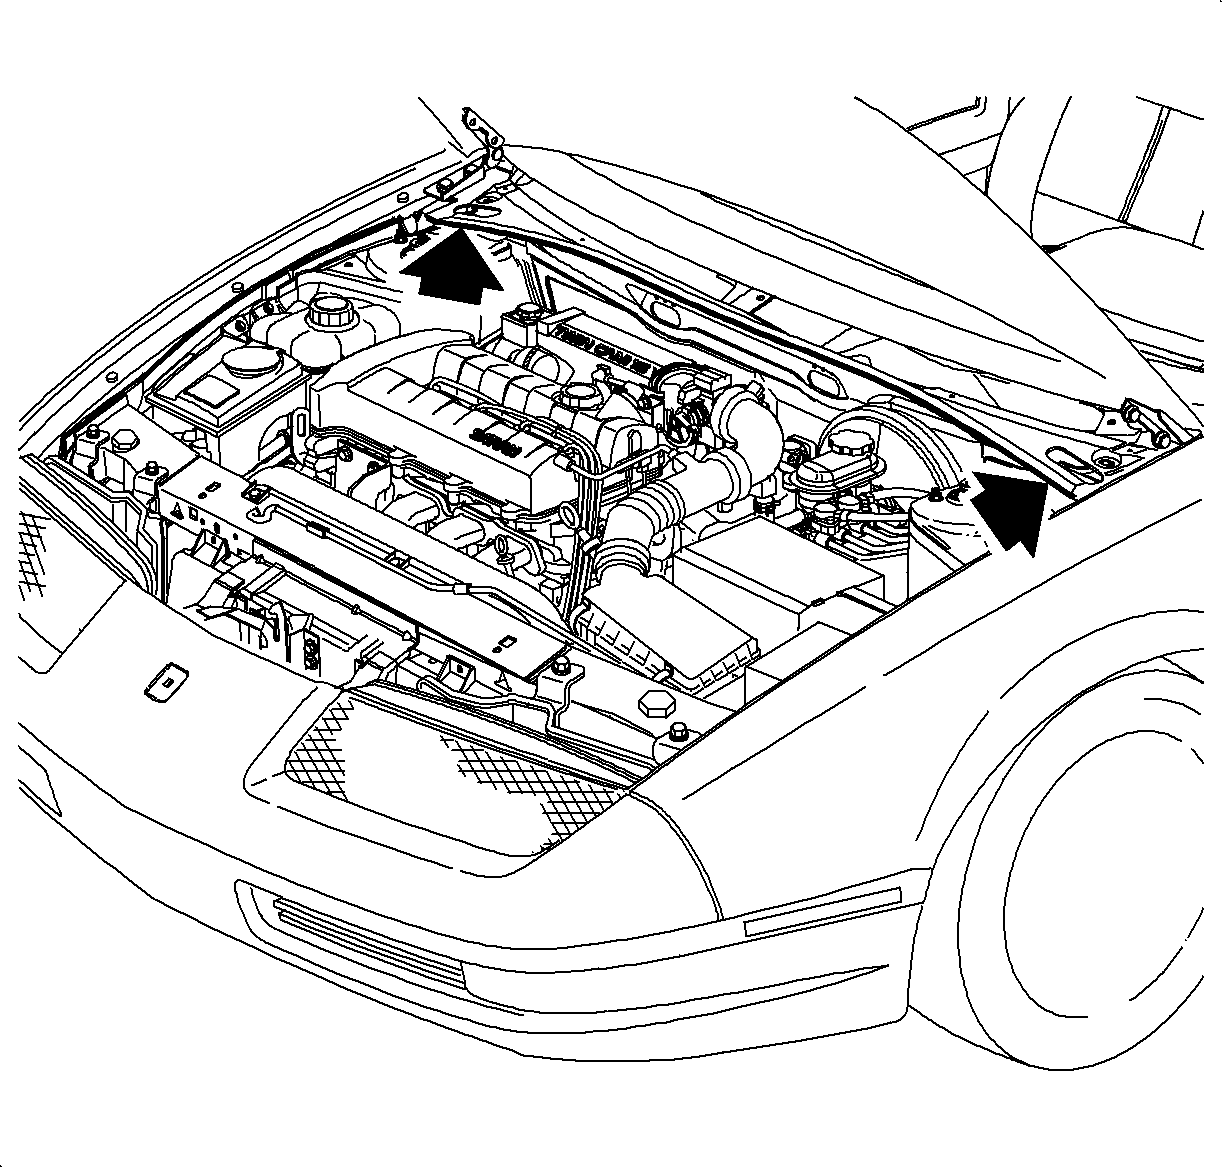
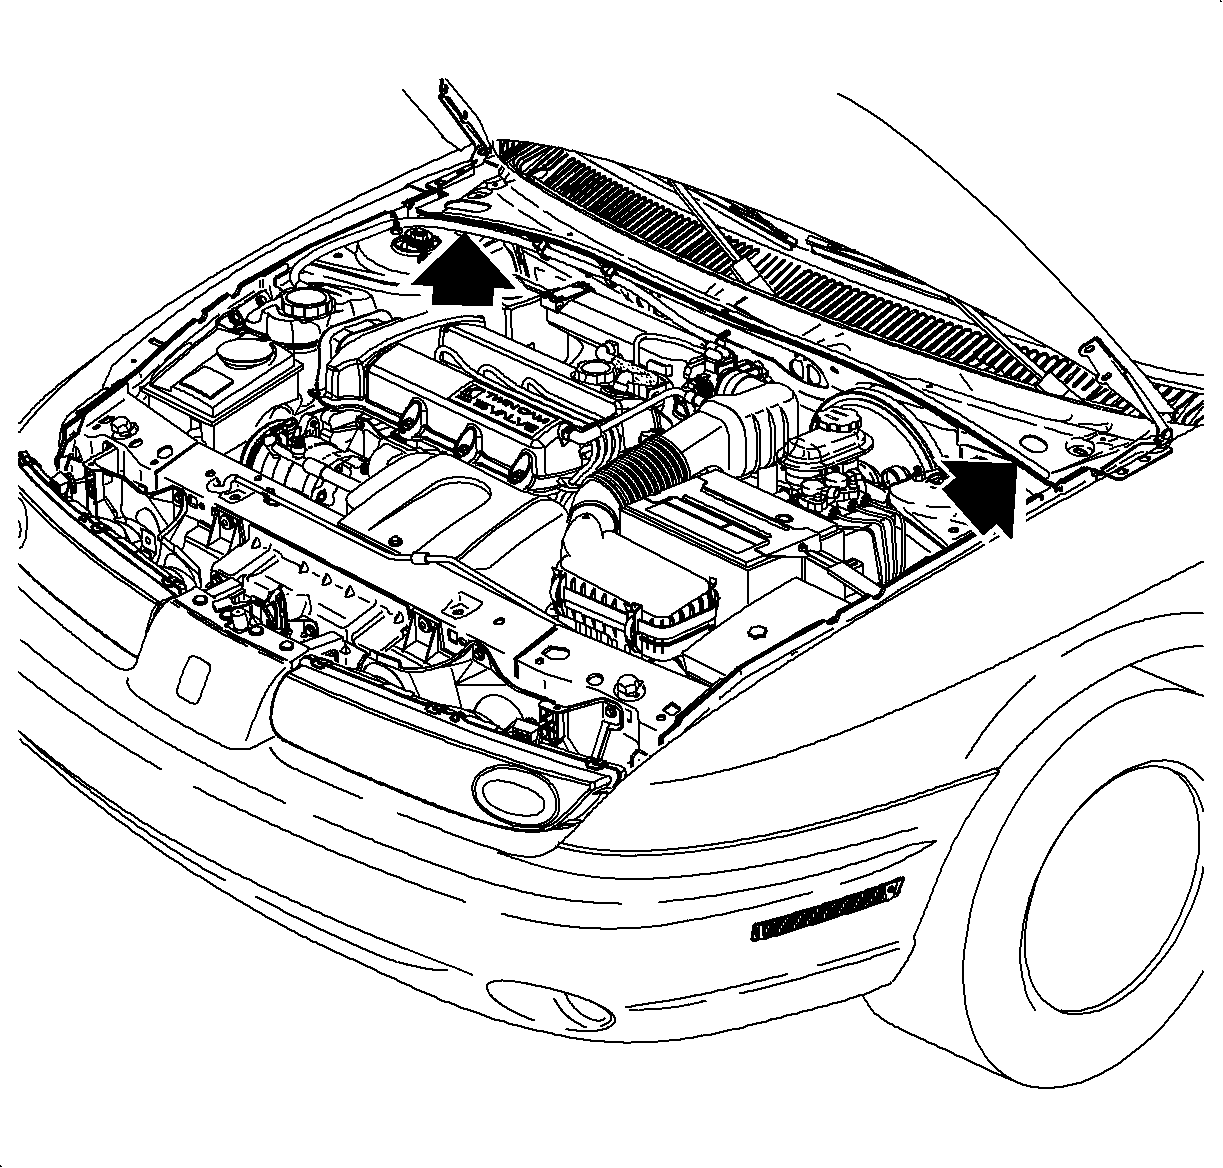
Important: Left side shown. Right side similar.
| • | If a waterleak is detected at the frame rail/hood hinge area, proceed to Frame Rail/Hood Area Waterleak Repair in this bulletin. |
| • | If no waterleak is detected at the frame rail/hood hinge area, refer to additional waterleak diagnostic information in the Body/Repair Service Manual 1991-1999, or S-Series Body/Electrical Volume I Service Manual 2000-2001. |
Smile Joint Waterleak Repair
- If a waterleak is detected in the smile joint area, clean and dry the area to be repaired using compressed air and a nozzle.
- Using Kent Industries High Tech Leak Check Seam Sealer -- P/N 10105 or equivalent, apply the sealant inside the retention channel from the outside of the vehicle at the waterleak area.
- Verify the repair by water testing after the sealant has been allowed to dry according to the manufacturer's recommended instructions.
- If the waterleak still persists, apply Kent Industries High Tech Leak Check Seam Sealer -- P/N 10105 or equivalent, to the inside retention channel from inside the vehicle at the waterleak area.
- After verifying the repair, go back and perform steps 4-6 under General Waterleak Testing in this bulletin to ensure there are no additional waterleaks at the HVAC module, shock tower, or frame rail/hood hinge areas.
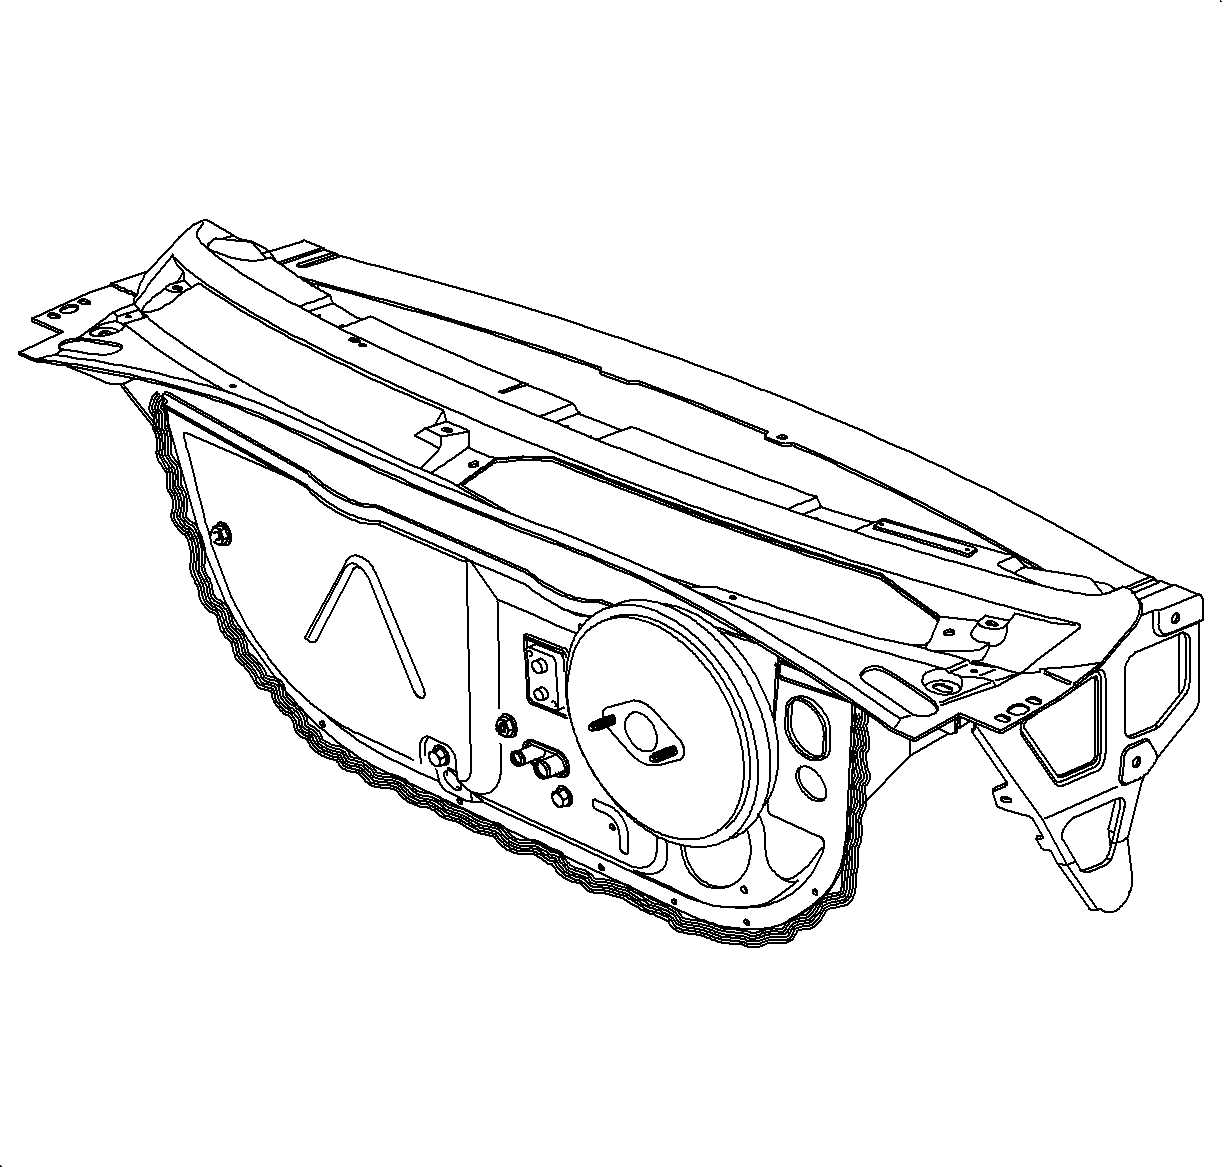
HVAC Module Seal Waterleak Repair
- If a waterleak is detected at the HVAC module case seals, clean and dry the seal areas to be repaired using compressed air and a nozzle.
- Using Kent Industries Spray Leak Check Seam Sealer P/N 50087, or equivalent, spray the seals with 2 coats. Refer to the manufacturer's recommended instructions.
- Verify the repair by water testing after the sealant has been allowed to dry according to the manufacturer's recommended instructions.
- After verifying the repair, go back and perform steps 5 and 6 under General Waterleak Testing in this bulletin to ensure there are no additional waterleaks at the shock tower or frame rail/hood hinge areas.
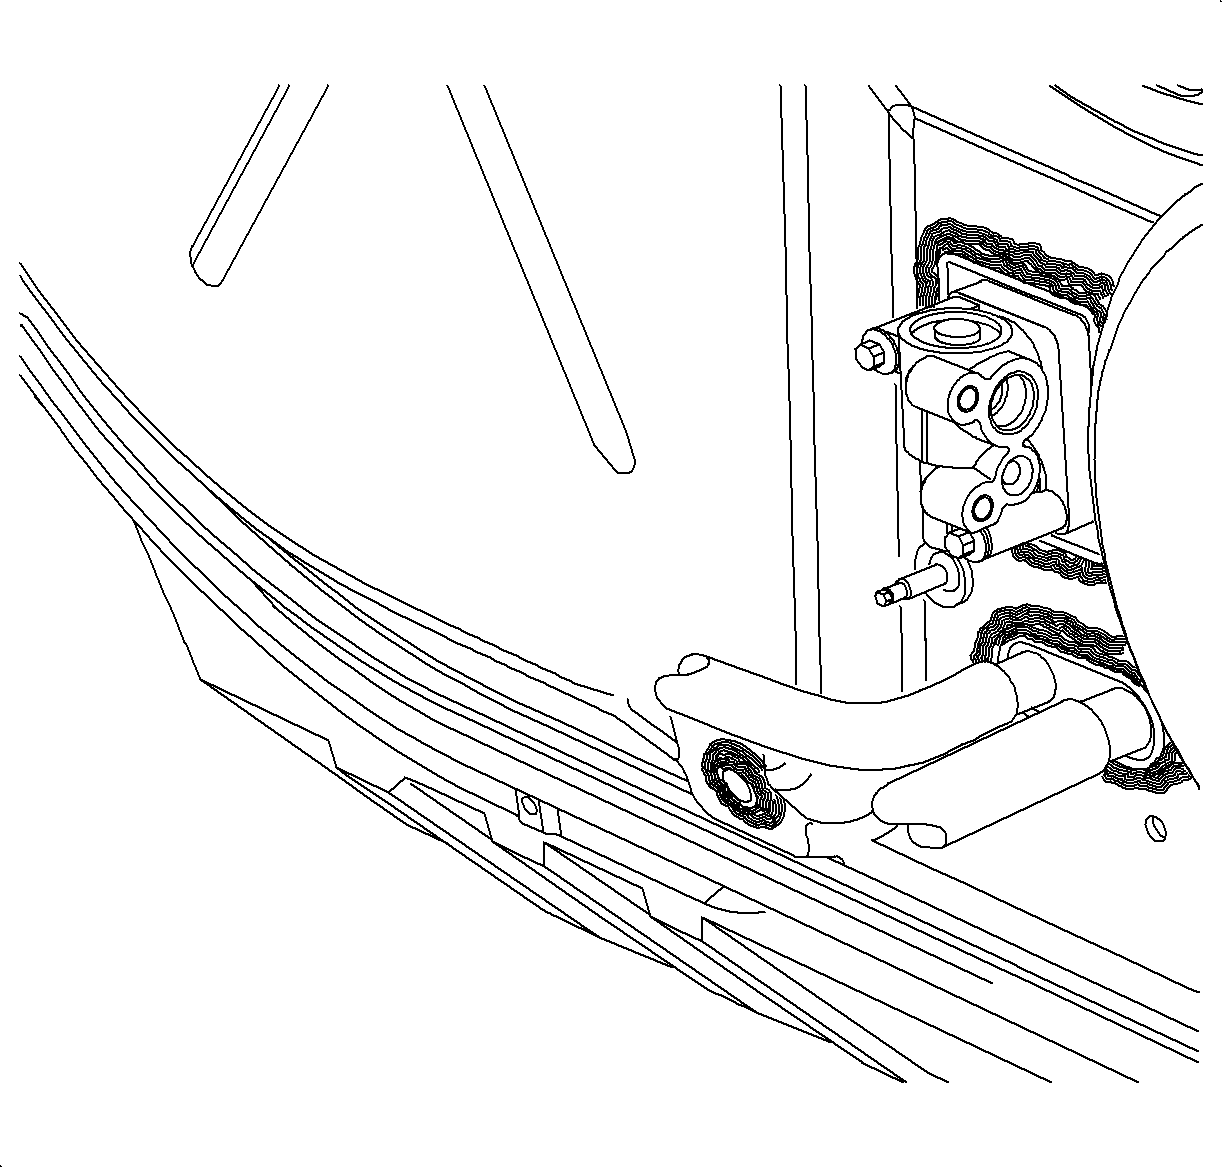
Strut Tower Area Waterleak Repair
- If a waterleak is detected in the strut tower area, clean and dry the area to be repaired using compressed air and a nozzle.
- Using Kent Industries High Tech Leak Check Seam Sealer -- P/N 10105 or equivalent, pump the sealant into the corner, filling the corner with sealant.
- Using Kent Industries High Tech Leak Check Seam Sealer -- P/N 10105 or equivalent, pump the sealant along the upper frame rail.
- Verify the repair by water testing after the sealant has been allowed to dry according to the manufacturer's recommended instructions.
- After verifying the repair, go back and perform step 6 under General Waterleak Testing in this bulletin to ensure there is no additional waterleak at the frame rail/hood hinge area.
Important: Right side shown. Left side similar.
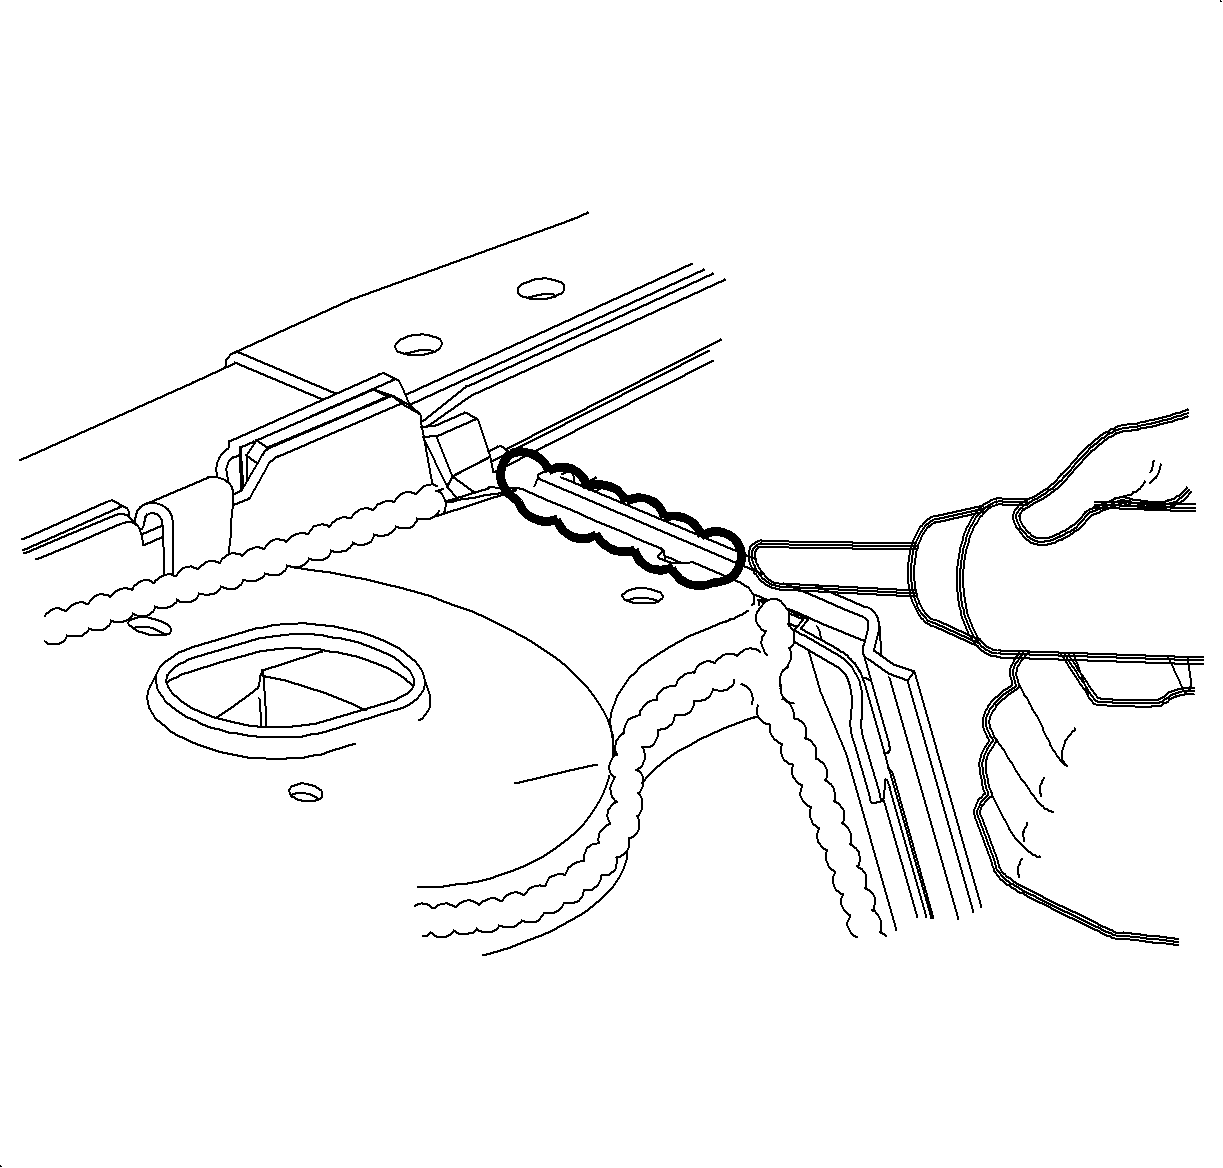
Important: Make sure to pump sealant under the lip of the cowl panel, where it overlaps the strut tower.
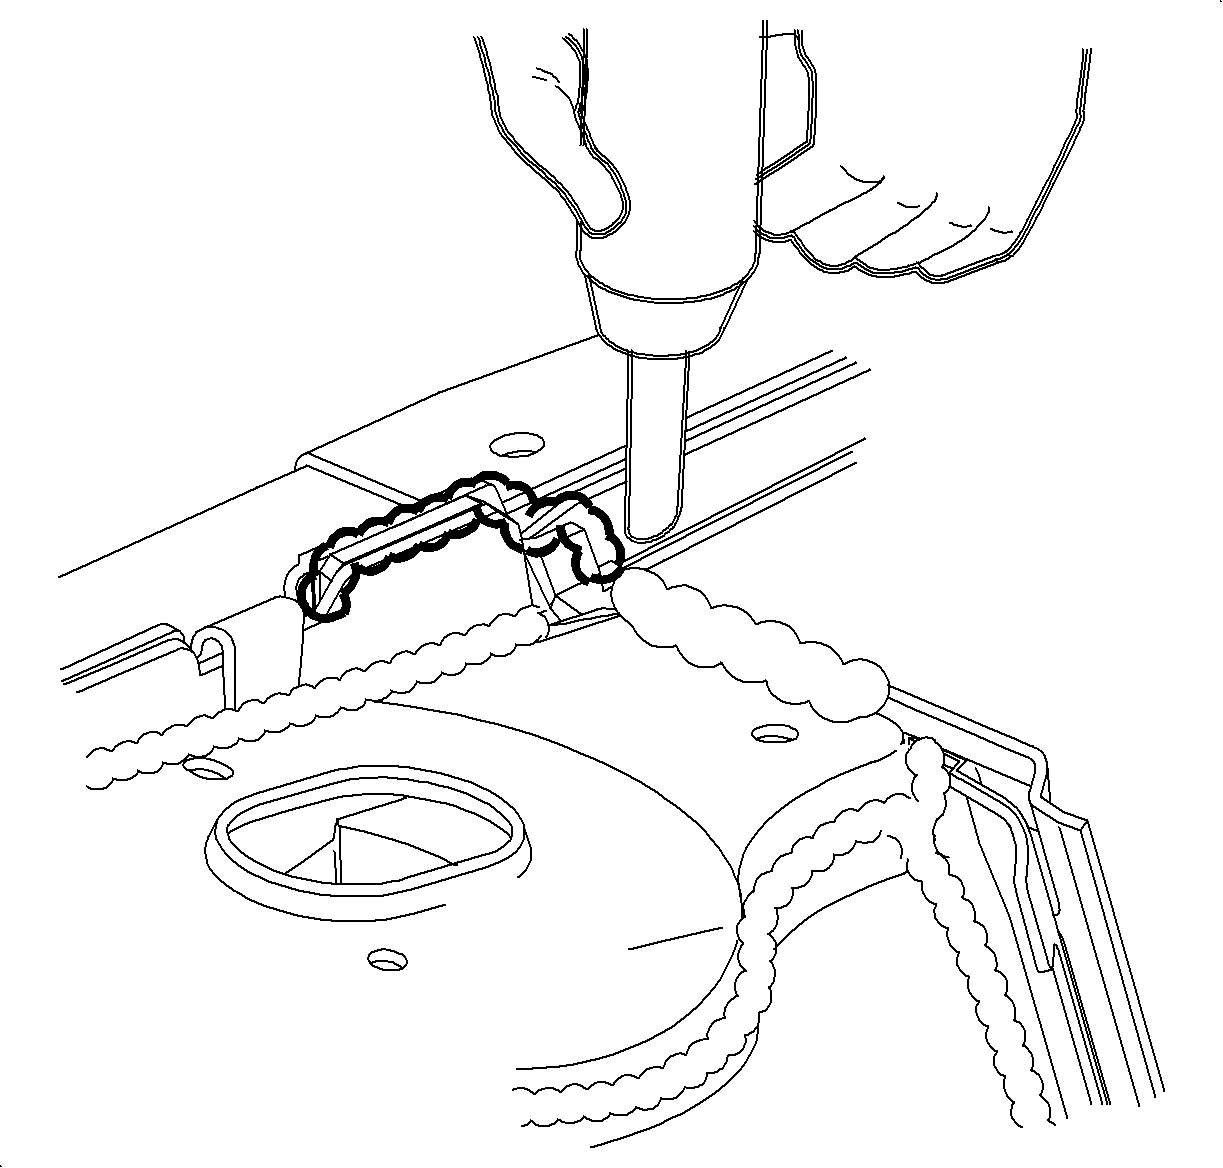
Frame Rail/Hood Hinge Area Waterleak Repair
- Remove the wheelhouse liner-to-fender fasteners on the affected side of the vehicle.
- Remove all fasteners from the top and rear of the front fender on the affected side of the vehicle. Pull the fender away from the body to allow access to the area to be repaired.
- Using Kent Industries Wet/Dry Re-Sealant Pump Grade sealer P/N 90010, seal the frame rail/hood hinge area.
- To seal the hood hinge-to-body bolts remove one bolt at a time to avoid movement of the hood hinge adjustment and apply 3m® Bedding and Glazing Compound P/N 08509, or equivalent, to the threads of the bolt.
- Install the bolt and tighten.
- Repeat steps 4 and 5 for the remaining bolts.
- Water test the frame rail/hood hinge area to verify the repair.
- Align the front fender as necessary and install the fasteners at the top and rear of the front fender.
- Install the wheelhouse liner-to-fender fasteners.
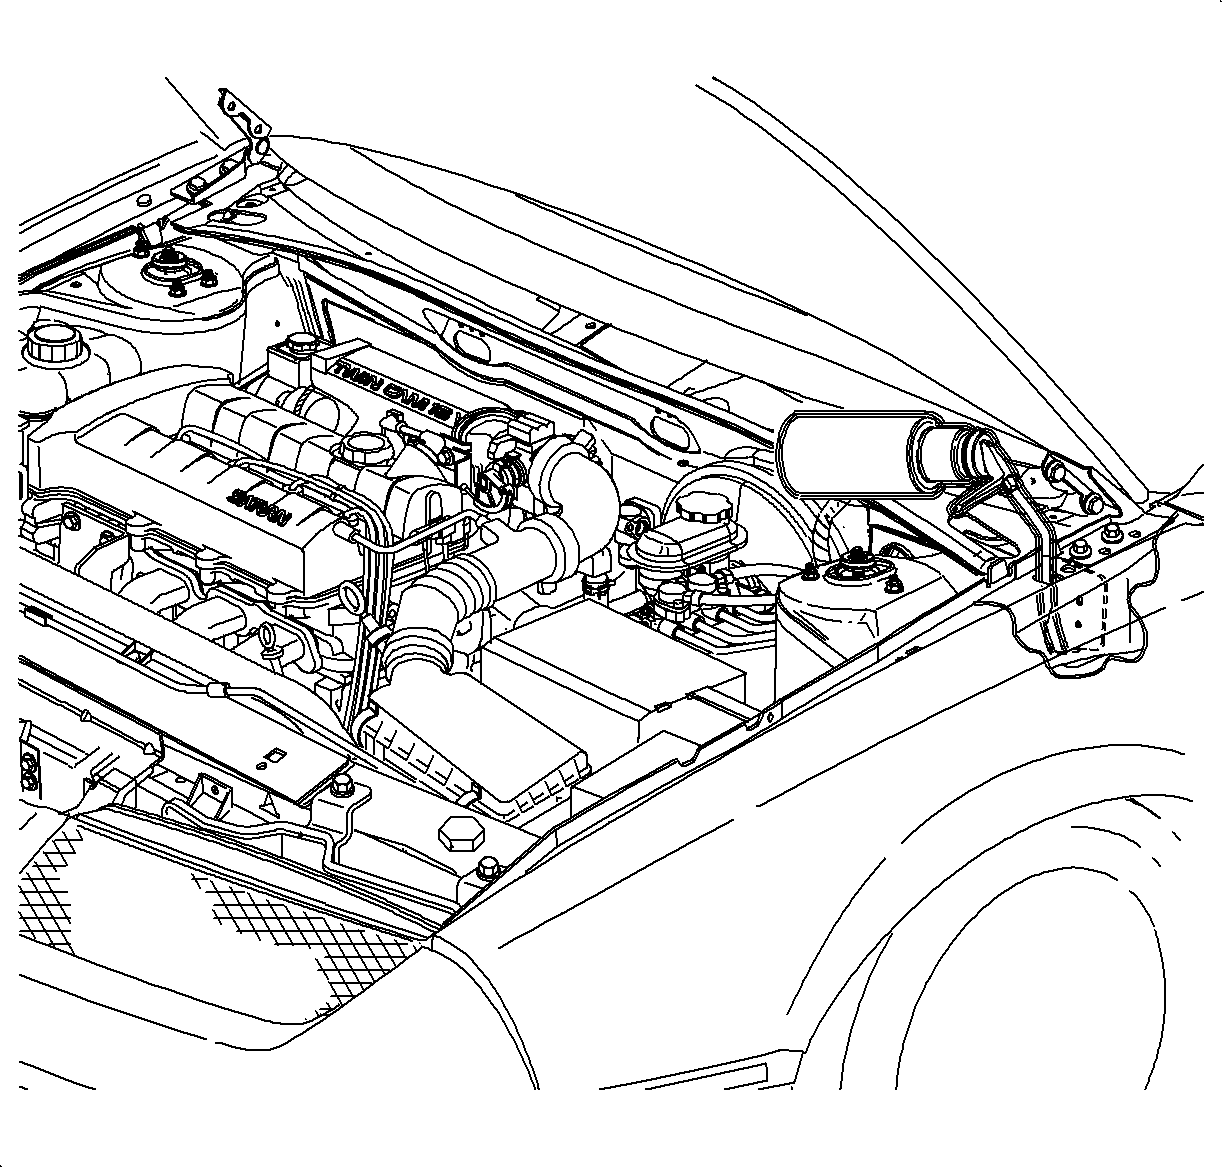
Important: Excess sealer in this area can cause a drain hole to be plugged. Once the sealer has cured, water test to verify that the frame rail drain holes have not been plugged. Water naturally drains through the frame rail into the wheelhouse area above the wheel.
| • | Remove the screw-on tip and replace with a 203 mm (8 in) length of ¼ in diameter hose. |
| • | Insert the end of the hose for the sealer into the J-nut slot at the rear of the front fender toward the rear of the vehicle. |
| • | Direct the sealer toward the lower left corner of the frame rail toward the center of the vehicle. |
| • | Allow the sealer to cure according to the manufacturer's recommendations. |
Notice: Fastener Notice
Tighten
Tighten the hood hinge-to-body bolts to 25 N·m (18 lb ft).
Tighten
Tighten the front fender-to-body bolts to 10 N·m (89 lb in).
Parts Requirements:
Part Number | Description |
|---|---|
10105* | High Tech Leak Check Seam Sealer |
50087* | Spray Leak Check Seam Sealer |
10590* | Wet/Dry Re-Sealant Pump Grade Sealer |
90010* | Hand Pump Sealer Applicator |
08509** | 3M® Bedding and Glazing Compound |
* | Available Through KENT Industries Products 1-800-654-6333 (USA) 1-800-663-2800 (Canada) |
** | Available From a Local Auto Parts Store or Paint Supply Store |
Claim Information | To receive credit for this repair, submit a claim through the Saturn Dealer System as follows: | |||
|---|---|---|---|---|
-- | Case Type | Description | Labor Operation Code | Time |
-- | VW | Waterleak Diagnosis (Inc. R Carpet and Repair Verification | T9673 -- | -- |
Sedans/Wagons | 2.7 hrs | |||
Coupes | 3.0 hrs | |||
-- | ADD: | To Repair Smile Joint | 0.3 hrs | |
To Repair Strut Towers | 0.1 hrs | |||
To Repair HVAC Module Case Seals (Inc. R of Air Induction System) | 0.3 hrs | |||
-- | VW | Seal Left Frame Rail and Hood Hinge-to-Body Bolts | T9623 | 0.8 hrs |
-- | VW | Seal Right Frame Rail and Hood Hinge-to-Body Bolts | T9624 | 0.8 hrs |
Depending on leak location, different types of sealers are required. When used, the sealer may be claimed as material using net item code M. Refer to the table on the facing page for the leak location, sealer required, material cost, quantity required, and material reimbursement amount.
Repair Location | Sealer Required | Retailer Material Cost | Quantity Required | Material Reimbursement Amount (30% Parts Allowance) |
|---|---|---|---|---|
Smile Joint | High Tech Leak Check Seam Sealer | $12.30 | 1 | $15.99 |
Strut Tower | High Tech Leak Check Seam Sealer | $4.06 | 0.33 | $5.28 |
HVAC Module Case | Spray Leak Check Seam Sealer | $20.16 | 1 | $26.21 |
Left Frame Rail Hood Hinge-to-Body Bolts | Wet/Dry Re-Sealant Pump Grade Sealer | $15.36 | 0.5 | $9.98 |
3M® Bedding and Glazing Compound | $7.62 | 0.1 | $0.99 | |
Right Frame Rail Hood Hinge-to-Body Bolts | Wet/Dry Re-Sealant Pump Grade Sealer | $15.36 | 0.5 | $9.98 |
3M® Bedding and Glazing Compound | $7.62 | 0.1 | $0.99 |
