For 1990-2009 cars only
Battery Tray Replacement A
Removal Procedure
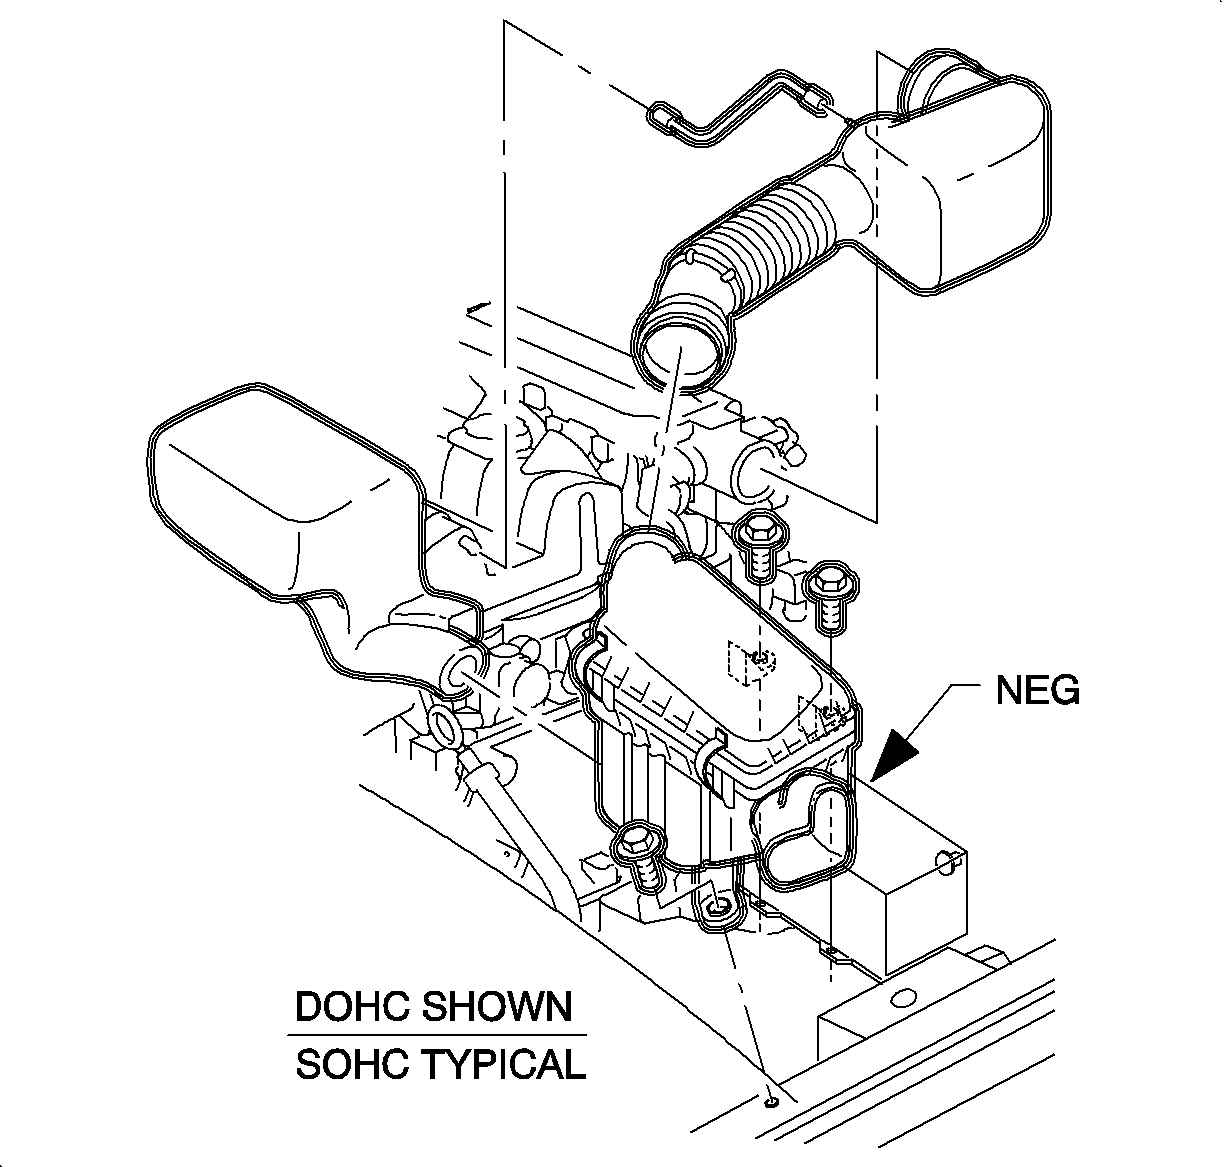
- Remove air induction system.
- Remove the battery. Refer to Battery Replacement .
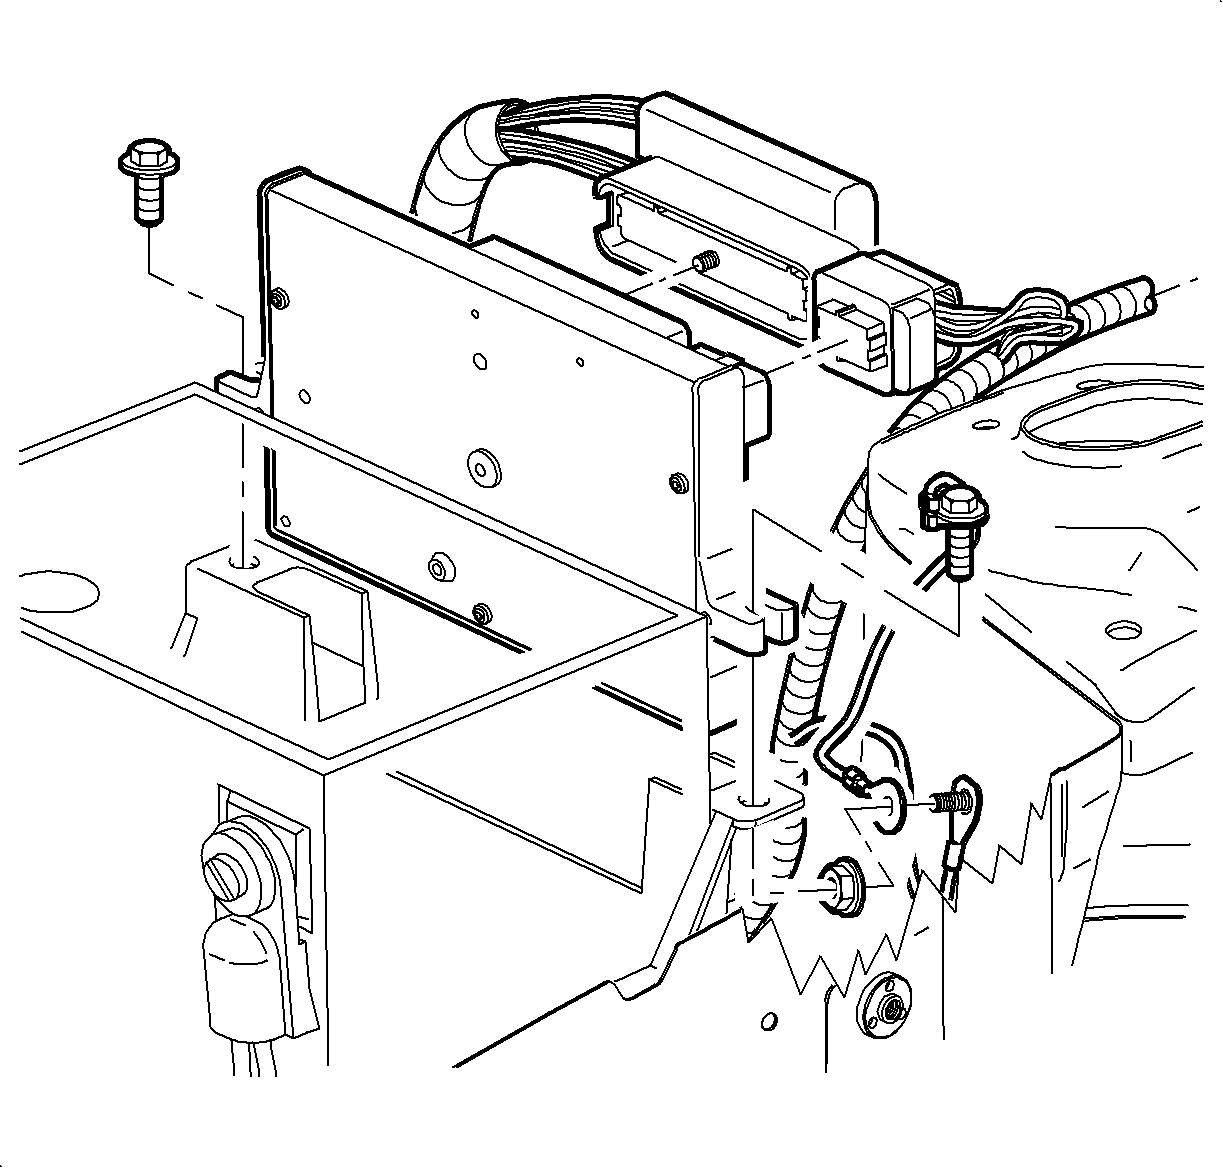
- Disconnect the PCM J2 black 28-way connector by moving the locking device toward the fender.
- Remove the PCM J1 black 80-way connector bolt and disconnect.
- Remove the PCM attachment bolts and PCM.
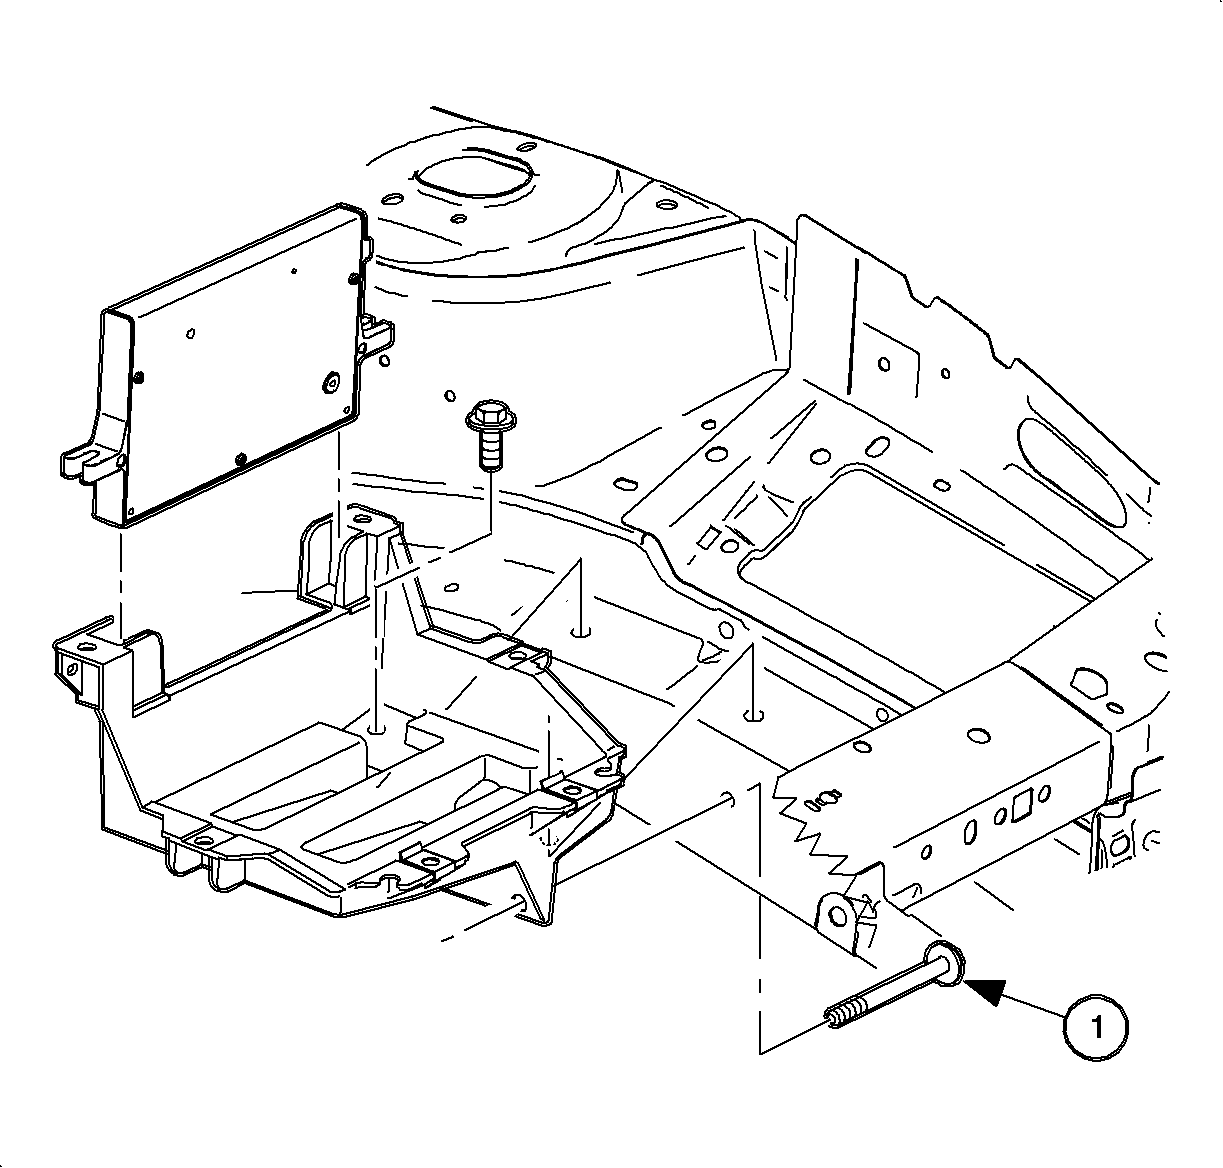
- Remove the battery tray bolts and tray. There is one bolt in the fender well.


Installation Procedure
- Install the tray and bolts, including the one bolt in the fender well.
- Install the PCM and attachment bolts.
- Connect the PCM J1 black 80-way connector and install the attachment bolt.
- Connect the PCM J2 black 28-way connector and engage the locking device.
- Install the battery. Refer to Battery Replacement .
- Install the air induction system.
- Set the clock.
Notice: Refer to Fastener Notice in the Preface section.

Tighten
Tighten the tray-to-fender well bolt to 10 N·m (89 lb in).
Notice: Ground strap must be attached to the PCM attachment bolt. The ground strap is a case ground that provides electromagnetic wave interference (EMI) protection. Correct torque is critical.
Tighten
Tighten the PCM attachment bolts to 6 N·m (53 lb in).
Tighten
Tighten the PCM connector-to-PCM bolt to 8 N·m (71 lb in).


