For 1990-2009 cars only
Removal Procedure

- Raise the vehicle. Refer to Lifting and Jacking the Vehicle in General Information.
- Remove the wheel(s).
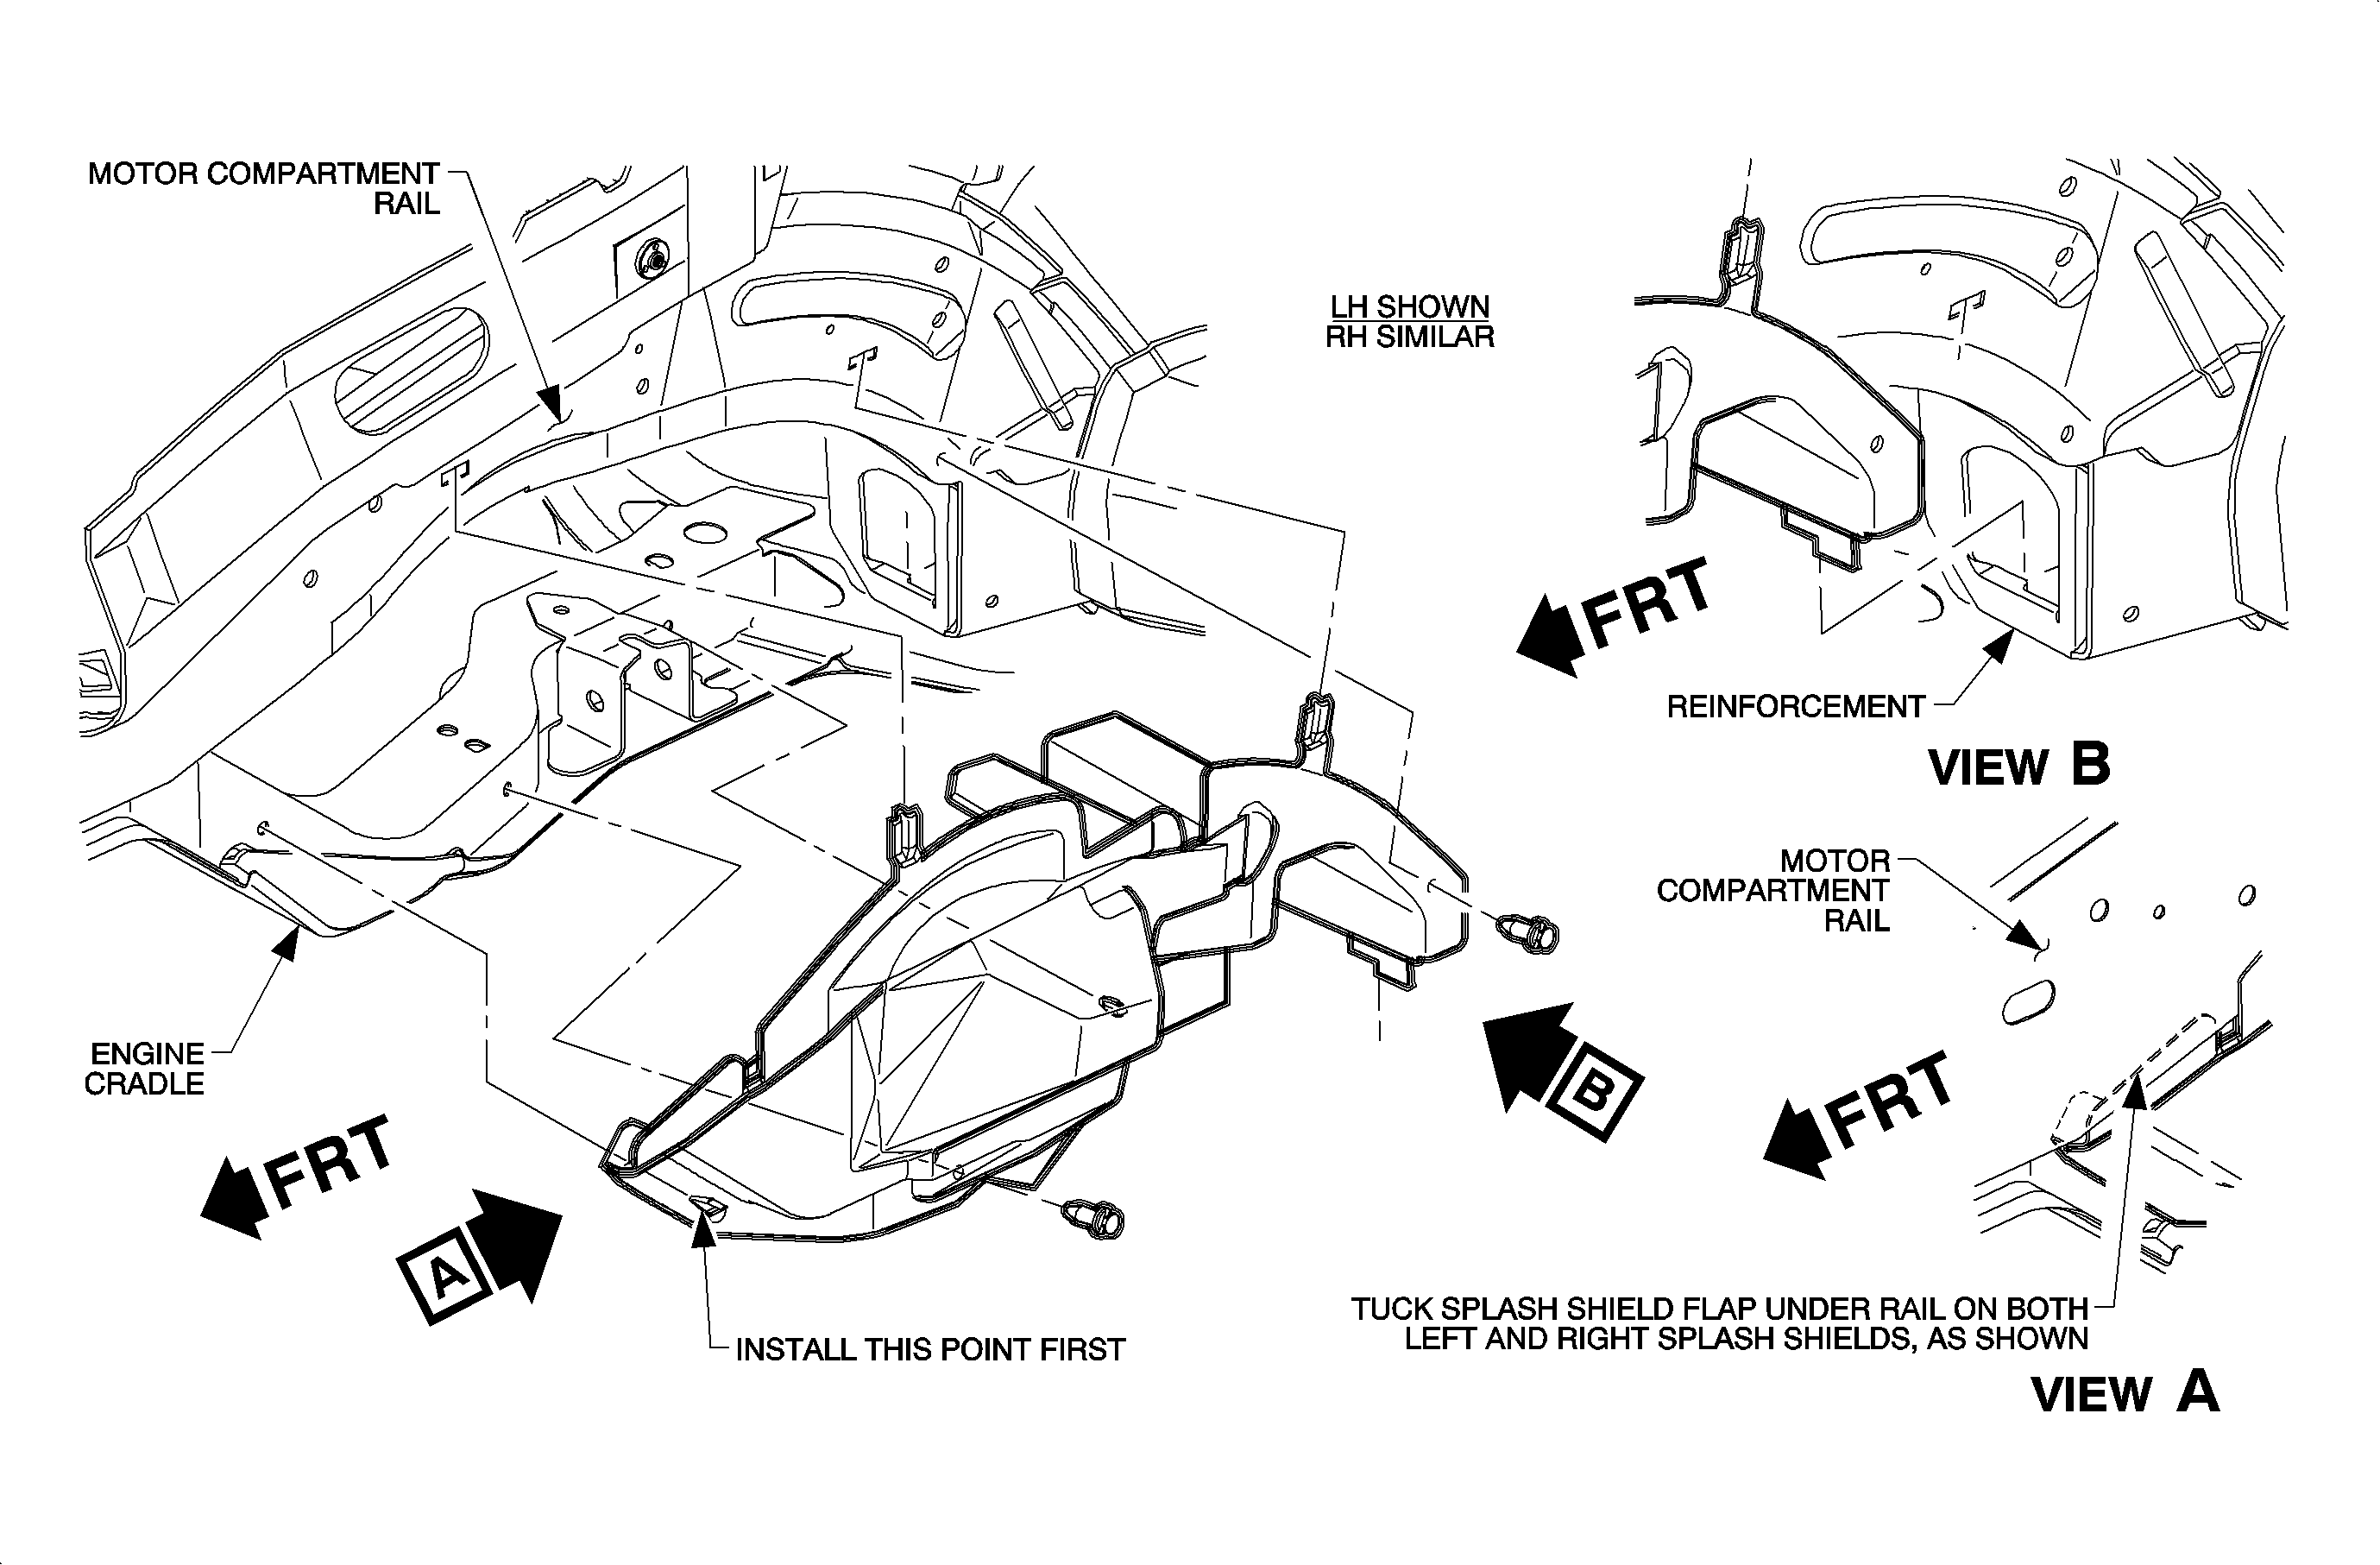
- Remove the 2 push pins.
- Remove the lower shield to the frame molded-in fasteners at the cradle by gently prying at the 3 fastener locations.
- For the left side, remove the front section of the shield first, then rear the section.
- For the right side, remove the rear section of the shield first, then front the section.
Important: If molded-in fasteners are damaged or broken, drill out with a 8 mm (5/16 in) bit and replace with a push pin.
Installation Procedure
- For the left side, install the rear section of the shield first, then the front section.
- For right side, install the front section of the shield first, then the rear section.
- Install the tabs in the body cut-out.
- Align the molded-in shield fasteners with the holes in the frame. Push straight in to install.
- Install the push pins.
Important: Make sure that the shield flaps are tucked in at the body locations.
