Excessive Exhaust System Noise and/or Exhaust System Leak

| Subject: | Excessive Exhaust System Noise and/or Exhaust System Leak (Replace Exhaust System Resonator) |
| Models: | 1998 Saturn S-Series vehicles equipped with DOHC engines (RPO LL0) built after and including VIN WZ217016 |
| 1999 - 2000 Saturn S-Series vehicles equipped with DOHC engines (RPO LL0) |
| 2001 Saturn S-Series vehicles equipped with DOHC engines (RPO LL0) built before and including VIN 1Z118280 |
Condition
Customers may comment about excessive exhaust system noise or an exhaust system leak.
Cause
Internal corrosion in high stress areas of end cap causes cracking.
Correction
Refer to the procedure in this bulletin to install new design exhaust system resonator. The new design exhaust system resonator has the service point moved directly behind resonator to improve serviceability.
Procedure
Important: This new design exhaust system resonator should be used when resonator requires replacement. If exhaust system intermediate pipe requires replacement, original service part (P/N 21013306) should be used along with the "Intermediate Pipe" procedure in Exhaust section of the appropriate model year S-Series Engine service manual.
Caution: MAKE SURE VEHICLE IS PROPERLY SUPPORTED AND SQUARELY POSITIONED PRIOR TO LIFTING. TO HELP AVOID PERSONAL INJURY WHEN A VEHICLE IS ON A HOIST, PROVIDE ADDITIONAL SUPPORT FOR THE VEHICLE ON THE OPPOSITE END FROM WHICH COMPONENTS ARE BEING REMOVED. ENSURE HOIST DOES NOT CONTACT FUEL OR BRAKE LINES.
- Raise vehicle on hoist.
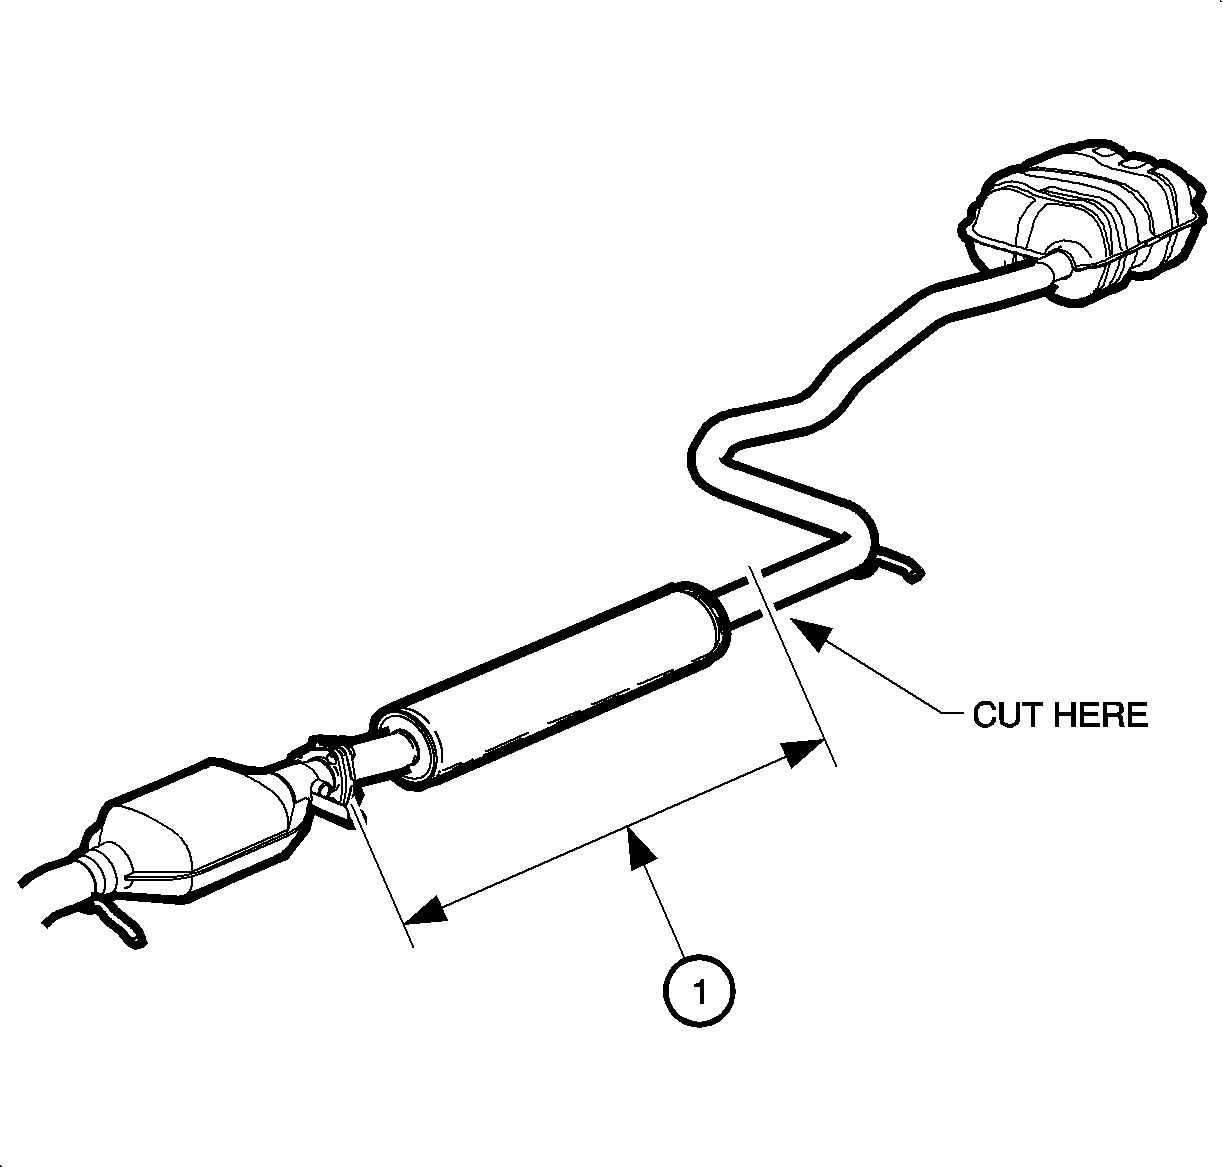
- Measure and mark intermediate pipe at location shown in illustration at distance of 86 cm (34 in.) behind gasket surface of catalytic converter flange.
- Using chain cutter SA1968NE (or equivalent) cut intermediate pipe at marked location.
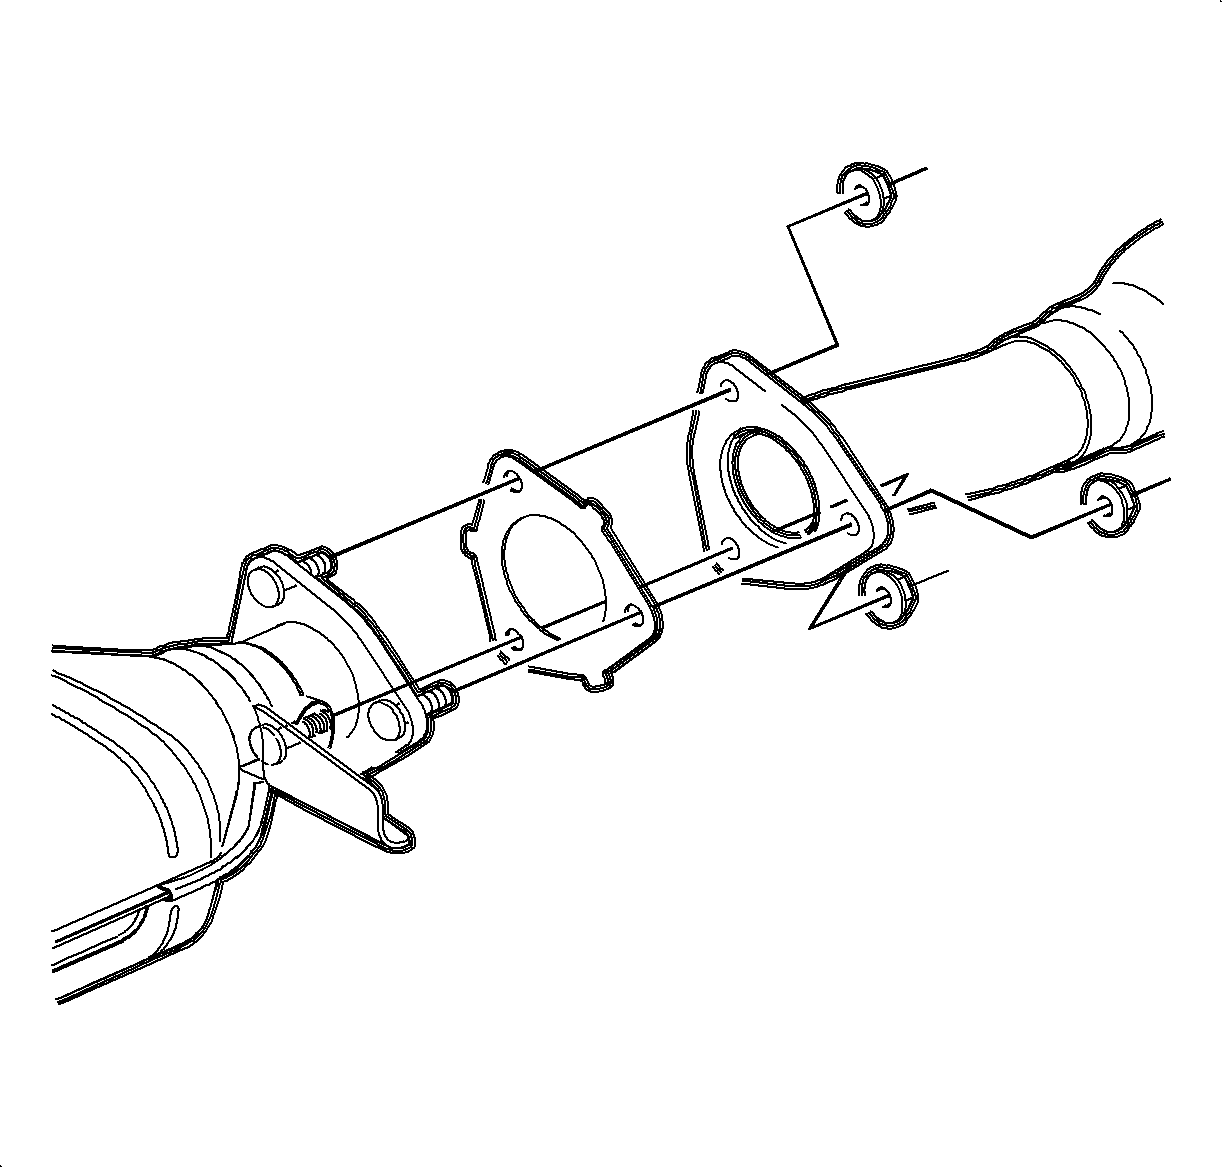
- Remove nuts at outlet of catalytic converter to intermediate pipe.
- Remove Resonator from vehicle.
- Remove catalytic converter gasket and discard.
- Obtain replacement parts. Refer to "Parts Requirements" in this bulletin.
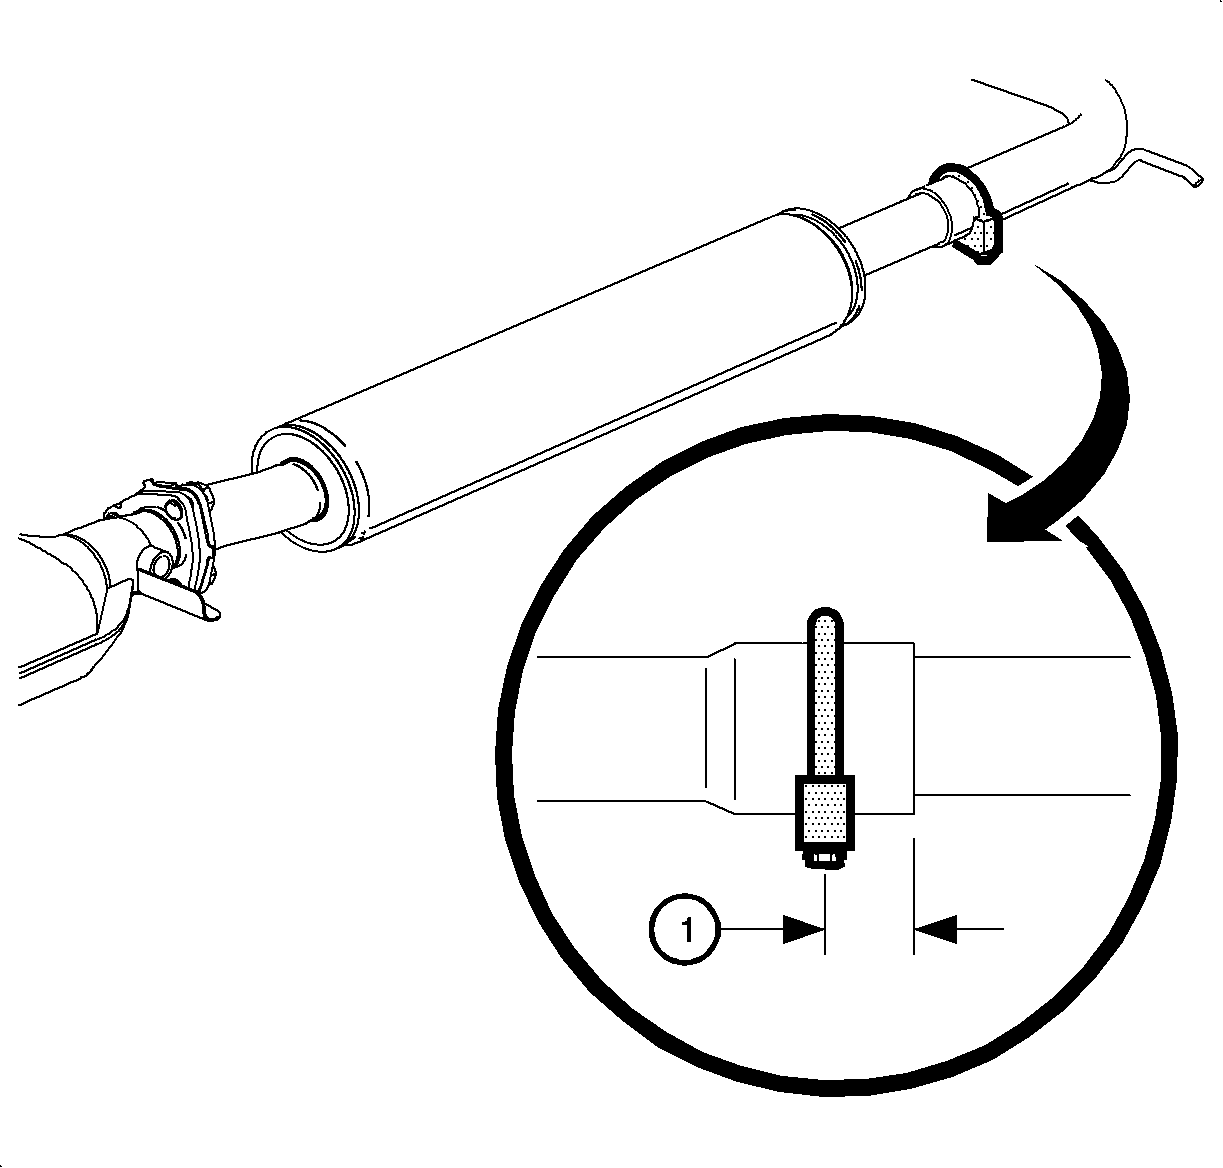
- Install pipe clamp over outlet end of replacement resonator.
- Slide outlet end of replacement resonator over remaining section of intermediate pipe.
- Install new gasket at outlet end of catalytic converter.
- Install resonator to catalytic converter outlet flange and install nuts. Flat portion of resonator flange should be downward.
- Refer to illustration and position pipe clamp 25 mm (1 in.) from the end of resonator pipe and facing forward.
- Align resonator and muffler to achieve proper clearances shown in step 13. Then, tighten clamp.
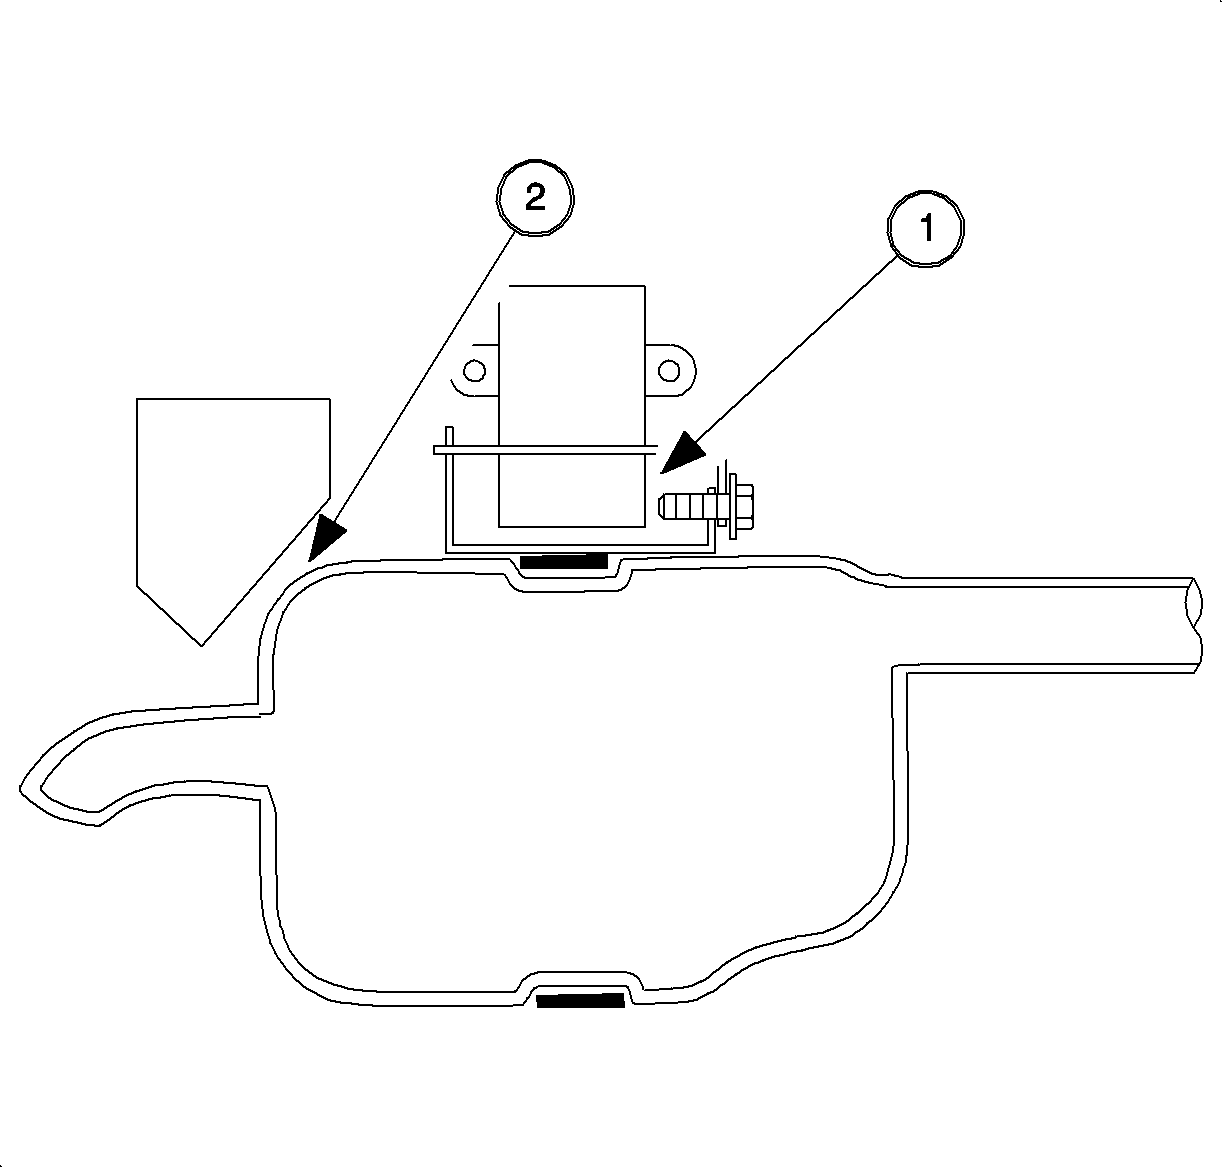
- Check exhaust system alignment and clearance to heat shields. Rattle noises will occur if any of the following clearances are not sufficient.
- Start engine and check for exhaust system leaks.
Tighten
Converter Flange Nuts: 25N·m (19 lbs ft)
Tighten
Exhaust Pipe Clamp Nuts: 41N·m(30 lbs ft)
| • | Resonator should have at least 15 mm (9/16 in.) clearance from heat shields. If necessary, bend heat shields away in any areas with insufficient clearance. |
| • | Position muffler to ensure 19 mm (3/4 in.) of clearance between rear of muffler and muffler ramp (2). If proper clearance cannot be obtained, intermediate pipe must be shortened at resonator joint. |
| • | Muffler hanger block should not contact hanger screw (1). If necessary, loosen muffler mounting strap, shift muffler mounting strap forward to eliminate contact, and retighten. |
Tighten
Muffler Mounting Strap Fasteners: 22N·m (16 lbs ft)
Parts Information
21013454 | Resonator |
21012835 | Gasket - Ctltc Conv |
25517280 | Clamp - Exh Muff |
CLAIMINFORMATION: | To receive credit for this repair during the warranty coverage period, submit a claim through the Saturn Dealer System for L2700 (Resonator - Replace). |
