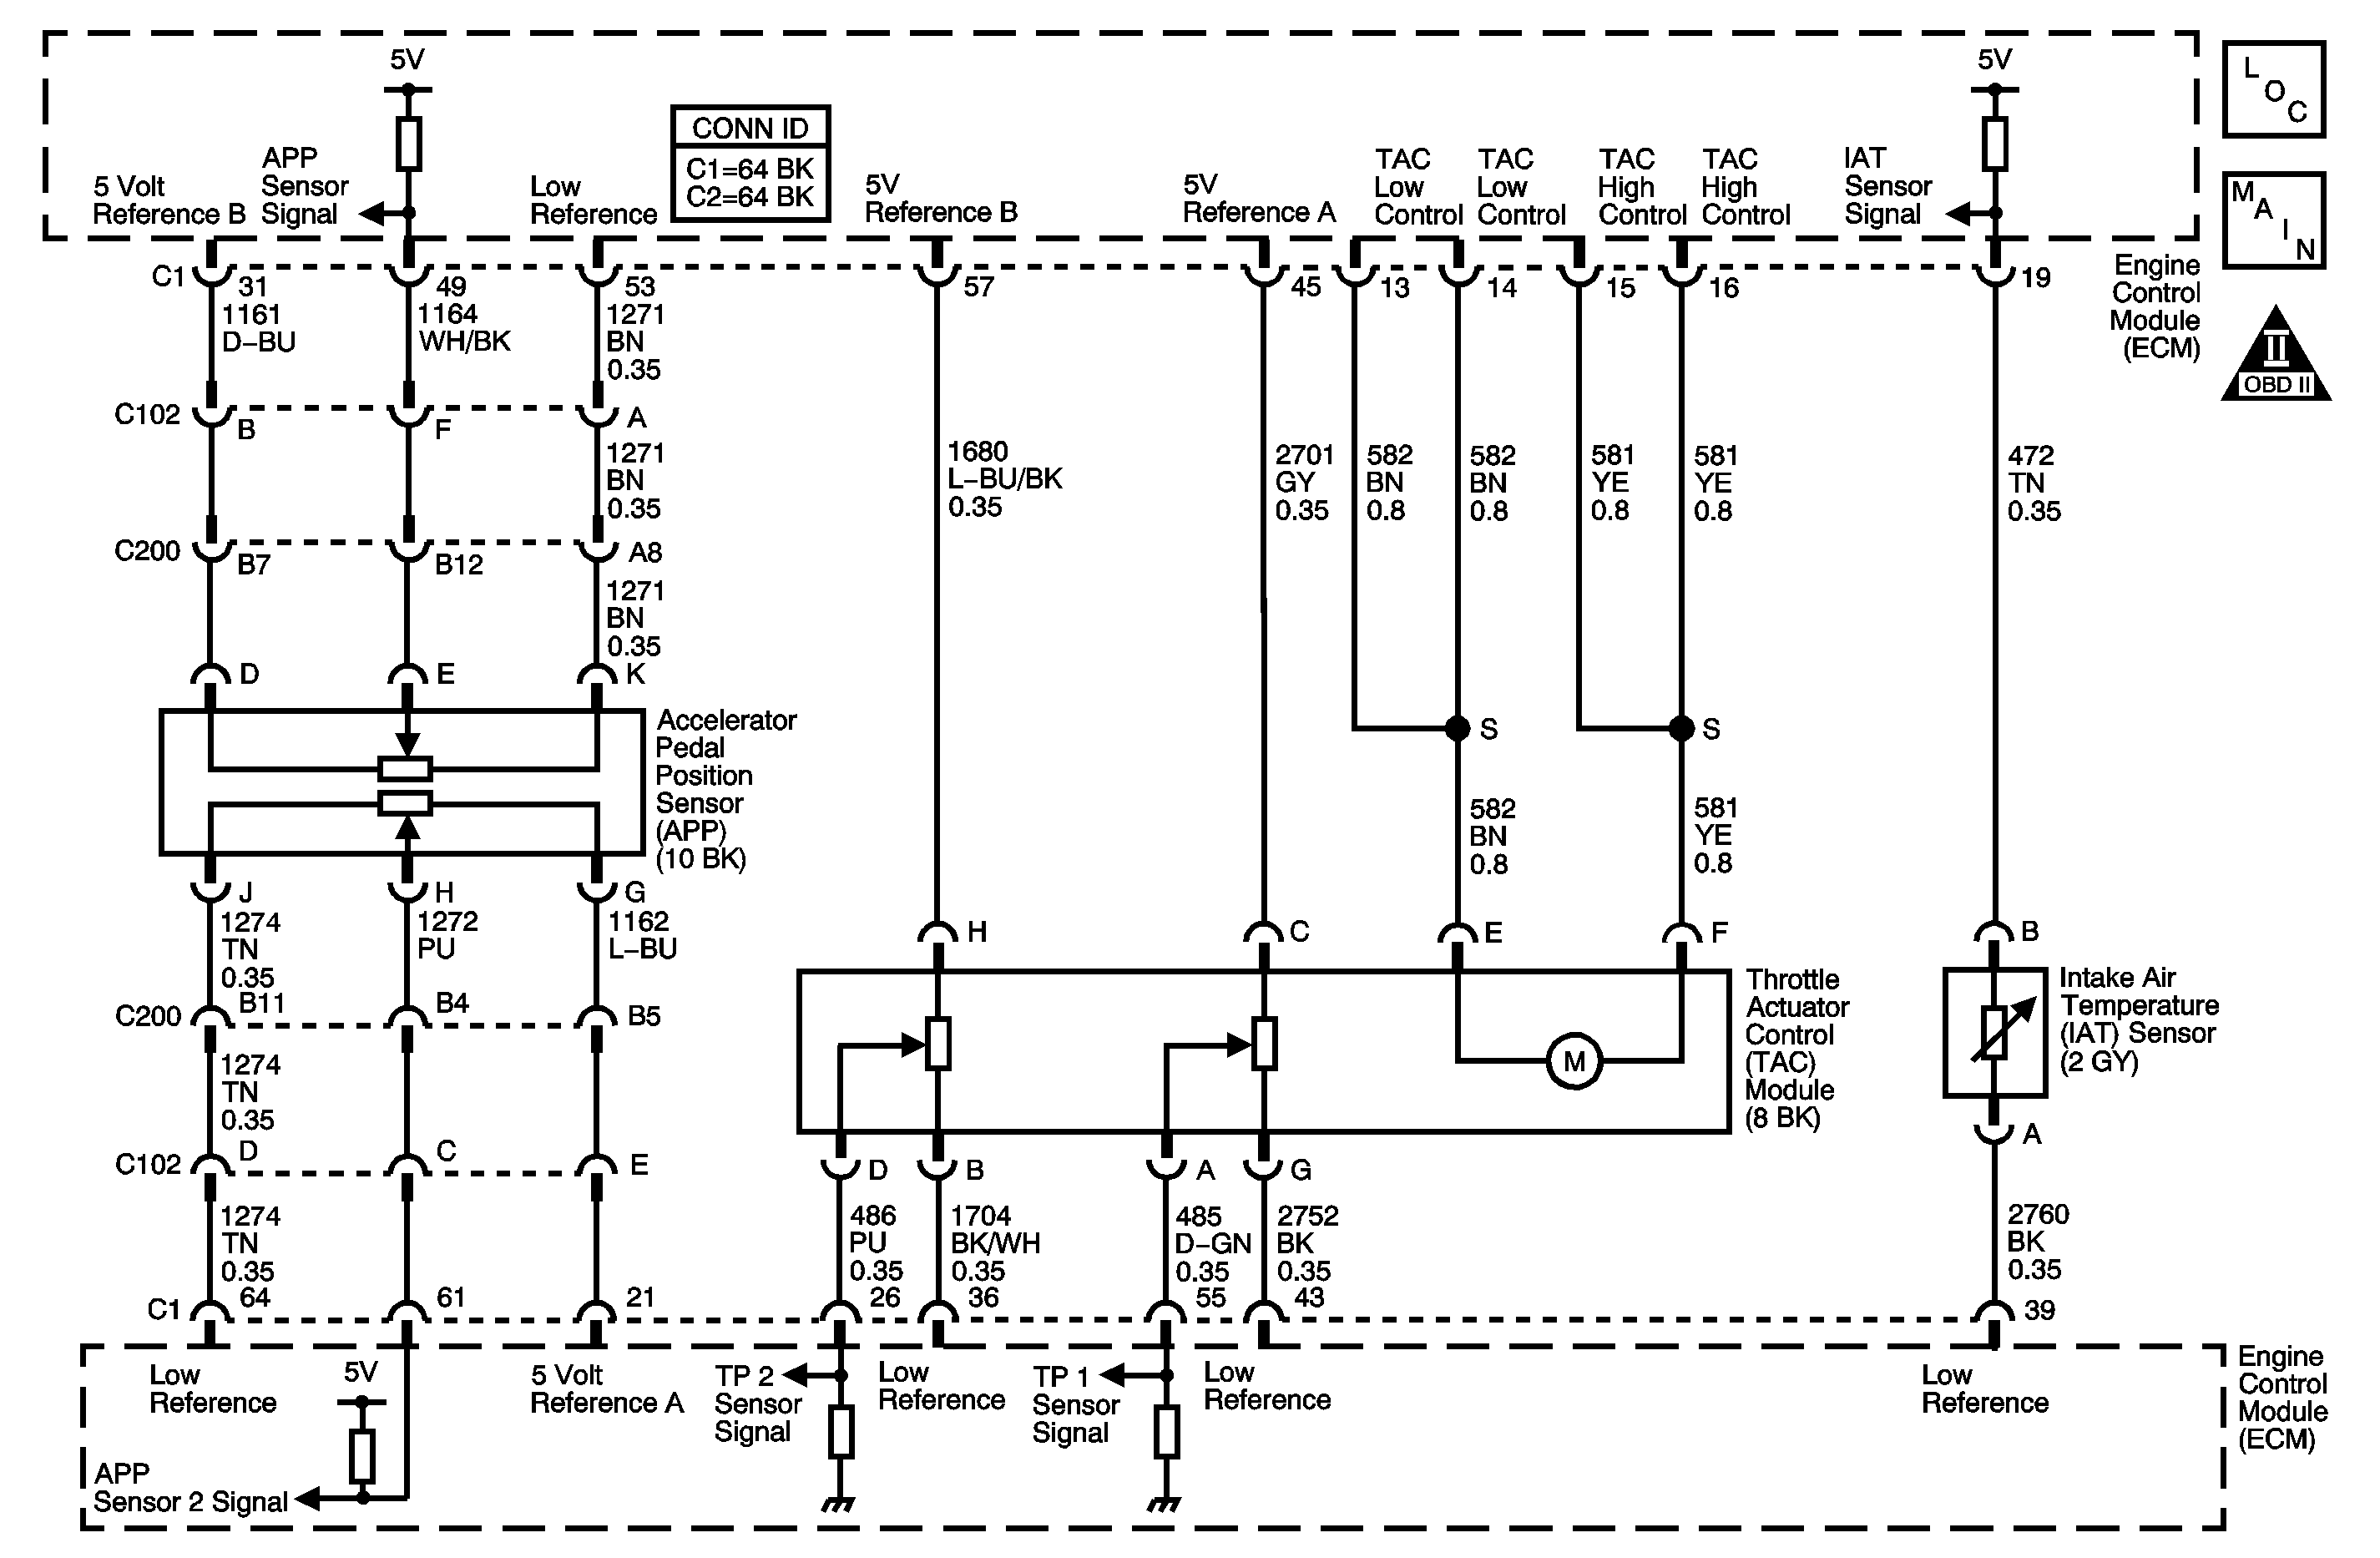
Circuit Description
The throttle position (TP) sensors 1 and 2 are located within the throttle body assembly. Each sensor has the following circuits:
| • | A 5-volt reference circuit |
| • | A low reference circuit |
| • | A signal circuit |
The TP sensor provides the engine control module (ECM) with a signal voltage proportional to the throttle plate movement. The TP sensor 1 signal voltage at closed throttle is near the 5-volt reference and decreases as the throttle plate is opened. The TP sensor 2 signal voltage at closed throttle is near the low reference and increases as the throttle plate is opened. When the TP sensor 2 signal voltage is not within the predicted range, this DTC will set.
Conditions for Running the DTC
| • | The ignition switch is in the crank or run position. |
| • | DTC P1639 is not set. |
| • | The ignition voltage is more than 2.25 volts. |
Conditions for Setting the DTC
The TP sensor 2 voltage is less than 0.27 volts or more than 4.67 volts.
Action Taken When the DTC Sets
| • | The control module illuminates the malfunction indicator lamp (MIL) when the diagnostic runs and fails. |
| • | The control module records the operating conditions at the time the diagnostic fails. The control module stores this information in the Freeze Frame and/or the Failure Records. |
| • | The control module commands the TAC system to operate in the Reduced Engine Power mode. |
| • | A message center or an indicator displays Reduced Engine Power. |
| • | Under certain conditions the control module commands the engine OFF. |
Conditions for Clearing the MIL/DTC
| • | The control module turns OFF the malfunction indicator lamp (MIL) after 3 consecutive ignition cycles that the diagnostic runs and does not fail. |
| • | A current DTC, Last Test Failed, clears when the diagnostic runs and passes. |
| • | A history DTC clears after 40 consecutive warm-up cycles, if no failures are reported by this or any other emission related diagnostic. |
| • | Clear the MIL and the DTC with a scan tool. |
Step | Action | Values | Yes | No |
|---|---|---|---|---|
Schematic Reference: Engine Controls Schematics Connector End View Reference: Engine Controls Connector End Views or Engine Control Module Connector End Views | ||||
1 | Did you perform the Diagnostic System Check-Engine Controls? | -- | Go to Step 2 | |
2 |
Does the scan tool indicate voltage less than the first value or greater than the second value? | 0.27 V 4.67 V | Go to Step 4 | Go to Step 3 |
3 |
Does the DTC fail this ignition? | -- | Go to Step 4 | Go to Intermittent Conditions |
4 |
Does the scan tool indicate that the TP sensor 2 voltage is more than the specified value? | 4.8 V | Go to Step 5 | Go to Step 12 |
5 | Probe the TP sensor signal circuit with a test lamp connected to ground. Does the test lamp illuminate? | -- | Go to Step 12 | Go to Step 6 |
6 | Observe the TP sensor 2 parameter with a test lamp still connected to the TP sensor signal circuit. Does the scan tool indicate that the voltage is less than the specified value? | 0.25 V | Go to Step 7 | Go to Step 11 |
7 | Measure the voltage of the TP sensor 2 5-volt reference circuit with a DMM. Does the DMM indicate that the voltage is more than the specified value? | 4.8 V | Go to Step 8 | Go to Step 10 |
8 |
Is the resistance less than the specified value? | 5ohms | Go to Step 9 | Go to Step 14 |
9 | Test the TP sensor low reference circuit for a short to ground. Did you find and correct the condition? | -- | Go to Step 22 | Go to Step 18 |
10 | Does the DMM indicate that the voltage is less than the specified value on the TP sensor 2 5-volt reference circuit? | 5 V | Go to Step 15 | Go to Step 17 |
11 | Test the TP sensor 2 signal circuit for an open or for high resistance. Refer to Circuit Testing and Wiring Repairs in Wiring Systems. Did you find and correct the condition? | -- | Go to Step 22 | Go to Step 13 |
12 | Test the TP sensor 2 signal circuit for a short to voltage. Refer to Circuit Testing and Wiring Repairs in Wiring Systems. Did you find and correct the condition? | -- | Go to Step 22 | Go to Step 20 |
13 | Test the TP sensor 2 signal circuit for a short to ground. Refer to Circuit Testing and Wiring Repairs in Wiring Systems. Did you find and correct the condition? | -- | Go to Step 22 | Go to Step 20 |
14 | Test the TP sensor 2 low reference circuit for an open or for high resistance. Refer to Circuit Testing and Wiring Repairs in Wiring Systems. Did you find and correct the condition? | -- | Go to Step 22 | Go to Step 20 |
15 | Test the TP sensor 2 5-volt reference circuit for an open or for high resistance. Refer to Circuit Testing and Wiring Repairs in Wiring Systems. Did you find and correct the condition? | -- | Go to Step 22 | Go to Step 16 |
16 | Test the TP sensor 2 5-volt reference circuit for a short to ground. Refer to Circuit Testing and Wiring Repairs in Wiring Systems. Did you find and correct the condition? | -- | Go to Step 22 | Go to Step 20 |
17 | Test the TP sensor 2 5-volt reference circuit for a short to voltage. Refer to Circuit Testing and Wiring Repairs in Wiring Systems. Did you find and correct the condition? | -- | Go to Step 22 | -- |
18 | Inspect for poor connections at the throttle body harness connector. Refer to Testing for Intermittent Conditions and Poor Connections and Connector Repairs in Wiring Systems. Did you find and correct the condition? | -- | Go to Step 22 | Go to Step 19 |
19 | Replace the throttle body assembly. Refer to Throttle Body Assembly Replacement . Did you complete the replacement? | -- | Go to Step 22 | -- |
20 | Inspect for poor connections at the ECM harness connector. Refer to Testing for Intermittent Conditions and Poor Connections and Connector Repairs in Wiring Systems. Did you find and correct the condition? | -- | Go to Step 22 | Go to Step 21 |
21 | Replace the ECM. Refer to Engine Control Module Replacement . Did you complete the replacement? | -- | Go to Step 22 | -- |
22 |
Did the DTC fail this ignition? | -- | Go to Step 2 | Go to Step 23 |
23 |
Important: Be aware that repairing one individual condition may correct more than one DTC. Observe the Capture Info with a scan tool. Are there any DTCs that have not been diagnosed? | -- | System OK | |
