Caution: Keep the brakes applied at all times in order to prevent unexpected
vehicle motion. Personal injury may result if the vehicle moves unexpectedly.
- Raise and support the vehicle. Refer to
Lifting and Jacking the Vehicle
in
General Information.
- Remove the left front splash shield. Refer to
Engine Splash Shield Replacement
in
Body Front End.
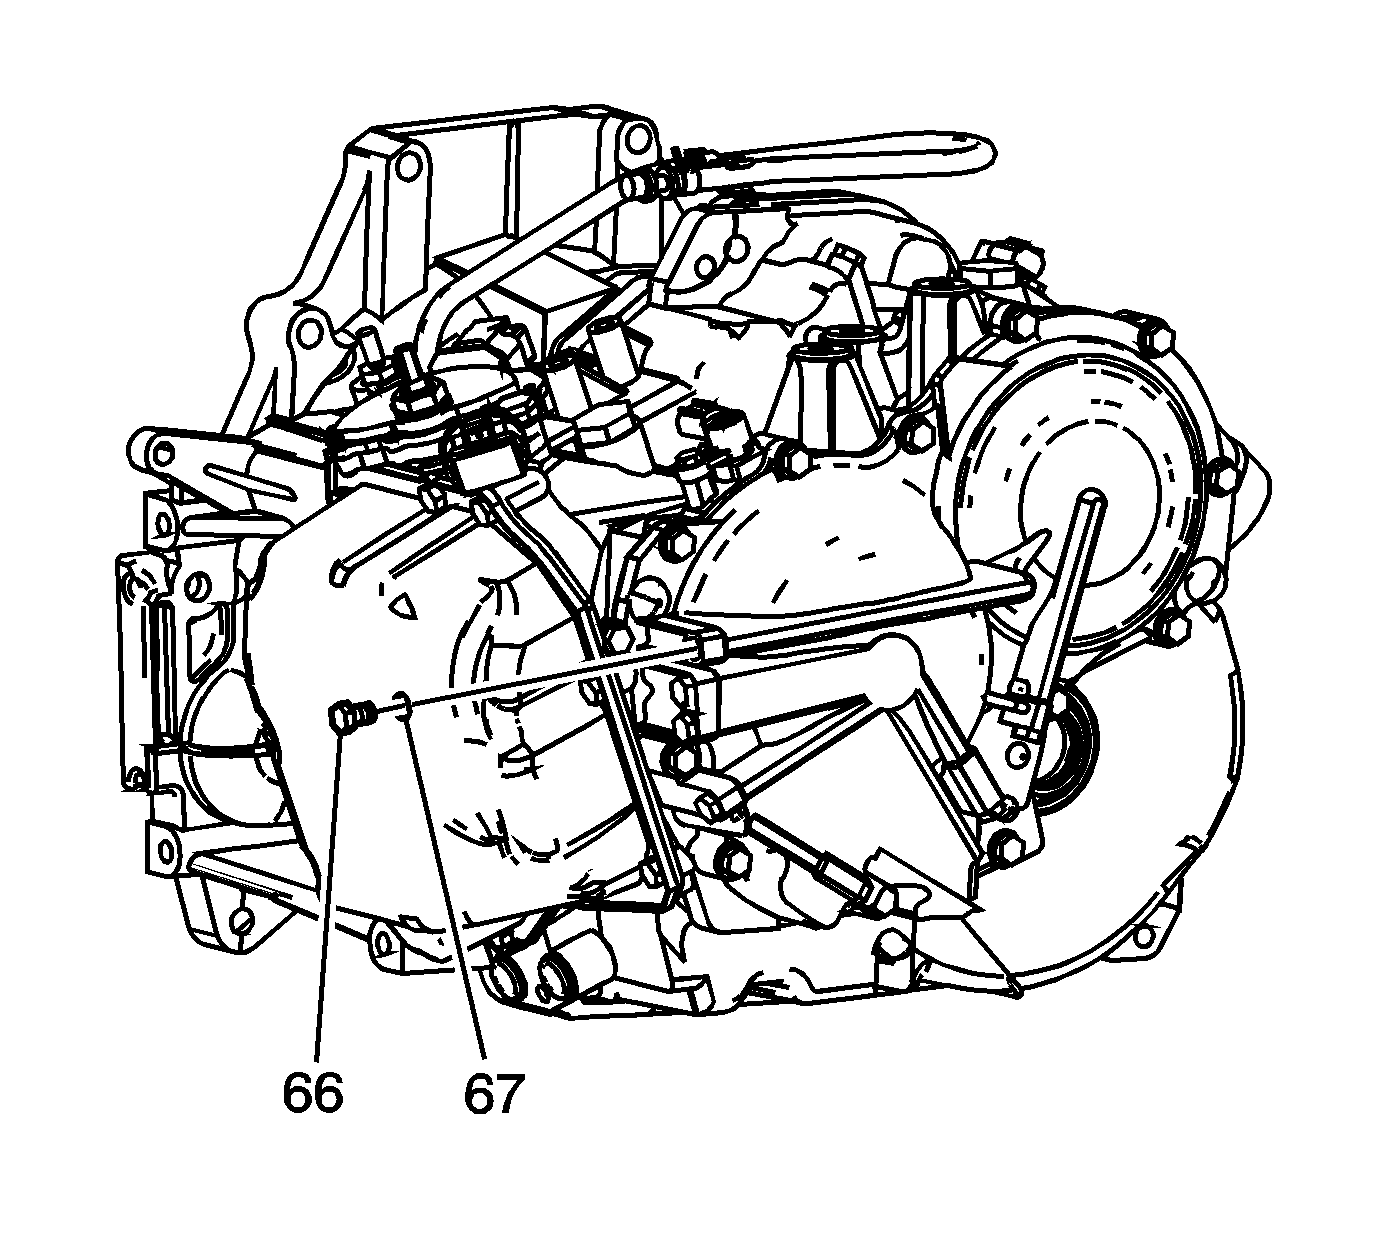
- Remove the automatic transmission fluid pressure test hole plug (66)
and O-ring seal (67).

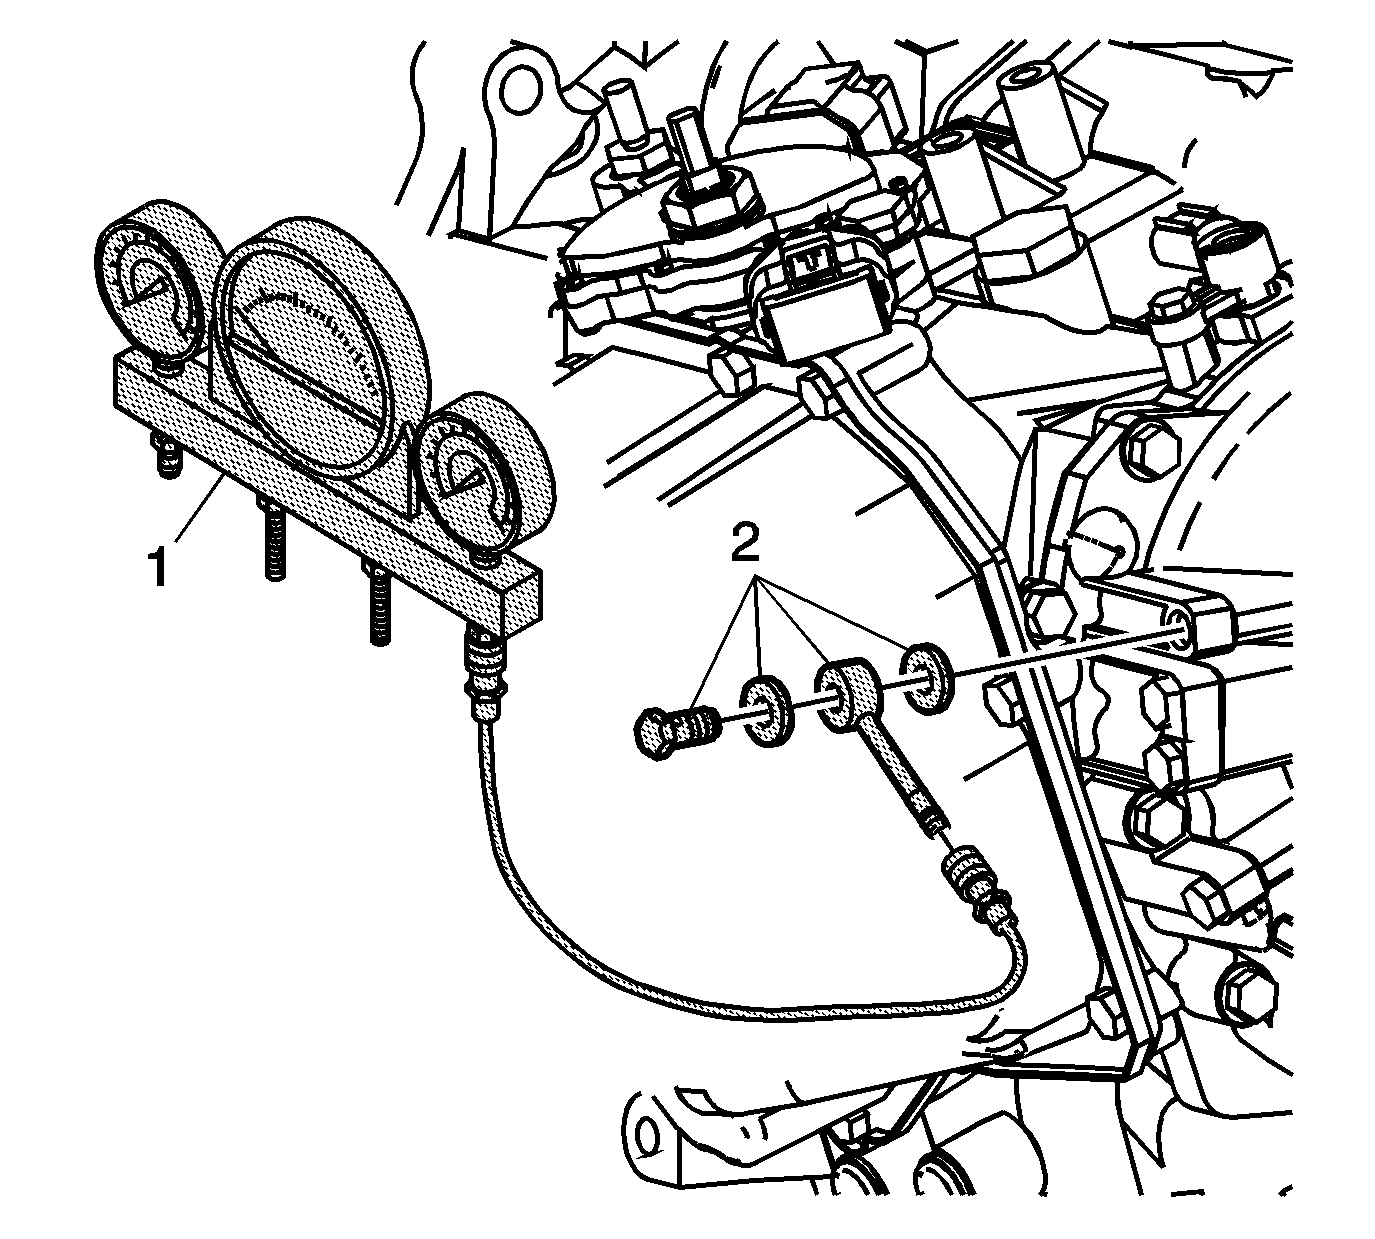
- Install the J 45542
(2) with a sealing washer on each side of the adapter into the
test hole.
- Connect the SA9127E
(1)
to the J 45542
(2).
- Fully apply the parking brake.
- Connect a scan tool for engine RPMs.
- Start the engine and allow the engine to warm up at idle.
- Firmly apply the brake and shift into REVERSE (R).
- Allow the engine to idle and record the line pressure.
Specifications
500-610 kPa (73-89 psi)
Important: Do not perform the 2600 RPM test longer
than 5 seconds.
- Increase the engine speed to 2600 RPM and record the line pressure.
Specifications
1710-1980 kPa (248-287 psi)
- Allow the transmission fluid to cool at idle in PARK (P) for at
least one minute.
- Firmly apply the brake and shift into DRIVE (D).
- Allow the engine to idle and record the line pressure.
Specifications
330-390 kPa (48-57 psi)
Important: Do not perform the 2600 RPM test longer
than 5 seconds.
- Increase the engine speed to 2600 RPM and record the line pressure.
Specifications
1280-1418 kPa (186-206 psi)
- If the line pressure reading is not within specifications refer to the
Line Test Results table.
Notice: Refer to Fastener Notice in the Preface section.

- Remove the tools and install the automatic transmission fluid pressure test
hole plug (66) and a new O-ring (67).
Tighten
Tighten the test hole plug to 7 N·m
(62 lb in).
- Install the left front splash shield. Refer to
Engine Splash Shield Replacement
in
Body Front End.
Line Test Results
Result
| Possible Cause
|
HIGHER than specification in BOTH DRIVE AND REVERSE
|
| • | Line pressure control solenoid valve assembly - SLT (316)
concern |
| • | Primary regulator valve (395) concern |
|
LOWER than specification in BOTH DRIVE AND REVERSE
|
| • | Line pressure control solenoid valve assembly - SLT (316)
concern |
| • | Primary regulator valve (395) concern |
| • | Fluid pump assembly (2) concern |
| • | 1-2 reverse clutch (603) concern |
|
LOWER than specification in DRIVE ONLY
|
| • | Low system line pressure |
| • | 1-2 reverse clutch (603) slipping |
| • | DRIVE hydraulic circuit concern/failure |
| • | Forward clutch (565) concern |
|
LOWER than specifications in REVERSE ONLY
|
| • | REVERSE hydraulic circuit concern/failure |
| • | Direct clutch (562) concern |
| • | Low and reverse clutch (511) concern |
|


