Removal Procedure
- Turn the ignition OFF.
- Loosen the battery cover screws and remove the battery cover.
- Disconnect the negative battery cable.
- Disconnect the positive battery cable.
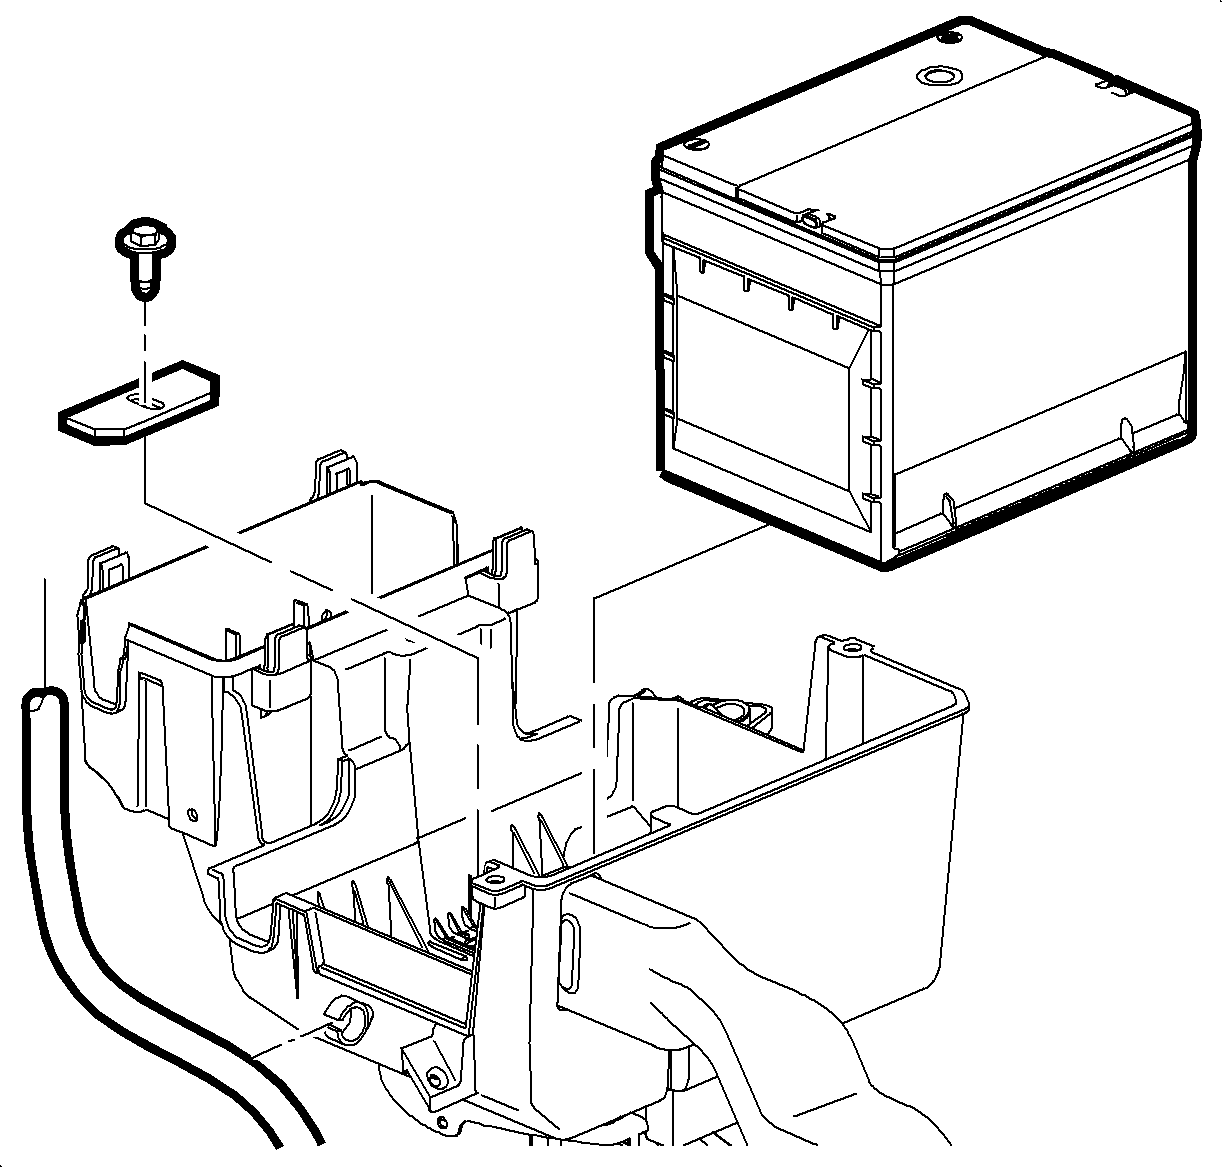
- Loosen the battery hold down bolt and remove the battery and the battery hold down.
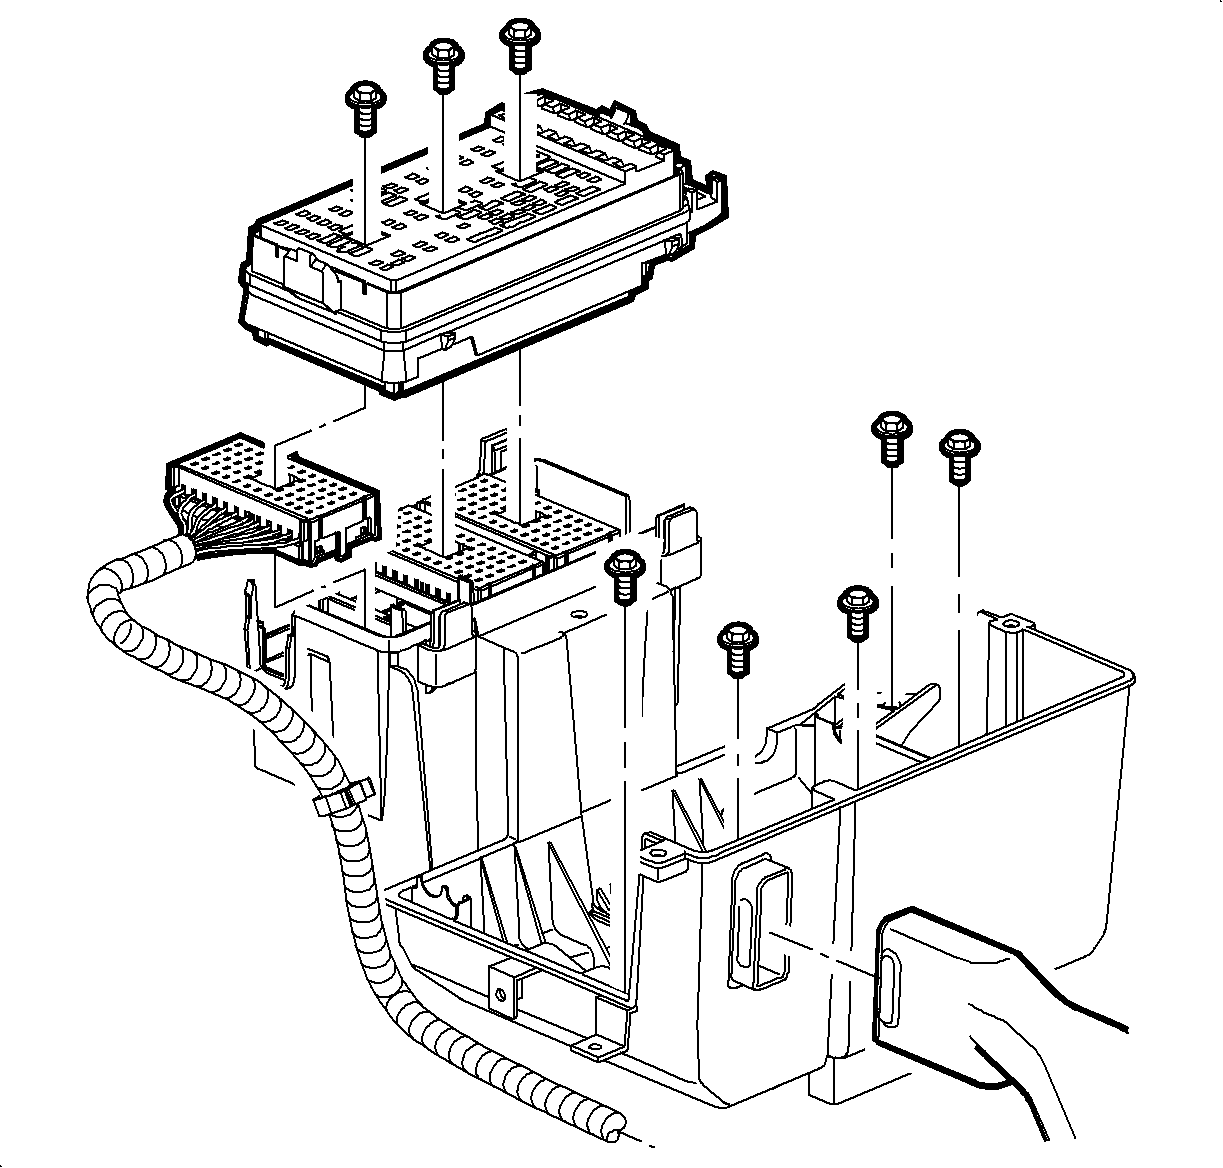
- Remove the underhood fuse block (UHFB) cover.
- Remove the positive battery cable and the electric power steering (EPS) wire from the B+ terminal at the UHFB.
- Open all the retainer clips and remove all the cables, lines and harnesses from the battery cooling box.
- Loosen the UHFB block connector retaining bolts.
- Unfasten the UHFB from its housing and disconnect the forward lamp harness.
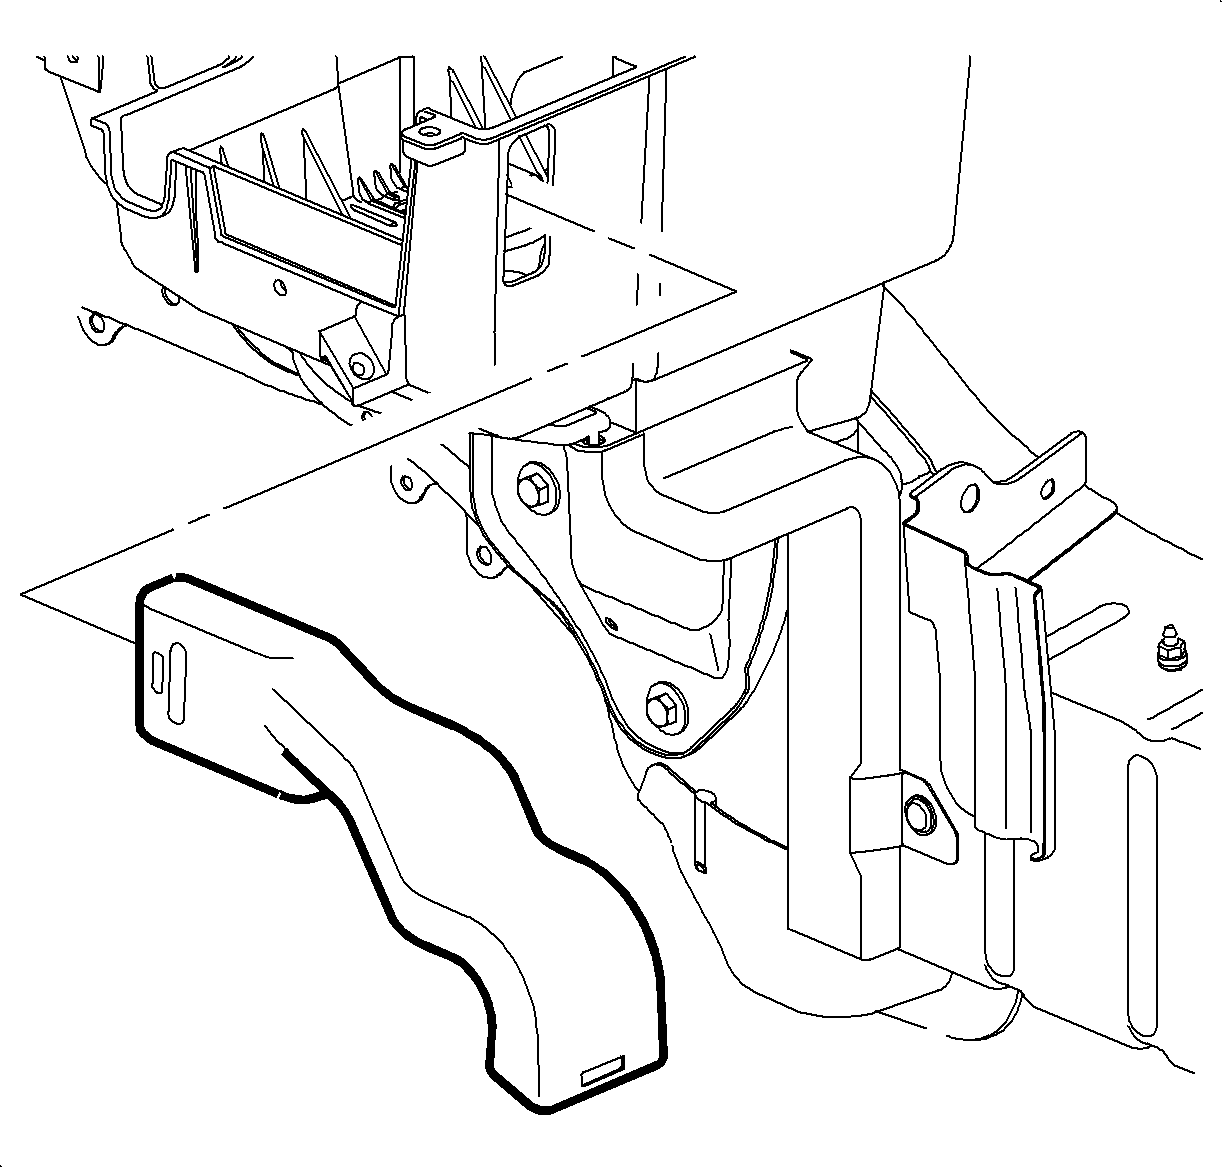
- Remove the battery cooling box bolts.
- Pull the inlet duct away from the battery cooling box.
- Rotate the UHFB out of the way and remove the battery cooling box.
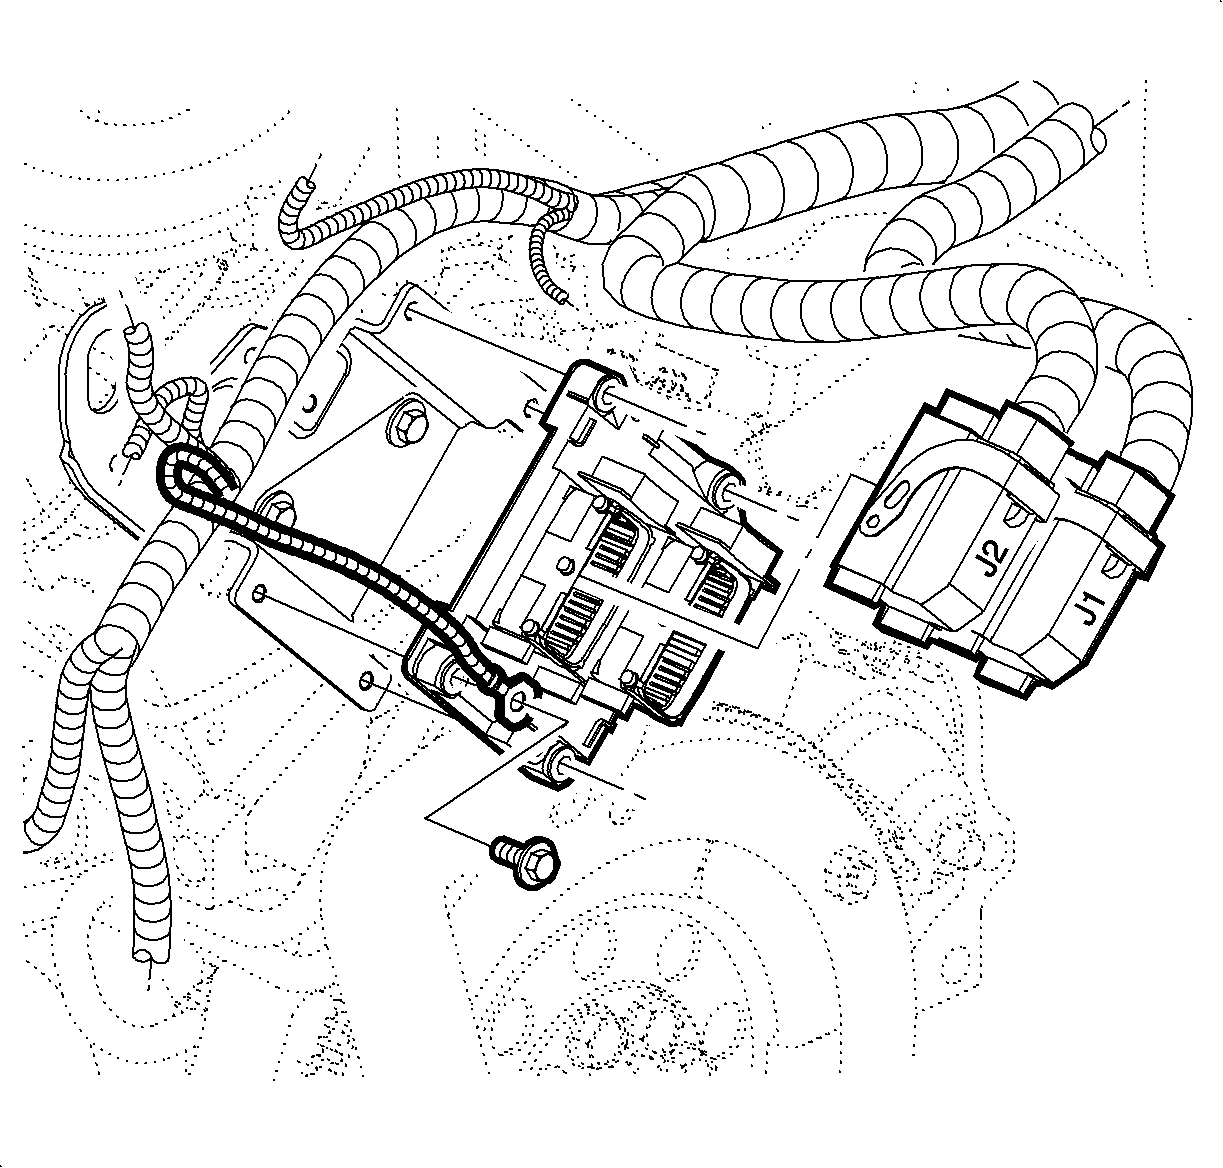
- Disconnect the ECM J1 and J2 harness connectors.
- Remove the ECM attachment bolts and remove the ECM.
Important: Record all the pre-set radio stations.
Caution: Do not tip the battery over a 45 degree angle or acid could spill causing serious personal injury.
Installation Procedure
- Install the ECM and the ECM attachment bolts, making sure the ground wire is attached between the upper front bolt and the ECM case.
- Connect the J1 and J2 harness connectors (J1 harness connector has more wires in its harness and is the connector closest to the front of the dash). Make sure the connectors are fully seated and locked into position.
- Position the battery cooling box on the tray so that the inlet and the outlet ducts are properly aligned.
- Install the battery cooling box bolts.
- Install the battery cooling box side support bolt.
- Connect the forward lamp harness to the UHFB and attach the UHFB into the housing.
- Install the UHFB connector retaining bolts.
- Secure all the cables, lines and harnesses into the retaining clips.
- Attach the positive battery cable and the EPS wire to the B+ terminal at the UHFB and tighten the nut.
- Insert the battery and install the battery hold down bolt.
- Connect the positive battery cable to the battery.
- Connect the negative battery cable to the battery.
- Install the UHFB cover.
- Install the battery cooling box cover and tighten the screws.
- Reprogram the radio stations.
- If the ECM has been replaced, it MUST be reprogrammed with the correct software and calibrations. Use the Service Stall System (SSS) to perform the reprogramming function.
- NOTE: Make sure to select the correct option content for the specific vehicle being programmed.
- Leave the ignition ON for 1 minute to enable the ECM to learn the throttle body.
- Turn the ignition OFF for 10 seconds, and then turn the ignition back ON.
- Clear the DTCs in all the controllers.
Tighten
Tighten the engine control module attachment bolts
to 8 N·m (71 lb in).
Important: Alignment of inlet and outlet ducts with the battery cooling box is critical to ensure proper airflow to the battery.
Important: Over tightening the battery cooling box bolts will break/crack the plastic.
Tighten
Tighten the battery cooling box bolts to 15 N·m
(11 lb ft).
Tighten
Tighten the battery cooling box side support bolt
to 10 N·m (89 lb in).
Tighten
Tighten the harness connector retainer to 4 N·m
(35 lb in).
Tighten
Tighten the UHFB B+ terminal nut to 10 N·m
(89 lb in).
Caution: Do not tip the battery over a 45 degree angle or acid could spill causing serious personal injury.
Tighten
Tighten the battery hold down bolt to 15 N·m
(11 lb ft).
Tighten
Tighten the battery terminal bolts to 17 N·m
(13 lb ft).
Tighten
Tighten the battery terminal bolts to 17 N·m
(13 lb ft).
Tighten
Tighten the battery cooling box cover screws to
2 N·m (18 lb in).
Perform the Security System Passlock Relearn procedure using the Service Stall System.
NOTE: The ECM will automatically learn the crankshaft variation while driving. No manual procedure is required.
