Tools Required
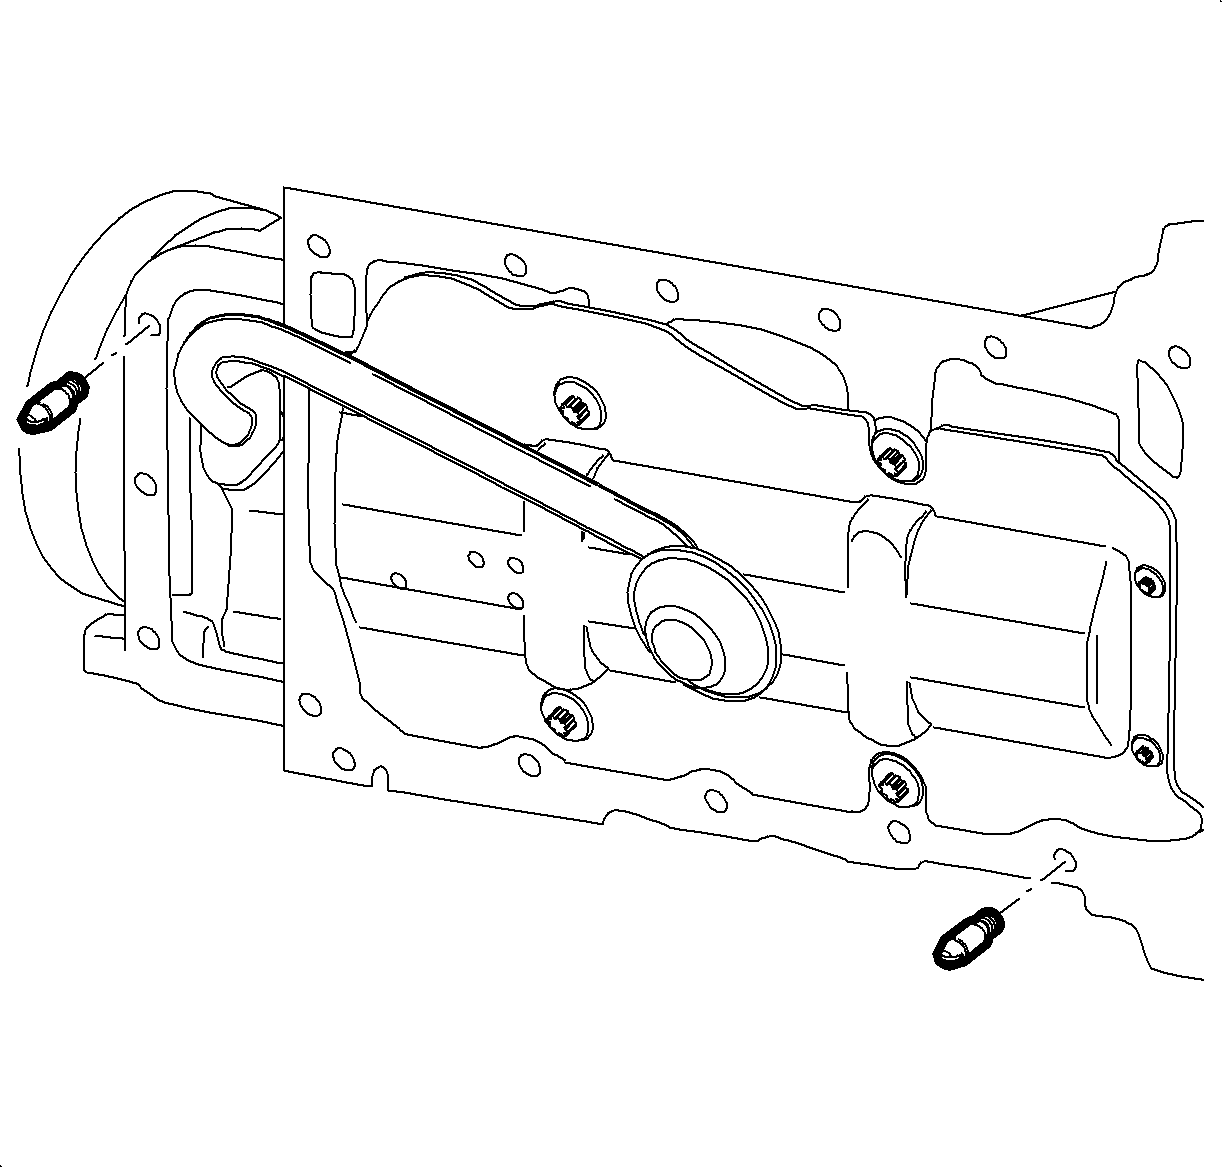
J 44715 Oil Pan Alignment Pins
Removal Procedure
- Raise the vehicle.
- Drain the oil.
- Install the drain plug.
- Remove the lower transaxle flange to oil pan bolts.
- Remove the oil pan bolts.
- Use pry points to break loose the seal. Bump the pan with a rubber mallet to loosen the pan from the engine block.
- Remove the oil pan.
- Clean sealer material from the block and oil pan assembly.
Caution: Ensure that the vehicle is properly supported and squarely positioned. To help avoid personal injury when a vehicle is on a hoist, provide additional support for the vehicle on the opposite end from which the components are being removed.

Notice: Refer to Fastener Notice in the Preface section.
Tighten
Tighten the oil pump drain plug - L81 to 25 N·m
(18 lb ft).
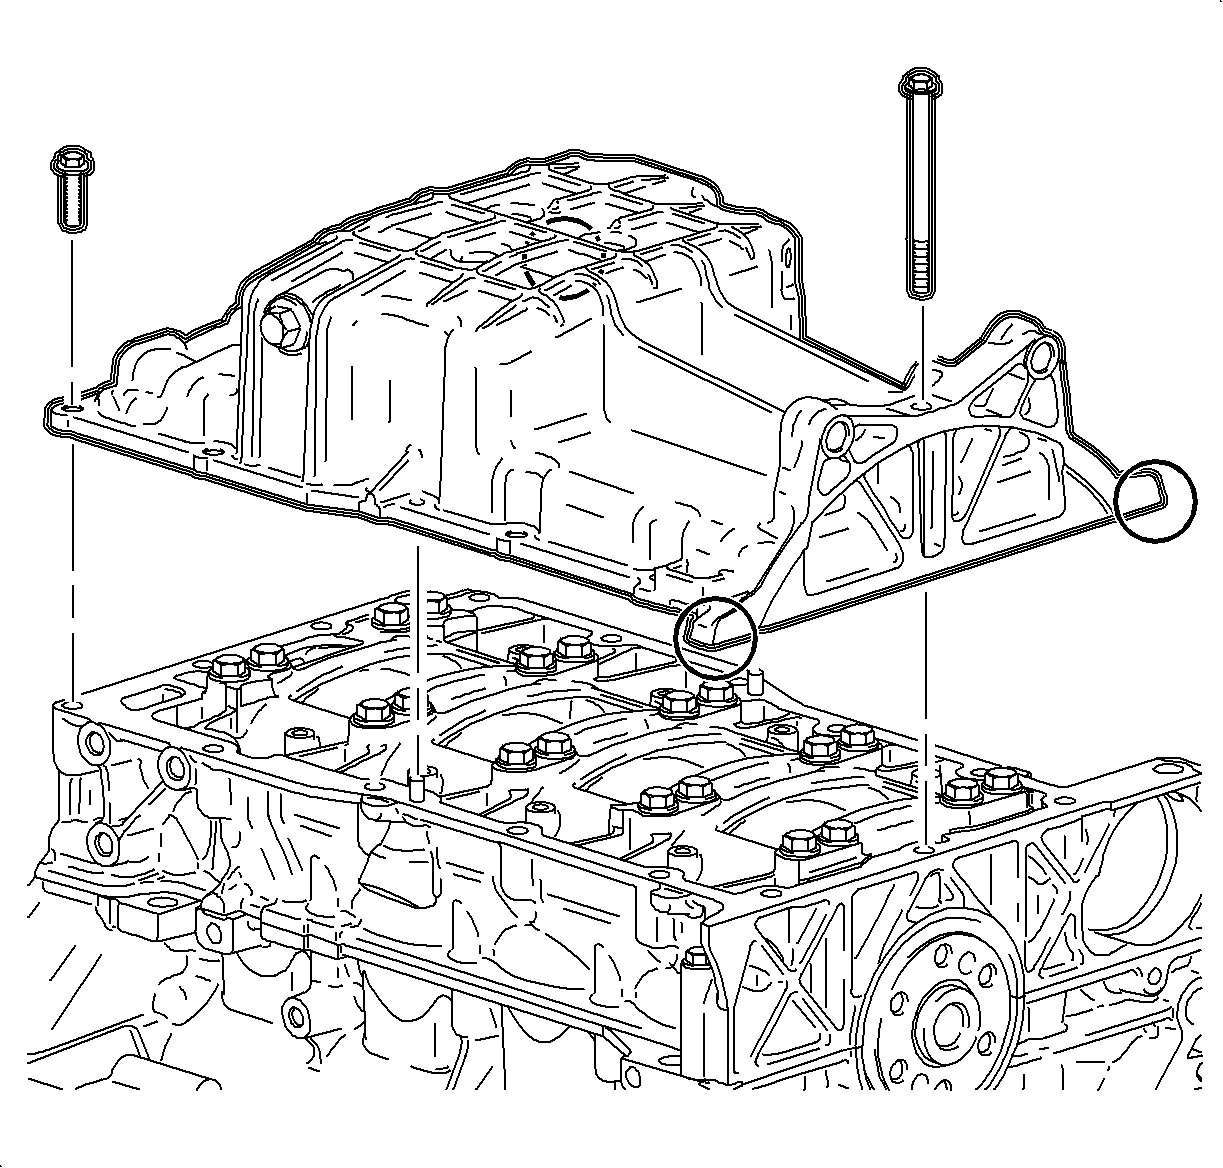
Important: Leave one bolt on each side of the oil pan while separating from the engine block.
Notice: When removing the oil pan, use only designated pry points to prevent damage to the sealing flange. The SA9123E RTV cutter tool may be used to break the oil pan loose from the engine block.
Installation Procedure
- Clean the oil pan and engine block sealing flanges with a chlorinated solvent such as carburetor spray cleaner, brake clean, or alcohol Saturn P/N 21007432, or equivalent.
- Install the J 44715 into the datum holes as shown in the illustration. Tighten until firmly sealed in the block.
- Apply a 2 mm bead of Permatex® The Right Stuff or equivalent 3 mm from the inside edge of the oil pan.
- Install the oil pan to the engine.
- Install the oil pan bolts.
- Install the oil pan-to-transaxle bolts.
- Remove the J 44715 pins.
- Install the remaining oil pan bolts.
- Attach the electrical connector bracket to the oil pan.
- Lower the vehicle.
- Refill the engine wit oil and adjust the oil level.
- Start the vehicle and inspect for oil leaks.
Important: Alignment of the oil pan is critical to ensure transaxle flange-to-oil pan alignment. Application of RTY is critical to ensure positive seal of the chamfered sealing flange on the oil pan-to-engine block mating surface. After the pan has been placed on the engine block, do not allow the pan to move as this will not allow the sealant to properly seal in the chamfered flange.

Notice: After the pan has been placed on the engine block, do not allow the pan to move as this will not allow the sealant to properly seal in the chamfered flange.

Tighten
| • | Tighten the oil pan bolts - L81 to 15 N·m (11 lb ft). |
| • | Tighten the transaxle-to-oil pan bolts - L81 to 65 N·m (48 lb ft). |
