Wind Noise at Highway Speeds from Baase of Driver SIde (Left) A-Pillar Near VIN Plate Area (Seal Area with Seam Sealer)

| Subject: | Wind Noise at Highway Speeds from Base of Driver Side (Left) A-Pillar Near VIN Plate Area (Seal Area with Seam Sealer) |
| Models: | 2003-2006 Saturn VUE |
| Attention: | Fixed Operations Manager and Technician |
This bulletin is being revised to add the 2005 and 2006 model year. Please discard Corporate Bulletin Number 03-08-58-005A (Section 08 -- Body and Accessories).
Condition
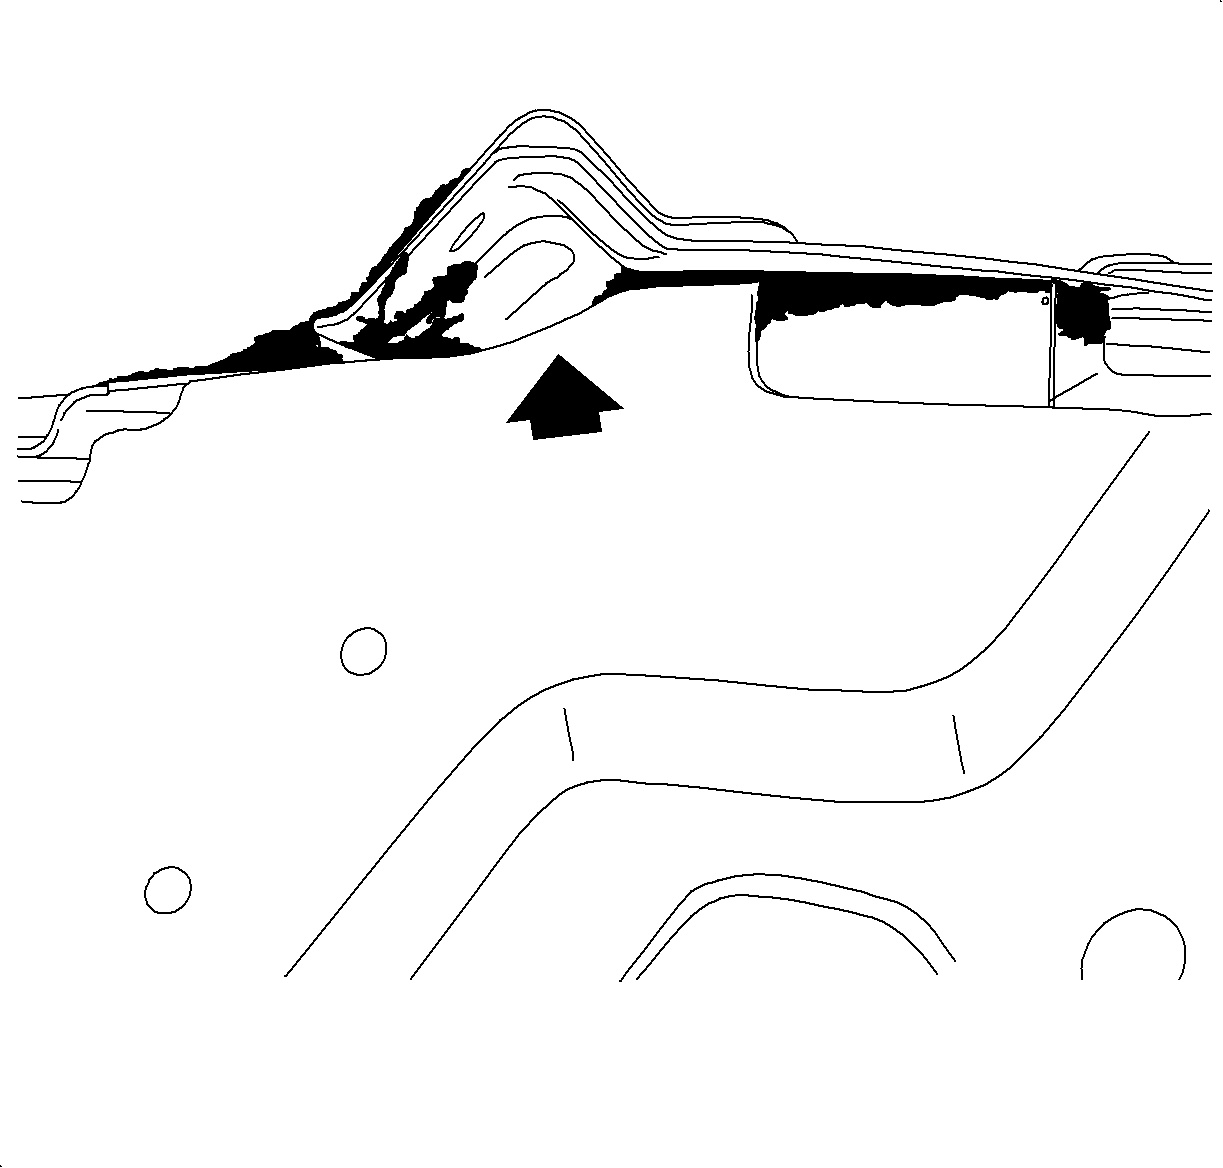
Some customers may comment on wind noise from the base of the driver (left) side A-pillar near the VIN plate area. This condition may be most noticeable at highway speeds.
Cause
This condition may be caused by a small skip in the seam sealer of the spaceframe at the base of the A-pillar.
Correction
Apply seam sealer to the affected area.
Service Procedure
- Verify that wind noise is coming from the base of the driver side A-pillar near the VIN plate. Refer to "Air/Wind Noise" (SI Document ID #487218) in the Diagnostic Information and Procedures section located in the appropriate model year Saturn VUE Service Manual.
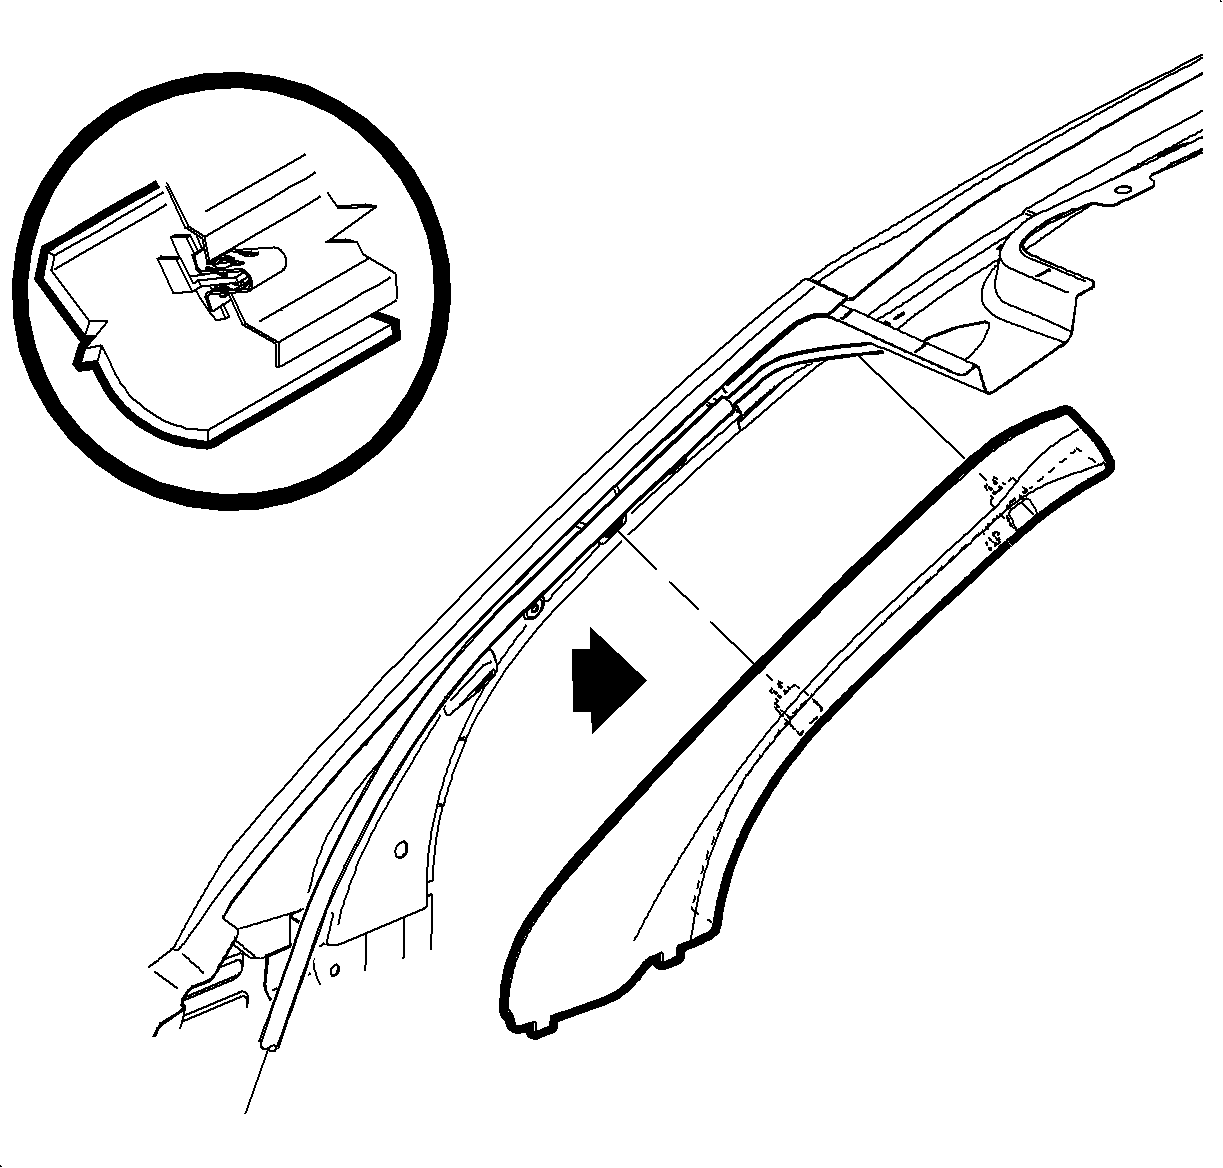
- Using a small flat-bladed tool, remove the fastener cover from the windshield upper garnish molding by prying at the bottom edge.
- Remove the windshield upper garnish molding fastener (7 mm hex head) from the garnish molding.
- Starting at the top, gently pull on the garnish molding to disengage the clips.
- Remove the molding from the vehicle.
- Obtain spray type Kent Leak Chek™ aerosol sealant, Kent P/N 50087, or equivalent.
- Apply Kent Leak Chek™ aerosol sealant, or equivalent. Sealant must be aimed directly underneath the shroud panel toward the right side of the vehicle.
- After sealant has been applied, test drive the vehicle.
- Position the windshield upper garnish molding to the top of the instrument panel. Align the molding to the body structure.
- Gently push at the clip locations to install the garnish molding.
- Install the windshield upper garnish molding fastener.
- Install the fastener cover.
- Replace the door seal over the edge of the garnish molding.
- Drive the vehicle in order to verify that the condition has been repaired.
Caution: Use care when working around the roof rail inflator module because sharp objects may puncture the roof rail airbag and the airbag will not deploy correctly. In order to avoid personal injury, if any part of the module is damaged replace the entire module.
Notice: If a vehicle is equipped with a head curtain inflator module, ensure that the inflator module and tether are undamaged. If tether or curtain airbag are damaged in any way, they must be replaced.

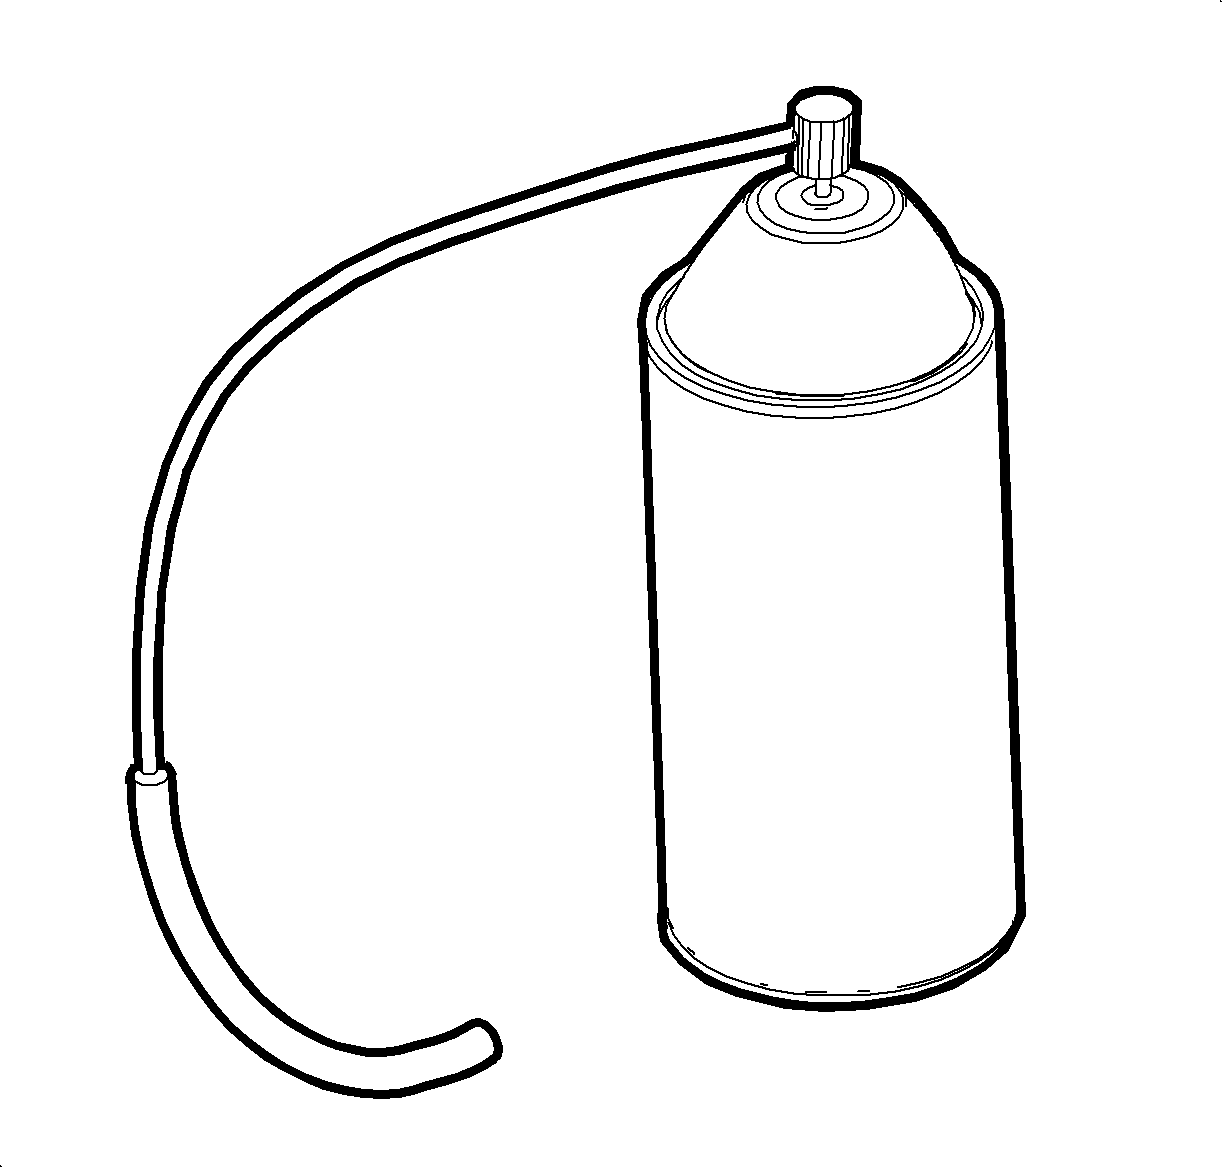
| 6.1. | Attach 305 mm (12 in) plastic extension tube (included with each container of Kent Leak Chek™ aerosol sealant) to the spray nozzle. |
| 6.2. | Attach a 127 mm (5 in) long section of 5 mm (3/16 in) OD rubber vacuum tubing (4 mm [5/32 in] ID) to the end of the 305 mm (12 in) long plastic extension tube. (The rubber tubing is needed to direct the sealant to the upper shroud panel assembly.) |
| Important: Do not discard partially used cans of Kent Leak Chek™ aerosol sealant. 1 can of Kent Leak Chek™ will seal approximately 3 vehicles. |
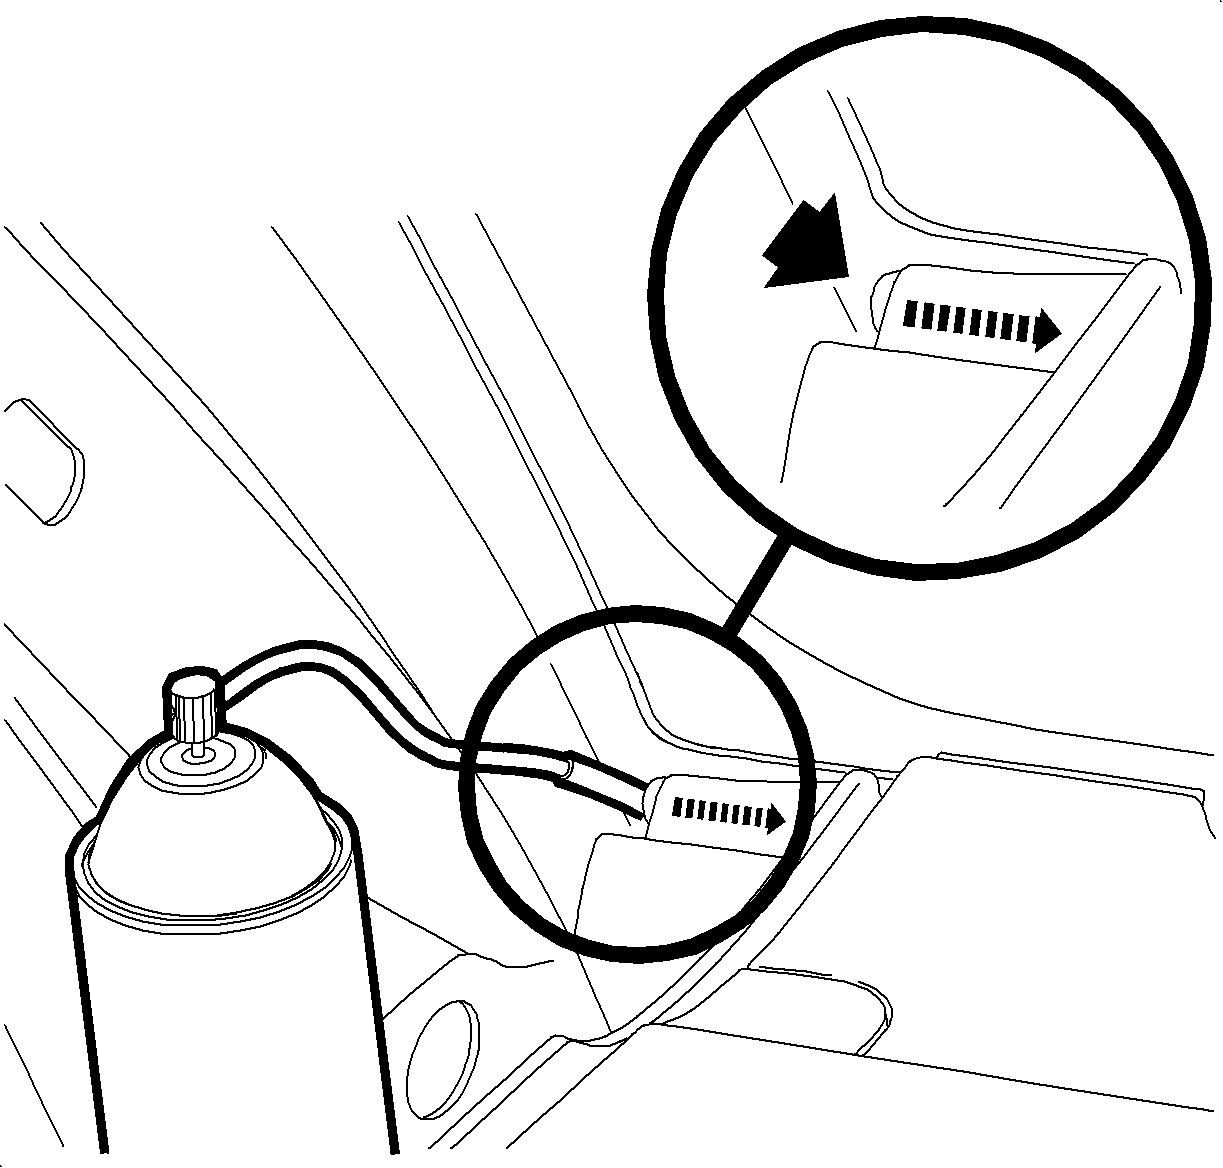
Important: Prior to applying Kent Leak Chek™ aerosol sealant, or equivalent, place clean shop towels on top of the I/P area to protect the I/P from possible overspray.
| • | If the condition persists, repeat Step 7. |
| • | If the condition has been eliminated, proceed to next step. |
Important: If the vehicle is equipped with a side inflator module, position the module tether rearward of the molding attaching clips.
Notice: Use the correct fastener in the correct location. Replacement fasteners must be the correct part number for that application. Fasteners requiring replacement or fasteners requiring the use of thread locking compound or sealant are identified in the service procedure. Do not use paints, lubricants, or corrosion inhibitors on fasteners or fastener joint surfaces unless specified. These coatings affect fastener torque and joint clamping force and may damage the fastener. Use the correct tightening sequence and specifications when installing fasteners in order to avoid damage to parts and systems.
Tighten
Tighten the fastener to 2 N·m (18 lb in).
Parts Information
Part Number | Description |
|---|---|
Kent P/N 50087* | Kent Leak Chek™ aerosol sealant, or equivalent |
*1 can of Kent Leak Chek™ will seal approximately 3 vehicles.
To order Kent Leak Chek™ aerosol sealant, call 800-654-6333 (in Canada, 800-563-1717). The minimum order is $25.00.
Warranty Information
For vehicles repaired under warranty, use:
Labor Operation | Description | Labor Time |
|---|---|---|
C2001 | Molding, Windshield Garnish - R&R or Replace | Use published labor operation time |
Additional Warranty Information
It will be necessary to sell the Kent Leak Chek™ Body Sealer to the CSO as "material" using net item code "M". Claims received in the amount of $7.84 ($5.60 dealer cost plus 40% parts allowance) for this part will be accepted. Claims exceeding the amount of $7.84 will be returned with the Return Reason 143 - Material / Reimbursement > Maximum Allowed.
