For 1990-2009 cars only
Special Tools
| • | J 43828 Ball Joint Remover |
| • | SA9140E Torque Angle Gage |
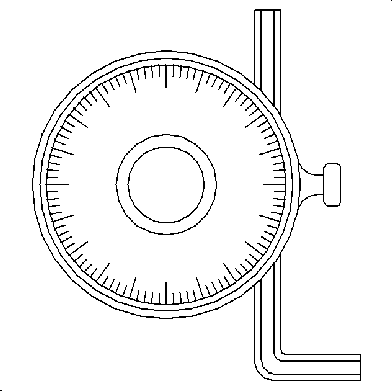
Removal Procedure
- Raise and support the vehicle. Refer to Lifting and Jacking the Vehicle.
- Remove the wheel and tire assembly. Refer to Tire and Wheel Removal and Installation.
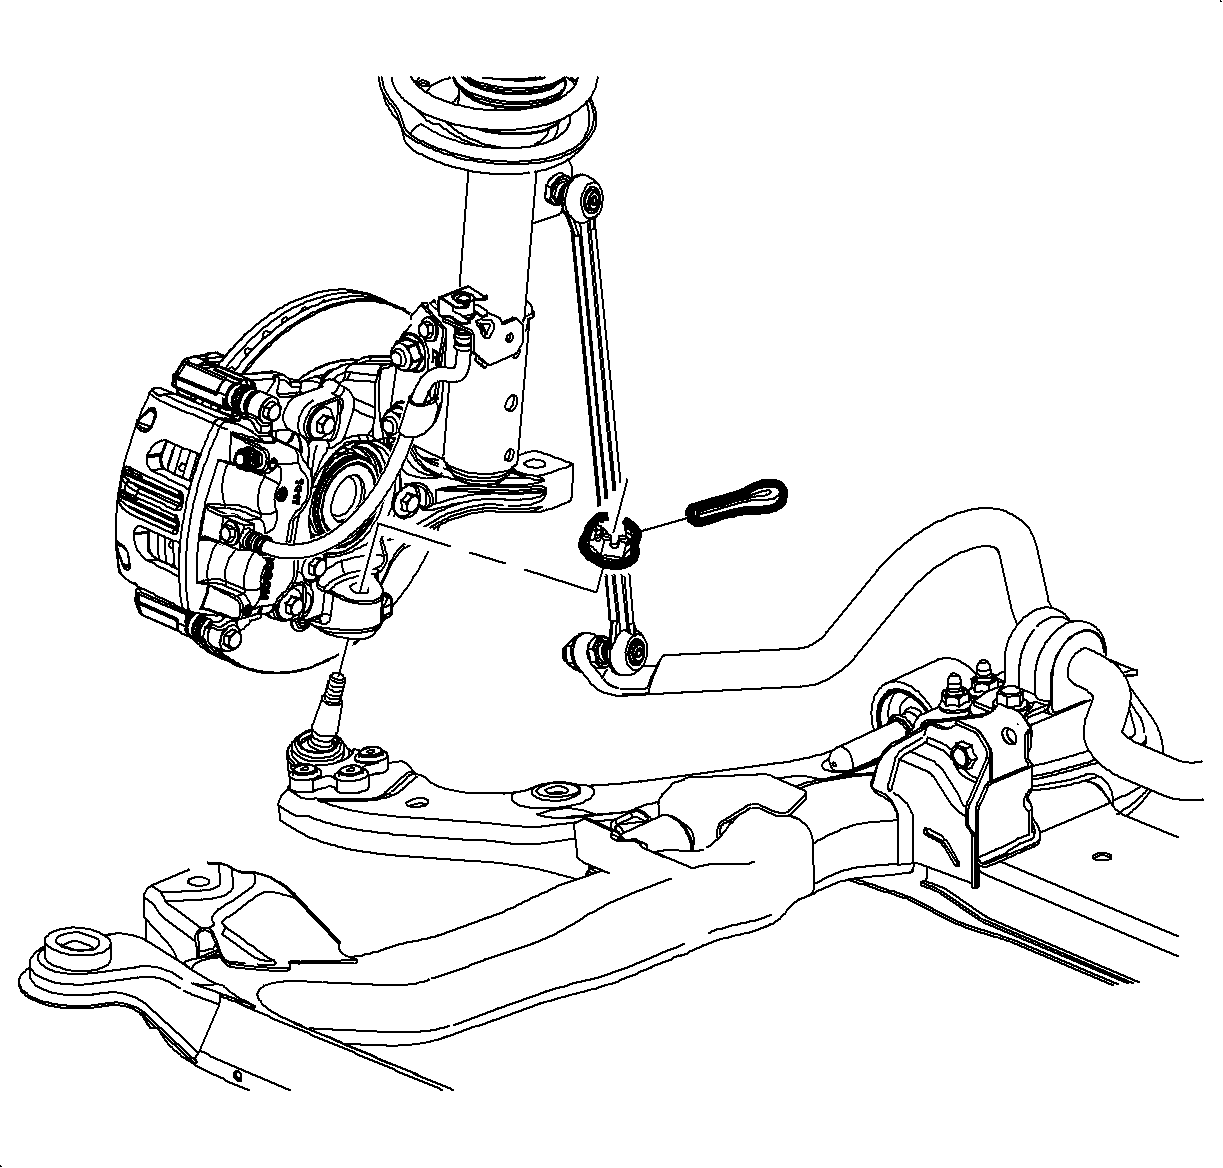
- Remove the control arm ball stud cotter pin. Discard the cotter pin.
- Loosen the ball stud nut until the nut is level with the top of the ball stud.
- Using the J 43828 , separate the lower control arm from the steering knuckle.
- Remove the ball stud nut.
- Remove the control arm-to-frame front bolt and nut. Discard the bolt and nut.
- Remove the control arm-to-frame rear bolts and nuts. Discard the bolts and nuts.
- Remove the control arm.

Installation Procedure
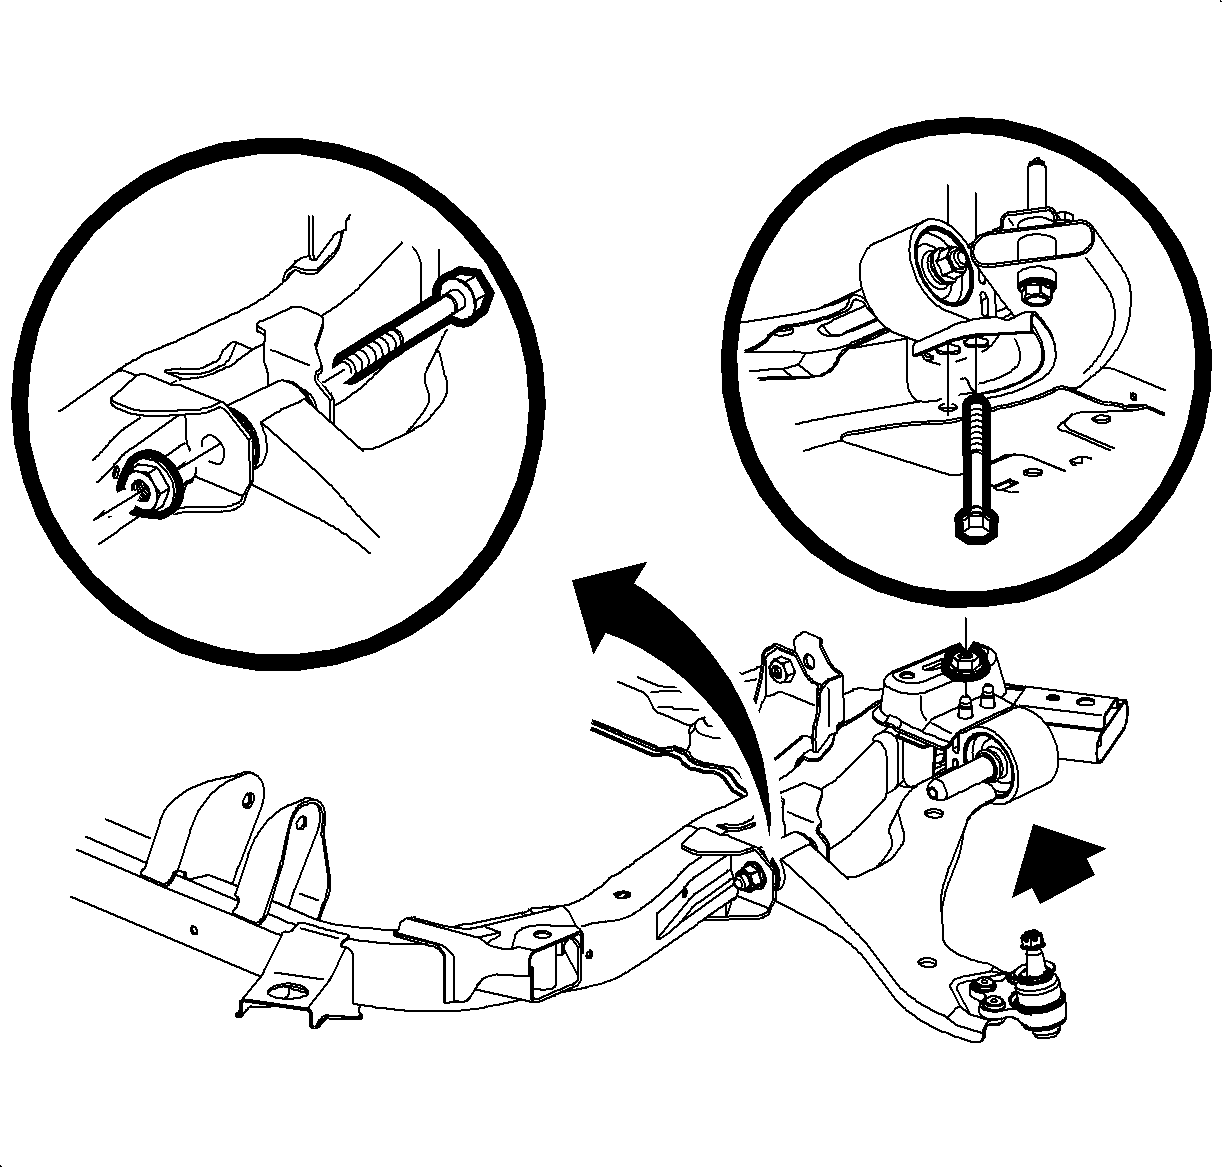
- Install the control arm to the frame.
- Install new control arm-to-frame rear bolts and nuts.
- Install a new arm-to-frame front bolt and nut.
- Install the control arm ball stud into the steering knuckle.
- Using the SA9140E , install the ball stud nut.
- If the bottom of the ball stud has a cup and is silver, tighten the nut to 10 N·m (89 lb in) plus an additional 150 degrees.
- If the bottom of the ball stud is flat and black, tighten the nut to 10 N·m (89 lb in) plus an additional 150 degrees.
- Continue to tighten the nut only enough to align the castle nut slots with the ball stud, install the cotter pin.
- Install the wheel and tire assembly. Refer to Tire and Wheel Removal and Installation in Tires and Wheels.
- Lower the vehicle.
Notice: Refer to Fastener Notice in the Preface section.
Tighten
Tighten the nuts to 70 N·m (52 lb ft).
Install new control arm-to-frame rear bolts and nuts.
Tighten
Tighten the bolt to 200 N·m (148 lb ft).
Notice: Refer to Lower Control Arm Ball Stud Identification Notice in the Preface section.
Tighten
Important:
• Do not loosen the castle nut, only tighten to align the ball stud slot. • Ensure that the cotter pin ends do not contact the ABS sensor harness or drive axle.
