Pop/Rattle Noise from Front of Vehicle During Suspension Movement (Clean Components, Apply Retaining Compound, and Install New Nuts)

| Subject: | Pop/Rattle Noise from Front of Vehicle During Suspension Movement (Clean Components, Apply Retaining Compound, and Install New Nuts) |
| Models: | 2004 Saturn VUE Vehicles |
| with 3.5L V-6 Engine (VIN 4 - RPO L66) |
| Built Up To and Including VIN Breakpoint 4S837201 |
| Attention: | Fixed Operations Manager and Technician |
Condition
Some customers may comment on a pop or rattle noise from the front end of the vehicle during significant suspension movement.
Cause
This condition may be caused by the front control arm bushing sleeve rotating on the control arm stud.
Correction
Verify the concern. If condition is present, clean components, apply retaining compound and install new nuts. Refer to service procedure in this bulletin.
Service Procedure
- Verify concern using Chassis Ear ( SA9217NE or J39570 ) or equivalent.
- Raise and support the vehicle. Refer to "Lifting and Jacking the Vehicle" (Document ID #995301) in the General Information section of the 2004 Saturn VUE Service Manual, Vol. 1.
- Remove front tire and wheel assemblies (both sides). Refer to "Tire and Wheel Removal and Installation" (Document ID #1219741) in the Suspension section of the 2004 Saturn VUE Service Manual, Vol. 1.
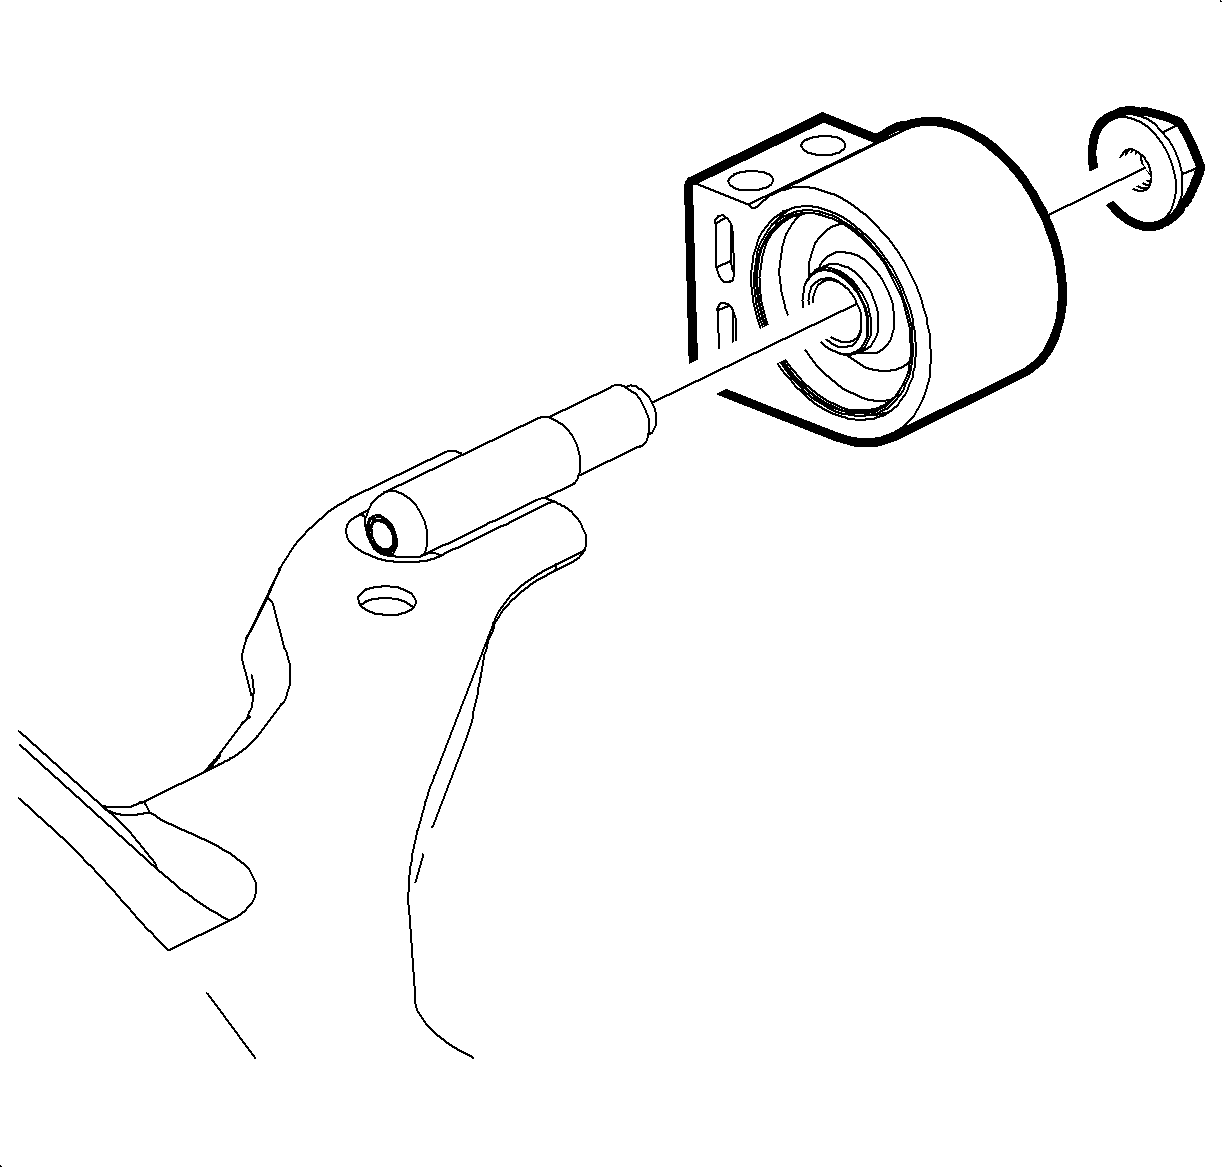
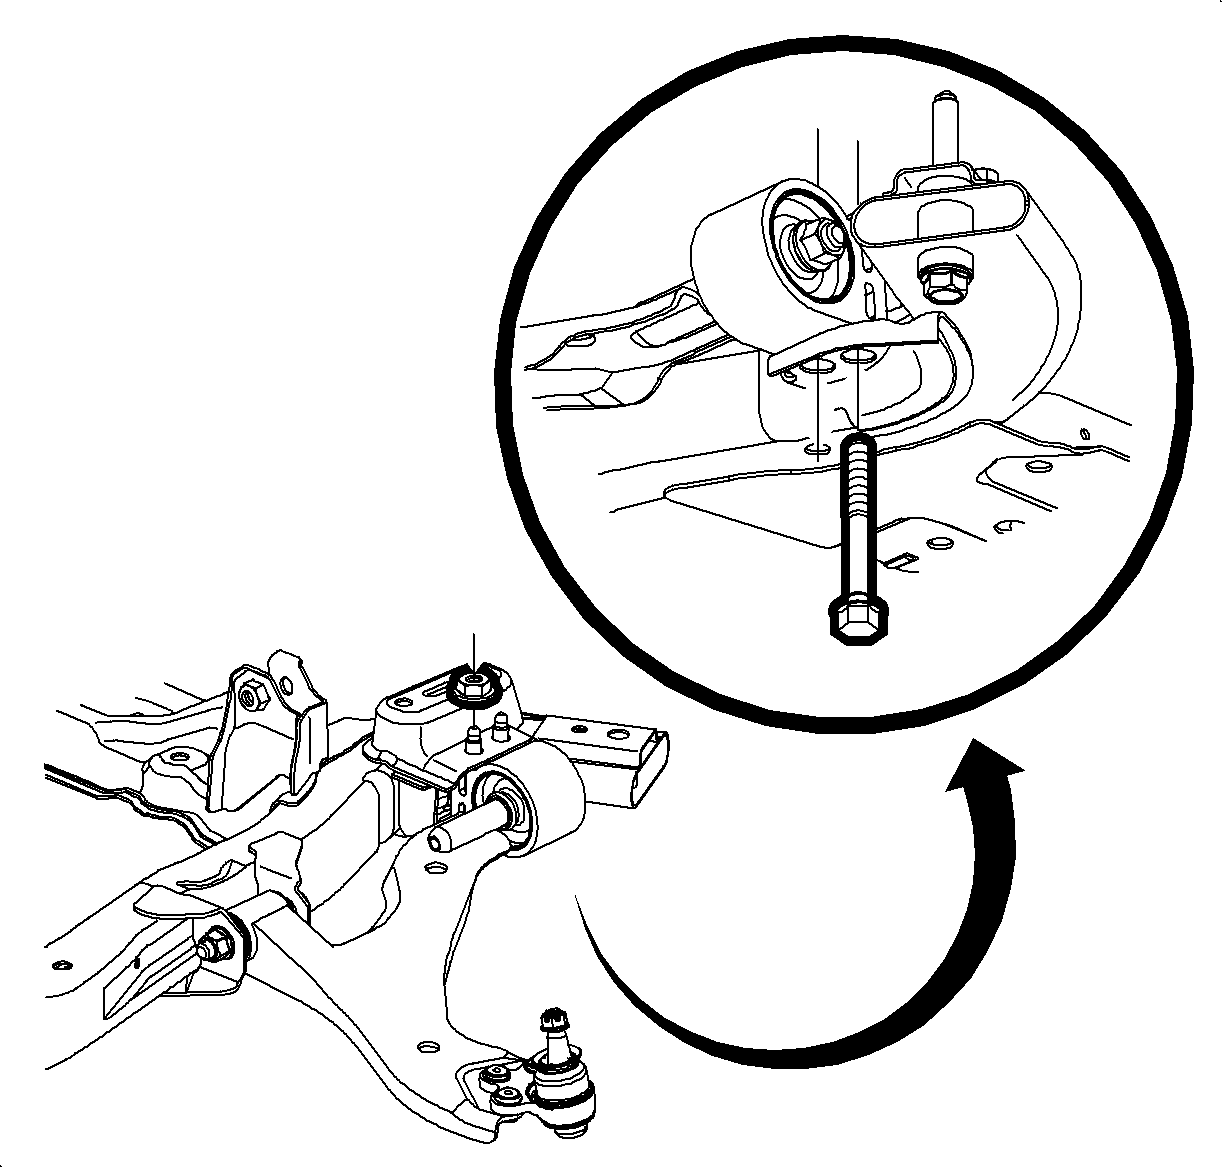
- Remove the lower control arm rear bushing nut. Discard nut.
- Remove the control arm-to-frame rear bolts and nuts. Discard the bolts and nuts.
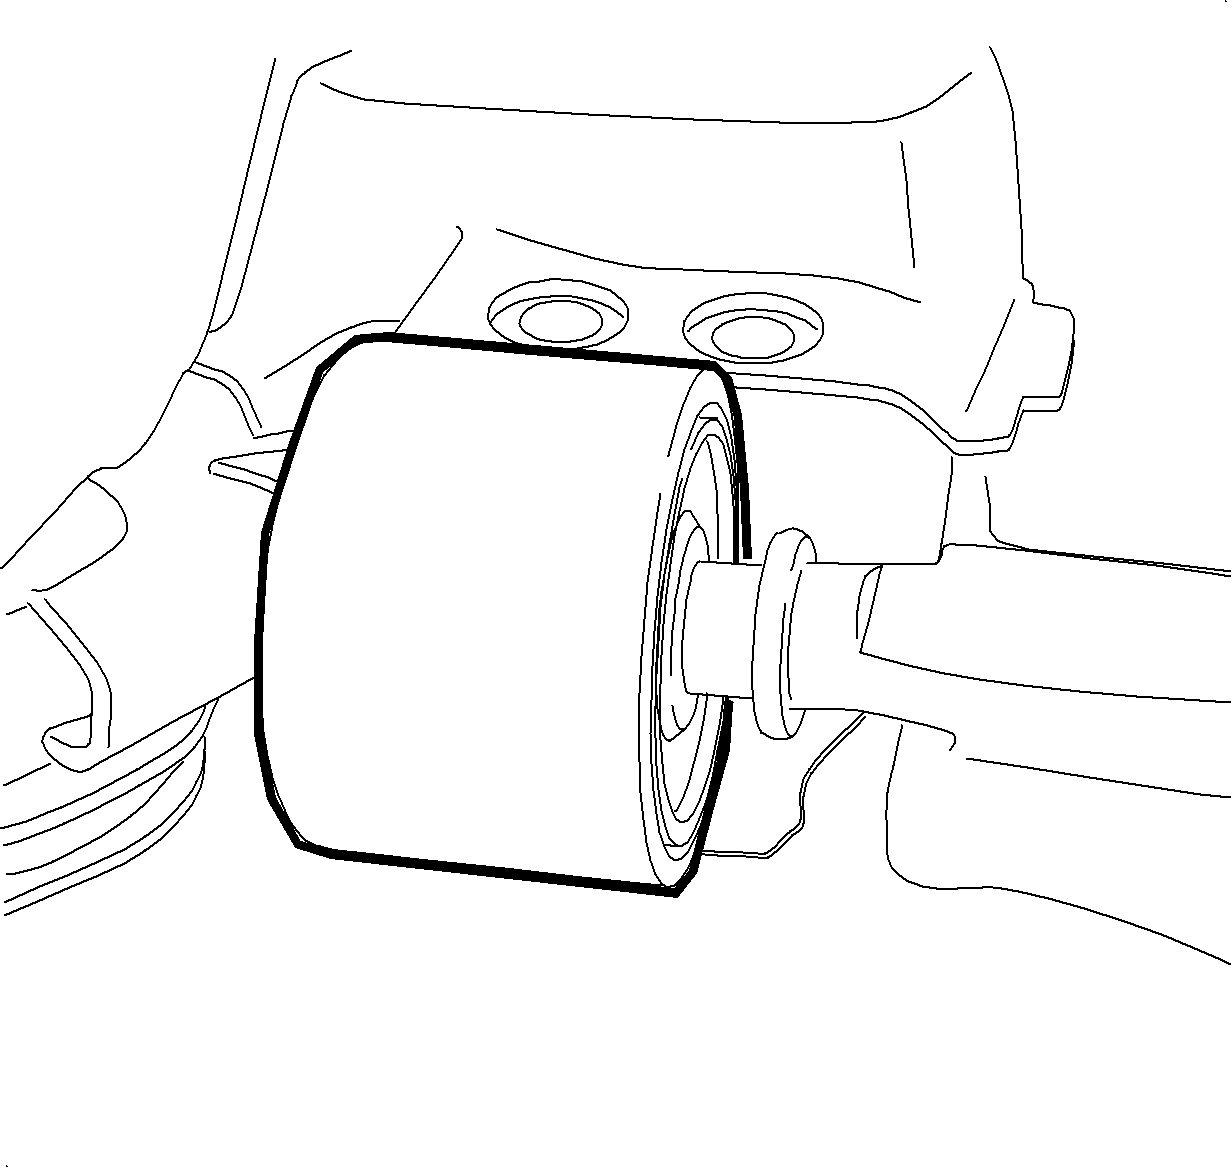
- Slide the rear bushing towards the rear of the vehicle so that a gap is visible between the bushing and the shoulder of the control arm stud.
- Use Saturn® Brake & Choke Cleaner, P/N 21007432 (in Canada, P/N 88901247) or GM Brake Cleaner, P/N 12378392 (in Canada, P/N 88901247), and a shop cloth to wipe the surface clean where the inner sleeve of the bushing and the shoulder of the stud contact each other.
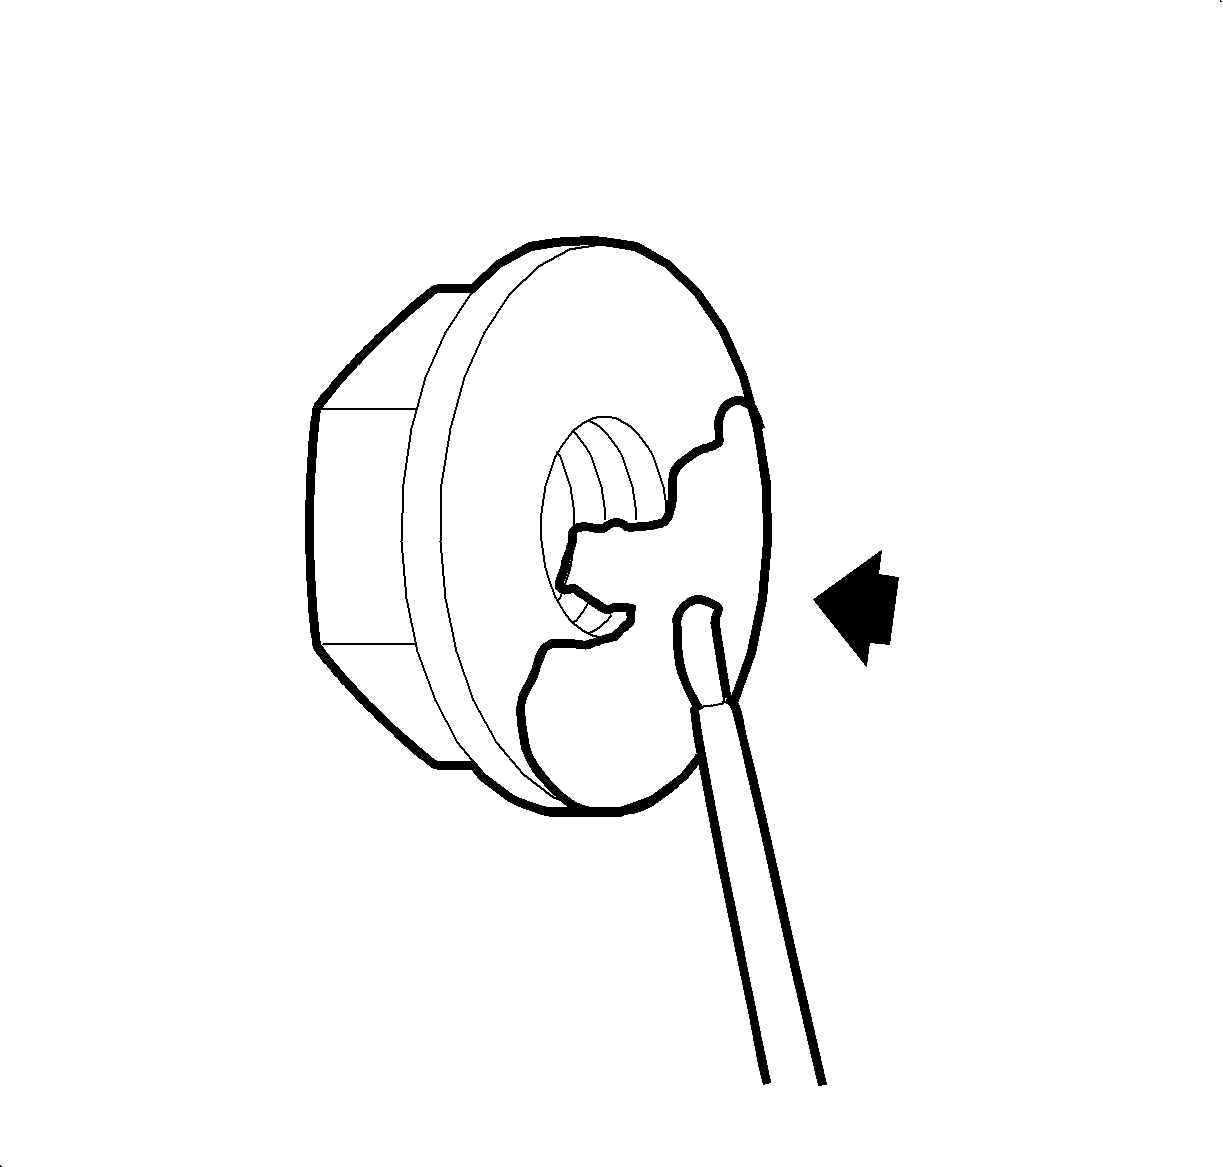
- On the nut side of the bushing, clean the threads on the stud and the end of the bushing inner sleeve where it contacts the retaining nut, using the same method in Step 7.
- Spray all of the areas again with Saturn® Brake & Choke Cleaner and dry completely with compressed air.
- Slide the rear bushing back into position.
- Install new control arm-to-frame rear bolts, P/N 11509671, and nuts, P/N 11516078.
- Perform Steps 4 through 11 on opposite side of vehicle before proceeding to next step.
- Install the wheel and tire assemblies (both sides). Refer to "Tire and Wheel Removal and Installation" (Document ID #1219741) in the Suspension section of the 2004 Saturn VUE Service Manual, Vol. 1.
- Lower the vehicle.
- Apply Loctite™ 620 Retaining Compound, or equivalent, on the threads as well as the face of the nut that contacts the rear bushing’s inner sleeve.
- Install new lower control arm bushing nut, P/N 11516382. Tighten to specification using a torque wrench and a 21 mm crowfoot at 90° to the torque wrench.
- Allow one hour of retaining compound (thread-locker) cure time before validating the repair.
Caution: Approved safety glasses and gloves should be worn when performing the following steps to reduce the chance of personal injury.
Important: If all components are not completely clean and dry before reassembly, the inner sleeve of bushing will rotate on the control arm stud during suspension movement, and a pop or rattle noise condition will still be present.
Caution: Wear safety glasses when using compressed air in order to prevent eye injury.
Notice: Use the correct fastener in the correct location. Replacement fasteners must be the correct part number for that application. Fasteners requiring replacement or fasteners requiring the use of thread locking compound or sealant are identified in the service procedure. Do not use paints, lubricants, or corrosion inhibitors on fasteners or fastener joint surfaces unless specified. These coatings affect fastener torque and joint clamping force and may damage the fastener. Use the correct tightening sequence and specifications when installing fasteners in order to avoid damage to parts and systems.
Tighten
Tighten control arm-to-frame rear bolts and nuts
to 70 N·m (52 ft-lbs).
Important: Do not install lower control arm rear bushing nuts at this time. The rear bushing nuts should not be installed until vehicle is at normal ride height. Installing lower control arm rear bushing nuts prior to lowering vehicle to normal ride height may cause premature failure of bushing.
Important: Vehicle must be lowered with all wheels on the ground when installing and tightening lower control arm bushing nut.
Important: If the crowfoot is not at 90° to the torque wrench, the torque value will not be correct, and the inner sleeve of bushing may still exhibit a noise condition.
Tighten
Tighten lower control arm bushing nut to 127 N·m
(93 ft-lbs)
Parts Information
Part Number | Description | Qty |
|---|---|---|
12378392 21007432 (in Canada, 88901247) | Brake & Choke Cleaner | 1 can per repair |
11516382 | Nuts | 2 |
11509671 | Bolts | 4 |
11516078 | Nuts | 4 |
N/A | *Loctite™ 620 Retaining Compound (or equivalent) | 10 mL |
*To order, call Loctite Corporation 1-800-562-8483 (or in Canada, 1-800-263-5043).
Claim Information
To receive credit for this repair during the warranty coverage period, submit a claim through the Saturn Dealer System for E9403 (Lower Control Arm - Bushing Spindles).
