Notice:
• Turn the ignition OFF when installing or removing the control module connectors and disconnecting or reconnecting the power to the control module (battery cable, powertrain control module (PCM)/engine control module (ECM)/transaxle control module
(TCM) pigtail, control module fuse, jumper cables, etc.) in order to prevent internal control module damage. • Control module damage may result when the metal case contacts battery voltage. DO NOT contact the control module metal case with battery voltage when servicing a control module, using battery booster cables, or when charging the vehicle battery. • In order to prevent any possible electrostatic discharge damage to the control module, do no touch the connector pins or the soldered components on the circuit board. • Remove any debris from around the control module connector surfaces before servicing the control module. Inspect the control module connector gaskets when diagnosing or replacing the control module. Ensure that the gaskets are installed correctly.
The gaskets prevent contaminant intrusion into the control module. • The replacement control module must be programmed.
Important: It is necessary to record the remaining engine oil life. If the replacement module is not programed with the remaining engine oil life, the engine oil life will default to 100 percent. If the replacement module is not programmed with the remaining engine oil life, the engine oil will need to be changed at 5 000 km (3,000 mi) from the last engine oil change.
Removal Procedure
- Using a scan tool, retrieve the percentage of remaining engine oil. Record the remaining engine oil life.
- Disconnect the negative battery cable. Refer to Battery Negative Cable Disconnection and Connection .
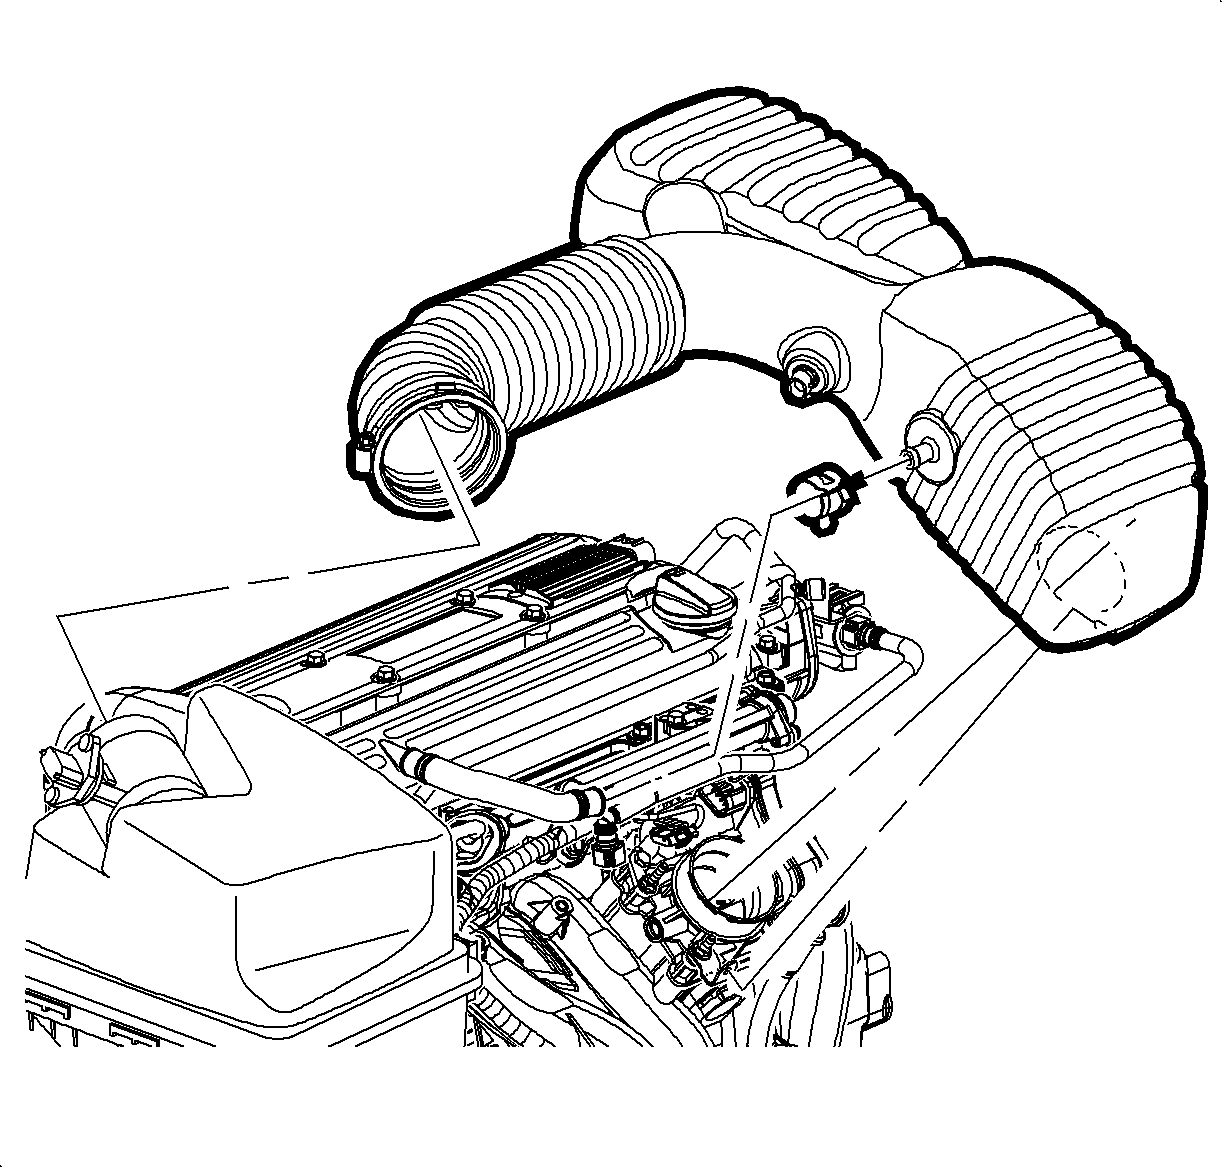
- Disconnect the intake air temperature (IAT) sensor.
- Loosen the clamp at the air cleaner assembly.
- Remove the push pin attachment from the outlet resonator/duct assembly to support bracket.
- Loosen the clamp at the throttle body assembly.
- Disconnect the positive crankcase ventilation (PCV) fresh air hose at the cam cover.
- Remove the outlet resonator/duct assembly.
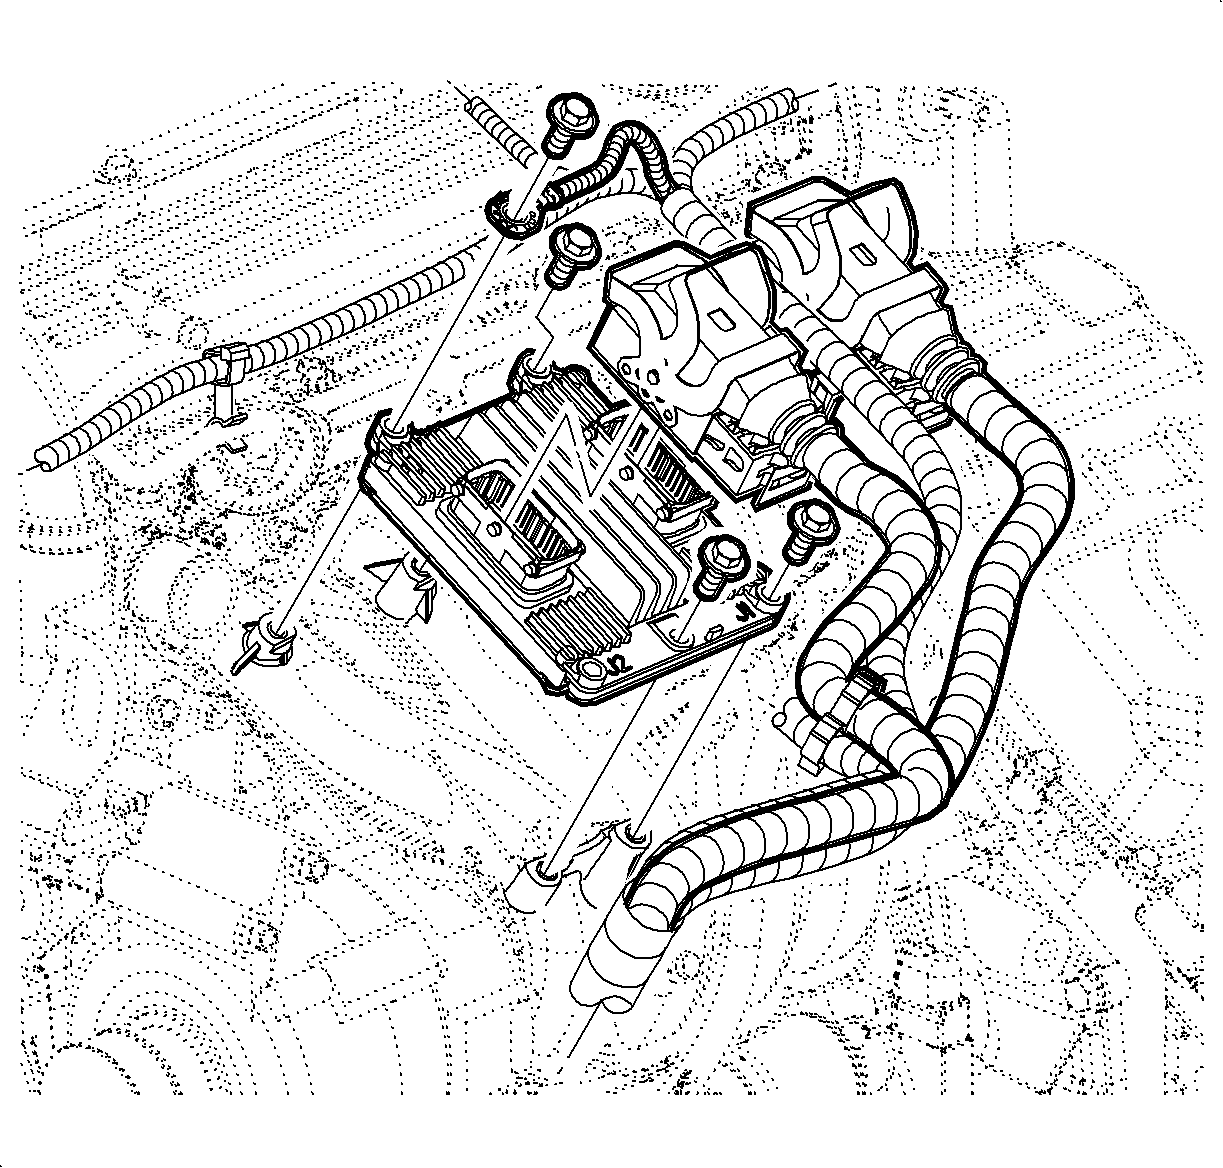
- Remove the J 1 and J 2 connectors at the engine control module (ECM).
- Remove the 4 ECM attachment bolts.
Installation Procedure
- Install the ECM.
- Install the ECM bolts.
- Connect the J 1 and J 2 ECM electrical connectors.
- Install the outlet resonator/duct assembly into position.
- Connect the PCV fresh air vent hose assembly.
- Tighten the clamp at the throttle body assembly.
- Position the outlet resonator/duct assembly up with the support bracket and install the push-pin.
- Tighten the clamp at the air cleaner assembly.
- Connect the IAT sensor connector.
- Connect the negative battery cable. Refer to Battery Negative Cable Disconnection and Connection .
- Program the ECM. Refer to Control Module References .
- Perform the Passlock Relearn Procedure using the SSS.
- Turn the ignition to OFF for 10 seconds.
Notice: Refer to Fastener Notice in the Preface section.
Tighten
Tighten the engine control module bolts to 8 N·m (71 lb in).
Notice: If a new ECM is being installed, it must be reprogrammed with new software and calibrations. Refer to Service Stall System (SSS) User Guide for reprogramming procedures. The ECM may be damaged if the reprogramming process is interrupted. Make sure the scan tool is connected securely to the DLC and the vehicle battery has sufficient charge.
Important: Ensure the original ECM has the correct VIN and vehicle options.
Important: The new ECM must learn the passlock password from the body control module (BCM). When the ECM reprogram is completed, use the Service Stall System (SSS) to perform the ECM Passlock Relearn Procedure.
