For 1990-2009 cars only
Tools Required
| • | J 23327 Spring Compressor |
| • | J 45124 Adjustable Bridge |
Note these items during assembly:
| • | Apply automatic transmission fluid to all O-ring seals before assembly. |
| • | Soak all clutch fiber plates in automatic transmission fluid for a minimum of 30 minutes. |
- Install new inner (618) or (634) and outer O-ring seals (617) or (633) on the clutch piston (616) or (632).
- Install the clutch piston assembly (616) or (632) into the clutch housing (635).
- Install the clutch return spring (614) or (630).
- Install the clutch return spring retainer cap (613) or (629).
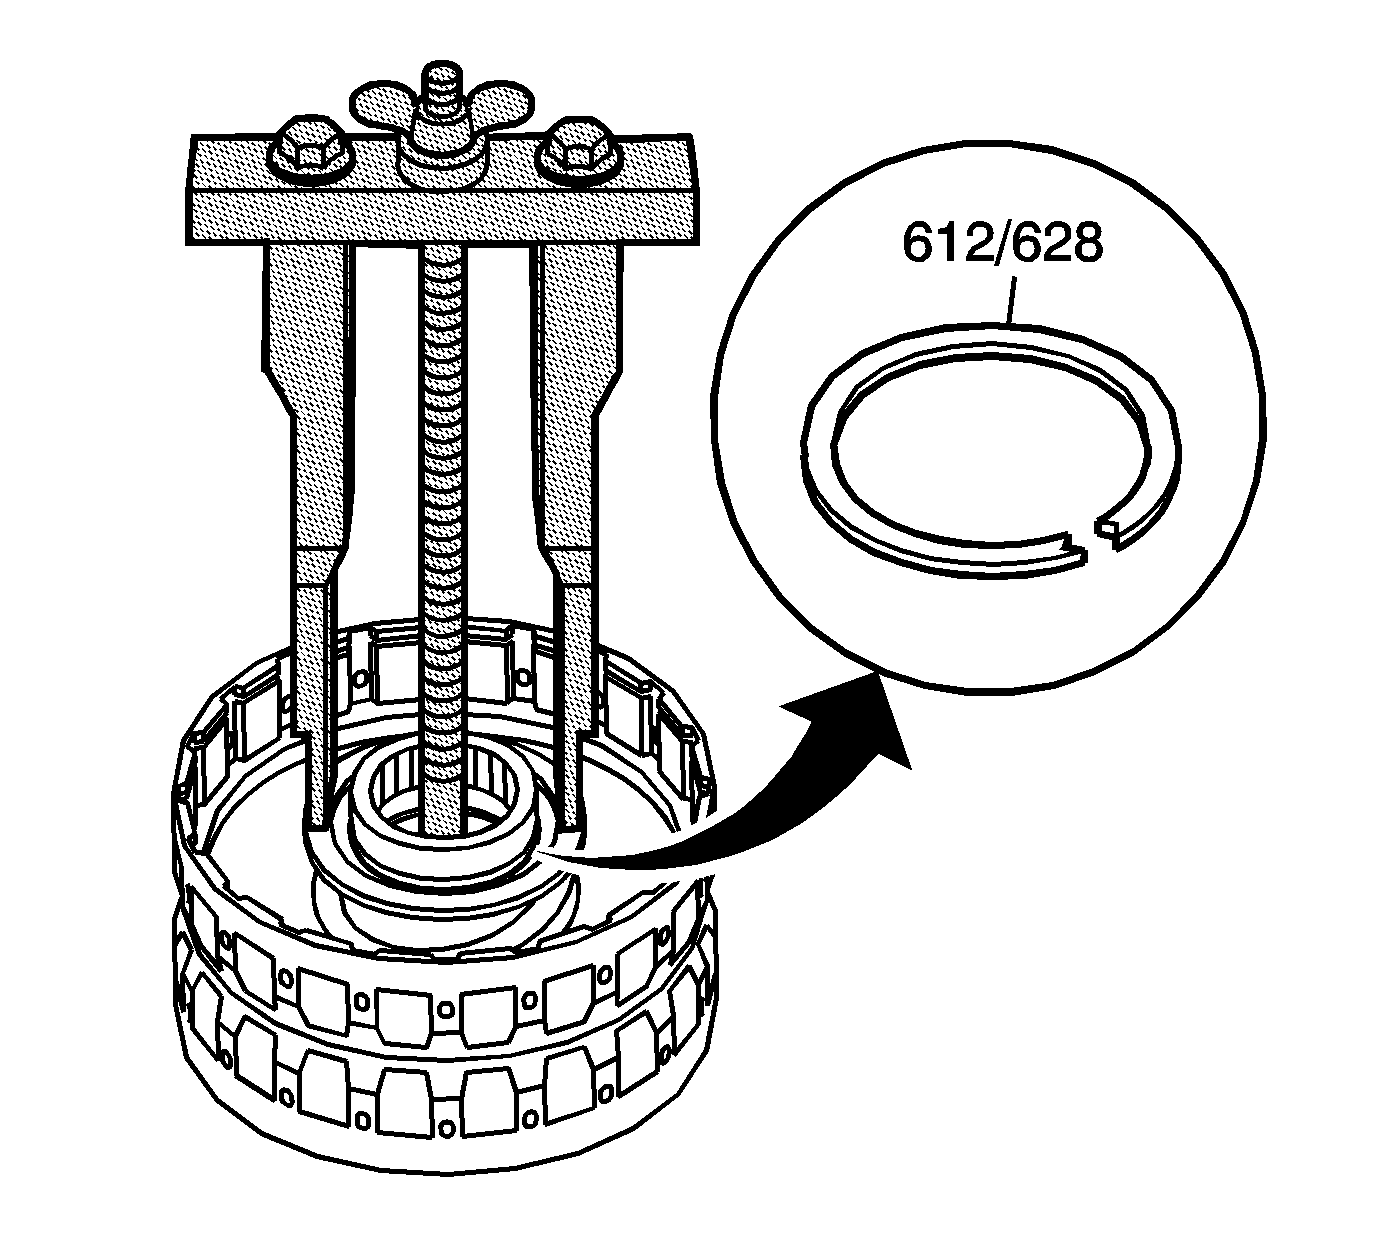
- Install the clutch piston return spring retaining ring (612) or (628) on the clutch piston return spring retainer cap (613) or (629).
- Using the bridge and legs of the J 45124 (3) with the forcing screw of J 23327 (2) and J 21420-2 (1) plate of J 23327 , compress the clutch piston return spring (614) or (630) until the groove for the clutch spring retainer cap retaining ring (612) or (628) is accessible.
- Install the clutch piston return spring retaining cap retaining ring (612) or (628).
- Remove the tools.
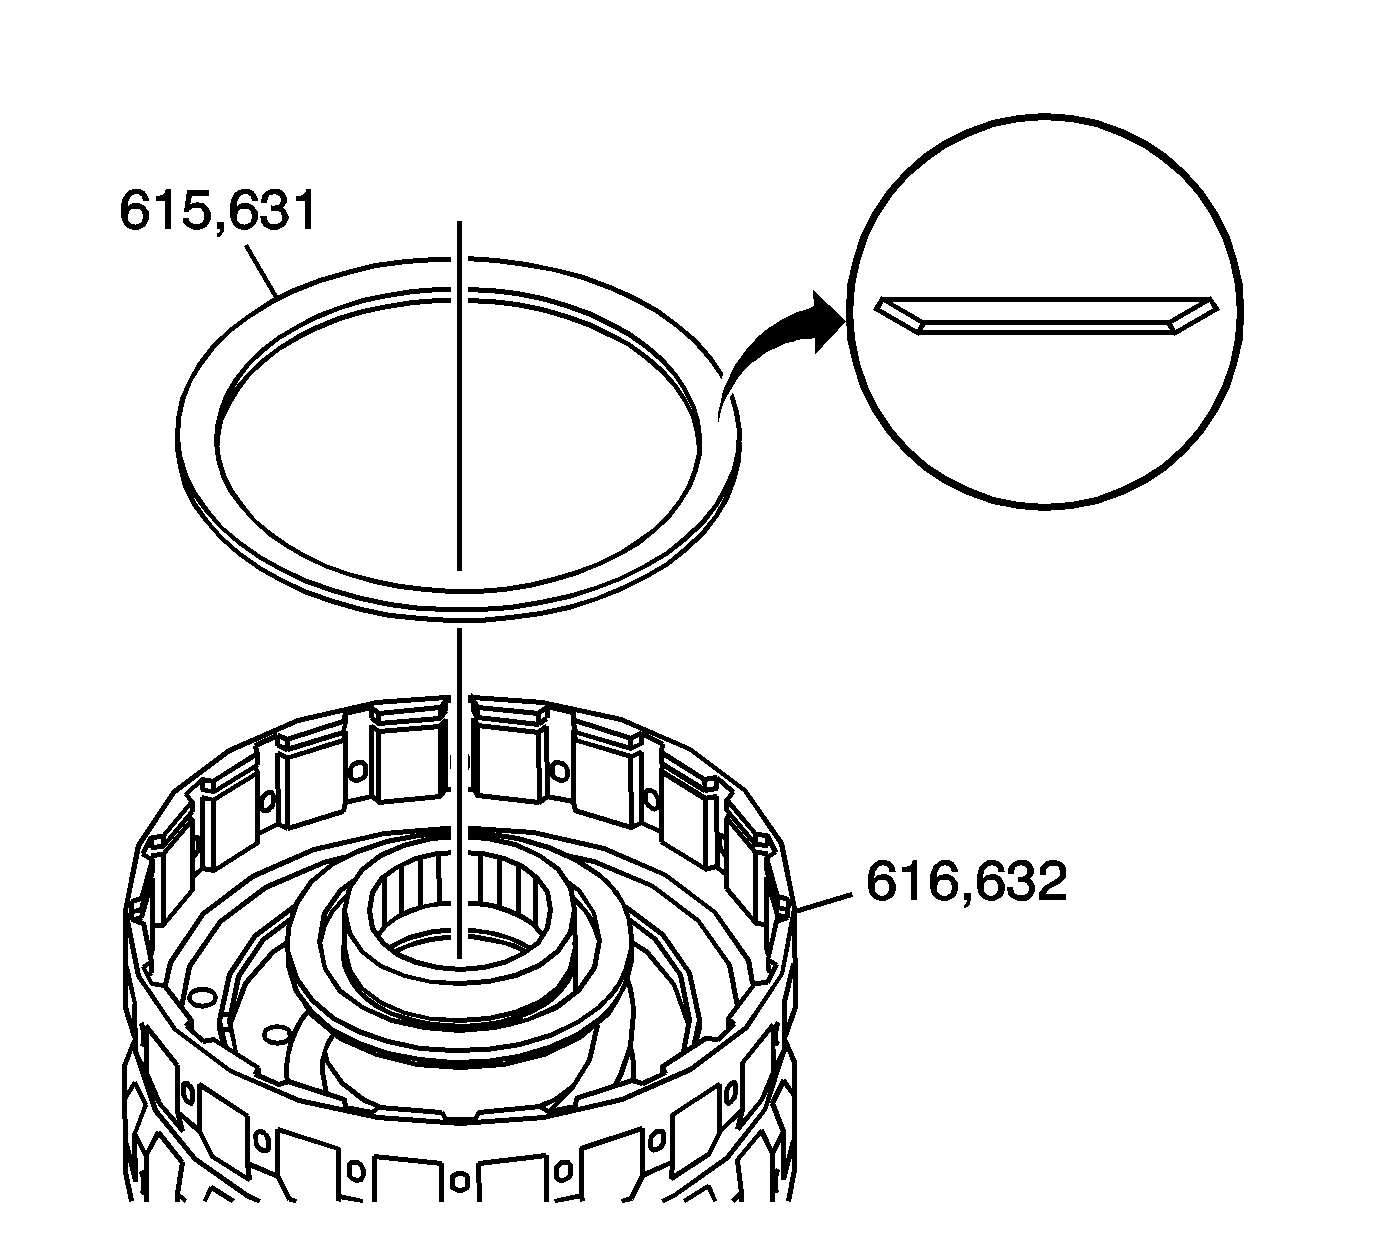
- Install the spring plate (615) or (631) into the groove of the clutch piston assembly (616) or (632) with the cone side down.
- Install a clutch steel flat plate (611) or (627).
- Install a clutch fiber plate (610, 626).
- Alternately install the steel plates and the fiber plates. Install the clutch steel wave plates (650) or (651) in the top 2 positions, if the clutch plates are being replaced.
- Install the clutch selective backing plate (609) or (625).
- Install the backing plate retaining ring (608) or (624).
- Measure the clutch backing plate clearance. Refer to Clutch Backing Plate Clearance Measurement .
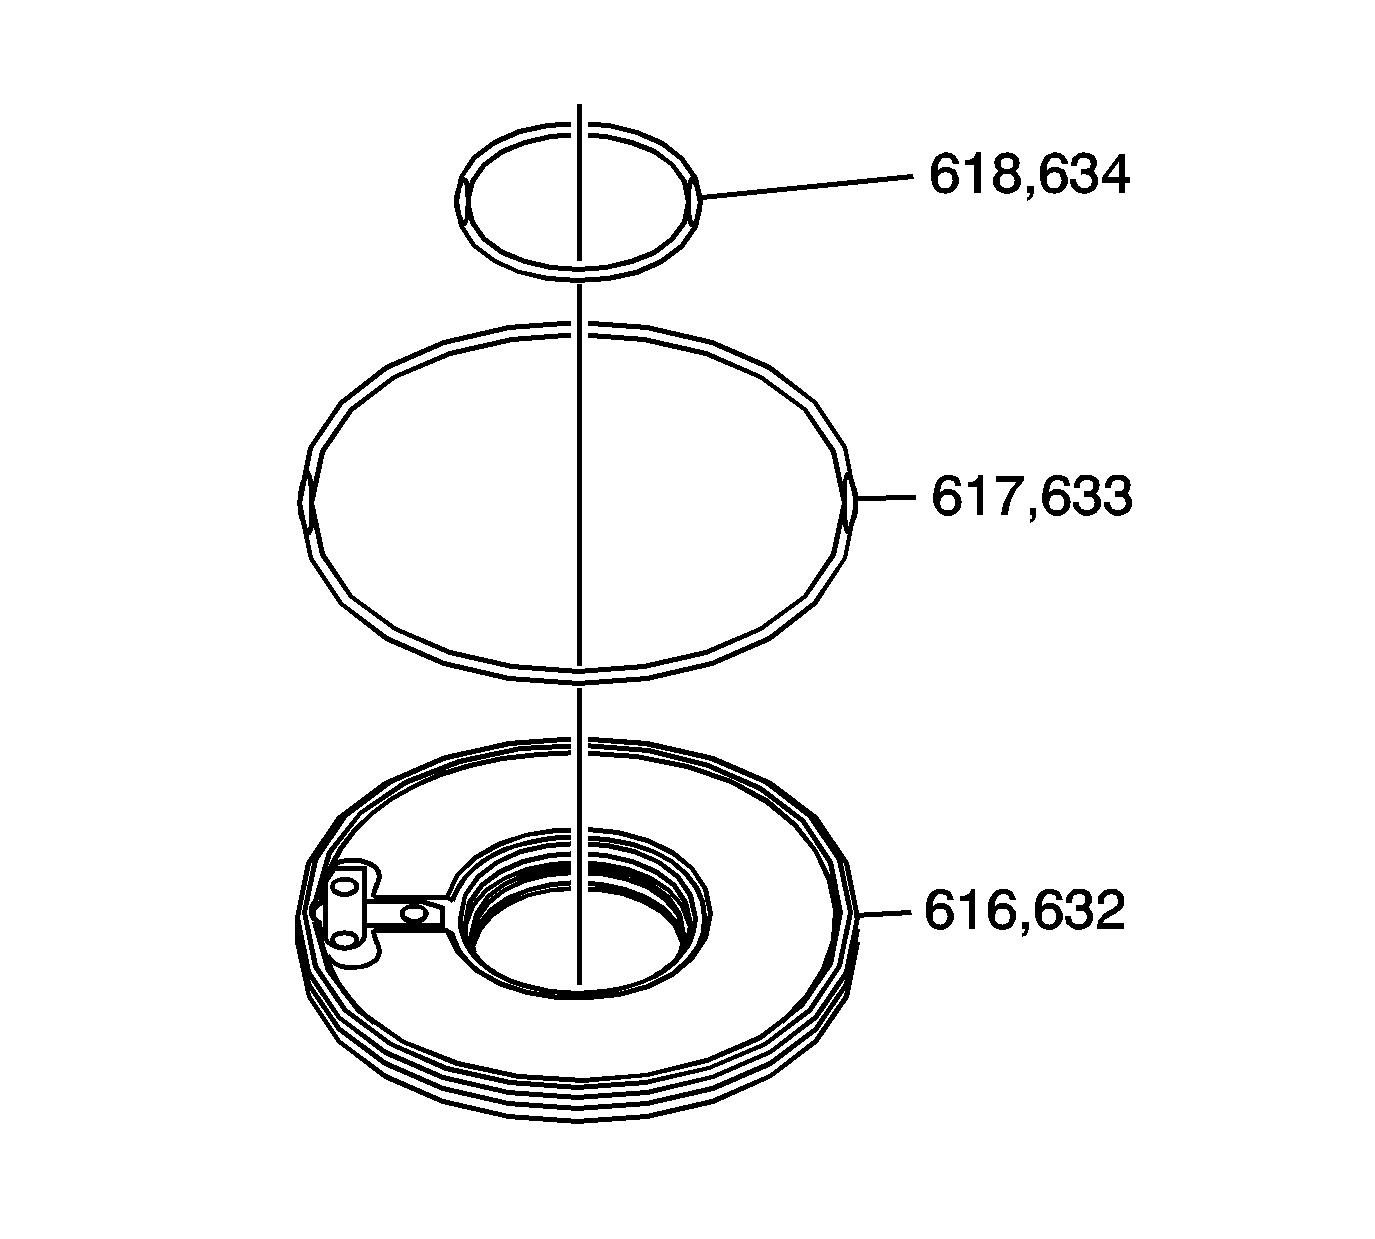
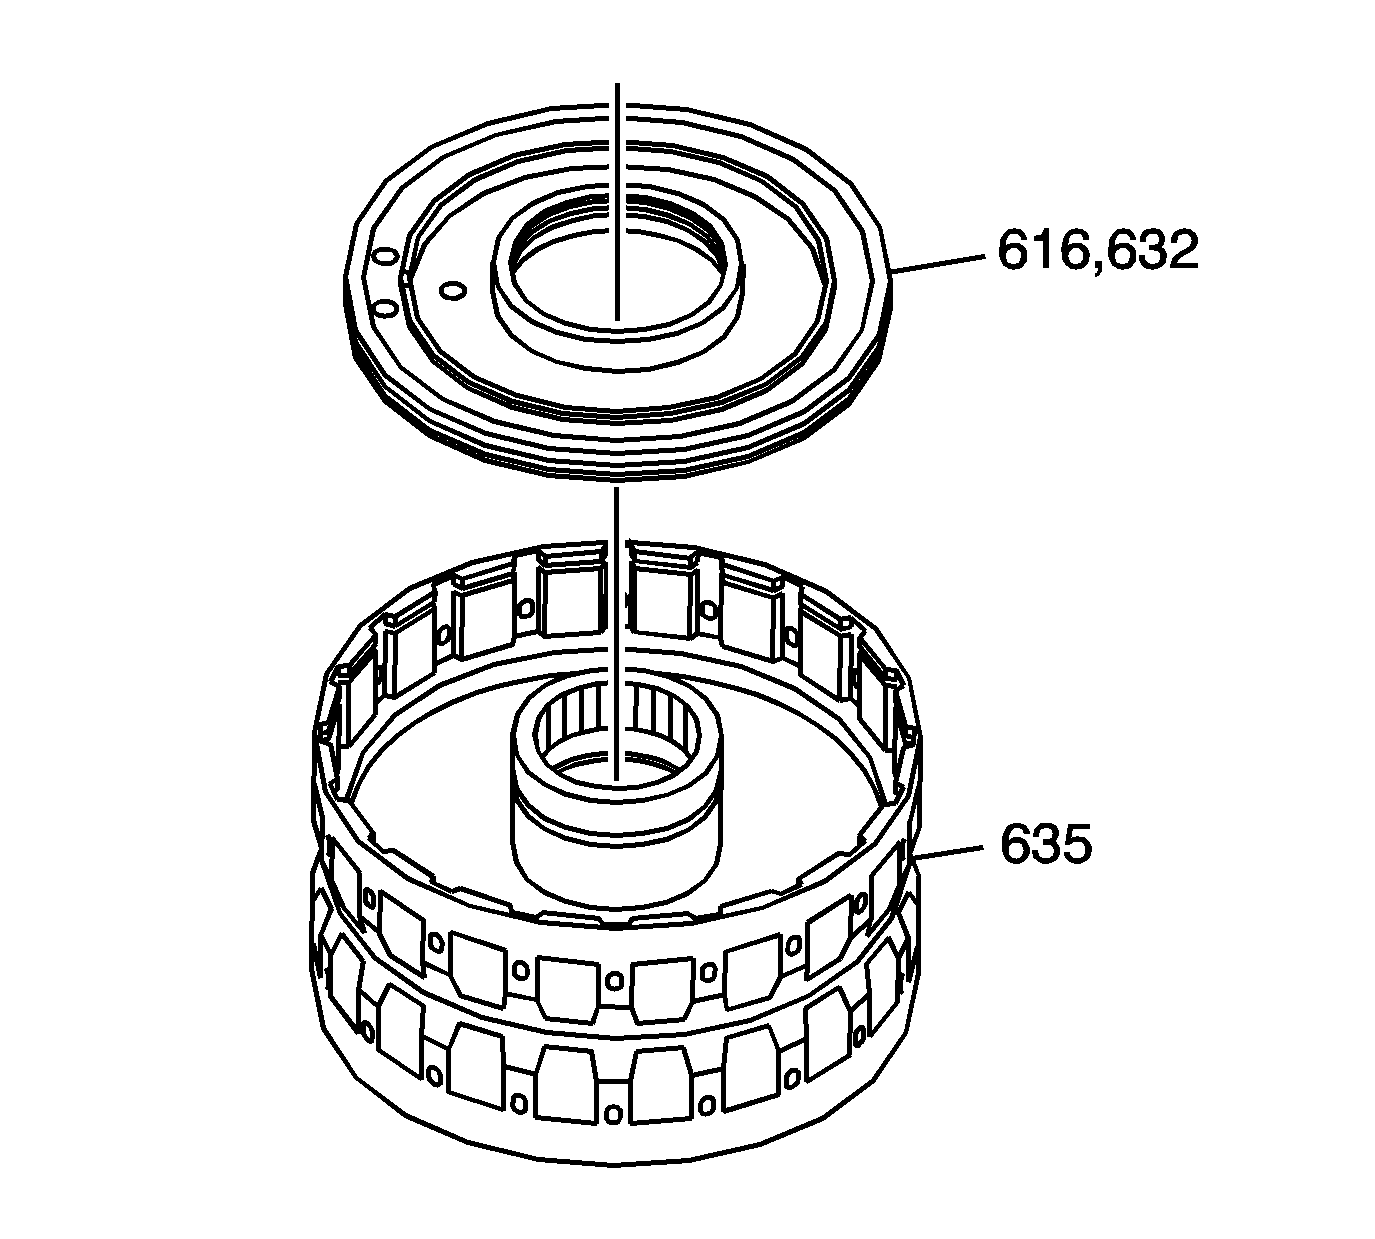
| • | Apply even hand pressure and rotate the clutch piston assembly. |
| • | Ensure proper seating. |
| • | Do not pinch the O-ring seal by installing the piston with excessive force. |
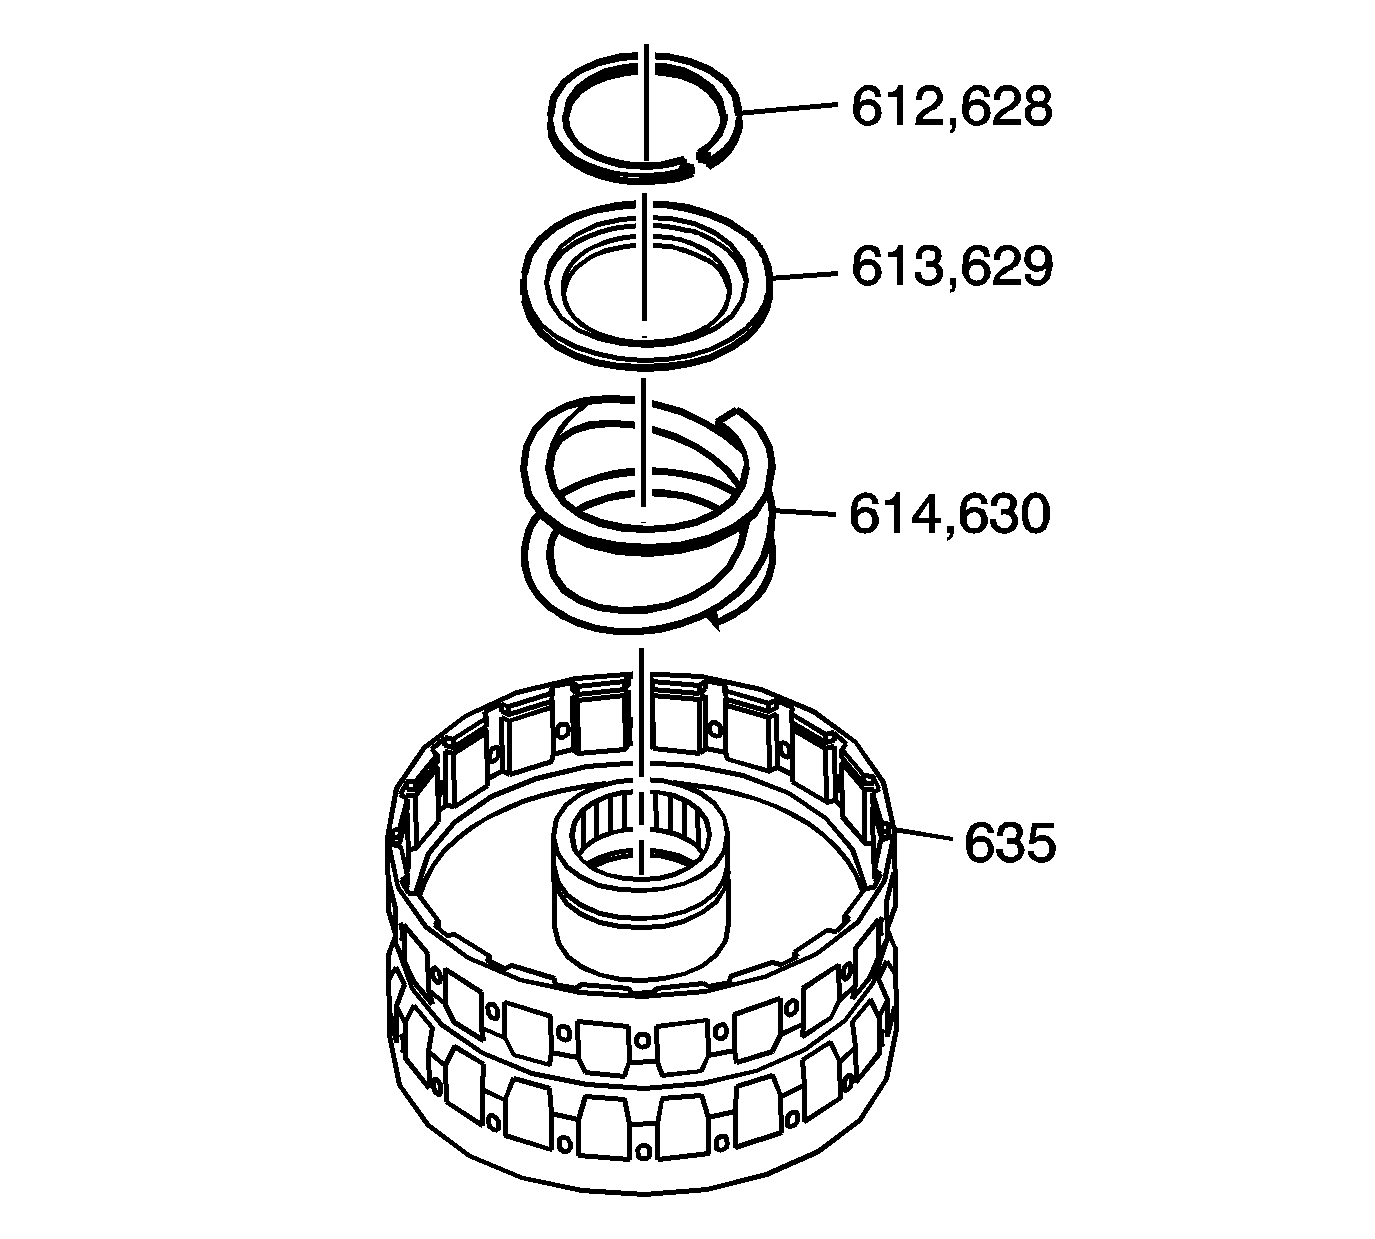
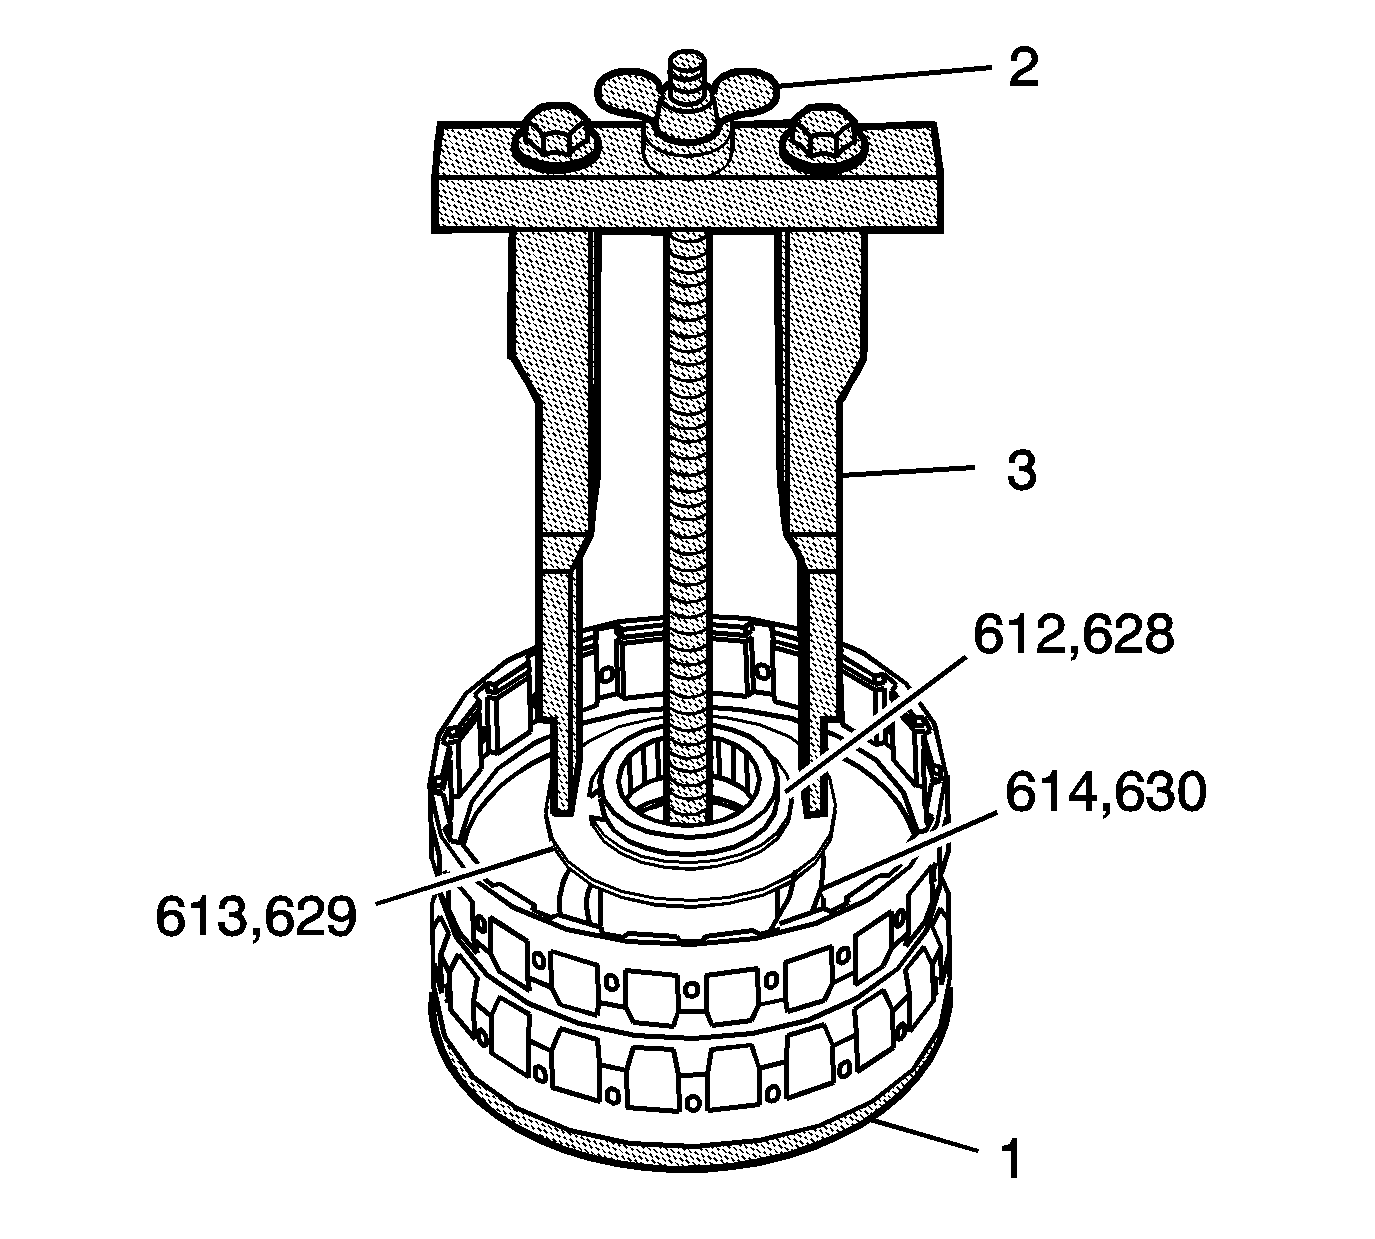
Important: Position the legs of the J 45124 on the spring retainer cap only where the spring is in contact with the cap.
| • | Adjust the legs of the J 45124 to have full contact with the clutch piston return spring retainer cap (613) or (629). |
| • | Ensure the legs remain in position where the spring retainer cap is in contact with the spring. |
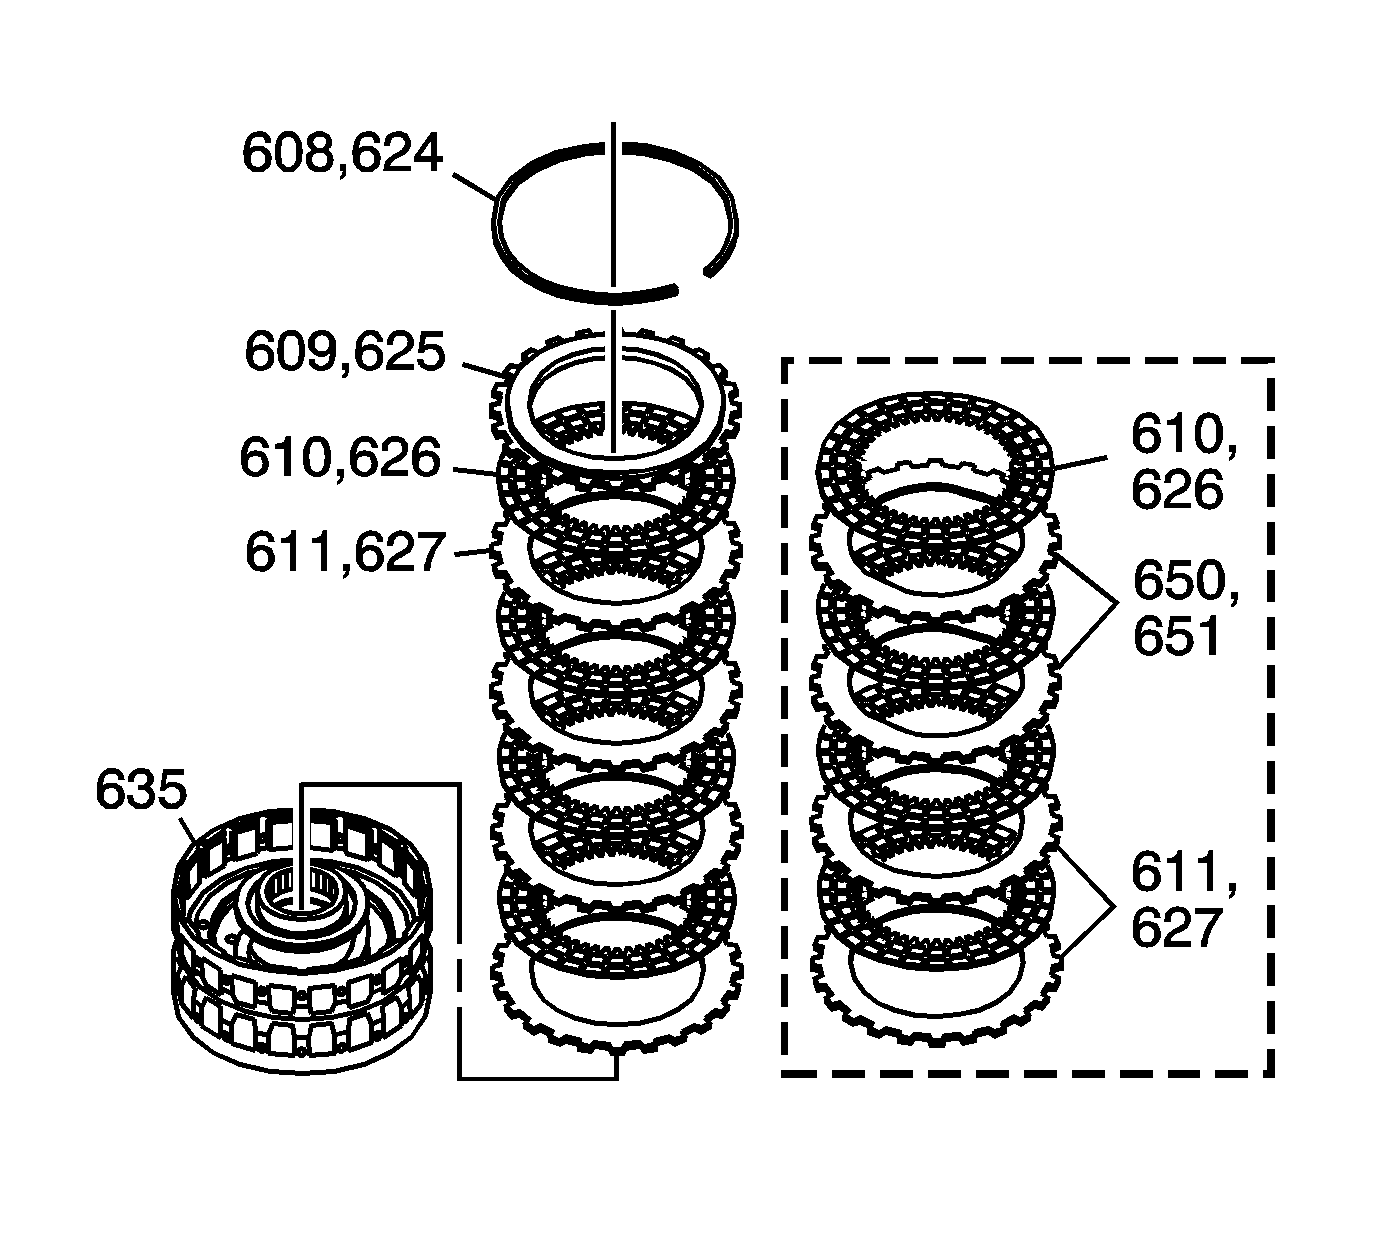
Important: There are 2 possible configurations for the 4th and 5th/reverse clutch assembly. Use the 2nd design when replacing the 4th and 5th/reverse clutch assembly.
4th Clutch
• 1st design: four 4th clutch steel flat plates (611) • 2nd design: two 4th clutch steel wave plates (650) and two 4th clutch steel flat plates (611) 5th/Reverse Clutch
• 1st design: four 5th/reverse clutch steel flat plates (627) • 2nd design: two 5th clutch steel wave plates (651) and two 5th clutch steel flat plates (627)
