For 1990-2009 cars only
Removal Procedure
- Remove the carpet retainer. Refer to Rear Carpet Retainer Replacement .
- Remove the lock pillar garnish molding. Refer to Lock Pillar Upper Garnish Molding Replacement .
- Remove the rear upper trim molding. Refer to Rear Window Upper Molding Replacement .
- Remove the finish molding from the rear upper trim.
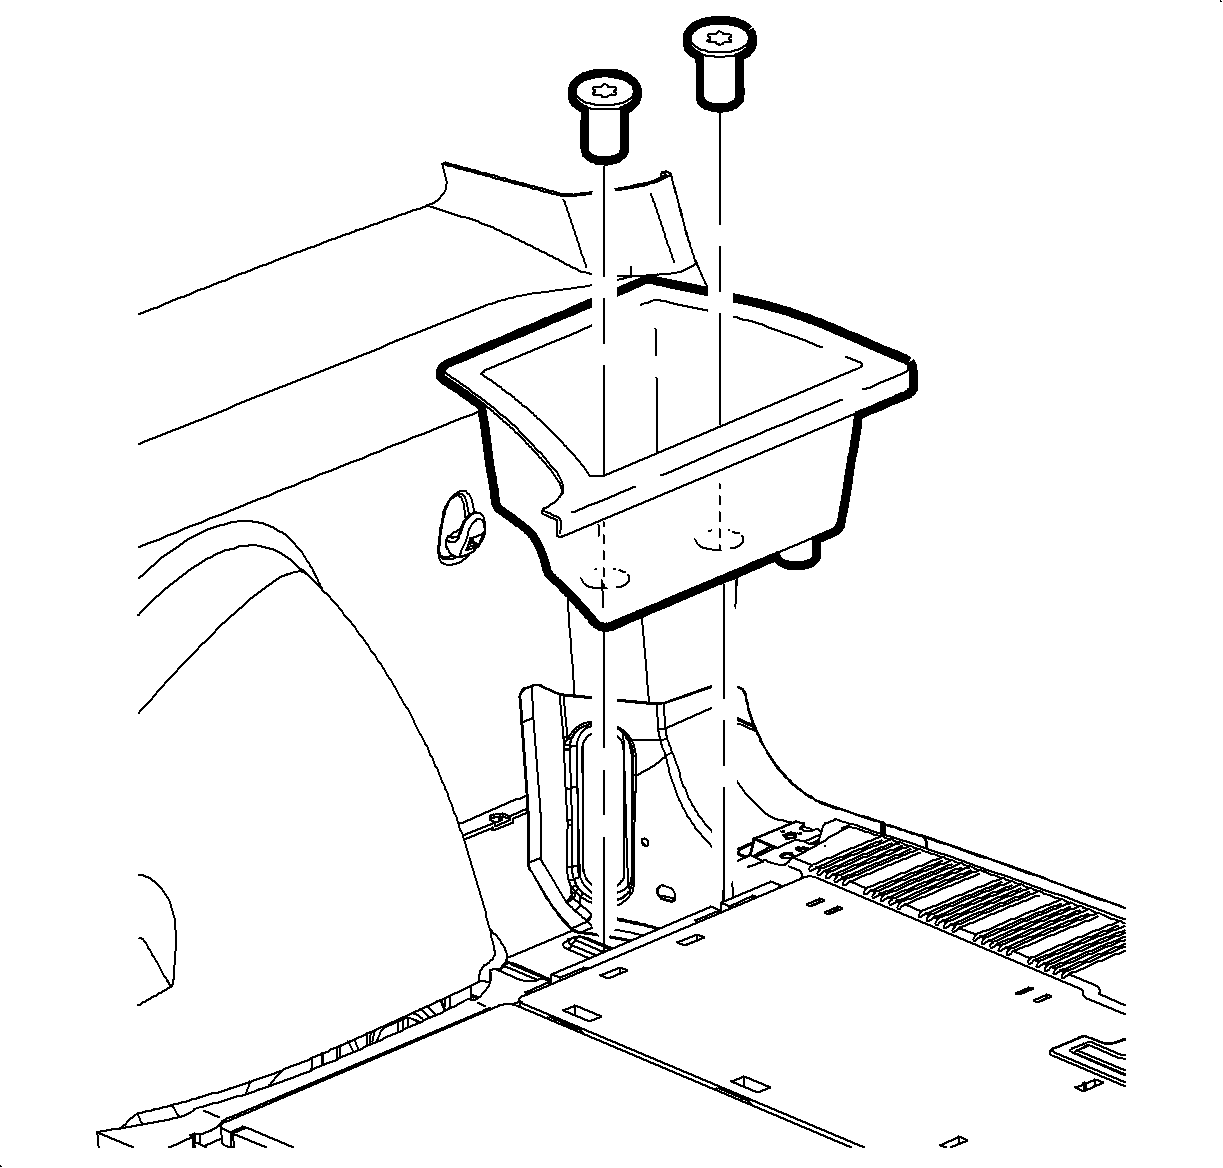
- On the driver side, remove the fasteners from the load floor storage bin.
- On the driver side, remove the load floor storage bin.
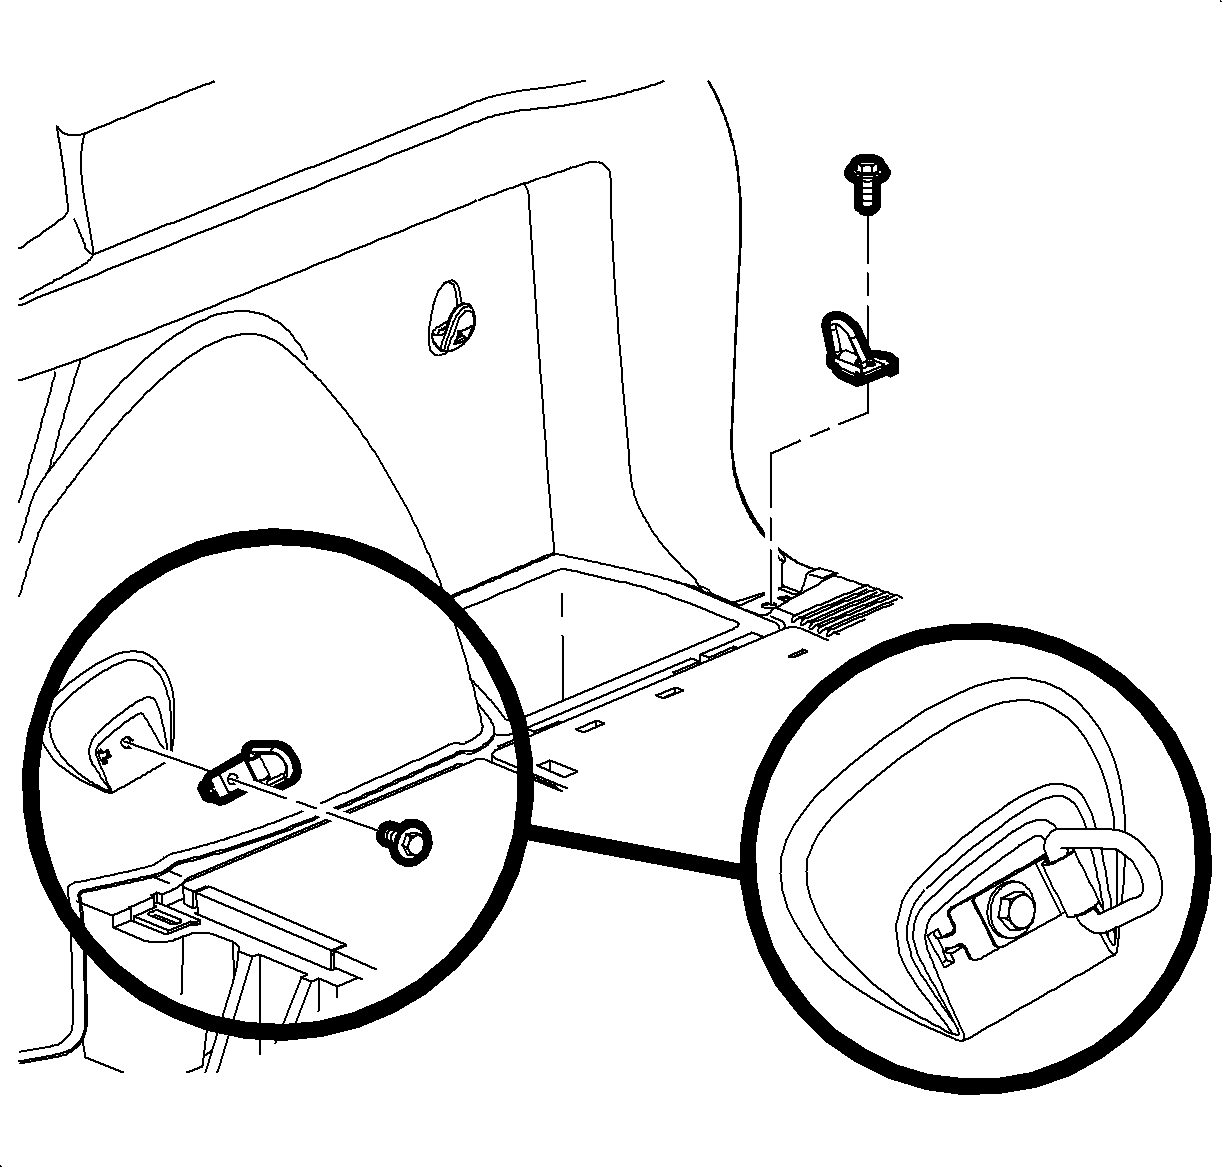
- Remove the cargo hooks.
- On the driver side, disconnect the accessory wire harness.
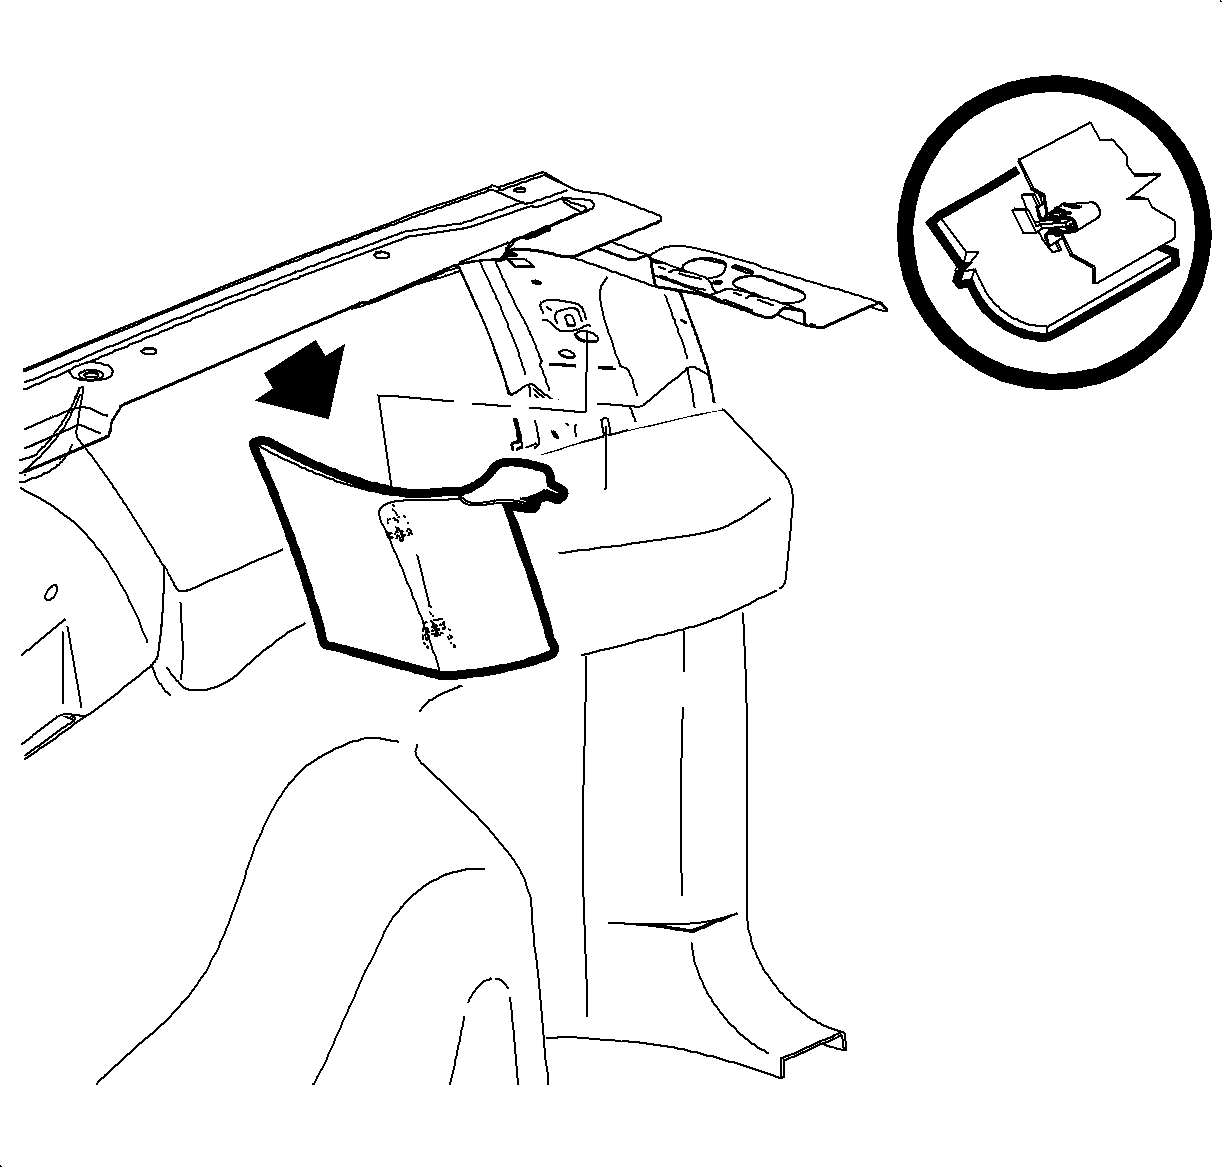
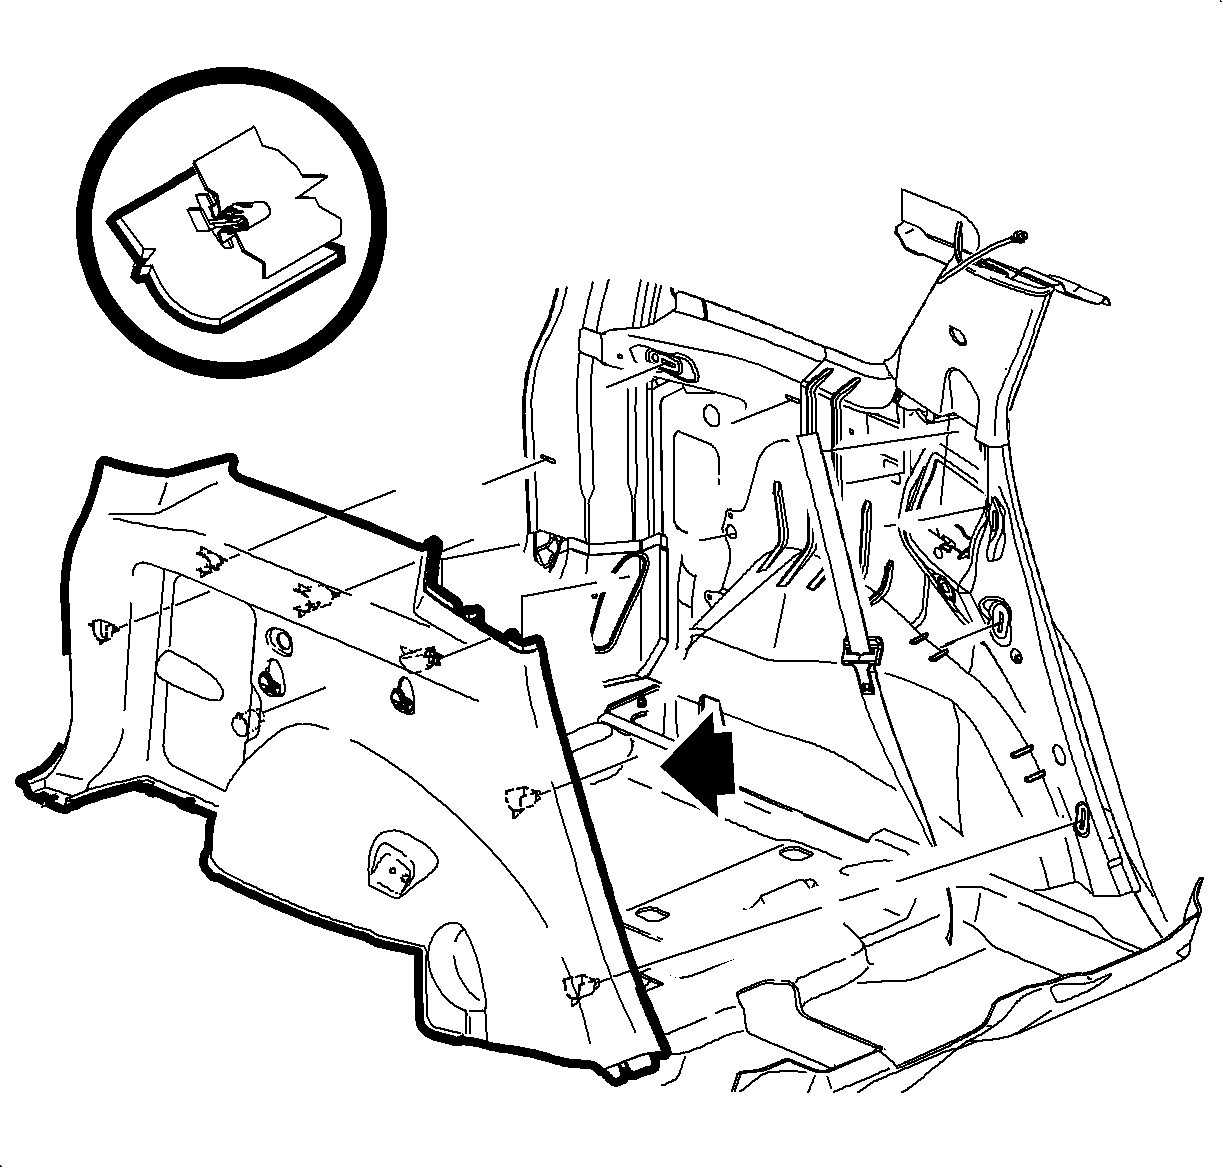
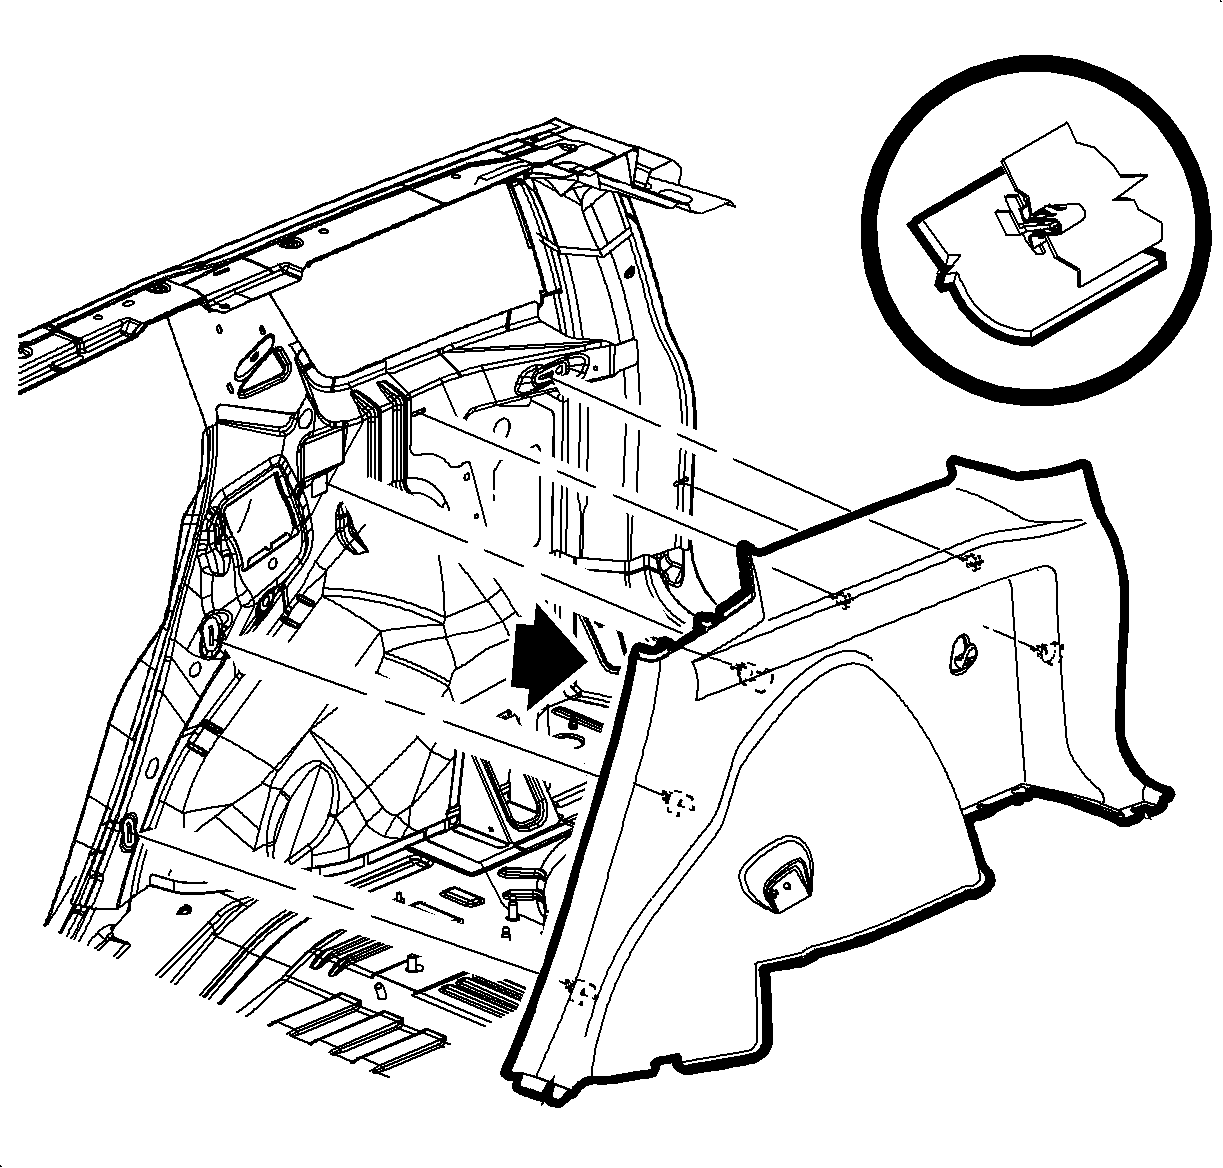
- Pull at the clip locations to disengage the side trim panel from the vehicle.
Installation Procedure
- Position the rear side trim panel to the vehicle. Place the trim under the seat belt webbing.
- On the driver side, connect the accessory wire harness.
- Push at the clip locations to secure the panel to the vehicle.
- Secure the weatherstrip seal over the trim edge.
- Install the lock pillar garnish molding. Refer to Lock Pillar Upper Garnish Molding Replacement .
- Install the finish molding to the rear upper trim.
- Install the rear upper trim molding. Refer to Rear Window Upper Molding Replacement .
- Install the carpet retainer. Refer to Rear Carpet Retainer Replacement .
- Install the load floor storage bins.
- Install the cargo hooks.

Notice: Refer to Fastener Notice in the Preface section.

Tighten
Tighten the fasteners to 2.5 N·m (22 lb in).

Tighten
Tighten the fasteners to 25 N·m (18 lb ft).
