For 1990-2009 cars only
Removal Procedure
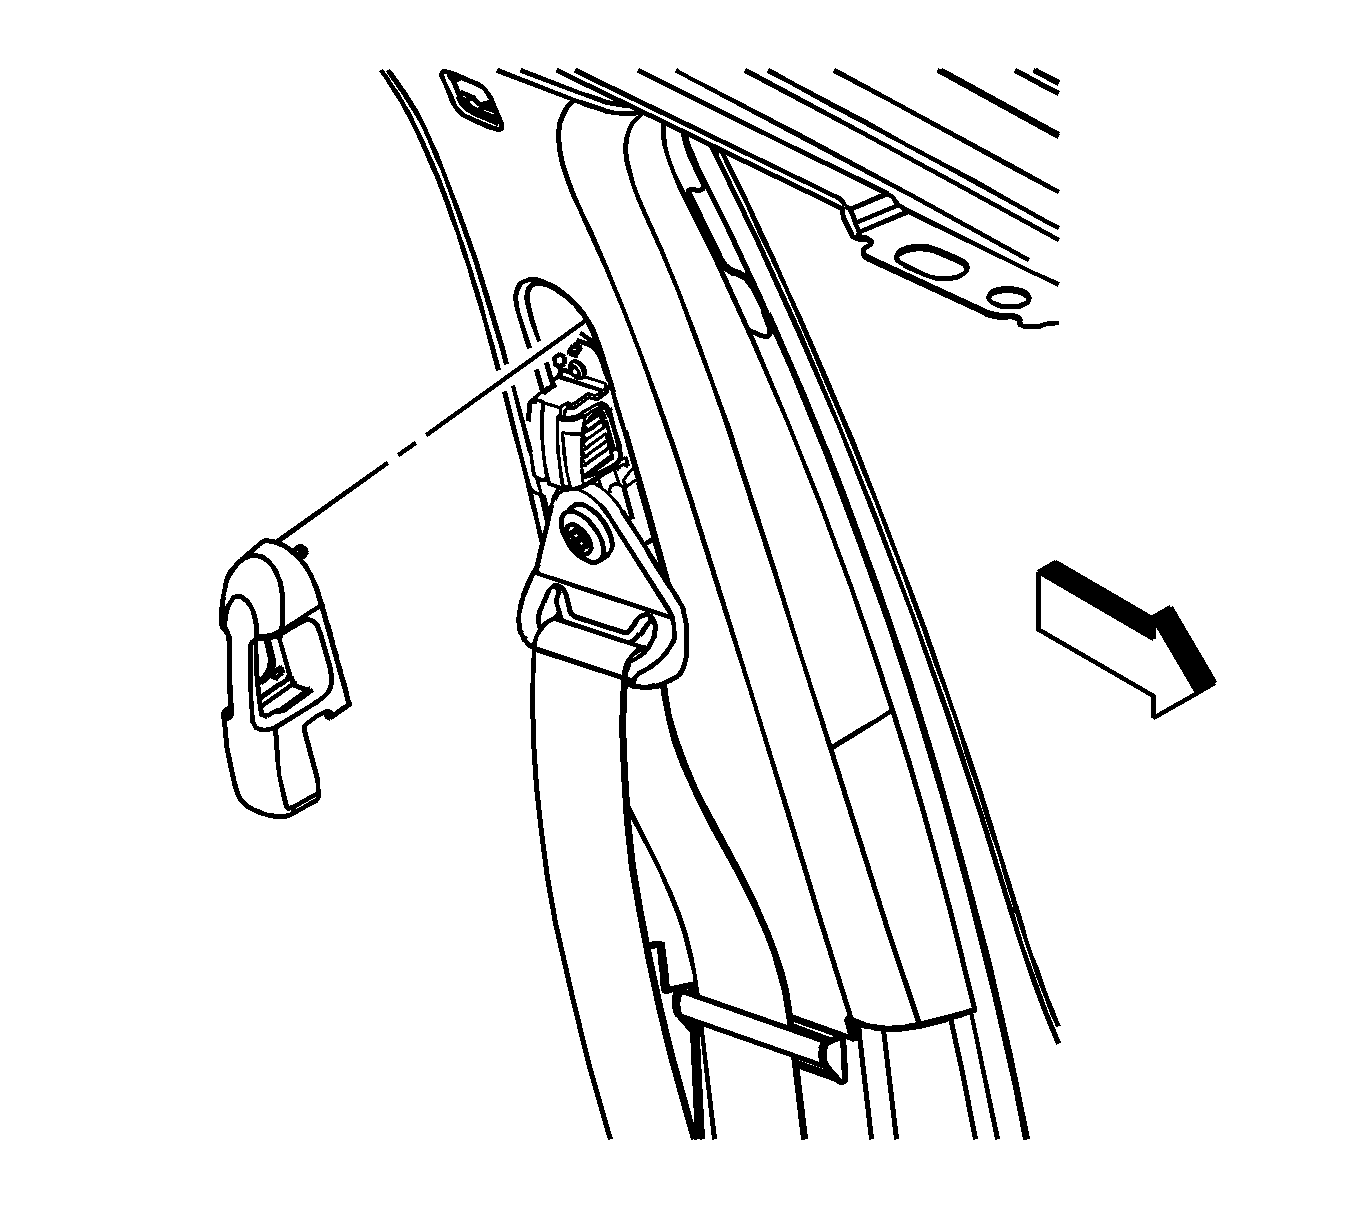
- Unsnap the height adjuster cover.
- Remove the D-ring bolt.
- Remove the shoulder belt from the center pillar.
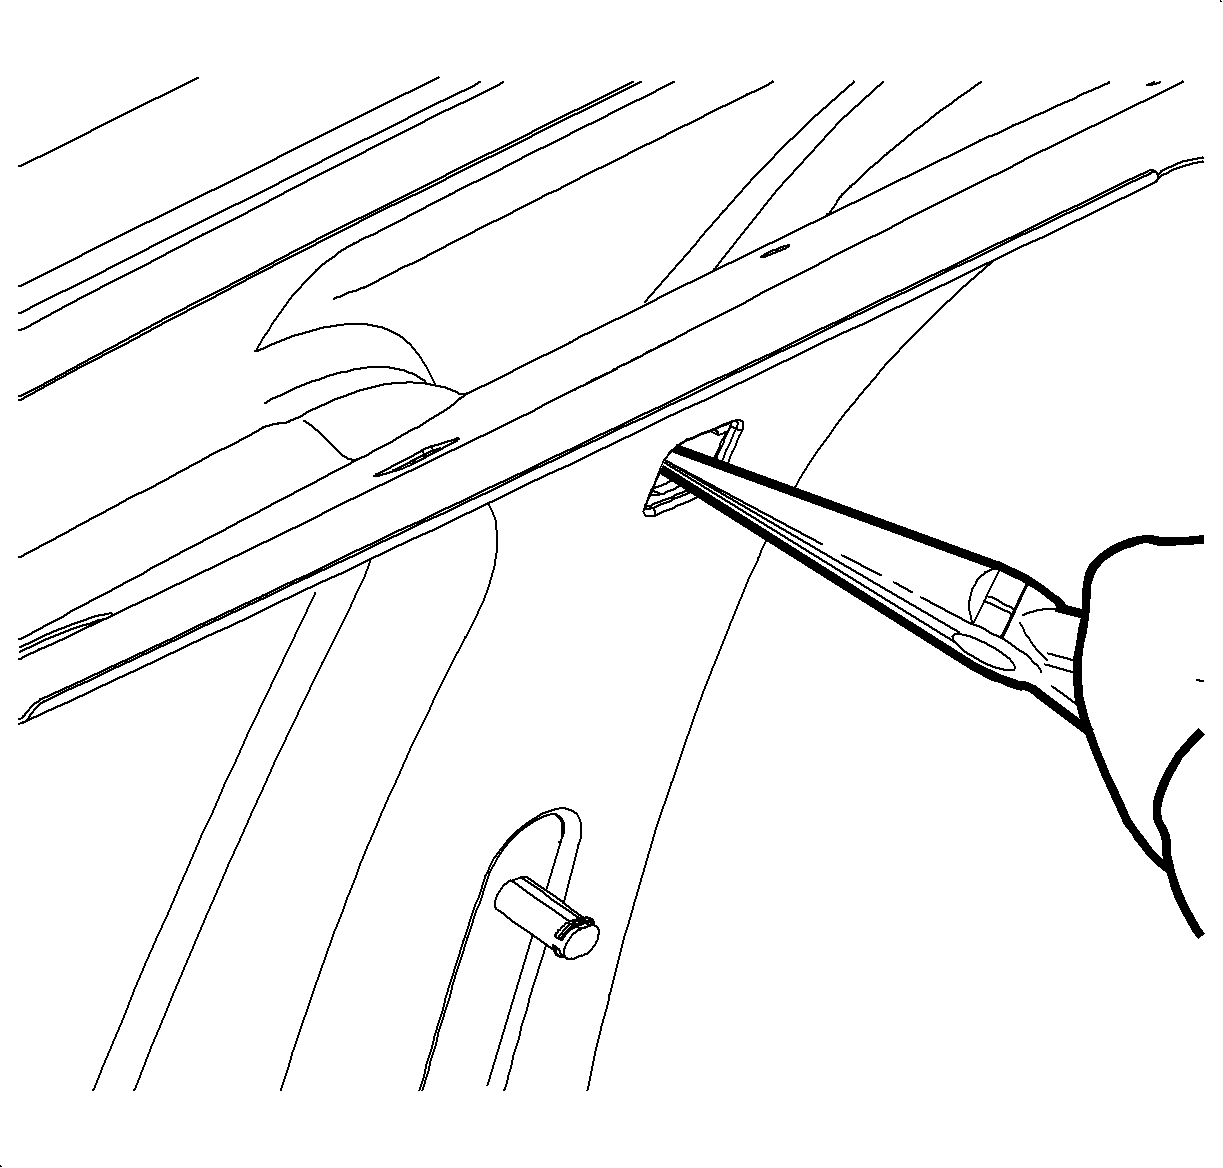
- Remove the fastener cover from the center pillar garnish molding by inserting a small flat-bladed tool in the gap at the forward vertical side of the cover.
- Remove the center pin of the garnish molding fastener by using needle-nose pliers.
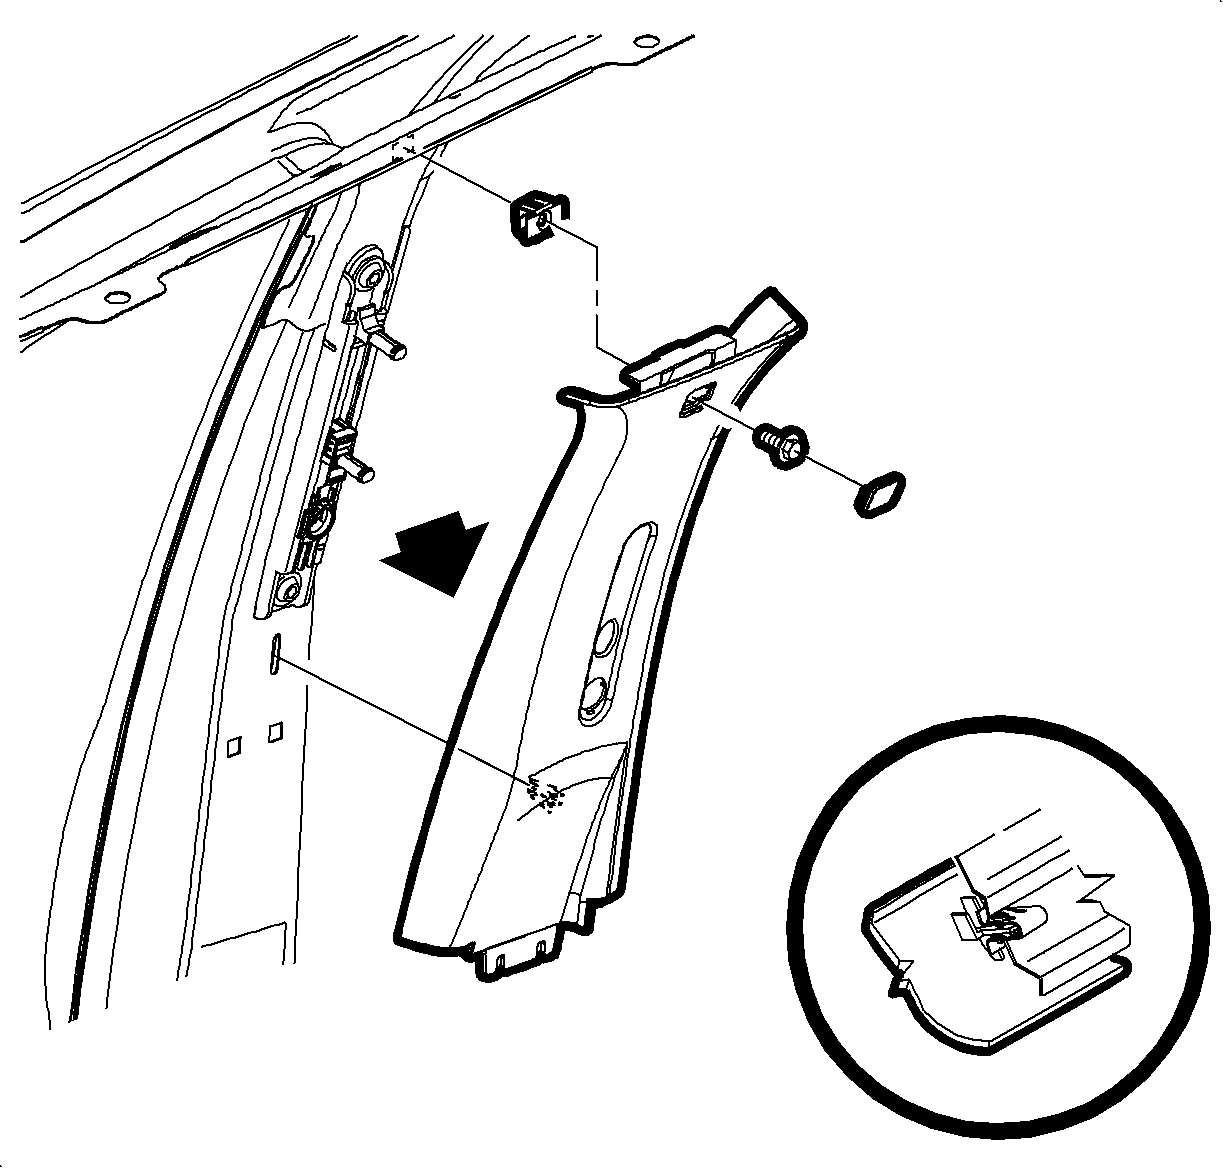
- Starting at the top, gently pull on the garnish molding to disengage the attaching clips.
- Remove the garnish molding by sliding the molding up and disengaging the inside clips from the lower garnish molding.


Installation Procedure
- Position the center pillar garnish molding over the lower garnish molding with the bottom tabs behind the lower molding.
- Gently push at the clip locations to install the garnish molding.
- Insert the weatherstripping over the trim edge.
- Install the center pin of the garnish molding fastener.
- Install the fastener cover to the garnish molding.
- Install the shoulder belt assembly and fasteners.
- Press on the shoulder belt height adjuster cover until the cover snaps closed.
- Ensure proper operation of the seat belt.

Notice: Refer to Fastener Notice in the Preface section.
Tighten
Tighten the fasteners to 50 N·m (37 lb ft).
