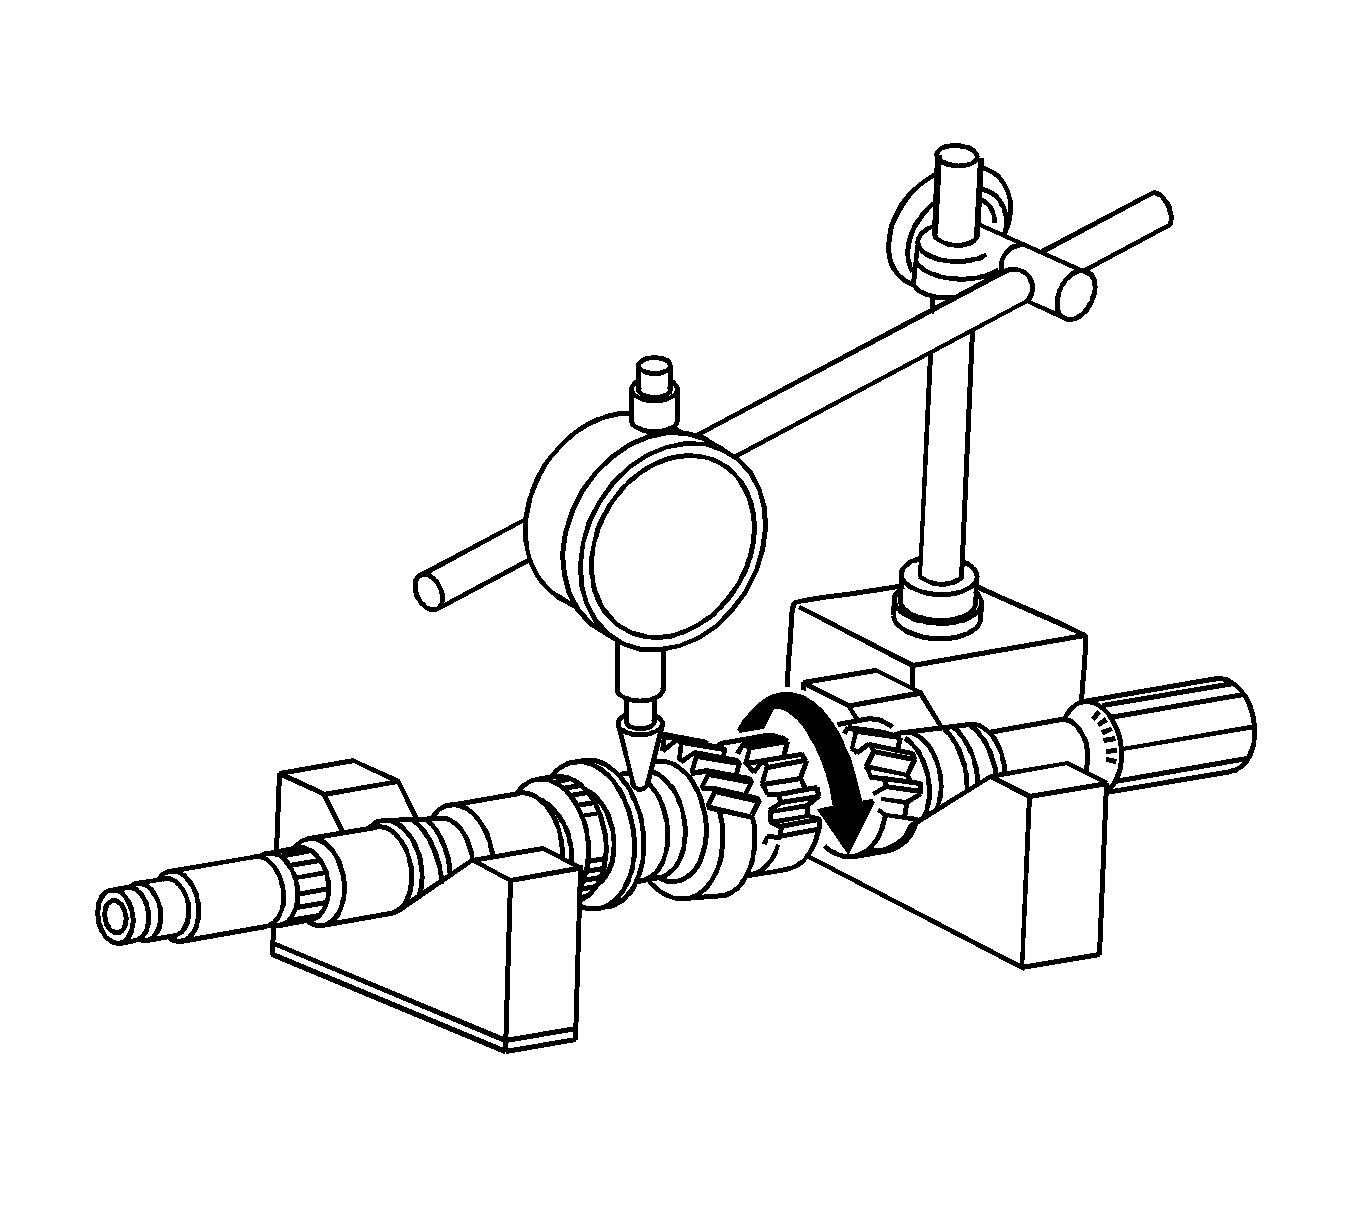
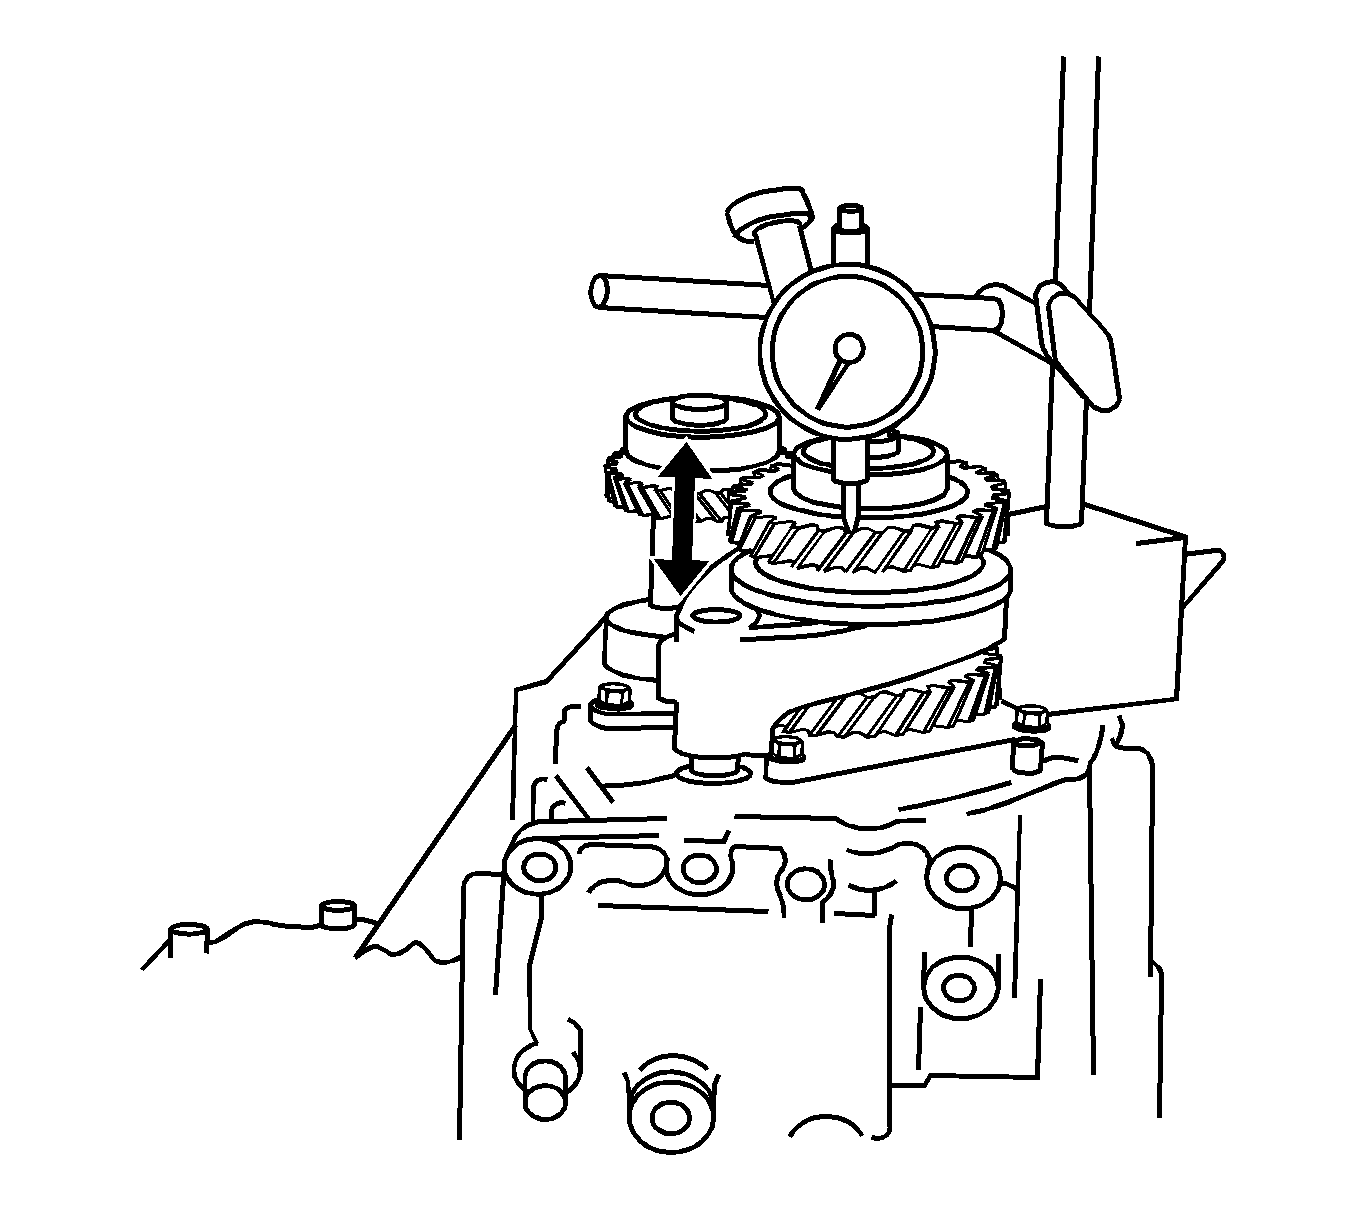
- Using a dial indicator, check the output shaft journals for runout. Maximum runout is 0.03 mm (0.0012 in).
- If the runout exceeds the maximum, replace the output shaft.
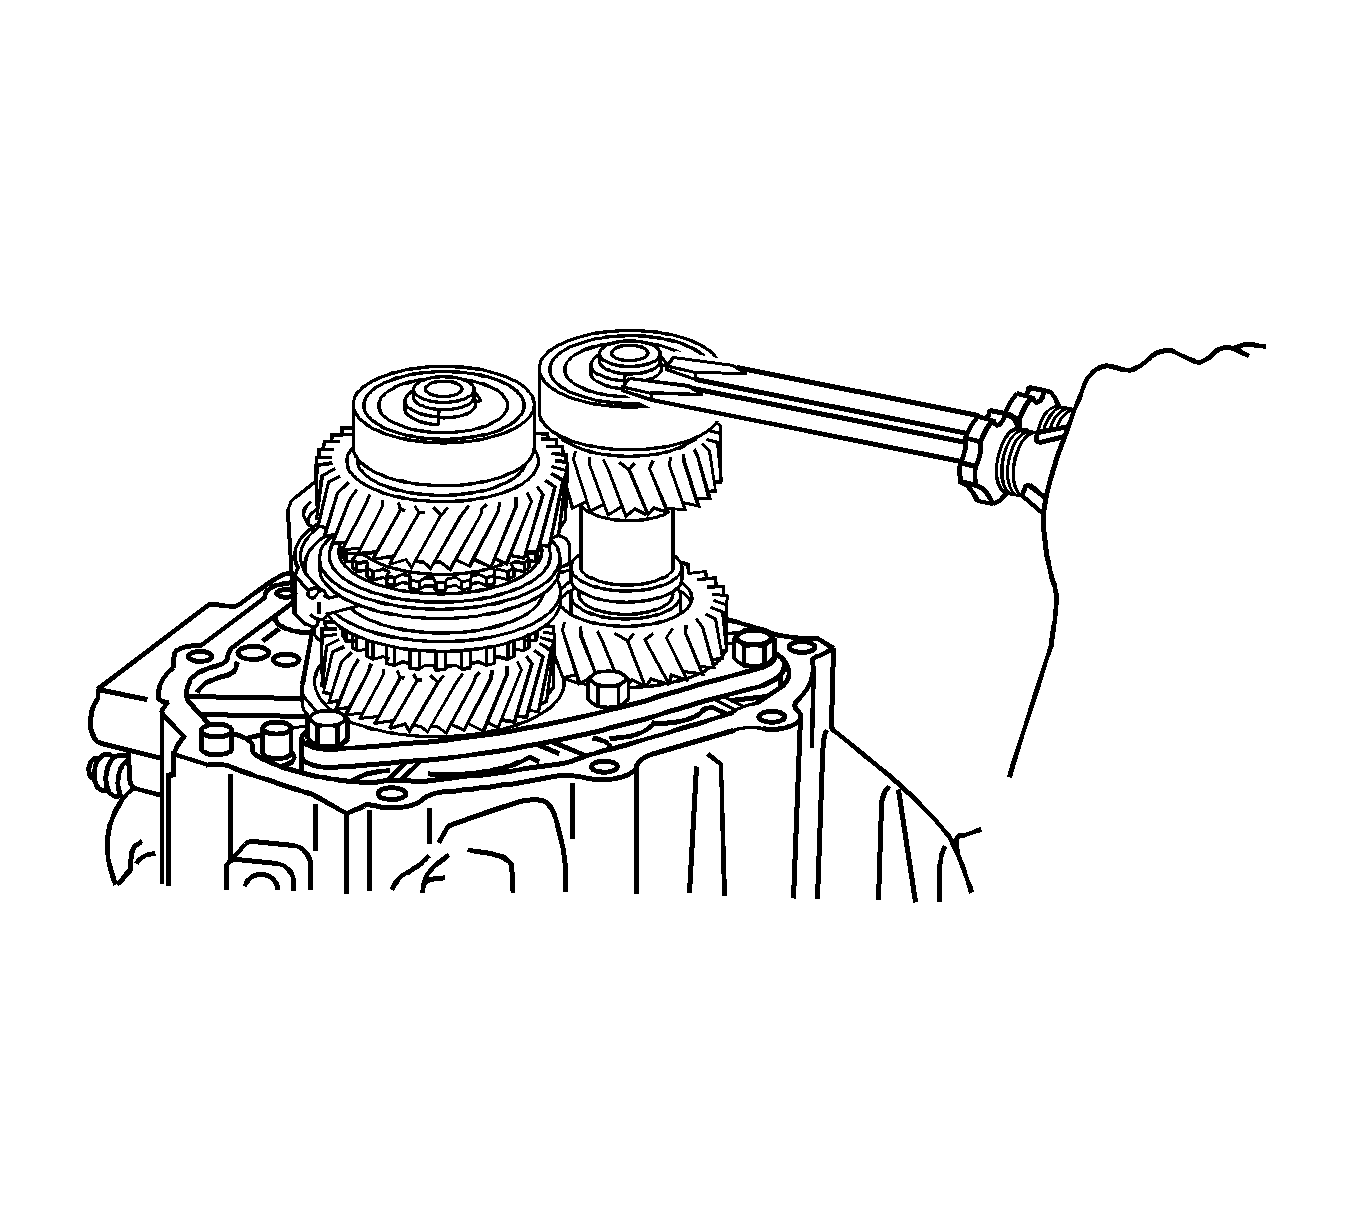
- Using a micrometer, measure the outer diameter of the input shaft journal surfaces.
- If the out diameter is less than the minimum, replace the output shaft.
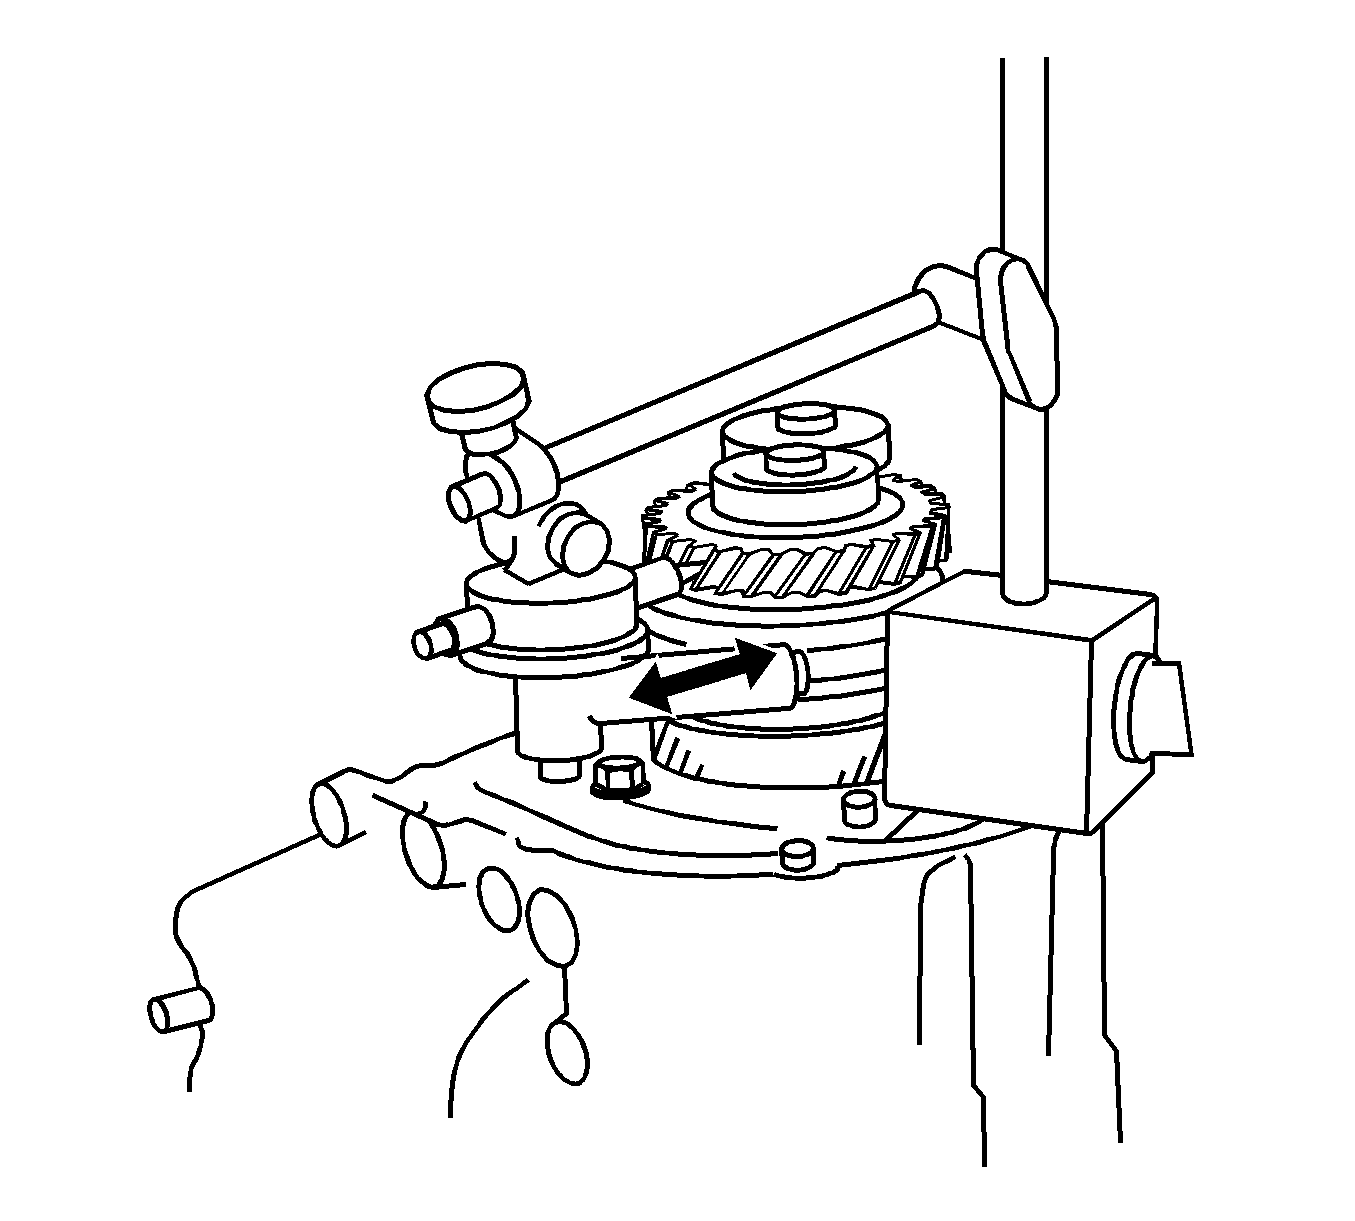
- Using a feeler gage, measure the clearance between the hub sleeve and the gear shift fork. Maximum clearance is 0.35 mm (0.014 in). If the clearance exceeds the maximum, replace the gear shift fork or hub sleeve.
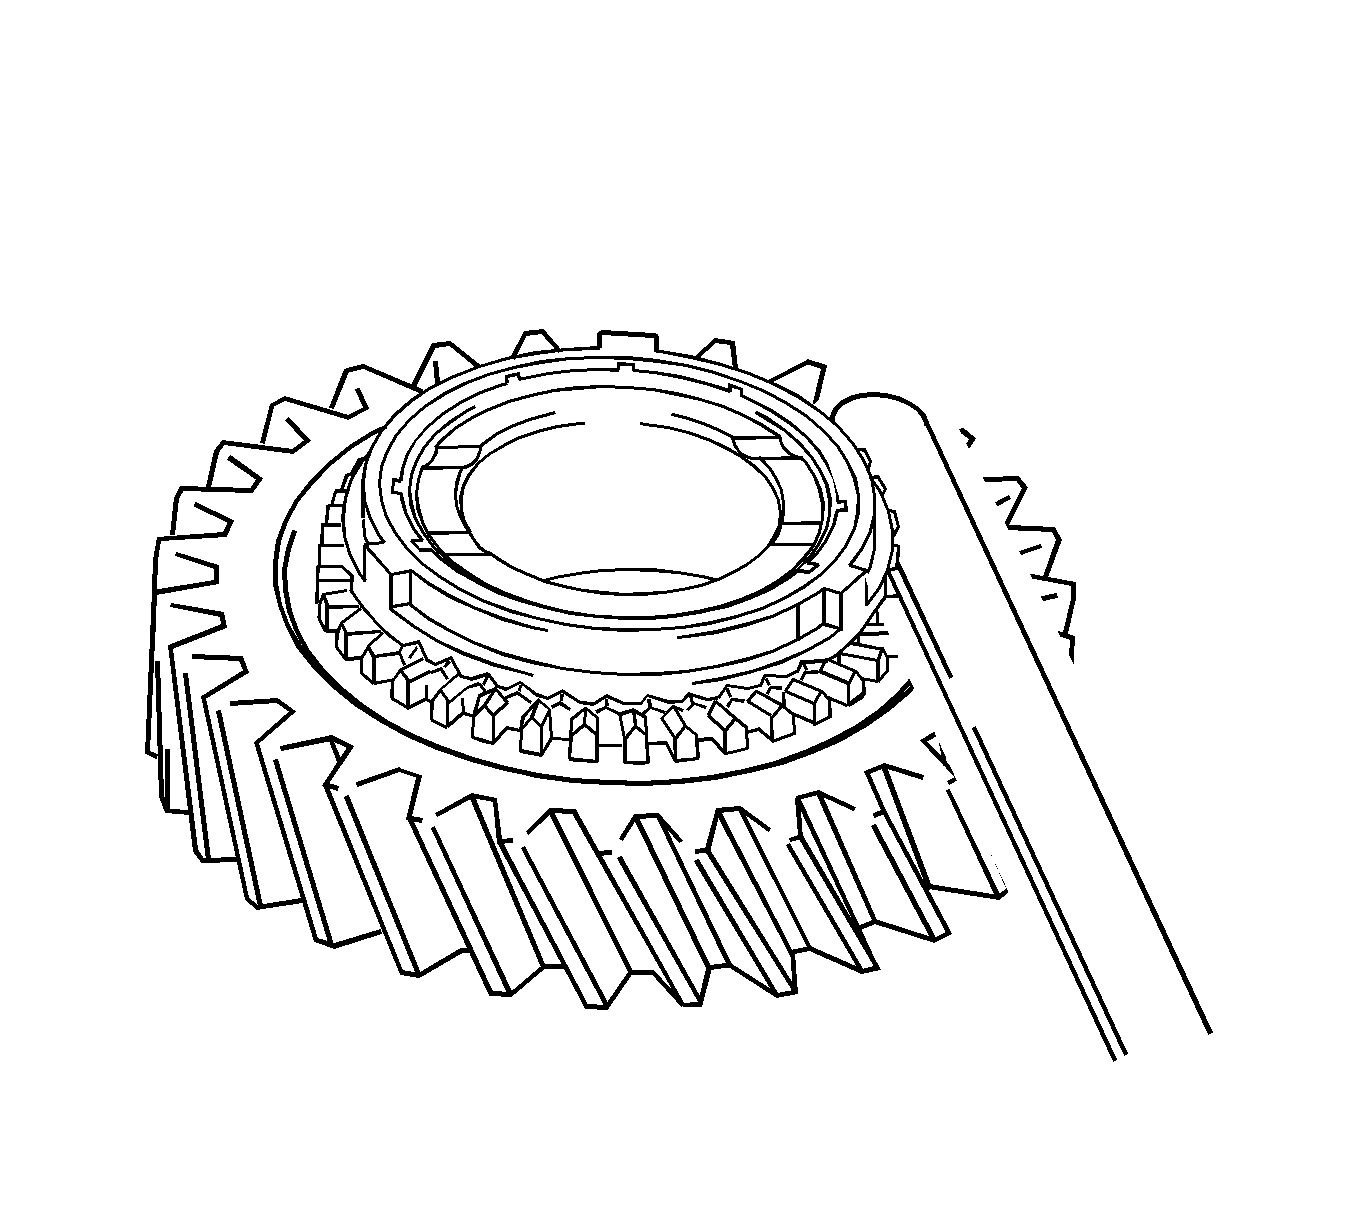
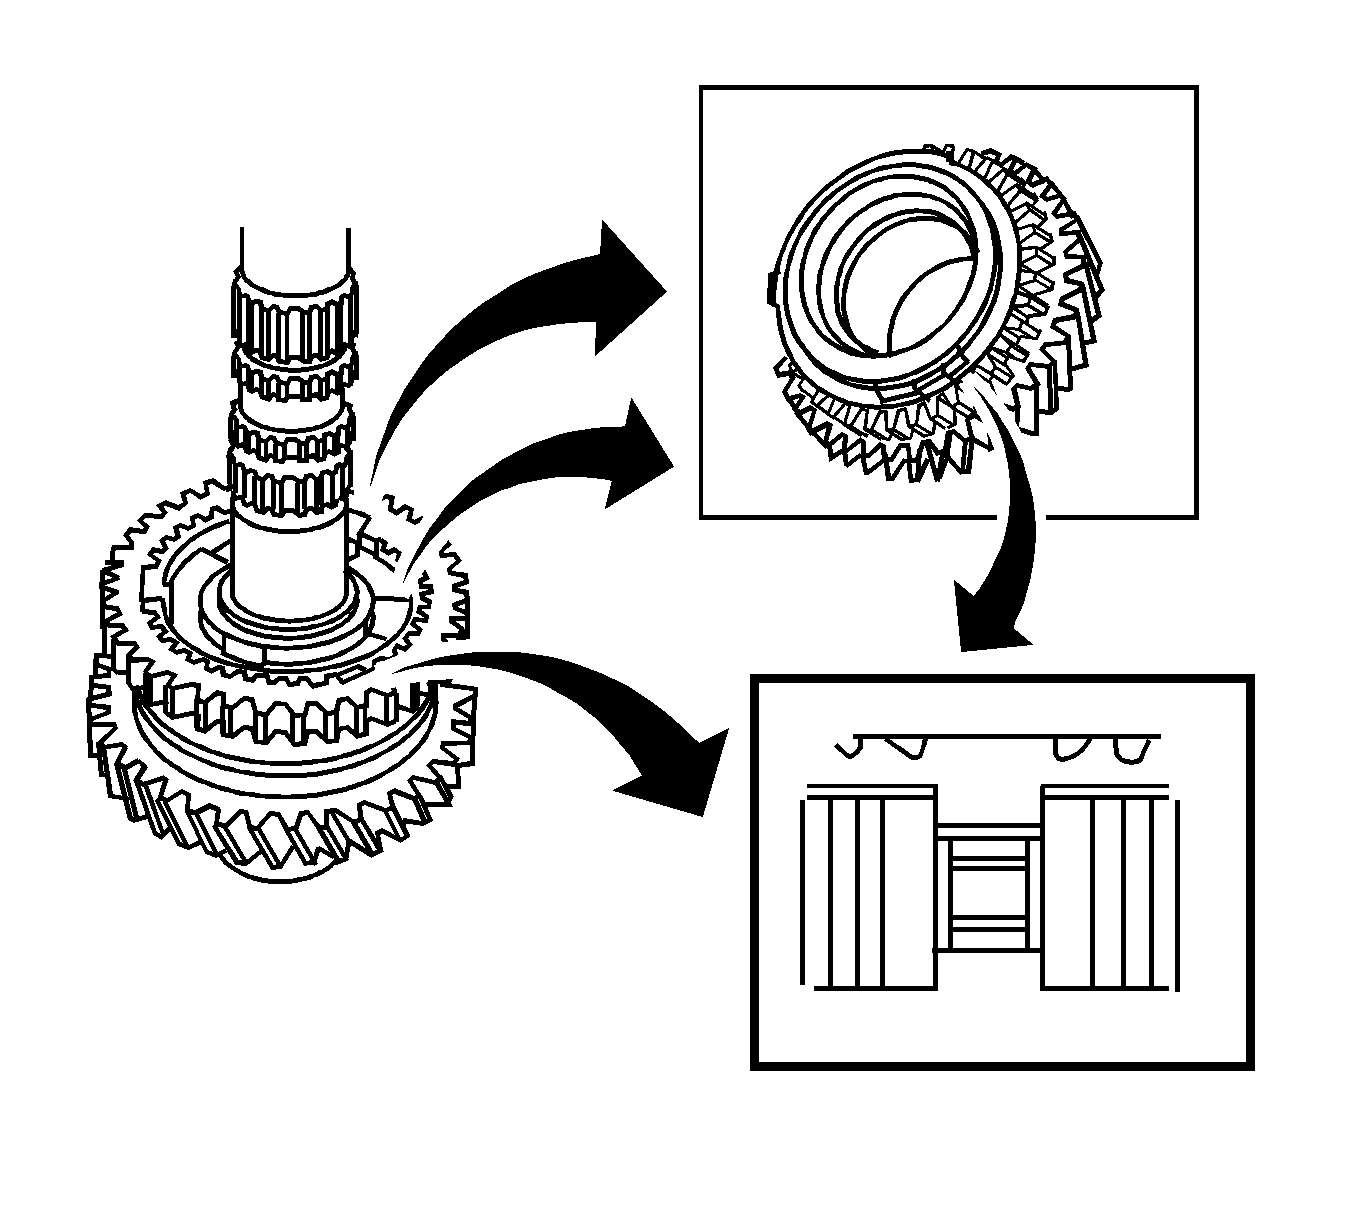
- Using a feeler gage, measure the clearance between the synchronizer ring and the gear spline end. Minimum clearance is 0.70 mm (0.0276 in). If the clearance is less than the minimum, replace the synchronizer ring.
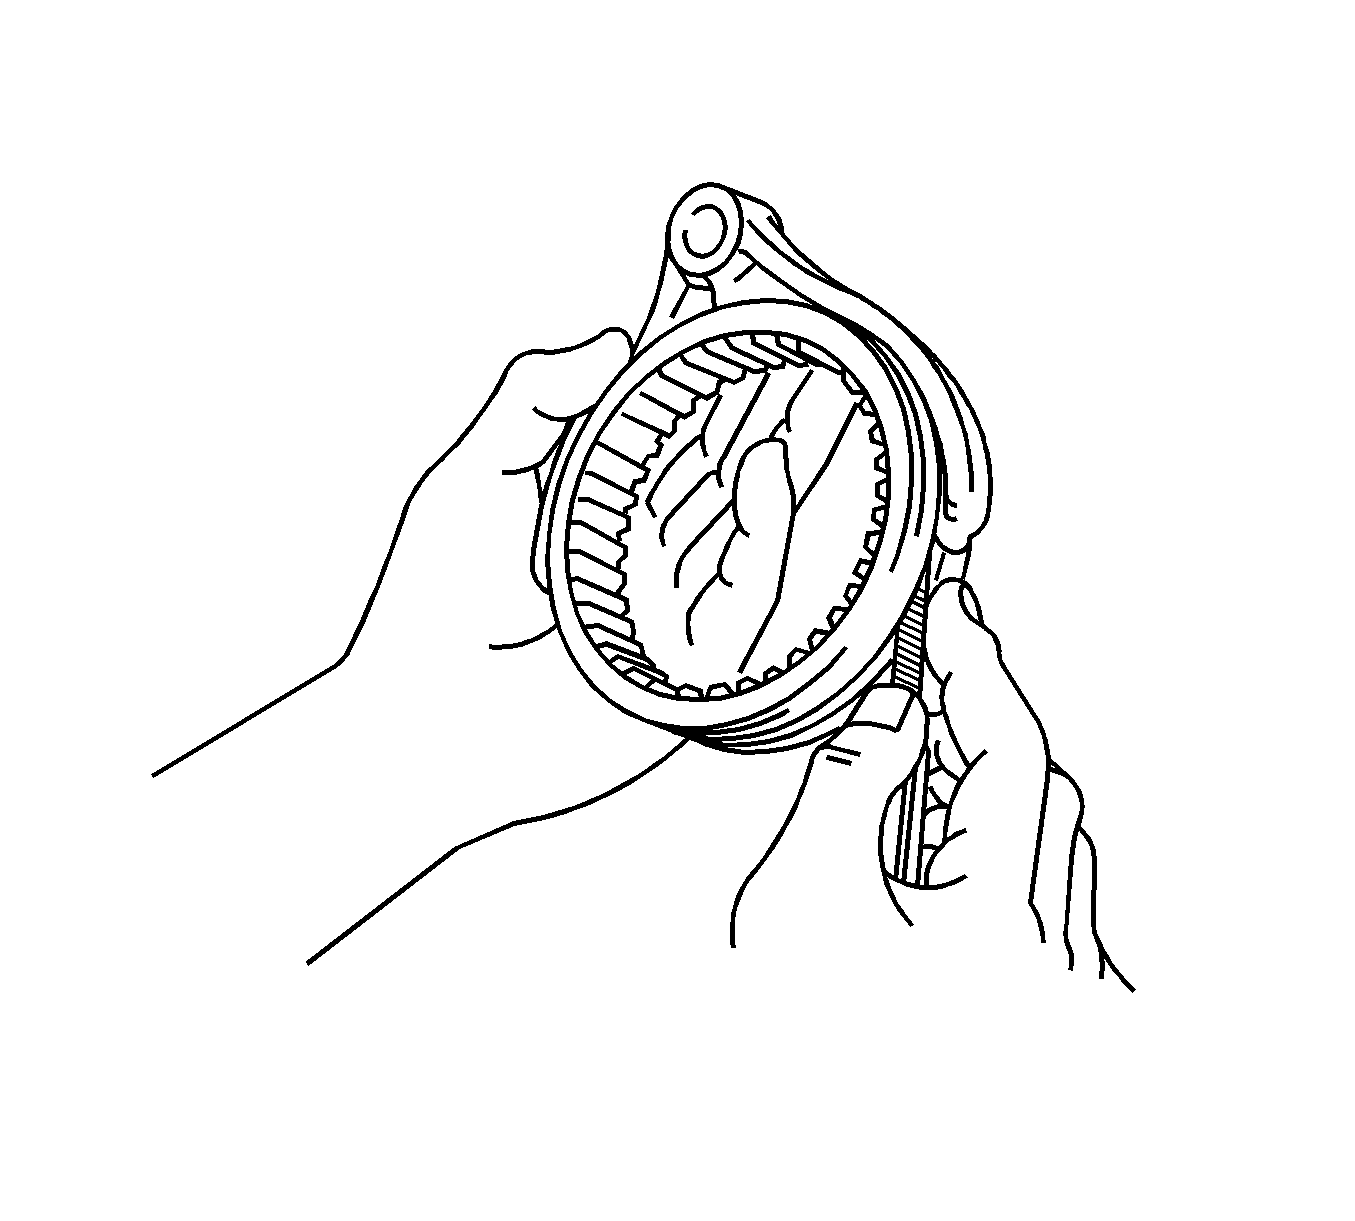
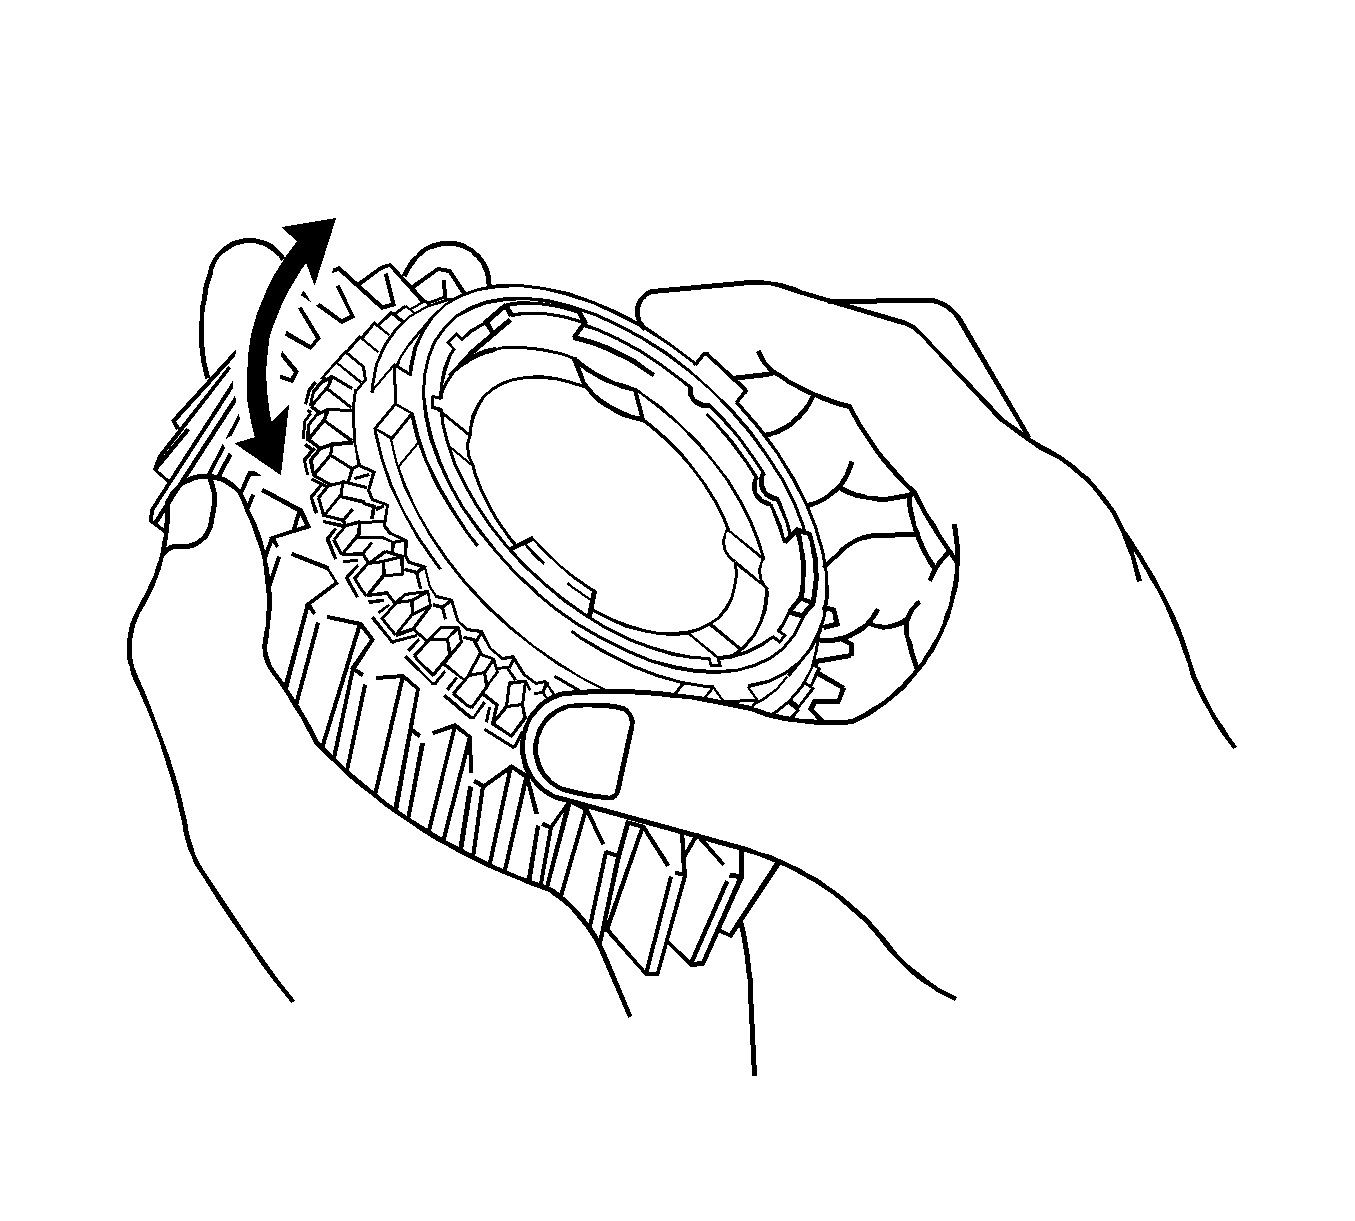
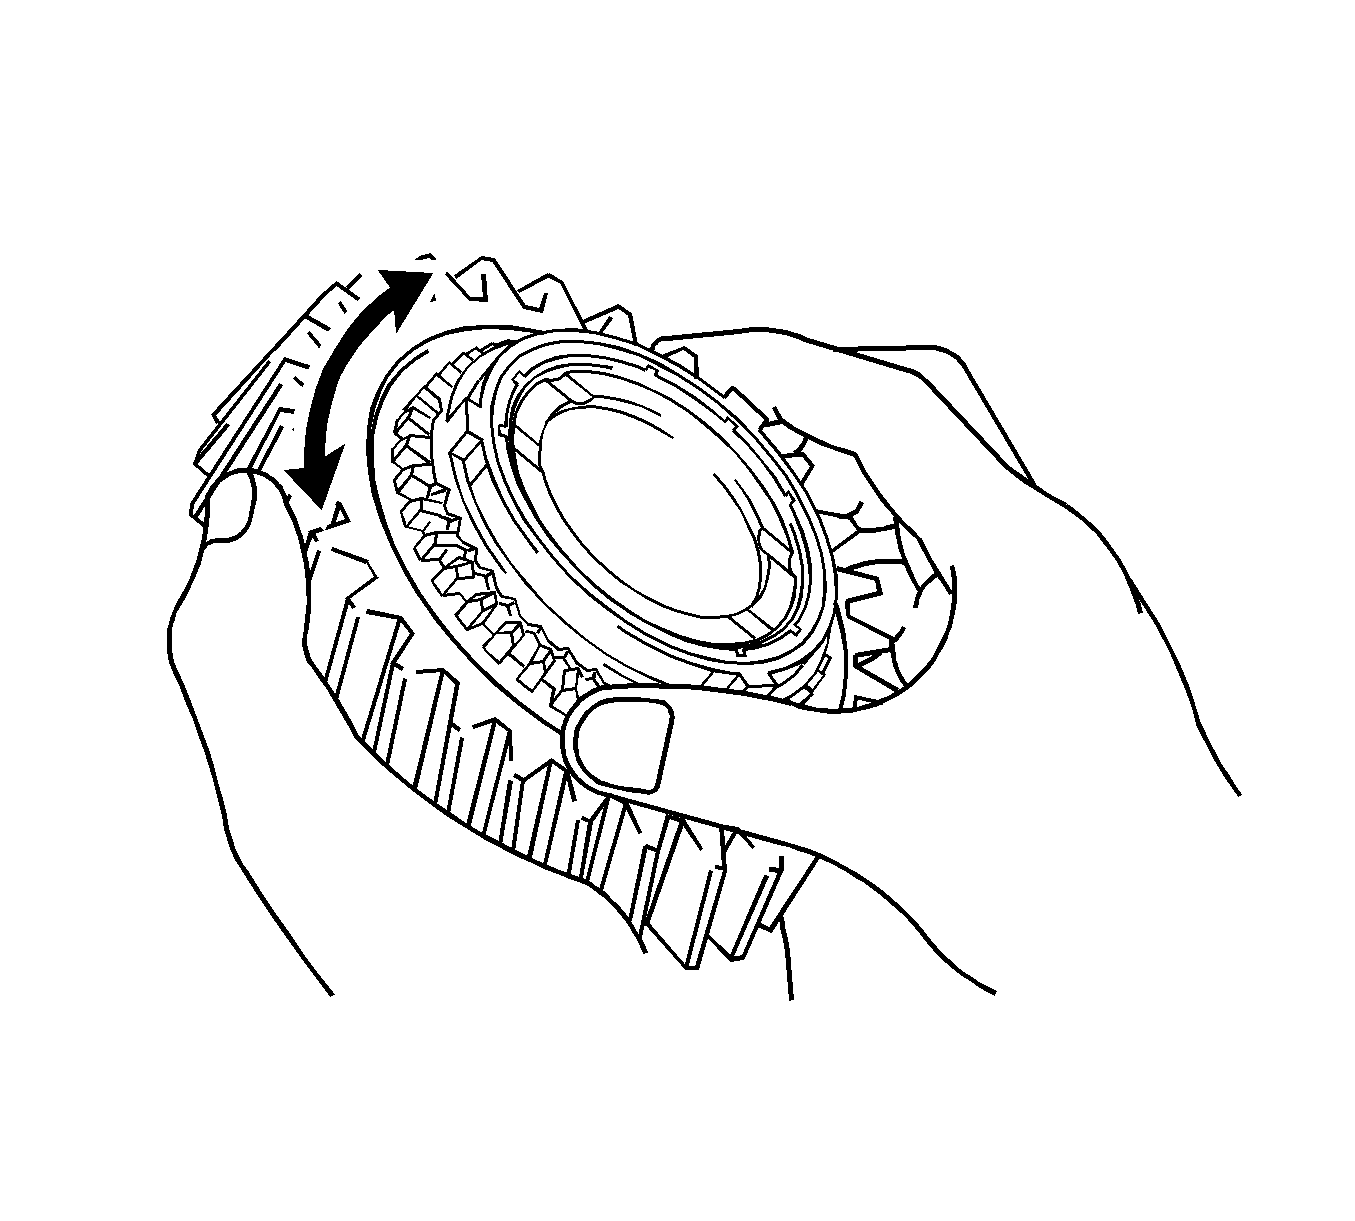
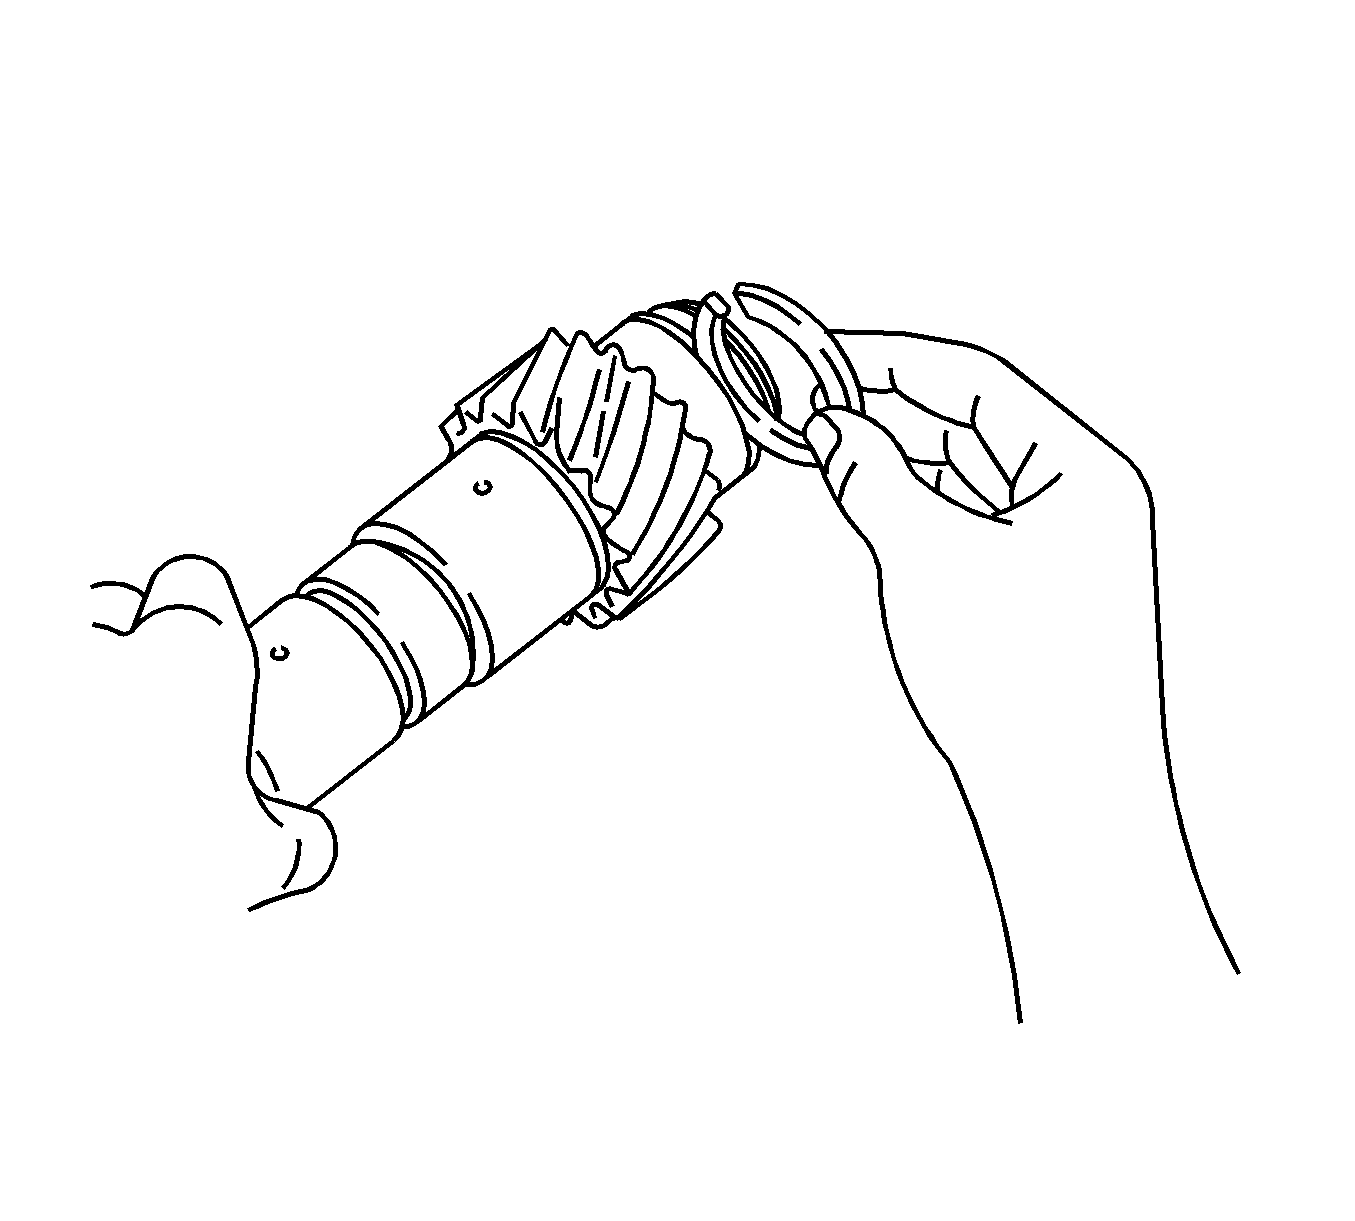
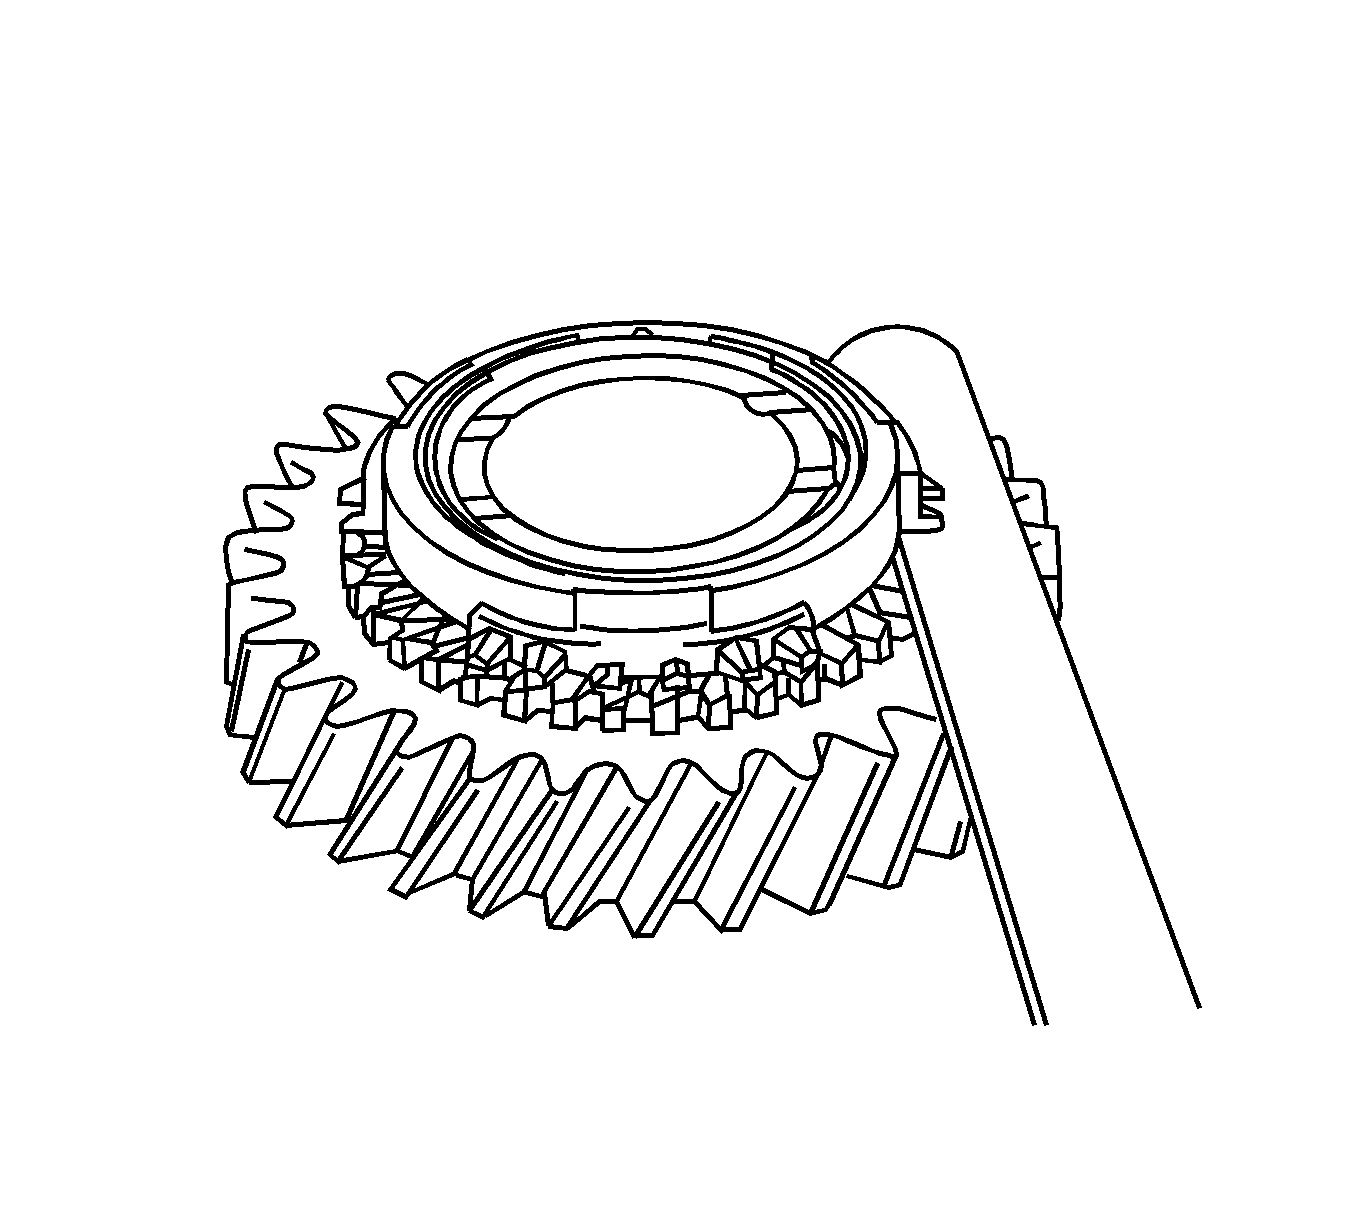
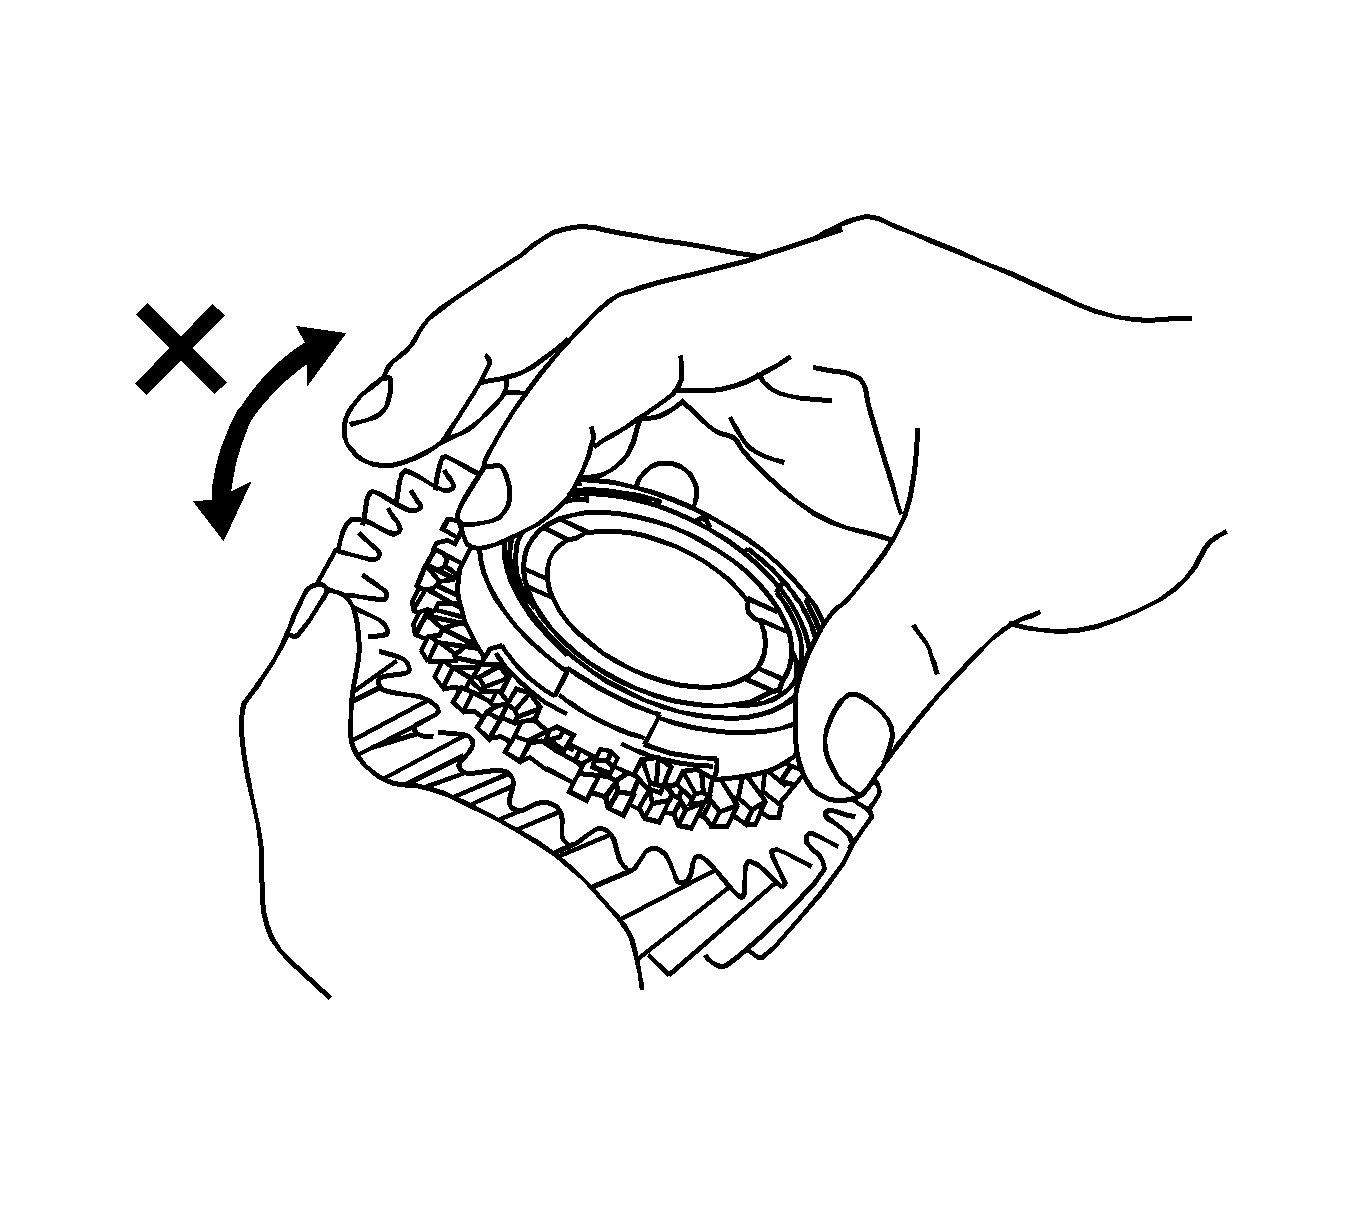
- Check the 2nd gear braking action of the synchronizer ring. Turn the synchronizer ring in one direction while pushing it into the gear cone. Ensure that the ring locks. Replace the ring if necessary.
- Using a feeler gage, measure the clearance between the synchronizer ring and the gear spline end. Minimum clearance is 0.75 mm (0.0295 in). If the clearance is less than the minimum, replace the synchronizer ring.
- Check the 1st gear braking action of the synchronizer ring. Turn the synchronizer ring in one direction while pushing it into the gear cone. Ensure that the ring locks. Replace the ring if necessary.
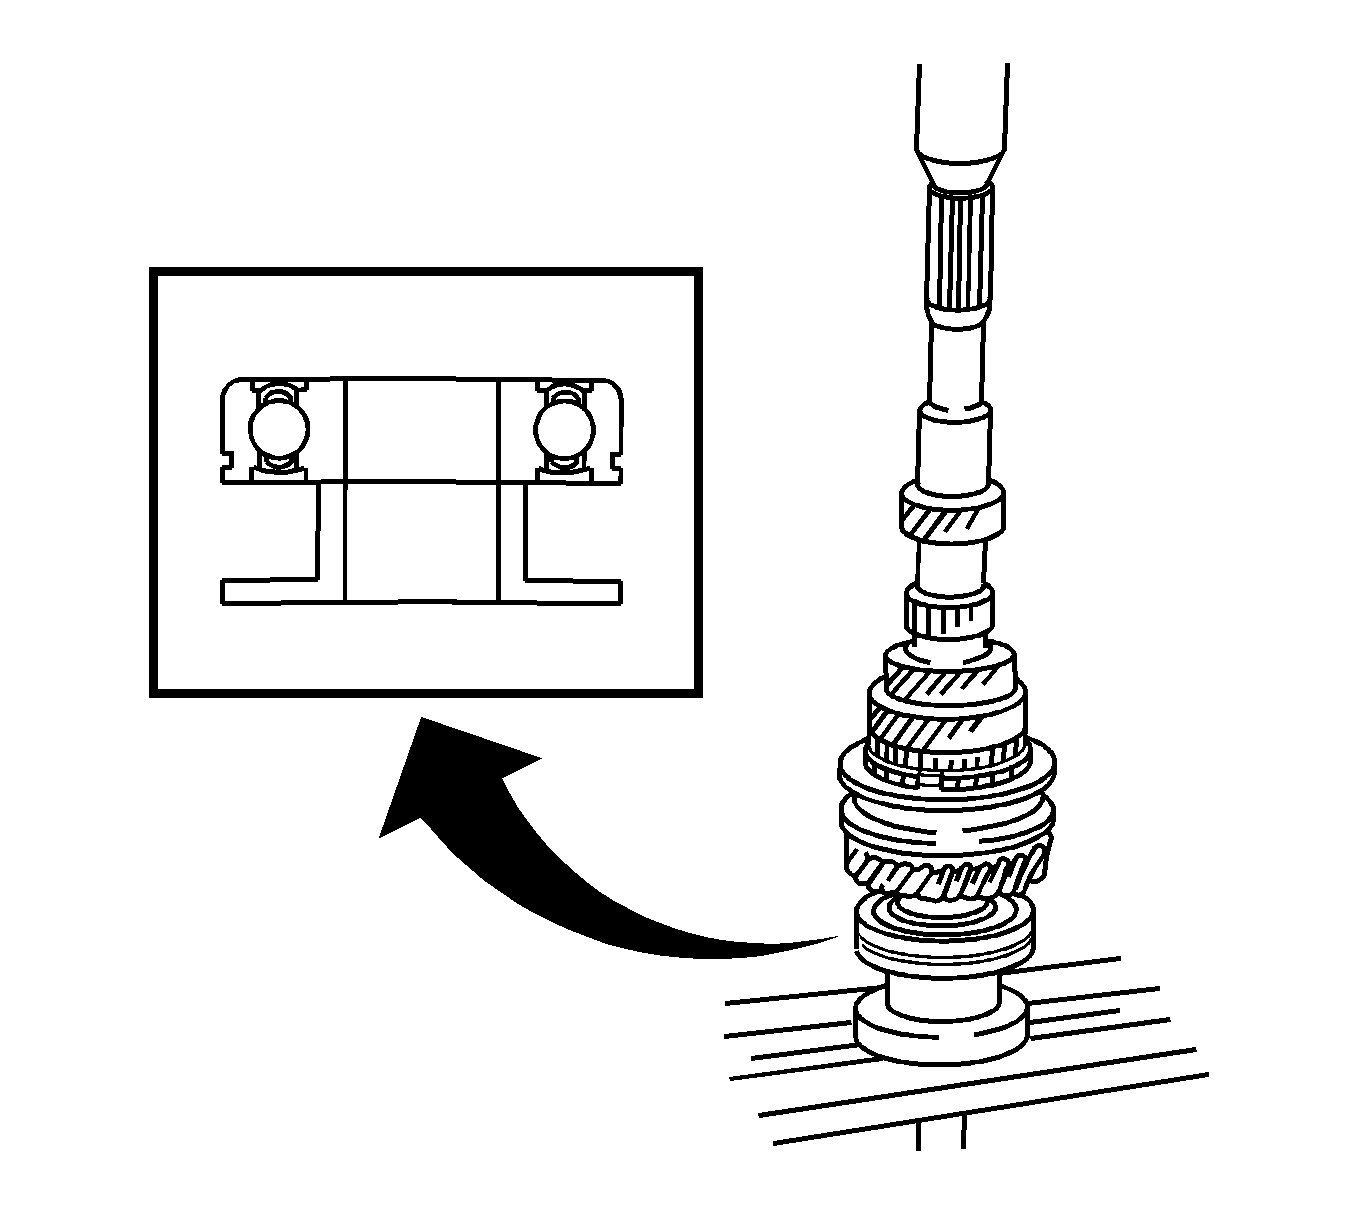
- Using a press, install the front bearing inner race.
- Install the snap ring to the output shaft. Select a snap ring that will make the thrust clearance of the front bearing inner race less than 0.1 mm (0.004 in).
- Assemble the reverse gear assembly.
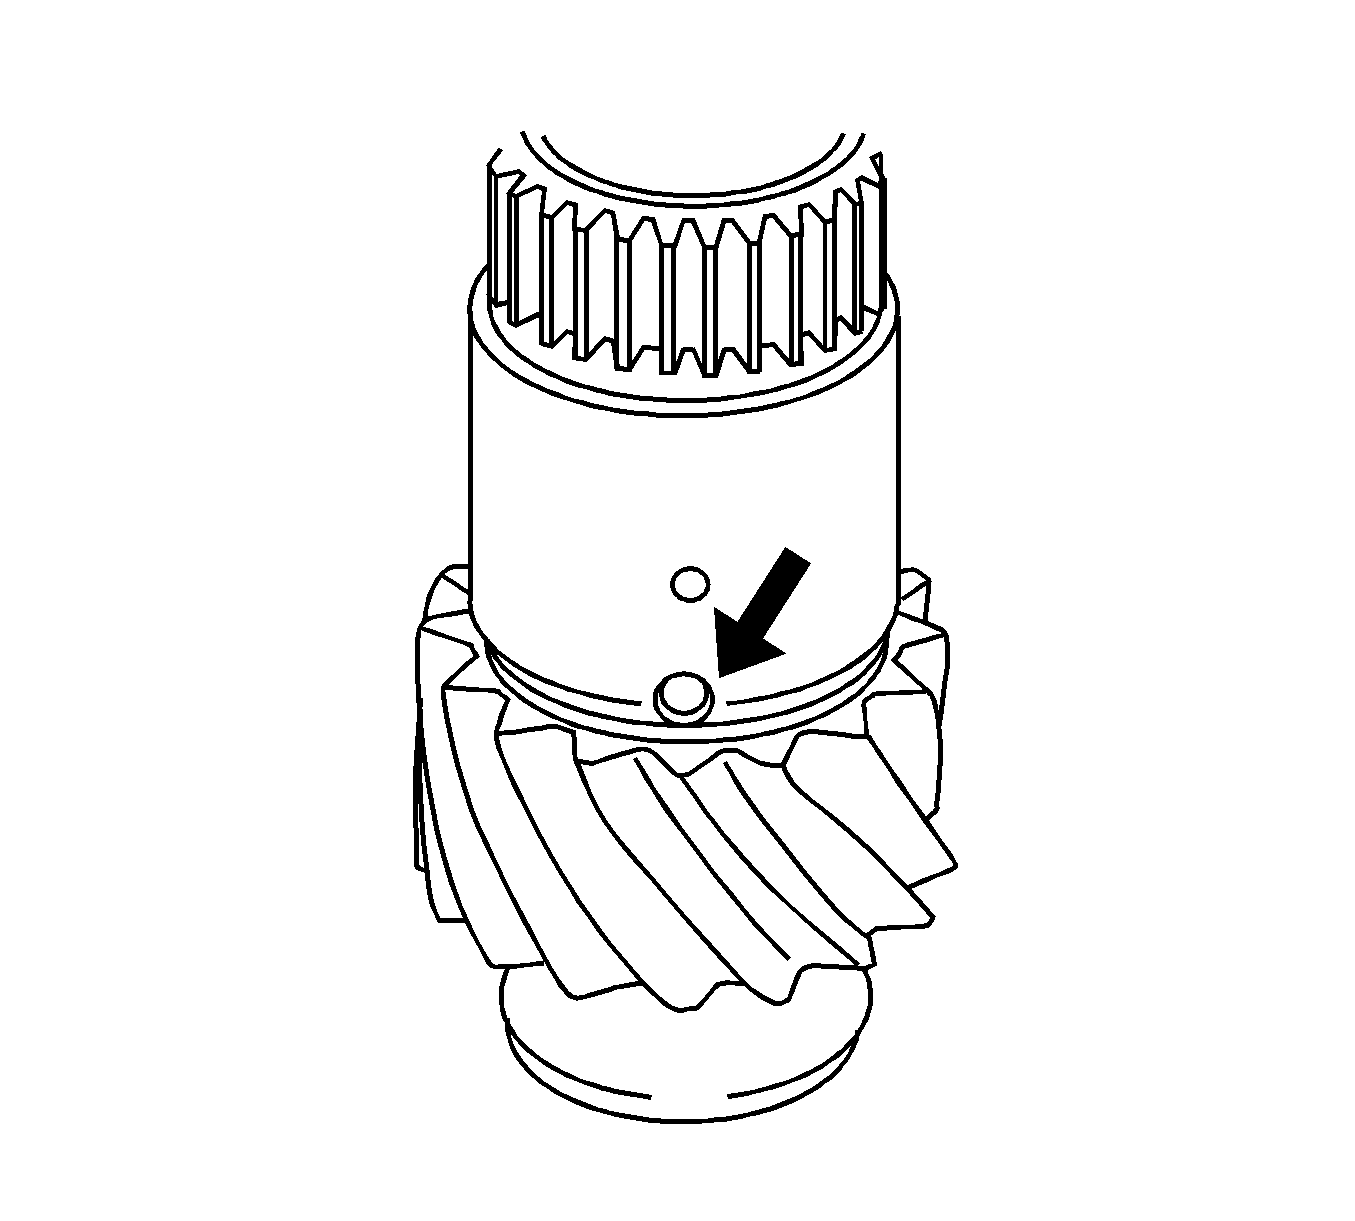
- Install the ball to the output shaft.
- Install the 1st gear thrust washer to the output shaft.
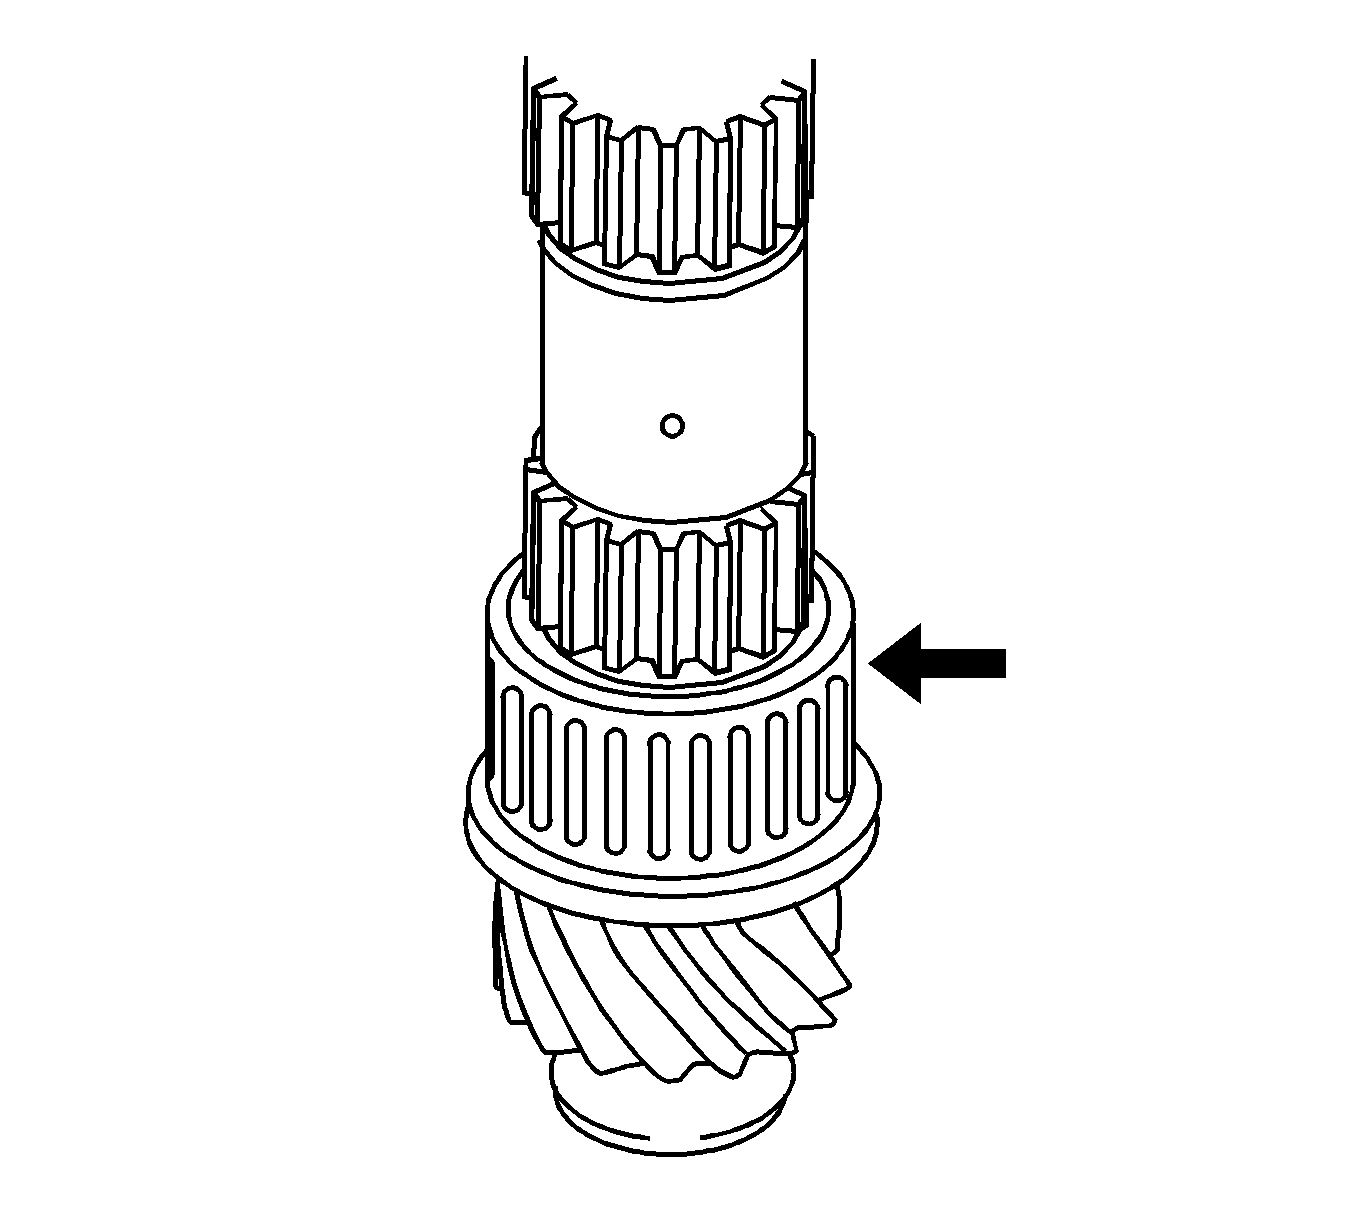
- Apply gear oil to the roller bearing, then install the roller bearing to the output shaft.
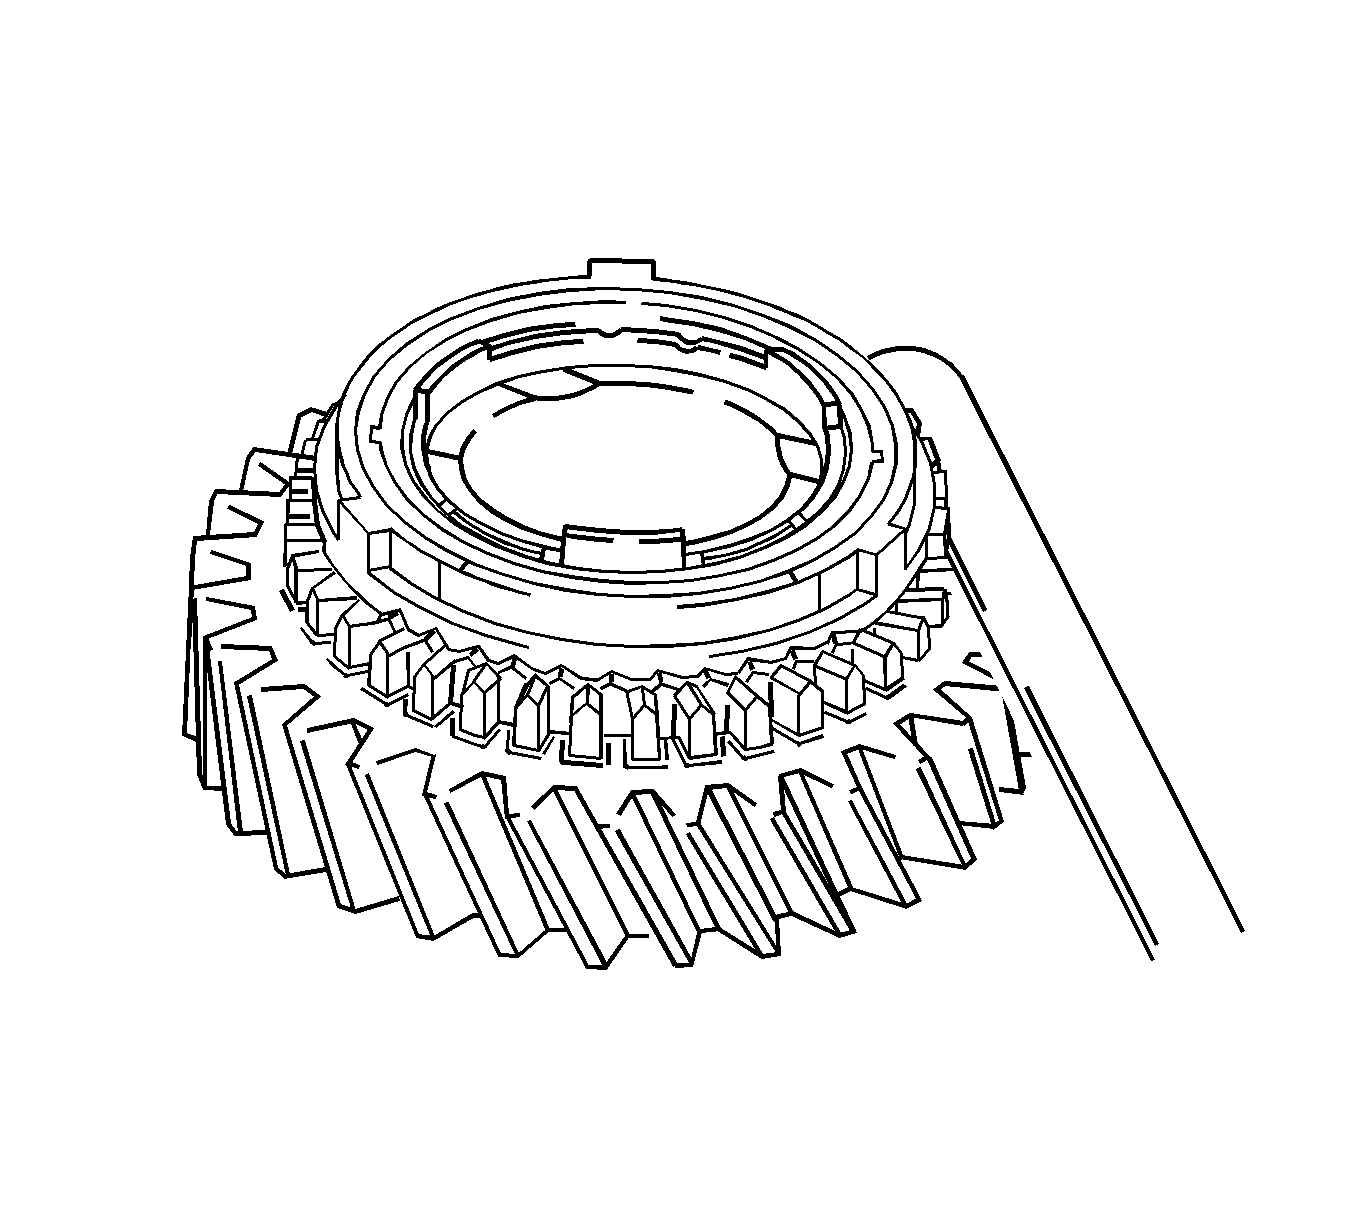
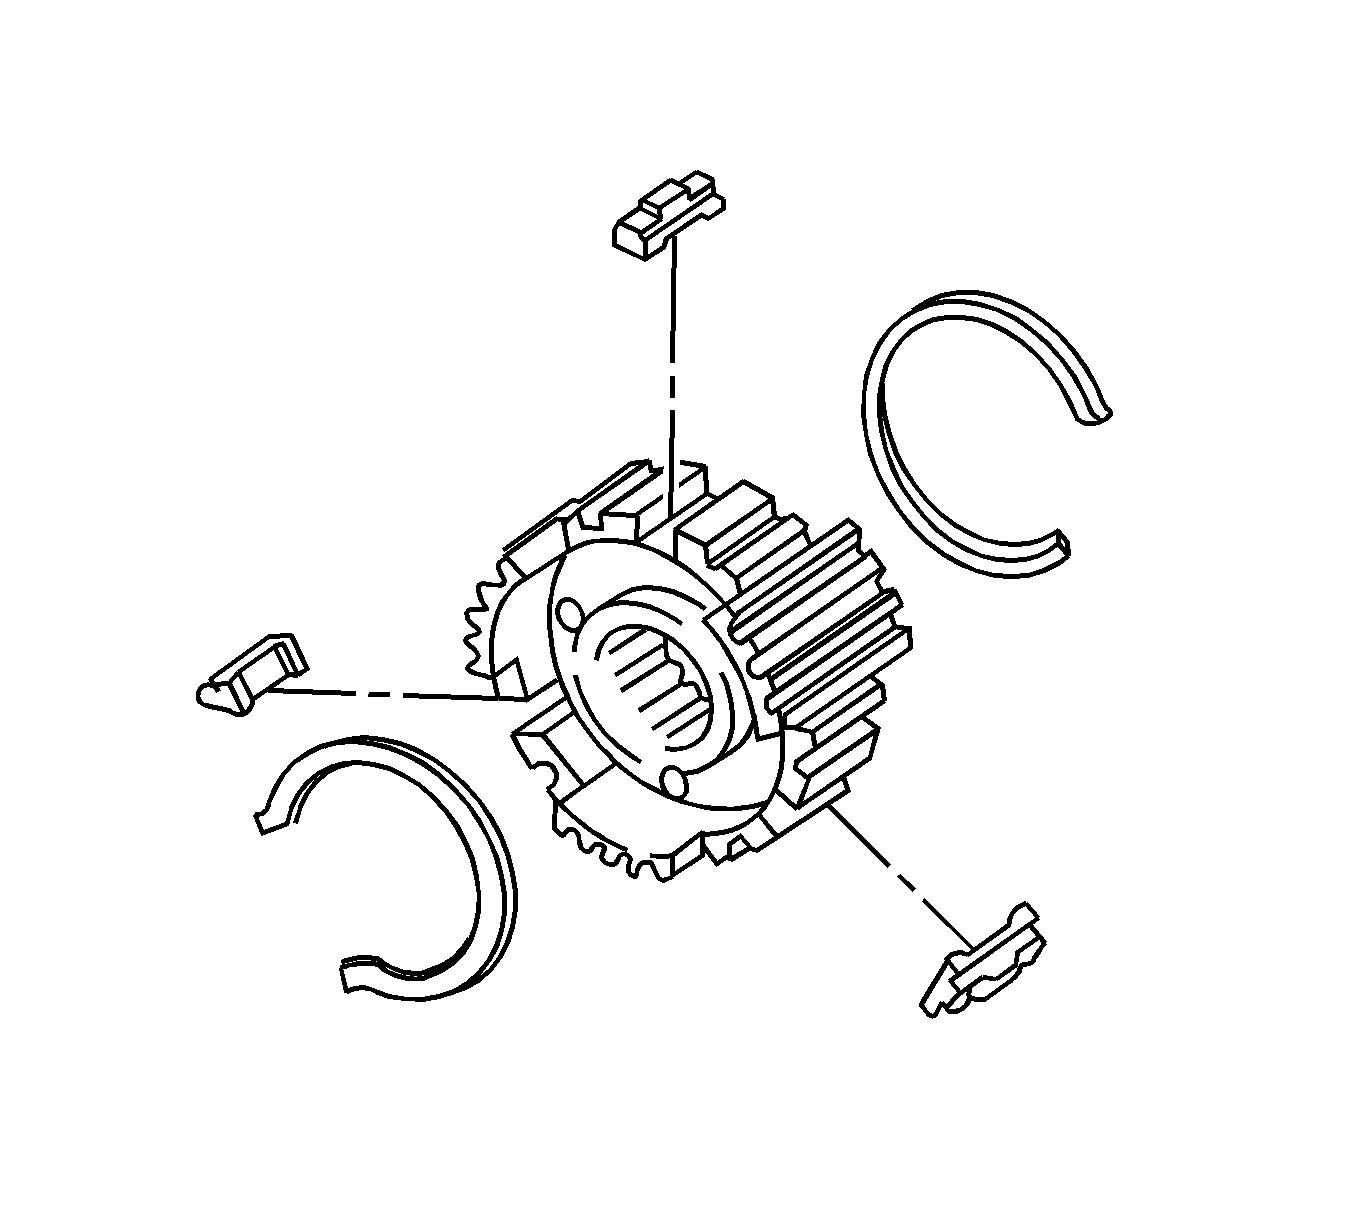
- Install the No.1 synchronizer to 1st gear.
- Place the reverse gear assembly and align the No.1 synchronizer ring slots with the No.1 shifting keys.
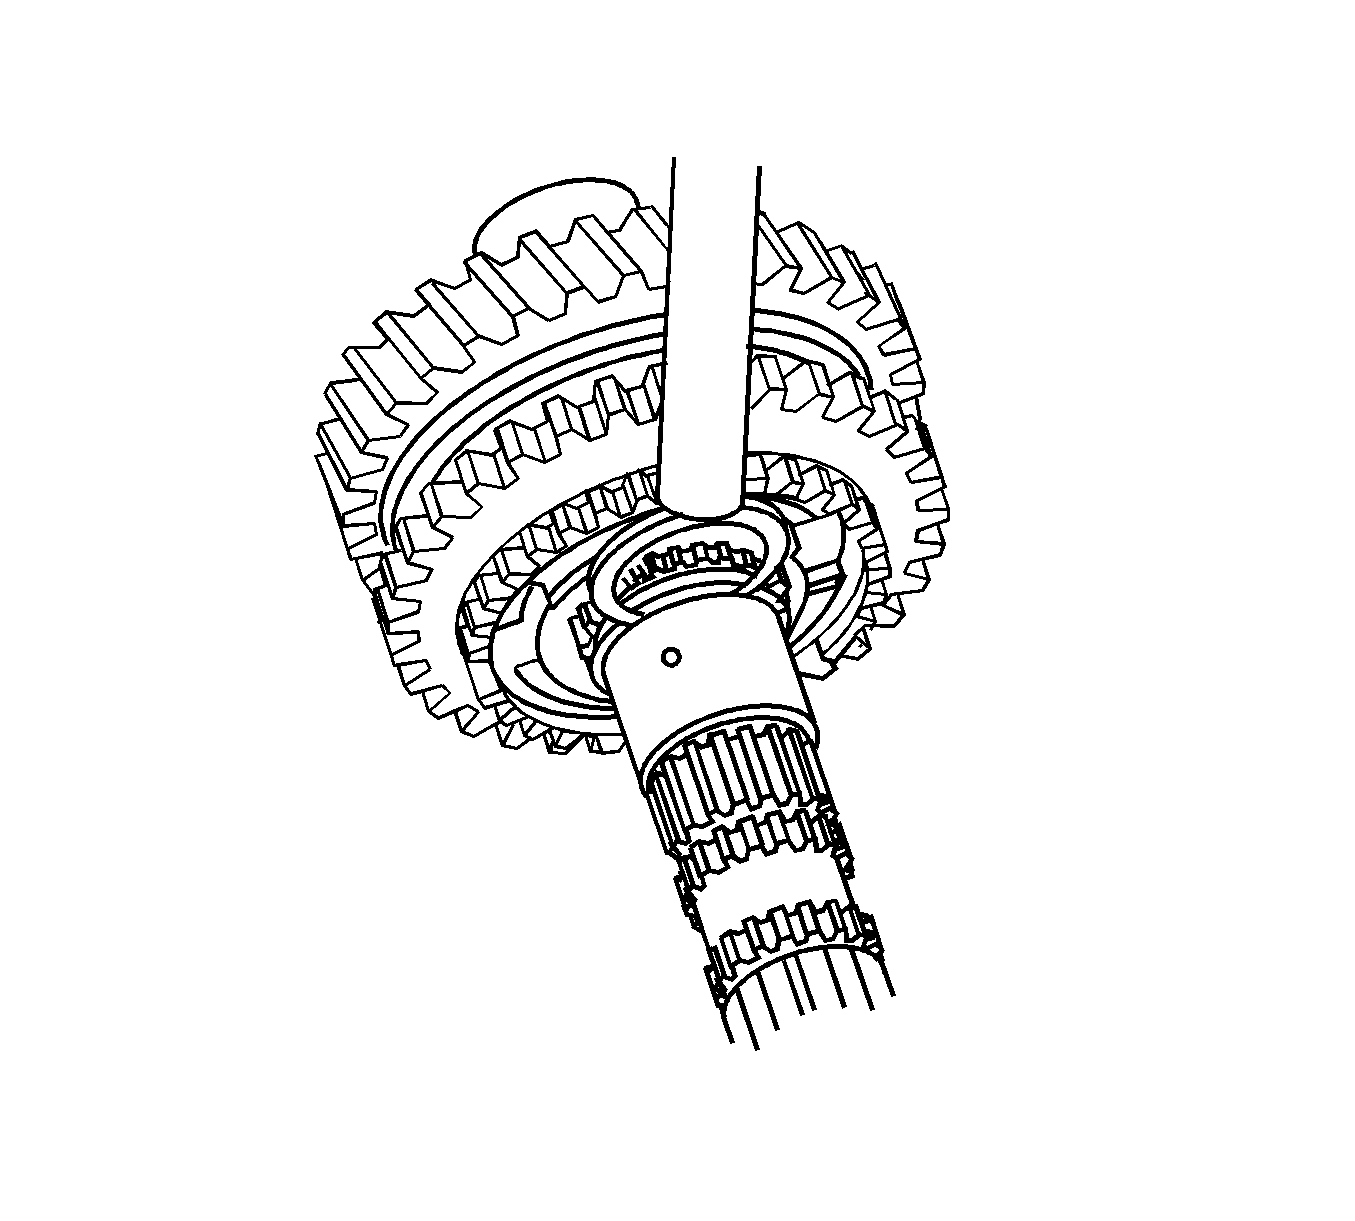
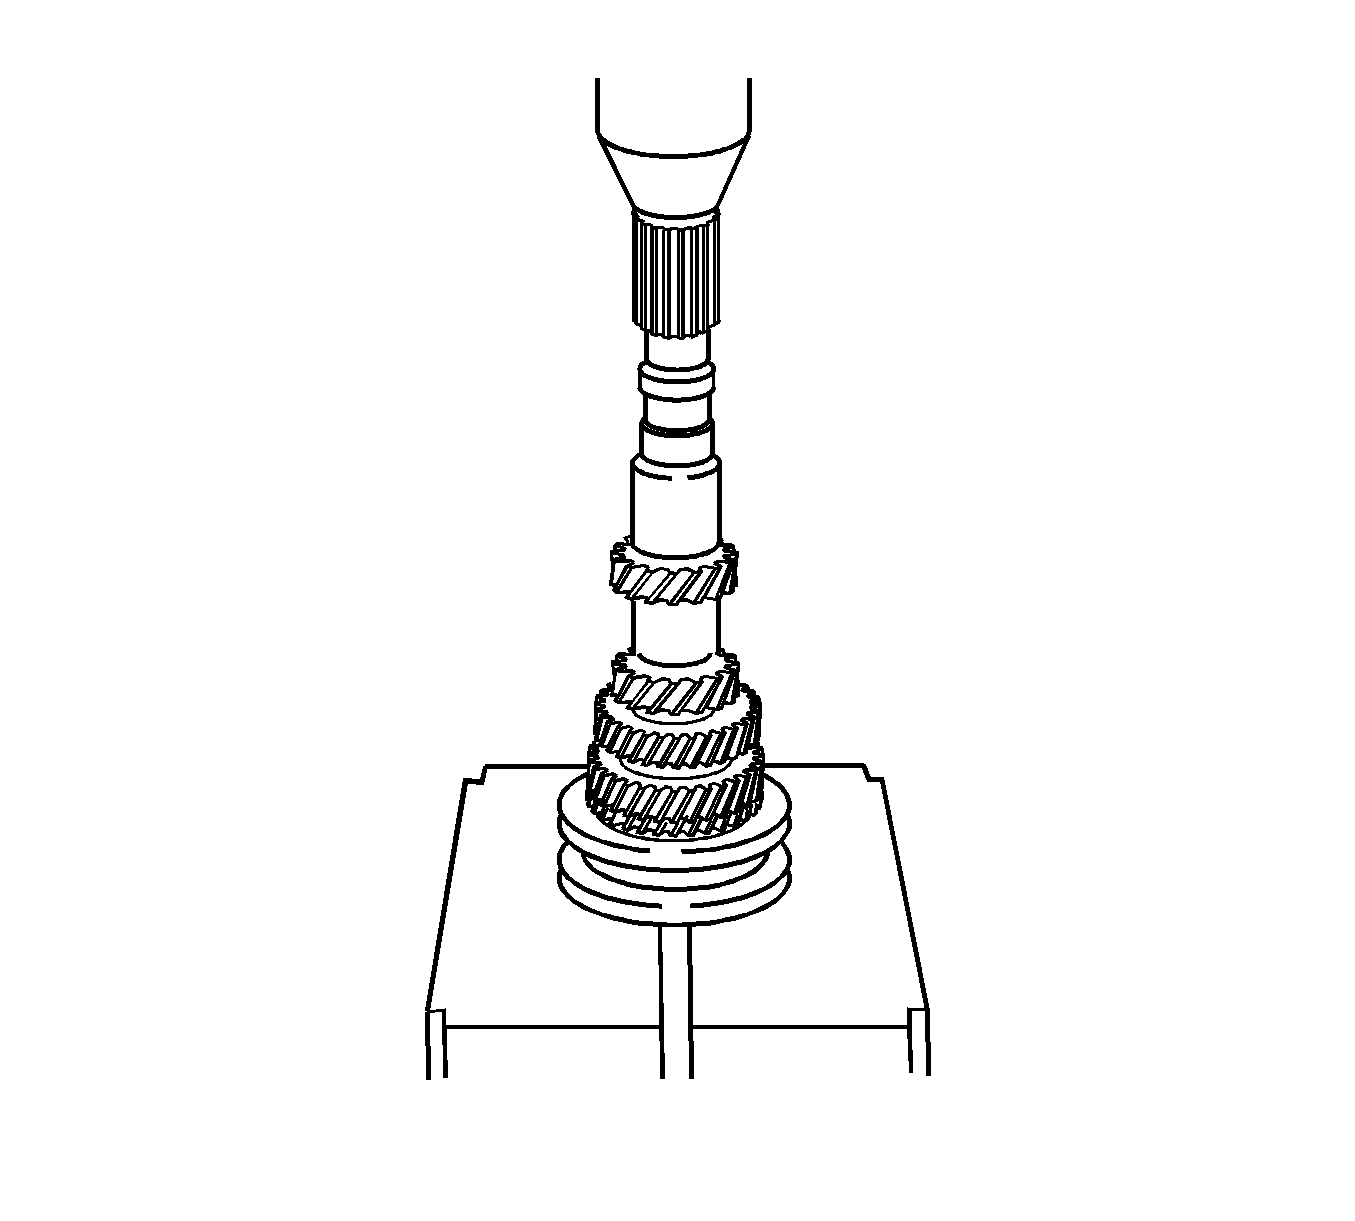
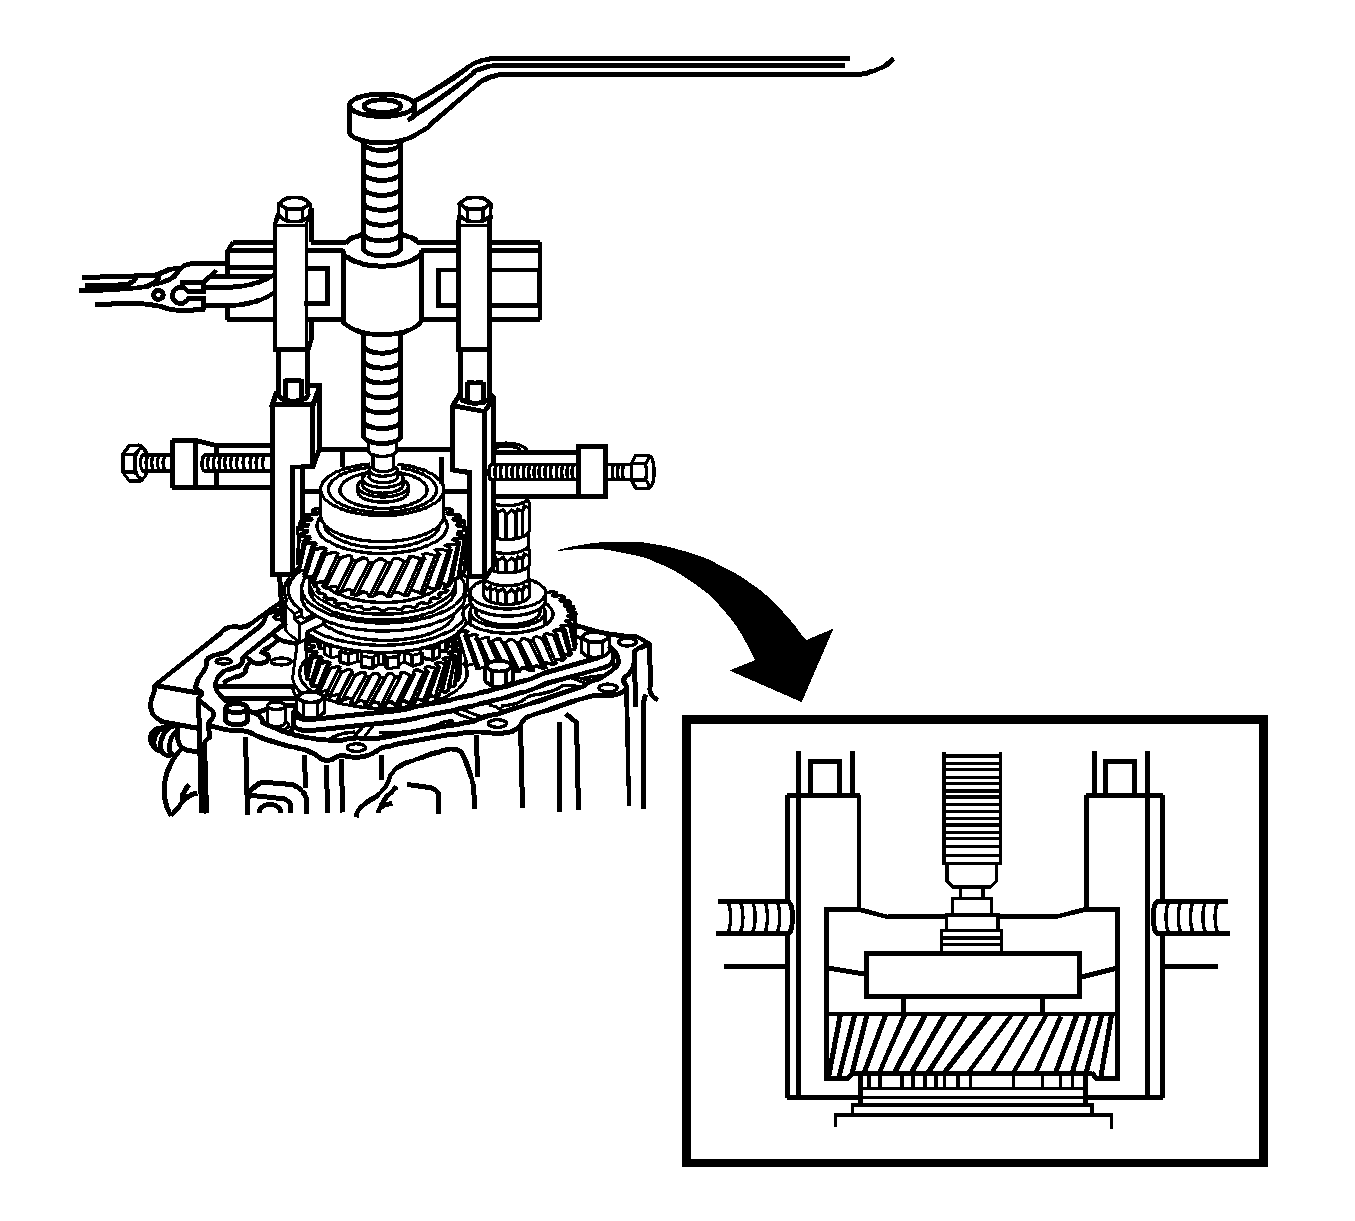
- Using a press, install the reverse gear assembly, 1st gear and the No.1 synchronizer to the output shaft.
- Select a snap ring that will make the thrust clearance of the front bearing inner race less than 0.1 mm (0.004 in). Install the snap ring to the output shaft.
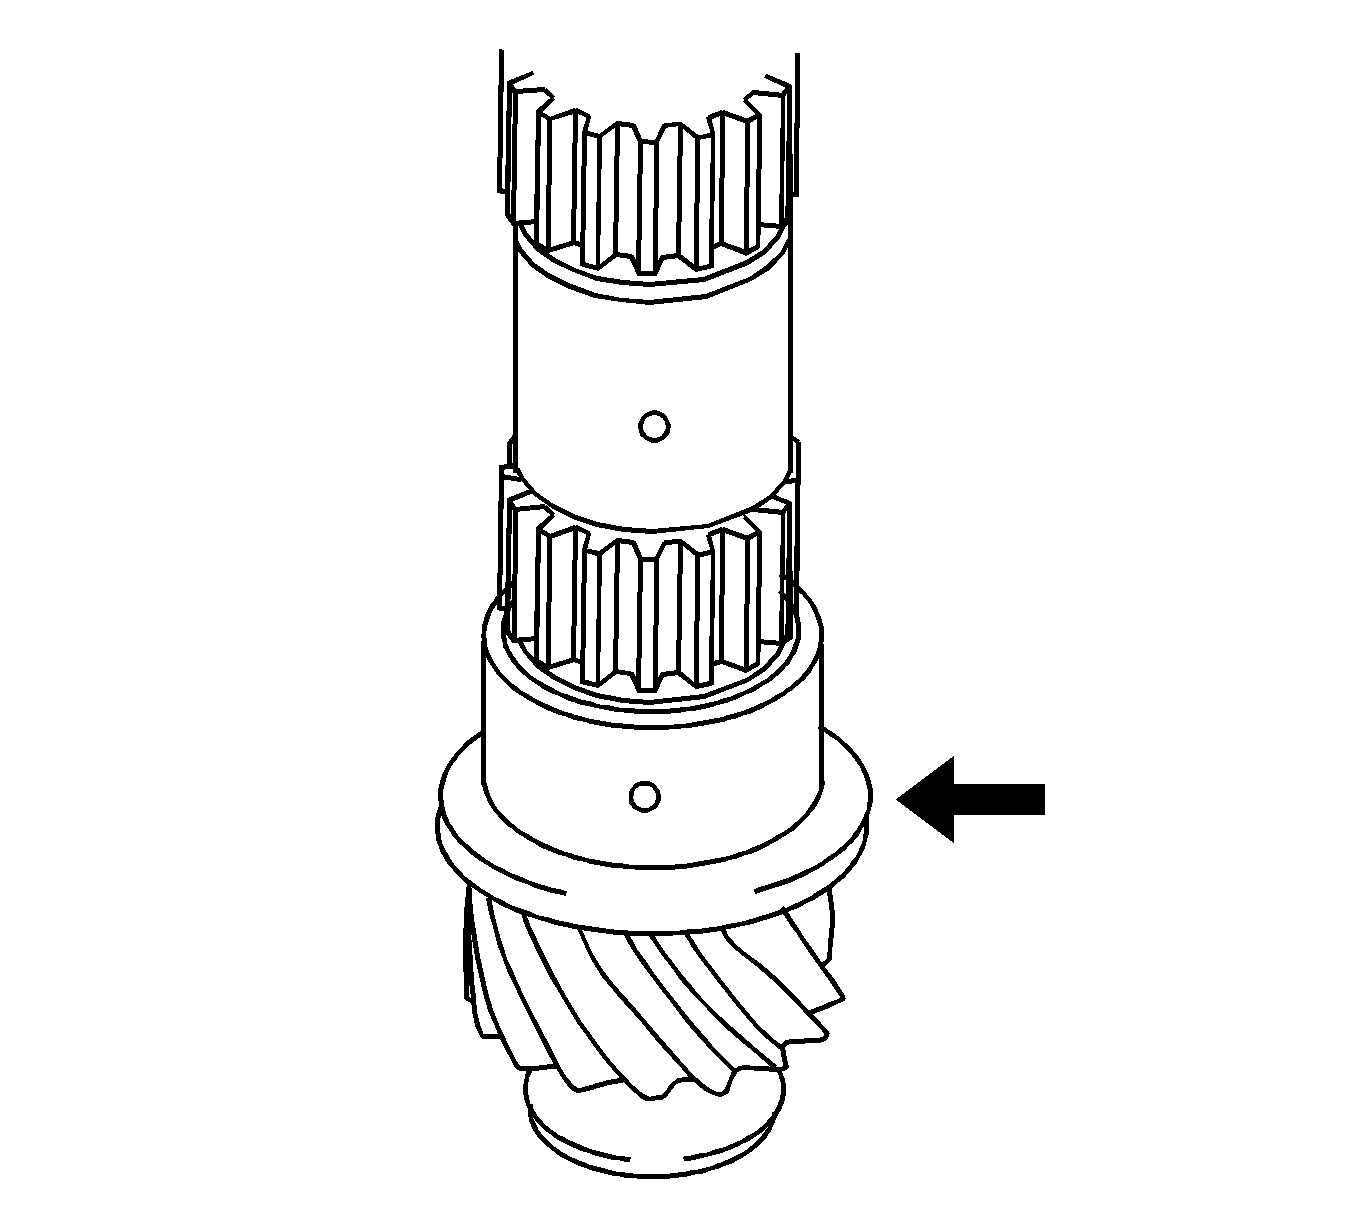
- Install the spacer to the output shaft.
- Install the roller bearing to the output shaft.
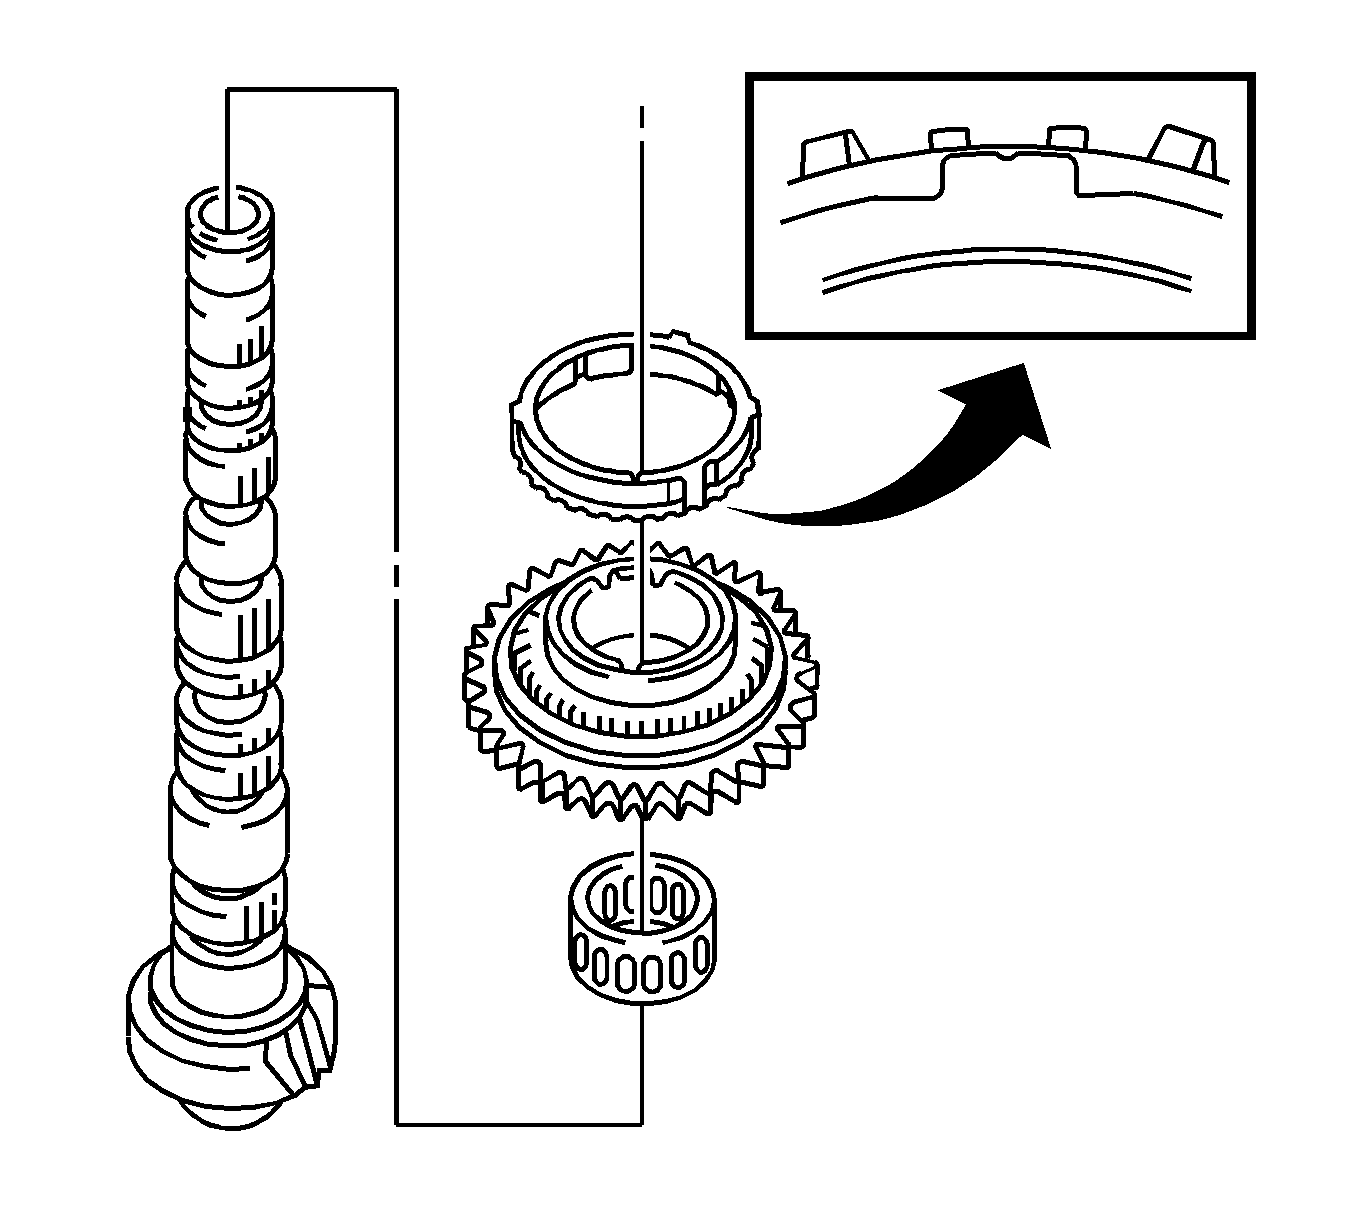
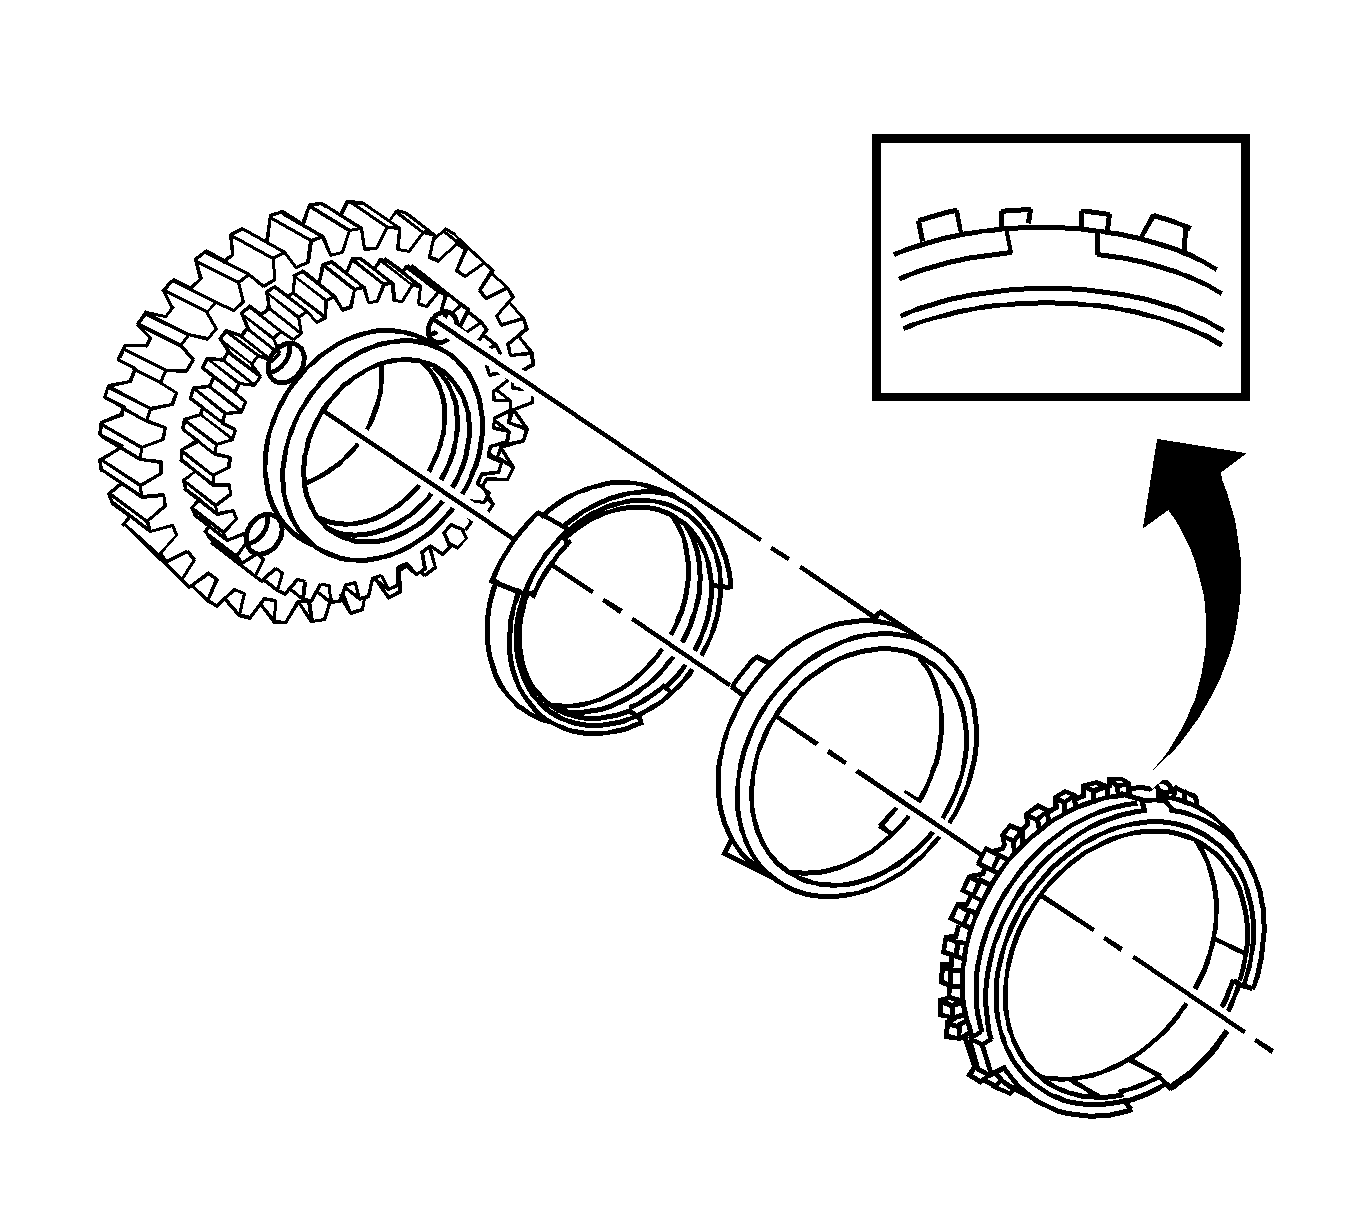
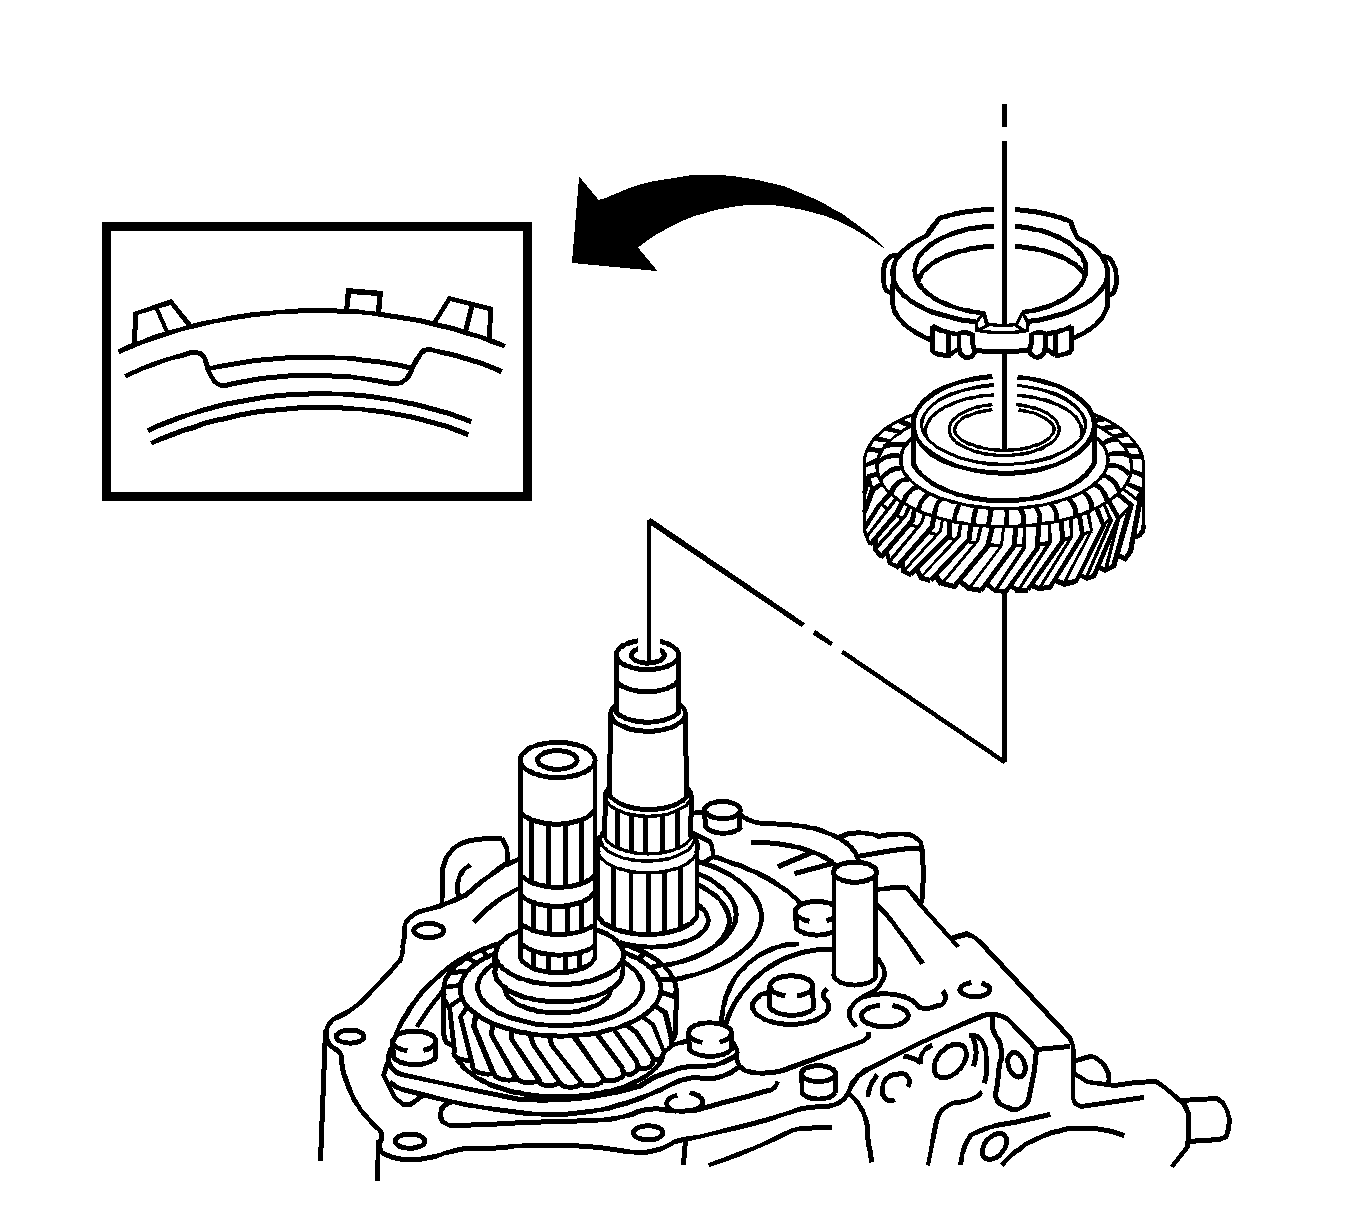
- Place the No.2 synchronizer ring on the 2nd gear.
- Install the 2nd gear with the No.2 synchronizer rings and align the No.2 synchronizer ring slots with the No.1 shifting keys.
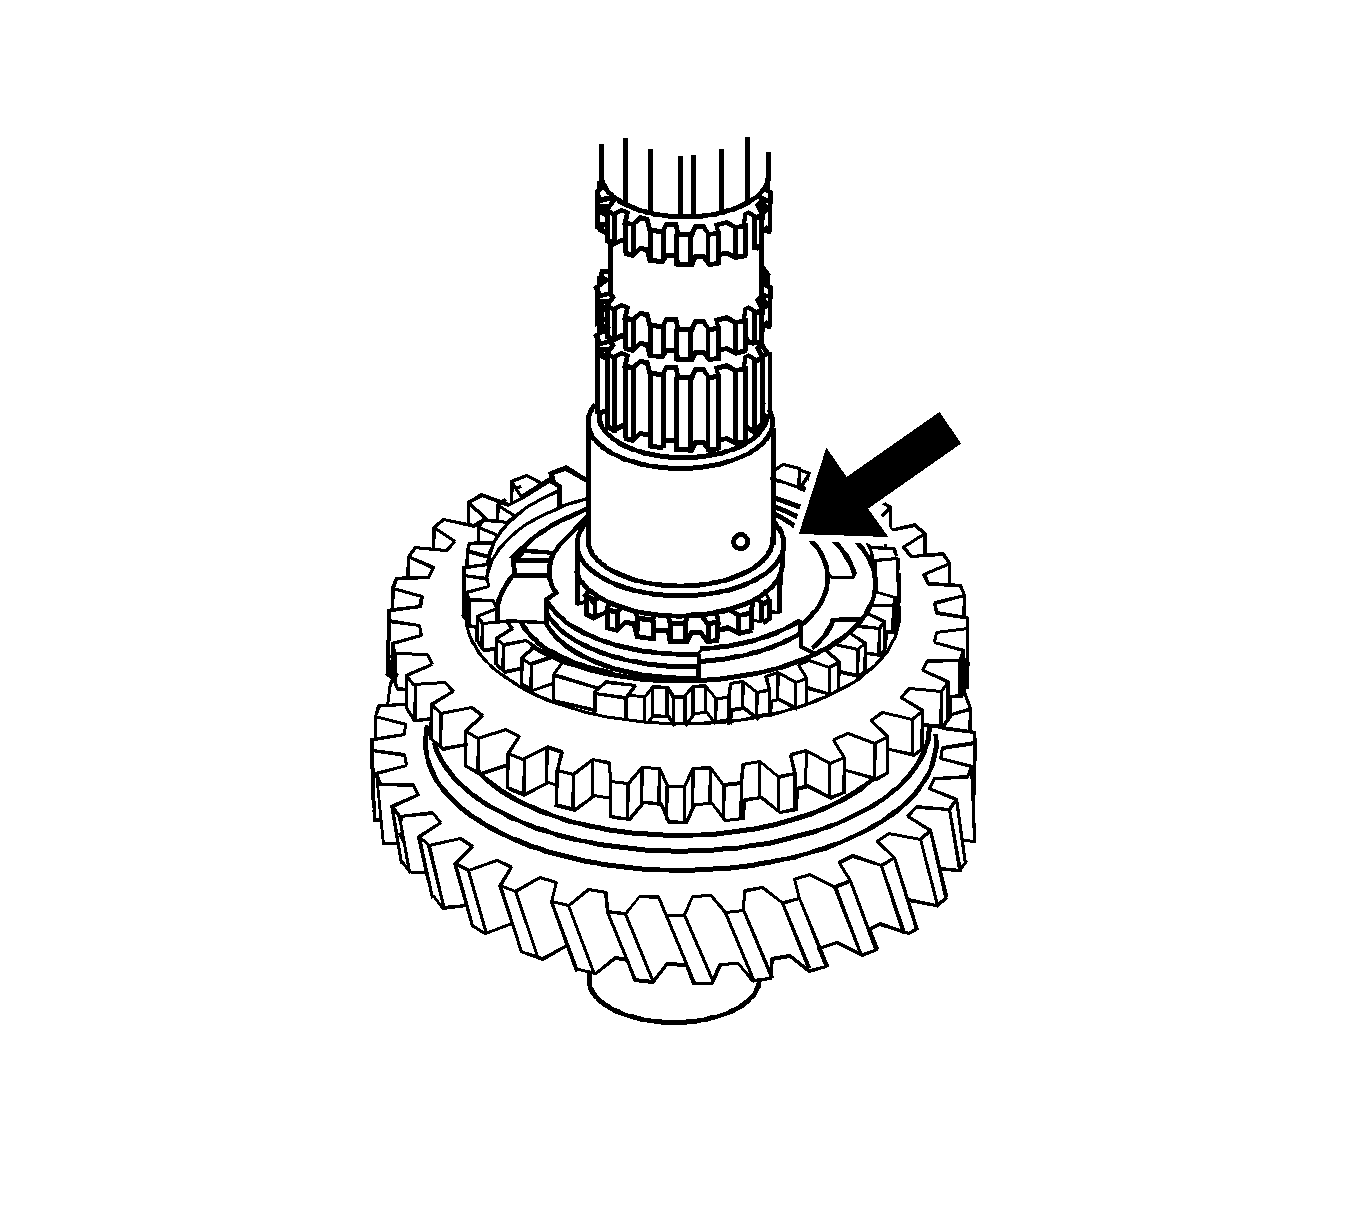
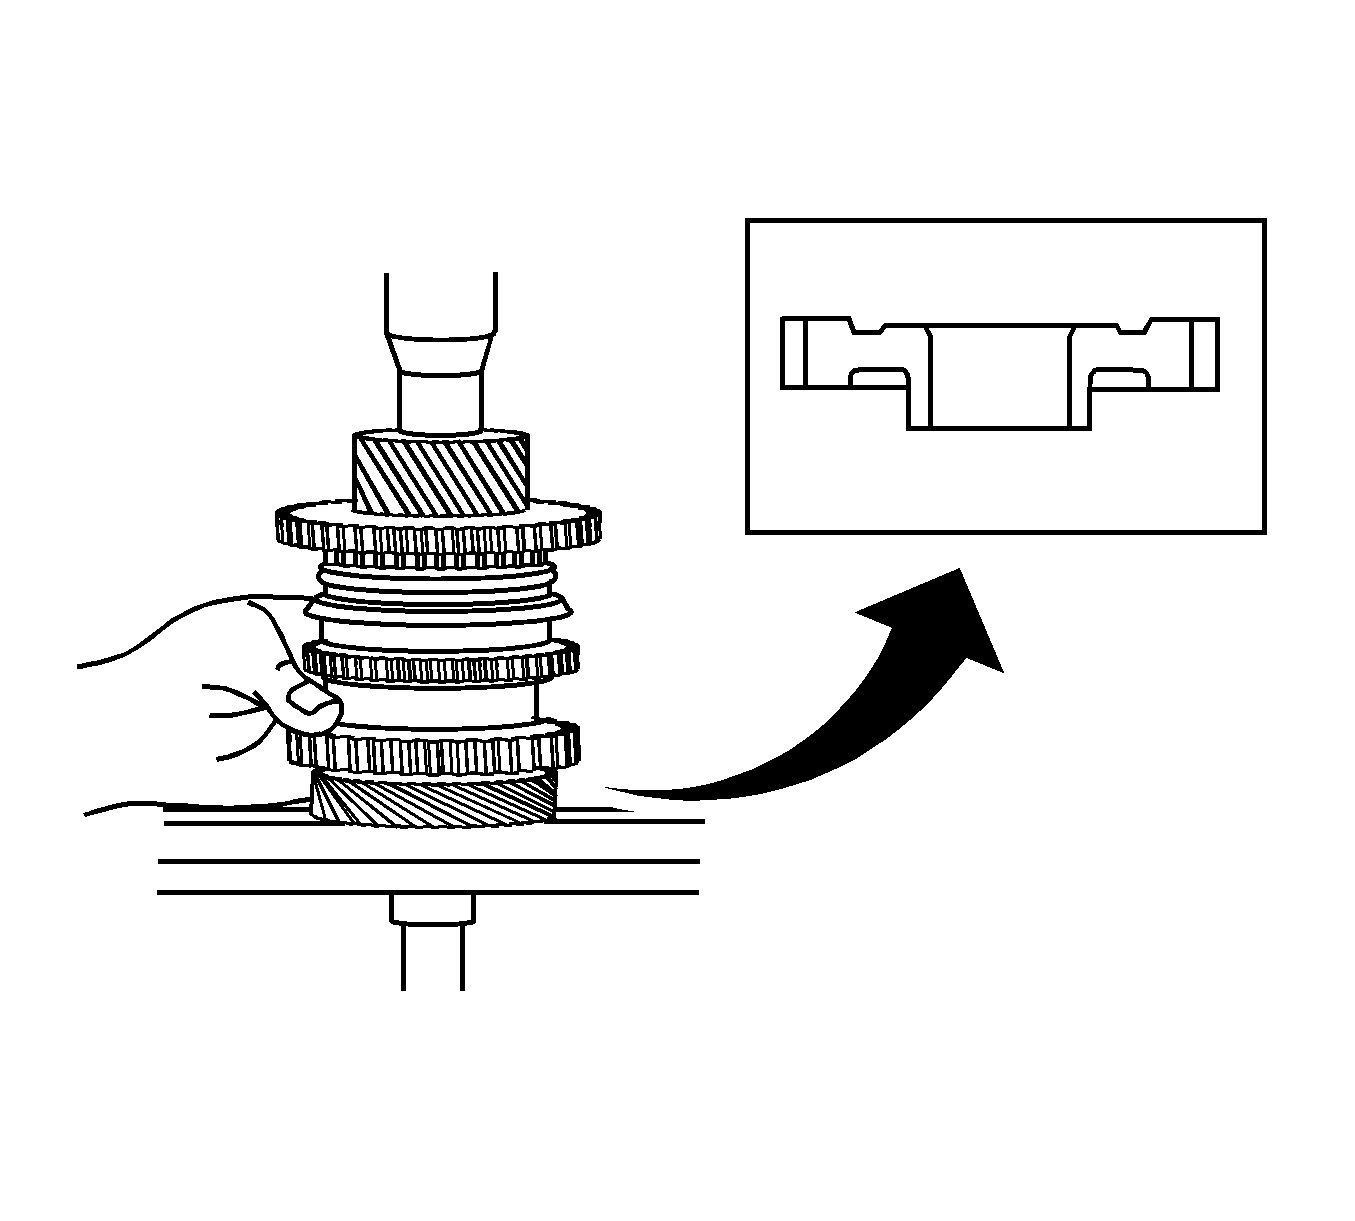
- Using a press, install the 3rd driven gear to the output shaft.
- Install the spacer to the output shaft.
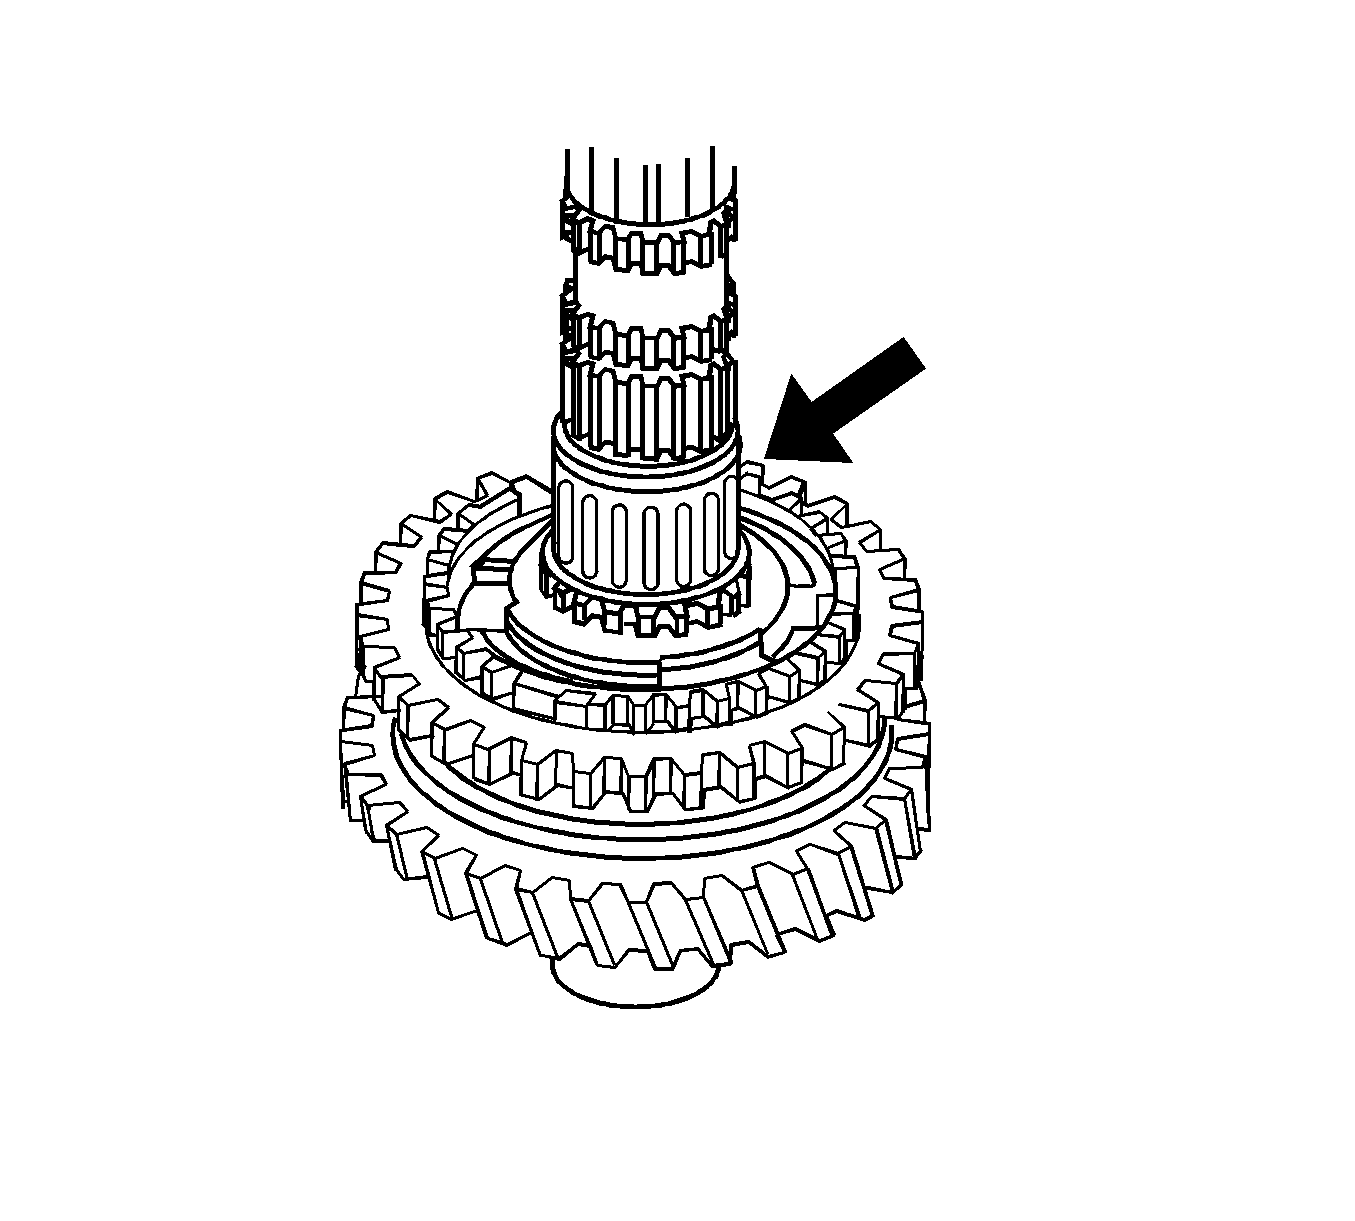
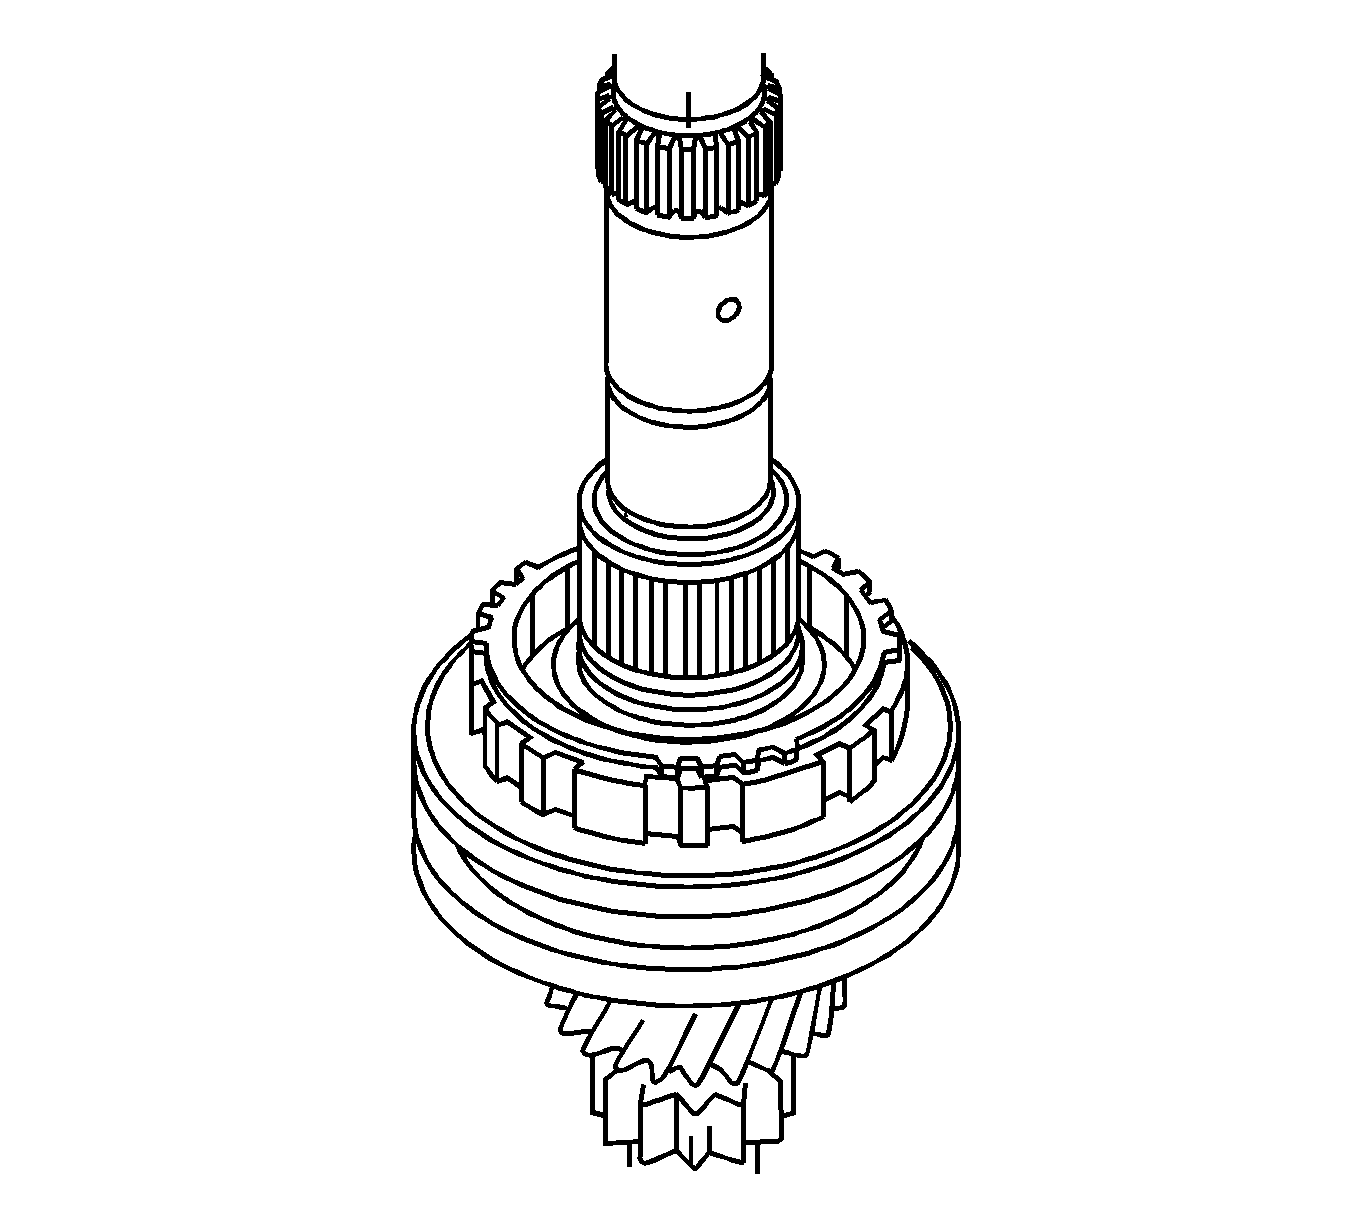
- Using a press, install the radial ball bearing and the 4th driven gear to the output shaft.
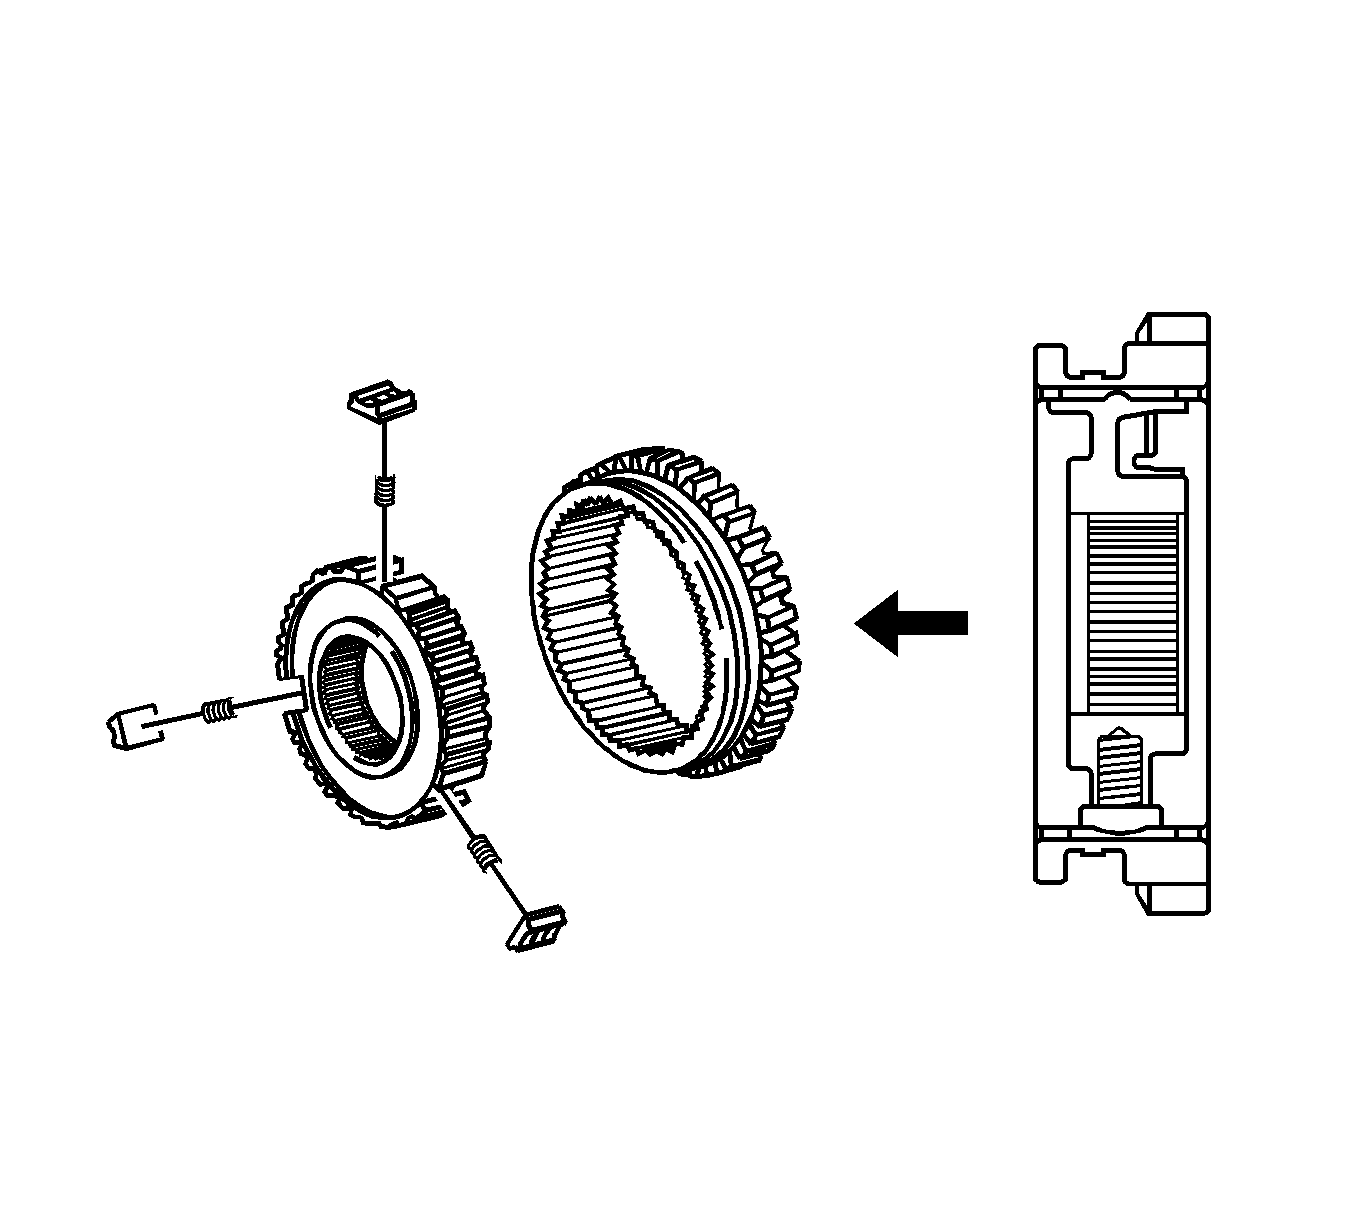
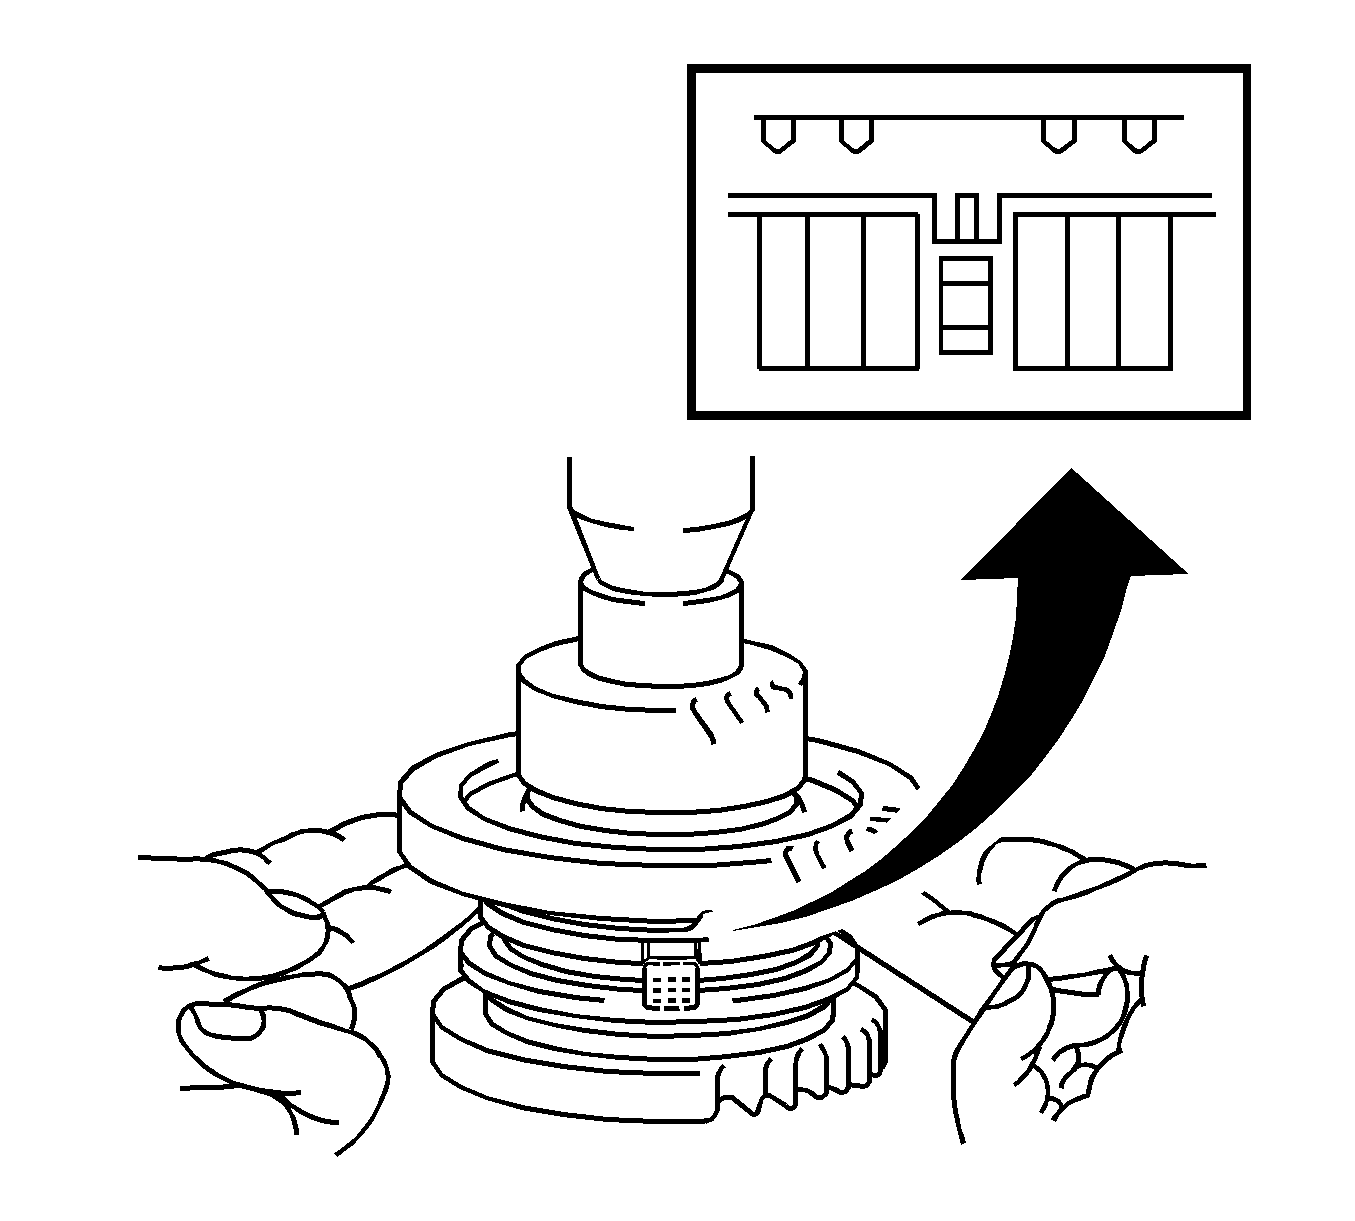
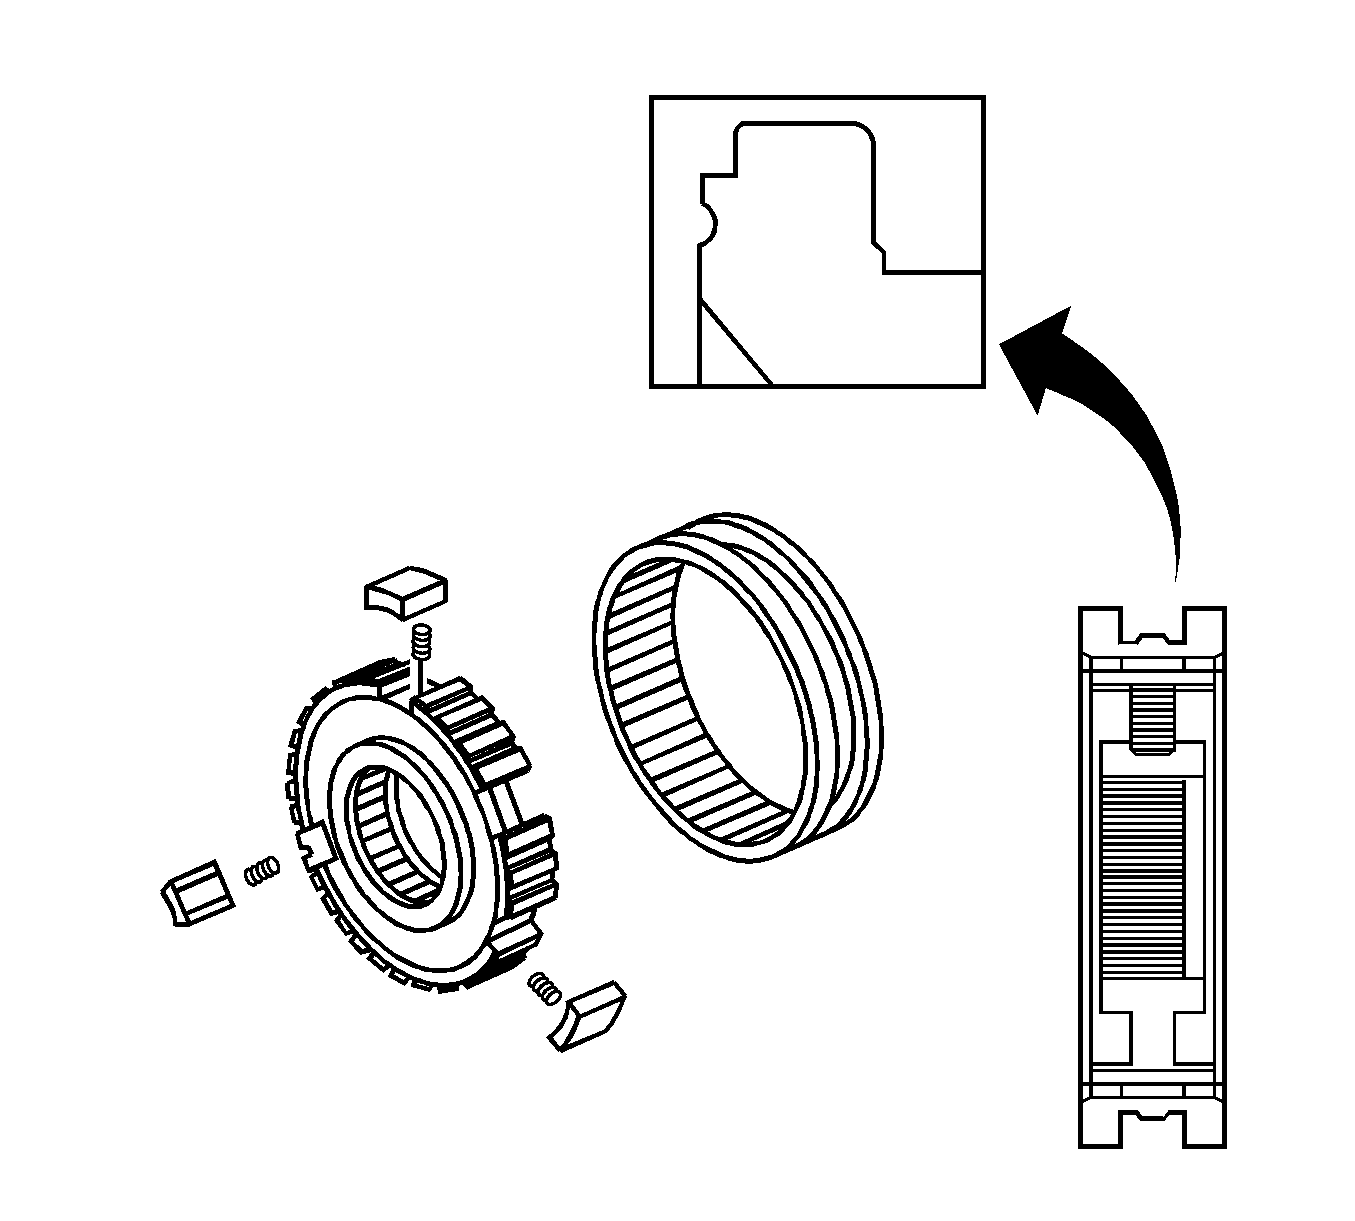
- Assemble the No.2 hub sleeve assembly.
- Apply gear oil to the roller bearing, then install the roller bearing to the input shaft.
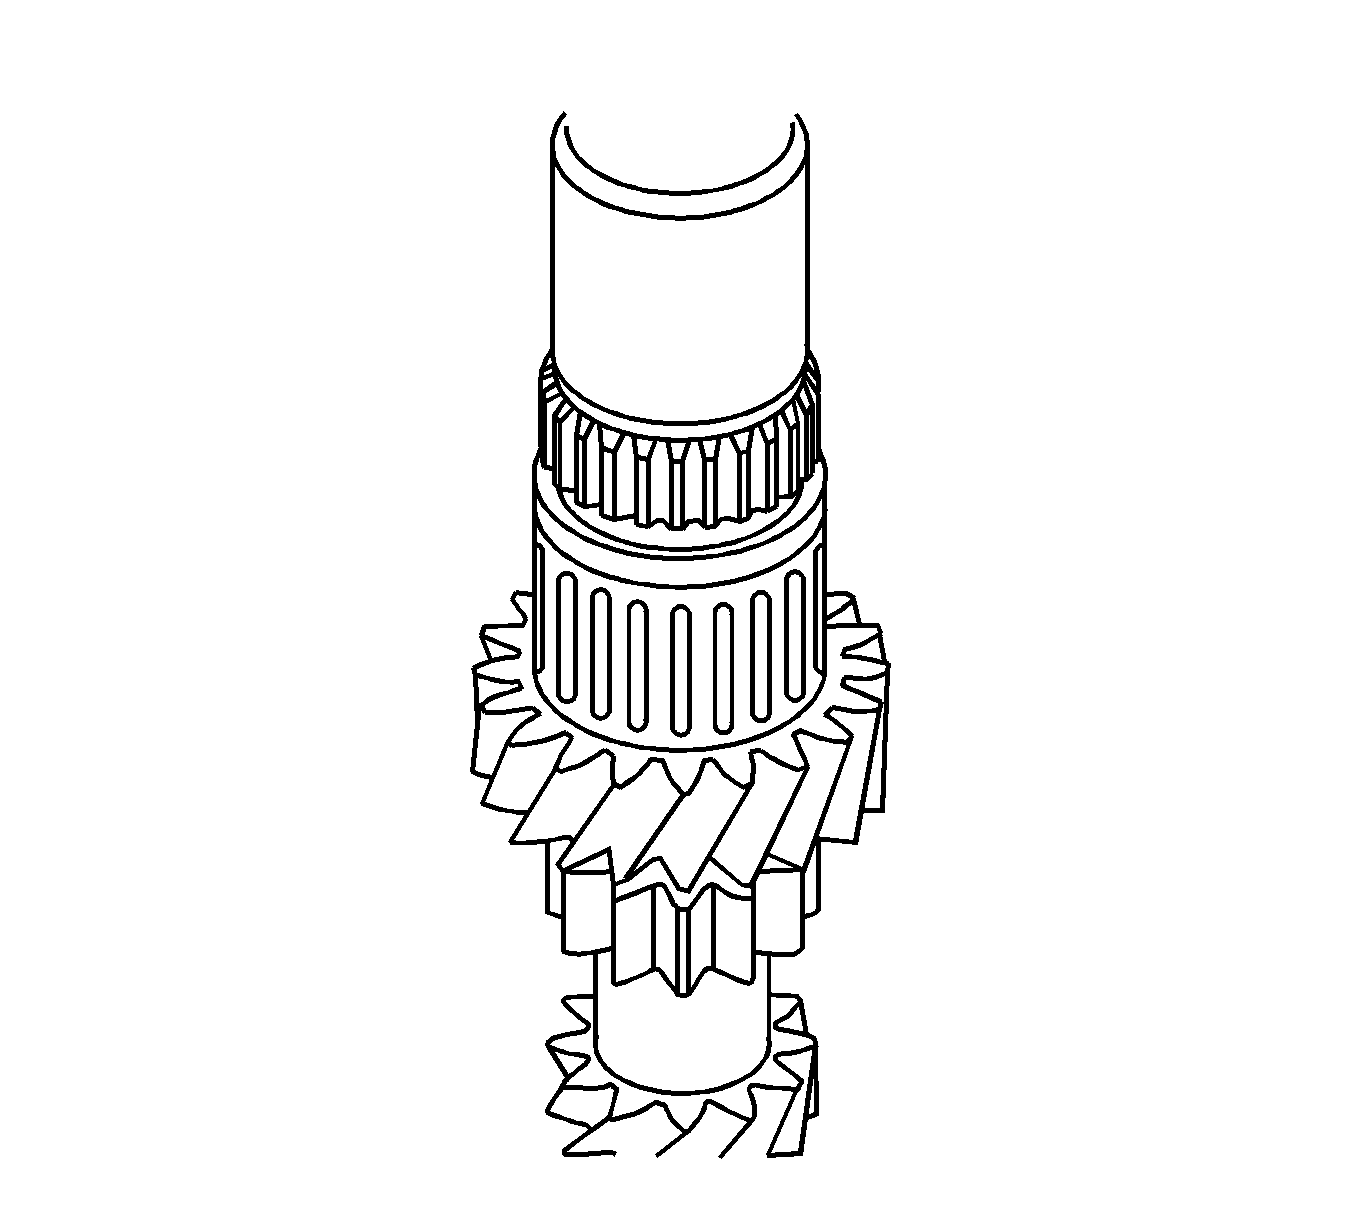
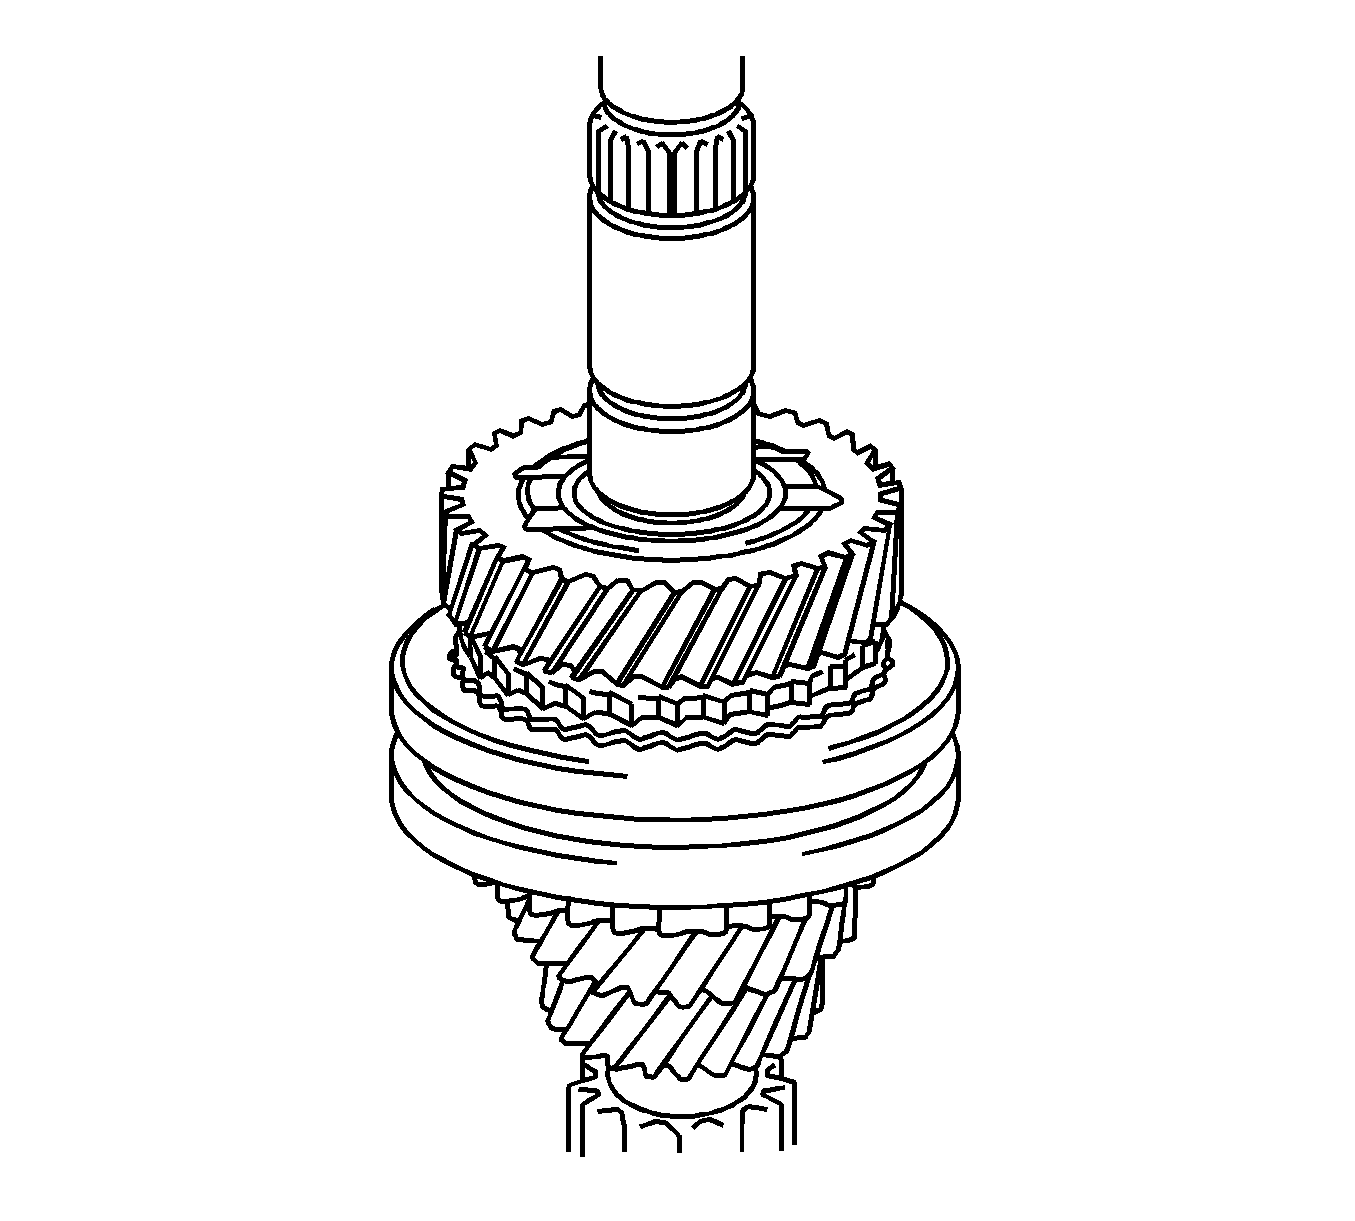
- Install the 3rd gear on the input shaft.
- Install the No.2 3rd gear synchronizer ring.
- Using a press, install the No.2 hub sleeve and 3rd gear to the input shaft.
- Select a snap ring that will make the thrust clearance of the front bearing inner race less than 0.1 mm (0.004 in).
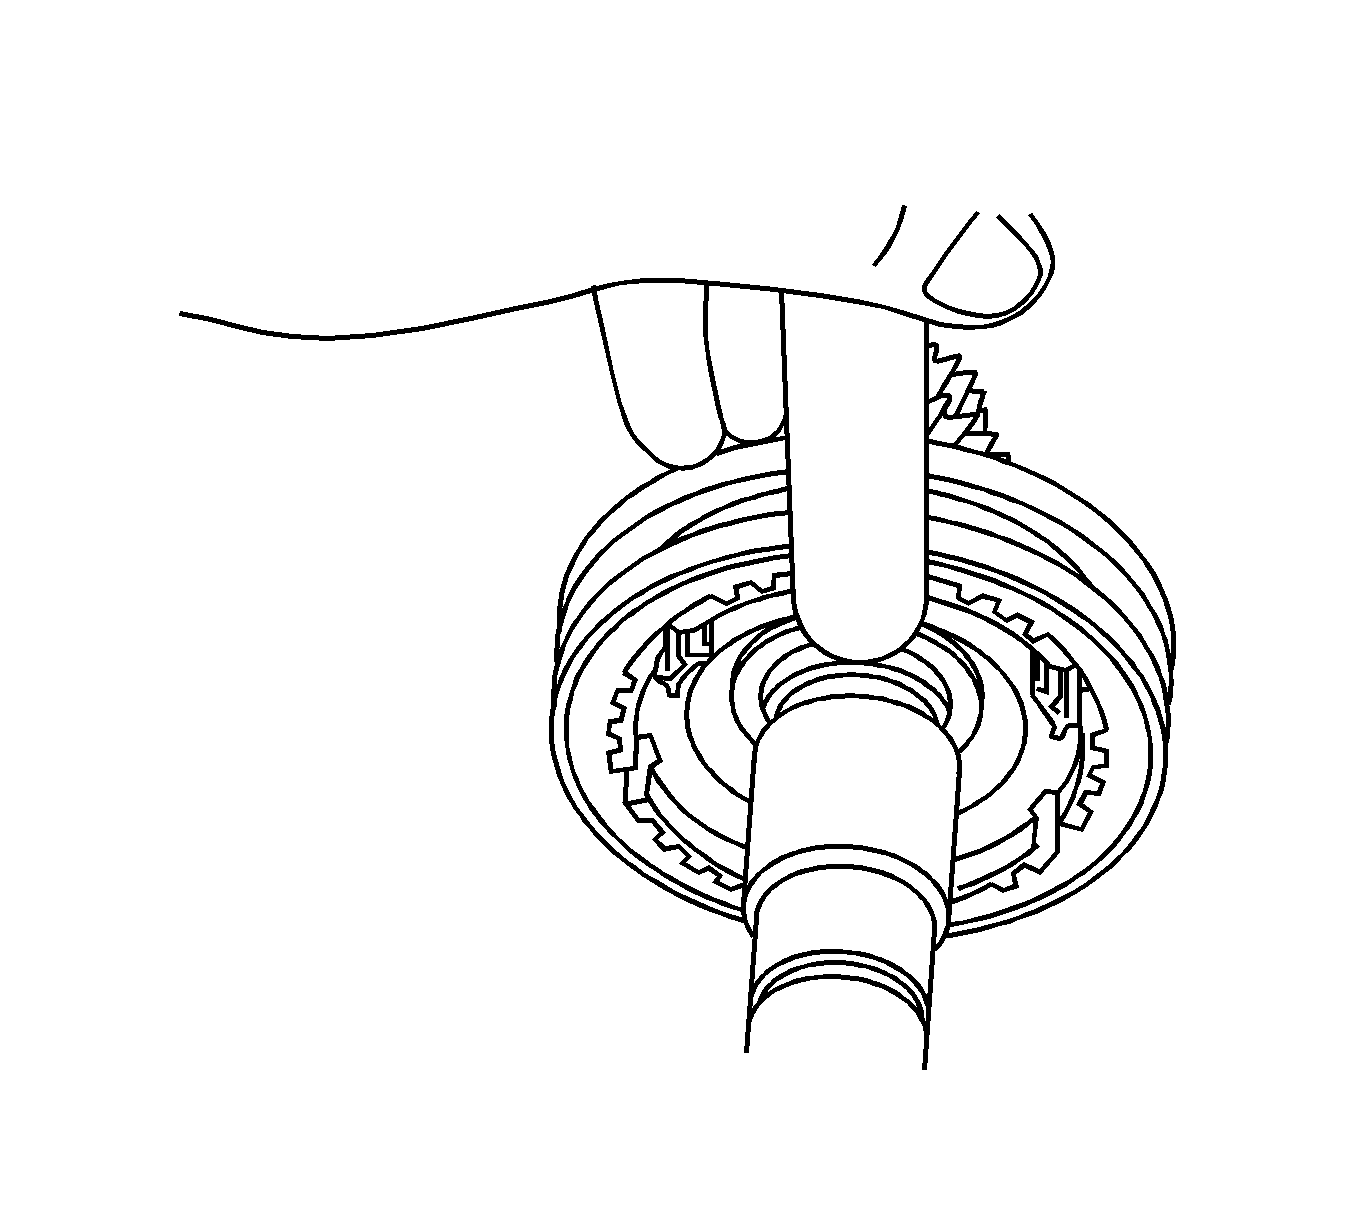
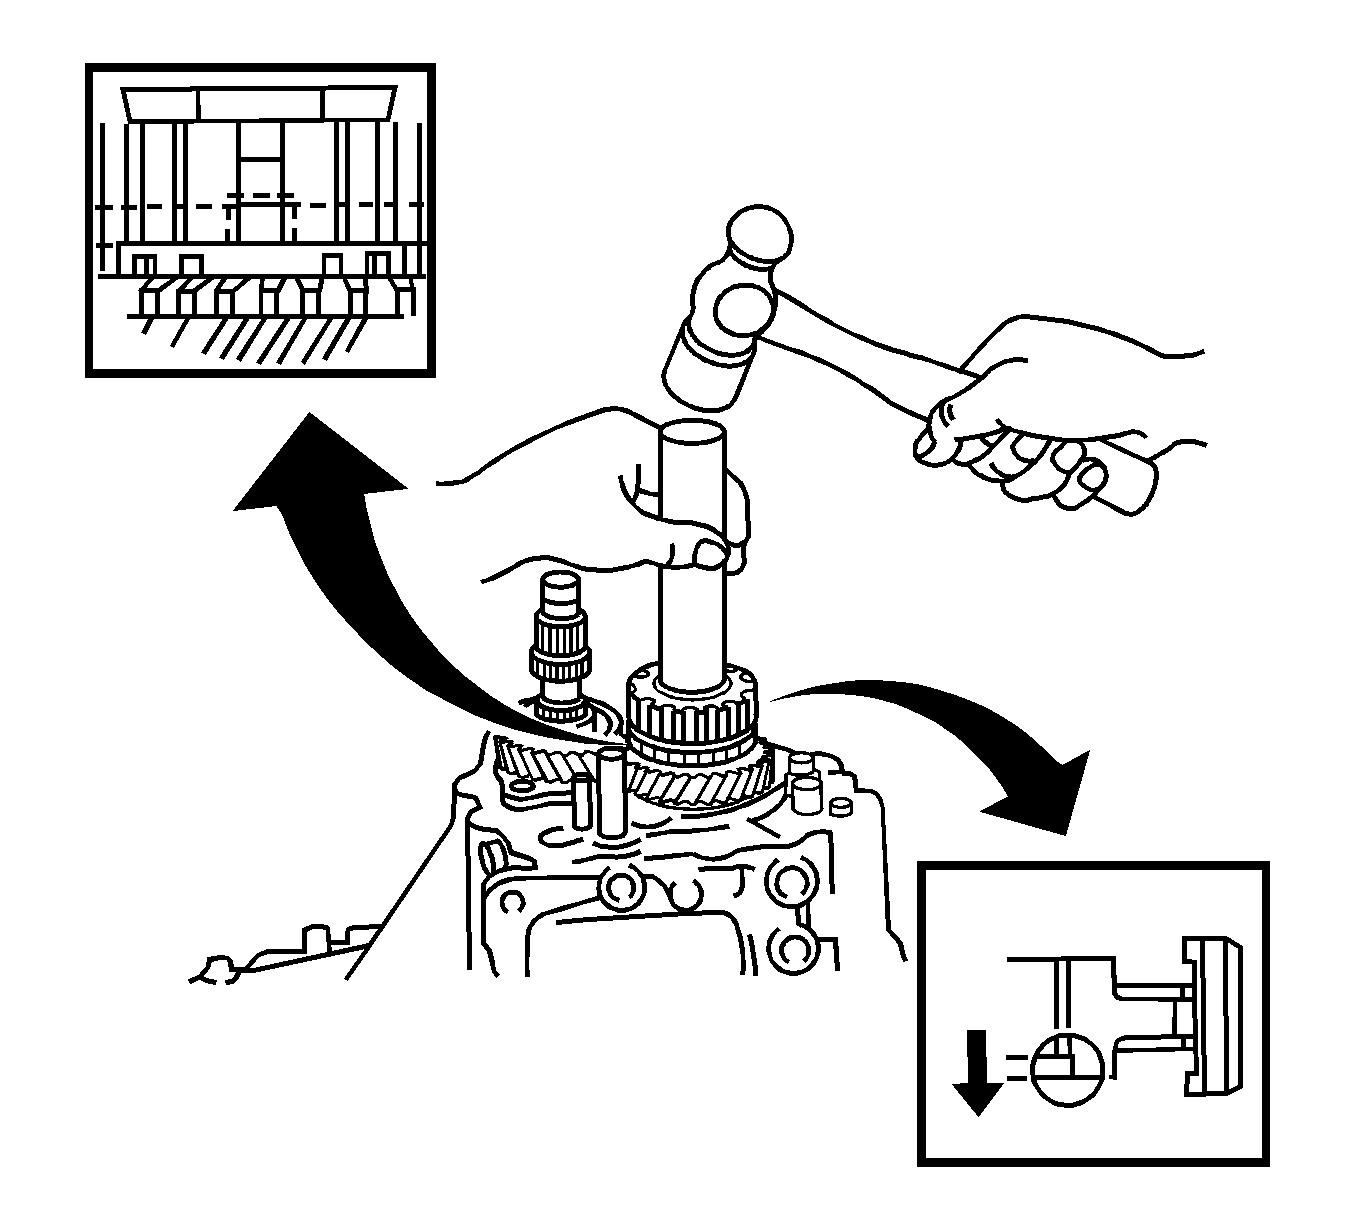
- Using a brass bar and hammer, install the No.2 hub sleeve snap ring.
- Place the No.2 4th gear synchronizer ring on the No.2 Hub sleeve assembly and align the No.2 synchronizer ring slots with the No.2 shifting keys.
- Install the spacer to the input shaft.
- Apply gear oil to the roller bearing, then install the roller bearing on the input shaft.
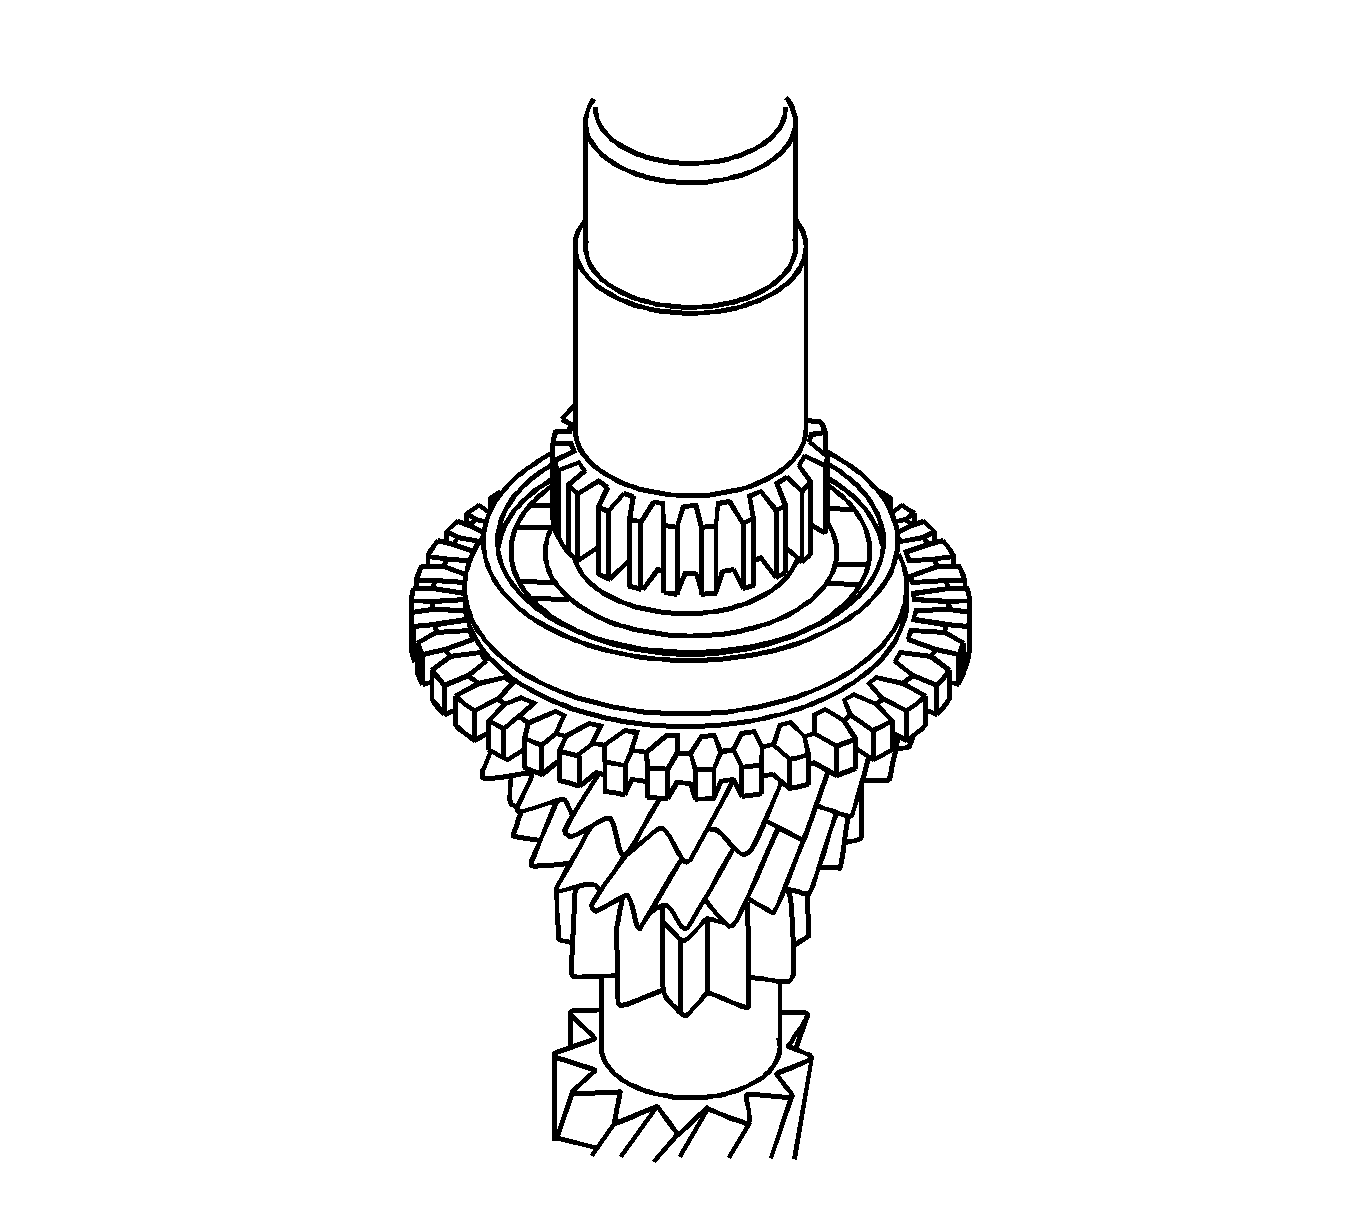
- Install 4th gear to the input shaft.
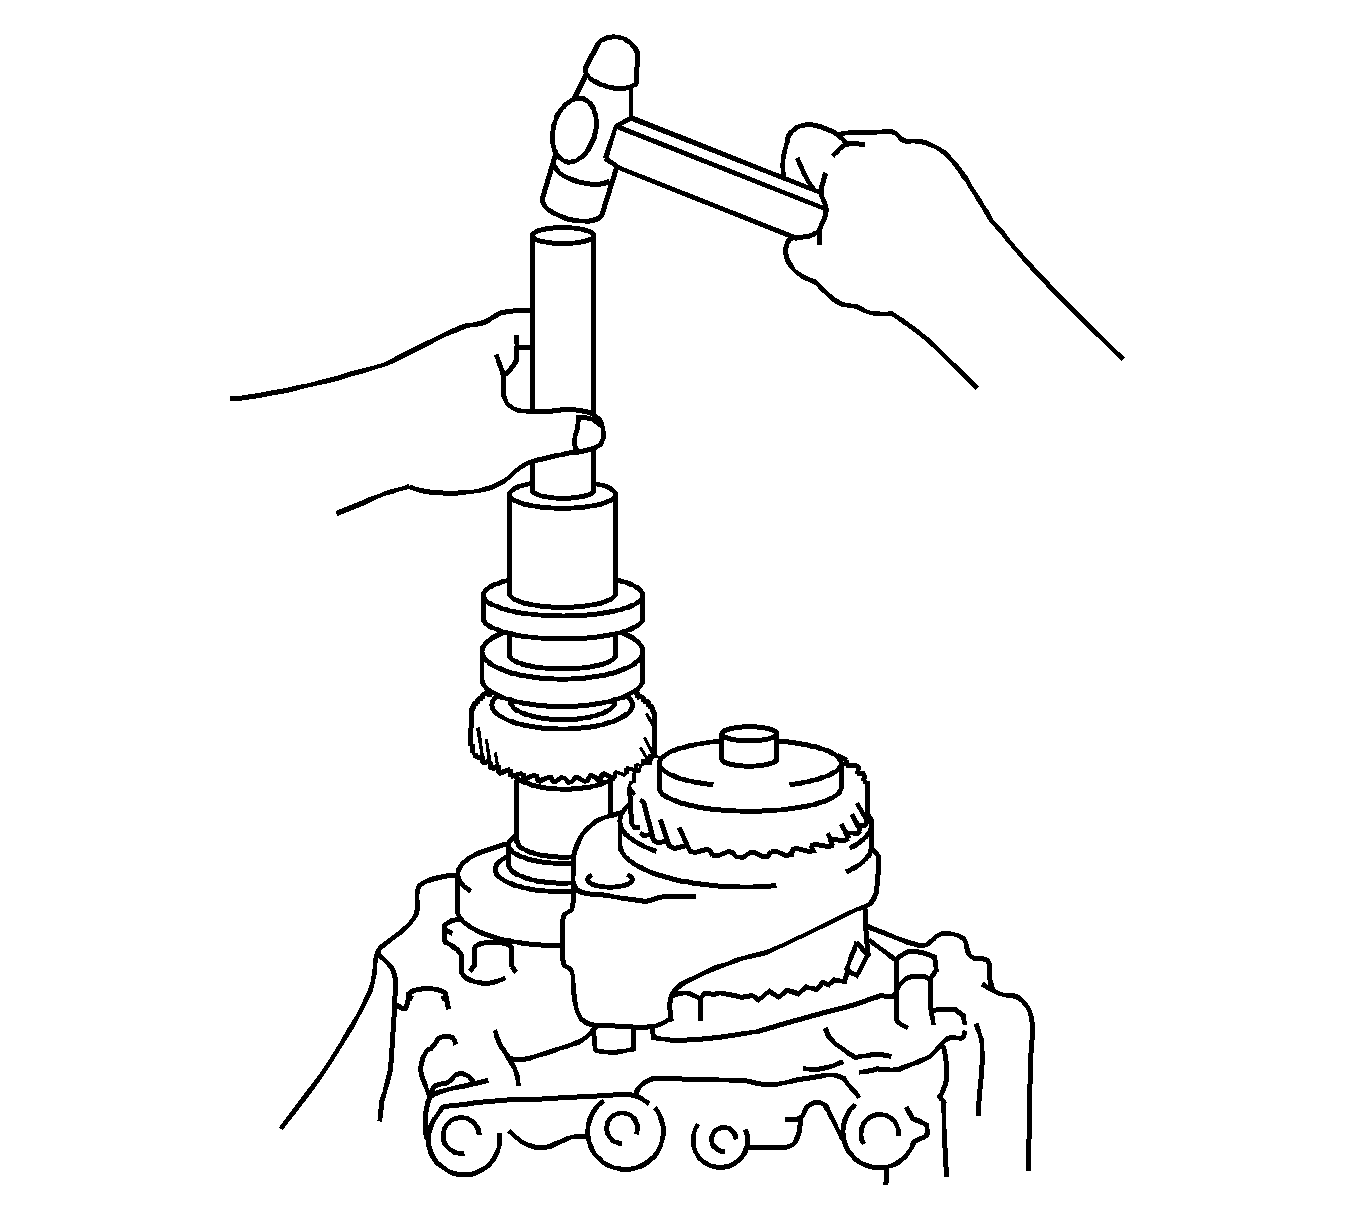
- Using a press, install the center ball bearing.
- Select a snap ring that will make the thrust clearance of the front bearing inner race less than 0.1 mm (0.004 in).
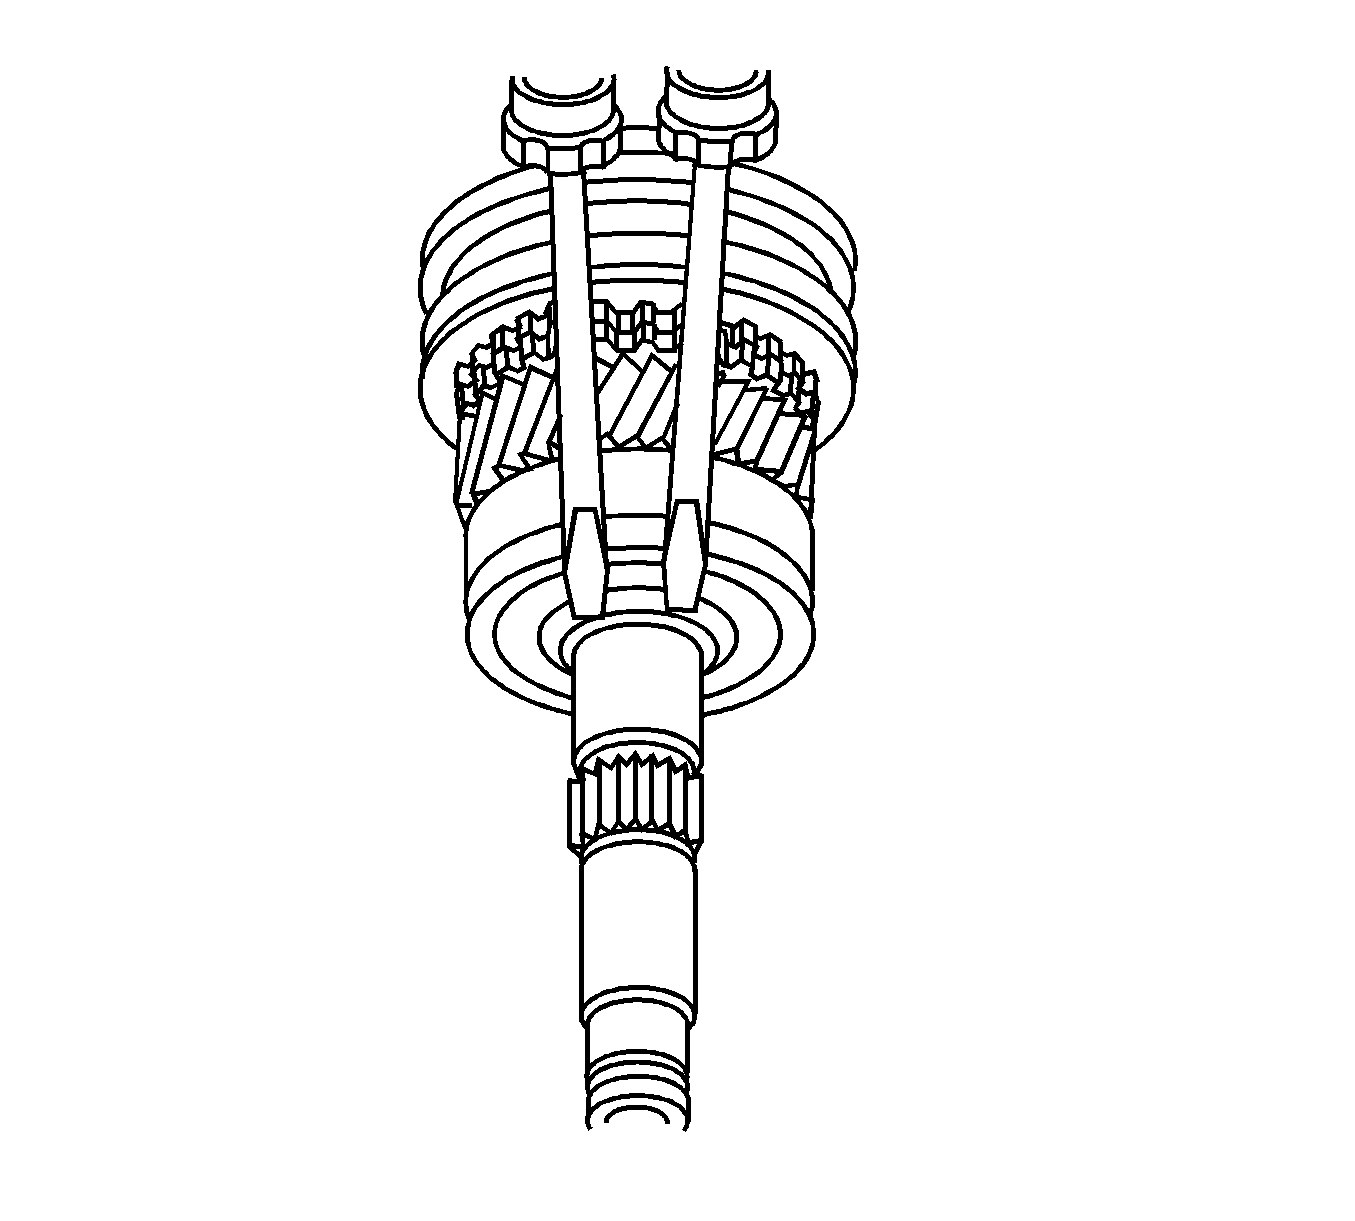
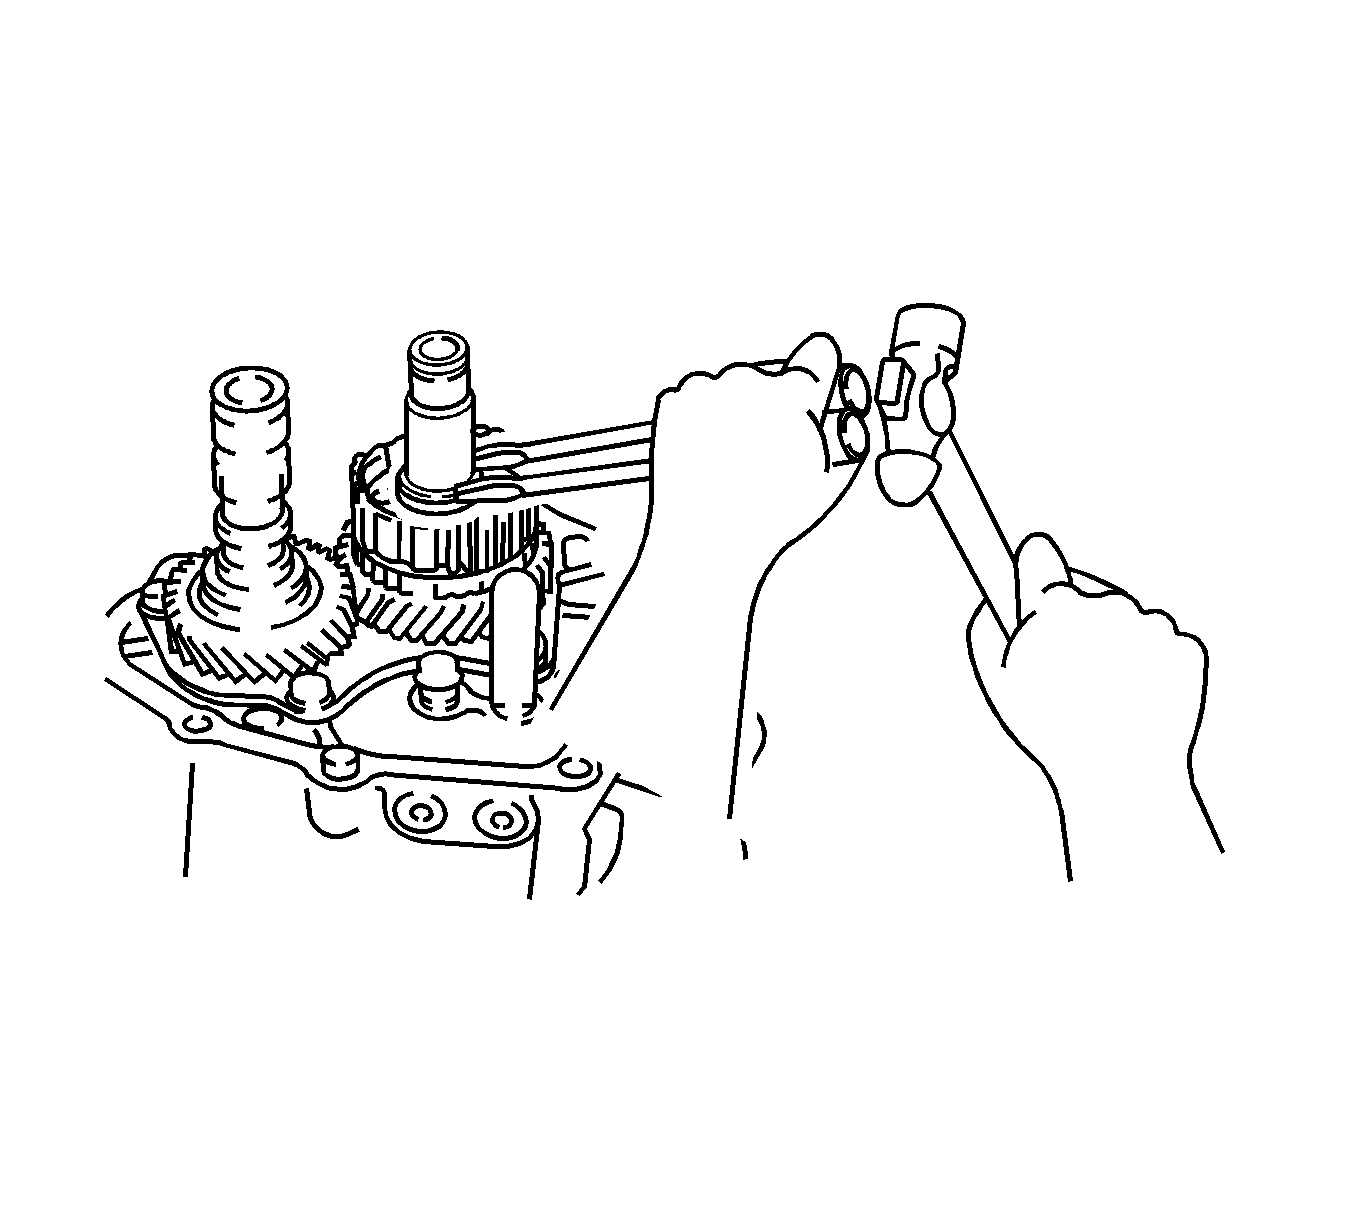
- Install the input shaft snap ring.
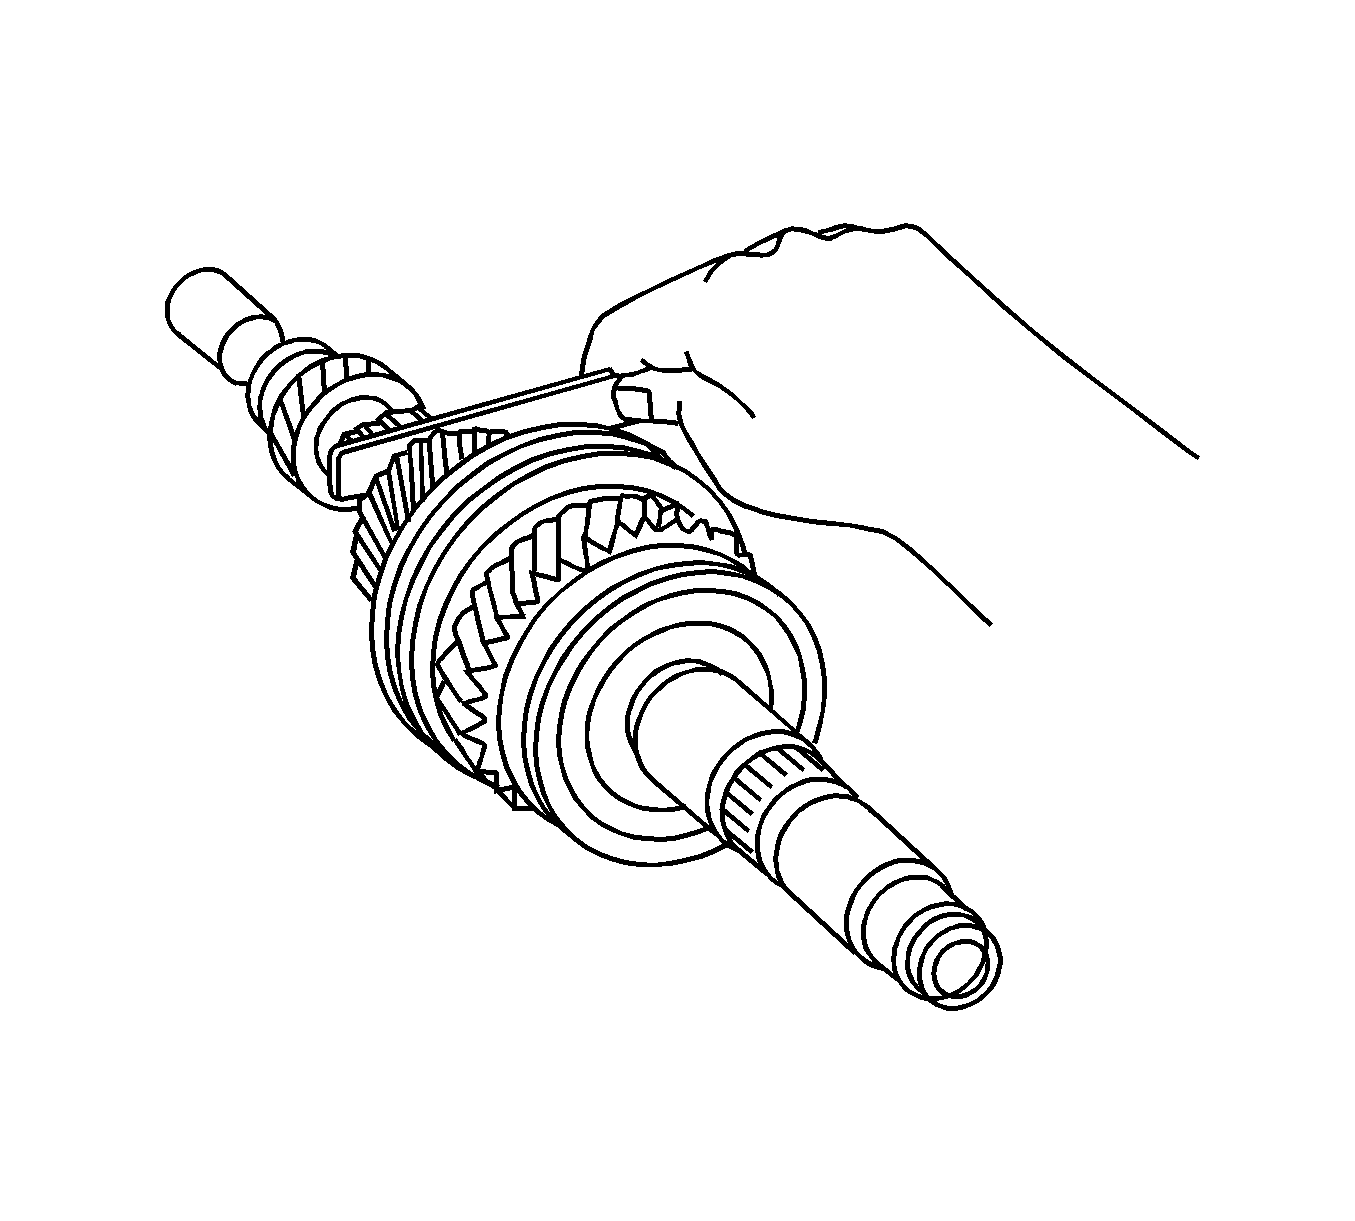
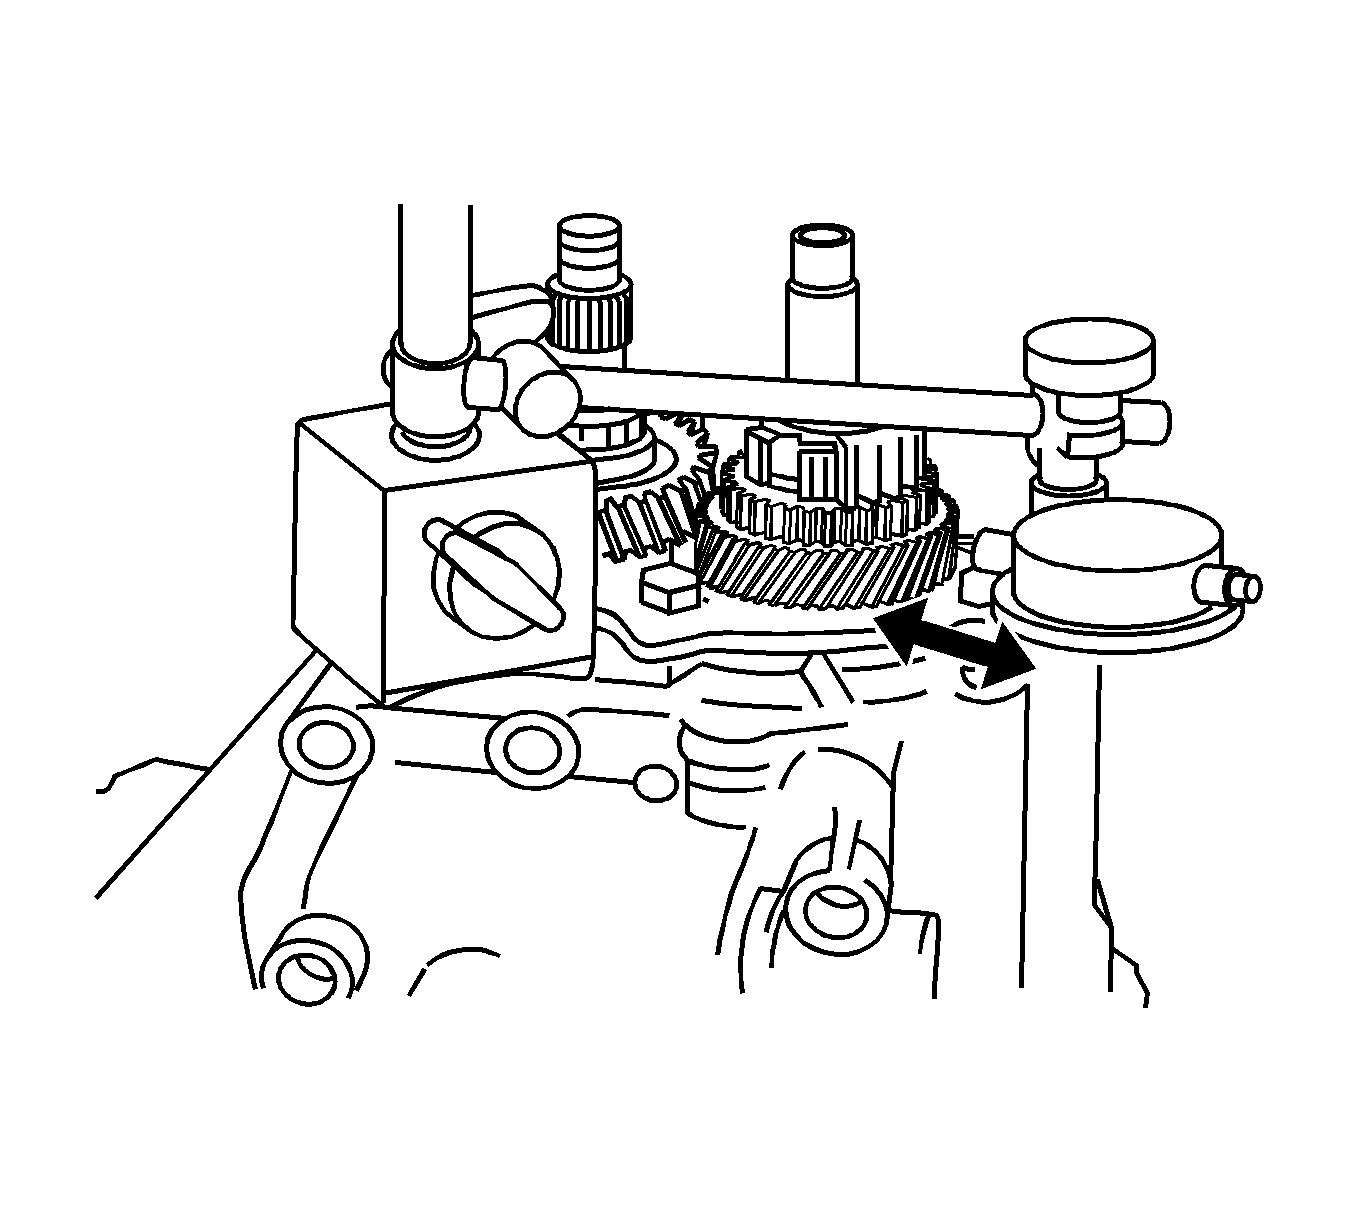
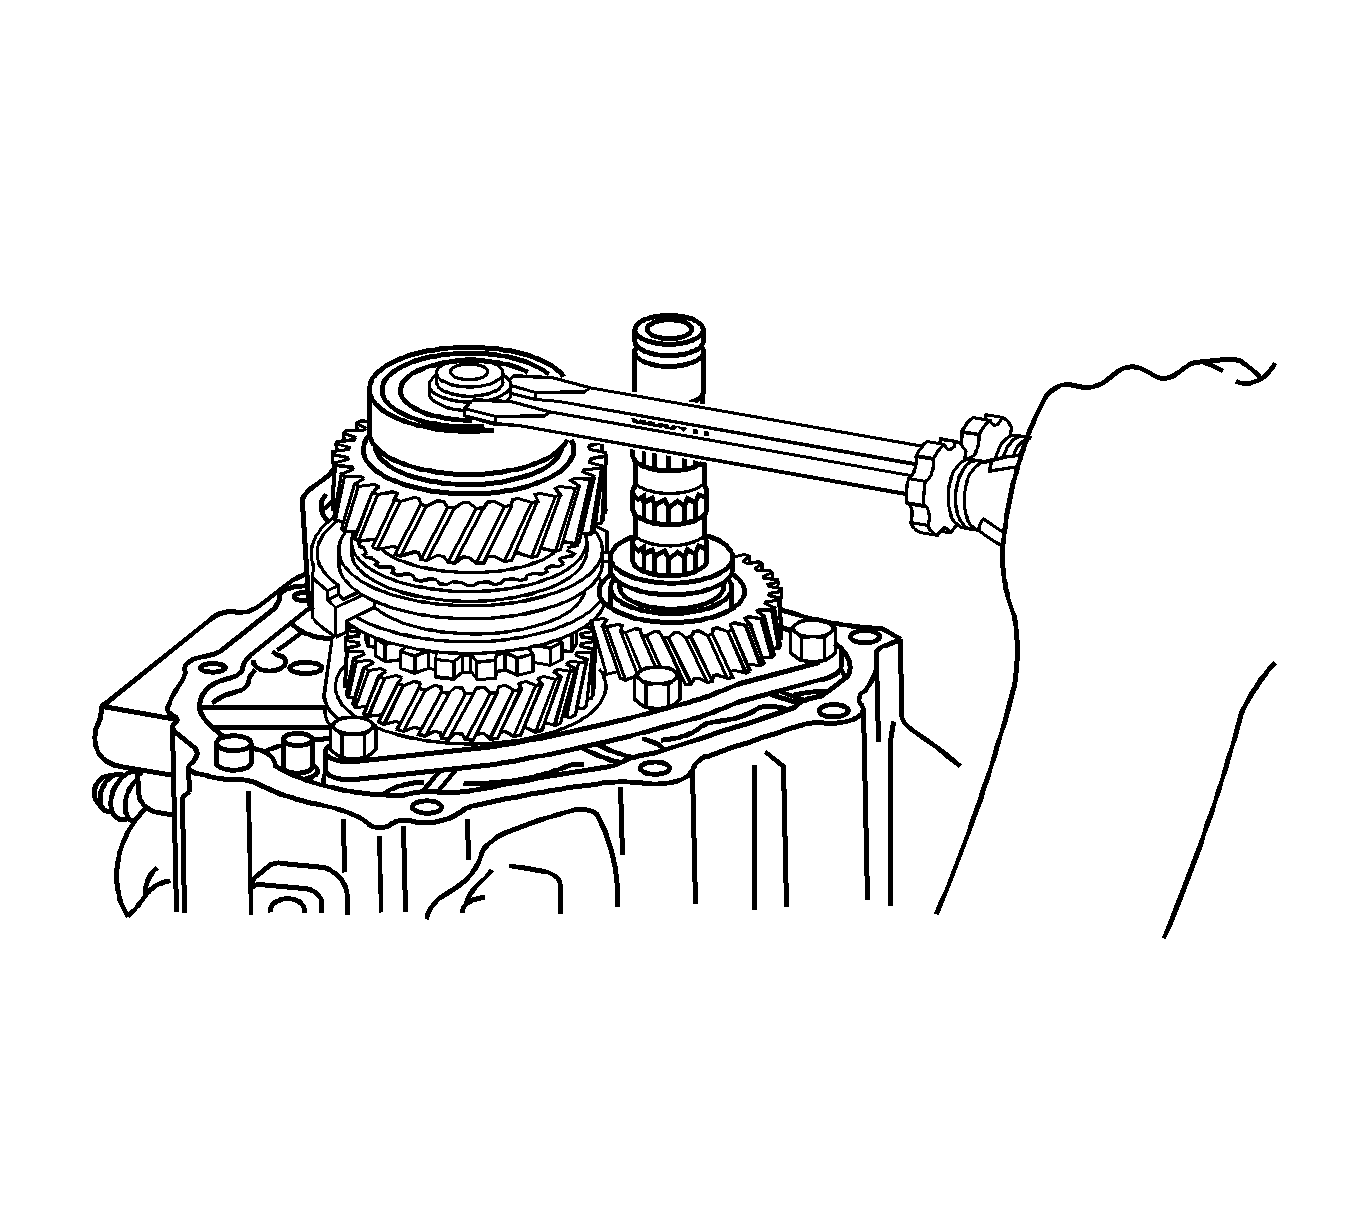
- Using a feeler gage, measure the thrust clearance for 4th gear of the input shaft.
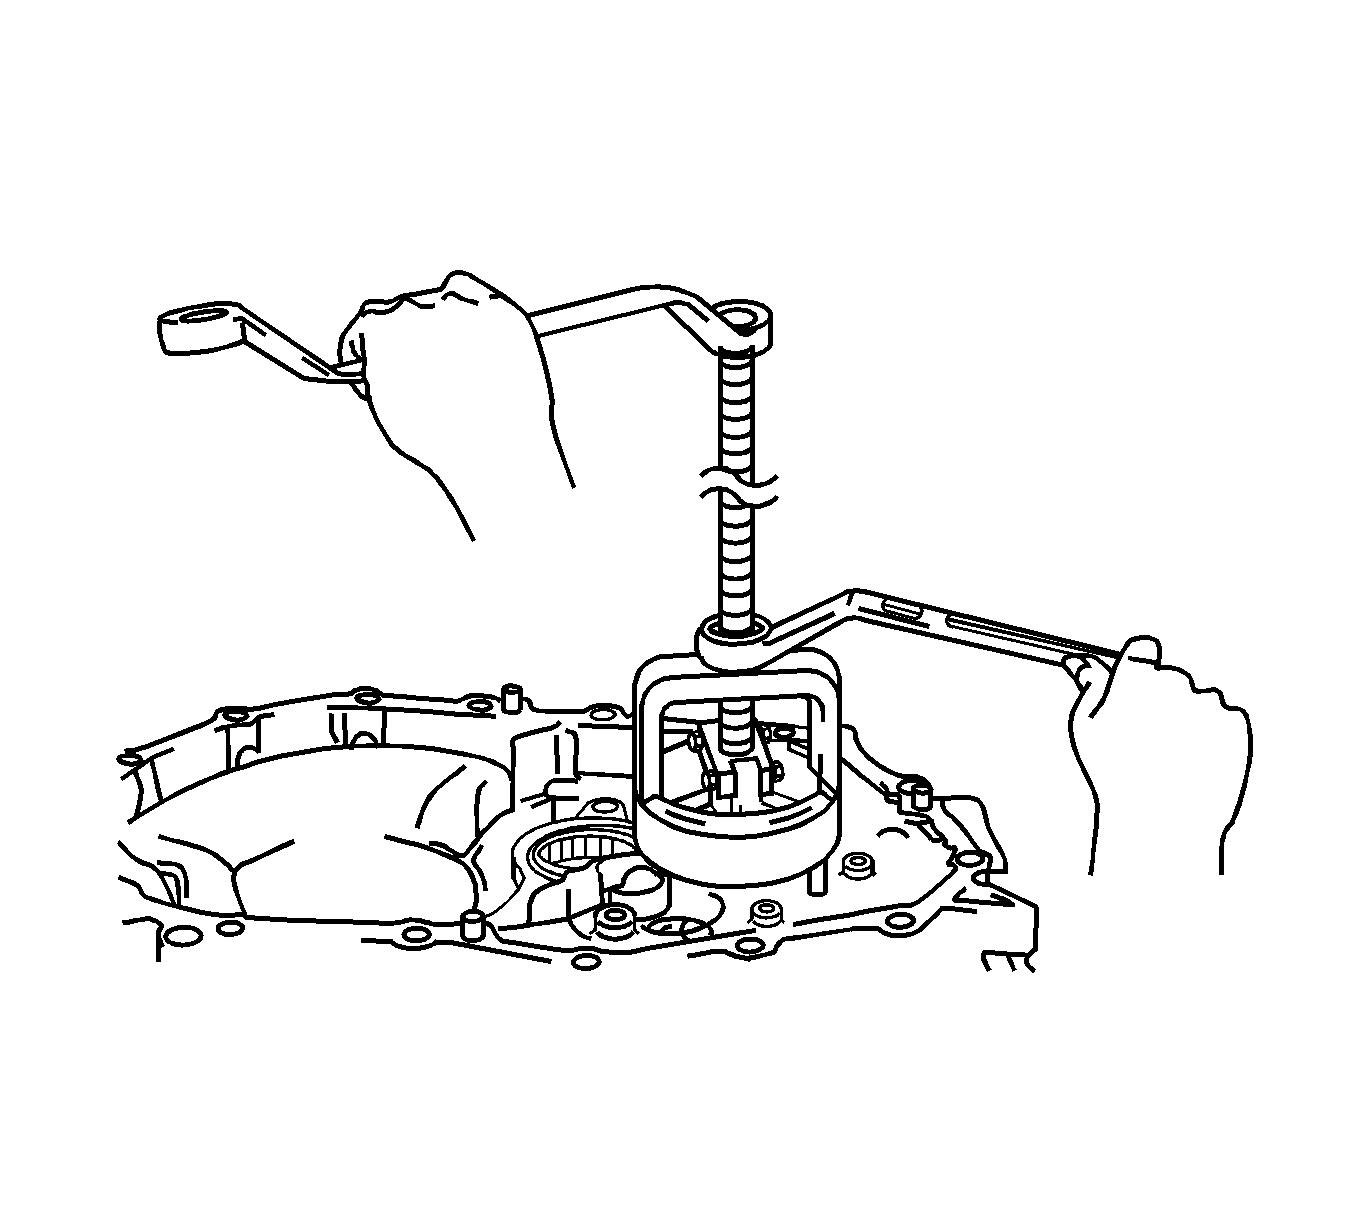
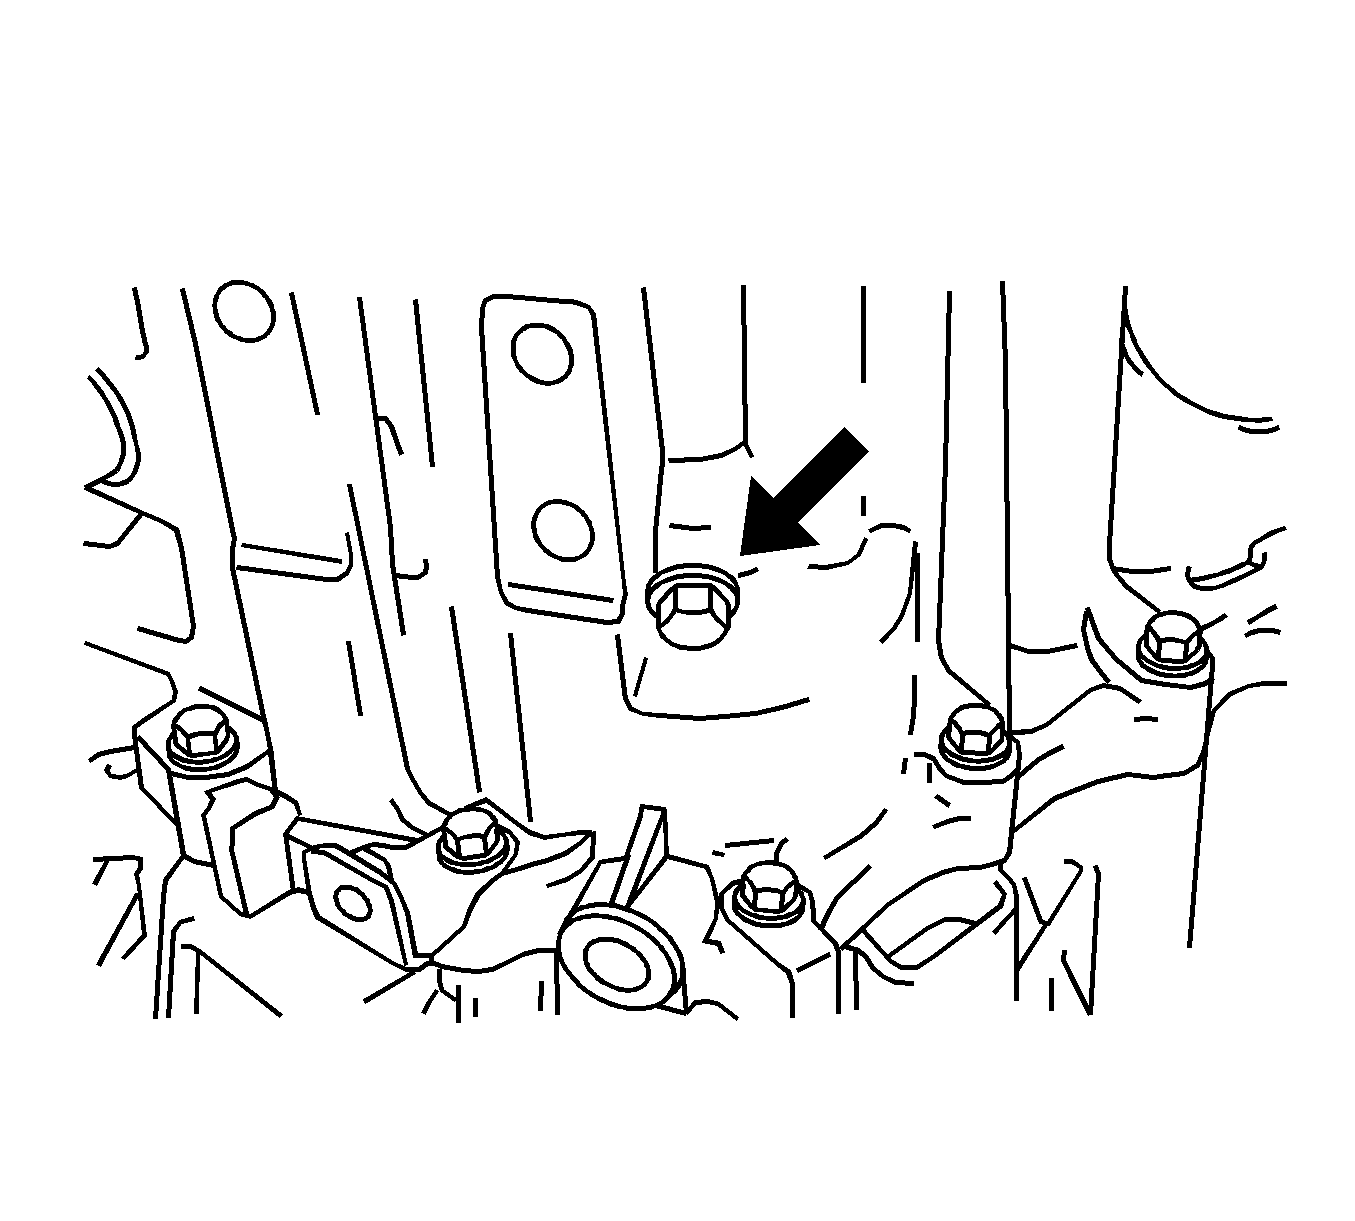
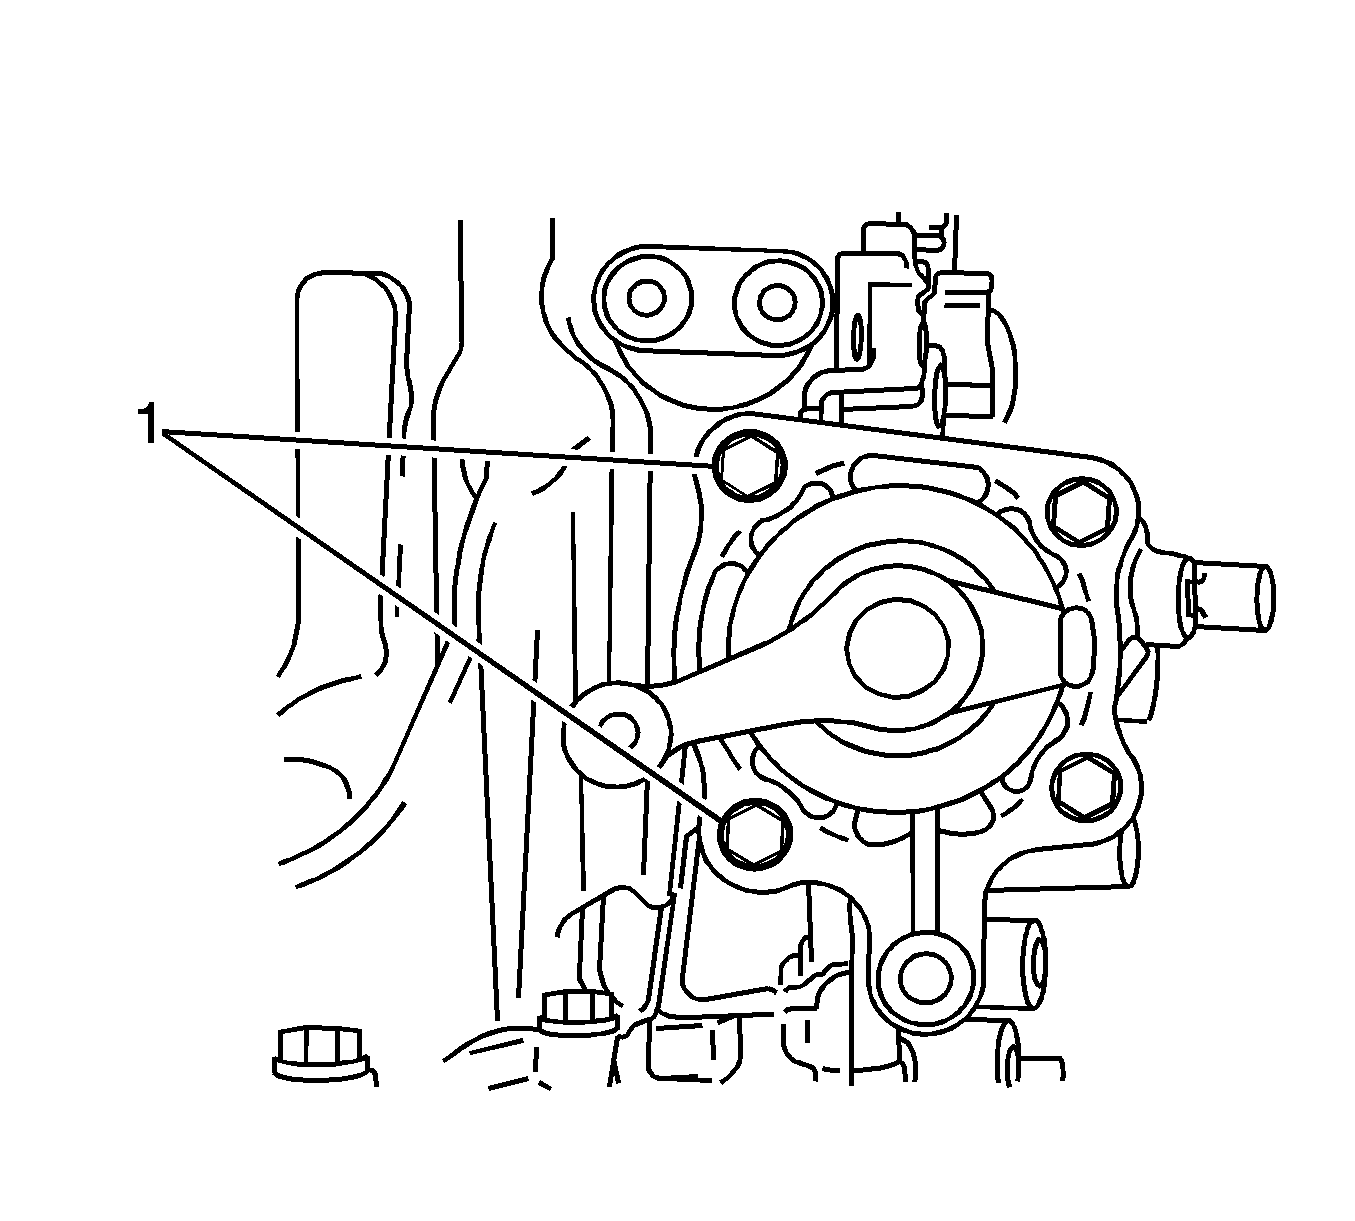
- Install the bolt and the transaxle case receiver to the transaxle case.
- Install the bearing lock plate and bolt.
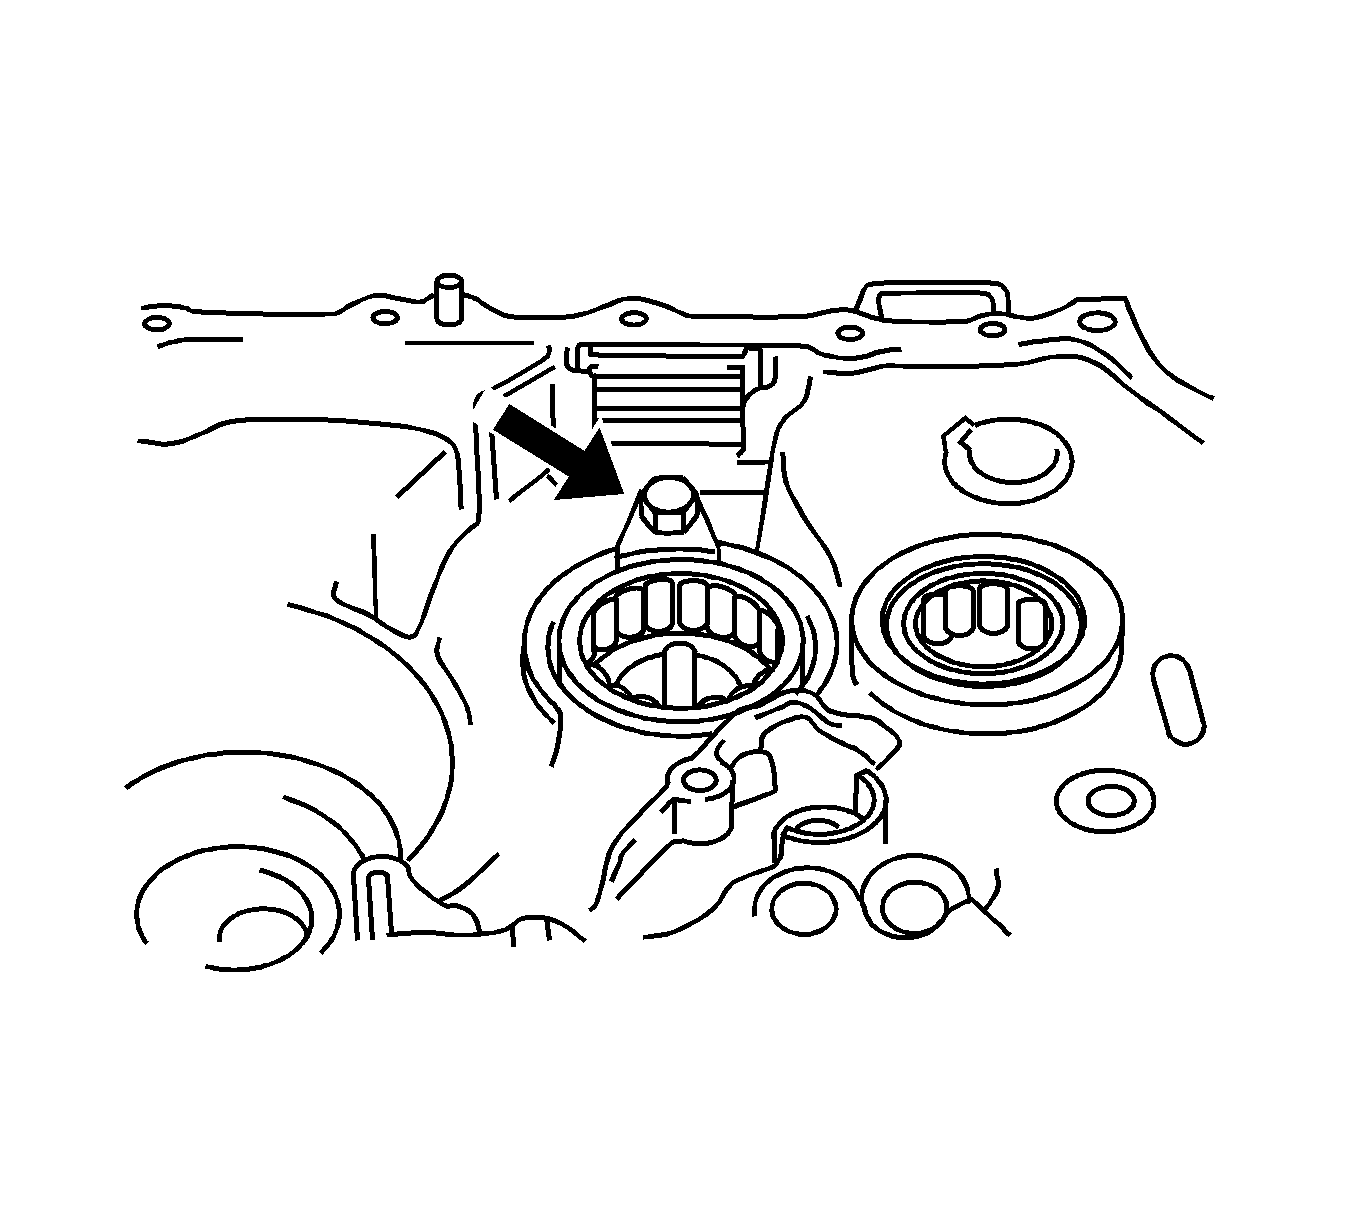
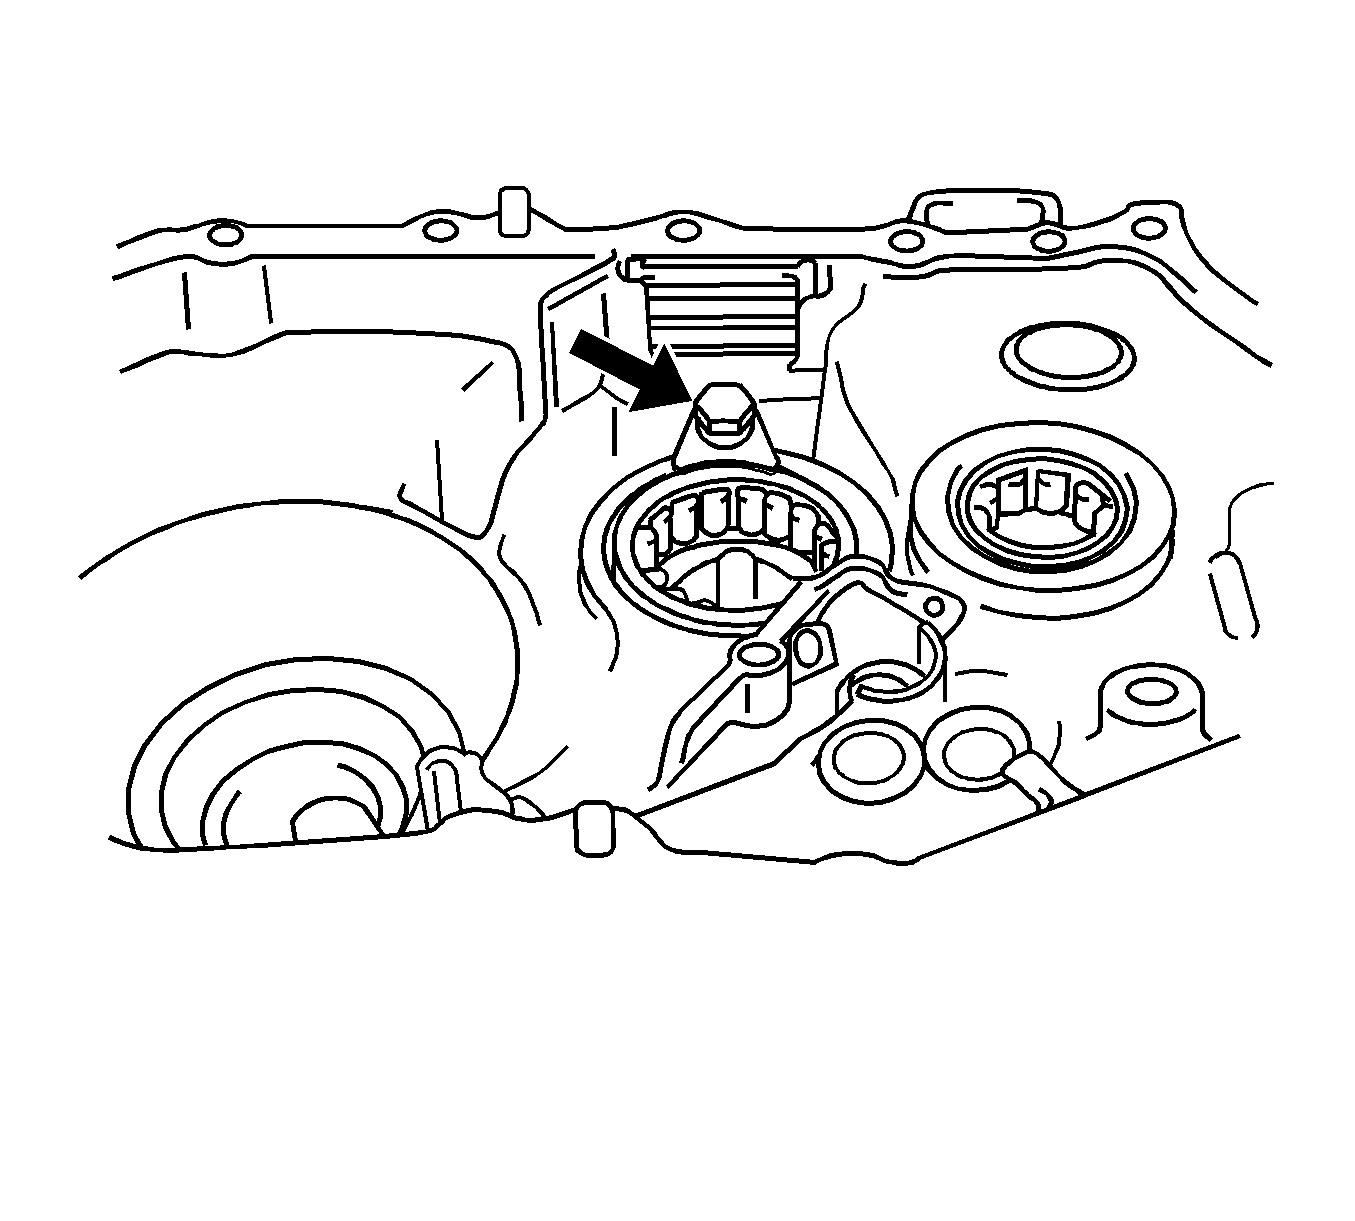
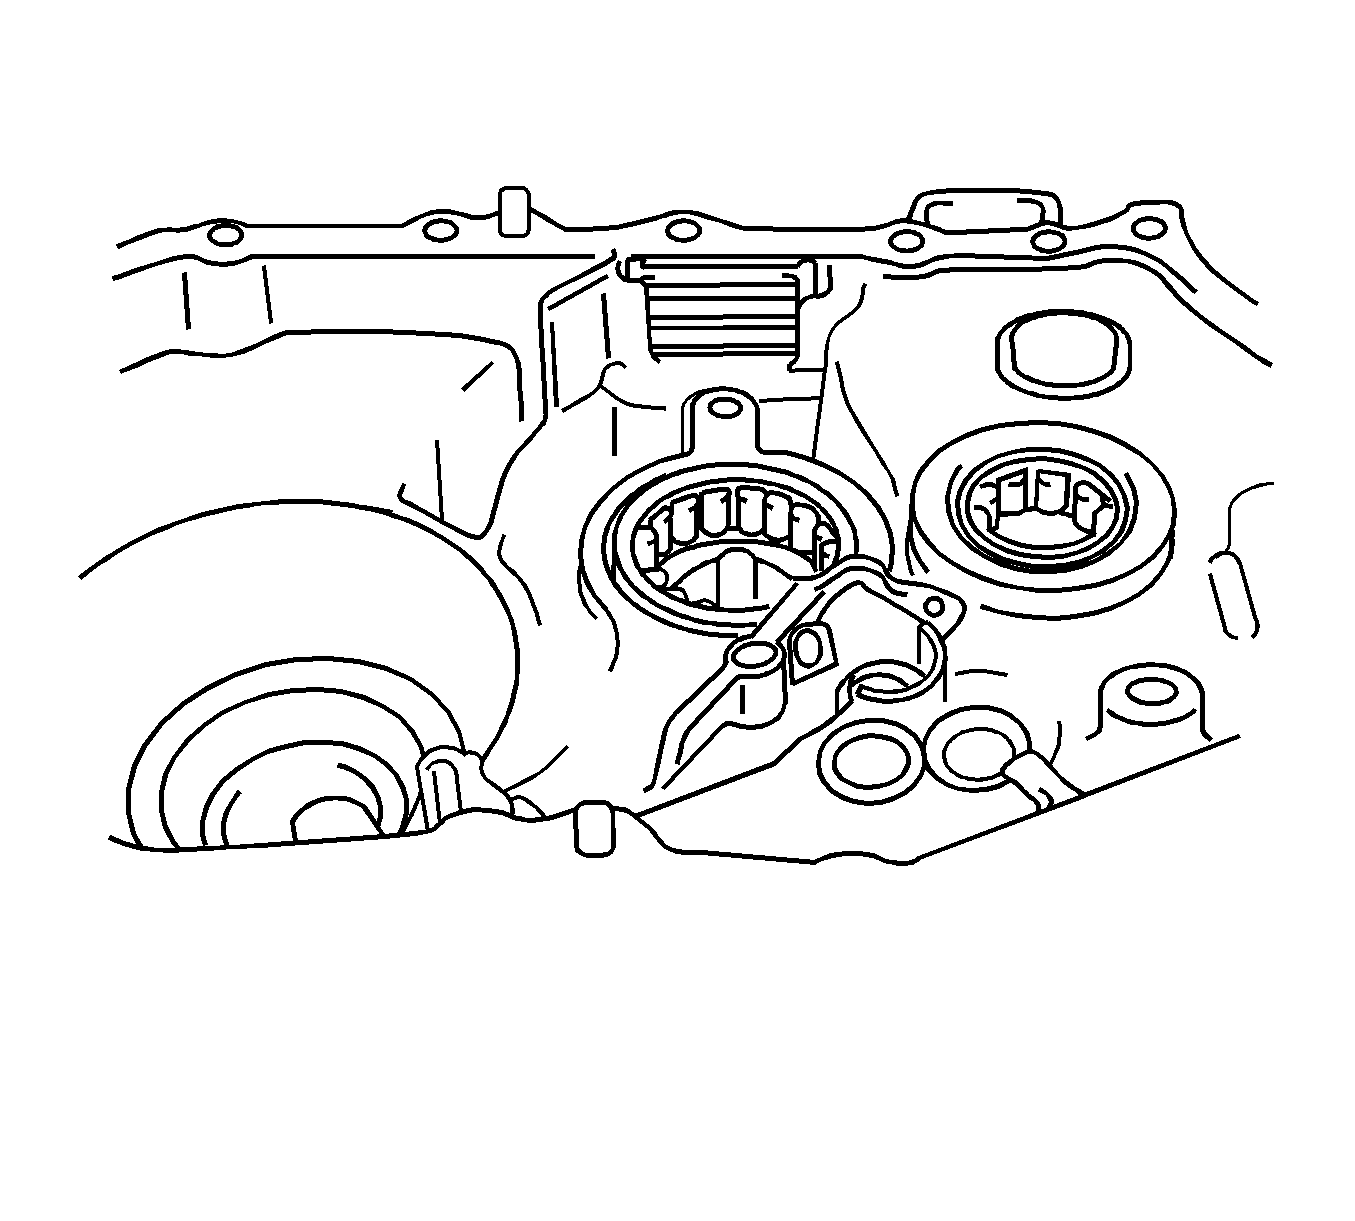
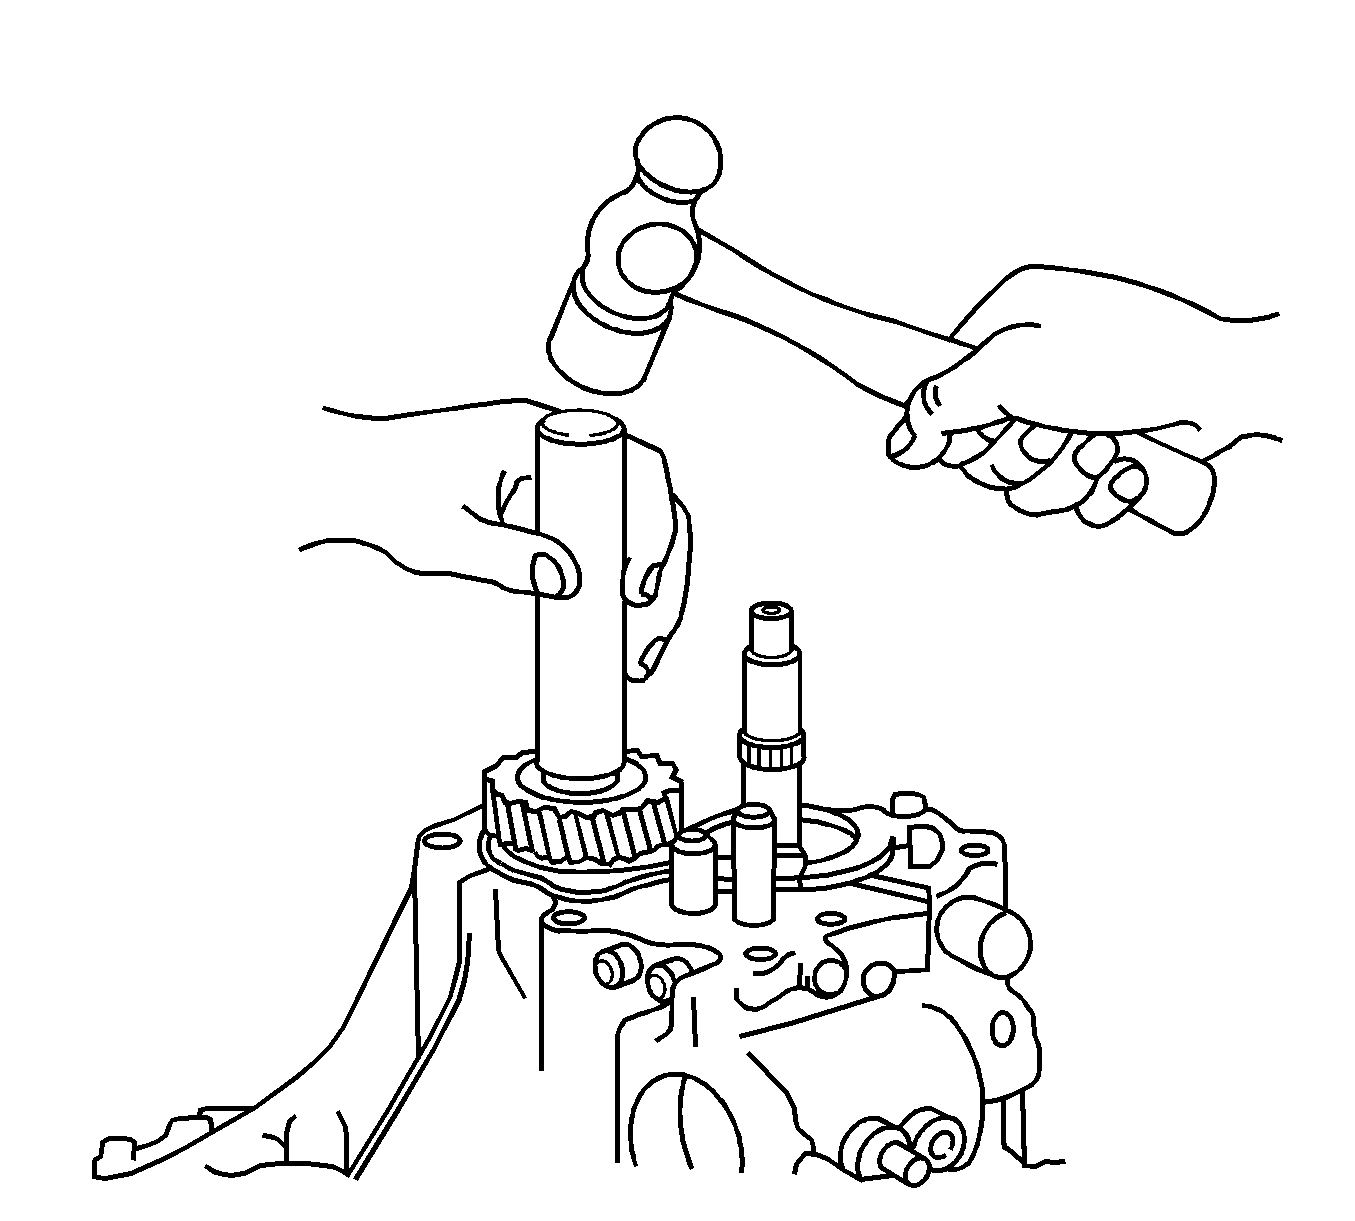
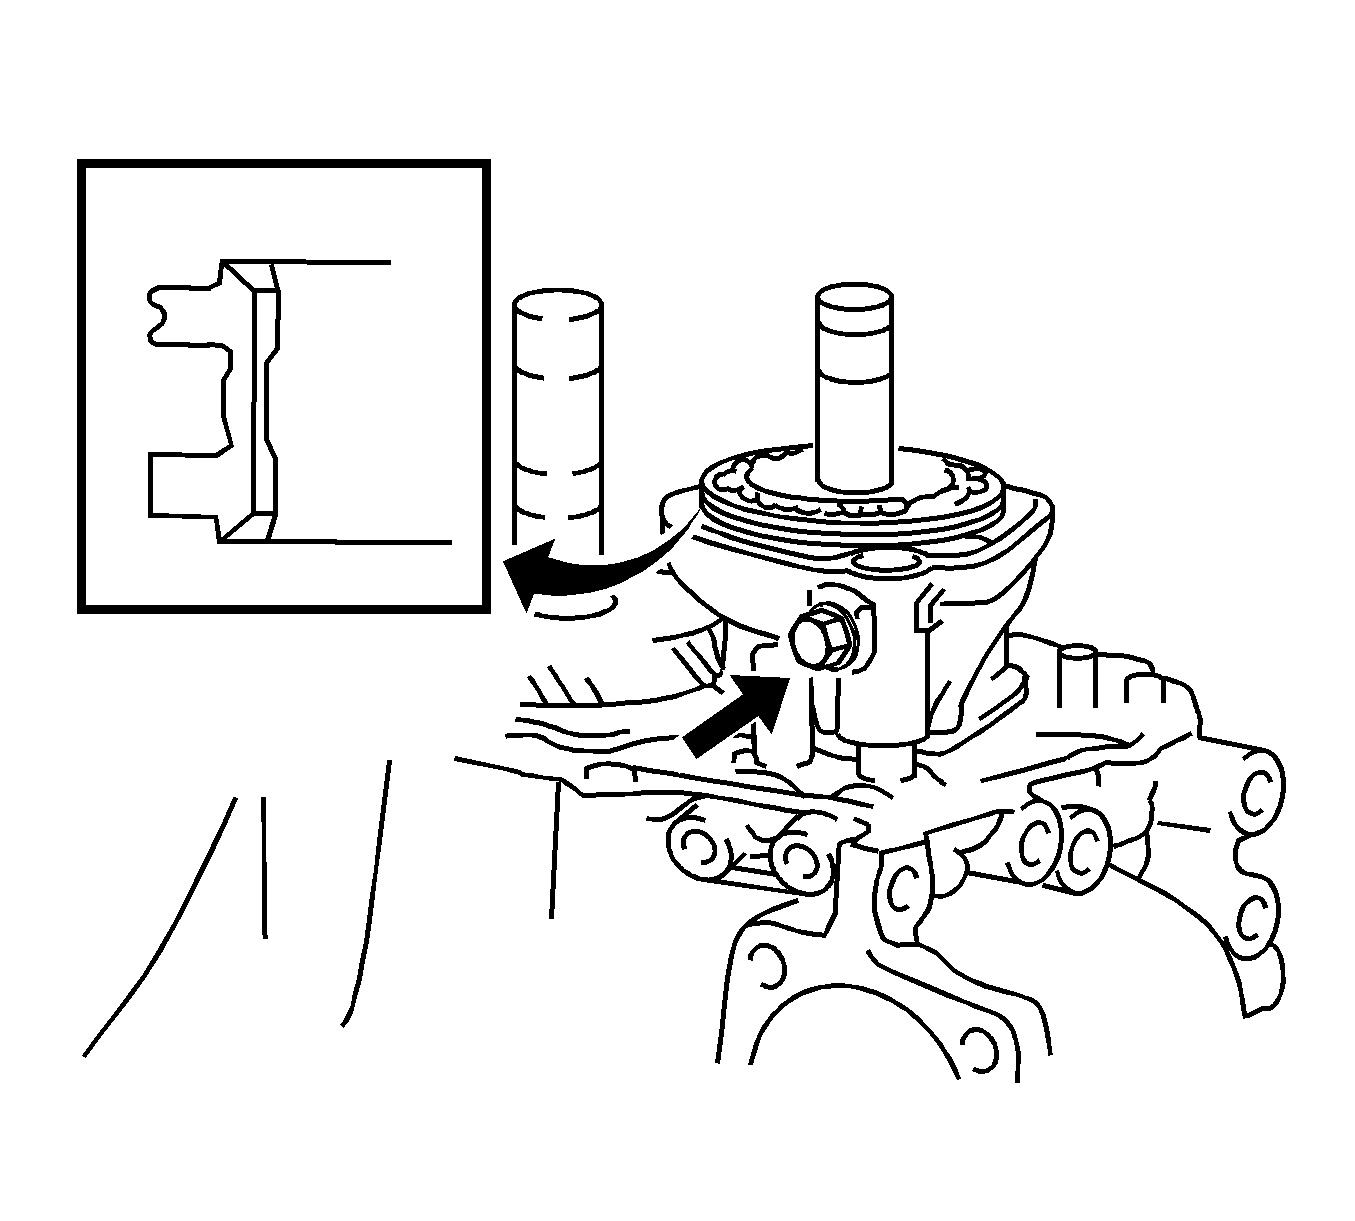
- Using a press, install the output shaft front bearing.
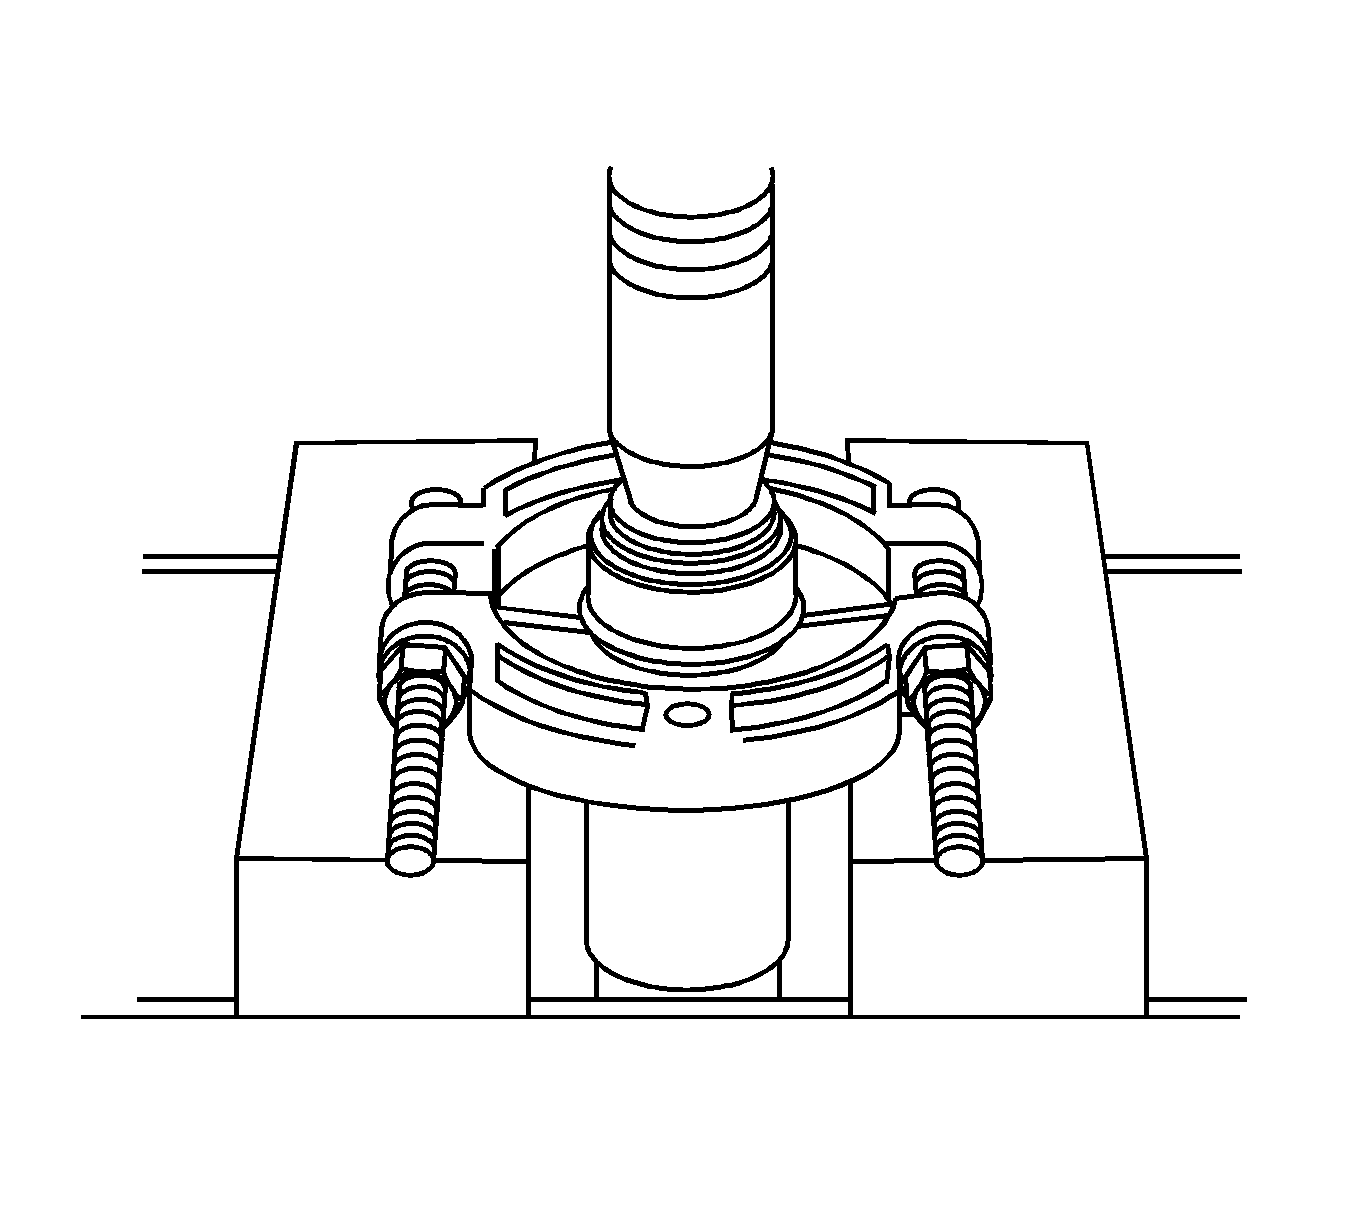
- If the output shaft front bearing requires replacement, install the bolt and output shaft cover.
- Using a press, install the input shaft bearing.
- If the input shaft bearing has been replaced, install a new oil seal.
- Using a feeler gage, measure the clearance between the hub sleeve and the gear shift fork. Maximum clearance is 0.89 mm (0.0350 in). If the clearance exceeds the maximum, replace the gear shift fork or hub sleeve.
- Using a feeler gage, measure the clearance between the synchronizer ring and the gear spline end. Minimum clearance is 0.75 mm (0.0295 in). If the clearance is less than the minimum, replace the synchronizer ring.
- Check the 5th and 6th gear braking action of the synchronizer ring. Turn the synchronizer ring in one direction while pushing it into the gear cone. Ensure that the ring locks. Replace the ring if necessary.
- Assemble the No.3 clutch hub assembly.
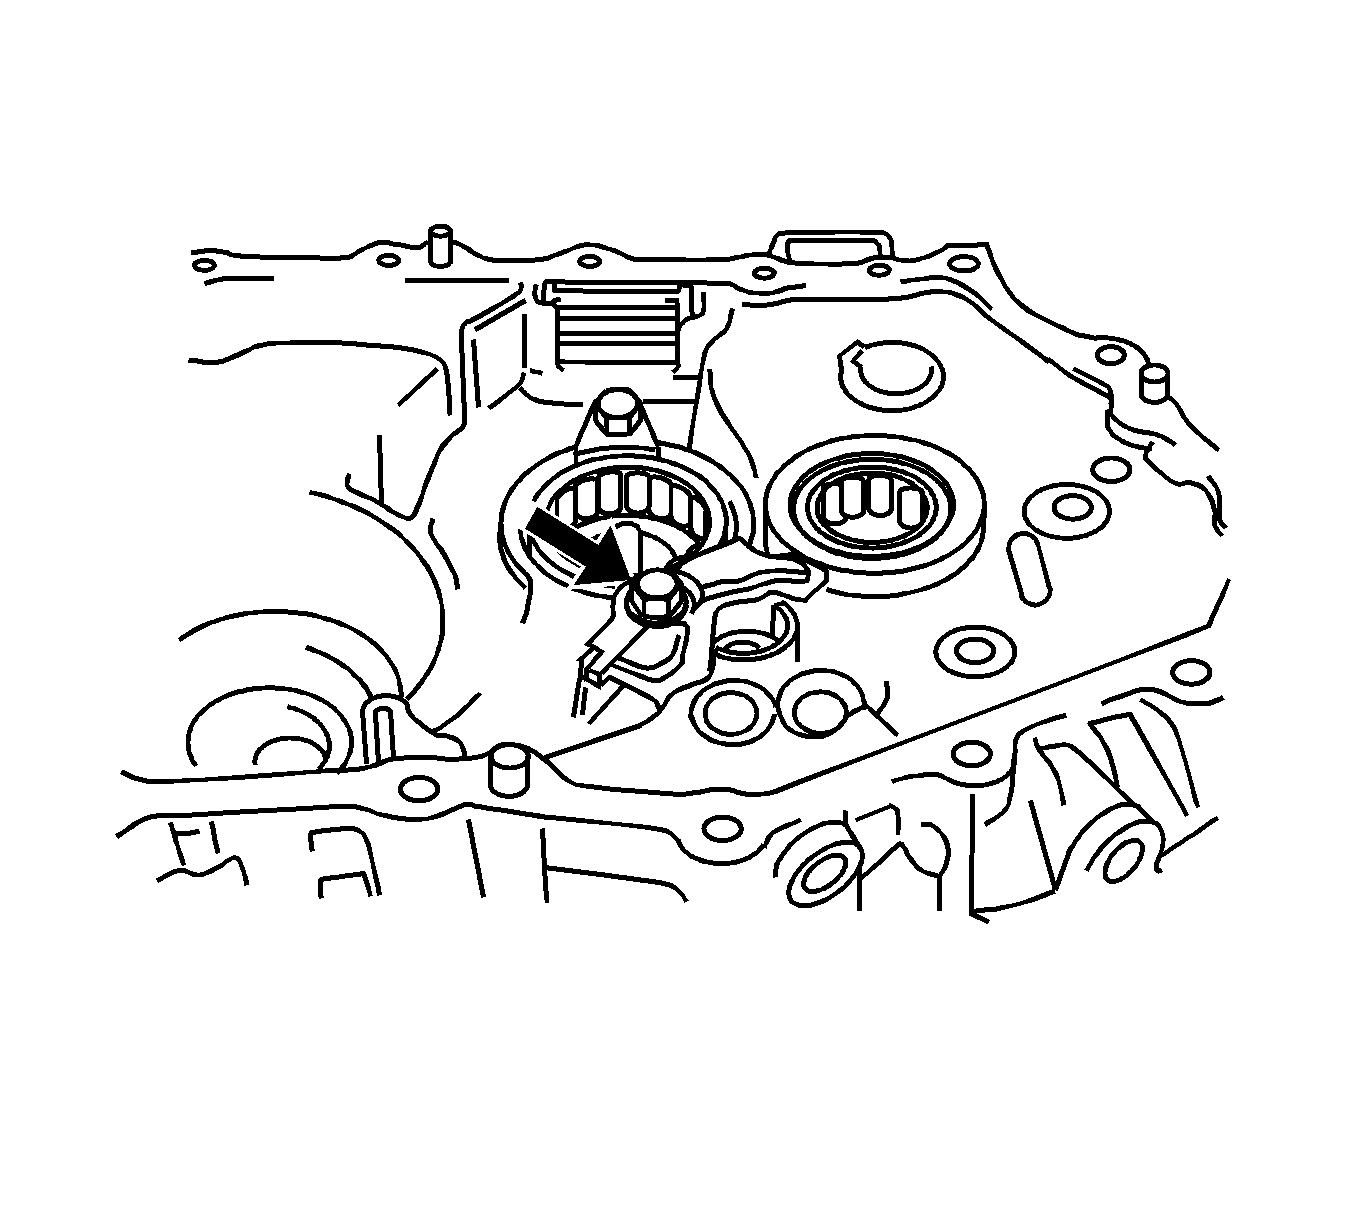
- Install the magnet to the transaxle case
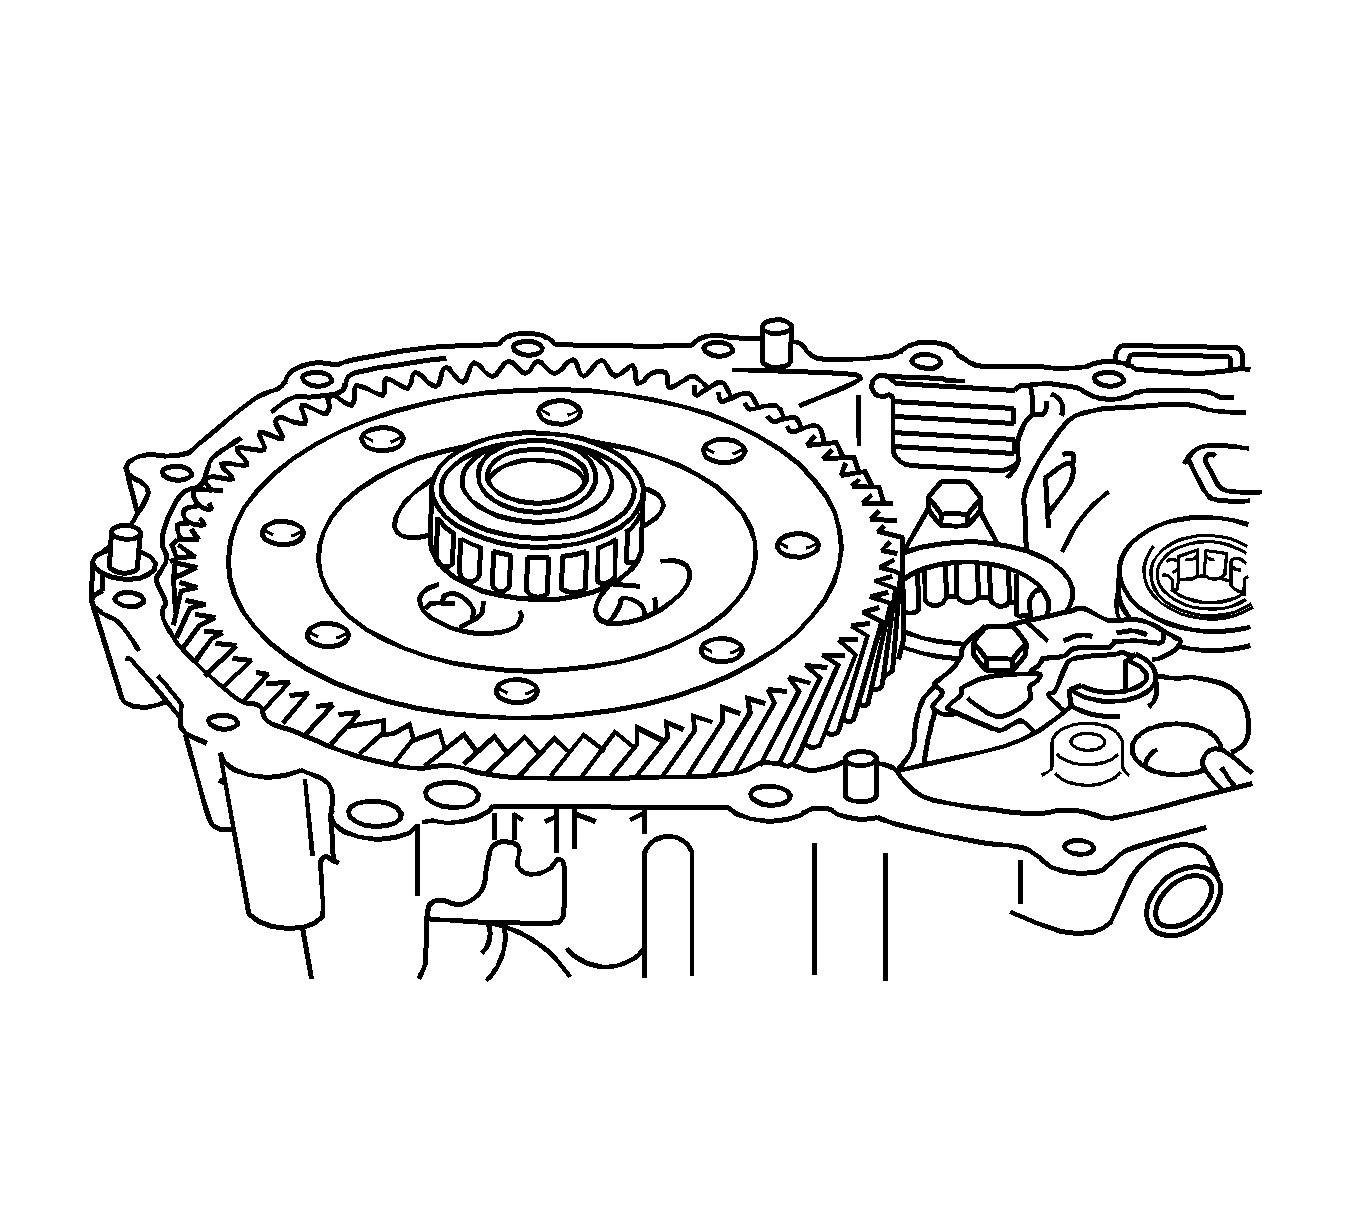
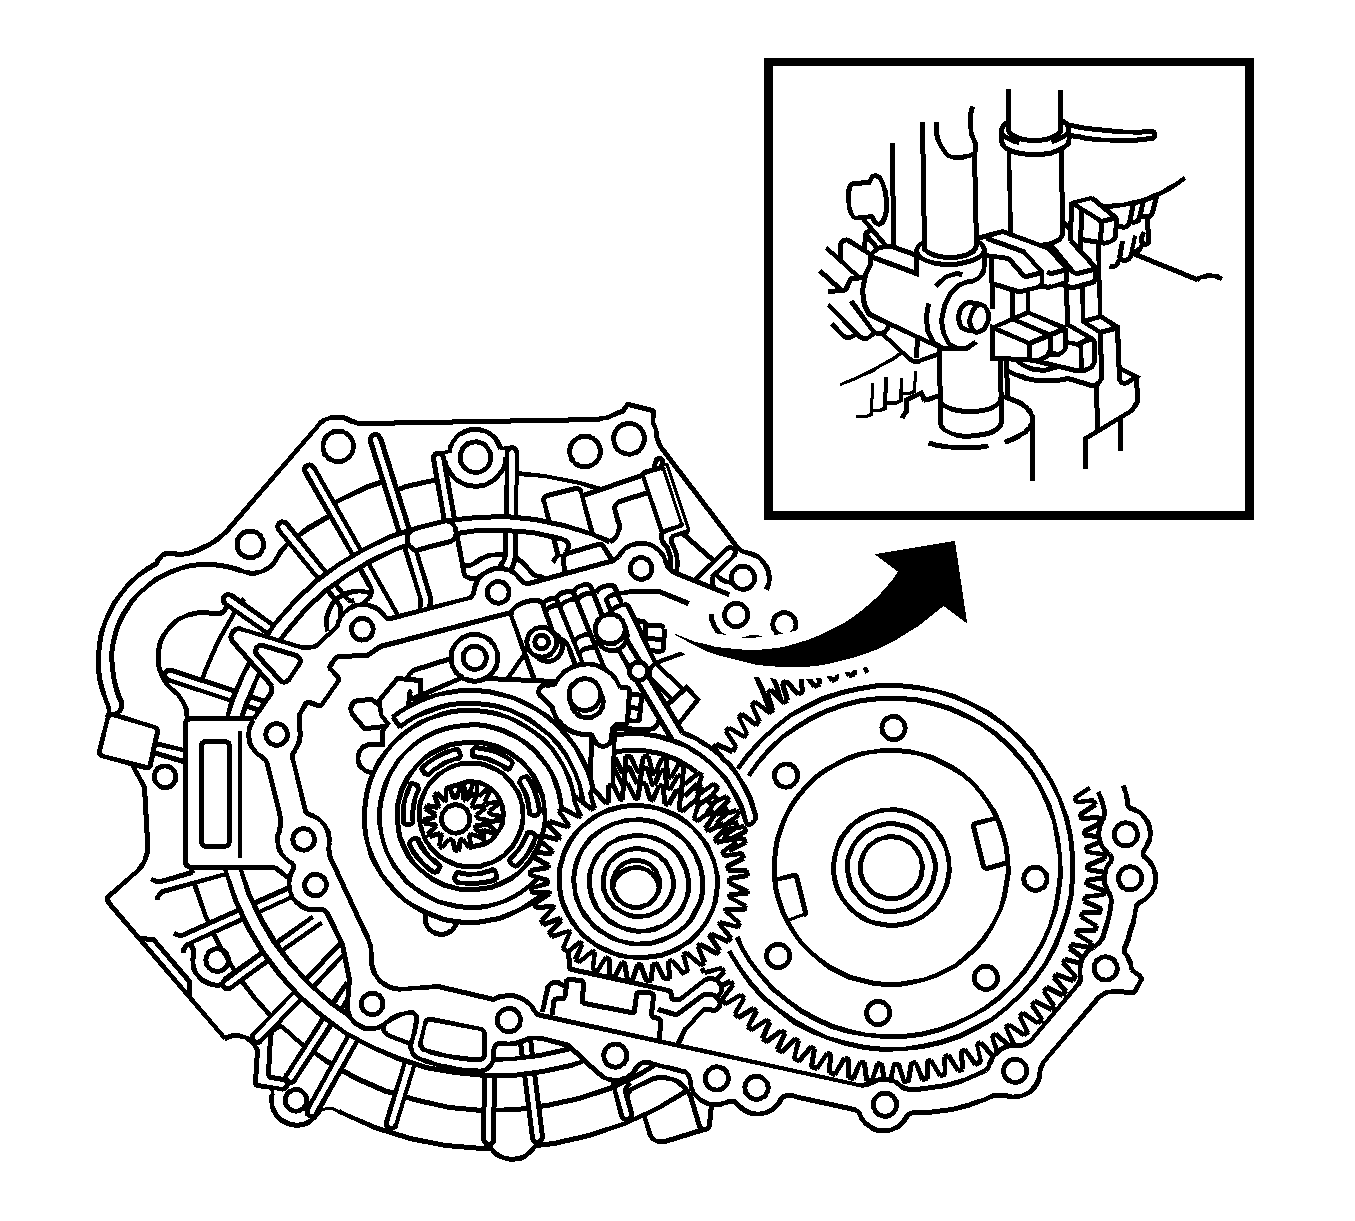
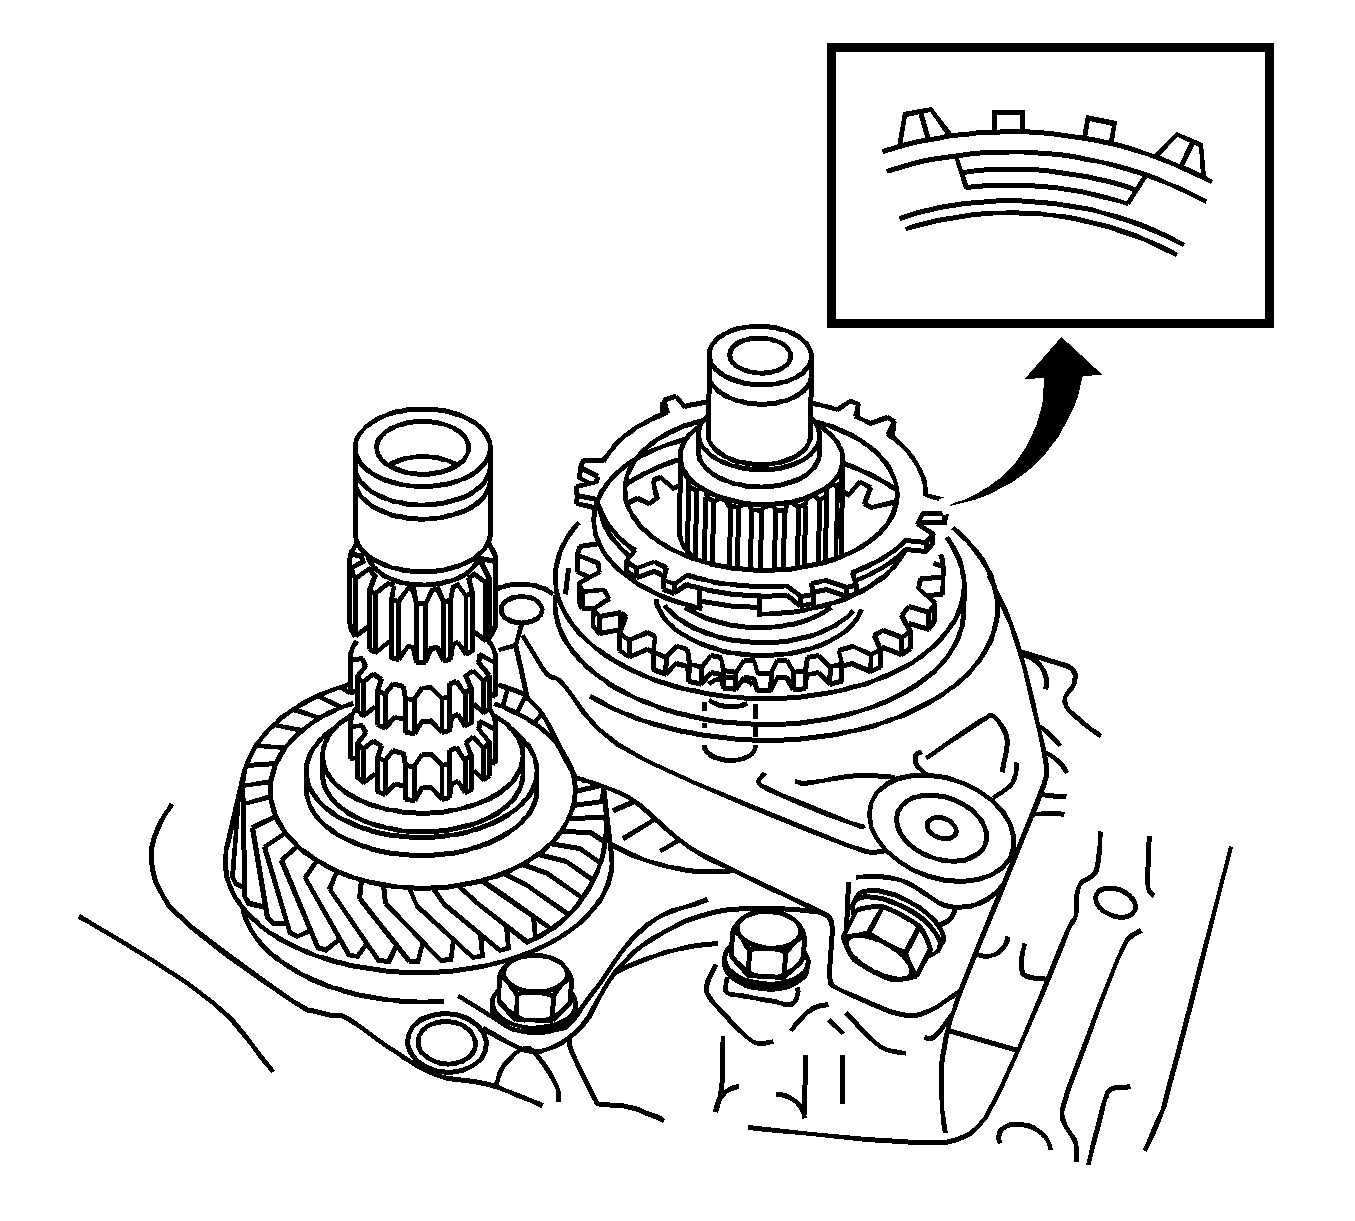
- Install the differential case assembly to the transaxle case.
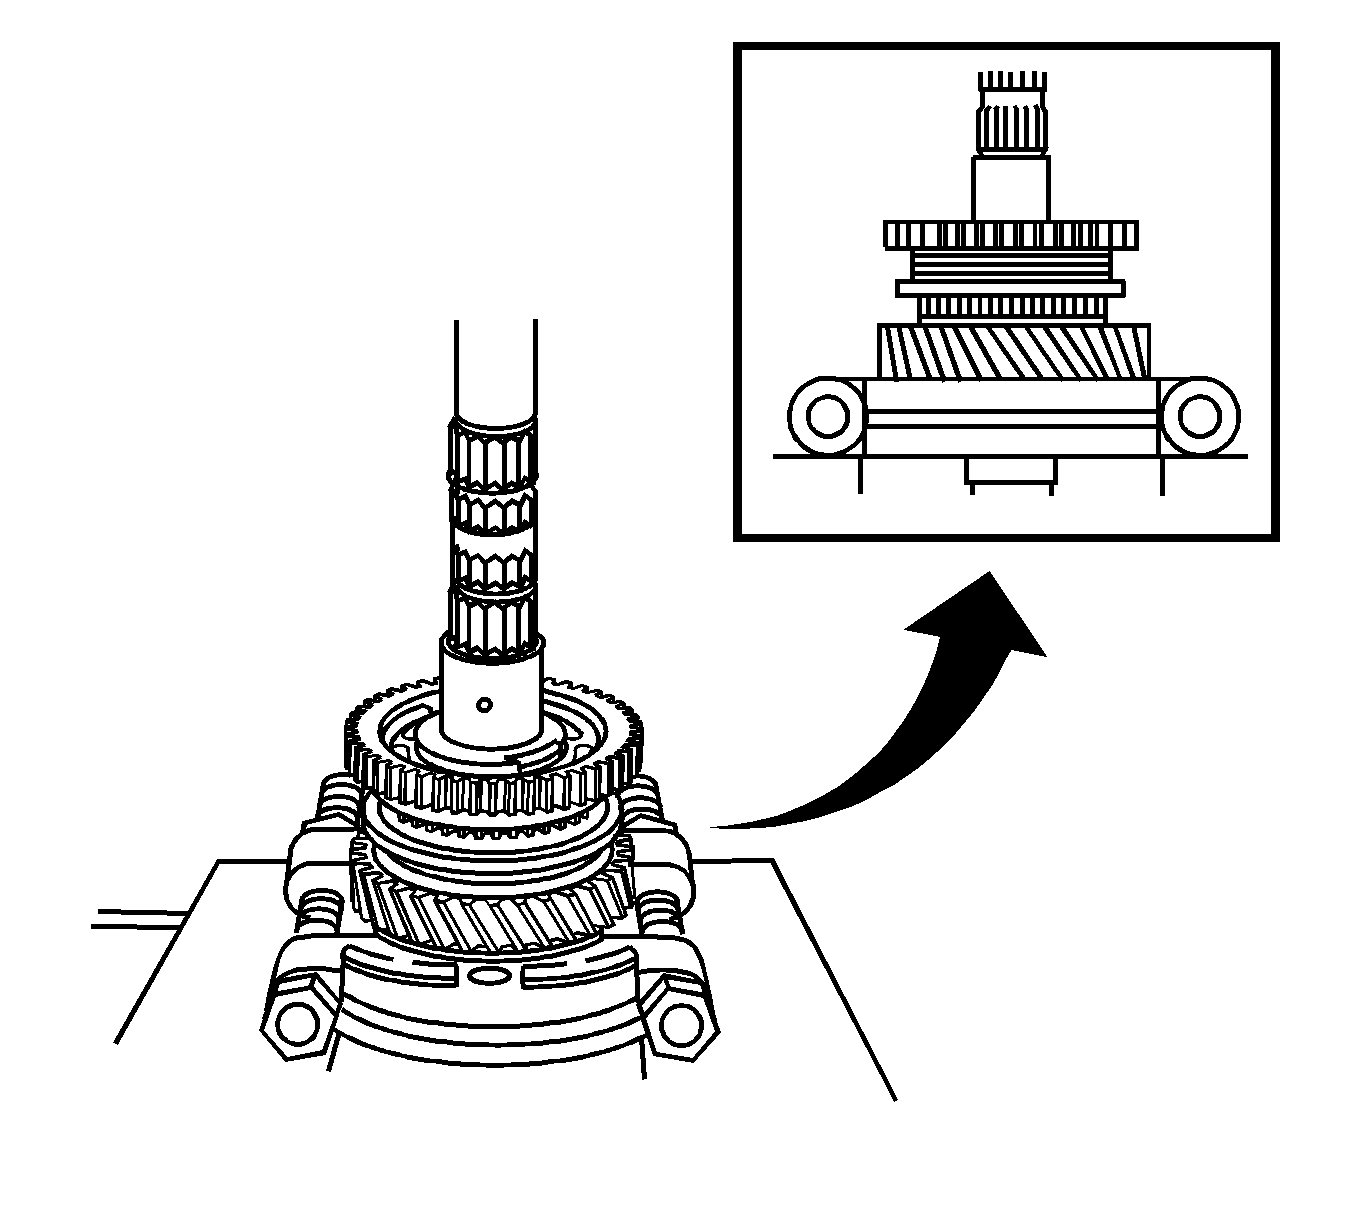
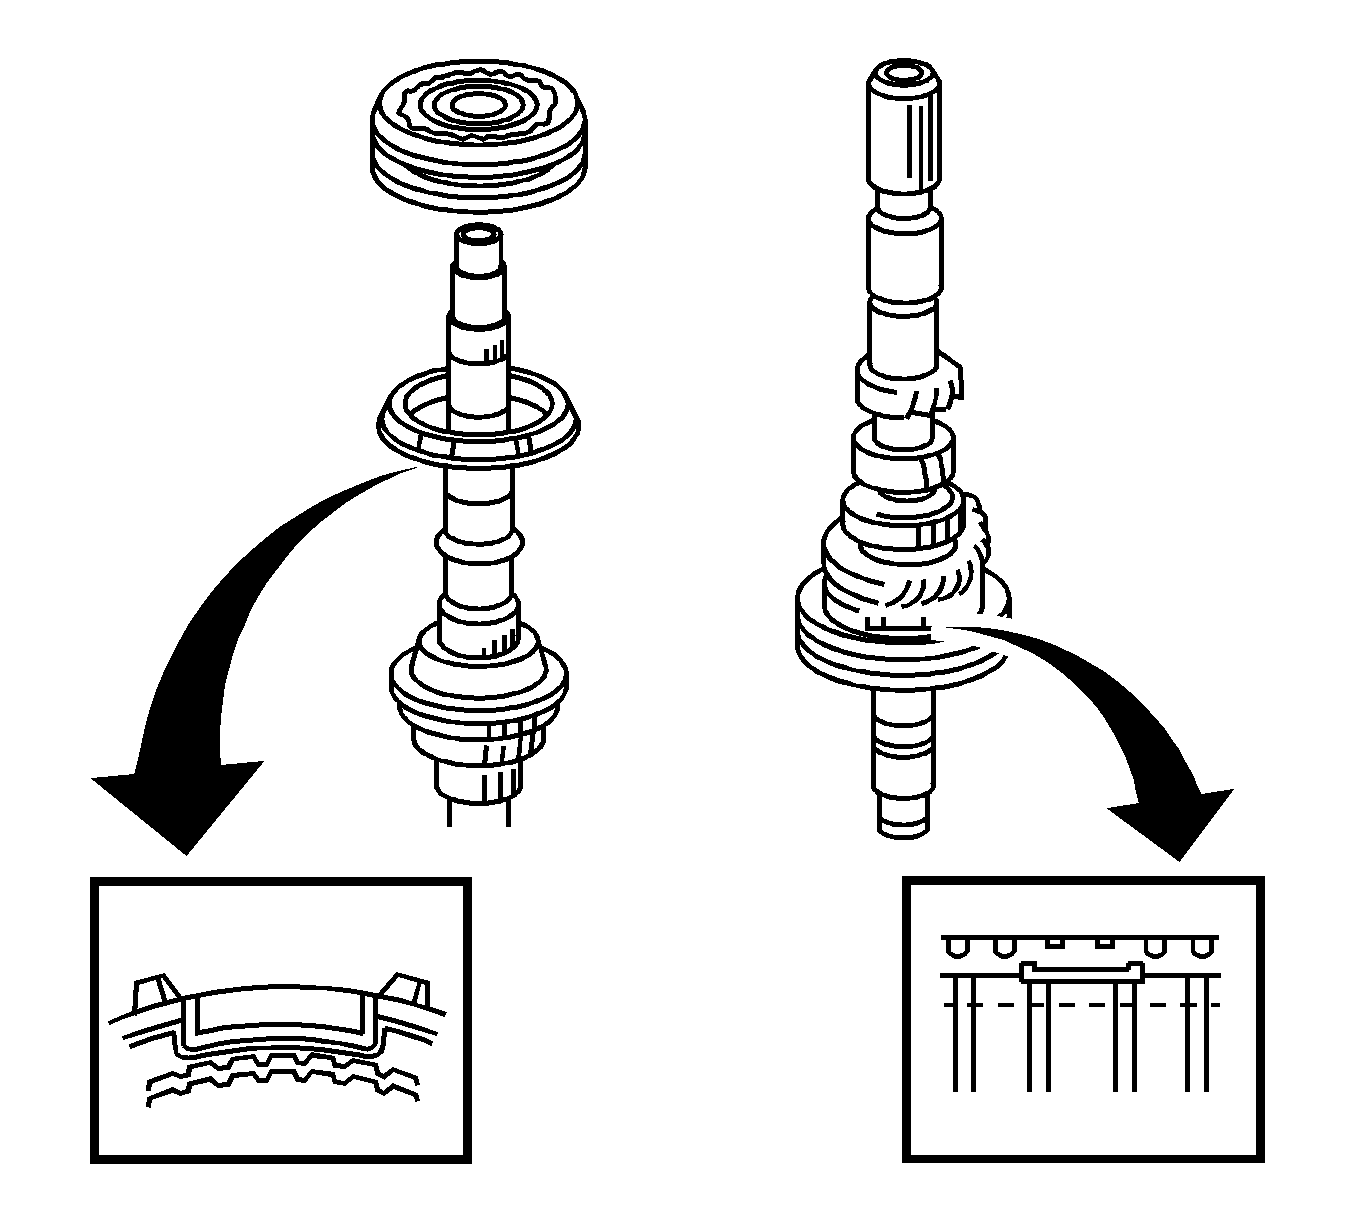
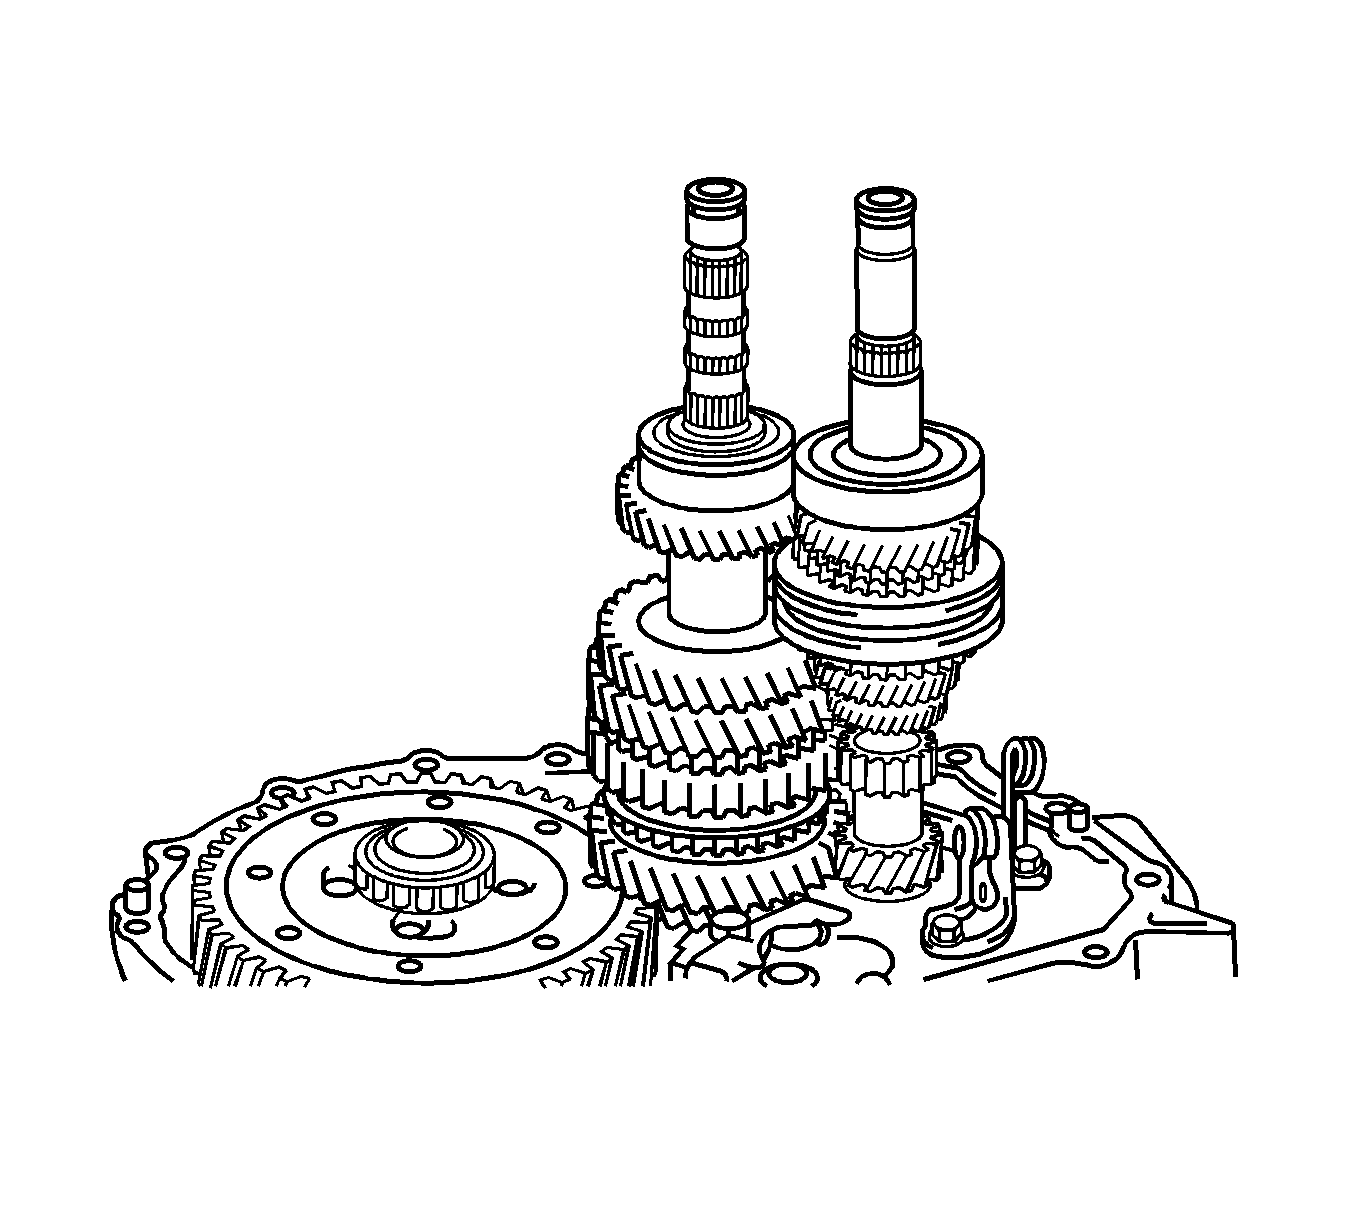
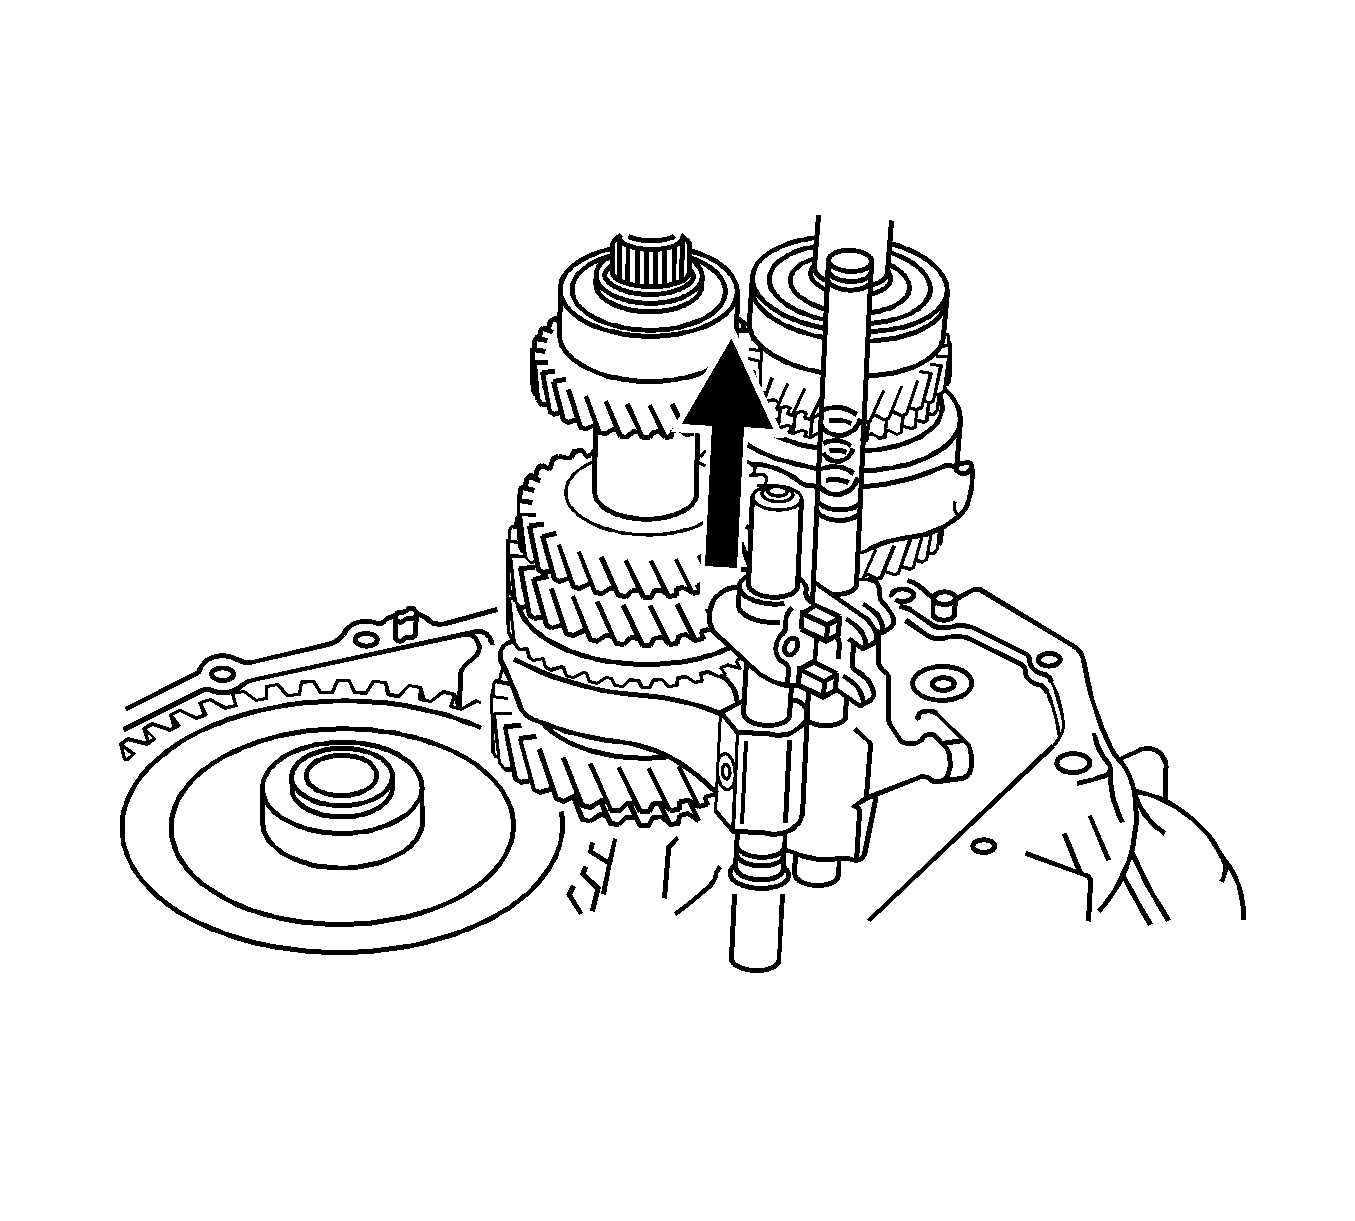
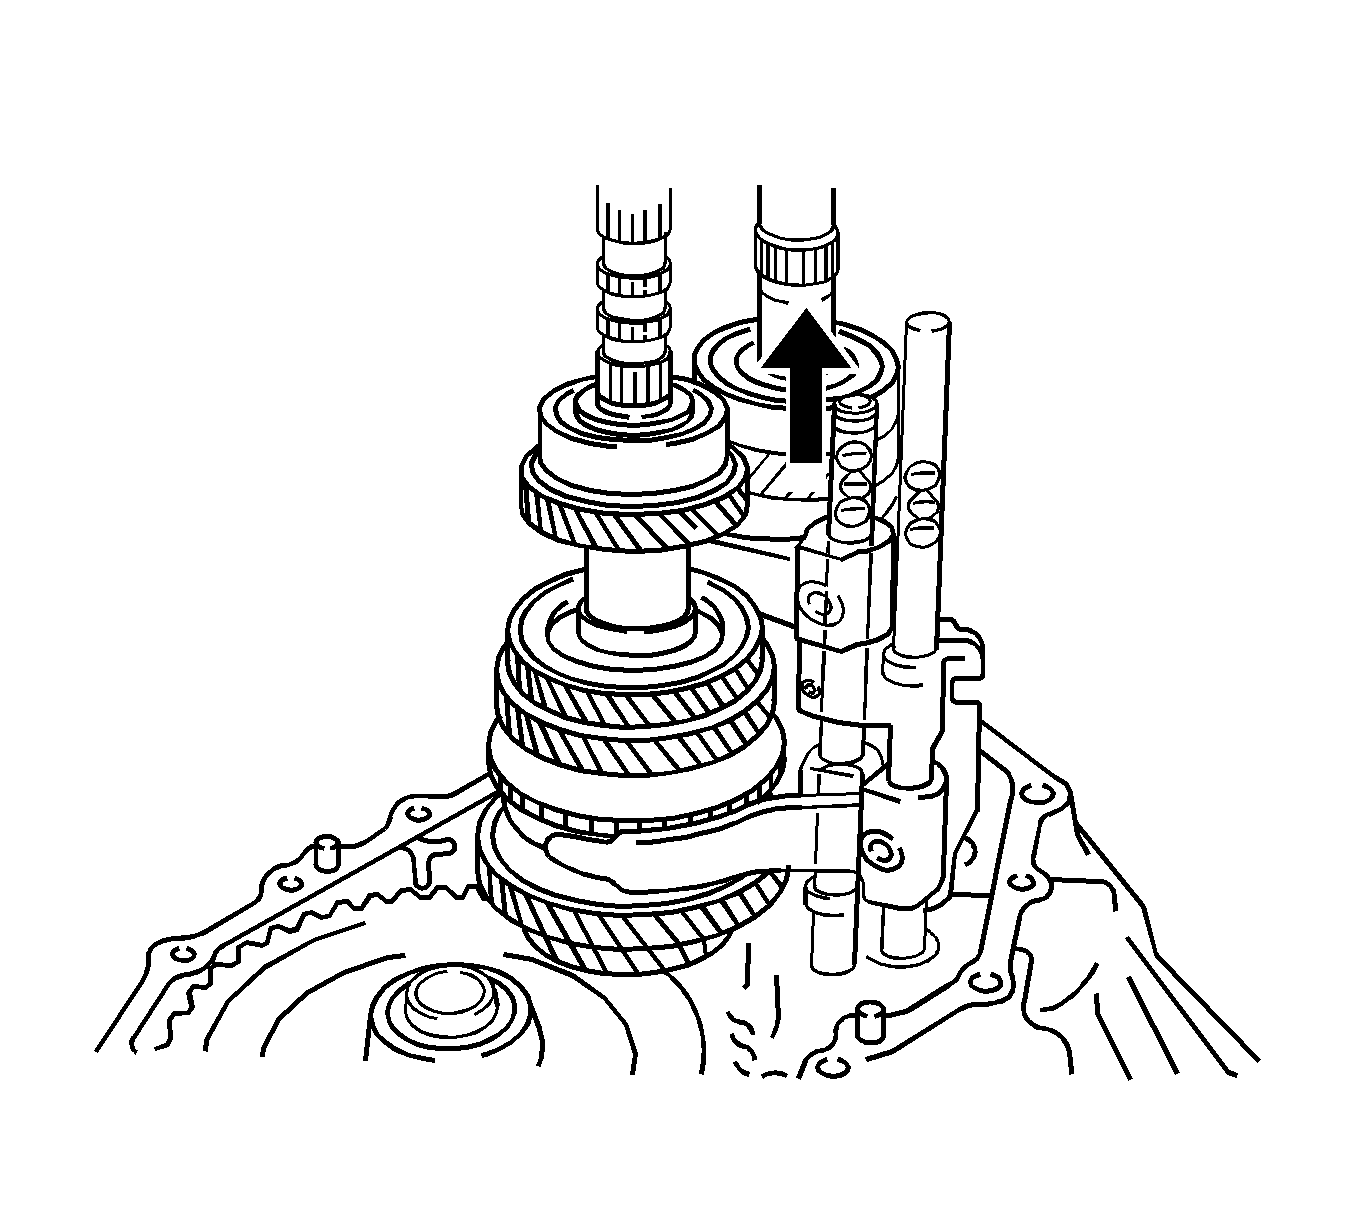
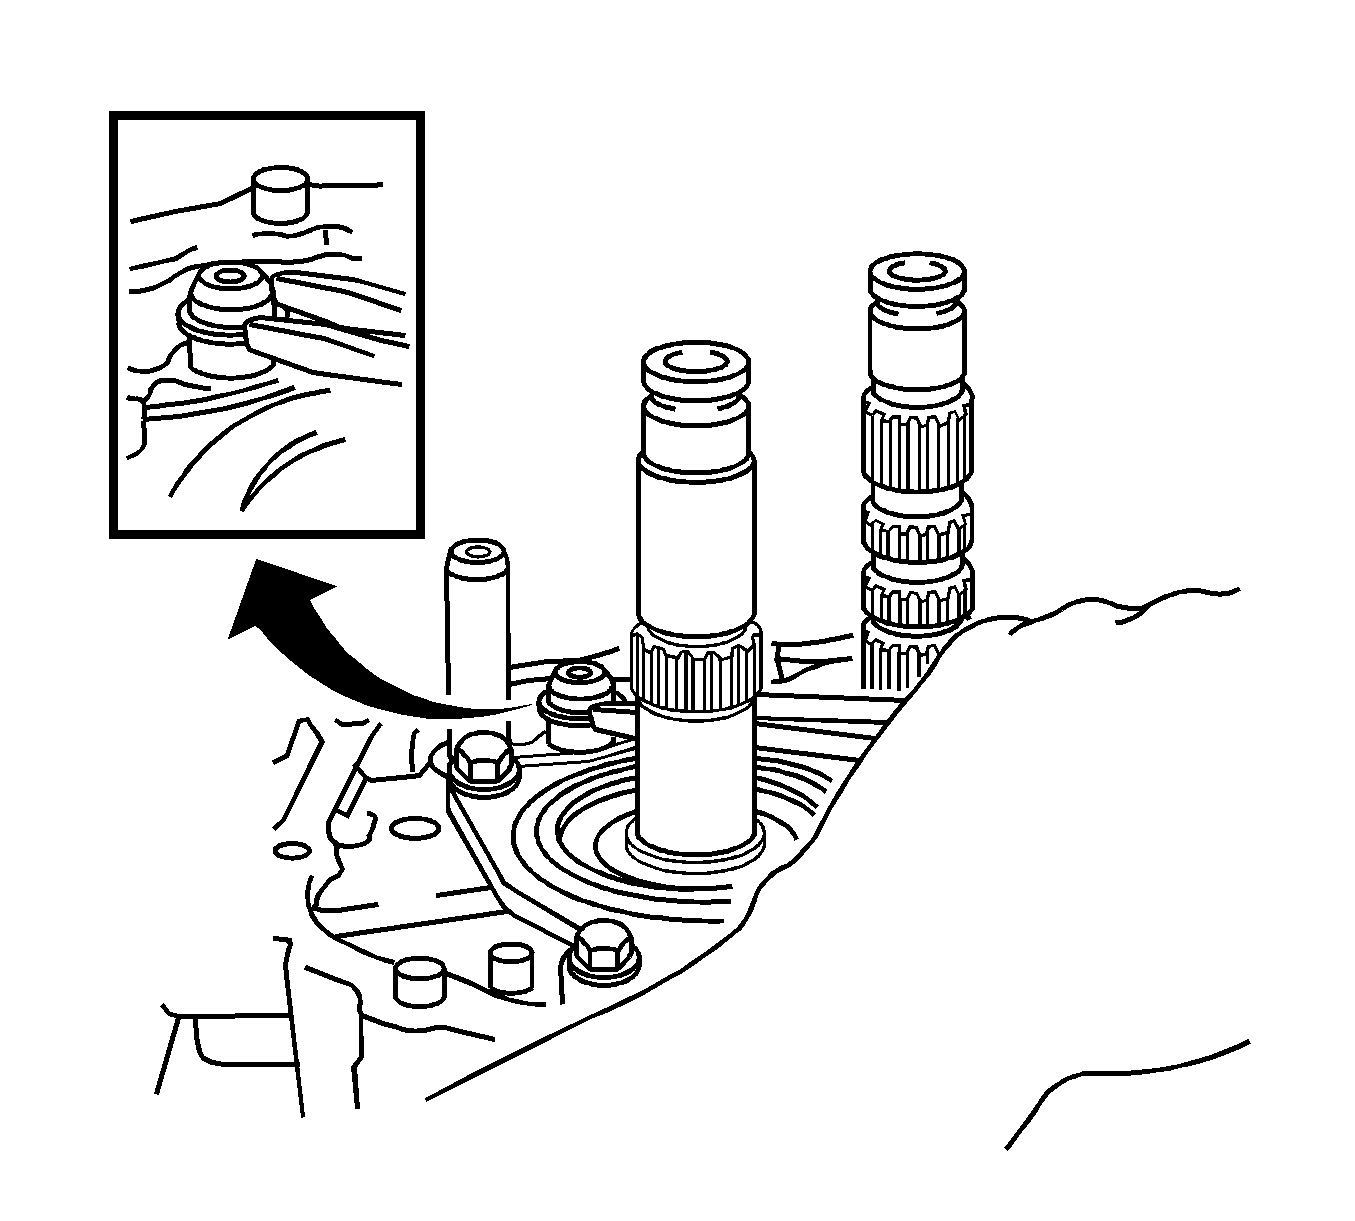
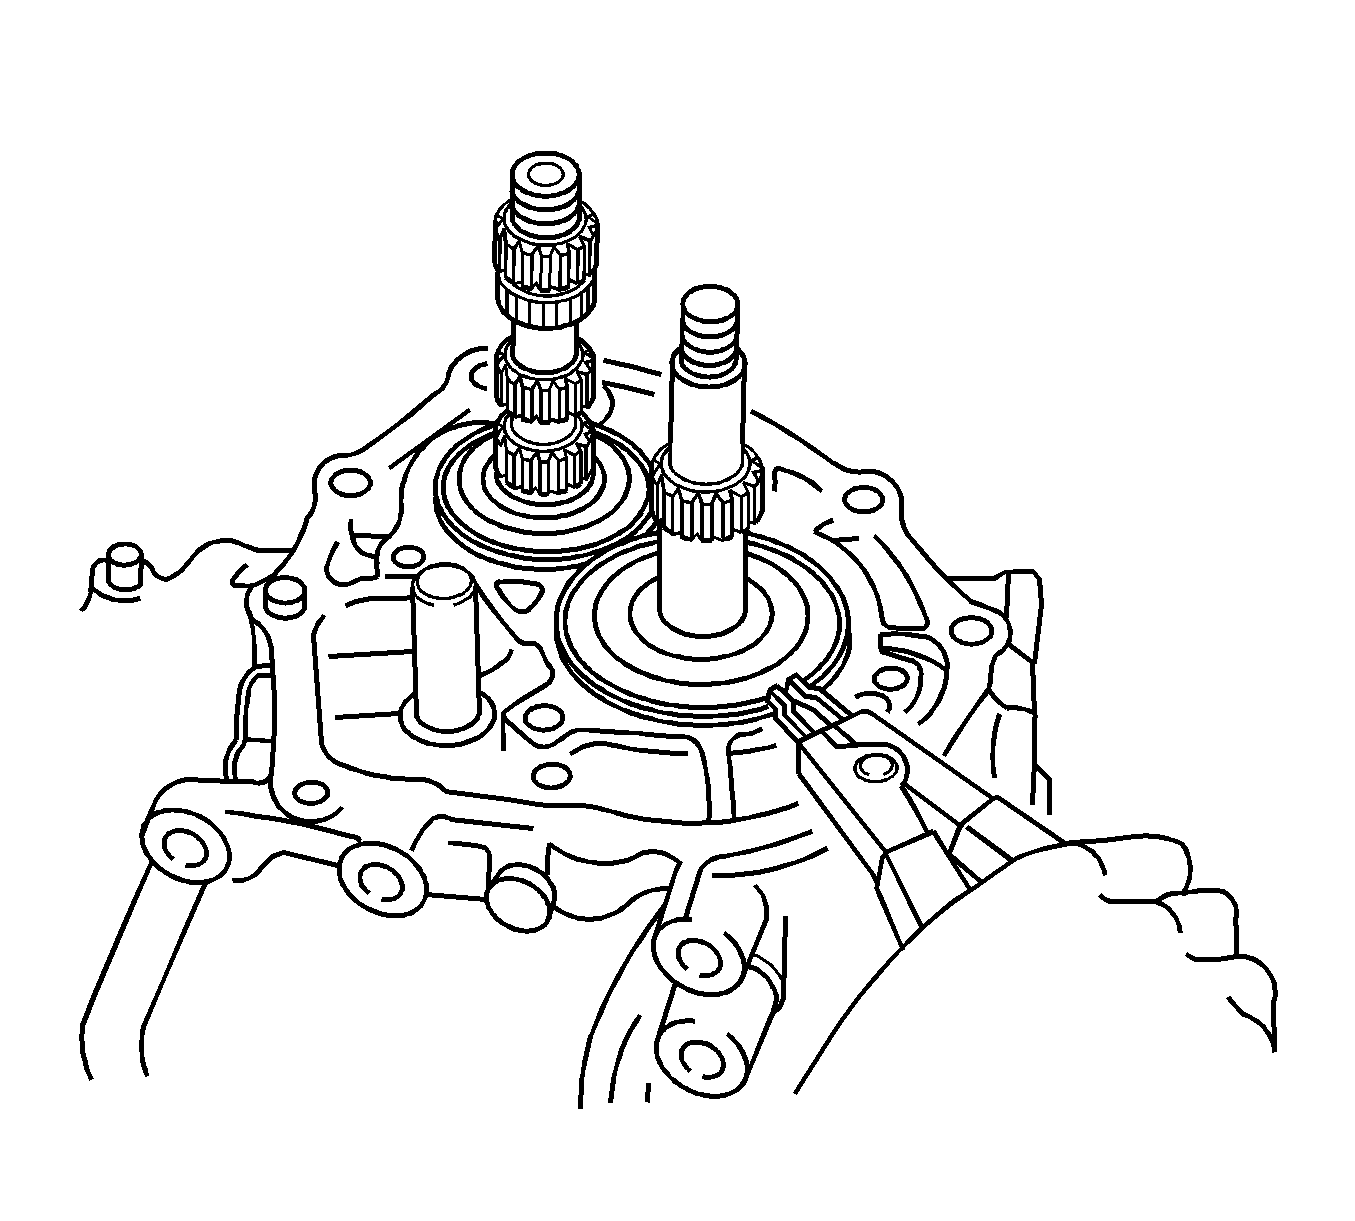
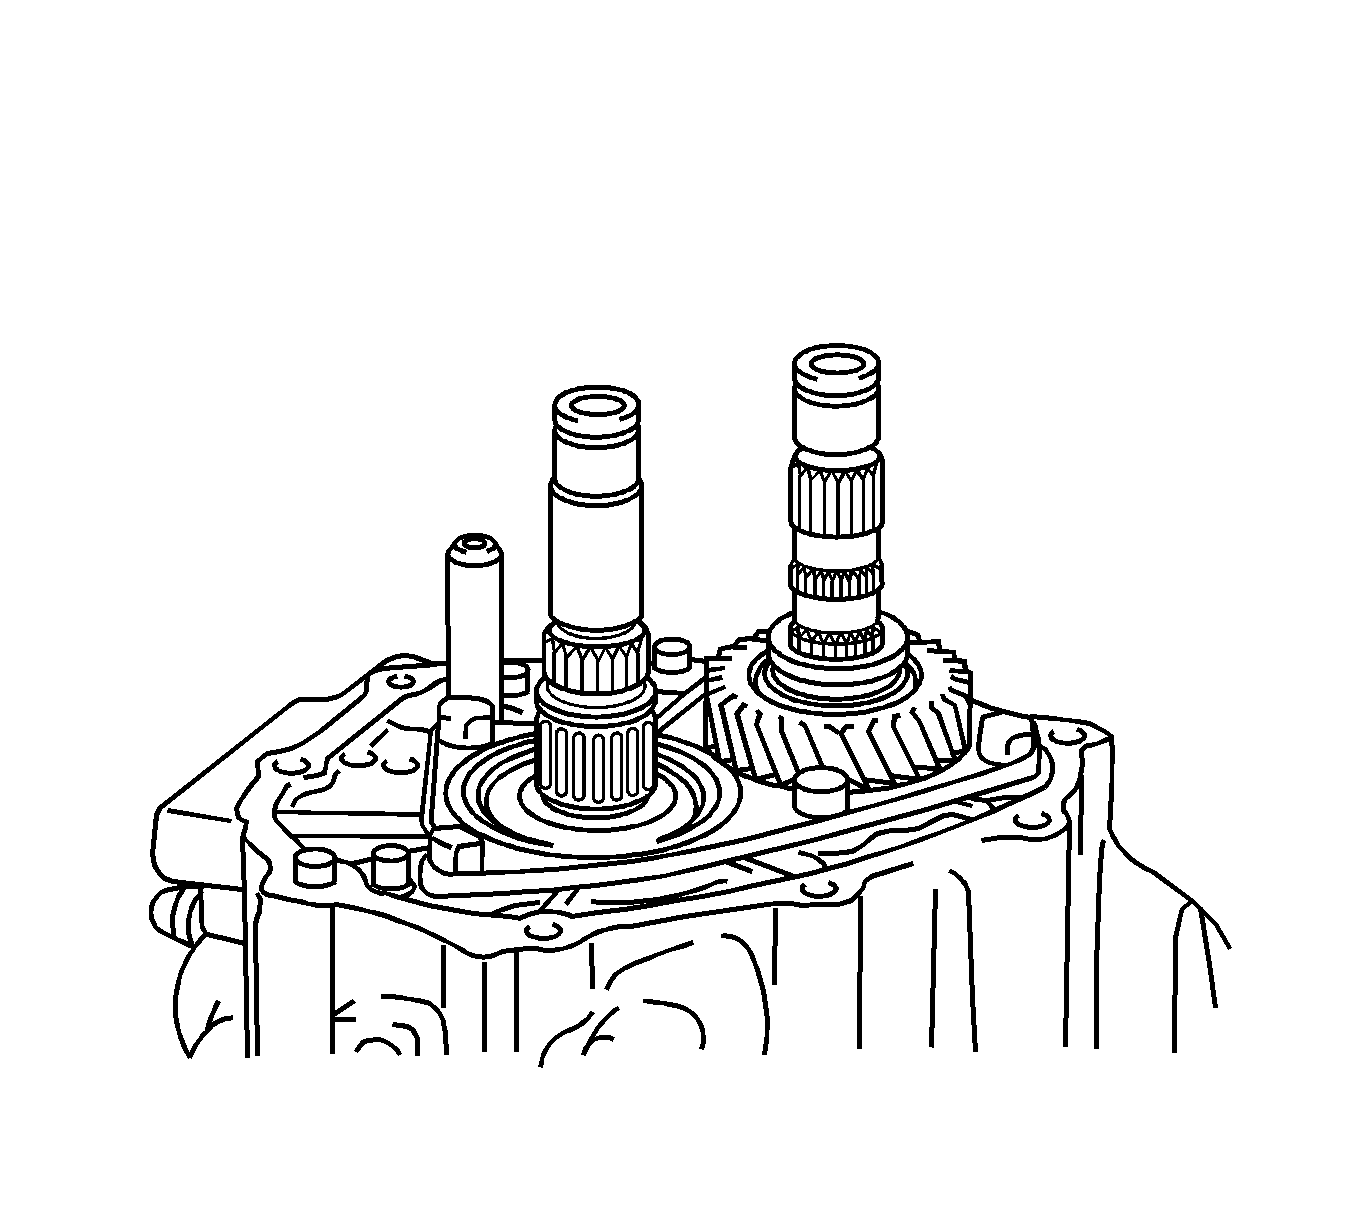
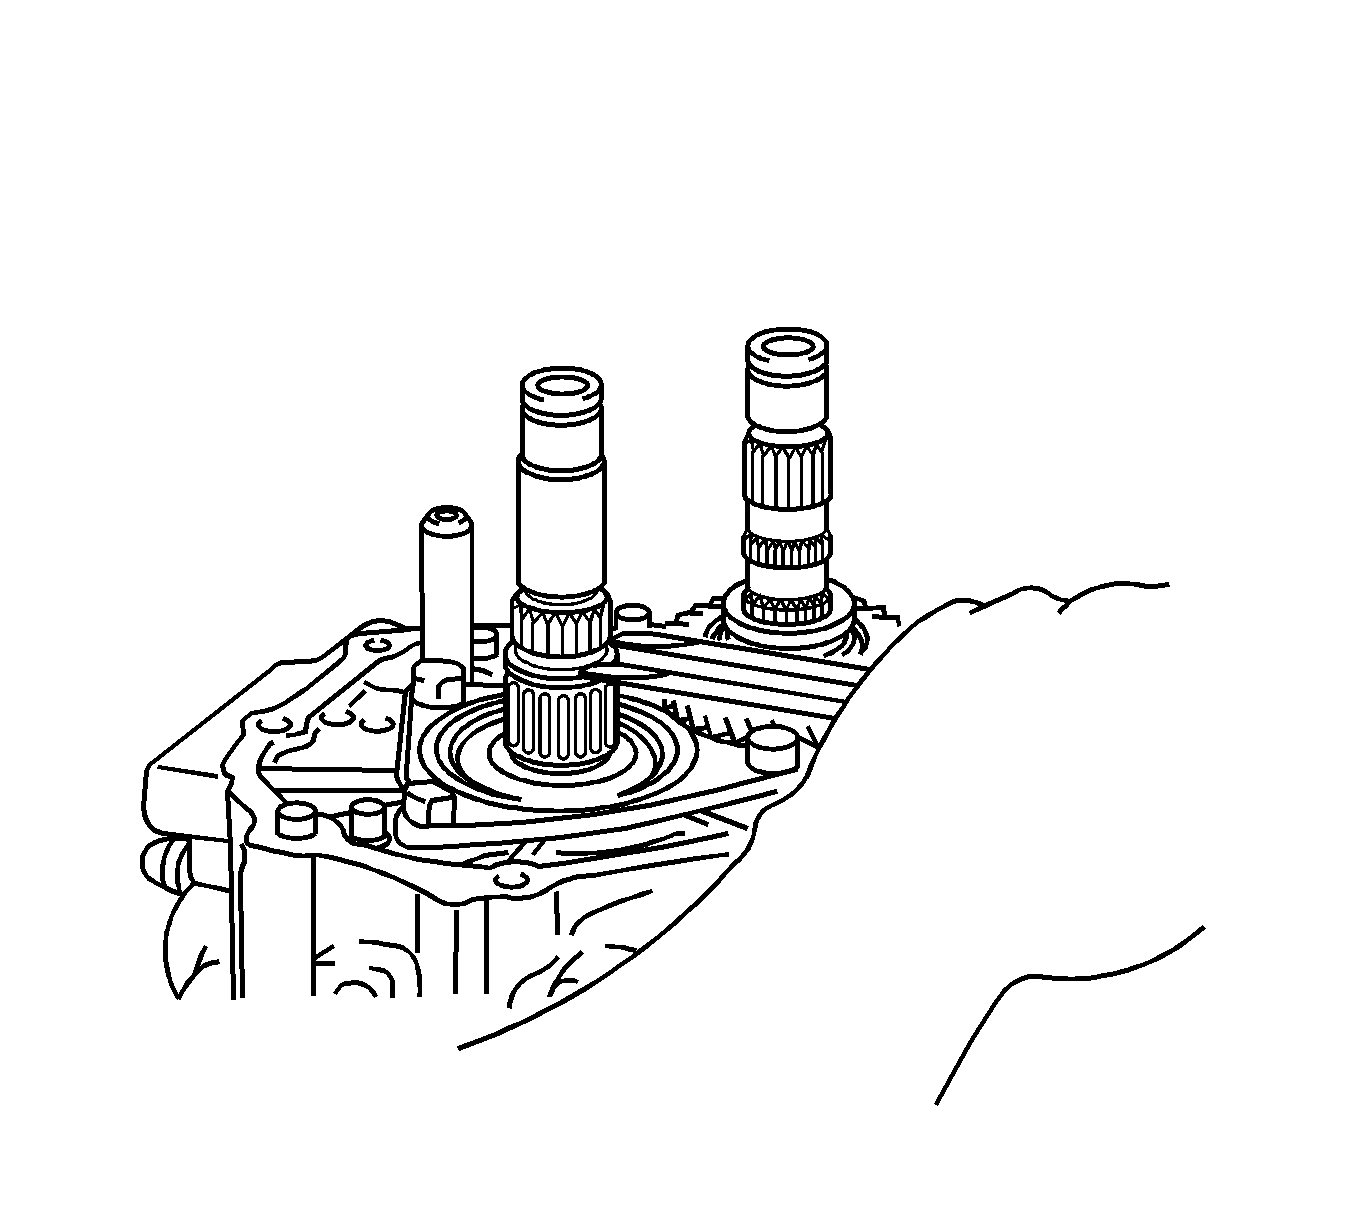
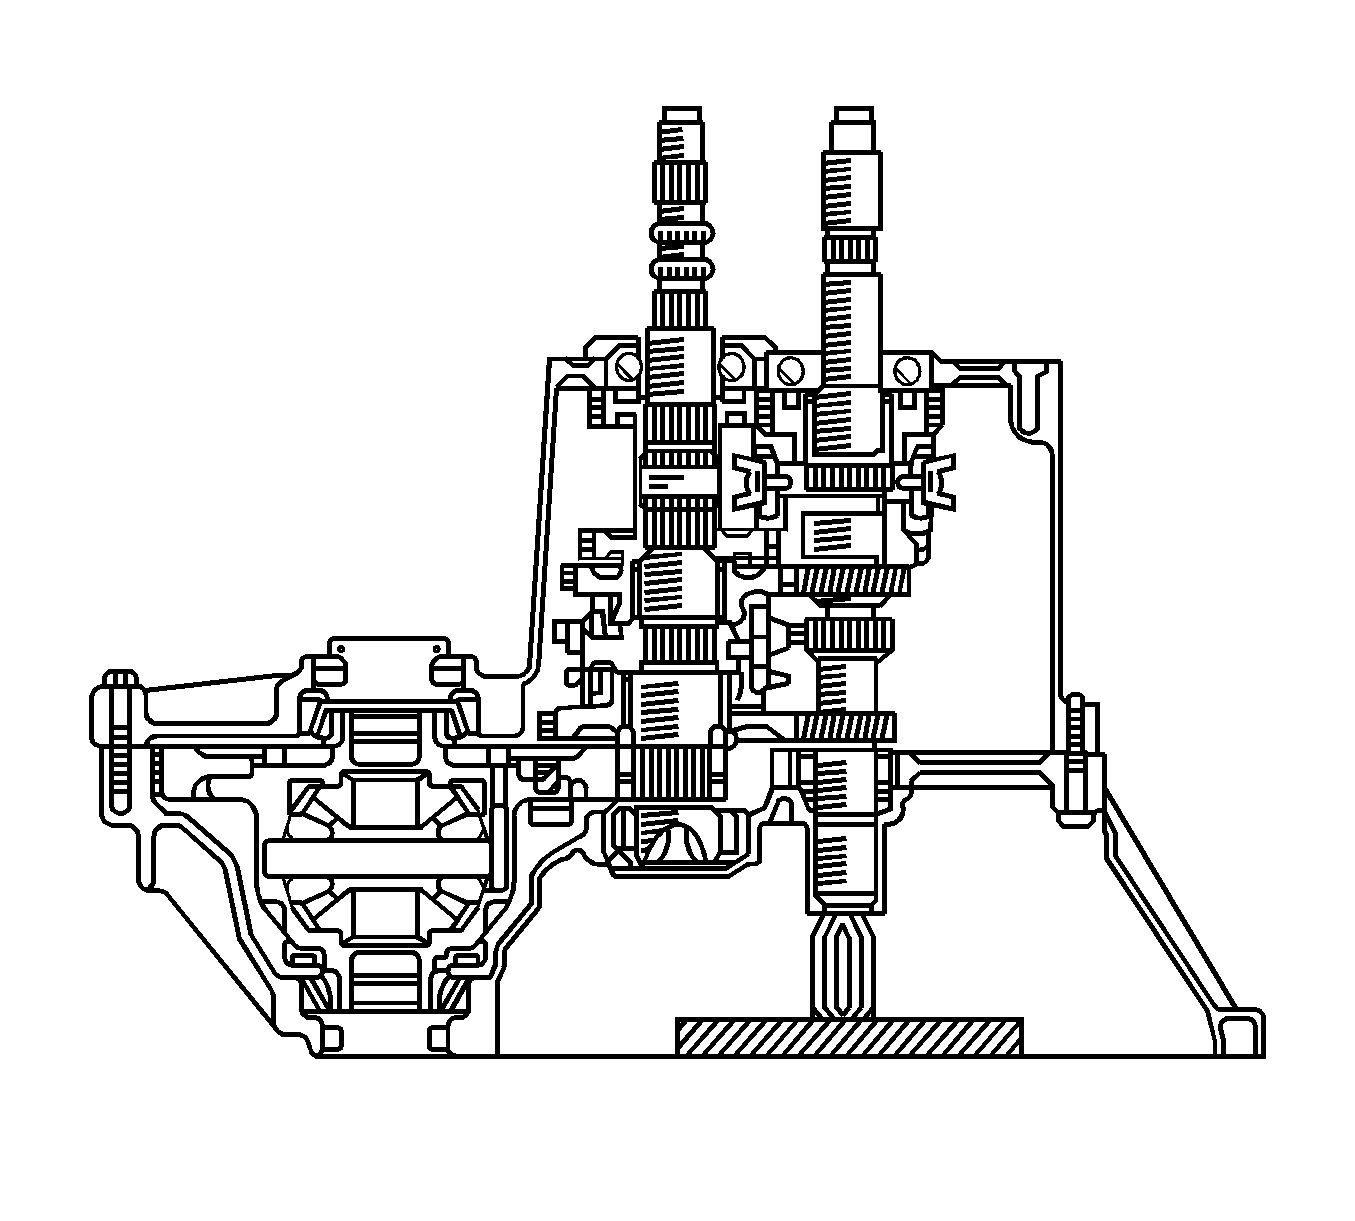
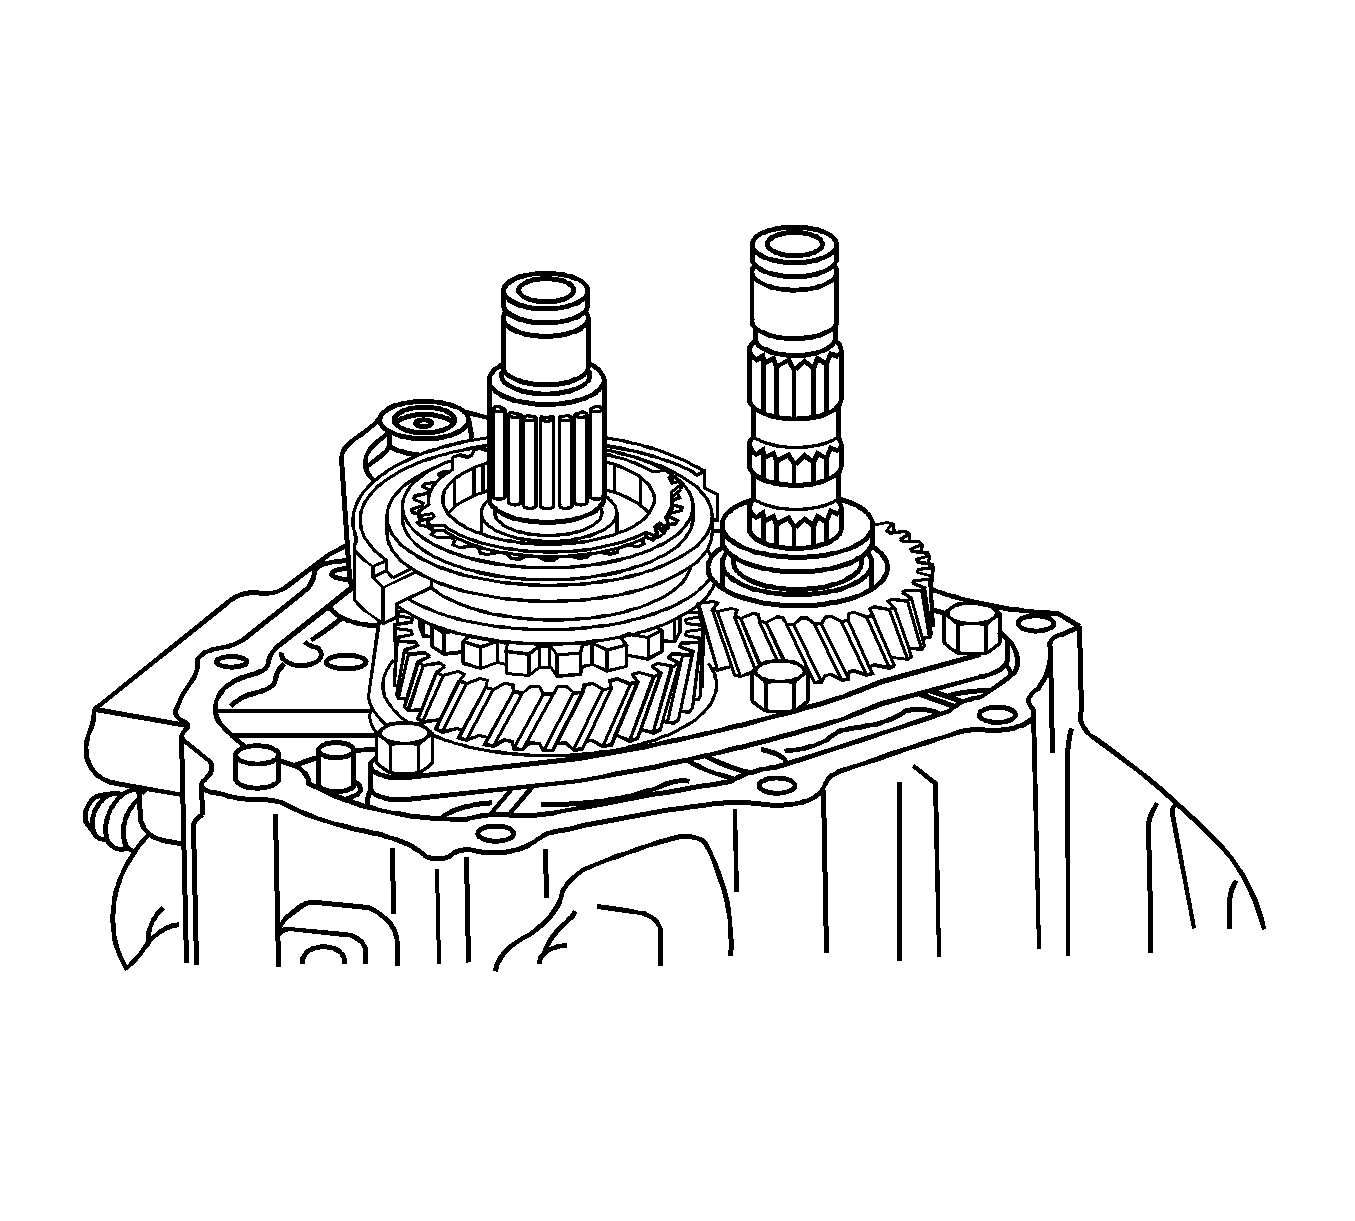
- Install the input and output shafts together into the transaxle case.
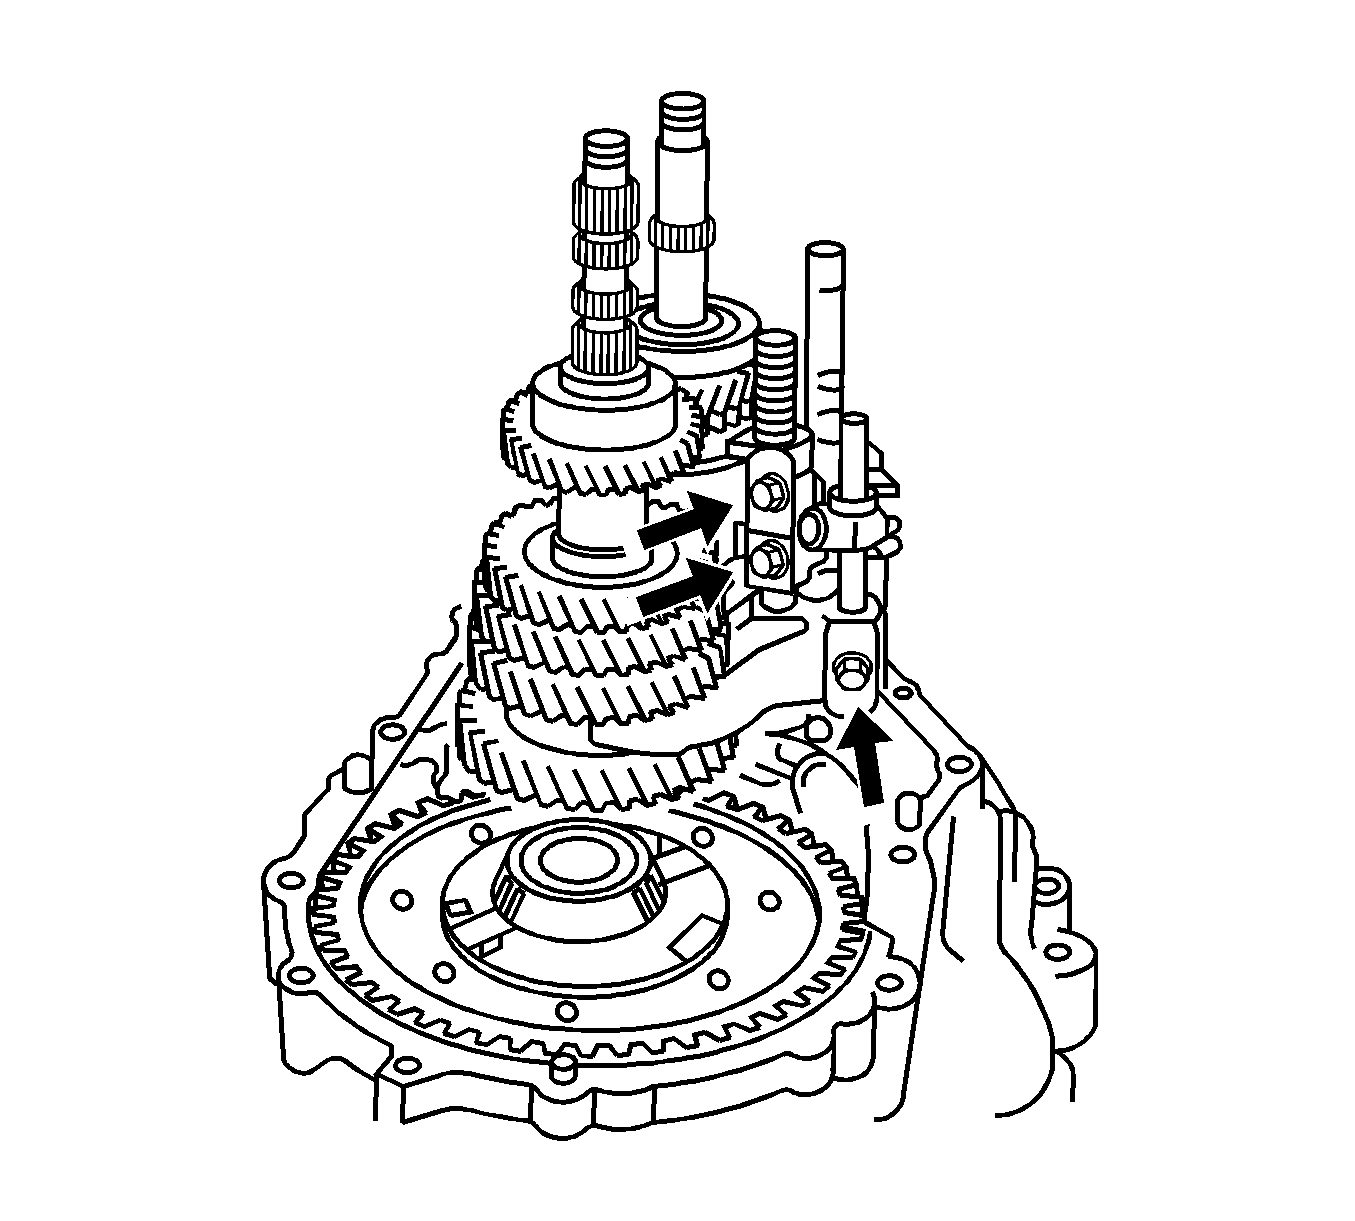
- Install the No.2 gear shift fork to the No.2 hub sleeve groove.
- Install the No.3 gear shift fork shaft to the reverse shift fork to the transaxle case.
- Install the reverse shift fork.
- Install the No.1 gear shift fork to the reverse gear assembly.
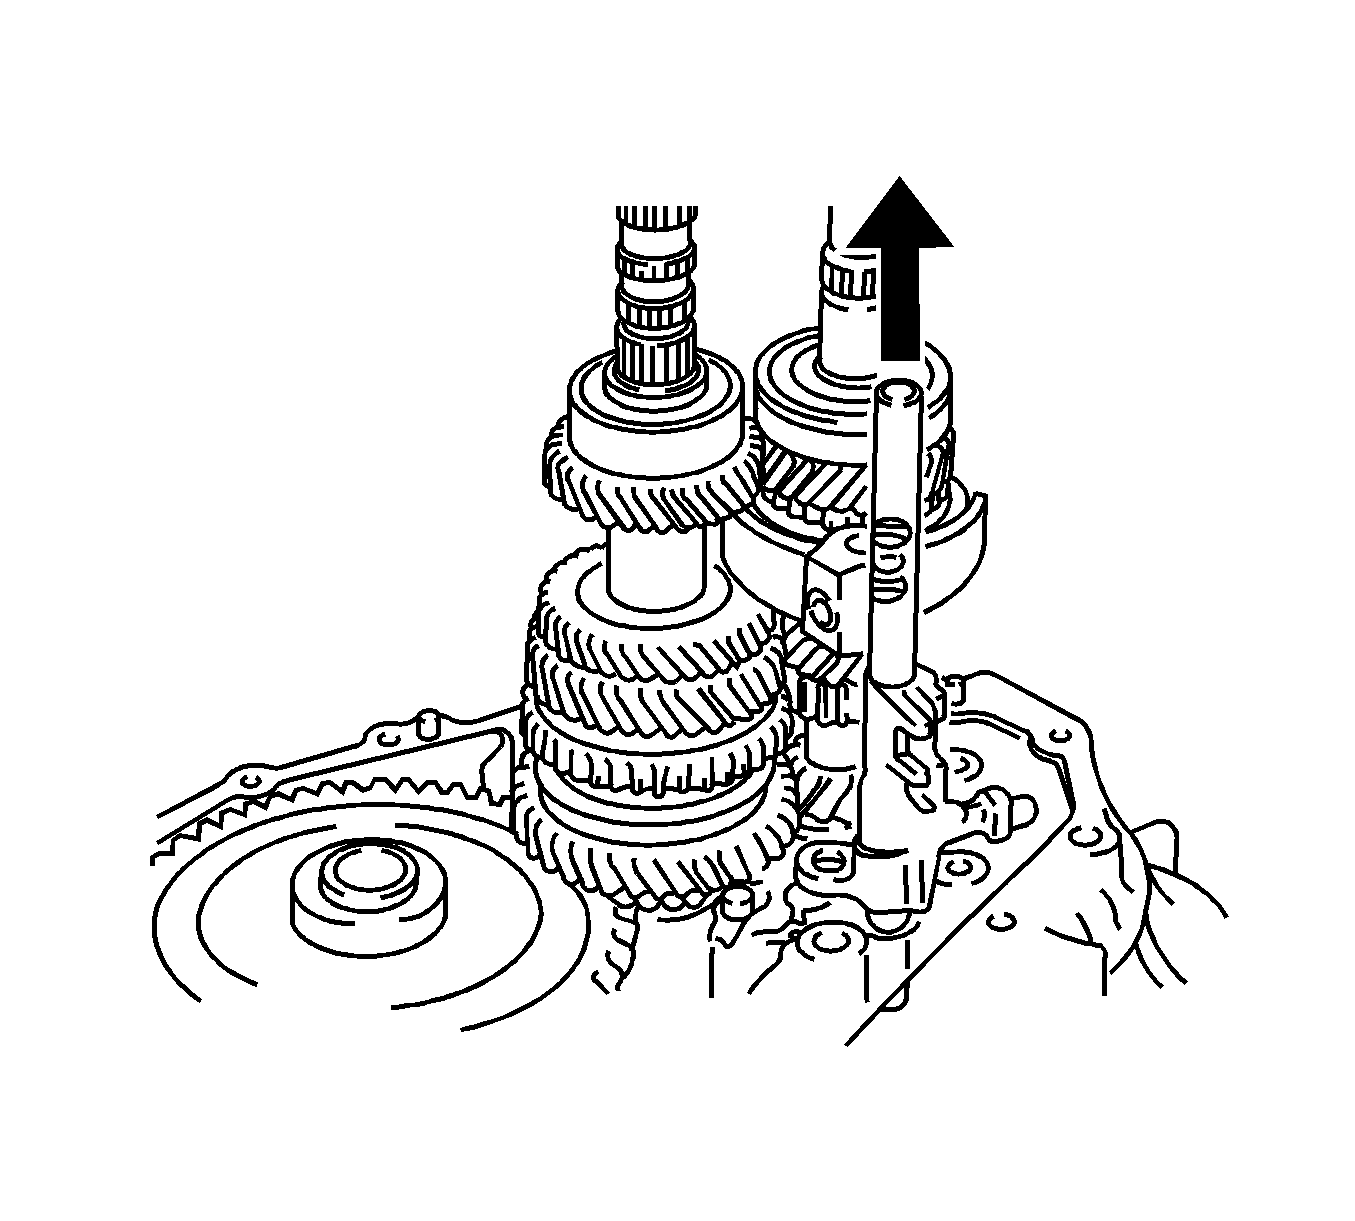
- Install the No.1 gear shift head to the shift shaft.
- Install the No.1 gear shift fork shaft to the No.1 gear shift fork to the transaxle case.
- Install the No.2 gear shift fork shaft to the No.2 gear shift fork.
- Install the No.1 gear shift head, No.1 gear shift fork and the reverse shift fork to the transaxle case.
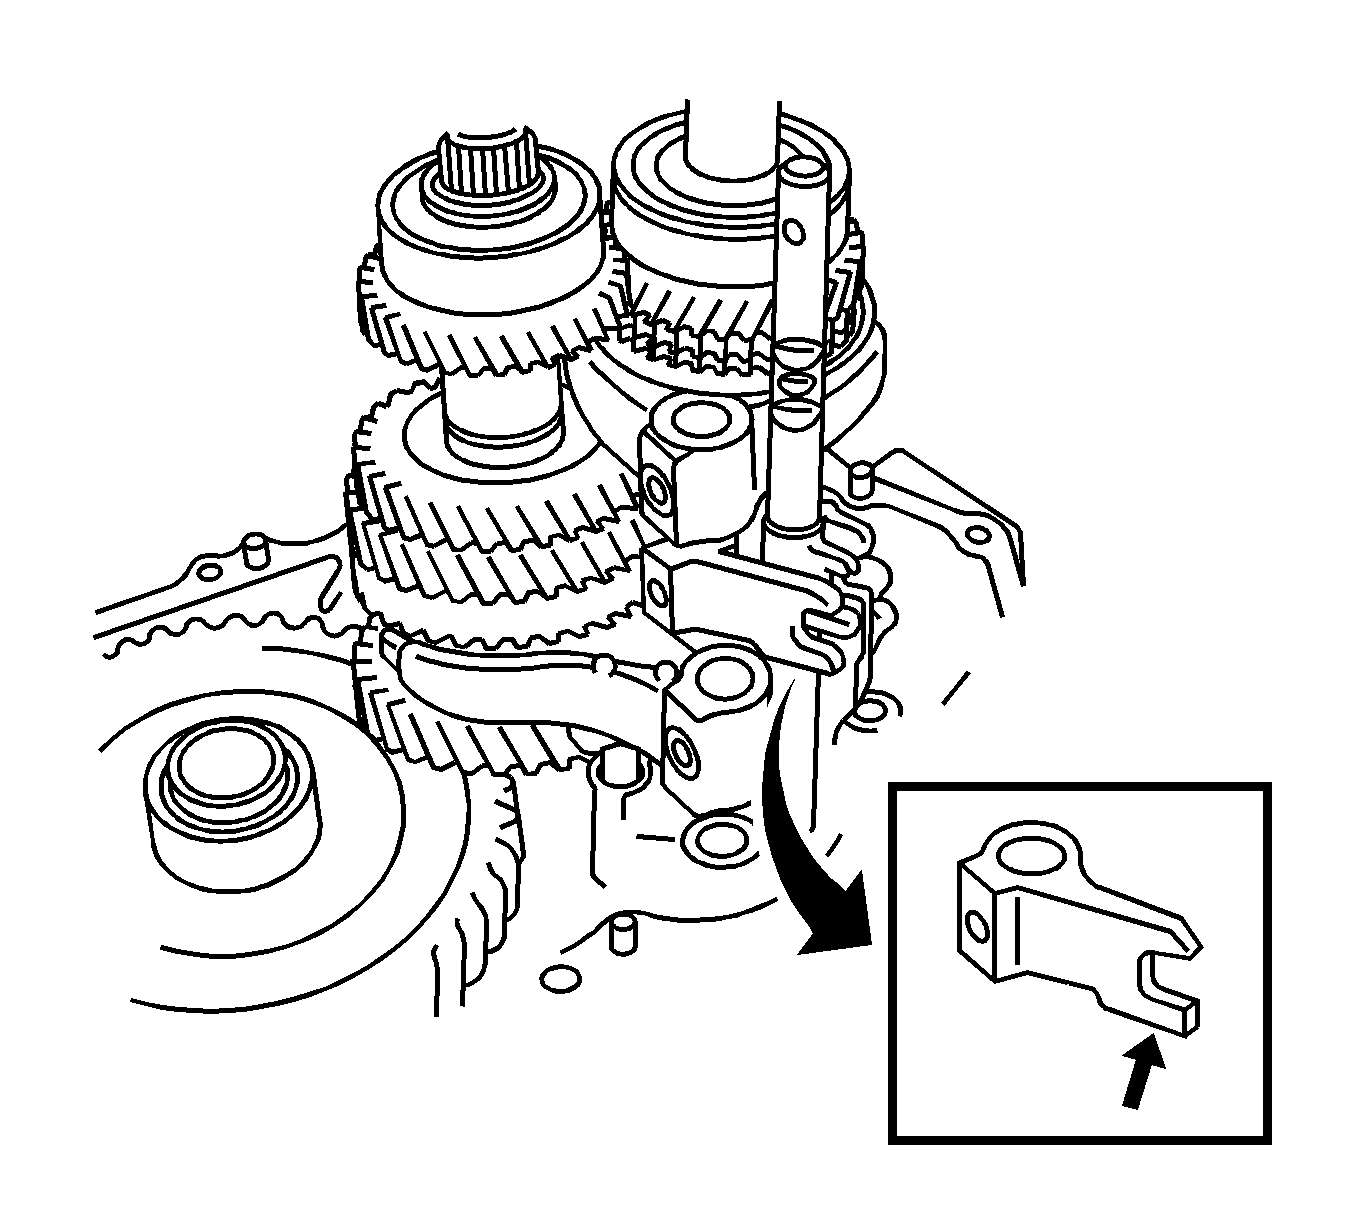
- Ensure that the 3 gear shift heads are aligned correctly.
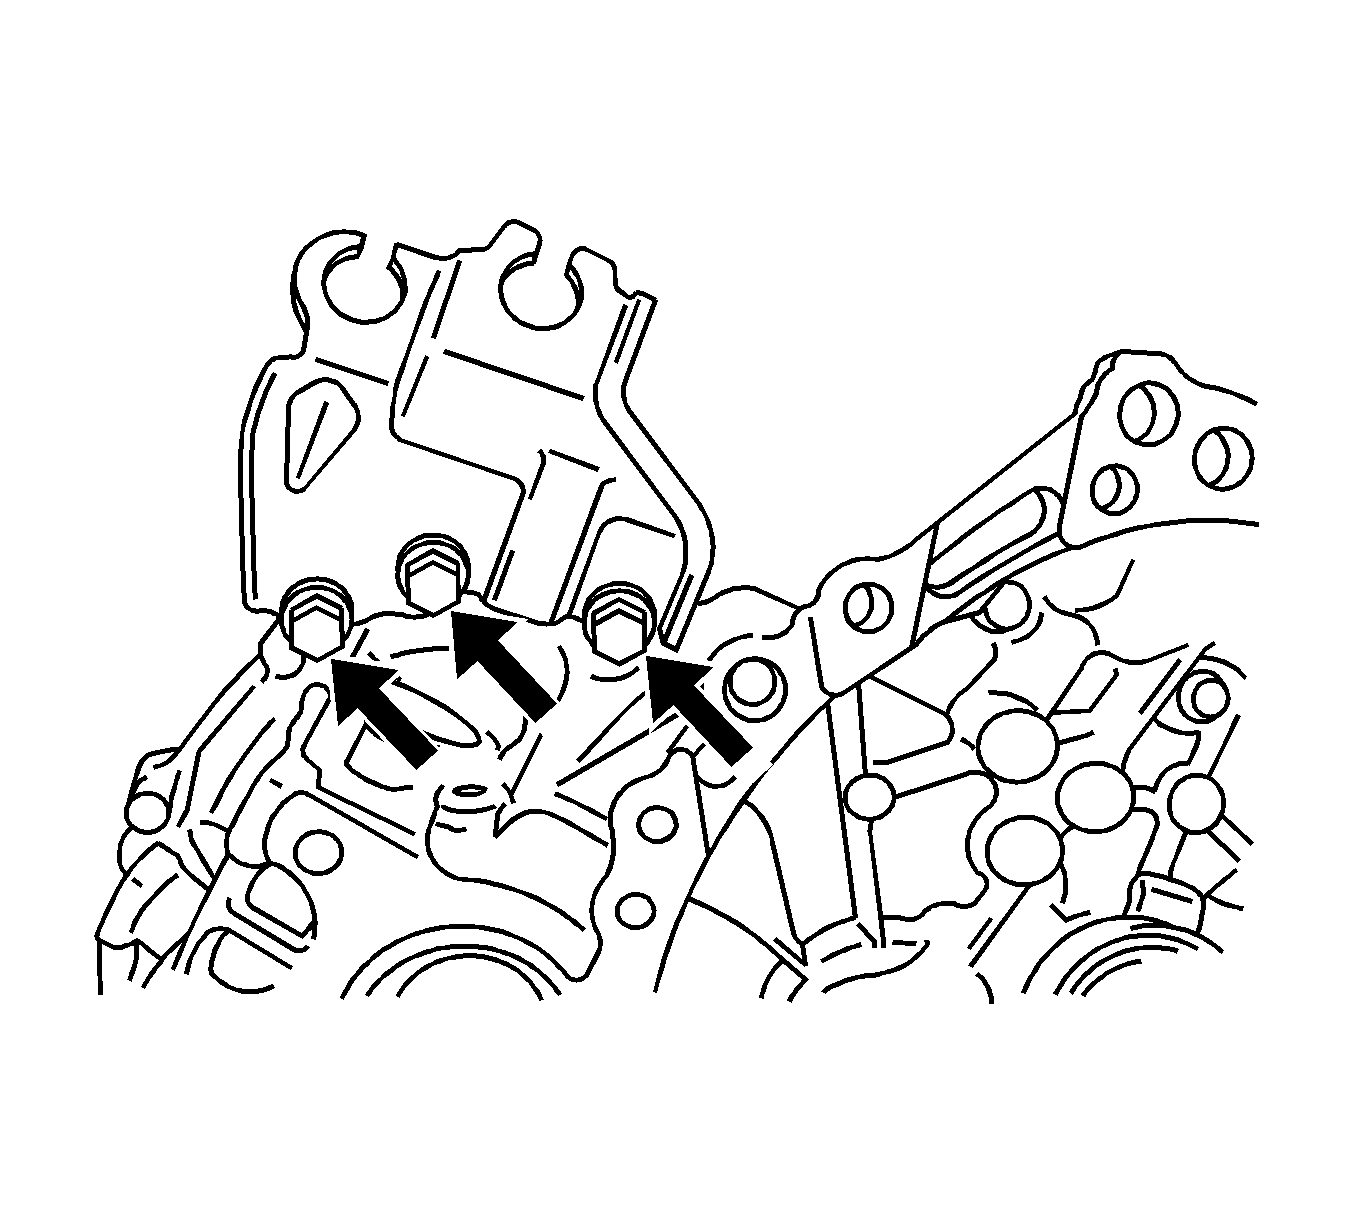
- Apply Threadlocker 242 G/M P/N 12345382 to the 3 gear shift fork set bolts.
- Install the 3 gear shift fork set bolts.
- Install the 2 snap rings to the No.1 and No.2 gear shift fork shafts.
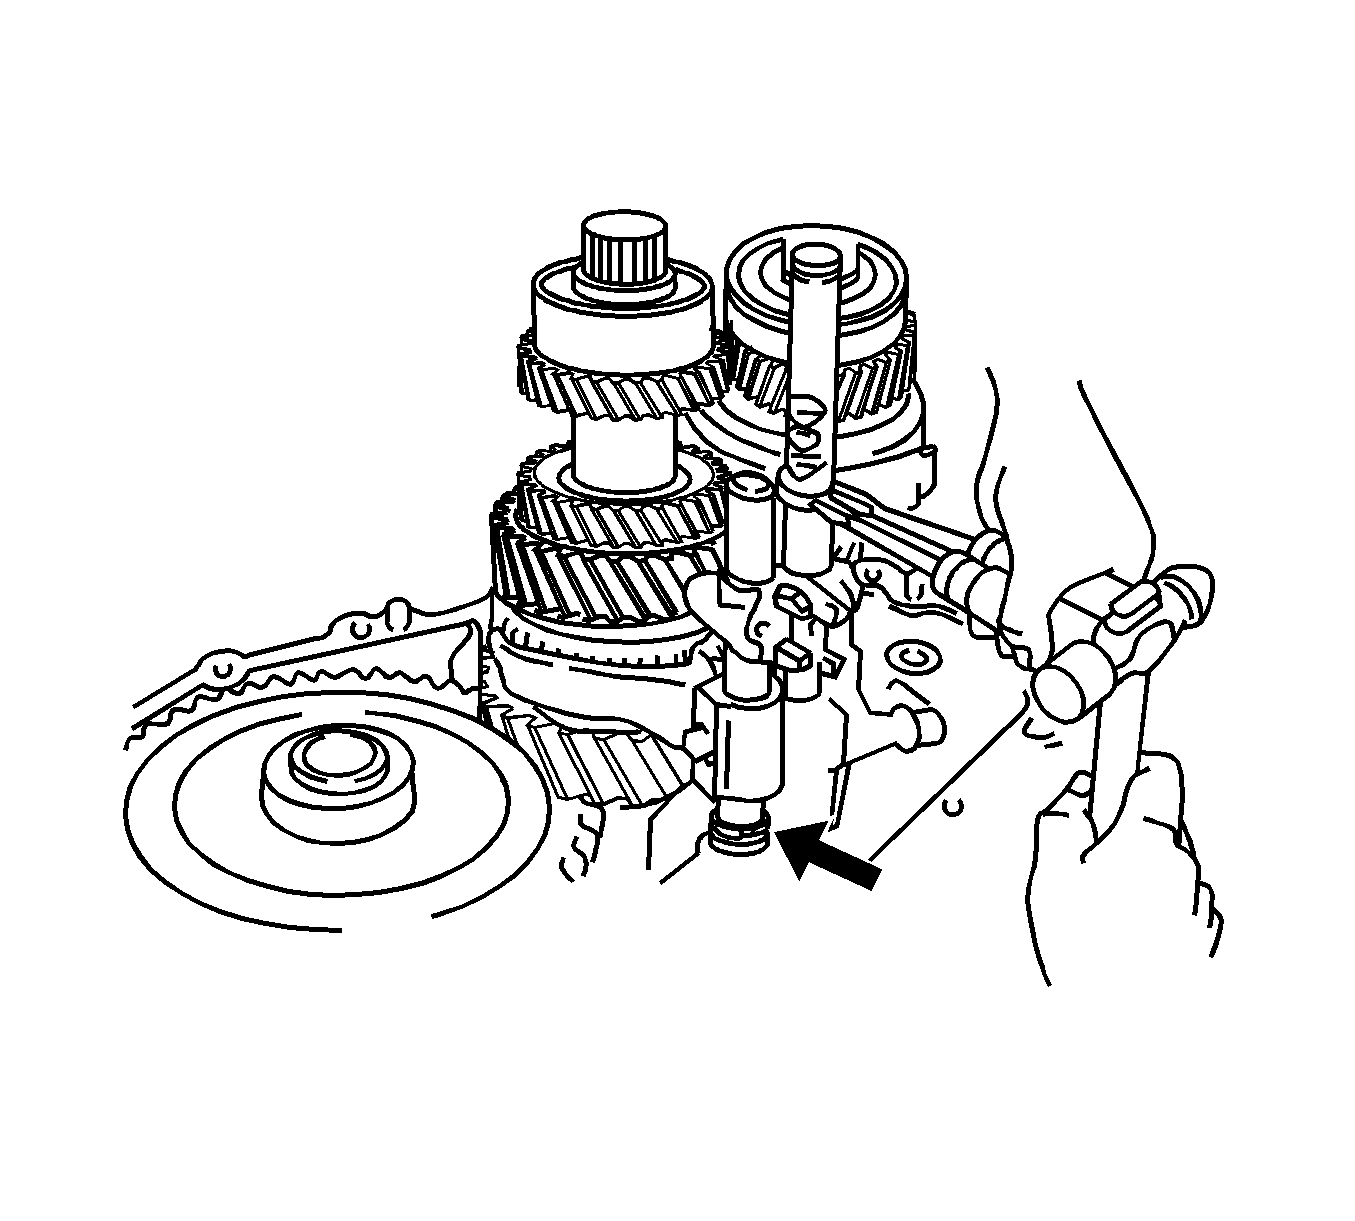
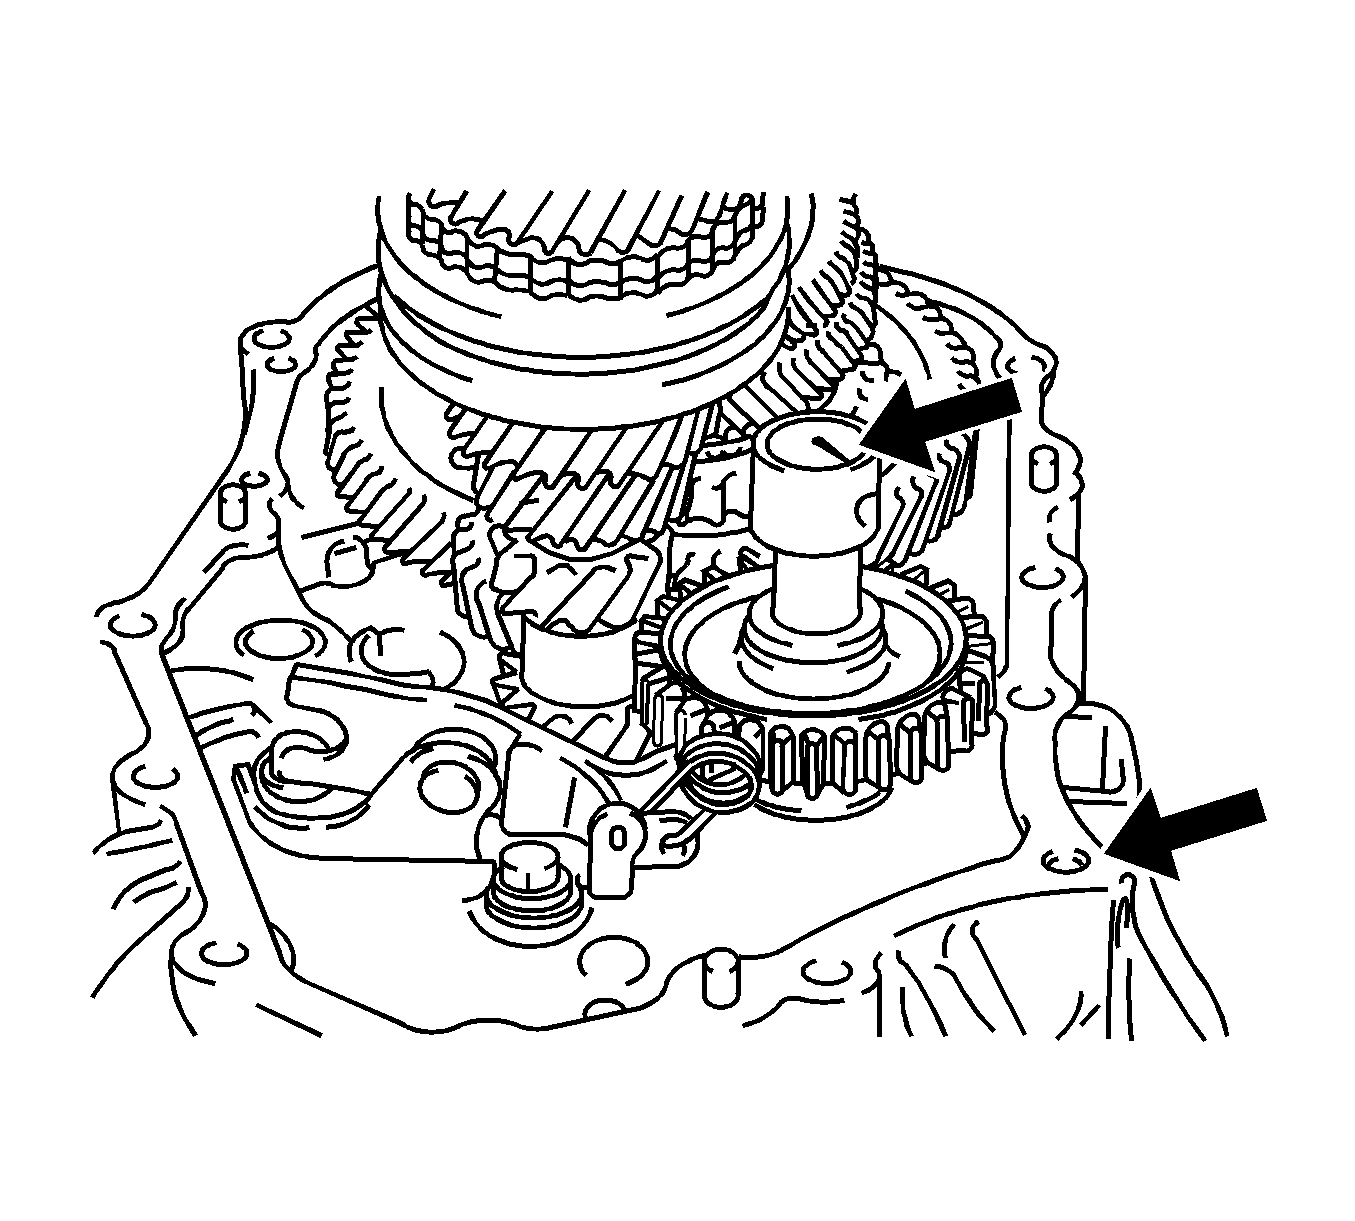
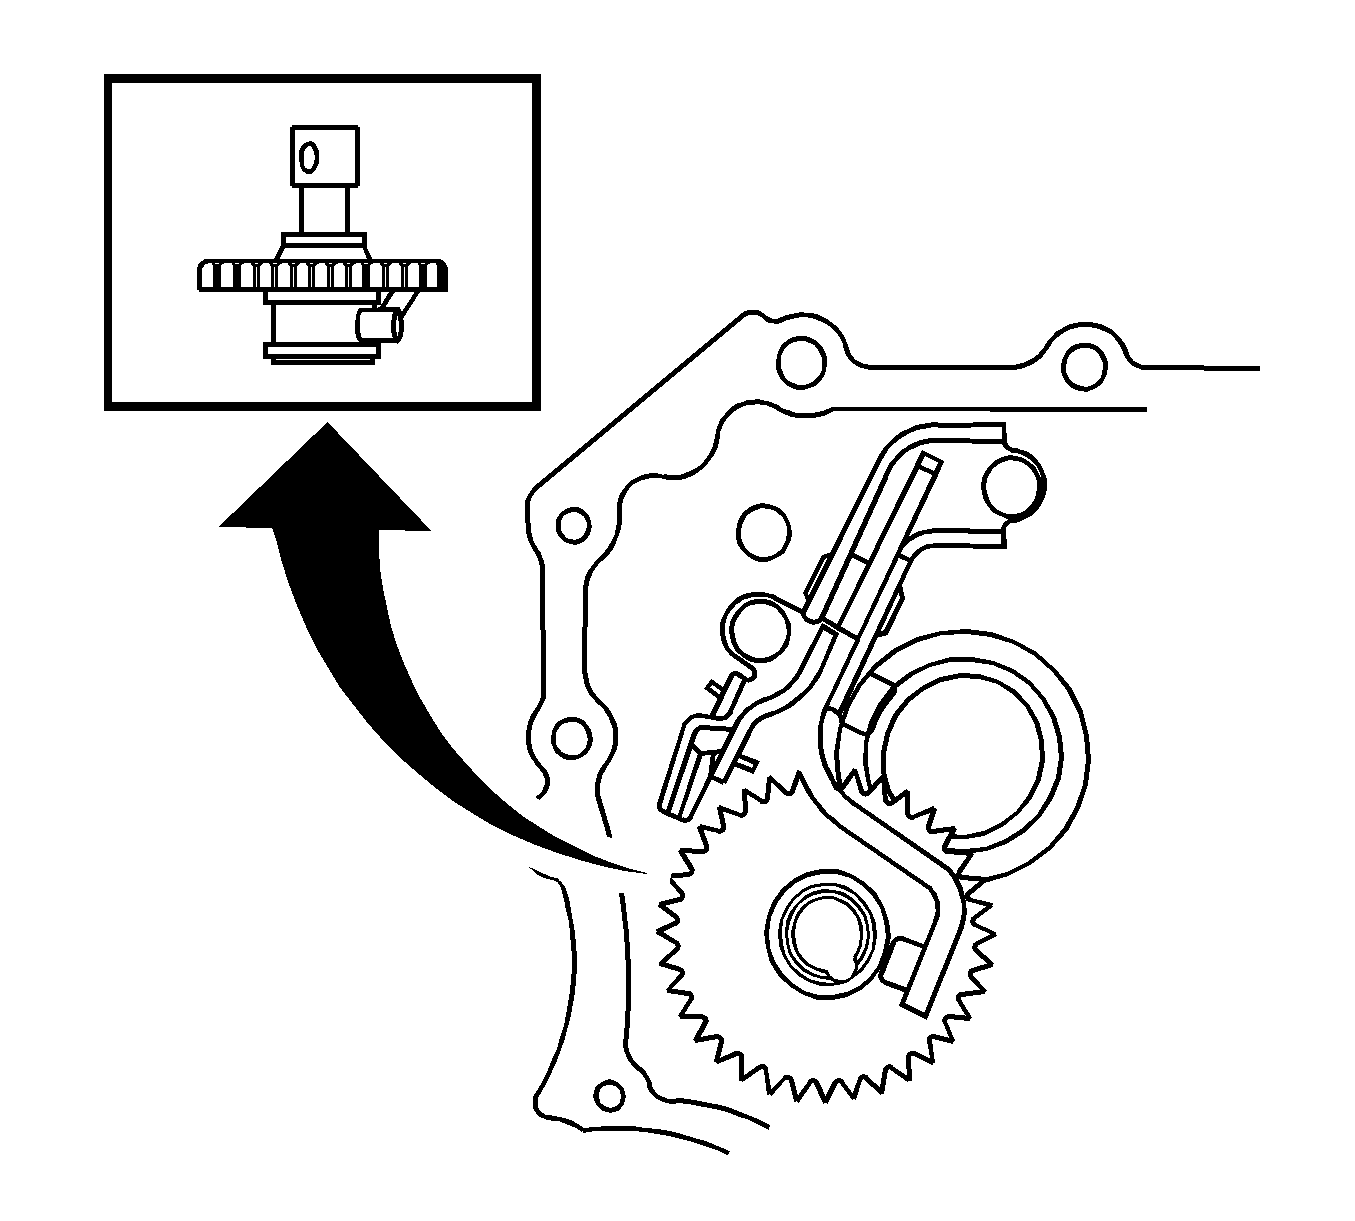
- Install the reverse idler gear, thrust washer and shaft.
- Set the pin on the top of the reverse shift arm into the groove on the reverse idler gear.
- Fit the claw of the reverse shift arm bracket with the notch of the input shaft front bearing.
- Install the 2 reverse shift arm bracket, then install the bracket retaining bolts.
- Install the oil receiver pipes to the transaxle case.
- Install the oil receiver retaining bolts.
- Apply RTV Silicone Sealer GM P/N 12346240 (Canadian P/N 10953493) or equivalent to the transaxle case side.
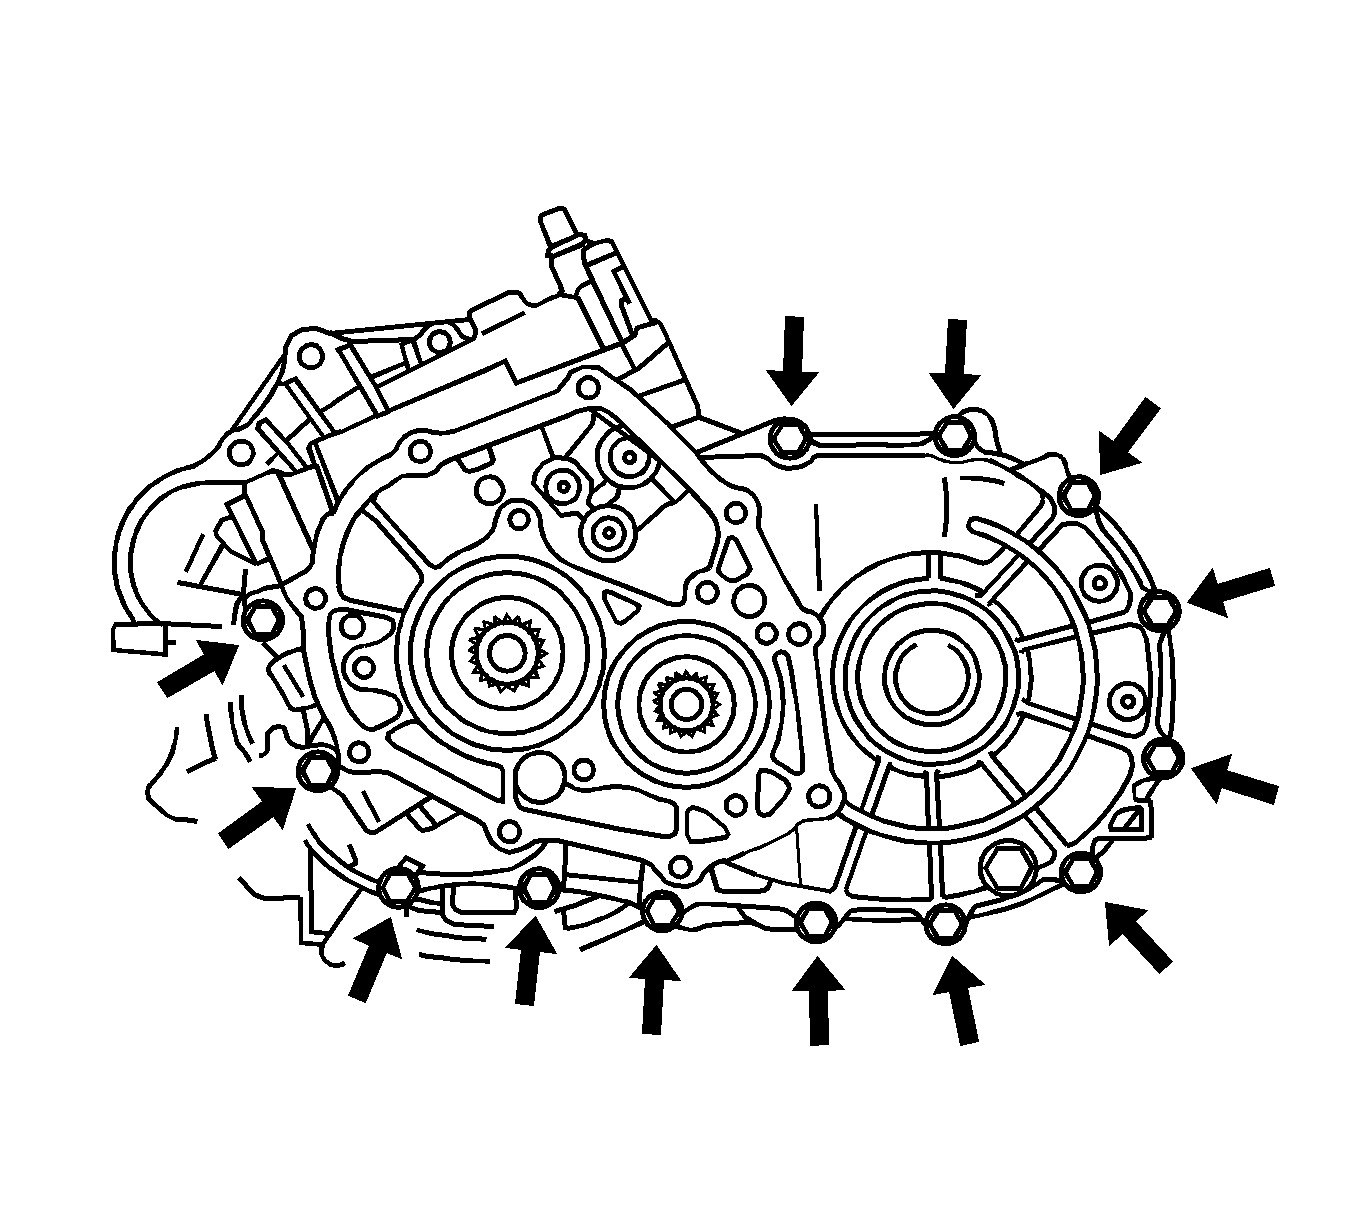
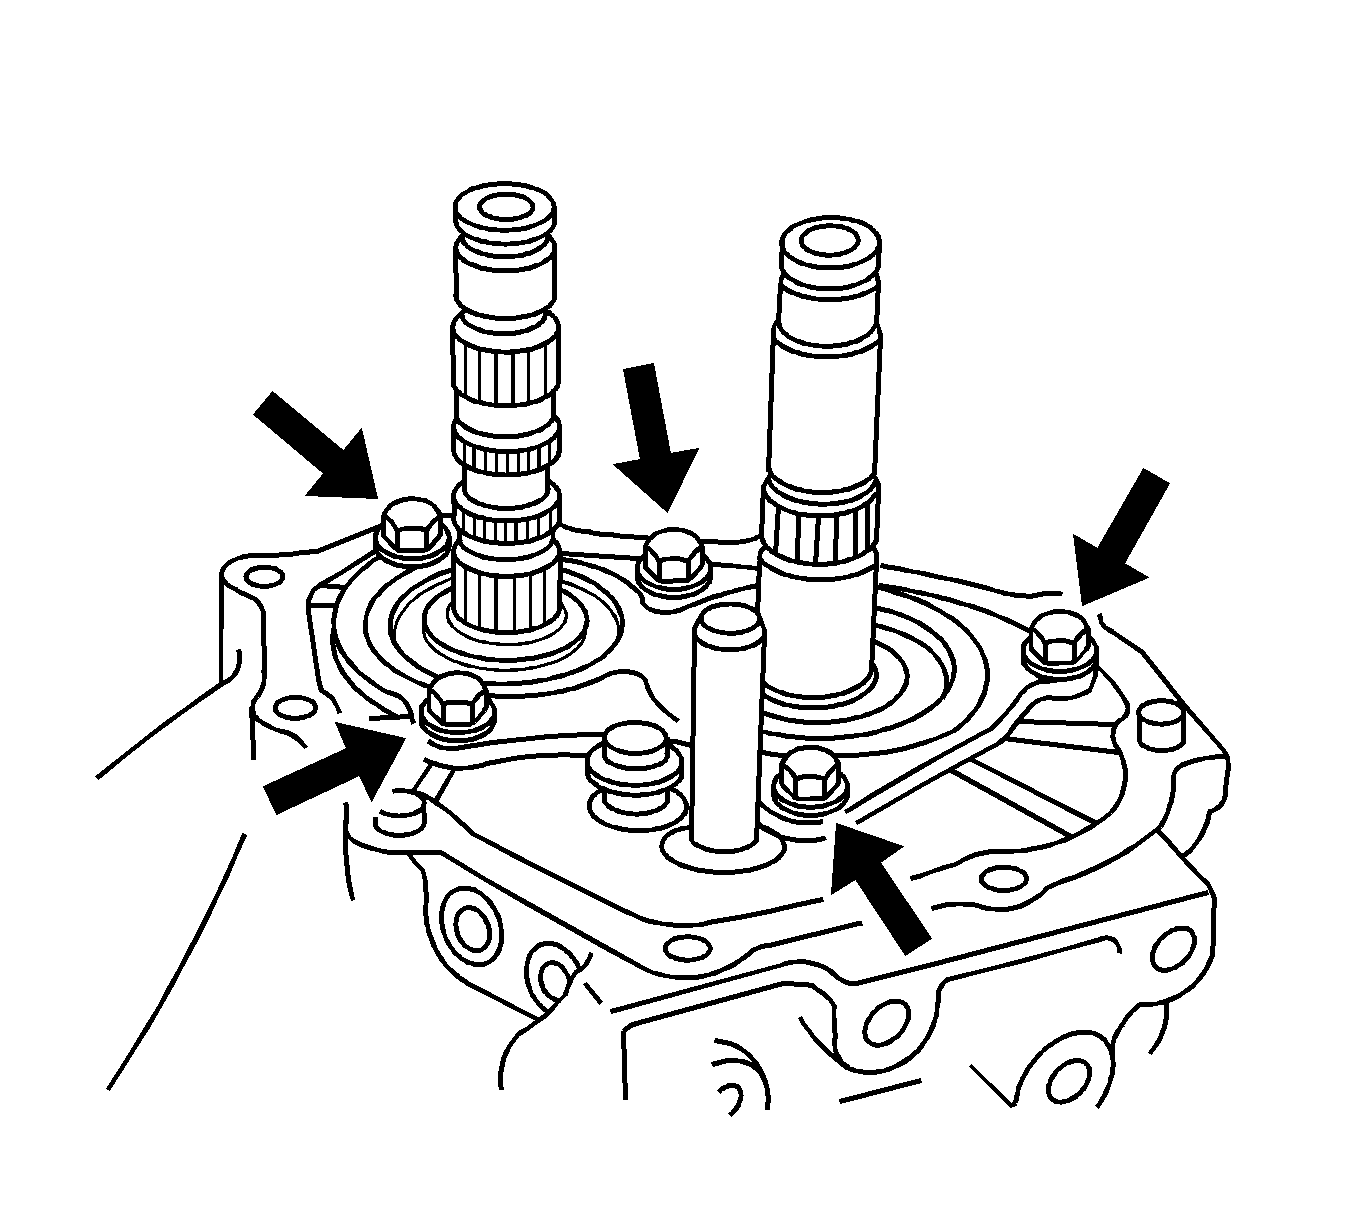
- Install the 13 transaxle case retaining bolts.
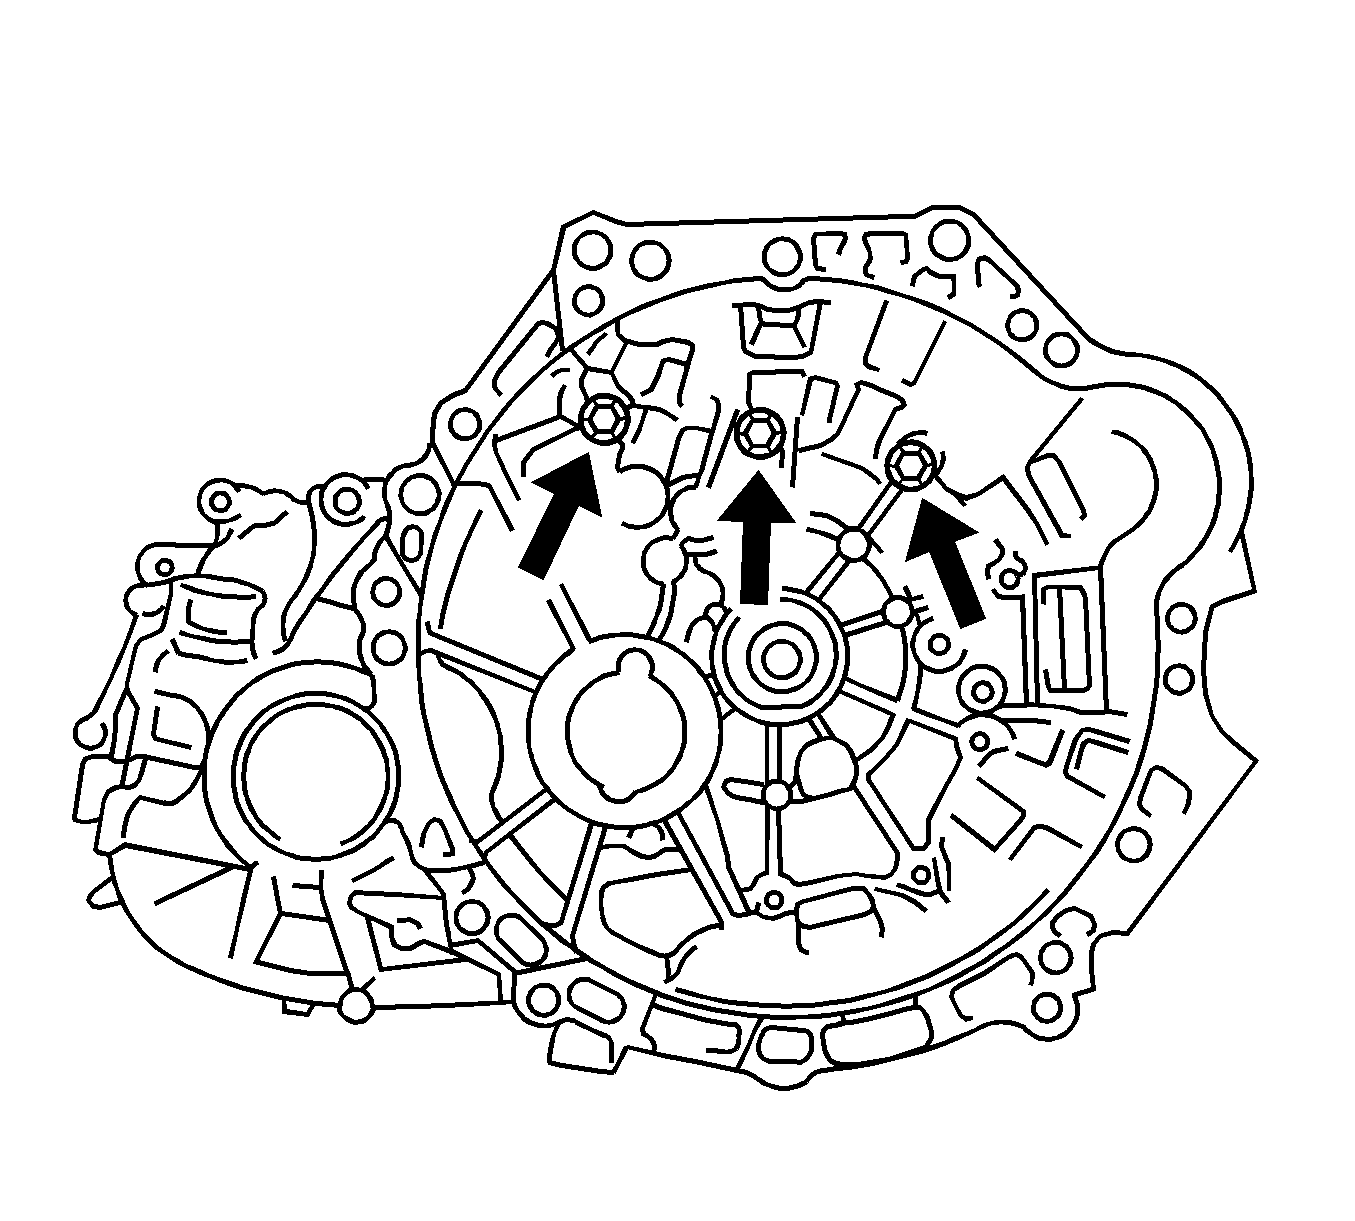
- Install the 3 transmission case retaining bolts.
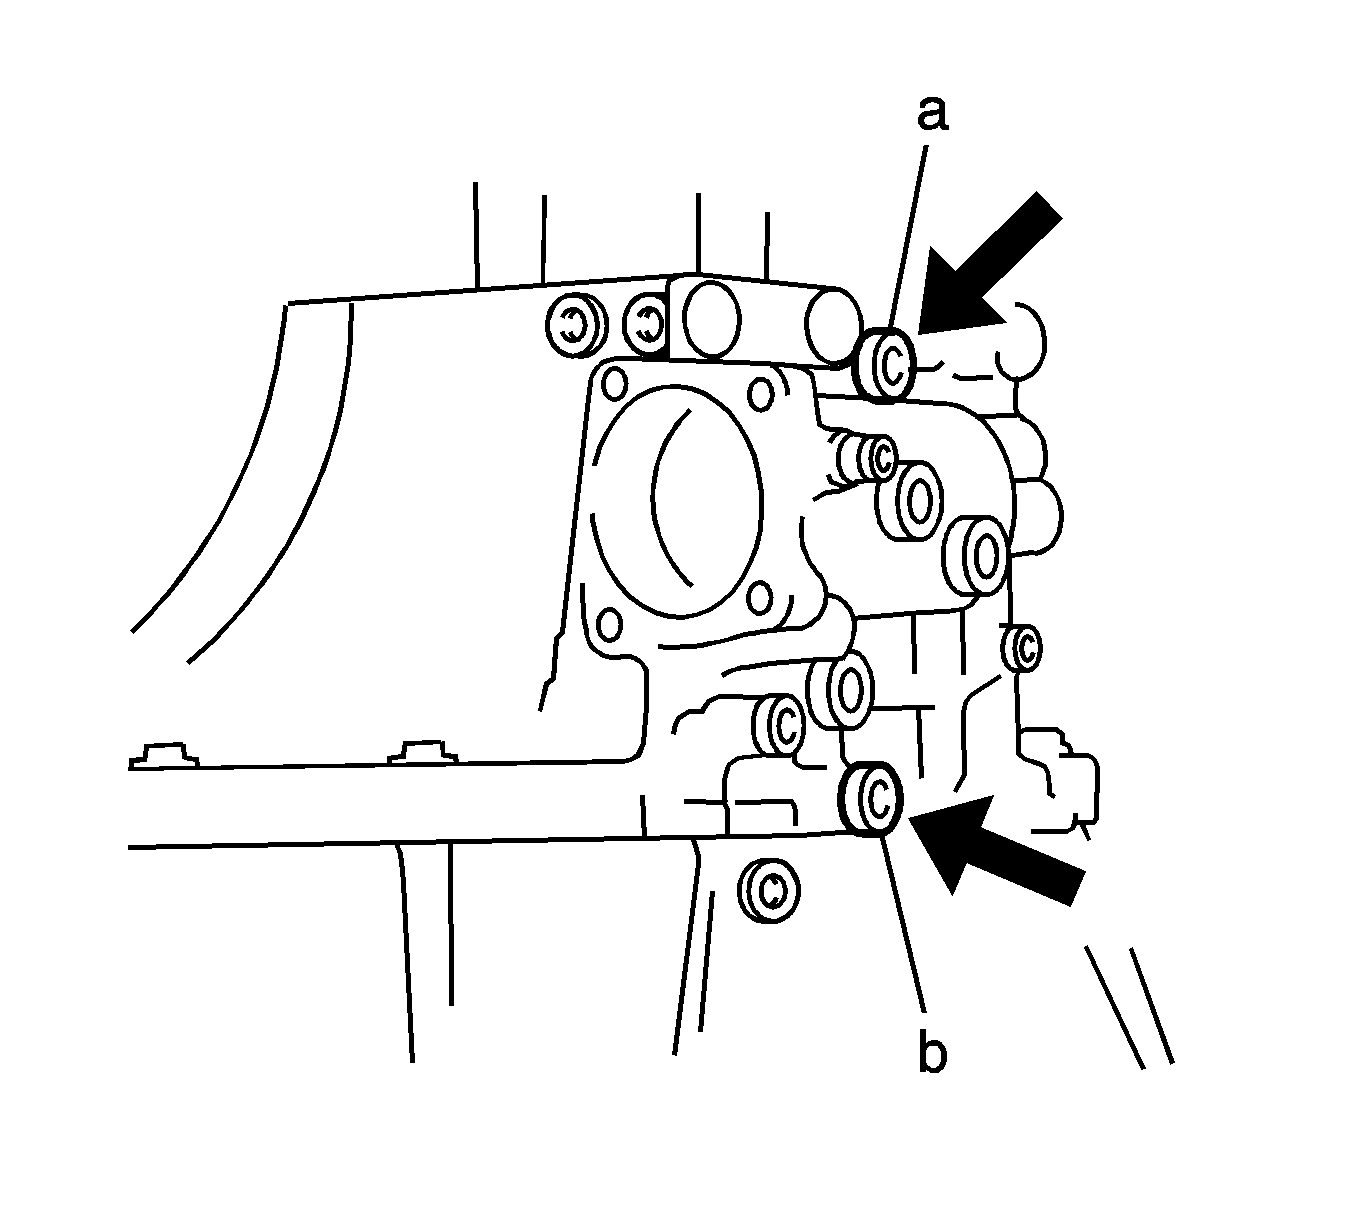
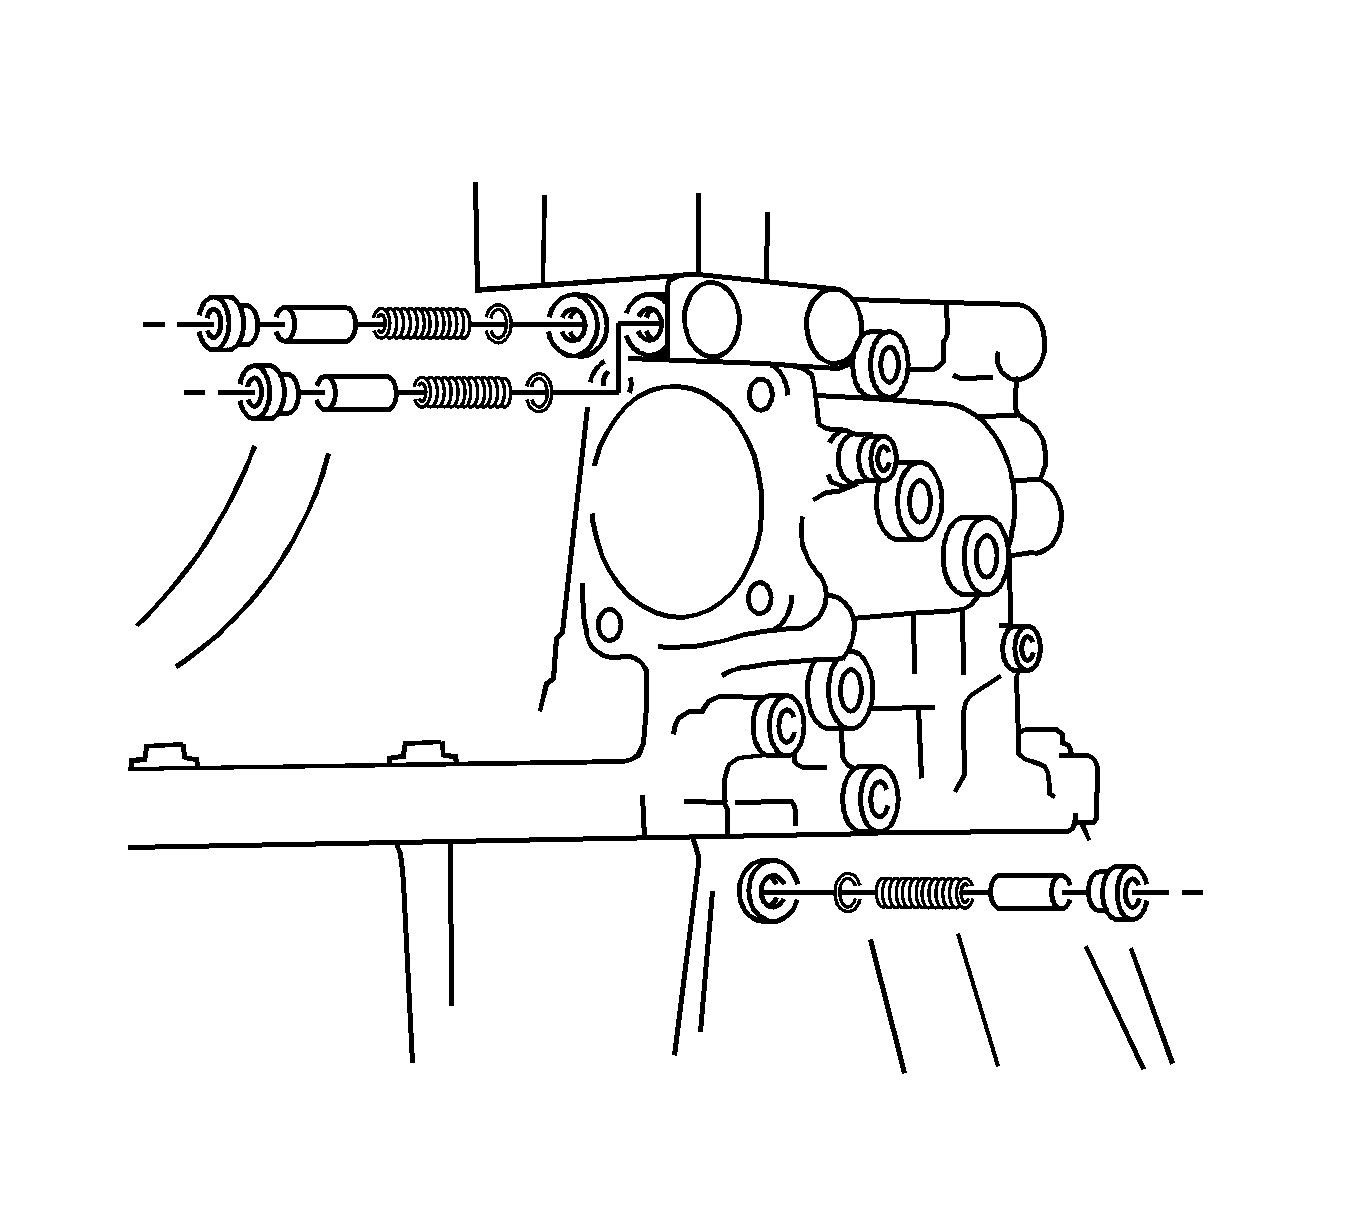
- Using a Allen wrench or equivalent, install the 2 screw plugs to the transaxle case.
- Using a Allen wrench or equivalent, Install the 3 screw plug assemblies to the transaxle case.
- Install the snap ring to the No.2 shift fork shaft.
- Install the reverse idler gear shaft lock bolt and gasket to the transaxle case.
- Using snap ring pliers or equivalent, install the 2 snap rings.
- Install the rear bearing retainer to the transaxle case.
- Coat the 5 rear bearing retainer bolts with Threadlocker 242 G/M P/N 12345382 or the equivalent.
- Install the bolts.
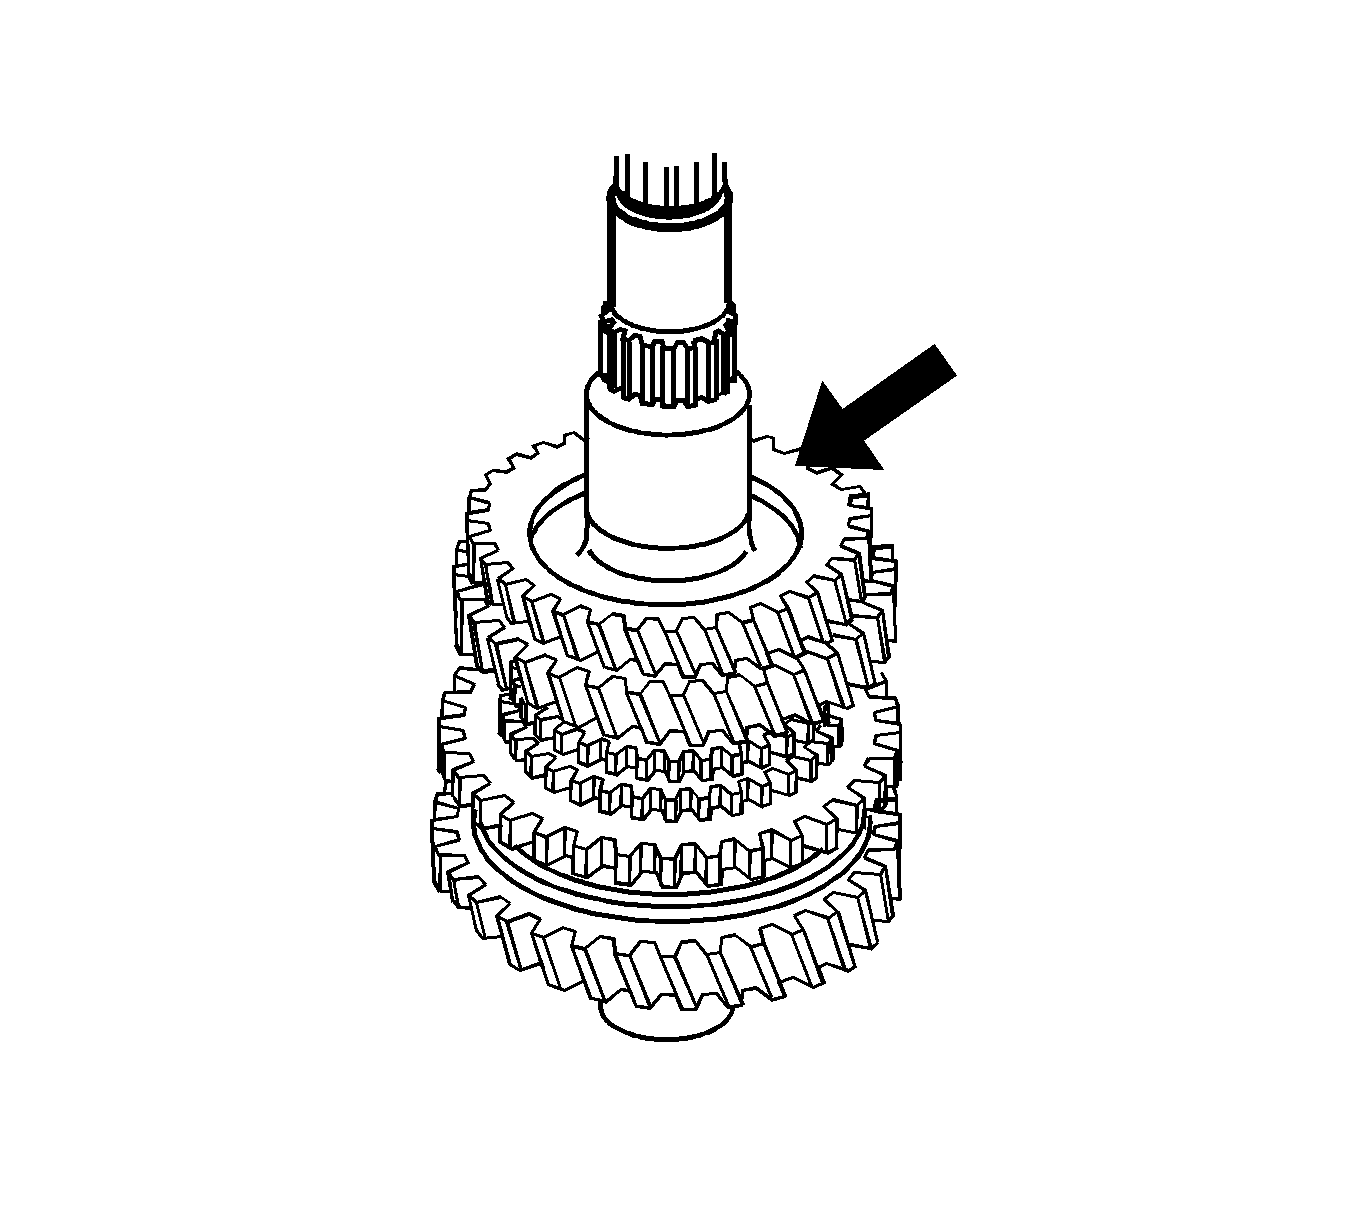
- Install the 5th driven gear.
- Install the 2 spacers and the roller bearing.
- Install the snap ring to the output shaft.
- Install 5th gear and the 5th gear synchronizer ring to the input shaft.
- Before installing the No.3 clutch hub assembly and input shaft rear ball bearing assembly, place a suitable wooden block on the rear side of the input shaft.
- Install the No.3 clutch hub assembly.
- Select a snap ring that will make the thrust clearance of the front bearing inner race less than 0.1 mm (0.004 in).
- Install the 5th gear snap ring to the shaft.
- Using a dial indicator, measure the radial runout of 6th gear.
- If the gear exceeds any of the maximum measurements, replace the gear, roller bearing or shaft.
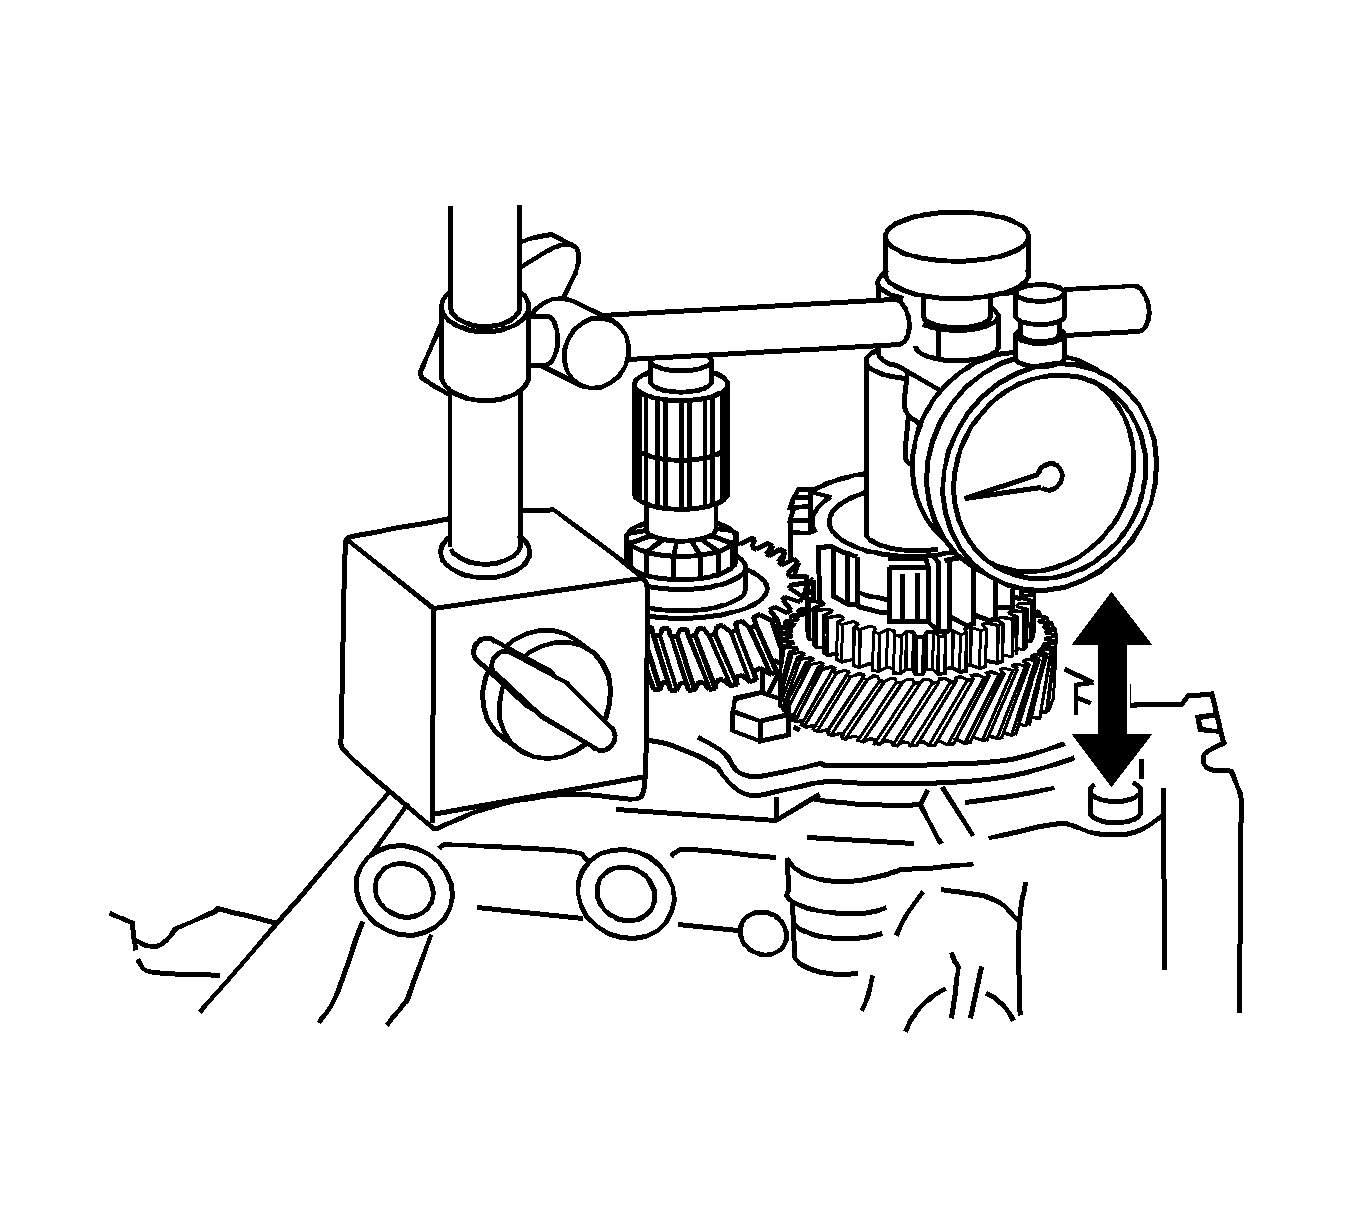
- Using a dial indicator, measure the thrust clearance of 5th gear.
- Install the No.3 gear shift fork and No.3 hub sleeve.
- Coat the retaining bolt with Threadlocker 242 G/M P/N 12345382 or the equivalent.
- Install the bolt.
- Install the 6th gear synchronizer ring.
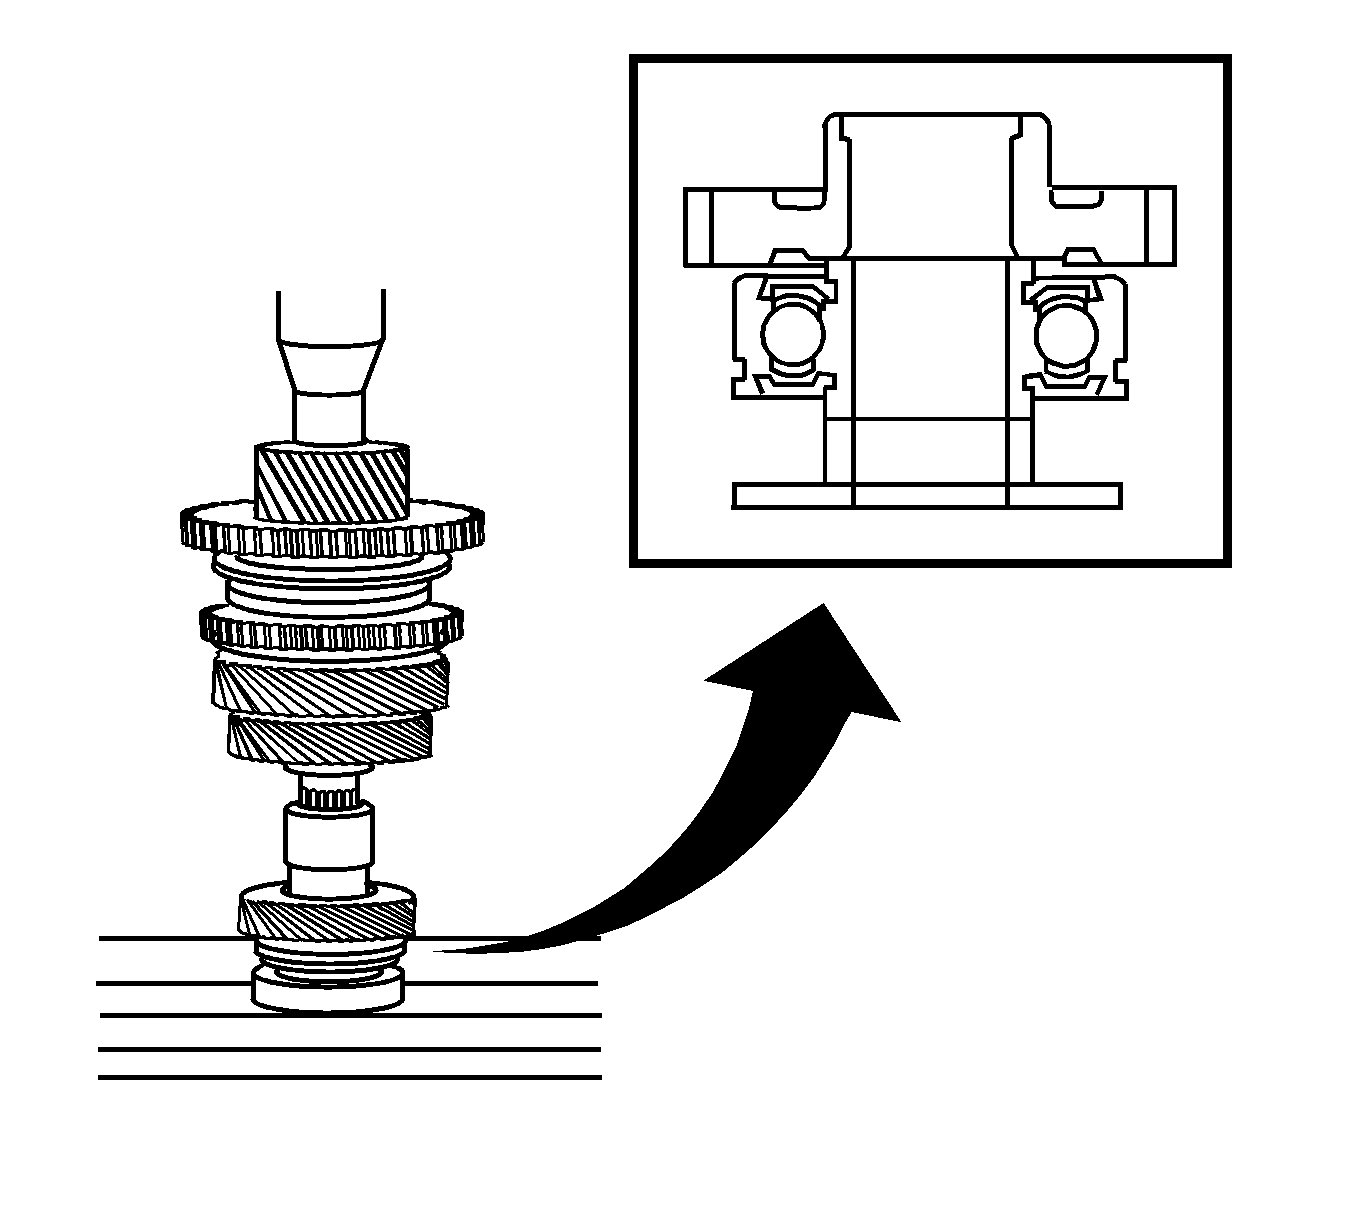
- Install the roller bearing and spacer to the input shaft.
- Install the 6th drive gear, then the rear bearing to the input shaft.
- Install the input shaft snap ring.
- Install the spacer to the output shaft.
- Install the rear bearing to the output shaft.
- Install the 6th driven gear to the input shaft.
- Install the 6th driven gear snap ring to the output shaft.
- Using a dial indicator, measure the radial runout of 6th gear.
- If the gear exceeds any of the maximum measurements, replace the gear, roller bearing or shaft.
- Using a dial indicator, measure the thrust clearance of 6th gear.
- Apply RTV Silicone Sealer GM P/N 12346240 (Canadian P/N 10953493) or equivalent to the transaxle case cover.
- Install the 9 transmission case cover bolts.
- Coat the 2 retainer bolts (1) with Threadlocker 242 G/M P/N 12345382 (Canadian P/N 10953489) or the equivalent.
- Install the 4 bolts and the select lever shaft assembly to the transaxle case.
- Coat the lock ball threads with Threadlocker 242 G/M P/N 12345382 (Canadian P/N 10953489) or the equivalent.
- Install the lock ball assembly to the transaxle case.
- Install the 2 bolts and the selecting bellcrank assembly.
- Apply Multi-Purpose grease to the inside surface of the control bellcrank dust cover (1).
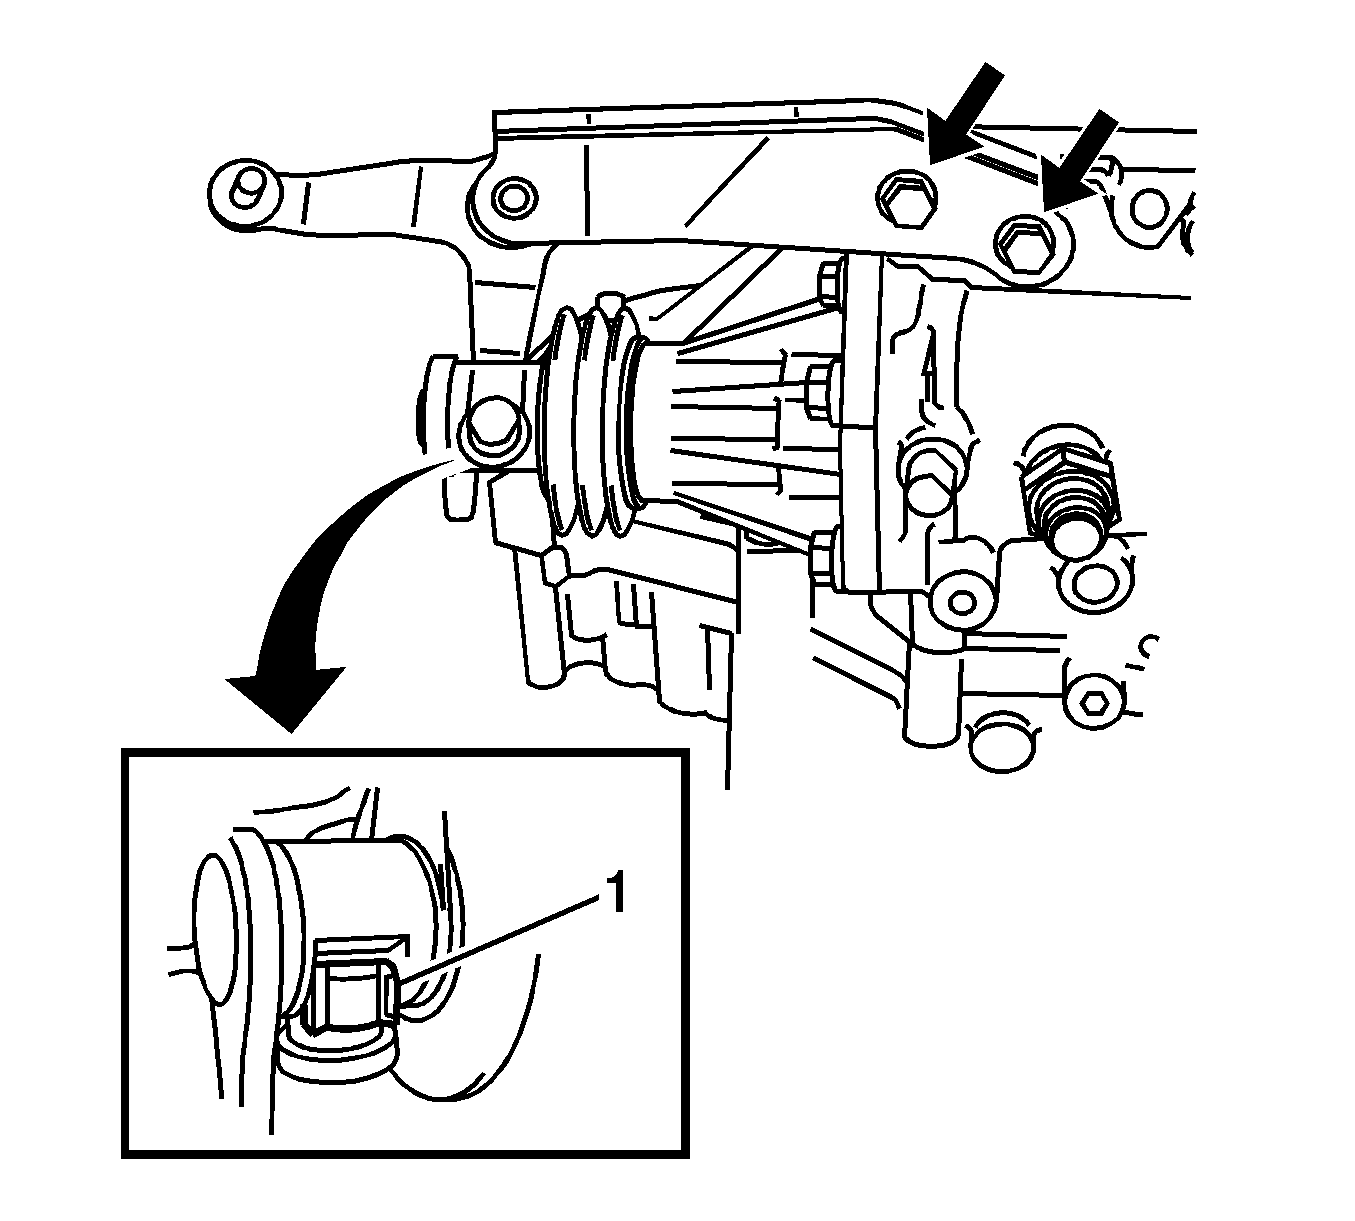
- Install the 3 bolts and the control cable bracket.
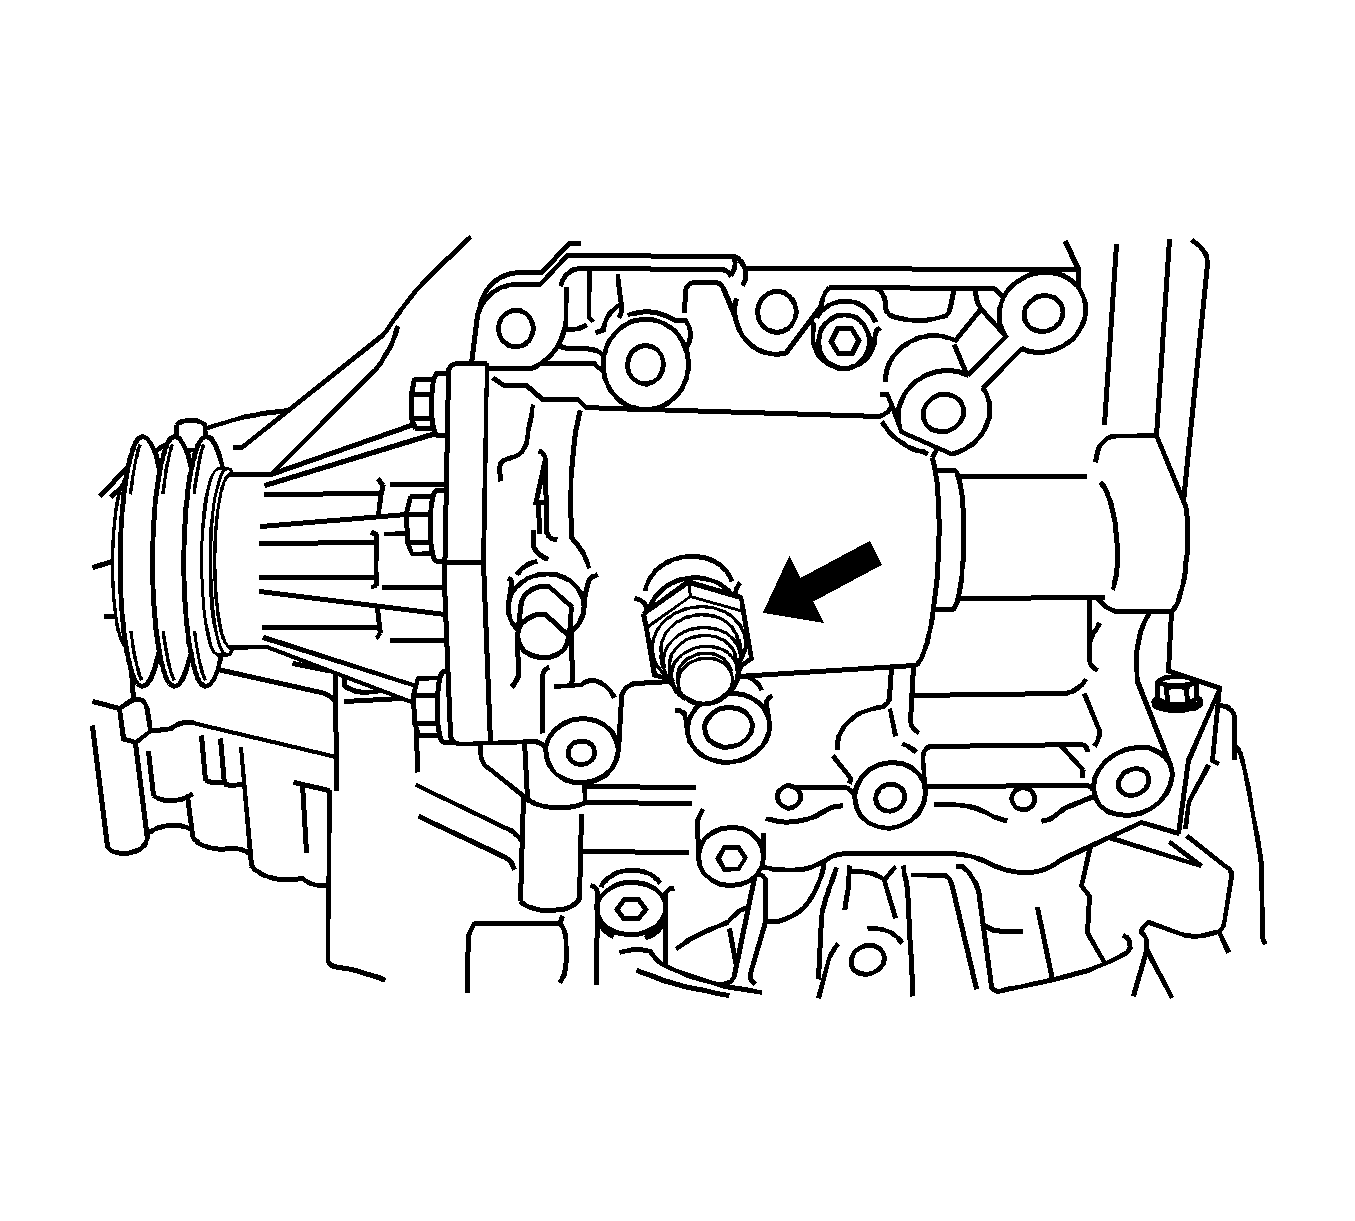
- Install the backup light switch and new gasket to the transaxle case.
- Install the bolt and speedometer drive hole cover.
- Install the drain plug and gasket.
- Install the filler plug and gasket.
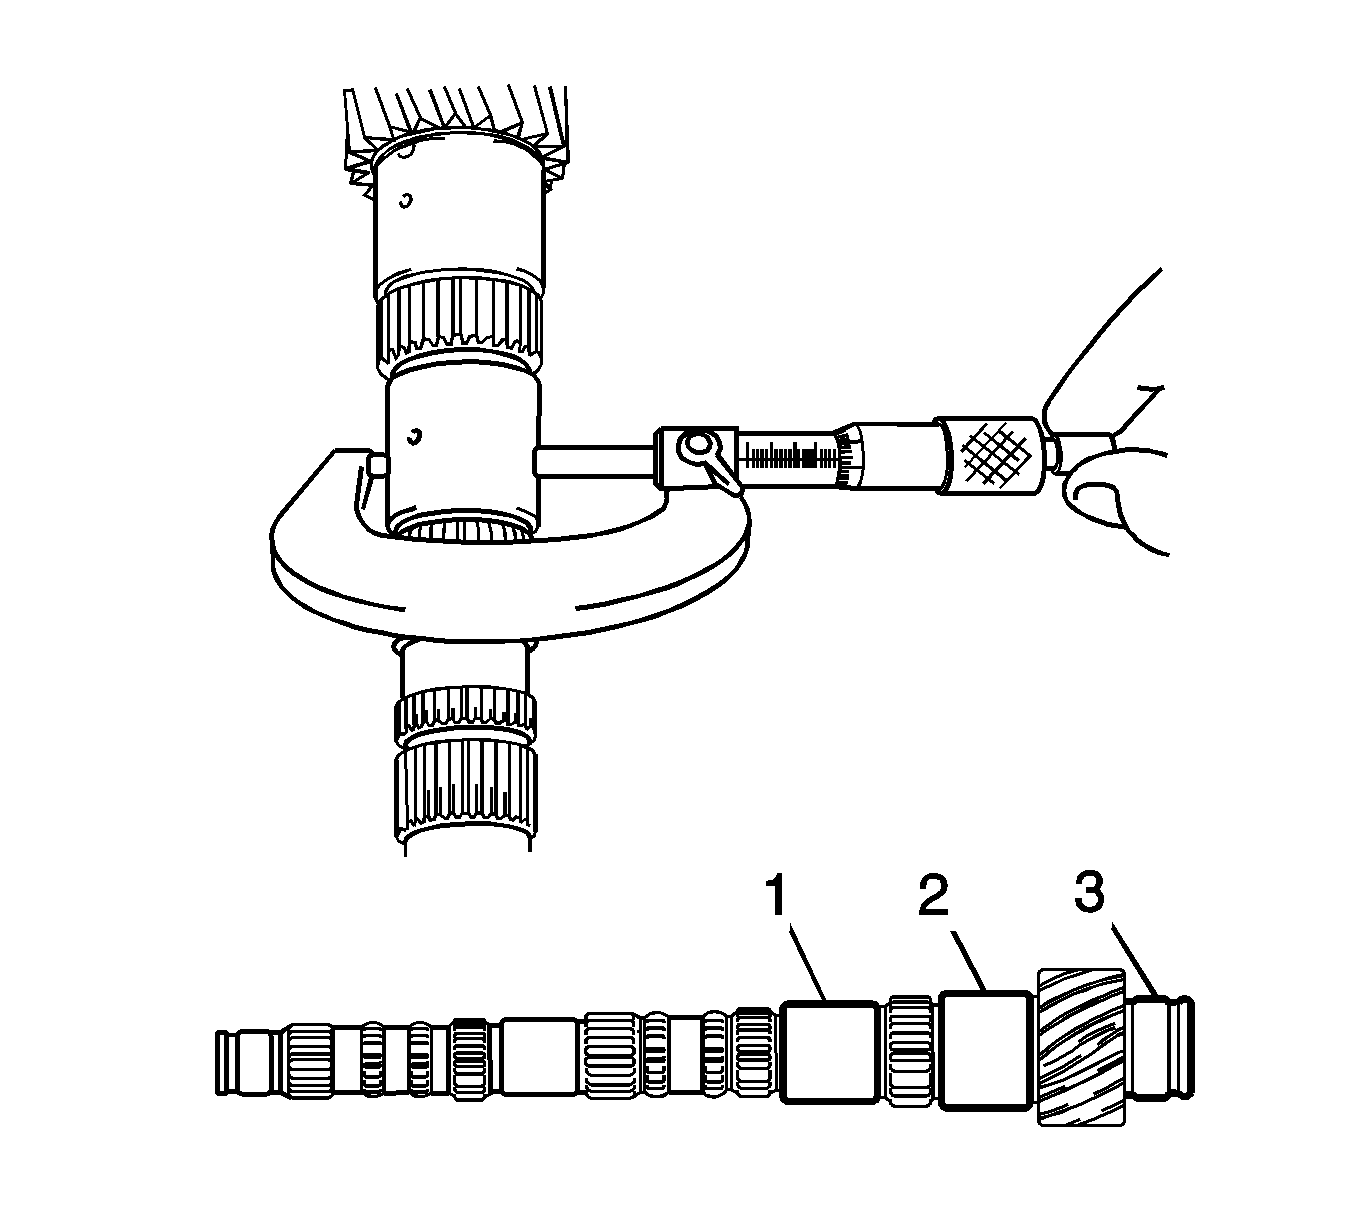
Minimum Outer Diameter
| • | 1: 31.985 mm (1.2592 in) |
| • | 2: 37.985 mm (1.4955 in) |
| • | 3: 32.985 mm (1.2986 in) |

Thrust Clearance
Thrust Clearance: 0.10-0.55 mm (0.0039-0.0217 in).
Notice: Refer to Fastener Notice in the Preface section.
Tighten
Tighten the bolt to 11 N·m (8 lb ft).
Tighten
Tighten the bolt to 11 N·m (8 lb ft).
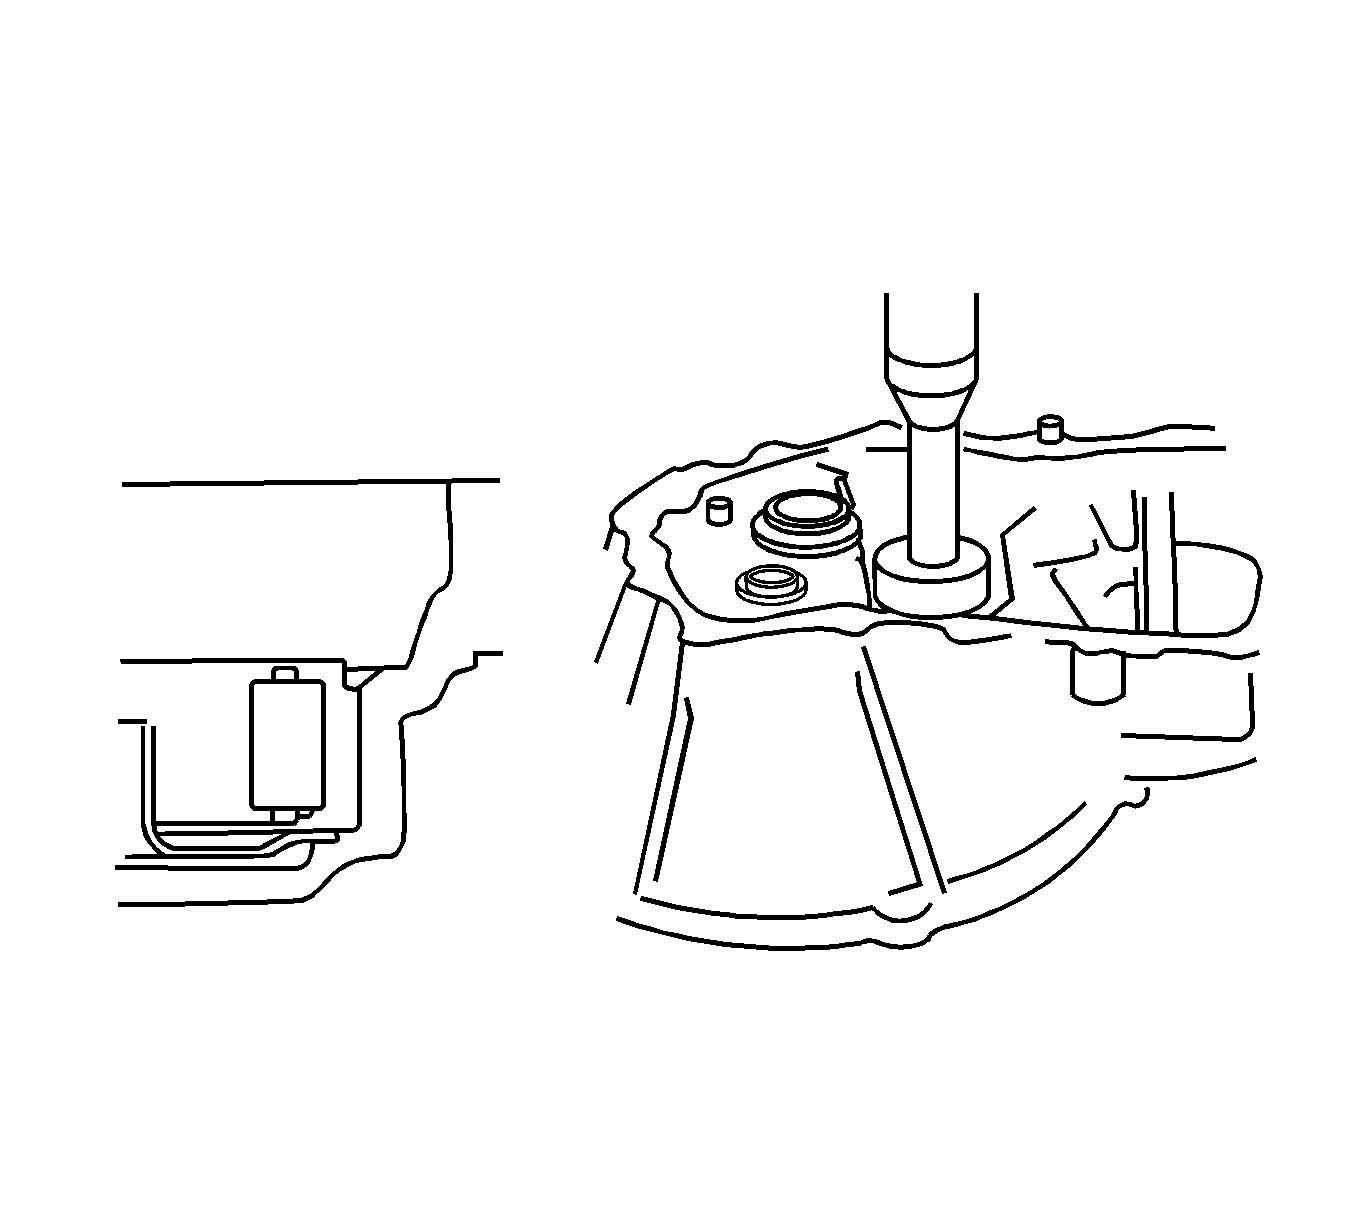

Oil Seal Installation Depth
Oil Seal installation depth should be 15.6-16.0 mm (0.614-0.630 in).


Tighten
Tighten the set bolts to 16 N·m (12 lb ft).

Tighten
Tighten the bolts to 17 N·m (13 lb ft).

Tighten
Tighten the bolts to 17 N·m (13 lb ft).
Tighten
Tighten the 13 bolts to 30 N·m (22 lb ft).
Tighten
Tighten the 3 bolts to 30 N·m (22 lb ft).
Tighten
| • | Tighten screw plug (a) to 13 N·m (9 lb ft). |
| • | Tighten screw plug (b) to 39 N·m (29 lb ft). |
Tighten
Tighten the 3 screw plugs to 24.5 N·m (18 lb ft).
Tighten
Tighten the lock bolt to 29 N·m (22 lb ft).
Tighten
Tighten the bolts to 27 N·m (20 lb ft).
Thrust Clearance
Standard radial runout should be between 0.015-0.056 mm (0.0006-0.0022 in).
Maximum runout should not exceed 0.56 mm (0.0022 in).
Thrust Clearance
Standard thrust clearance should be between 0.10-0.62 mm (0.0039-0.0244 in).
Maximum clearance should not exceed 0.62 mm (0.0244 in).
Tighten
Tighten the bolt to 16 N·m (12 lb ft).

Thrust Clearance
Standard radial runout should be between 0.009-0.50 mm (0.0003-0.0020 in).
Maximum runout should not exceed 0.50 mm (0.0020 in).
Thrust Clearance
Standard thrust clearance should be between 0.10-0.60 mm (0.0039-0.0236 in).
Maximum clearance should not exceed 0.60 mm (0.0236 in).

Tighten
Tighten the 9 bolts to 18 N·m (14 lb ft).
Tighten
Tighten the 4 bolts to 18 N·m (14 lb ft).
Tighten
Tighten the lock ball to 29 N·m (22 lb ft).
Tighten
Tighten the 2 bolts to 25 N·m (15 lb ft).
Tighten
Tighten the 3 bolts to 11 N·m (8 lb ft).
Tighten
Tighten the switch to 40 N·m (29 lb ft).
Tighten
Tighten the bolt to 11 N·m (8 lb ft).
Tighten
Tighten the drain plug to 39 N·m (29 lb ft).
Tighten
Tighten the filler plug to 39 N·m (29 lb ft).
