Battery Positive Cable Replacement 2.2L (L61)
Removal Procedure
Important:
• Always use replacement cables that are of the same type, diameter and length of the cables that you are replacing. • Always route the replacement cable the same way as the original cable.
- Disconnect the negative battery cable from the battery. Refer to Battery Negative Cable Disconnection and Connection .
- Disconnect the positive battery cable from the battery.
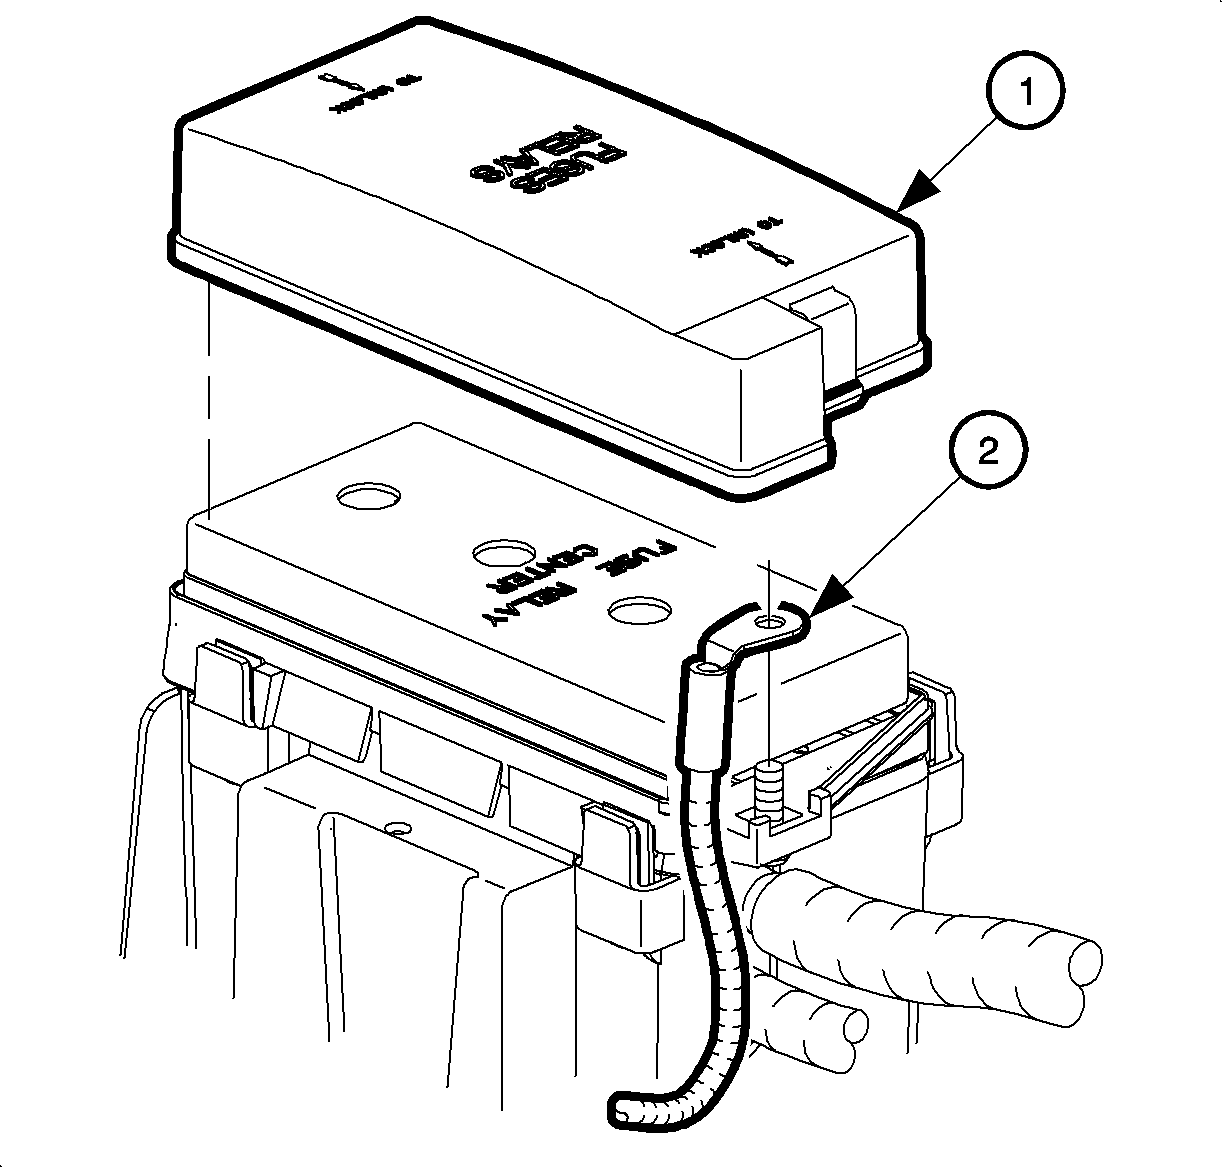
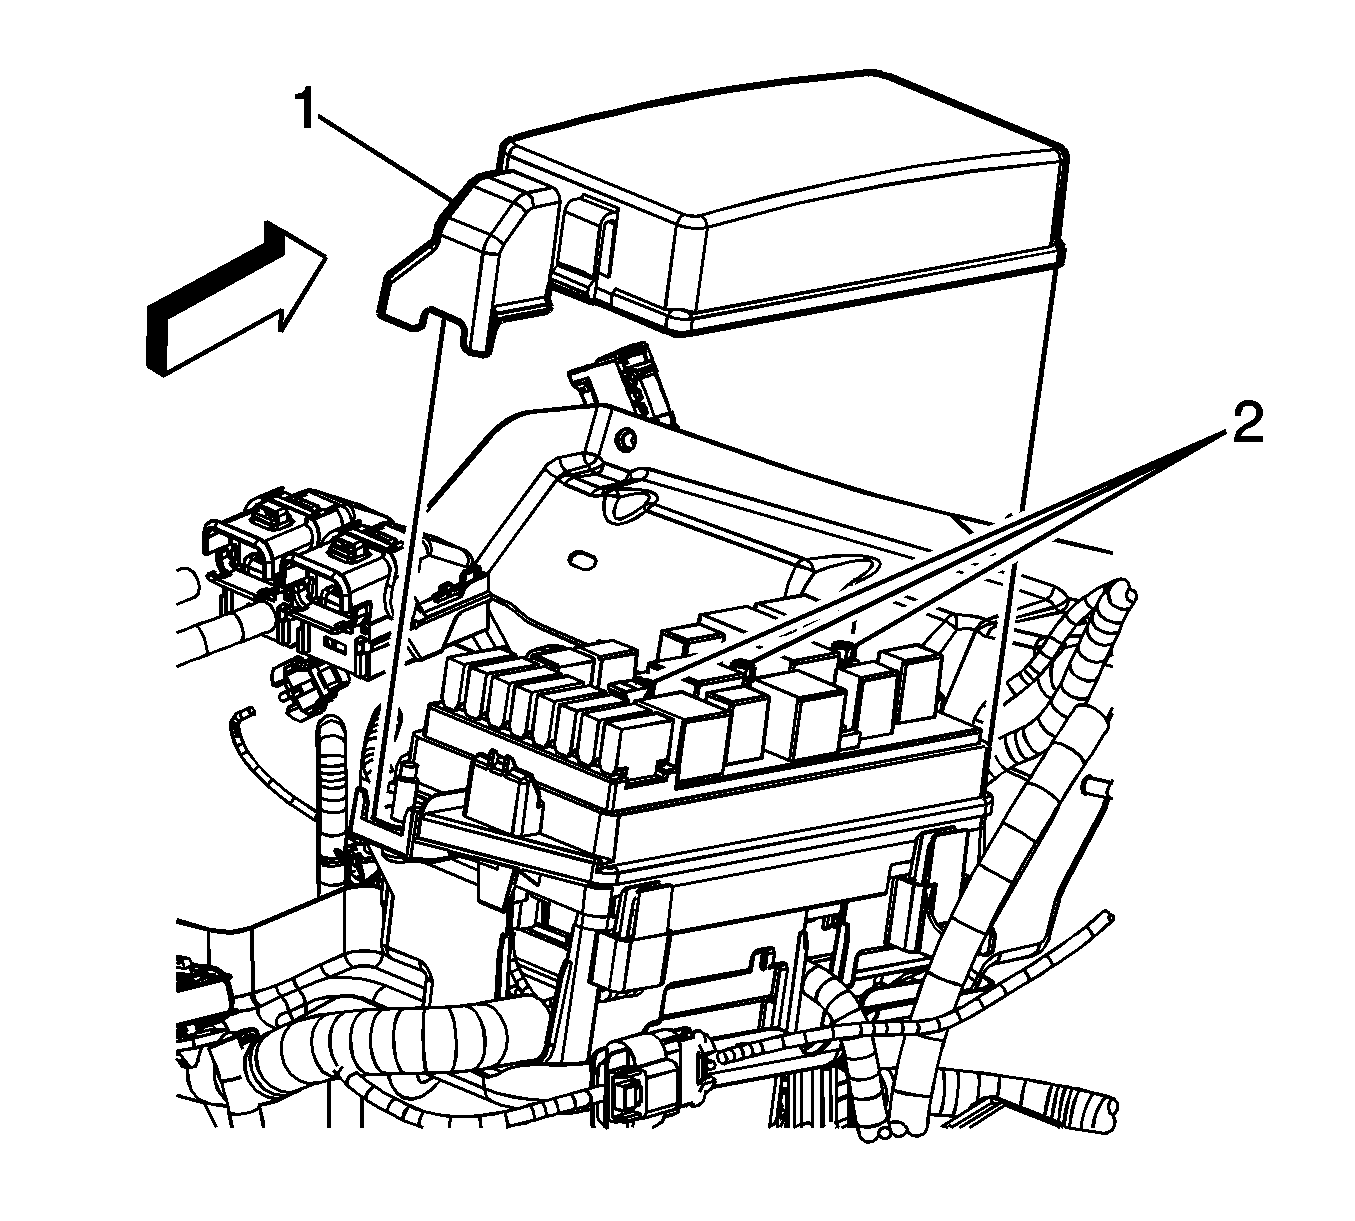
- Remove the UHJB cover (1).
- Disconnect the positive battery cable (2) from the UHJB.
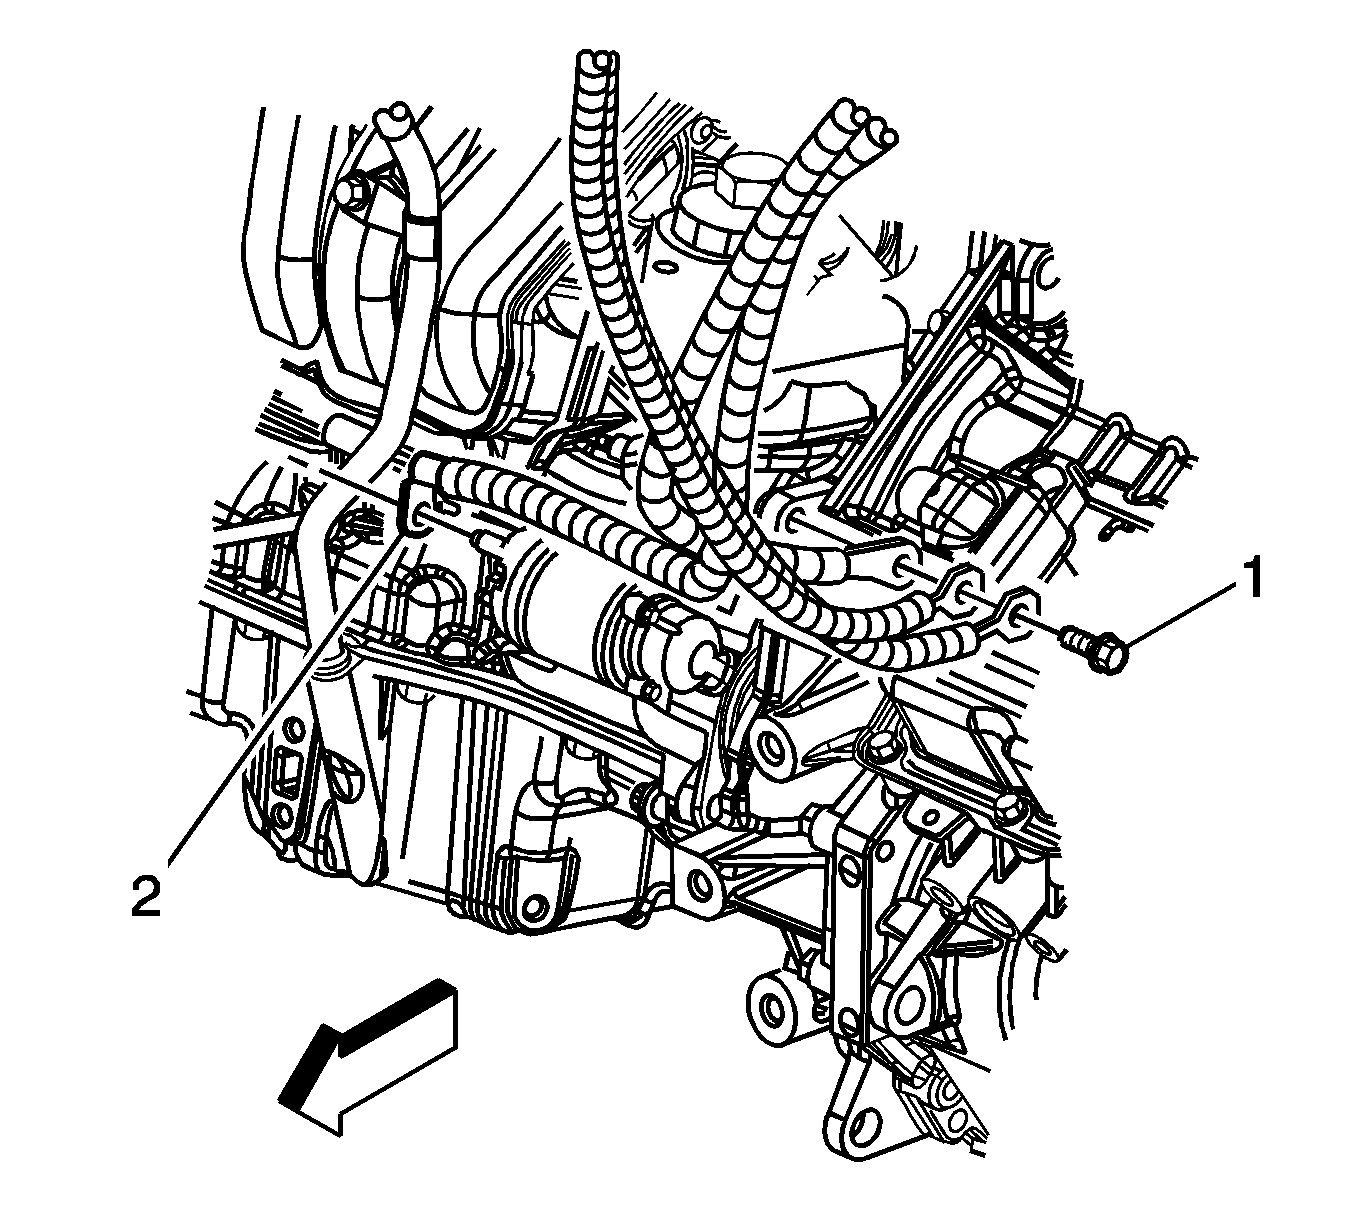
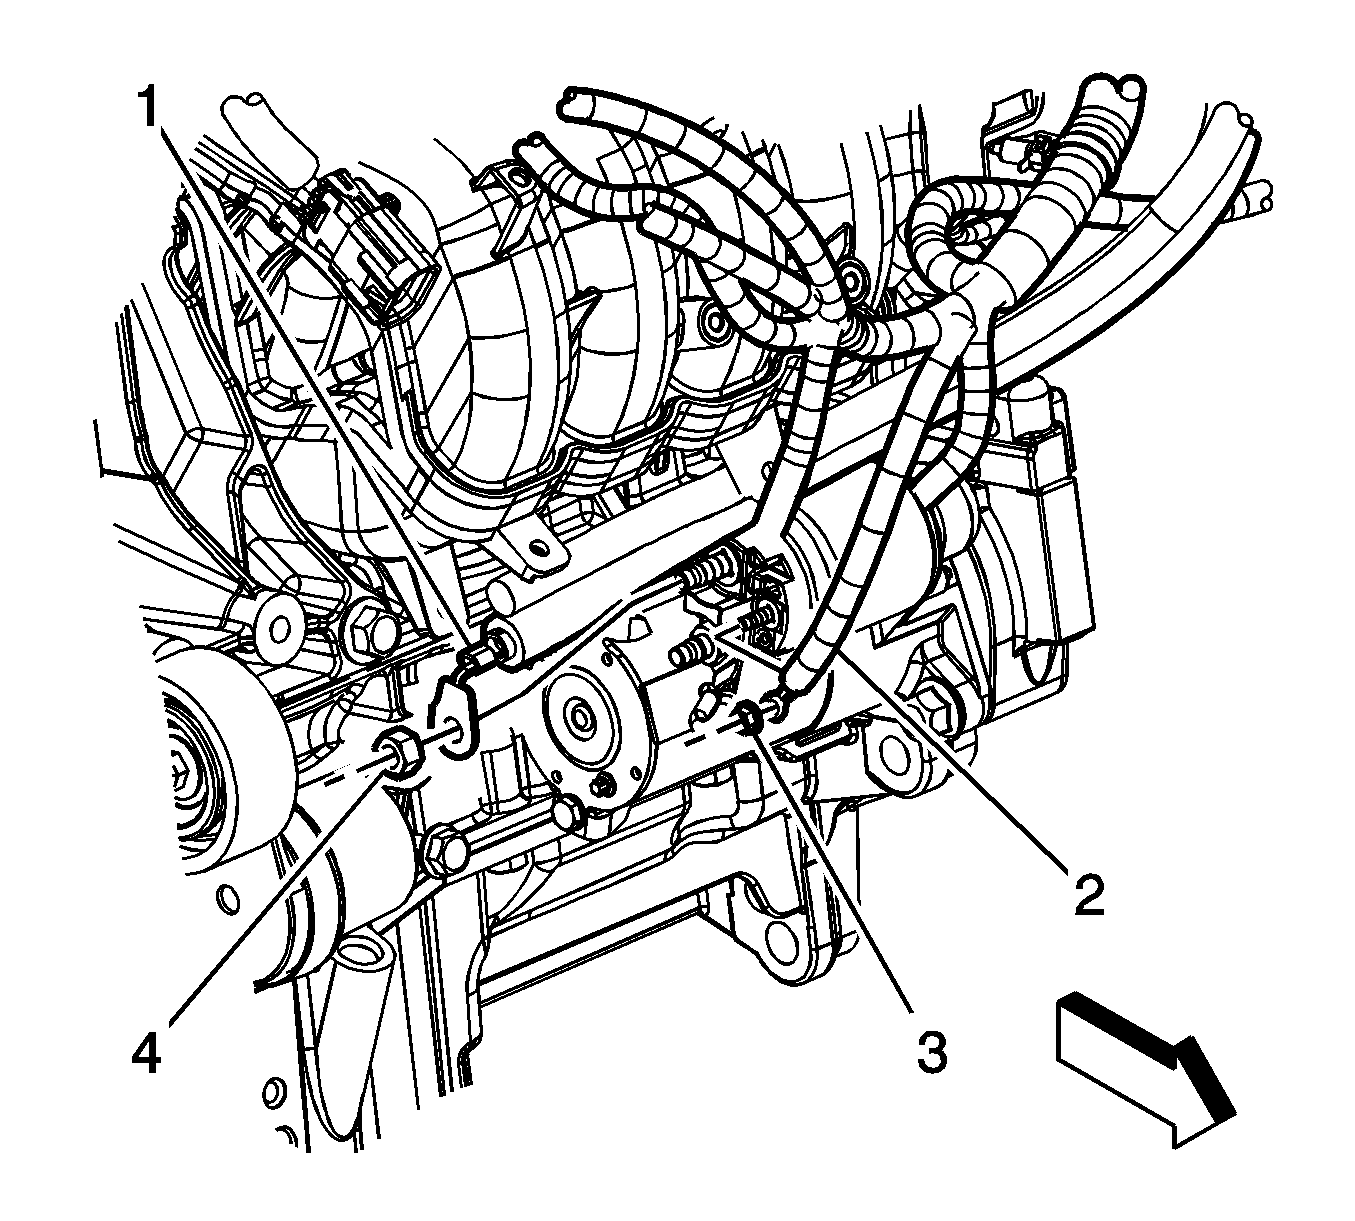
- Disconnect the positive battery cable from the starter (2).
- Disconnect the positive battery cable from the retainers.
- Disconnect the positive battery cable from the generator.
- Remove the positive battery cable from the vehicle.
Installation Procedure
- Route the battery cable through the engine compartment and connect to the cable retainers.
- Connect the positive battery cable to the generator.
- Connect the positive battery cable to the starter (2).
- Connect the positive battery cable to the UHJB (2).
- Install the UHJB cover (1).
- Connect the positive battery cable to the battery.
- Connect the negative battery cable. Refer to Battery Negative Cable Disconnection and Connection .

Notice: Refer to Fastener Notice in the Preface section.

Tighten
Tighten the positive cable to UHJB to 17 N·m (13 lb ft).
Battery Positive Cable Replacement 3.5L (L66)
Removal Procedure
Important:
• Always use replacement cables that are of the same type, diameter and length of the cables that you are replacing. • Always route the replacement cable the same way as the original cable.
- Disconnect the negative battery cable from the battery. Refer to Battery Negative Cable Disconnection and Connection .
- Disconnect the positive battery cable (2) from the battery.
- Remove the (UHJB) cover (1).
- Disconnect the positive battery cable (2) from the UHJB.
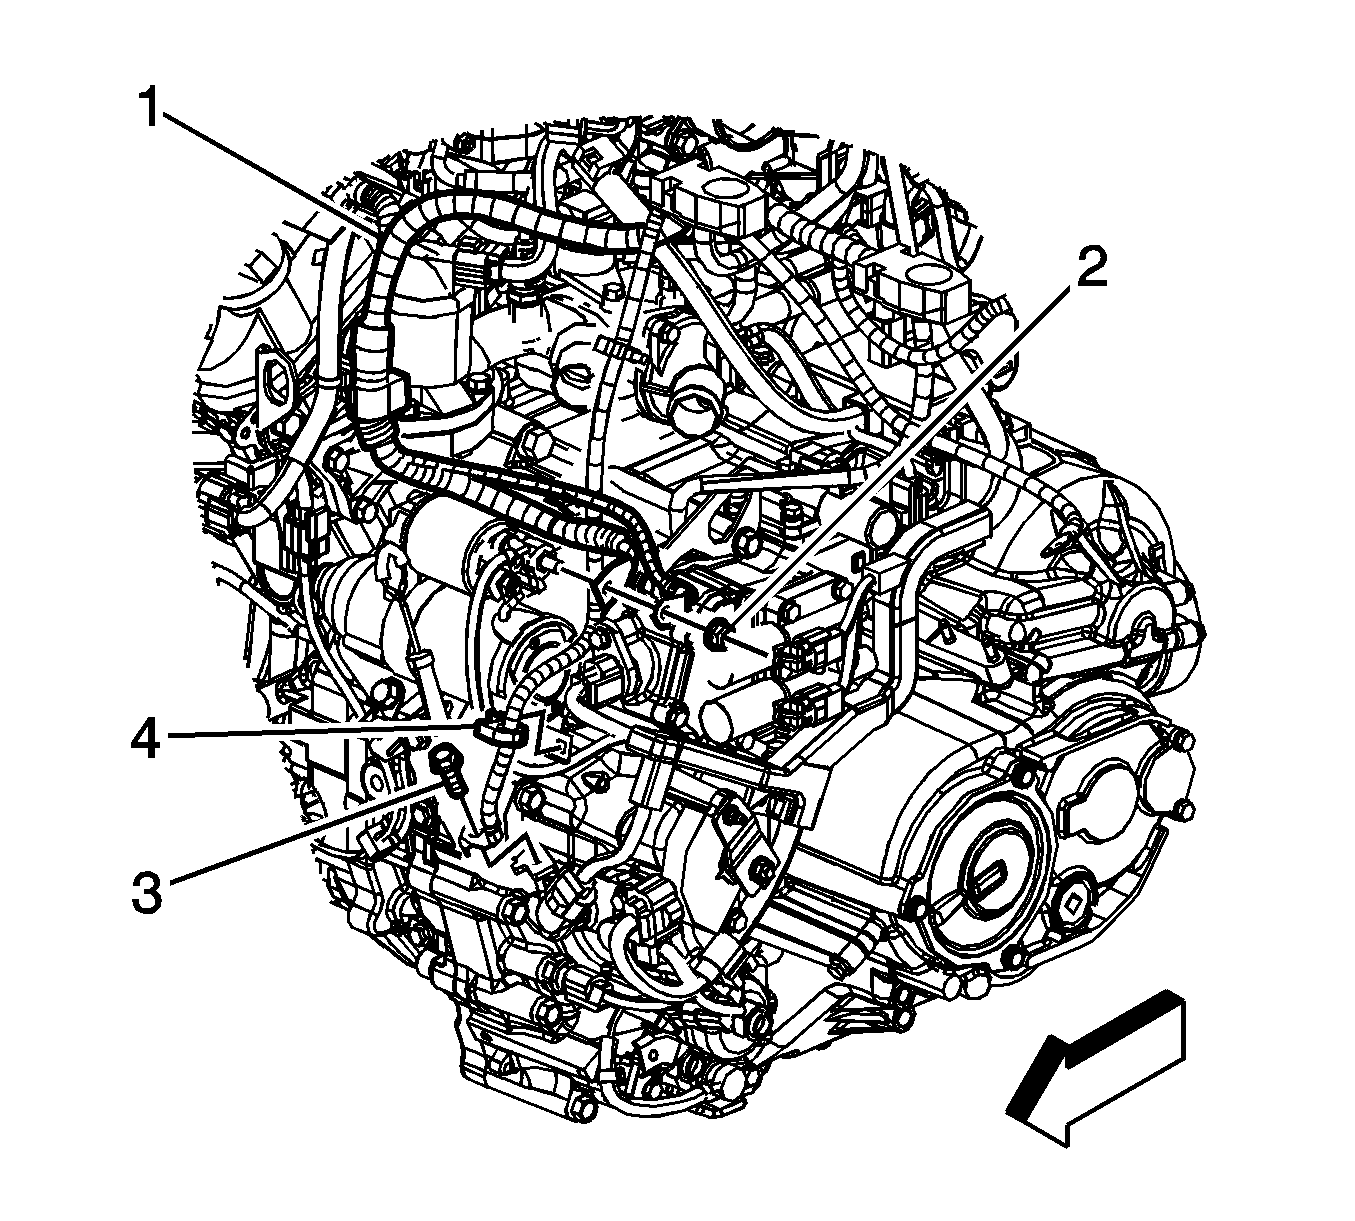
- Disconnect the positive battery cable from the starter (2).
- Disconnect the positive battery cable from the retainers.
- Disconnect the positive battery cable from the generator.
- Remove the positive battery cable from the vehicle.

Installation Procedure
- Route the battery cable through the engine compartment and connect to the cable retainers.
- Connect the positive battery cable to the generator.
- Connect the positive battery cable to the starter (2).
- Connect the positive battery cable to the UHJB (2).
- Install the UHJB cover (1).
- Connect the positive battery cable to the battery.
- Connect the negative battery cable. Refer to Battery Negative Cable Disconnection and Connection .

Notice: Refer to Fastener Notice in the Preface section.

Tighten
Tighten the positive cable to UHJB to 17 N·m (13 lb ft).
Battery Positive Cable Replacement 2.4L (LAT)
Removal Procedure
Important:
• Always use replacement cables that are of the same type, diameter and length of the cables that you are replacing. • Always route the replacement cable the same way as the original cable.
- Disconnect the negative battery cable. Refer to Battery Negative Cable Disconnection and Connection .
- Open the positive battery cable cover on the engine wiring harness auxiliary bussed electrical center (BEC).
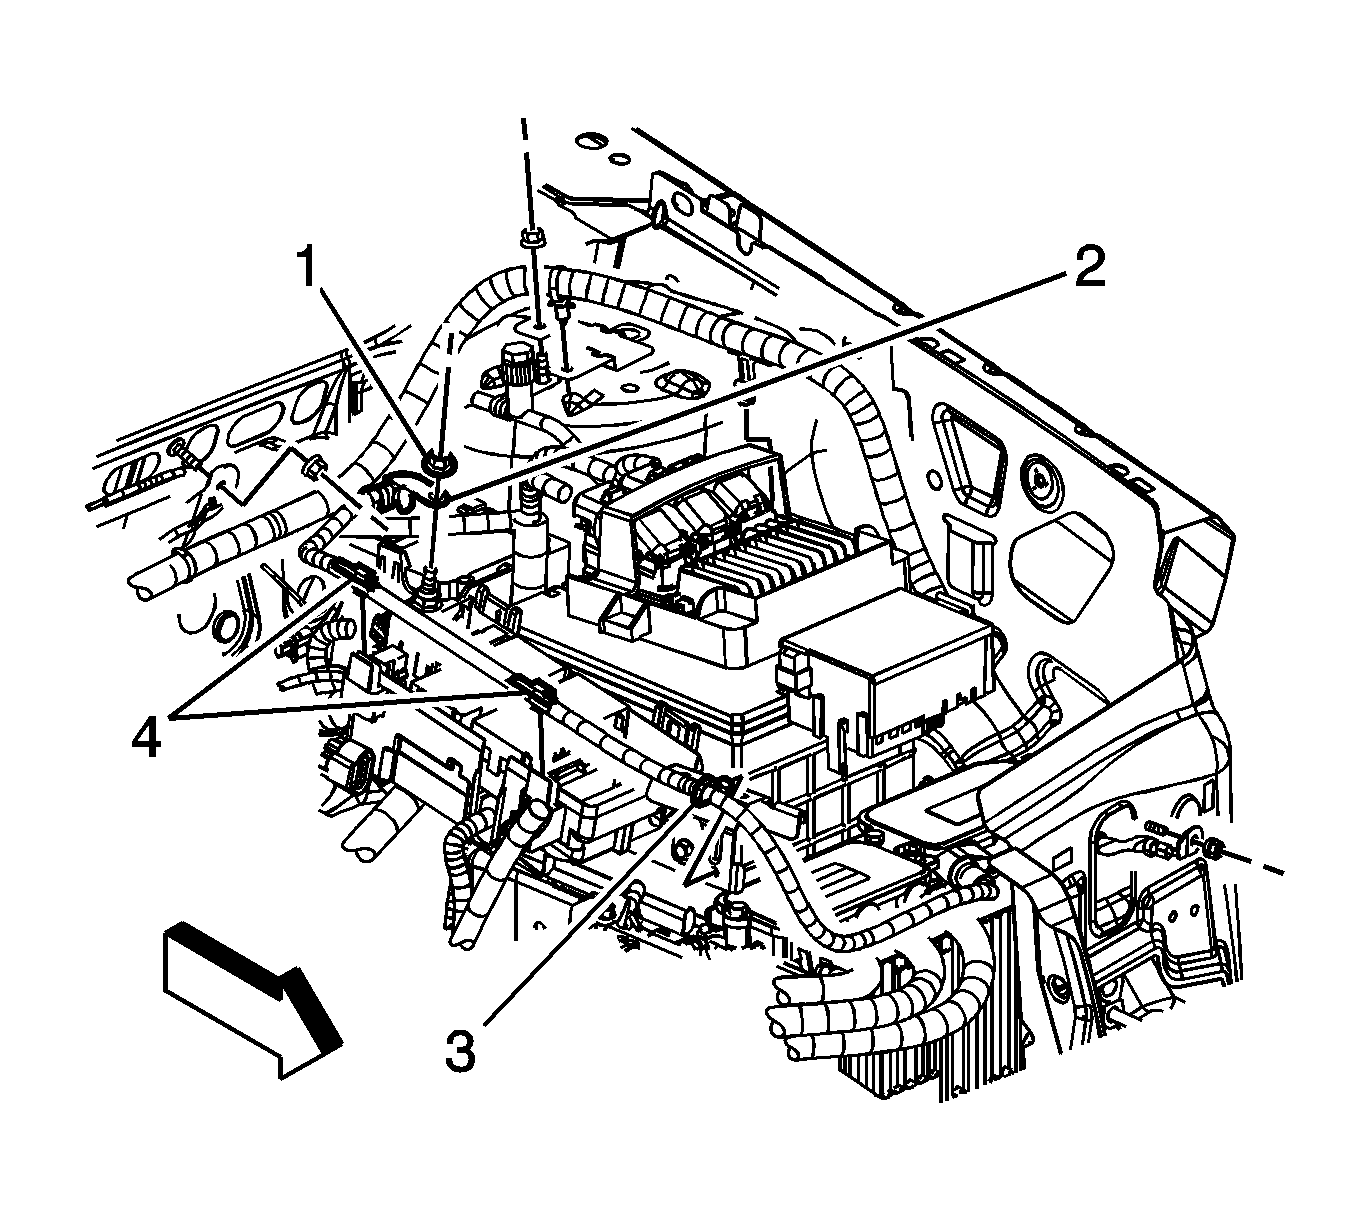
- Remove the positive battery cable to the engine wiring harness auxiliary BEC stud nut (1).
- Remove the positive battery cable lead (2) from the engine wring harness auxiliary BEC.
- Remove the positive battery cable retainer from the positive battery cable bracket.
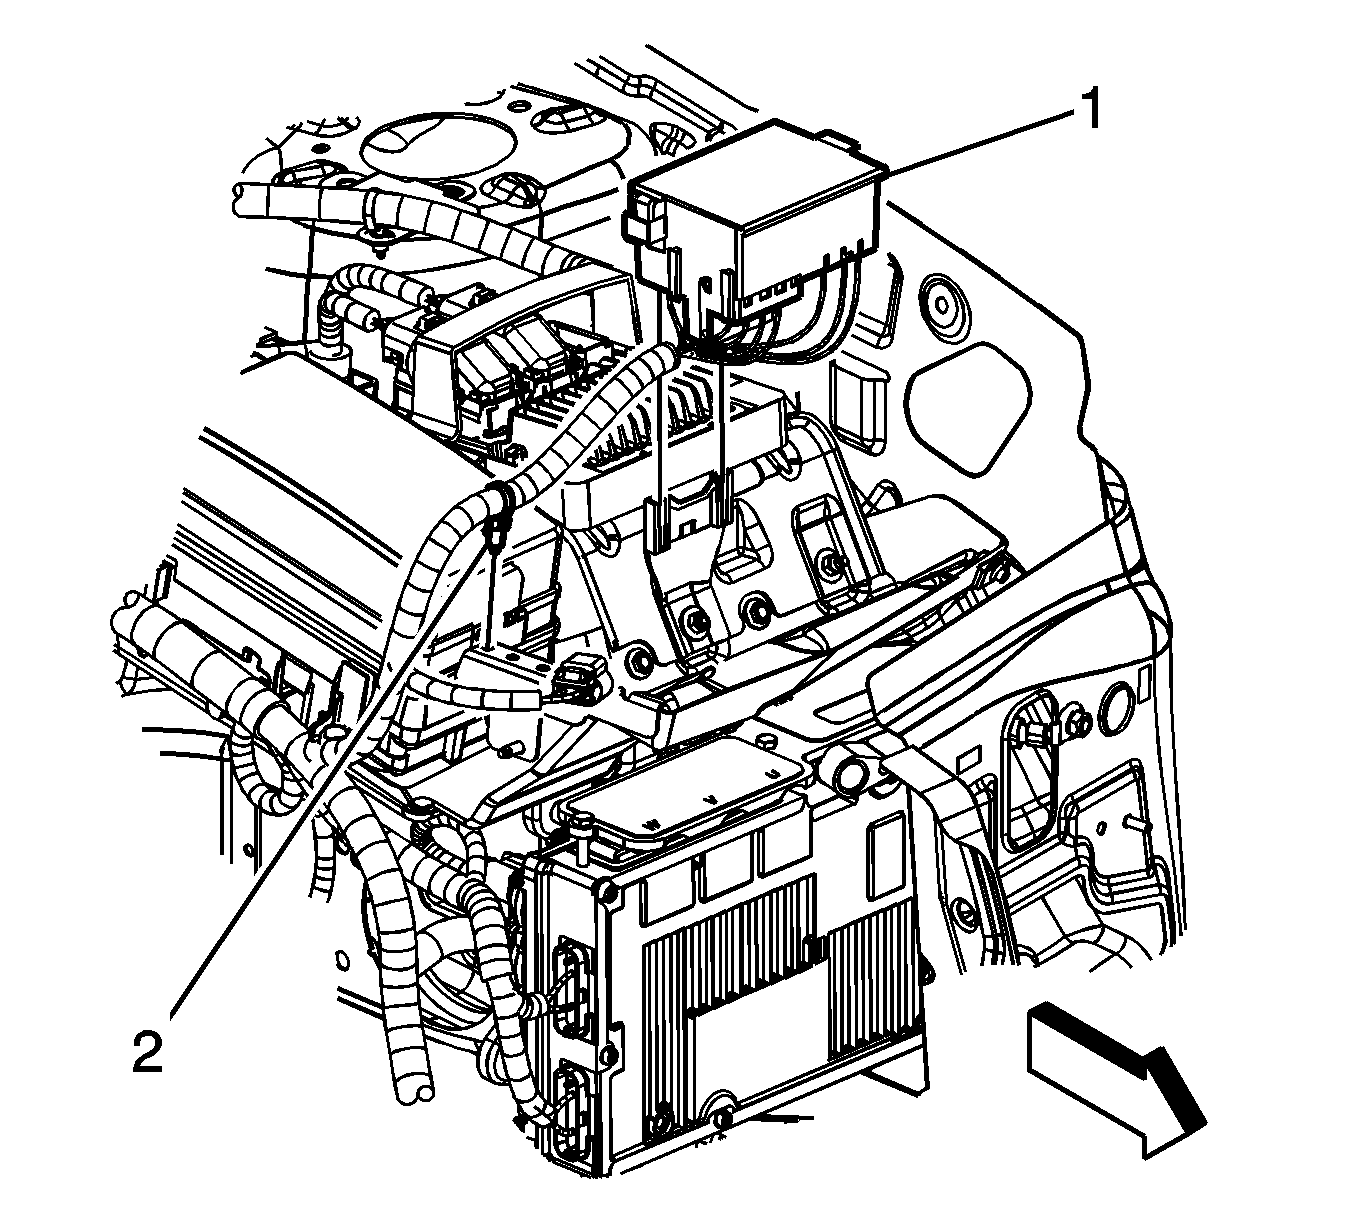
- Remove the engine wiring harness auxiliary BEC (1) from the wiring harness relay block bracket.
- Remove the engine wiring harness retainer (2) from the positive battery cable bracket.
- Reposition the engine wiring harness auxiliary BEC (1) out of the way.
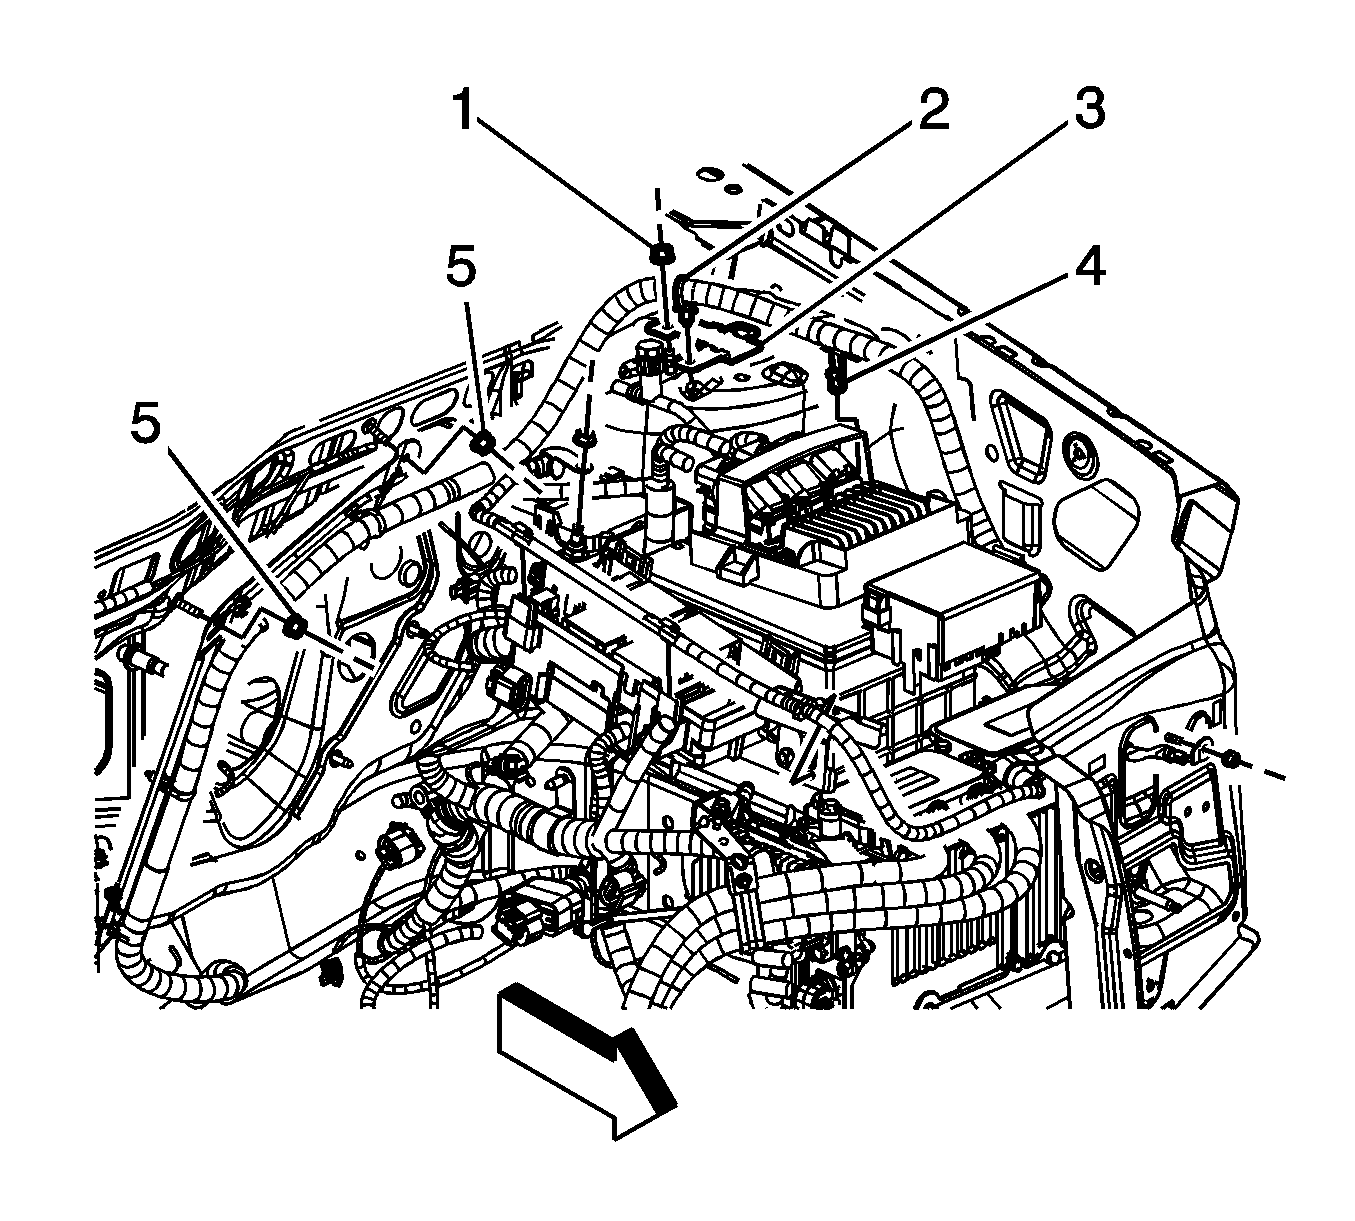
- Remove the 36 volt positive battery cable retainer (4) from the engine control module (ECM) bracket.
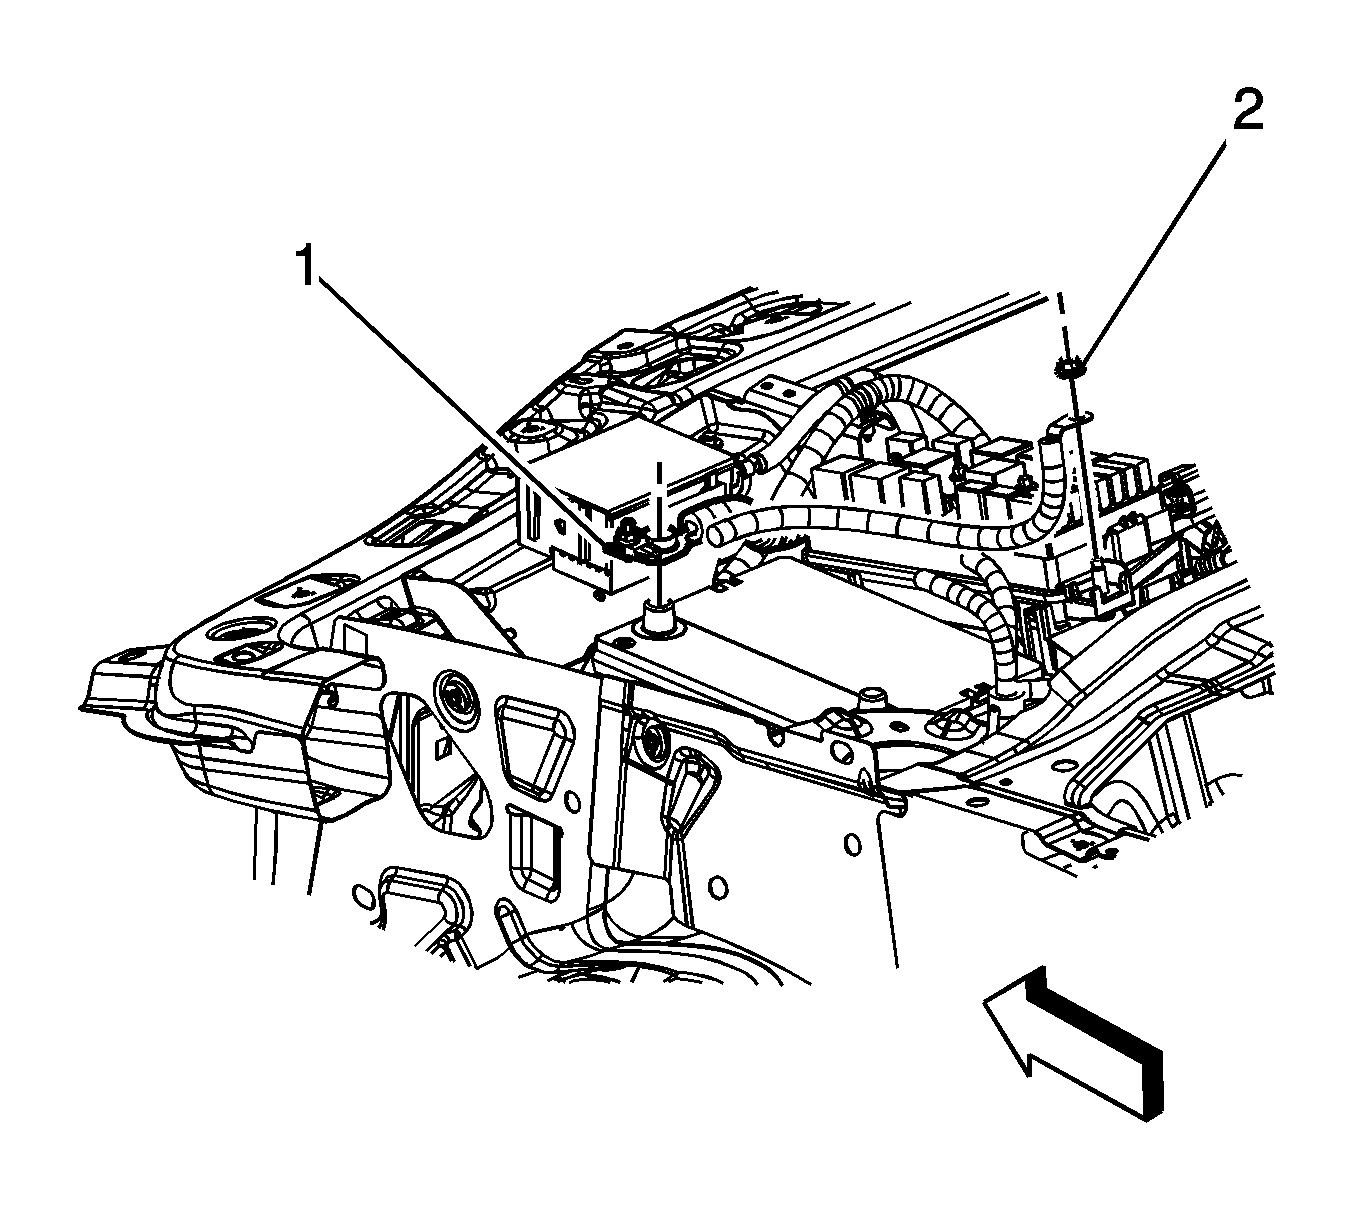
- Remove the ECM bracket (1) from the battery hold down bracket. Reposition the ECM bracket out of the way.
- Remove the battery hold down bracket nuts (1, 4).
- Remove the wiring harness relay block bracket nut (3) and bracket (2).
- Remove the battery hold down retainer (5).
- Raise and support the vehicle. Refer to Lifting and Jacking the Vehicle .
- Remove the positive battery cable to starter motor nut (4).
- Remove the positive battery cable lead (1) from the starter motor.
- Remove the positive battery cable from in between the starter and the engine.
- Lower the vehicle.
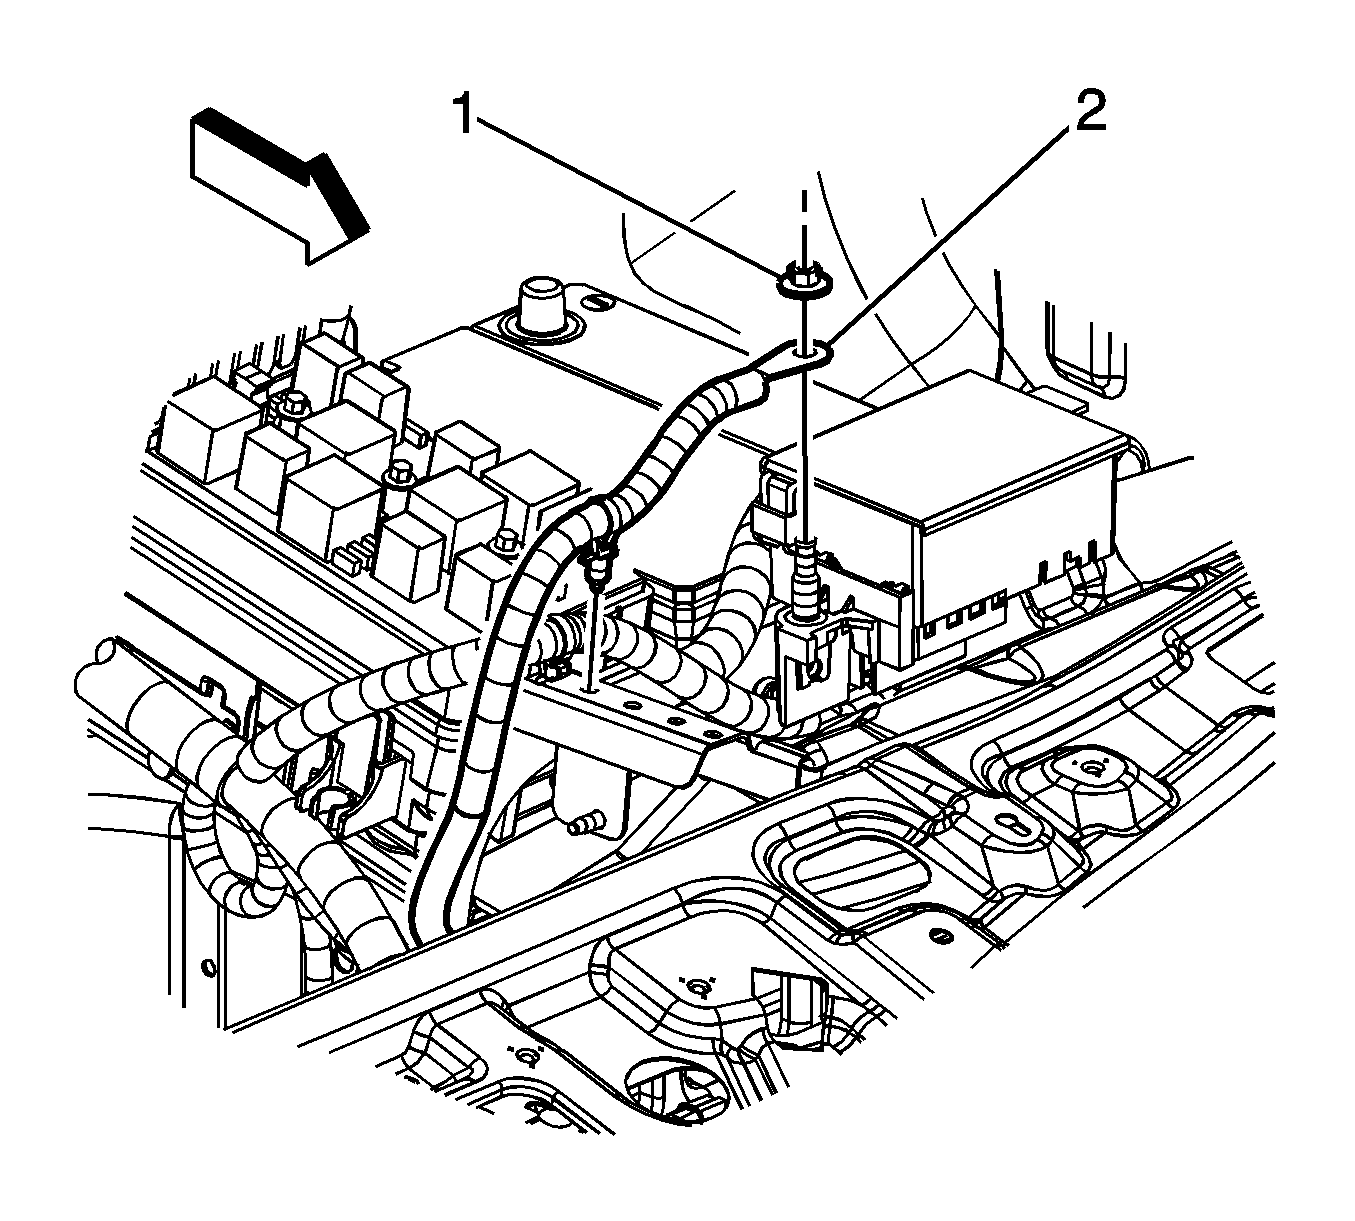
- Remove the underhood bussed electrical center (UBEC) cover (1).
- Remove the positive battery cable lead to UBEC nut (1).
- Remove the positive battery cable lead (2) from the UBEC stud.
- Remove the positive battery cable lead from the UBEC.
- Squeeze the two side retaining tabs on the positive battery cable cover, and open the cover.
- Loosen the positive battery cable terminal nut (1).
- Remove the positive battery cable from the battery.
- Remove the positive battery cable from the vehicle.
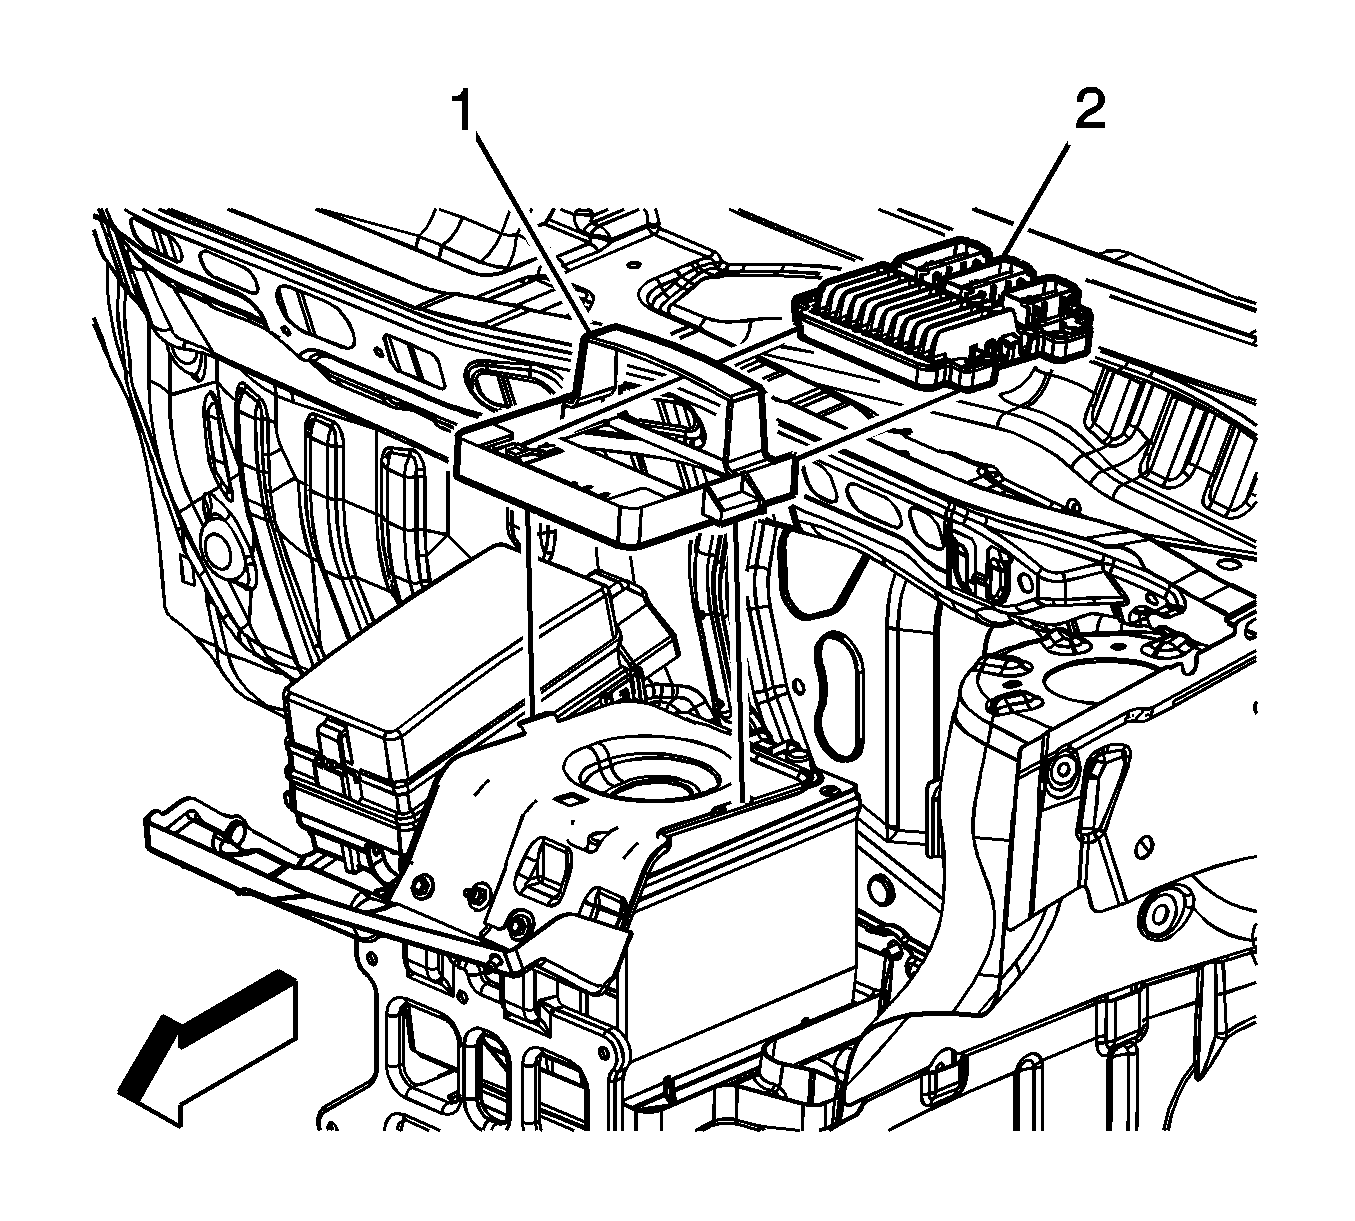
Important: It is not necessary to disconnect the engine wiring harness and the body wiring harness electrical connectors from the ECM prior to repositioning. It is also not necessary to remove the ECM from the bracket prior to repositioning.
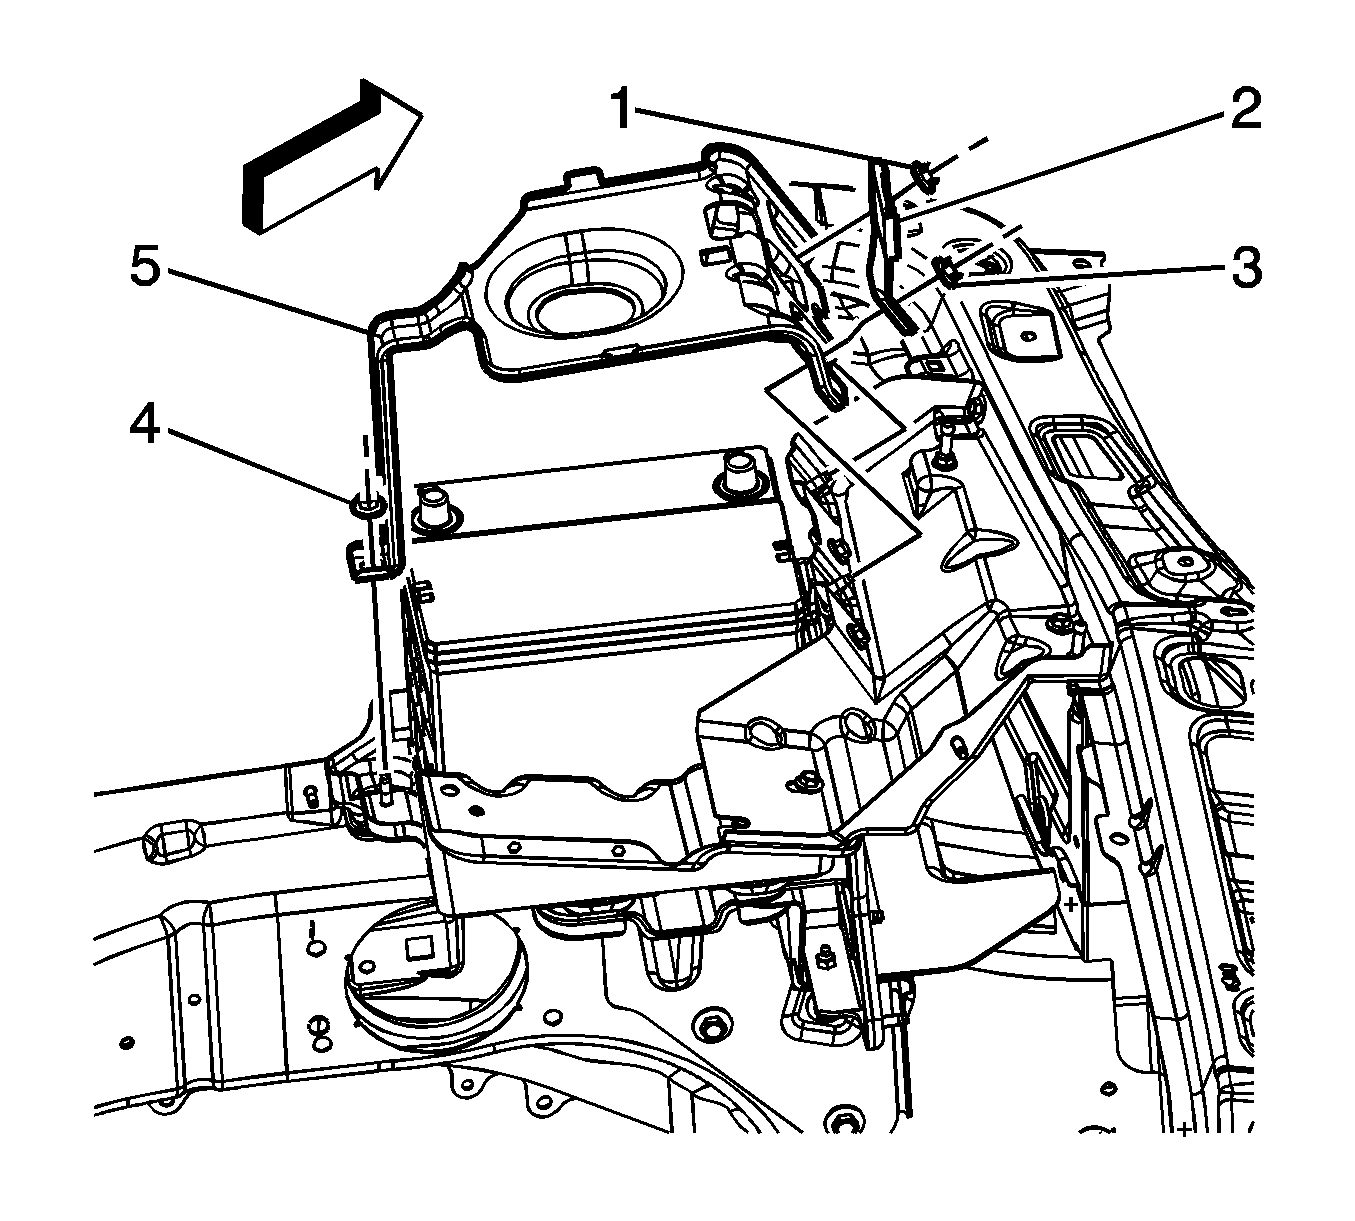
Important: Note the routing of the positive battery cable prior to removing.
Installation Procedure
- Install the positive battery cable to the vehicle as close to the original routing noted during removal.
- Install the positive battery cable to the battery.
- Tighten the positive battery cable terminal nut (1).
- Close the positive battery cable cover until the two side retainers are engaged.
- Install the positive battery cable lead to the UBEC.
- Install the positive battery cable lead (2) to the UBEC stud.
- Install the positive battery cable lead to UBEC nut (1).
- Install the UBEC cover (1).
- Raise the vehicle.
- Route the positive battery cable in between the starter and the engine.
- Install the positive battery cable lead (1) to the starter motor.
- Install the positive battery cable to starter motor nut (4).
- Lower the vehicle.
- Install the battery hold down retainer (5).
- Install the battery hold down bracket nuts (1, 4).
- Install the wiring harness relay block bracket (2) and nut (3).
- Position the ECM bracket and install the ECM bracket (1) to the battery hold down bracket.
- Install the 36 volt positive battery cable retainer (4) to the ECM bracket.
- Position the engine wiring harness auxiliary BEC (1).
- Install the engine wiring harness auxiliary BEC (1) to the wiring harness relay block bracket.
- Install the engine wiring harness retainer (2) to the positive battery cable bracket.
- Install the positive battery cable lead (2) to the engine wring harness auxiliary BEC.
- Install the positive battery cable to the engine wiring harness auxiliary BEC stud nut (1).
- Close the positive battery cable cover on the engine wiring harness auxiliary BEC.
- Install the positive battery cable retainer to the positive battery cable bracket.
- Connect the negative battery cable. Refer to Battery Negative Cable Disconnection and Connection .

Notice: Refer to Fastener Notice in the Preface section.
Tighten
Tighten the nut to 22 N·m (16 lb ft).

Tighten
Tighten the nut to 15 N·m (11 lb ft).


Tighten
Tighten the nut to 10 N·m (89 lb in).

Tighten
Tighten the nuts to 10 N·m (89 lb in).
Tighten
Tighten the nut to 10 N·m (89 lb in).


Tighten
Tighten the nut to 15 N·m (11 lb ft).
