For 1990-2009 cars only
Exhaust Manifold Replacement 2.2L (L61) and 2.4L (LAT)
Removal Procedure
- Remove the air cleaner outlet duct. Refer to one of the following:
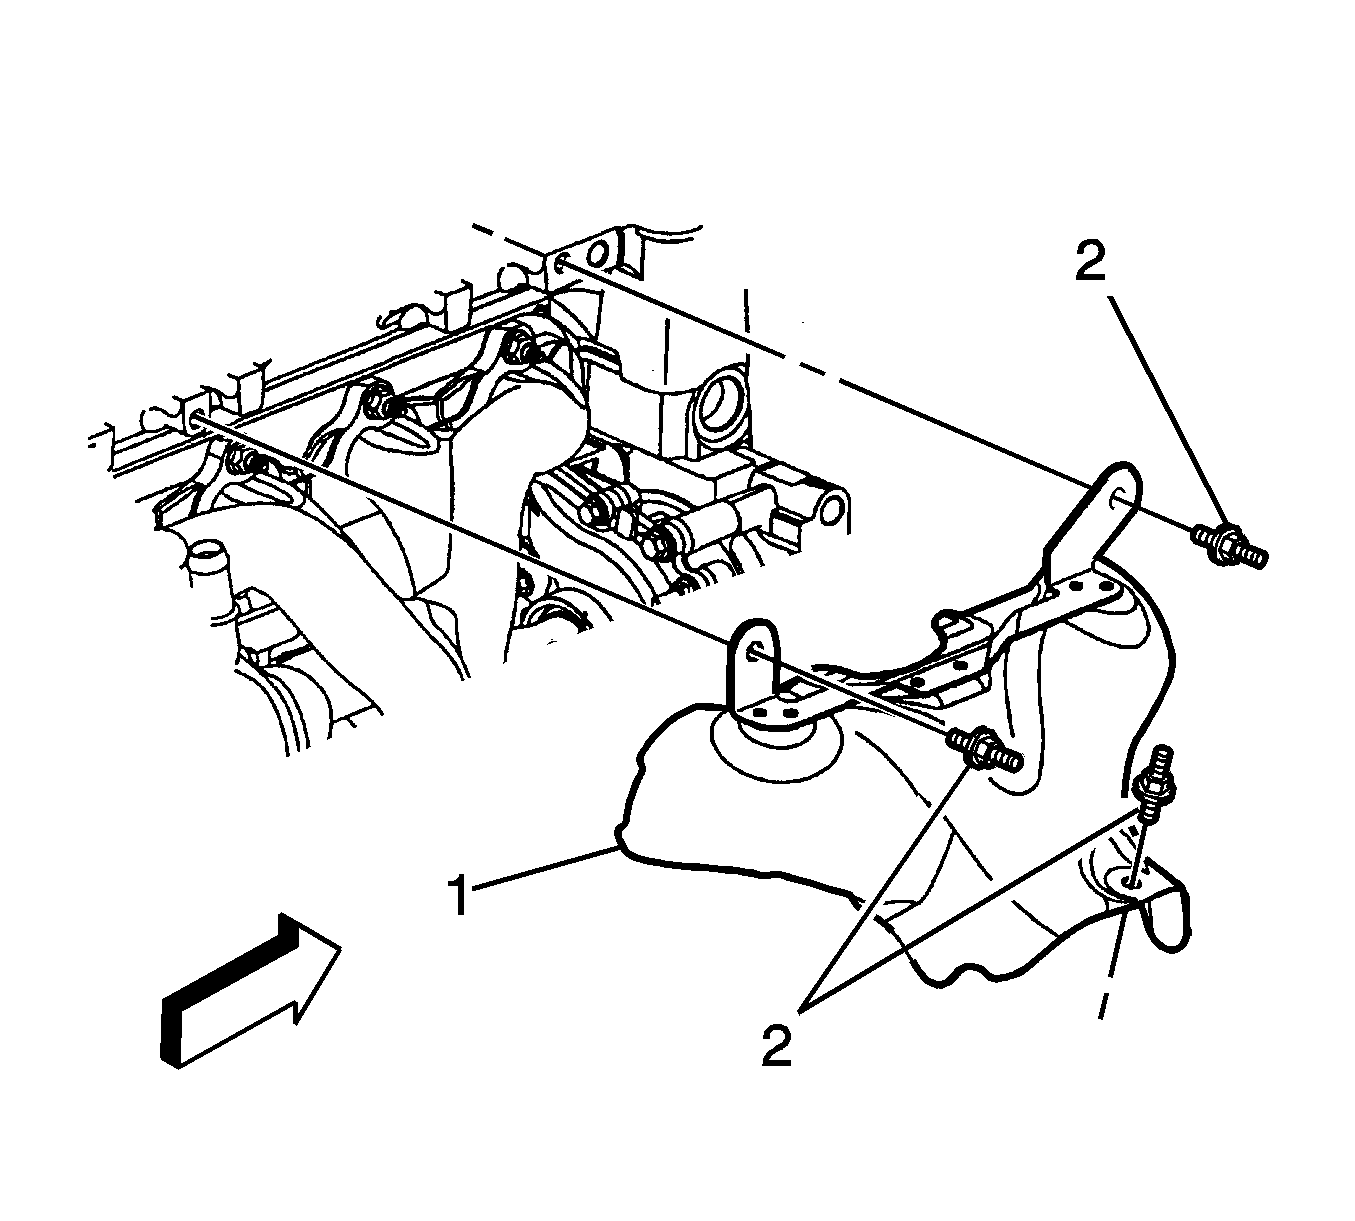
- Remove the exhaust manifold heat shield studs (2).
- Remove the exhaust manifold heat shield (1).
- Remove the bank 1 heated oxygen sensor (HO2S). Refer to one of the following:
- Remove the catalytic converter. Refer to Catalytic Converter Replacement .
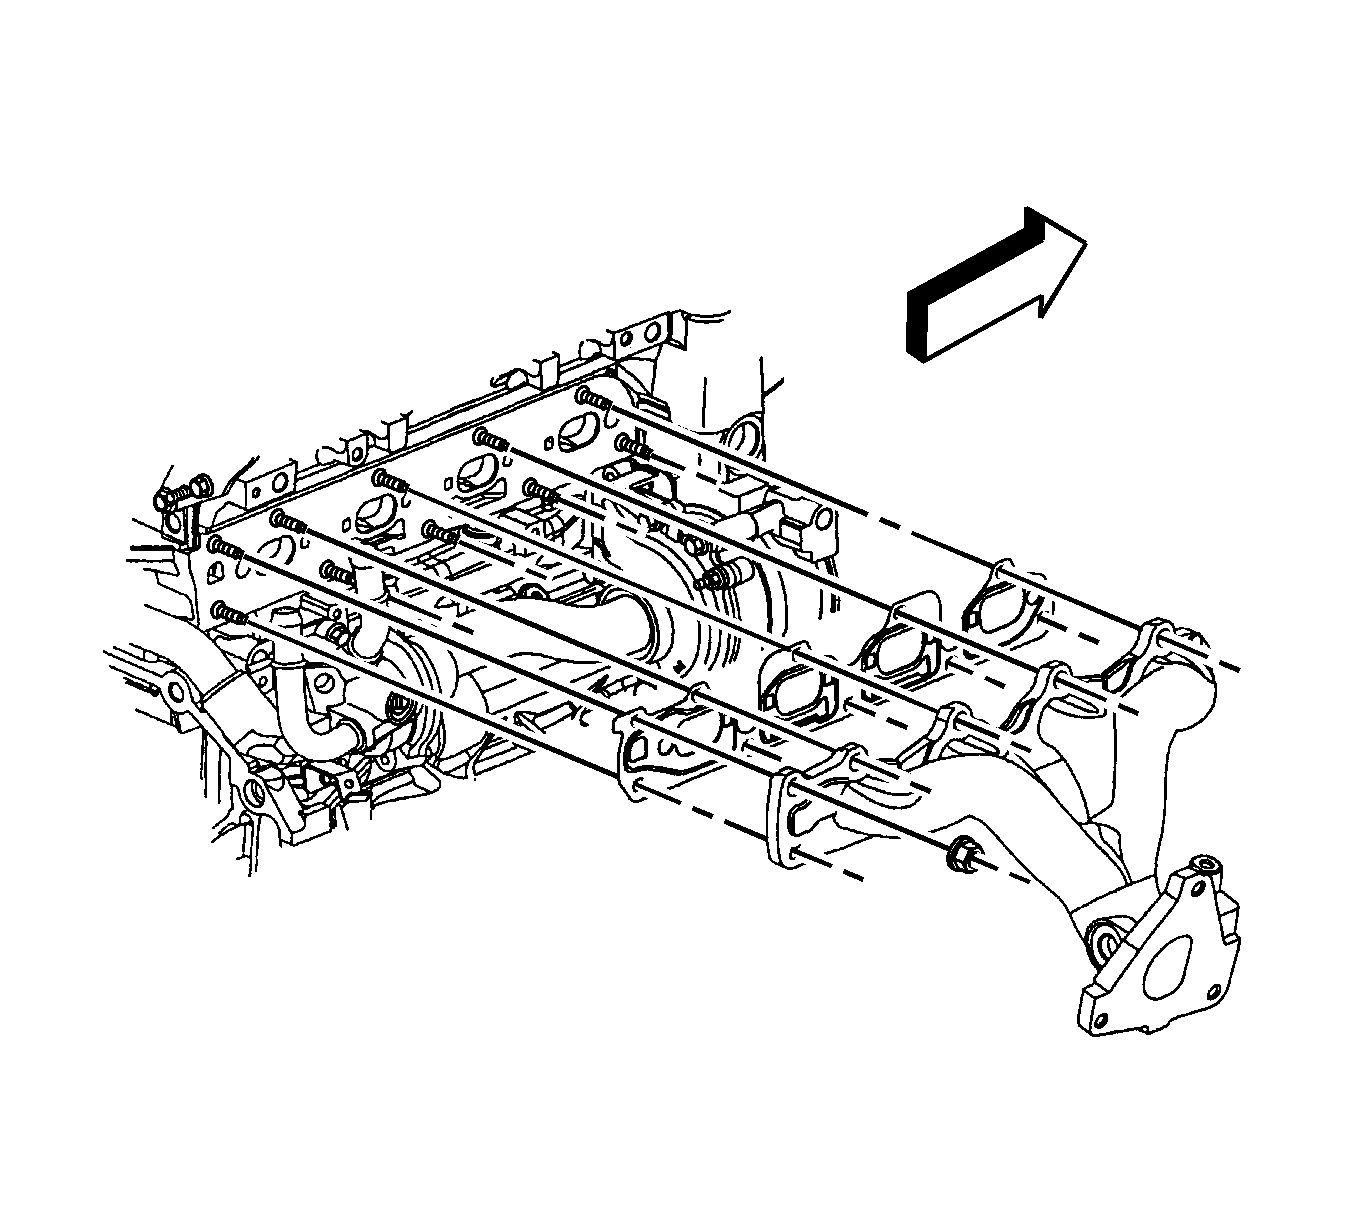
- Remove the exhaust manifold nuts.
- Remove the exhaust manifold.
- Remove and discard the exhaust manifold gasket.
- Clean and inspect all gasket mating surfaces.

| • | Air Cleaner Outlet Resonator Replacement for the 2.2L engine |
| • | Air Cleaner Outlet Duct Replacement for the 2.4L engine |
| • | Heated Oxygen Sensor 1 Replacement for the 2.2L engine |
| • | Heated Oxygen Sensor 2 Replacement for the 2.4L engine |

Installation Procedure
- Install a NEW exhaust manifold gasket.
- Install the exhaust manifold.
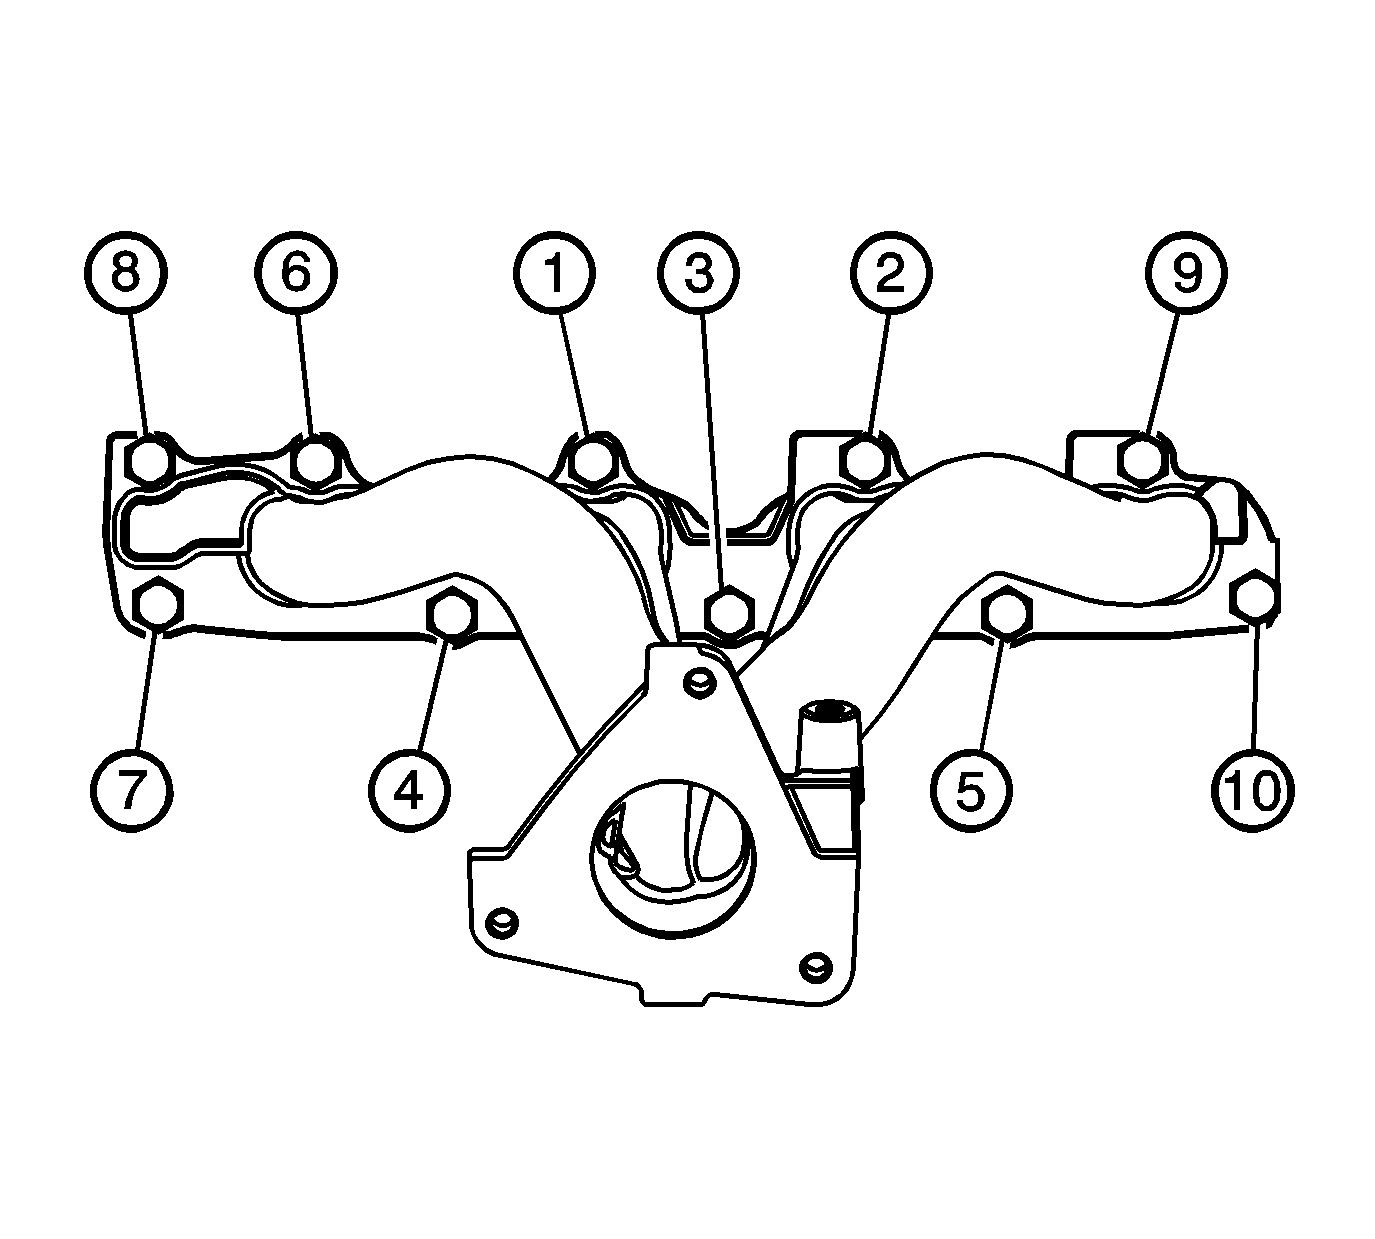
- Install the exhaust manifold nuts.
- Install the catalytic converter. Refer to Catalytic Converter Replacement .
- Install the bank 1 HO2S. Refer to one of the following:
- Install the exhaust manifold heat shield (1).
- Install the exhaust manifold heat shield studs (2).
- Install the air cleaner outlet duct. Refer to one of the following:

Notice: Refer to Fastener Notice in the Preface section.

Tighten
Tighten the nuts in the sequence shown to 14 N·m (10 lb ft).
| • | Heated Oxygen Sensor 1 Replacement for the 2.2L engine |
| • | Heated Oxygen Sensor 2 Replacement for the 2.4L engine |

Tighten
Tighten the studs to 25 N·m (18 lb ft).
| • | Air Cleaner Outlet Resonator Replacement for the 2.2L engine |
| • | Air Cleaner Outlet Duct Replacement for the 2.4L engine |
