For 1990-2009 cars only
Removal Procedure
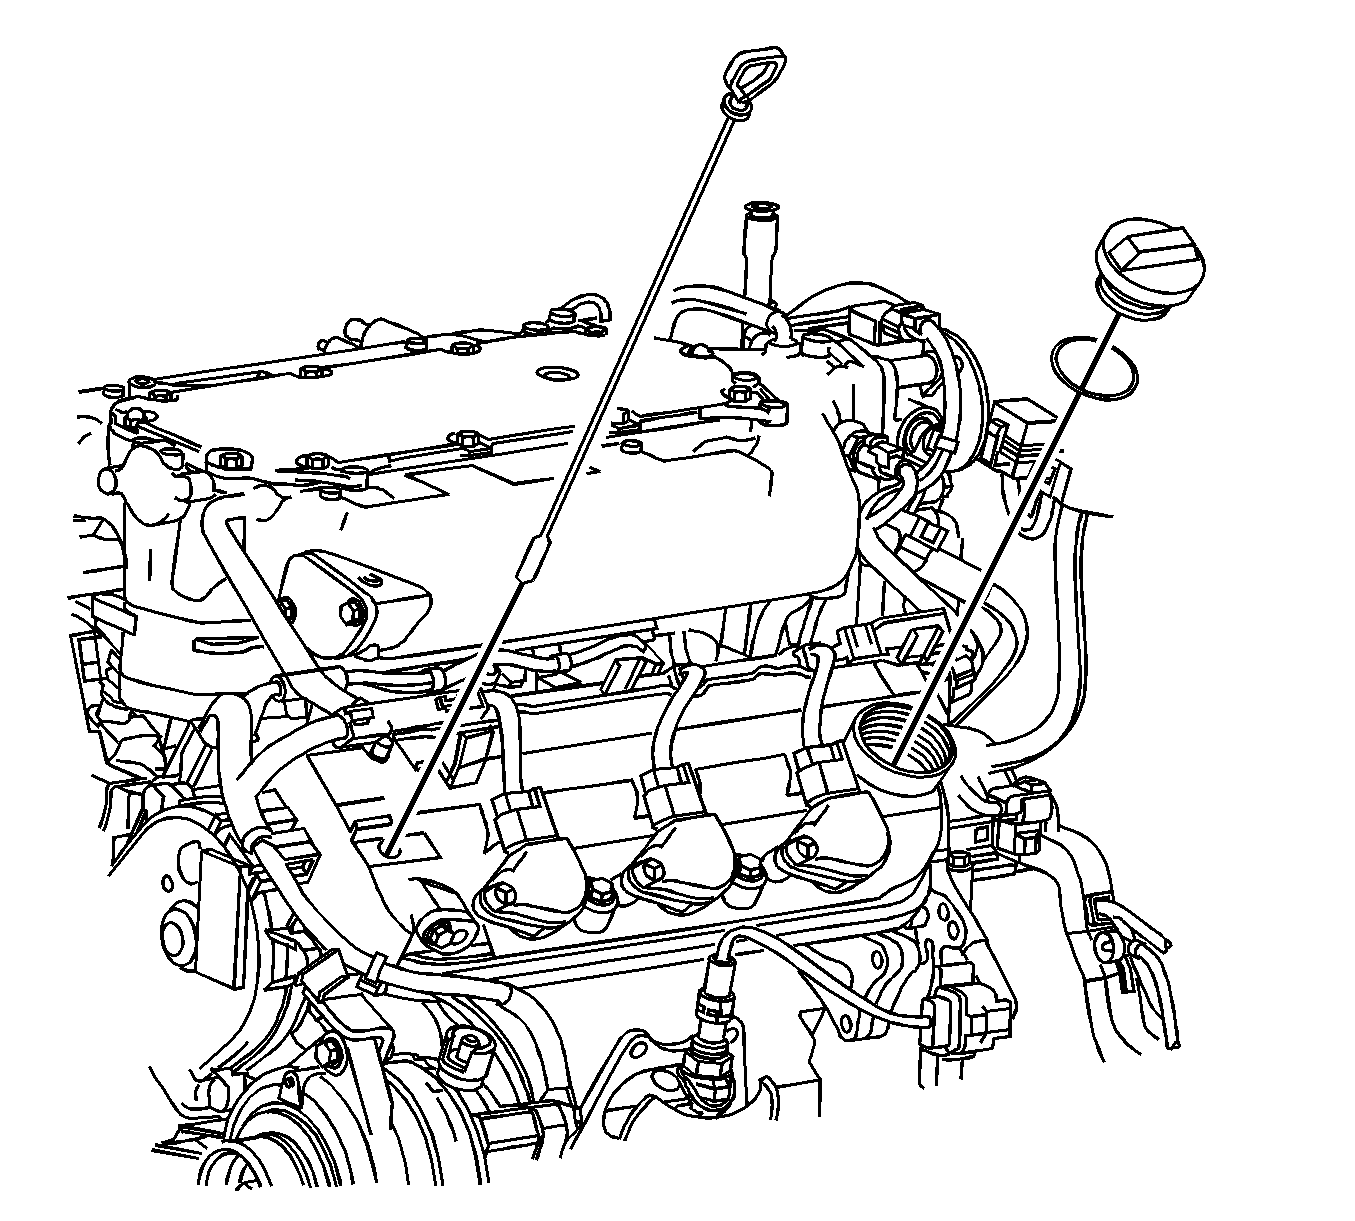
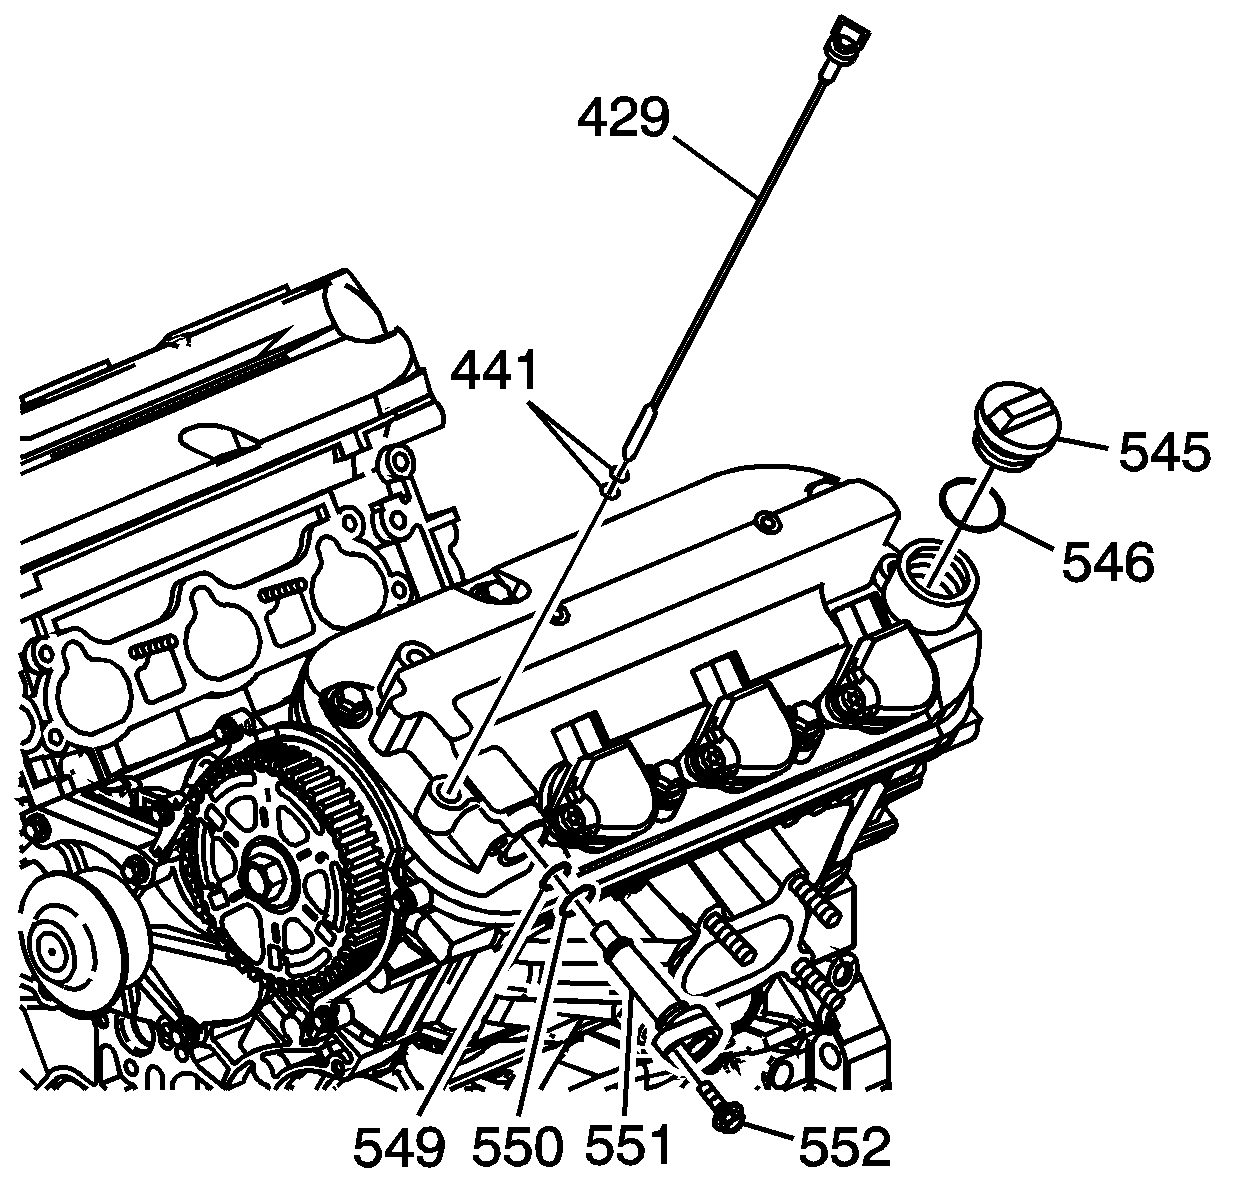
- Remove the oil level indicator.
- Remove the oil fill cap.
- Remove the positive crankcase ventilation (PCV) valve and bolt. Refer to Positive Crankcase Ventilation Hose/Pipe/Tube Replacement .
- Disconnect the ignition wiring harness from the ignition coils and retaining bracket.
- Remove the wiring harness bracket bolt from the cylinder head.
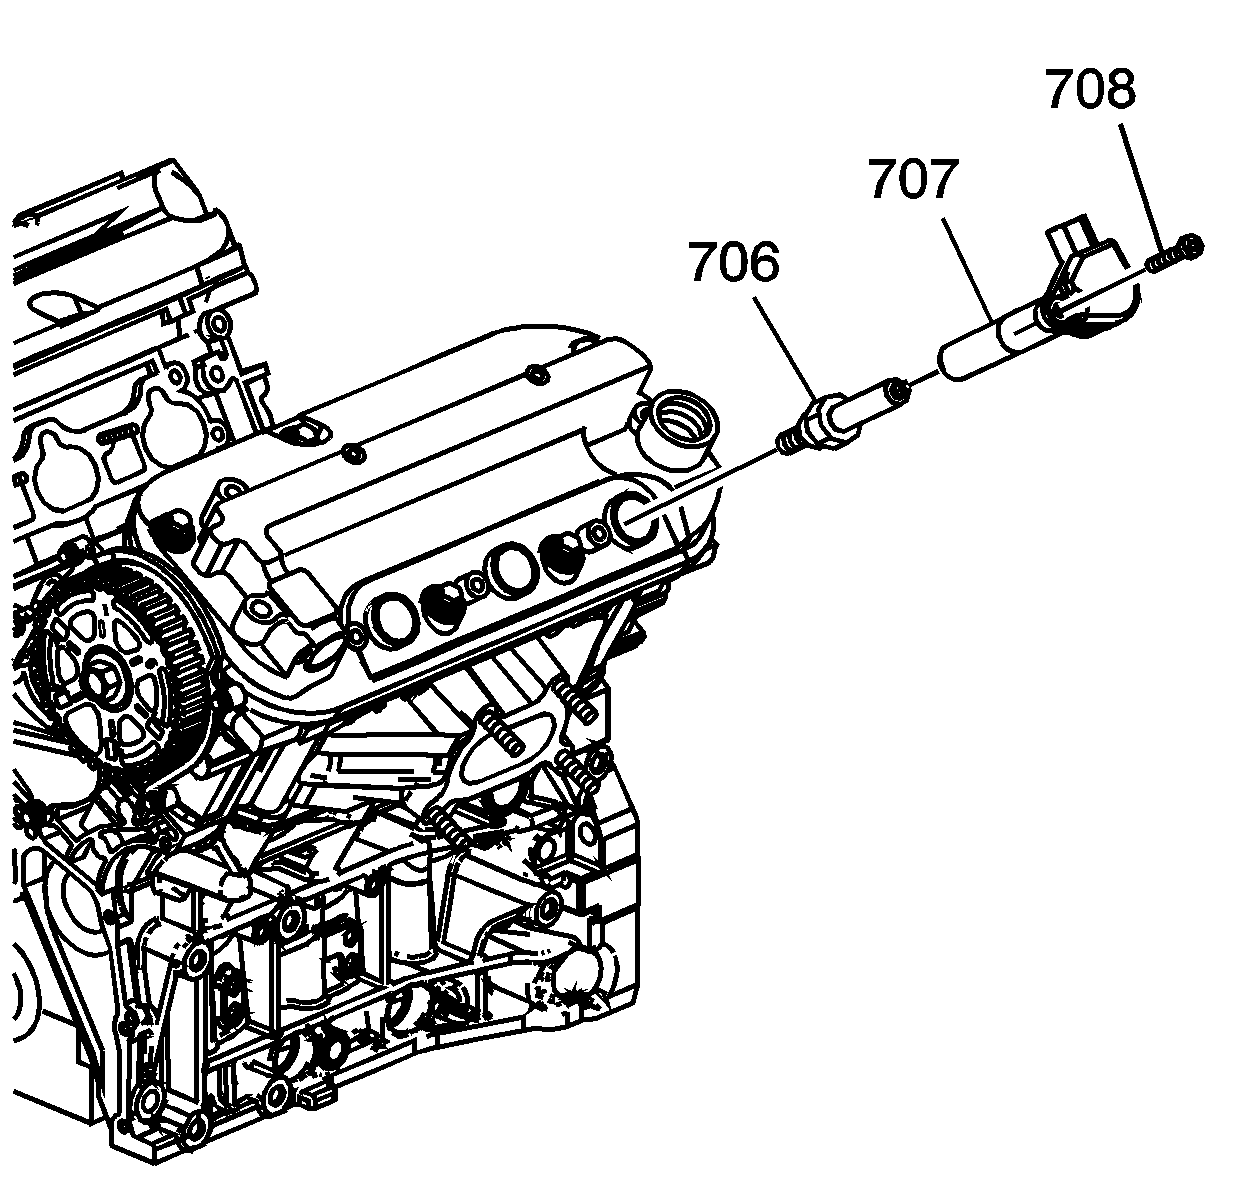
- Remove the bolts (708), and ignition coils (707).
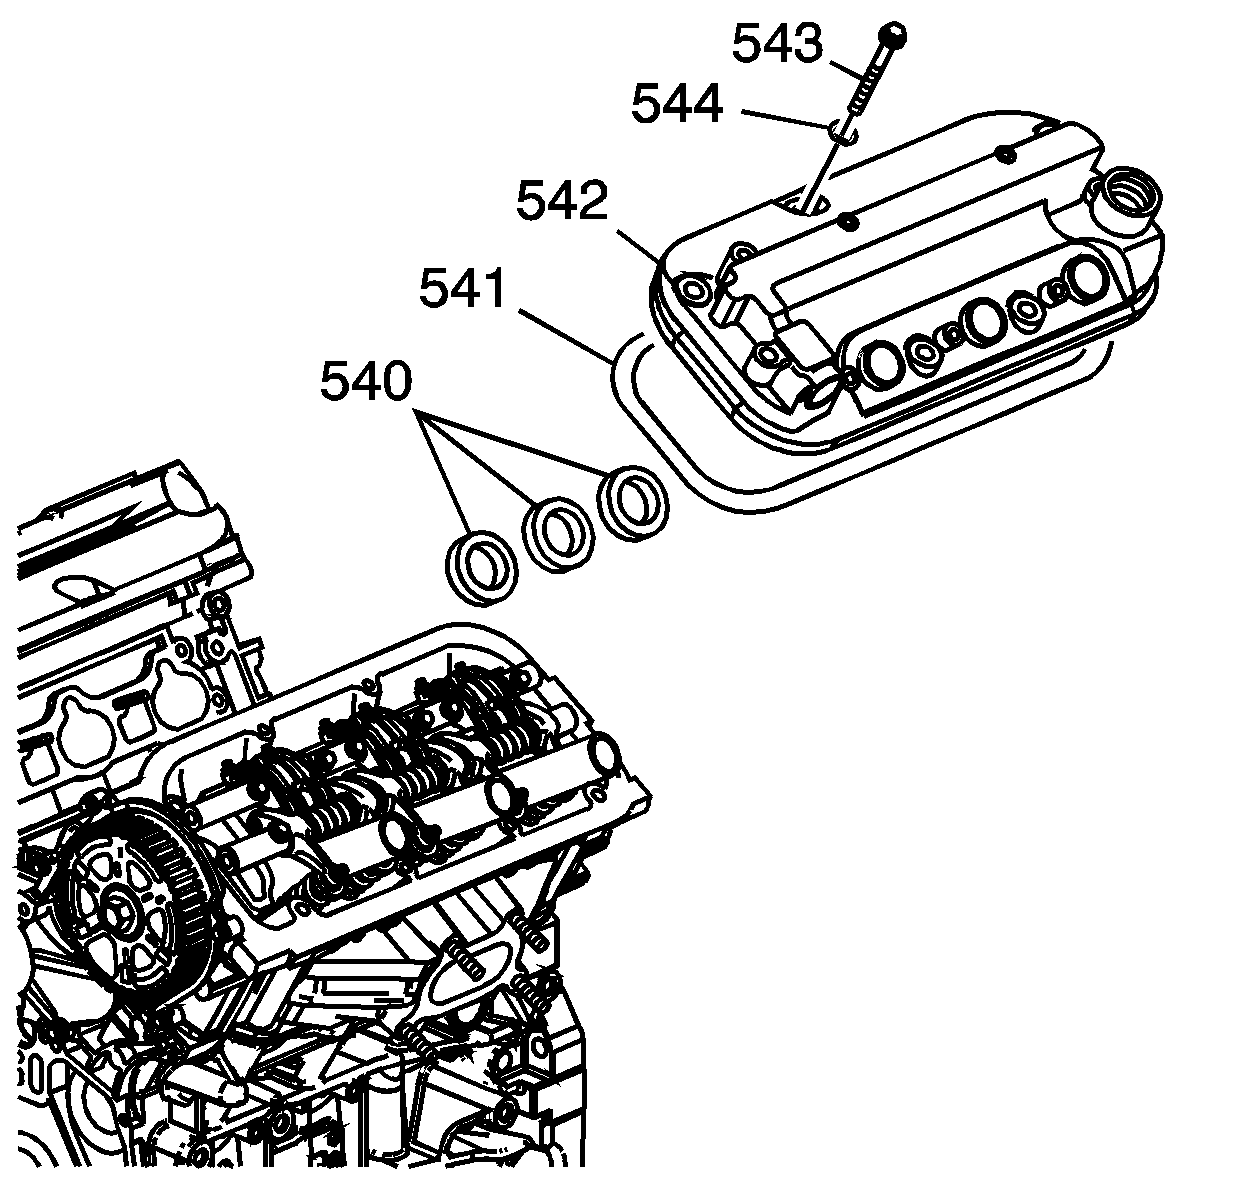
- Remove the bolts (543), grommets (544), valve cover (542) and gasket (541).
- Remove the seals (540), if required.
Installation Procedure
- Install NEW seals (540), NEW gasket (541), cover (542), NEW grommets (544) and bolts (543).
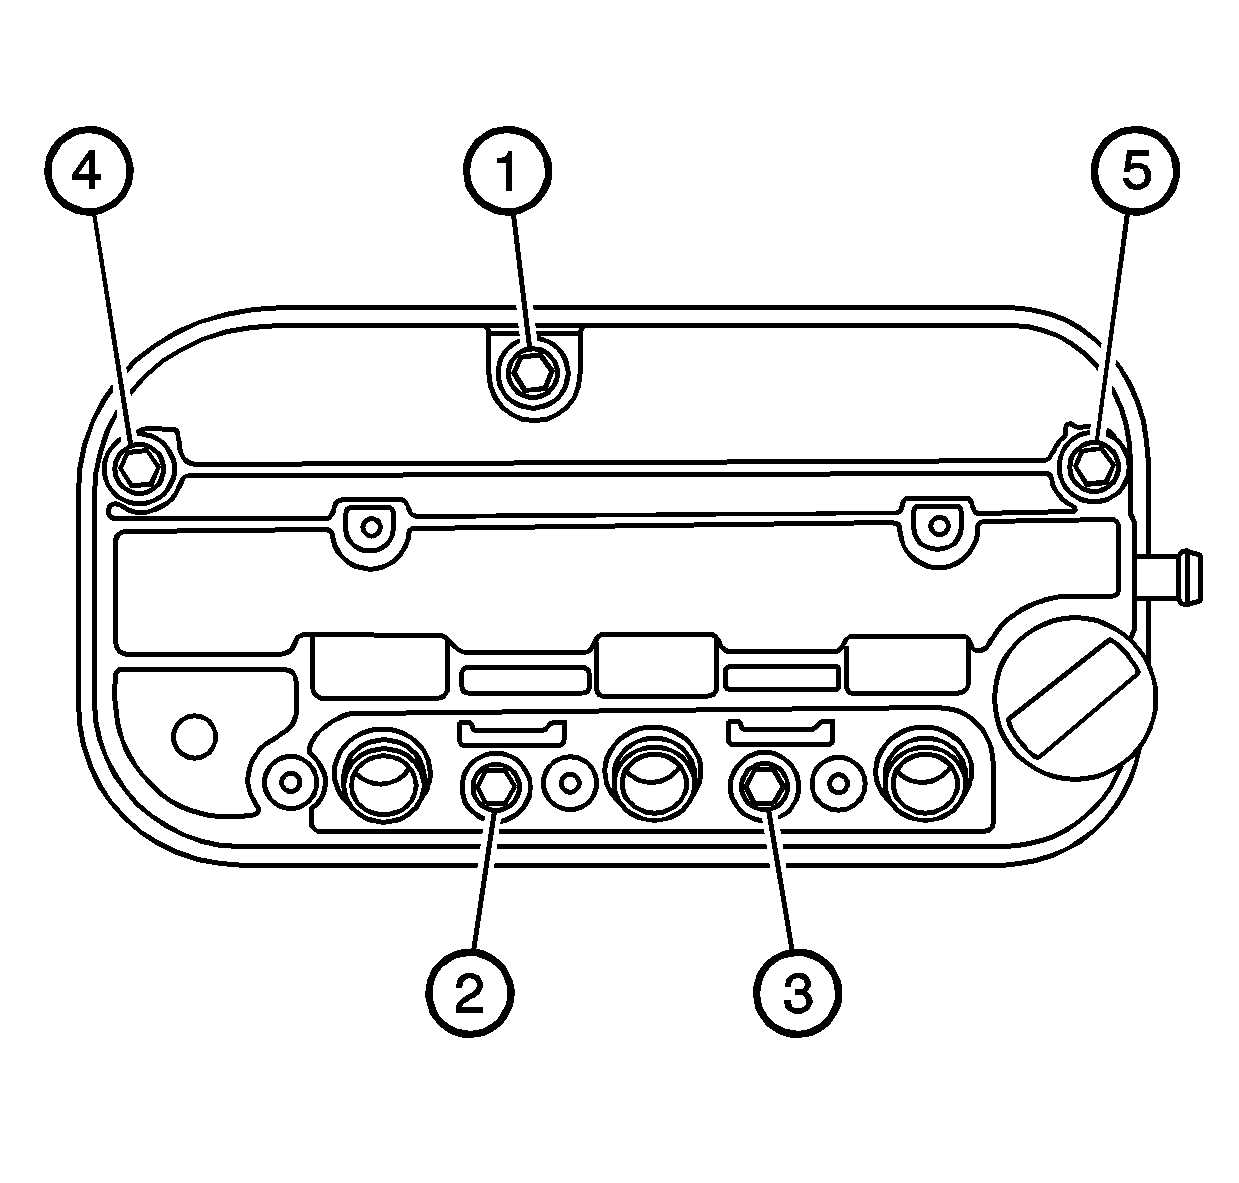
- Tighten the bolts in sequence.
- Tighten the bolts a first pass to 6 N·m (53 lb in).
- Tighten the bolts a final pass to 12 N·m (106 lb in).
- Install the ignition coils (707) and bolts (708).
- Install the wiring harness bracket bolt to the cylinder head.
- Connect the ignition wiring harness to the retaining bracket and ignition coils.
- Install the oil level indicator (429) and NEW O-rings (441).
- Install the NEW O-rings (549 and 550), positive crankcase ventilation (PCV) valve (551) and bolt (552).
- Install the NEW O-ring (546) and cap (545).
Notice: Refer to Fastener Notice in the Preface section.
Tighten
Tighten
Tighten the bolts to 12 N·m (106 lb in).
Tighten
Tighten the bolt to 10 N·m (89 lb in).
Tighten
Tighten the bolt to 12 N·m (106 lb in).
